Blog

brother cs 6000i manual

Brother CS 6000i Manual: Article Plan

This comprehensive guide details the Brother CS 6000i, covering setup, features, troubleshooting, and maintenance. PDF manuals are readily available online for easy access.

The Brother CS 6000i is a popular, computerised home sewing machine known for its versatility and user-friendly design. It caters to both beginners and experienced sewists, offering a wide range of stitches and features. This machine simplifies various sewing projects, from basic alterations to quilting and crafting.

Accessing the manual, often in PDF format, is crucial for understanding its full potential. It provides detailed instructions, safety precautions, and troubleshooting tips, ensuring a smooth and enjoyable sewing experience.

Unboxing and Initial Setup

Upon receiving your Brother CS 6000i, carefully inspect the box for any damage. Once opened, verify all package contents against the included list. Before initial use, remove all packing materials and protective coverings. Ensure the machine is placed on a stable, level surface with adequate space.

Refer to the manual’s setup section for detailed guidance on connecting the power cord and preparing the machine for its first operation. Proper setup is vital for optimal performance and longevity.

Package Contents

Your Brother CS 6000i package should include the sewing machine itself, a power cord, a foot controller, and various presser feet – including a zigzag foot, buttonhole foot, and overcasting foot. Expect to find a set of needles, bobbins, a screwdriver, a cleaning brush, and an oiler.

Crucially, the package contains the operation manual, providing essential instructions. Verify all listed items are present before proceeding; contact Brother support if anything is missing.

Setting Up the Machine

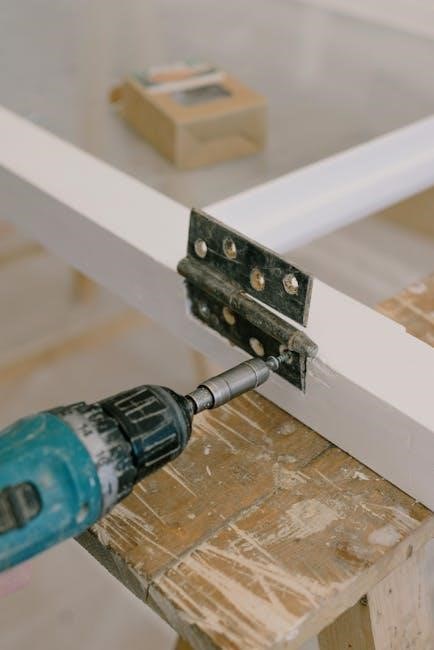
Begin by placing the Brother CS 6000i on a stable, level surface with ample space. Connect the power cord and foot controller securely. Attach the power switch and ensure it’s in the ‘off’ position. Next, install the bobbin following the manual’s guidance – this is a crucial first step.

Carefully thread the upper thread, referencing the illustrated diagrams in the manual. Finally, attach the desired presser foot before powering on the machine.

Key Features and Specifications

The Brother CS 6000i boasts 60 built-in stitches, including decorative and utility options, catering to diverse sewing projects. It features an automatic needle threader, simplifying setup, and adjustable sewing speed for precise control. This machine includes a quick-set bobbin and an extension table for larger fabrics.

Its lightweight design enhances portability, while the LCD screen provides clear stitch selection. The CS 6000i is designed for both beginners and experienced sewers.

Stitch Selection and Functions

The Brother CS 6000i offers 60 pre-programmed stitches, encompassing various categories like straight, zigzag, decorative, and buttonhole stitches. Users can easily select stitches via the LCD screen and adjust stitch length and width for customization. The machine excels in creating professional-looking buttonholes with its one-step buttonhole function.

Furthermore, it supports diverse sewing applications, from basic garment construction to quilting and decorative embellishments, making it a versatile choice for all skill levels.

Technical Specifications (Dimensions, Weight, Power)

The Brother CS 6000i measures approximately 17.32 x 9.53 x 12.28 inches, offering a compact footprint for various workspaces. Its weight is around 14.33 pounds, providing stability during operation. The machine operates on standard household power, typically 100-240V, 50/60Hz, with a power consumption of 85W.

These specifications ensure efficient performance and ease of use, making it suitable for both beginners and experienced sewers.

Understanding the Machine Components

The Brother CS 6000i features several key components working in harmony. These include the needle, responsible for stitch formation; the presser foot, controlling fabric movement; and the bobbin, supplying the lower thread. The machine’s frame provides structural support, while the handwheel allows manual control.

Understanding these parts and their functions is crucial for effective operation and maintenance, ensuring longevity and optimal sewing results.

Identifying Key Parts (Needle, Presser Foot, Bobbin)

The needle, crucial for stitch creation, comes in various sizes for different fabrics. The presser foot, selectable for diverse techniques, holds fabric firmly. The bobbin, housed beneath the needle plate, delivers the lower thread, completing the stitch.

Locating these components – often detailed in the CS 6000i manual – is essential for threading, changing, and troubleshooting. Correct identification ensures proper function and prevents damage.

Control Panel Overview

The Brother CS 6000i’s control panel features intuitive buttons for stitch selection, speed control, and automatic functions. LCD display clearly shows chosen stitch settings and relevant information. Key buttons include the needle up/down, reverse, and start/stop controls.

Referencing the manual helps understand each button’s function, enabling efficient operation. Familiarity with the panel unlocks the machine’s full potential, streamlining your sewing projects.

Basic Operation: Threading the Machine

Correct threading is crucial for smooth operation of the Brother CS 6000i. The manual provides detailed diagrams illustrating the upper and lower threading paths. Begin by guiding the thread through each numbered guide, tension disc, and finally, the needle.

Ensure the presser foot is raised during threading. Proper threading prevents skipped stitches and ensures consistent tension. Refer to the manual’s illustrations for a visual guide to successful threading.

Upper Threading Guide

The Brother CS 6000i’s upper threading begins with spool placement and guiding the thread through the first tension disc. Follow the numbered guides meticulously, ensuring the thread seats correctly in each component. Next, lead the thread through the take-up lever, then down to the needle clamp.

Always raise the presser foot before threading to release tension. The manual’s diagrams clearly illustrate this process. Correct upper threading is vital for stitch quality and preventing thread breakage.

Bobbin Winding and Insertion

Bobbin winding on the CS 6000i involves placing the bobbin on the winding spindle and guiding the thread from the spool. Engage the bobbin winding mechanism and press the foot pedal to evenly wind the thread. Once full, disengage and trim the thread.

For insertion, consult the manual’s diagrams. Place the bobbin into the bobbin case, ensuring correct thread direction. Properly inserted bobbins are crucial for consistent stitch formation and avoiding tangled threads.

Stitching Techniques

Mastering stitch techniques with the Brother CS 6000i begins with understanding stitch selection. Practice straight stitching for seams and topstitching, adjusting stitch length as needed. Zigzag stitching is ideal for finishing raw edges and creating decorative effects.

Experiment with different presser feet to achieve varied results. Consistent fabric feeding and proper tension are key to professional-looking stitches. Refer to the manual for detailed guidance on each stitch function.

Straight Stitching

Achieving a perfect straight stitch on the Brother CS 6000i requires careful setup. Select the straight stitch option on the machine and adjust the stitch length according to your fabric and project needs. Consistent fabric feeding is crucial; guide the fabric gently, avoiding pulling or pushing.

Ensure proper thread tension for balanced stitches. Practice on scrap fabric before starting your project to refine your technique. Use a straight stitch foot for enhanced precision and a professional finish.

Zigzag Stitching

The Brother CS 6000i’s zigzag stitch offers versatility for various applications, from finishing raw edges to creating decorative designs. Select the zigzag stitch and adjust the width and length using the control panel. Wider stitches are ideal for stretch fabrics, while narrower stitches reinforce seams.

Experiment with different settings on scrap fabric to understand the stitch’s capabilities. A zigzag foot provides optimal results. Maintain consistent fabric feeding for even stitch formation and a professional appearance.

Advanced Features and Functions

The Brother CS 6000i boasts an automatic needle threader, simplifying a traditionally tedious task. Speed control allows for precise stitching, especially beneficial for beginners or intricate projects. Explore the variety of built-in stitches beyond basic options, including decorative and quilting stitches.

Utilize the drop-in bobbin system for easy bobbin changes and visibility. The machine’s capabilities extend to free-motion quilting and various fabric types, enhancing creative possibilities.

Automatic Needle Threader

The Brother CS 6000i’s automatic needle threader significantly simplifies the threading process. Lower the presser foot lever and guide the thread through the designated slots; the machine then automatically threads the needle. This feature is incredibly useful for those with visual impairments or dexterity challenges.

Ensure the thread is properly seated in each guide for successful operation. Refer to the manual’s diagrams for a clear visual representation of the threading path. Practice makes perfect – mastering this feature saves time and frustration.

Speed Control

The Brother CS 6000i features adjustable speed control, allowing users to customize the sewing pace. This is crucial for beginners learning delicate techniques or experienced sewers tackling complex projects. A slower speed provides greater precision, while a faster speed increases efficiency.

The speed slider is conveniently located on the machine, enabling easy adjustments during operation. Experiment with different speeds to find the optimal setting for your fabric and desired stitch quality. Consistent speed control results in professional-looking seams.

Troubleshooting Common Issues

Encountering problems is normal; the Brother CS 6000i manual addresses frequent concerns. Thread breakage often stems from incorrect threading or improper tension. Bobbin issues, like jams or uneven stitching, usually require re-insertion or cleaning. Consult the manual’s diagrams for correct threading paths.

If the needle breaks, ensure it’s the correct type and size for your fabric. Regular cleaning prevents lint buildup, a common cause of malfunctions. Refer to the troubleshooting section for specific error codes and solutions.

Thread Breakage

Frequent thread breakage with the Brother CS 6000i often indicates a threading error. Double-check the manual’s diagrams to ensure correct upper and bobbin threading. Incorrect tension is another common culprit; adjust both upper and bobbin tension dials. Using the wrong needle type or size for your fabric can also cause breaks.

Ensure the needle is properly inserted and not bent or damaged. Lint buildup in the tension discs can hinder smooth thread flow; clean the machine regularly as outlined in the manual.

Bobbin Issues

Bobbin problems with the Brother CS 6000i frequently involve incorrect winding or insertion. Refer to the manual for proper bobbin winding techniques, ensuring even distribution. Verify the bobbin is inserted correctly into the case, following the diagram precisely. Using a low-quality bobbin can cause tension issues and jams.

Check for lint or thread fragments within the bobbin case; clean it thoroughly. Incorrect bobbin tension can lead to looping or uneven stitches; adjust as needed, consulting the manual’s guidance.

Maintenance and Cleaning

Regular cleaning is crucial for the Brother CS 6000i’s longevity. Power off and unplug the machine before cleaning. Brush away lint from the bobbin area and feed dogs after each use. Use a small brush or vacuum attachment to remove debris. Avoid using compressed air, which can push dust deeper inside.

Lubricate key areas – as detailed in the manual – sparingly with sewing machine oil. Never oil the bobbin area. Inspect the machine for any worn or damaged parts during cleaning.

Regular Cleaning Procedures

Consistent cleaning maintains optimal performance of your Brother CS 6000i. After each use, brush away lint from the bobbin case and surrounding areas with the provided brush. Periodically, use a vacuum with a brush attachment to remove dust from internal components. Pay attention to the feed dogs and needle plate.

Wipe down the exterior with a soft, dry cloth. Avoid liquids near electrical parts. Refer to the manual for detailed cleaning diagrams and recommended frequencies.

Lubrication

Proper lubrication ensures smooth operation of your Brother CS 6000i. Generally, this machine is designed to be largely maintenance-free regarding oiling. However, the manual may recommend occasional oiling of specific points, like the bobbin race, for extended periods of use.

Use only sewing machine oil; other lubricants can cause damage. Apply sparingly with an oiler, avoiding excess. Consult the manual for precise lubrication points and frequencies to prevent malfunctions.

Safety Precautions

Always disconnect the Brother CS 6000i from the power source before cleaning, changing the needle, or threading. Never operate the machine with damaged parts, and avoid using excessive force. Keep fingers away from moving parts, like the needle and presser foot, during operation.

Ensure the machine is stable on a flat surface. Do not attempt repairs yourself; contact authorized service personnel. Read the entire manual before use to understand all safety guidelines and prevent injury.

Downloading the PDF Manual

Accessing the Brother CS 6000i’s PDF manual is straightforward. Numerous websites offer downloadable versions, often directly from Brother’s official support pages or reputable sewing machine resource sites. A quick online search using “Brother CS 6000i manual PDF” will yield several results.

Ensure the source is trustworthy to avoid malware. The 60-page manual provides detailed instructions, diagrams, and troubleshooting tips, offering comprehensive guidance for users. Download and save it for convenient offline access.

Finding Additional Resources Online

Beyond the official PDF manual, a wealth of resources exists online for Brother CS 6000i owners. YouTube hosts numerous video tutorials demonstrating threading, stitch selection, and troubleshooting techniques. Sewing forums and communities provide platforms for asking questions and sharing experiences.

Brother’s website itself offers FAQs, support articles, and downloadable software updates. Websites specializing in sewing machine parts and accessories can also be valuable for finding replacements or enhancements.

Frequently Asked Questions (FAQ)

Q: Where can I download the CS 6000i manual? A: Numerous websites offer the 60-page PDF manual for free download. Q: What if my machine keeps breaking the thread? A: Check threading, needle type, and tension settings. Q: How do I wind the bobbin? A: Consult the manual’s bobbin winding section for detailed instructions.

Q: Is the CS 6000i good for beginners? A: Yes, it’s user-friendly with automatic features. Q: Where can I find troubleshooting help? A: Online forums and Brother’s support site are excellent resources.

Comparison with Similar Brother Models

Compared to the Brother CS 4000, the CS 6000i offers more built-in stitches and a faster sewing speed. Against the SE 400, the CS 6000i lacks embroidery capabilities but excels in standard sewing tasks. Models like the XR-7700 share similar features but may have a different control panel layout;

The CS 6000i provides a balance of features and affordability, making it a strong contender within Brother’s lineup. Consider your specific needs when choosing between these models.

Warranty Information and Support

Brother offers a one-year limited warranty on the CS 6000i, covering defects in materials and workmanship. Extended warranties may be available for purchase. For support, visit the official Brother website for FAQs, downloadable manuals, and troubleshooting guides.

Customer service can be reached via phone or online chat. Authorized Brother service centers provide repair options. Retain your proof of purchase for warranty claims and support inquiries.

marketing strategies for small business pdf

Marketing plans are essential roadmaps, helping small businesses pinpoint customers and build awareness. Downloadable templates in PDF format offer a structured approach.

A well-defined marketing plan aligns efforts with overall business goals, ensuring efficient resource allocation and maximized impact for sustained growth.

The Importance of a Marketing Plan

A robust marketing plan isn’t merely a document; it’s the foundational blueprint for a small business’s success. It meticulously details objectives, target audiences, and strategies, providing a clear roadmap to navigate the competitive landscape. Without a plan, marketing efforts can become fragmented and ineffective, leading to wasted resources and missed opportunities.

Utilizing a marketing plan template – often available as a PDF download – streamlines the process, offering a pre-structured framework. This ensures crucial elements, like executive summaries and budget allocations, aren’t overlooked. The plan facilitates informed decision-making, allowing businesses to prioritize initiatives with the highest potential return.

Furthermore, a well-crafted plan fosters accountability. By setting SMART goals (Specific, Measurable, Achievable, Relevant, Time-bound), businesses can track progress and adjust strategies as needed. It’s a dynamic tool, evolving alongside the business and market conditions, ultimately driving sustainable growth and profitability.

Defining Your Target Audience

Precisely identifying your target audience is paramount before implementing any marketing strategy. A marketing plan, often initiated with a downloadable PDF template, emphasizes this crucial step. It’s not enough to simply state “everyone” is your customer; detailed demographics, psychographics, and buying behaviors must be understood.

Consider factors like age, location, income, interests, and pain points. What problems does your product or service solve for them? Where do they spend their time online and offline? This granular understanding informs messaging and channel selection, ensuring marketing efforts resonate with the right people.

Effective targeting maximizes ROI by focusing resources on those most likely to convert. A clearly defined audience allows for personalized campaigns, fostering stronger customer relationships and brand loyalty. Ignoring this step leads to wasted ad spend and diluted marketing impact.

Understanding the Current Market

Market research, often detailed in a marketing plan PDF, reveals trends and opportunities. Analyzing competitors and understanding customer needs are vital for success.

Market Research Techniques

Effective market research is the cornerstone of any successful small business marketing plan, often outlined within a comprehensive PDF template. Several techniques can be employed to gather crucial insights. Surveys, both online and offline, provide direct feedback from potential customers regarding their needs and preferences.

Analyzing competitor strategies – examining their marketing plans, pricing, and customer engagement – offers valuable benchmarks. Focus groups allow for in-depth discussions, uncovering nuanced opinions. Utilizing analytics tools to track website traffic and social media engagement provides data-driven insights into customer behavior. Furthermore, exploring industry reports and publicly available data sources can reveal broader market trends.

Remember, a well-researched market understanding, documented within your marketing plan, minimizes risk and maximizes the return on investment for your small business.

Competitive Analysis

Competitive analysis, a vital component of your small business marketing plan (often found within a downloadable PDF template), involves identifying and evaluating your rivals. Begin by listing direct and indirect competitors – those offering similar products or services, and those addressing the same customer needs differently.

Assess their strengths and weaknesses: pricing strategies, marketing tactics, customer service, and brand reputation. Examine their online presence – website, social media, and content marketing efforts. Identify gaps in the market that your business can exploit. Understanding your competitors’ marketing plans, even superficially, is crucial.

This analysis informs your own strategy, allowing you to differentiate your offerings and position your small business for success. A thorough competitive landscape assessment, documented in your marketing plan, is invaluable.

Core Marketing Objectives

Detail overall marketing objectives for your small business, or campaign-specific goals, within your marketing plan template. Primary objectives drive focused strategies.

Setting SMART Goals

Establishing SMART goals – Specific, Measurable, Achievable, Relevant, and Time-bound – is crucial for effective marketing. A marketing plan, often available as a PDF template, should clearly outline these objectives. For example, instead of aiming for “increased website traffic,” a SMART goal would be “increase organic website traffic by 15% within the next quarter through targeted SEO efforts.”

This approach provides clarity and allows for accurate tracking of progress. Utilizing marketing templates helps structure these goals, ensuring they align with broader business objectives. Regularly reviewing and adjusting SMART goals based on performance data, accessible through analytics tools, is vital for optimizing marketing strategies and maximizing return on investment for your small business.

Remember, well-defined goals are the foundation of a successful marketing campaign, and a PDF plan provides a centralized location for documenting and monitoring them.

Aligning Marketing with Business Goals

A successful marketing plan, often found as a downloadable PDF template, isn’t a standalone entity; it’s intrinsically linked to overall business objectives. Detail your overall marketing objectives within the plan, ensuring they directly support the company’s vision. For instance, if the business goal is to increase revenue by 20%, marketing goals should focus on lead generation, customer acquisition, and increased sales conversions.

This alignment ensures that marketing efforts aren’t wasted on activities that don’t contribute to the bottom line. A marketing strategy template facilitates this process by prompting you to define primary objectives and how marketing will contribute. Regularly review the plan to confirm continued alignment as business goals evolve, maximizing efficiency and impact.

Effective marketing is about more than just promotion; it’s about driving tangible business results.

Branding and Messaging

Marketing plans, including PDF templates, emphasize building a strong brand identity and crafting a consistent message for recognition and customer loyalty.

Developing a Brand Identity

Crafting a compelling brand identity is paramount for small businesses, and many marketing plan templates, often available as PDF downloads, dedicate sections to this crucial element. This involves defining your brand’s core values, personality, and unique selling proposition. Consider what makes your business different and how you want customers to perceive you.

Visual elements are key – think logo design, color palettes, and typography. These should be consistent across all marketing materials, reinforcing brand recognition. A strong brand voice, reflected in your messaging, is equally important.

Templates often guide you through exercises to articulate your brand’s mission and vision. Understanding your target audience is vital; your brand identity should resonate with their needs and preferences. A well-defined brand identity fosters trust, loyalty, and ultimately, business success. It’s the foundation of all effective marketing efforts.

Crafting a Consistent Message

Consistency in messaging is vital for building brand recognition and trust, a point emphasized in many small business marketing plan templates available as PDF resources. Your brand’s voice should be uniform across all platforms – website, social media, email marketing, and even in-person interactions.

This doesn’t mean being monotonous; it means adhering to a defined tone and style that reflects your brand identity. Ensure your key messages are clear, concise, and resonate with your target audience.

Templates often include guidelines for developing a messaging framework. Regularly review your marketing materials to ensure alignment. A consistent message reinforces your brand values and builds a stronger connection with customers, ultimately driving conversions and fostering loyalty. Inconsistency can confuse customers and dilute your brand’s impact.

Digital Marketing Strategies

Digital strategies – SEO, social media, email, and content marketing – are crucial. PDF marketing plan templates detail these, boosting online visibility and customer engagement.

Search Engine Optimization (SEO)

Search Engine Optimization (SEO) is a foundational digital marketing strategy for small businesses aiming to increase organic visibility in search engine results. A comprehensive marketing plan, often available as a PDF template, will detail keyword research, on-page optimization, and off-page strategies like link building.

Effective SEO involves understanding what potential customers are searching for and tailoring website content accordingly. This includes optimizing website structure, meta descriptions, and image alt text. Many marketing plan templates emphasize the importance of local SEO, particularly for businesses with a physical location, focusing on Google My Business optimization and local keyword targeting.

Regularly updating content and monitoring keyword rankings are vital components of a successful SEO strategy. Utilizing analytics tools, as outlined in many marketing plan resources, allows businesses to track progress and refine their approach. A well-executed SEO strategy can significantly reduce reliance on paid advertising and drive sustainable, long-term traffic to a small business website.

Social Media Marketing

Social Media Marketing is a crucial component of any modern small business marketing plan, often detailed within downloadable PDF templates. It involves leveraging platforms like Facebook, Instagram, and LinkedIn to connect with target audiences, build brand awareness, and drive website traffic.

A successful strategy requires identifying the platforms where your ideal customers are most active and creating engaging content tailored to each platform’s unique audience. Marketing plans frequently emphasize the importance of consistent posting, interactive content (polls, quizzes), and utilizing relevant hashtags to expand reach.

Paid social media advertising can amplify organic efforts, allowing for precise targeting based on demographics, interests, and behaviors. Many marketing plan resources highlight the need to track key metrics like engagement rate, reach, and conversions to measure the effectiveness of social media campaigns and optimize future strategies for maximum ROI.

Email Marketing

Email Marketing remains a highly effective marketing tactic for small businesses, often outlined in comprehensive marketing plan PDF resources. It allows for direct communication with potential and existing customers, fostering relationships and driving conversions.

Building an email list is paramount, typically achieved through website opt-in forms offering valuable content or exclusive discounts. Segmentation is key – dividing your audience based on demographics, purchase history, or interests allows for personalized messaging, significantly increasing engagement rates.

Effective email campaigns include newsletters, promotional offers, and automated sequences (welcome emails, abandoned cart reminders). Marketing plans emphasize the importance of A/B testing subject lines and content to optimize performance. Tracking open rates, click-through rates, and conversions provides valuable insights for refining your email marketing strategy.

Content Marketing

Content Marketing is a cornerstone of modern marketing strategies for small businesses, frequently detailed within a comprehensive marketing plan PDF. It focuses on creating and distributing valuable, relevant, and consistent content to attract and engage a defined audience – ultimately driving profitable customer action.

This encompasses blog posts, articles, videos, infographics, and social media updates. High-quality content establishes your business as an industry authority, builds trust, and improves search engine rankings. A marketing plan should outline a content calendar, ensuring a consistent flow of fresh material.

Effective content addresses customer pain points, provides solutions, and entertains. Analyzing content performance (website traffic, social shares, lead generation) is crucial for optimizing your strategy and maximizing ROI. Remember to align content with your overall marketing objectives.

Traditional Marketing Methods

Print advertising and local events remain valuable, complementing digital efforts outlined in a marketing plan PDF. Networking builds community connections and brand visibility.

Print Advertising

Print advertising, though often overshadowed by digital strategies detailed in a comprehensive marketing plan PDF, still holds relevance for certain small businesses and target demographics. Consider local newspapers, community magazines, and targeted mailers. These methods can be particularly effective when reaching audiences less active online.

When designing print ads, prioritize clear messaging and a strong call to action. Ensure your branding is consistent with your overall marketing efforts. Track responses using unique codes or offers to measure effectiveness. While potentially more expensive than digital options, print can offer a tangible connection with potential customers, building trust and recognition within the local community. A well-executed print campaign, integrated with your broader marketing strategy, can yield positive results.

Local Events and Networking

Local events and networking represent a powerful, often underutilized, component of a successful small business marketing plan, frequently outlined in downloadable PDF resources. Participating in community fairs, sponsoring local sports teams, or hosting workshops builds brand visibility and fosters direct customer relationships.

Networking events provide invaluable opportunities to connect with potential partners, suppliers, and, most importantly, customers. Prepare a concise “elevator pitch” highlighting your business’s unique value proposition. Collect business cards and follow up promptly. Remember, networking isn’t solely about immediate sales; it’s about building long-term relationships and establishing your business as a trusted member of the local community. A consistent presence at relevant events significantly enhances brand recognition and generates valuable leads.

Marketing Plan Template Overview

A comprehensive marketing plan template, often available as a PDF, includes an executive summary and detailed budget allocation for effective small business strategies.

Executive Summary

The executive summary, positioned at the forefront of your marketing plan, serves as a concise overview for stakeholders. It should encapsulate the core elements of your small business’s marketing strategy, highlighting key objectives, target audiences, and anticipated outcomes.

Though appearing first, this section is best written last, after the complete plan is finalized. It distills complex information into an easily digestible format, typically spanning one to two pages. A strong executive summary clearly articulates the marketing challenges, proposed solutions, and the projected return on investment.

Consider including a brief mention of the marketing budget and key performance indicators (KPIs) that will be used to measure success. Many small business owners utilize PDF templates to ensure all critical components are addressed, streamlining the planning process and providing a professional presentation;

Marketing Budget Allocation

Effective marketing budget allocation is crucial for small businesses seeking optimal return on investment. Begin by outlining total marketing expenditure, then distribute funds strategically across various channels. PDF marketing plan templates often include pre-defined categories for streamlined budgeting.

Prioritize channels aligned with your target audience and marketing objectives. Consider allocating resources to digital marketing – SEO, social media, email marketing, and content creation – alongside traditional methods like print advertising or local events.

A typical allocation might include percentages for advertising, content creation, social media management, website maintenance, and marketing tools. Regularly review and adjust allocations based on performance data, ensuring resources are directed towards the most effective strategies. Detailed tracking within your plan is key.

Measuring and Analyzing Results

Key Performance Indicators (KPIs) track marketing success; utilize analytics tools to monitor progress against marketing plan goals, refining strategies accordingly.

Key Performance Indicators (KPIs)

Key Performance Indicators (KPIs) are crucial metrics for evaluating the effectiveness of your small business marketing plan. Selecting the right KPIs ensures you’re tracking what truly matters for growth. Common KPIs include website traffic, lead generation rates, conversion rates, customer acquisition cost (CAC), and return on investment (ROI) for each marketing channel.

For digital marketing, monitor metrics like click-through rates (CTR) for ads, engagement rates on social media, and email open/click rates. Analyzing these indicators provides insights into campaign performance. Regularly reviewing these KPIs – weekly or monthly – allows for timely adjustments to your marketing strategies.

Remember to align your KPIs with your overall business objectives. A PDF marketing plan template often includes a section for defining and tracking these vital metrics, ensuring accountability and data-driven decision-making.

Utilizing Analytics Tools

Analytics tools are indispensable for understanding your marketing performance and refining your strategies. Google Analytics is a powerful, free option for tracking website traffic, user behavior, and conversion goals. Social media platforms offer built-in analytics dashboards providing insights into audience demographics and engagement.

For email marketing, tools like Mailchimp or Constant Contact provide detailed reports on open rates, click-through rates, and subscriber growth. These insights help optimize email campaigns for better results. Integrating these tools with your marketing plan template – often available as a PDF – streamlines data collection and analysis.

Regularly analyzing data from these tools allows you to identify what’s working, what’s not, and make data-driven decisions to improve your small business’s marketing ROI.

Free Marketing Plan PDF Resources

Numerous online resources offer free marketing plan PDF templates to jumpstart your strategy. Forbes Advisor and GanttPRO provide downloadable templates, streamlining the planning process for small businesses. These resources often include sections for executive summaries, target audience analysis, and budget allocation.

Uptown Studios offers a small business marketing strategy template available for free download. Voluntary Sector Organisation provides a marketing plan template geared towards non-profits, adaptable for various businesses. Searching online for “marketing plan template PDF” yields a wealth of options.

Remember to customize these templates to reflect your unique business goals and target market. Utilizing these resources saves time and ensures a comprehensive marketing plan.

saw guide milescraft

Milescraft Saw Guide: A Comprehensive Overview (Updated 02/06/2026)

The Milescraft Saw Guide offers a versatile‚ affordable alternative to track saws‚ providing remarkably straight and accurate cuts with existing circular saws and jigsaws;

What is the Milescraft Saw Guide?

The Milescraft Saw Guide‚ specifically model 1403‚ is designed as a universal rip guide‚ enhancing the functionality of standard circular saws and even jigsaws. It’s essentially a robust‚ adjustable base that transforms your existing power tools into a more precise cutting system.

Unlike dedicated track saw systems‚ the Milescraft guide prioritizes compatibility‚ aiming to work with a wide range of circular saw models. Constructed from rigid aluminum‚ it provides a stable platform for achieving straight‚ accurate cuts‚ particularly beneficial for long rip cuts. It features a 50-inch cutting length‚ expandable for larger projects‚ and simplifies setup with easy alignment capabilities.

Universal Compatibility: Which Saws Work Best?

The Milescraft Saw Guide boasts “universal” compatibility‚ fitting most standard circular saws with blades up to 7-1/4 inches (184mm). However‚ real-world experience reveals nuances. While adaptable‚ some saws integrate more seamlessly than others;

Reddit discussions highlight potential issues with blade depth‚ specifically when maxed at 2 1/2 inches‚ causing release mechanisms to interfere with clamping. Motor housing interference is also a concern‚ potentially leading to canting and slightly beveled cuts. Users suggest a 1-inch depth often resolves mounting problems. Despite these caveats‚ the guide remains a valuable upgrade for many circular saws.

Key Features and Benefits

The Milescraft Saw Guide delivers several key advantages for DIYers and professionals alike. Its rigid aluminum construction ensures repeatable‚ accurate cuts‚ transforming ordinary circular saws into precision tools. A standout feature is the 50-inch cutting length‚ expandable for handling larger materials.

Setup is remarkably quick and easy‚ aligning the guide strip to your mark in seconds. User reviews consistently praise its ability to achieve straight‚ true rip cuts‚ rivaling more expensive track saw systems. This combination of features provides a superior value proposition‚ enhancing cutting accuracy and efficiency.

Rigid Aluminum Construction

The Milescraft Saw Guide’s foundation lies in its robust‚ solid aluminum build. This isn’t simply about durability; the rigidity is paramount to achieving consistently accurate cuts. Unlike plastic or composite guides‚ the aluminum resists flexing and warping under pressure‚ maintaining a perfectly straight cutting path.

This solid construction minimizes vibration and ensures the circular saw remains firmly aligned throughout the cut. The result is a professional-quality edge‚ free from the inconsistencies often found with less stable guides. It’s a key component in delivering repeatable precision and long-lasting performance.

50-inch Cutting Length & Expandability

The Milescraft Saw Guide boasts a substantial 50-inch cutting length‚ immediately accommodating a wide range of project sizes and sheet goods. This extended reach minimizes the need for repositioning the guide mid-cut‚ streamlining workflow and enhancing efficiency.

Furthermore‚ the guide’s design allows for expandability‚ meaning users can connect multiple sections to tackle even larger materials. This adaptability makes it suitable for both DIY enthusiasts and professional woodworkers. The combination of length and expandability provides exceptional versatility‚ handling everything from small trim pieces to full sheets of plywood with ease.

Ease of Setup and Alignment

Setting up the Milescraft Saw Guide is remarkably straightforward‚ designed for quick and efficient operation. Users simply align the guide strip to their desired mark‚ eliminating complex measuring and marking procedures. This intuitive setup drastically reduces preparation time‚ allowing you to focus on the cutting process itself.

The guide’s robust construction and secure clamping mechanism ensure consistent alignment throughout the cut. This minimizes the risk of drifting or inaccurate results‚ even on longer cuts. The simplicity of the setup makes it accessible to woodworkers of all skill levels‚ from beginners to seasoned professionals.

Milescraft Saw Guide vs. Track Saws: Cost & Functionality

Compared to dedicated track saws‚ the Milescraft Saw Guide presents a significantly more budget-friendly option for achieving straight‚ accurate cuts. While track saws integrate the guide rail and saw into a single system‚ the Milescraft guide adapts to existing circular saws‚ leveraging tools many woodworkers already own;

Functionally‚ both systems deliver similar results – clean‚ splinter-free cuts. However‚ track saws often offer features like dust extraction ports and more robust anti-splinter strips. The Milescraft guide excels in value‚ providing a “superior value” (as noted in Home Depot reviews) for those seeking precision without the high investment of a track saw system.

Addressing Compatibility Issues with Specific Circular Saws

While marketed as “universal‚” some circular saws exhibit compatibility challenges with the Milescraft Saw Guide. A common issue‚ highlighted on Reddit‚ involves blade depth limitations; maximizing depth to 2 ½ inches can interfere with the rear clamp mechanism. Users have found success by reducing the blade depth to 1 inch‚ resolving mounting problems.

Another concern is potential motor housing interference with the guide rail‚ possibly causing a slight bevel in cuts. Raising the saw off its base can alleviate this. Careful assessment of saw dimensions and adjustments are crucial for optimal performance and ensuring truly straight cuts.

Blade Depth Limitations (2 1/2 inches & Adjustments)

The Milescraft Saw Guide’s design presents a blade depth limitation‚ specifically when attempting to utilize the maximum 2 ½ inch cutting capacity. Reports from users‚ notably on Reddit‚ indicate that at this depth‚ the saw’s release mechanism can obstruct the rear clamp of the guide. This interference hinders secure mounting and potentially compromises cut accuracy.

A readily available solution is to adjust the blade depth. Reducing the cut depth to 1 inch effectively eliminates the mounting issues‚ allowing for a stable and reliable connection to the Milescraft guide. This adjustment often provides sufficient depth for common cutting tasks.

Motor Housing Interference & Potential Canting

Another concern raised by users centers around potential interference between the circular saw’s motor housing and the Milescraft guide’s rails. Specifically‚ the motor housing can make contact with the guide’s narrow rail when the blade is set to its maximum depth. This contact raises concerns about potential “canting” – a slight tilting of the saw during operation.

Canting‚ even at a low degree‚ can result in subtly beveled cuts‚ compromising the accuracy desired from the guide. Adjusting the blade depth‚ as previously mentioned‚ alleviates this issue by lifting the saw body away from the rail‚ ensuring a flush and stable cutting plane.

How to Properly Mount a Circular Saw to the Milescraft Guide

Successfully utilizing the Milescraft Saw Guide begins with secure and correct circular saw mounting. The guide’s universal base accommodates most standard saws‚ but careful attention to detail is crucial. Ensure the saw’s base plate is firmly seated within the guide’s designated area‚ utilizing the provided clamps for a snug fit.

Users have noted that maximizing blade depth (2 ½ inches) can sometimes interfere with clamp placement. Adjusting the blade depth‚ if not required for the cut‚ resolves this. Verify the saw remains flat and doesn’t rock before operation‚ guaranteeing accurate cuts.

Achieving Accurate Cuts with the Milescraft Guide

The Milescraft Saw Guide excels at delivering precision. For straight rip cuts‚ align the guide strip to your marked line and firmly secure the guide. Maintain consistent pressure while moving the saw along the track‚ allowing the guide to dictate the cutting path.

Reviewers consistently praise the guide’s ability to produce repeatable accuracy‚ vital for projects demanding consistent results. The rigid aluminum construction minimizes deflection‚ ensuring true cuts even over extended lengths. This system rivals dedicated track saws in performance‚ offering a cost-effective solution for accurate woodworking.

Straight and True Rip Cuts

The Milescraft Saw Guide truly shines when performing rip cuts‚ consistently delivering straight and accurate results. Users report effortlessly achieving clean‚ precise cuts‚ even on longer boards. The guide’s design ensures the circular saw remains perfectly aligned throughout the entire cut‚ eliminating wandering or deviation.

Simply align the guide strip to your desired measurement‚ clamp the guide securely‚ and proceed with the cut. The robust aluminum construction prevents flexing‚ contributing to the exceptional straightness. This feature makes it an ideal solution for projects requiring consistently sized pieces.

Repeatable Accuracy for Consistent Results

One of the most lauded aspects of the Milescraft Saw Guide is its ability to deliver repeatable accuracy. The rigid aluminum construction and precise alignment features ensure that each cut mirrors the previous one‚ crucial for projects demanding consistency. Users consistently praise the guide for enabling them to produce perfectly matched pieces with minimal effort.

This reliability stems from the guide’s solid build and the secure clamping system‚ preventing movement during operation. Whether you’re building furniture or crafting intricate designs‚ the Milescraft guide provides the confidence of consistently accurate cuts.

Milescraft Guide for Jig Saws: Versatility and Application

Beyond circular saws‚ the Milescraft 1403 Universal Saw Guide demonstrates impressive versatility by accommodating jig saws. This expands its utility for projects requiring curved or intricate cuts where a standard circular saw falls short. Users find it an excellent solution for achieving clean‚ controlled cuts in various materials‚ offering a stable platform for the jig saw blade.

The guide’s adaptability allows for precise maneuvering‚ enhancing the jig saw’s capabilities. It’s particularly beneficial for those lacking a dedicated scroll saw‚ providing a cost-effective alternative for detailed work.

User Reviews and Real-World Performance

Customer feedback consistently highlights the Milescraft Saw Guide’s ability to deliver impressively straight and accurate cuts‚ particularly on long rip cuts. Many users report achieving professional-quality results with relative ease‚ even when using saws that might typically struggle with precision. Reviews frequently emphasize the guide’s value proposition‚ positioning it as being on par with‚ or even exceeding‚ the performance of more expensive track saw systems.

The guide is overwhelmingly praised for its simplicity and effectiveness‚ making it a popular choice for both DIY enthusiasts and experienced woodworkers.

Positive Feedback on Straight Cut Accuracy

A significant portion of user reviews centers on the Milescraft Saw Guide’s exceptional ability to produce straight‚ true cuts. Customers consistently report successful extended rip cuts with minimal deviation‚ a feat often challenging with standard circular saws. Users specifically mention the guide’s effectiveness in achieving accuracy‚ eliminating the wobble and wandering commonly associated with freehand cutting.

Many highlight the guide’s performance as being comparable to dedicated track saw systems‚ but at a significantly lower cost. The positive feedback underscores the guide’s reliability in delivering consistent‚ precise results.

Value Proposition: Performance vs. Price

The Milescraft Saw Guide consistently receives praise for its outstanding value‚ offering performance that rivals more expensive track saw systems. Reviewers frequently state it’s “on par or better than anything in its class” while remaining significantly more affordable. This makes it an attractive option for DIY enthusiasts and professionals seeking precision without a substantial investment.

The ability to utilize existing circular saws further enhances the value‚ eliminating the need to purchase a dedicated track saw. Customers appreciate the cost-effectiveness and the improved accuracy it brings to their projects.

Alternatives to the Milescraft Saw Guide

While the Milescraft Saw Guide provides a cost-effective solution‚ several alternatives exist. Dedicated track saw systems‚ like those from Festool or Makita‚ offer superior dust extraction and potentially greater precision‚ but at a considerably higher price point. Other options include using a straight edge clamped to the workpiece‚ though this requires more skill and often yields less accurate results.

DIY track saw builds are also possible‚ but demand significant fabrication effort. Ultimately‚ the best alternative depends on budget‚ desired accuracy‚ and willingness to invest time in setup and construction.

Where to Purchase the Milescraft Saw Guide

The Milescraft Saw Guide is readily available at several major retailers‚ offering convenient purchasing options for most customers. Lowe’s currently stocks the Milescraft Circular Track Saw Guide (model 14092003)‚ featuring a 50-inch cutting length and red cutting strip. Similarly‚ The Home Depot carries the guide‚ with customer reviews highlighting its value and performance.

Walmart.com also offers the Milescraft 1403 Universal Saw Guide‚ praised for its precision with both circular and jigsaw saws. Checking each retailer’s website for current pricing and availability is recommended.

Availability at Lowe’s

At Lowe’s‚ the Milescraft Circular Track Saw Guide (model 14092003) is currently in stock online and at participating retail locations. This guide boasts universal adjustability‚ fitting most standard circular saws with blades up to 7-1/4 inches. Its rigid aluminum construction ensures repeatable‚ accurate cuts‚ simplifying projects for both DIY enthusiasts and professionals.

The product page highlights the quick setup process‚ allowing for cuts aligned to your mark in seconds. Checking Lowe’s website or your local store’s inventory is advised for real-time availability and pricing information.

Availability at The Home Depot

The Milescraft Track Saw Guide is readily available at The Home Depot‚ both online at homedepot.com and in most physical store locations. Customer reviews on their website consistently praise the guide’s performance‚ noting it’s “on par or better than anything in its class” at a superior value.

The expandable 50-inch cutting range and all-aluminum construction are key features highlighted by users. Checking The Home Depot’s website allows for verifying current stock levels‚ pricing‚ and potential promotional offers near you. Many reviewers emphasize its ability to deliver extended‚ straight‚ and true rip cuts effortlessly.

Availability at Walmart

The Milescraft 1403 Universal Saw Guide is available for purchase at Walmart‚ both through their online store at walmart.com and potentially in select retail locations. Customer feedback consistently highlights the guide as an excellent solution for achieving precise cuts‚ particularly long rip cuts.

Reviews overwhelmingly praise its ability to make straight cuts easy and accurate‚ ensuring excellent results every time. Checking Walmart’s website will confirm current pricing‚ stock availability‚ and shipping options. It’s presented as a viable table saw alternative‚ offering precision without the substantial investment.

Maintenance and Care of Your Milescraft Saw Guide

Maintaining your Milescraft Saw Guide is straightforward due to its robust‚ all-aluminum construction. Regularly inspect the guide rail for any debris accumulation‚ clearing it with a brush or cloth to ensure smooth saw movement. Periodically check the tightness of all screws and fasteners‚ tightening as needed to prevent wobble during operation.

Avoid exposing the guide to excessive moisture‚ as this could potentially lead to corrosion. While the aluminum is durable‚ cleaning with a mild detergent and water is recommended. Proper care will ensure years of accurate and reliable performance from your Milescraft guide.

Troubleshooting Common Issues

A frequent issue reported involves circular saw compatibility‚ particularly with blade depth exceeding 2 1/2 inches‚ potentially interfering with the guide’s clamps. Adjusting blade depth or utilizing a different saw may resolve this. Motor housing interference‚ causing potential canting‚ can also occur; reducing depth often rectifies this.

If experiencing inaccurate cuts‚ verify the guide is securely fastened and aligned correctly. Ensure the circular saw base is firmly against the guide rail. For mounting difficulties‚ double-check screw placement and compatibility with your specific saw model.

2018 chevrolet equinox manual

Welcome! This guide unlocks your 2018 Equinox’s potential, offering detailed insights into operation, maintenance, and safety features, accessible via PDF downloads.

Overview of the Vehicle

The 2018 Chevrolet Equinox is a compact crossover SUV designed for versatility and efficiency. It caters to diverse needs, from daily commutes to family adventures. Available in various trims, the Equinox offers a range of features, including advanced safety technologies and a user-friendly infotainment system. This vehicle boasts a comfortable interior and respectable fuel economy.

Understanding its capabilities requires referencing the official owner’s manual, a comprehensive resource detailing every aspect of the vehicle. The manual provides crucial information on operation, maintenance schedules, and troubleshooting common issues, ensuring a safe and enjoyable driving experience. Access the PDF version easily online!

Importance of the Owner’s Manual

Your 2018 Chevrolet Equinox owner’s manual is an indispensable resource, offering a complete understanding of your vehicle’s operation and maintenance. It details safety features, driving modes, and in-vehicle technology, maximizing your driving experience. Ignoring the manual can lead to improper vehicle use or neglected maintenance, potentially causing damage or safety hazards.

The manual provides crucial information on warning lights, troubleshooting, and warranty details. Easily accessible as a downloadable PDF, it empowers owners to address minor issues and understand their vehicle’s capabilities fully. Regularly consulting it ensures longevity and optimal performance of your Equinox.

Understanding Your Equinox

Dive deeper! Explore detailed specifications, key features, and trim level distinctions of your 2018 Chevrolet Equinox for a comprehensive understanding.

Vehicle Specifications (2018 Model)

The 2018 Chevrolet Equinox presents a range of configurations to suit diverse needs. Engine options include a 1.5L Turbo, a 2;0L Turbo, and a 1.6L Diesel (availability varies by region). Transmission choices are a 6-speed automatic or a 9-speed automatic.

Dimensions reveal a compact crossover, typically around 183.1 inches in length, 72.6 inches in width, and 65.4 inches in height. Curb weight fluctuates between approximately 3,265 to 3,635 pounds, depending on the trim and engine. Fuel tank capacity generally stands at 18.8 gallons. Available drivetrain options encompass front-wheel drive and all-wheel drive, enhancing versatility across various terrains. Detailed specifications are readily available within the official owner’s manual PDF.

Key Features and Technologies

The 2018 Equinox boasts a suite of advanced technologies. The infotainment system, featuring a 7 or 8-inch touchscreen, supports Apple CarPlay and Android Auto. Available features include a built-in 4G LTE Wi-Fi hotspot, enhancing connectivity on the go. Safety is prioritized with available Forward Collision Alert and Automatic Emergency Braking.

Additional highlights encompass a hands-free liftgate, heated seats, and a panoramic sunroof. The Teen Driver technology allows monitoring of driving habits. Bluetooth connectivity ensures seamless integration with smartphones. Refer to the owner’s manual for detailed instructions on utilizing these features and maximizing your driving experience.

Trim Levels and Differences

The 2018 Chevrolet Equinox offered several trim levels: L, LS, LT, and Premier. The base L model provides essential features, while the LS adds conveniences like a rearview camera. Stepping up to the LT introduces enhanced comfort and technology options, including heated seats and a power driver’s seat.

The Premier trim represents the pinnacle of luxury, boasting leather upholstery, a Bose sound system, and advanced safety features. Engine options varied by trim, with a 1.5L turbo, a 2.0L turbo, and a 1.6L diesel available. Consult the owner’s manual for a comprehensive breakdown of each trim’s specific features and specifications.

Operating Your Vehicle

Mastering your Equinox is easy! This section details starting, driving modes, fueling procedures, and essential fluid checks for optimal performance and safety.

Starting and Stopping the Engine

Starting your 2018 Equinox typically involves ensuring the vehicle is in Park or Neutral, firmly pressing the brake pedal, and then pressing the Start/Stop button. The engine will ignite, and the instrument cluster will illuminate. For a smooth start in cold weather, avoid excessive throttle.

To stop the engine, simply press the Start/Stop button while the vehicle is in Park or Neutral. Ensure the vehicle comes to a complete stop before shutting off the engine. Avoid prolonged idling to conserve fuel and reduce emissions. Always allow the engine to idle briefly before shutting it down, especially after highway driving.

Driving Modes and Controls

The 2018 Equinox offers selectable driving modes, influencing throttle response and shift patterns. These typically include Normal, Sport, and Snow/Ice modes, accessible via a dedicated selector. Normal mode balances fuel efficiency and performance. Sport mode enhances acceleration and responsiveness. Snow/Ice mode optimizes traction on slippery surfaces.

Essential controls include the steering wheel-mounted buttons for audio, cruise control, and phone functions. The gear selector manages transmission shifts. Familiarize yourself with the location and operation of all controls for safe and convenient driving.

Fueling and Fluid Checks

The 2018 Equinox accepts unleaded gasoline with an octane rating of 87 or higher. Always refer to the owner’s manual for specific fuel capacity details. Regularly check essential fluid levels, including engine oil, coolant, brake fluid, power steering fluid, and windshield washer fluid. Low fluid levels can compromise vehicle performance and safety.

Locate the dipsticks and reservoir caps, and follow the manual’s instructions for proper checking procedures. Ensure fluids are topped off to the recommended levels. Promptly address any leaks or significant fluid consumption.

Safety Features

Protect yourself! The 2018 Equinox boasts advanced safety, including airbags, stability control, and forward collision alert – detailed in your owner’s manual.

Airbag System

Crucial Safety Component: Your 2018 Chevrolet Equinox is equipped with an advanced airbag system designed to provide occupant protection during certain collision events. This system includes frontal airbags for both driver and passenger, as well as seat-mounted side-impact airbags.

The manual details proper seating positions and safety belt usage for optimal airbag effectiveness. It’s vital to understand that airbags deploy with significant force and can cause injury if not used correctly. Always follow the guidelines outlined in the owner’s manual regarding child safety seats and airbag deactivation (if equipped). Familiarize yourself with the system’s indicators and limitations for comprehensive safety knowledge.

Stability Control System

Enhanced Vehicle Control: The 2018 Chevrolet Equinox features a sophisticated Stability Control System (ESC) designed to help maintain directional control during challenging driving conditions. This system automatically intervenes to prevent skidding and loss of control by applying brakes to individual wheels and adjusting engine power.

The owner’s manual explains how the ESC works and its limitations. It’s important to remember that ESC doesn’t eliminate the risks associated with driving, and drivers should always maintain safe speeds and practice responsible driving habits. The system’s indicator light will illuminate when activated, providing visual feedback.

Forward Collision Alert

Proactive Safety Feature: The 2018 Chevrolet Equinox offers Forward Collision Alert (FCA) as an available safety feature. This system utilizes a forward-facing camera to monitor the distance between your vehicle and obstacles ahead. If a potential collision is detected, FCA provides visual and audible warnings to alert the driver.

The owner’s manual details how to enable, disable, and customize FCA settings. It emphasizes that FCA is a driver-assistance feature and doesn’t replace attentive driving. Drivers must always remain vigilant and prepared to take corrective action. Understanding the system’s limitations is crucial for safe operation.

Maintenance and Care

Preserve Performance! The manual details a recommended schedule for fluid checks, tire maintenance, and overall vehicle upkeep, ensuring longevity and reliability.

Recommended Maintenance Schedule

Proactive care is key! Your 2018 Equinox’s longevity depends on adhering to the outlined maintenance schedule within the owner’s manual. This schedule details inspections – like fluid levels, tire pressure, and brake components – at specific mileage intervals.

Regular oil changes are crucial, with recommendations varying based on driving conditions. Filter replacements (air, cabin, fuel) are also specified. Beyond routine checks, the manual highlights essential services like spark plug replacement and coolant flushes at designated intervals. Following this schedule ensures optimal performance, safety, and helps maintain your vehicle’s value. Consult the manual for the precise schedule tailored to your driving habits.

Fluid Capacities and Types

Maintaining correct fluid levels is vital! The 2018 Equinox requires specific fluids for optimal operation. The owner’s manual details capacities for engine oil (typically around 5.5 quarts with a 1.5L engine), coolant, transmission fluid, power steering fluid, brake fluid, and windshield washer fluid.

It also specifies the types of fluids to use – for example, Dex-Cool coolant is often recommended. Using the incorrect fluid can cause damage. Always refer to the manual for precise specifications, as variations may exist based on engine and trim level. Accurate fluid levels ensure smooth performance and prevent costly repairs.

Tire Information and Maintenance

Proper tire care enhances safety and longevity! The 2018 Equinox owner’s manual provides crucial tire information, including recommended tire sizes (often 225/65R17 or 235/50R18, depending on the trim), optimal tire pressure (typically around 35 PSI, check the door jamb sticker!), and load capacity.

Regularly check tire pressure and tread depth. The manual details proper tire rotation procedures to ensure even wear. It also explains how to interpret the DOT tire code for age and manufacturing information. Ignoring tire maintenance can lead to reduced fuel efficiency and increased risk of accidents.

In-Vehicle Technology

Explore connectivity! The 2018 Equinox manual details the infotainment system, Bluetooth pairing, and available navigation features for a seamless driving experience.

Infotainment System Overview

The 2018 Equinox’s infotainment system is a central hub for connectivity and control. The owner’s manual provides a comprehensive guide to navigating its features, including the touchscreen display and associated buttons. Users can access audio controls, smartphone integration via Apple CarPlay and Android Auto, and vehicle settings.

Detailed instructions cover customizing the home screen, adjusting audio preferences, and utilizing voice commands. The manual also explains how to connect external devices via USB and Bluetooth. Understanding these features enhances the driving experience, providing convenient access to entertainment and information while maintaining focus on the road; Refer to the manual for specific details on your Equinox’s trim level.

Bluetooth Connectivity

Establishing a Bluetooth connection in your 2018 Equinox allows for hands-free calling and wireless audio streaming. The owner’s manual details the pairing process, guiding you through the infotainment system’s menus. It explains how to discover available devices, enter pairing codes, and confirm the connection.

Troubleshooting tips are included for resolving common issues, such as failed connections or audio distortions. The manual also covers managing paired devices, deleting old connections, and optimizing Bluetooth performance. Securely connecting your smartphone enhances convenience and safety while driving, allowing you to stay connected without distractions.

Navigation System (if equipped)

If your 2018 Equinox features a navigation system, the owner’s manual provides comprehensive instructions for its operation. It details entering destinations, utilizing points of interest, and understanding map views. The manual explains how to adjust settings like voice guidance, route preferences, and map display options.

Information on updating map data is also included, ensuring accurate and reliable navigation. Troubleshooting sections address common issues, such as GPS signal loss or incorrect route calculations. Utilizing the navigation system effectively enhances your driving experience, providing turn-by-turn directions and minimizing travel time.

Troubleshooting Common Issues

This section details warning lights, jump-starting procedures, and a basic troubleshooting guide to resolve minor issues with your 2018 Chevrolet Equinox.

Warning Lights and Indicators

Understanding your Equinox’s warning lights is crucial for safe operation. The owner’s manual provides a comprehensive guide to each indicator, explaining its meaning and recommended action. Ignoring these signals could lead to more significant mechanical problems or compromise safety. Common lights include the check engine light, oil pressure warning, and low tire pressure indicator.

Pay close attention to lights related to braking systems, airbag functionality, and stability control. The manual details the difference between critical warnings requiring immediate attention and informational alerts. Regularly reviewing this section ensures you’re prepared to address any potential issues promptly and effectively, maintaining your vehicle’s reliability.

Jump Starting Procedures

A discharged battery can leave you stranded, but safely jump-starting your 2018 Equinox is possible. The owner’s manual details the correct procedure, emphasizing safety precautions to prevent damage to the electrical system. Always use jumper cables in good condition and follow the specified order for connecting and disconnecting them – positive to positive, negative to ground.

Incorrectly connecting cables can cause sparks or even battery explosions. Ensure both vehicles are turned off before starting the process. After jump-starting, allow the Equinox to run for a sufficient period to recharge the battery fully, and consider having it tested by a professional.

Basic Troubleshooting Guide

Encountering minor issues? The 2018 Equinox owner’s manual provides a basic troubleshooting guide for common problems. This section covers issues like unresponsive infotainment systems, difficulties starting the engine, and unusual noises. It details simple checks you can perform yourself before seeking professional assistance, potentially saving time and expense.

Warning lights are addressed, explaining their meaning and suggested actions. Remember, this guide is for preliminary assessment only; complex problems require a qualified technician. Always prioritize safety and consult the manual for specific instructions related to your vehicle’s features.

Detailed Component Information

Explore the inner workings! This section of the 2018 Equinox manual provides in-depth explanations of the engine, transmission, and braking systems.

Understanding the Engine

Engine Overview: The 2018 Chevrolet Equinox offers a choice of three engines – a 1.5L Turbo, a 2.0L Turbo, and a 1.6L Diesel. This section details each engine’s specifications, including horsepower, torque, and cylinder configuration. Learn about the engine’s key components, such as the turbocharger (if equipped), fuel injection system, and cooling system.

Operation & Maintenance: Understand proper engine break-in procedures and recommended oil types; Discover how the engine control module (ECM) manages performance and emissions. Familiarize yourself with routine maintenance tasks, like checking fluid levels and inspecting belts and hoses, to ensure optimal engine longevity and efficiency.

Transmission System Details

Transmission Types: The 2018 Equinox primarily features a six-speed automatic transmission, paired with the 1.5L and 2.0L engines. The diesel engine utilizes a nine-speed automatic. This section explains the function of each transmission, including gear ratios and shift patterns. Understand the differences between automatic and manual shift modes, if available.

Fluid & Maintenance: Learn about the recommended transmission fluid type and change intervals. Discover how to check the transmission fluid level and identify potential issues like slipping or harsh shifting. Proper transmission maintenance is crucial for smooth operation and preventing costly repairs, ensuring long-term reliability.

Braking System Explained

Components & Function: The 2018 Equinox utilizes a hydraulic braking system with ventilated front discs and solid rear discs. This section details the operation of the anti-lock braking system (ABS), preventing wheel lockup during hard braking. Understand the role of the brake booster and master cylinder in applying braking force.

Maintenance & Inspection: Learn how to inspect brake pads, rotors, and brake lines for wear and damage. Discover the recommended brake fluid type and change intervals. Addressing brake system issues promptly is vital for safety, ensuring optimal stopping performance and preventing accidents.

Accessing the Official Manual

Find your answers! Download the 2018 Equinox owner’s manual in PDF format from my.chevrolet.com, or explore MyChevrolet resources online.

Downloading the 2018 Equinox Owner’s Manual (PDF)

Effortless access to information! Obtaining the 2018 Chevrolet Equinox owner’s manual in PDF format is remarkably simple. Visit the official my.chevrolet.com website and navigate to the owner’s manual section. Search specifically for the 2018 Equinox model. The downloadable PDF contains 324 pages of comprehensive guidance, covering every aspect of your vehicle.

This digital resource provides detailed explanations, diagrams, and troubleshooting tips, ensuring you have the knowledge needed for safe and efficient operation. The file size is approximately 2MB, allowing for a quick and easy download. Keep this manual readily available for future reference!

MyChevrolet Resources

Beyond the manual! MyChevrolet offers a wealth of supplementary resources to enhance your ownership experience. Explore the website for frequently asked questions, helpful videos, and a supportive online community. Register your 2018 Equinox to access personalized alerts, maintenance reminders, and exclusive offers.

The platform also provides access to the Chevrolet owner center, where you can manage your vehicle’s information and connect with Chevrolet customer support. Utilize these digital tools to maximize your vehicle’s performance and stay informed about important updates and recalls. It’s a complete ownership ecosystem!

Locating Specific Information within the Manual

Finding answers quickly! The 2018 Equinox owner’s manual features a comprehensive index, allowing you to pinpoint specific topics with ease. Utilize the alphabetical listing to quickly navigate to sections covering everything from airbag systems to winter driving tips.

Furthermore, the manual is logically organized by vehicle systems and operational procedures. Scan the table of contents for broader categories, then delve into detailed subsections. Keyword searches within the PDF version are also highly effective. Don’t spend hours searching – the manual is designed for efficient information retrieval!

Warranty Information

Coverage details are key! Understand your 2018 Equinox’s warranty, including claim procedures, for peace of mind and protection against unexpected repairs.

Coverage Details

The 2018 Chevrolet Equinox warranty provides comprehensive coverage for your vehicle. Typically, this includes a bumper-to-bumper warranty lasting for 3 years or 36,000 miles, whichever comes first. Powertrain coverage, protecting the engine and transmission, often extends to 5 years or 60,000 miles. Corrosion protection is usually offered for 3 years/unlimited miles.

Specific details can vary, so reviewing your original warranty booklet is crucial. It outlines what components are covered, any exclusions, and deductible information. Understanding these terms ensures you maximize your warranty benefits when addressing potential vehicle issues. Refer to MyChevrolet resources for personalized warranty information.

Claim Procedures

To initiate a warranty claim for your 2018 Chevrolet Equinox, first, schedule a service appointment with an authorized Chevrolet dealership. Clearly describe the issue to the service advisor. The dealership will diagnose the problem and determine if it’s covered under warranty;

If approved, the dealership will submit the claim to Chevrolet. Keep detailed records of all service visits, including dates, descriptions of the problem, and repair orders. MyChevrolet resources offer guidance on the claim process and allow you to track claim status online. Contact Chevrolet customer service for assistance if needed.

honeywell visionpro 8000 installation manual

Honeywell VisionPro 8000 offers advanced climate control‚ detailed in its installation manual. This guide ensures successful operation and maintenance of your new thermostat system.

The manual‚ available as a PDF‚ provides step-by-step instructions for a smooth setup‚ covering everything from unpacking to advanced configuration options.

Honeywell’s commitment to user-friendly technology is evident in the TH8000 series‚ detailed within the comprehensive operating and installation documentation.

Overview of the System

Honeywell VisionPro 8000 is a touchscreen programmable thermostat designed for comprehensive home climate control. The system supports heating‚ cooling‚ and automatic changeover modes‚ offering flexible scheduling options.

Its installation manual details wiring diagrams for various HVAC systems‚ ensuring compatibility and efficient operation. Remote access and smart home integration capabilities enhance user convenience‚ as outlined in the documentation.

The system’s robust features and user-friendly interface are central to its design‚ providing optimal comfort and energy savings.

Key Features and Benefits

The Honeywell VisionPro 8000 boasts a vibrant touchscreen display and intuitive menu navigation‚ simplifying programming and adjustments. Its installation manual highlights features like dynamic scheduling and energy-saving modes.

Benefits include remote access via the Honeywell Home app‚ smart home integration‚ and precise temperature control. The system offers both automatic and manual changeover options for personalized comfort.

RoHS compliance and detailed error code explanations further enhance its value and reliability.

Unpacking and Component Check

Carefully unpack the Honeywell VisionPro 8000‚ verifying all components against the package contents list in the installation manual.

Ensure the thermostat‚ backplate‚ screws‚ and documentation are present before proceeding with installation‚ as detailed in the guide.

Package Contents Verification

Carefully inspect the Honeywell VisionPro 8000 package upon arrival. The installation manual lists all included items: the thermostat unit itself‚ a mounting backplate‚ installation screws‚ and wire labels.

Confirm the presence of the operating manual and any additional documentation. Report any missing or damaged components immediately to Honeywell support for prompt resolution.

Identifying System Components

The Honeywell VisionPro 8000 consists of a touchscreen thermostat‚ a backplate for wall mounting‚ and wiring terminals. The manual details each component’s function and appearance.

Familiarize yourself with the thermostat’s display‚ buttons‚ and connection points. Understanding these elements‚ as illustrated in the manual‚ is crucial for successful installation and operation.

Installation Prerequisites

Before starting‚ consult the manual for required tools and materials. Prioritize safety by disconnecting power and following all outlined precautions during installation.

Ensure compatibility with your HVAC system‚ referencing the manual’s wiring diagrams for proper connections and a successful setup.

Required Tools and Materials

Honeywell VisionPro 8000 installation necessitates a Phillips head screwdriver‚ a flathead screwdriver‚ and wire strippers for precise connections.

You’ll also require a level to ensure proper thermostat mounting‚ along with electrical tape for secure wiring. The manual recommends a multimeter for voltage verification.

Finally‚ have appropriate wiring (typically 18-22 gauge thermostat wire) readily available‚ and consult the manual for any system-specific requirements.

Safety Precautions

Before beginning Honeywell VisionPro 8000 installation‚ always disconnect power to your HVAC system at the breaker to avoid electrical shock.

The manual stresses the importance of following all local electrical codes and regulations. If unsure‚ consult a qualified HVAC technician.

Wear appropriate safety glasses and exercise caution when working with wiring; improper installation can lead to system malfunction or hazard.

Wiring and Connections

Honeywell VisionPro 8000 wiring requires careful adherence to provided HVAC system diagrams within the installation manual.

Proper connections ensure optimal thermostat functionality and system compatibility‚ detailed in the manual’s wiring section.

Securely connect wires to the thermostat backplate‚ referencing the manual for correct terminal assignments.

Thermostat Backplate Installation

The installation manual details mounting the Honeywell VisionPro 8000 backplate securely to the wall‚ ensuring a level and stable base.

Carefully remove the existing thermostat base‚ identifying and labeling wires before disconnecting. Use appropriate screws and anchors for your wall type‚ as outlined in the manual;

Proper backplate installation is crucial for correct thermostat operation and a clean‚ professional appearance‚ following the manual’s guidance.

HVAC System Wiring Diagrams

The Honeywell VisionPro 8000 installation manual provides detailed wiring diagrams for various HVAC system configurations‚ including conventional and heat pump setups.

These diagrams clearly illustrate terminal designations for wires like R‚ C‚ W‚ Y‚ and G‚ ensuring correct connections.

Carefully follow the appropriate diagram for your system type to avoid miswiring and potential damage‚ referencing the manual for clarification.

Power Supply Connection

The Honeywell VisionPro 8000 installation manual emphasizes the importance of a stable 24VAC power supply for reliable operation.

Connect the ‘C’ (common) wire to the HVAC system’s transformer‚ and the ‘R’ (power) wire to the 24VAC hot terminal.

Ensure the transformer meets the thermostat’s power requirements‚ as detailed in the manual‚ before establishing the power supply connection.

Initial System Setup

The Honeywell VisionPro 8000 manual guides users through powering on‚ date/time settings‚ and Wi-Fi network connectivity for optimal performance.

Follow the on-screen prompts for a streamlined setup‚ ensuring proper communication with your HVAC system‚ as outlined in the manual.

Powering On the Thermostat

According to the Honeywell VisionPro 8000 installation manual‚ after wiring is complete‚ the thermostat should power on automatically. If it doesn’t‚ verify the power supply connection.

The touchscreen display will illuminate‚ initiating the startup sequence. The manual details troubleshooting steps if the screen remains blank‚ including checking the breaker and wiring;

Ensure proper voltage is supplied for reliable operation‚ referencing the specifications within the manual for correct power requirements.

Date and Time Configuration

The Honeywell VisionPro 8000 installation manual instructs users to set the correct date and time via the touchscreen interface. Accurate timekeeping is crucial for scheduling functions.

Navigate to the settings menu‚ as outlined in the manual‚ to access the date and time options. Follow the prompts to input the current information precisely.

Proper configuration ensures accurate scheduling and reliable operation of your thermostat‚ enhancing its energy-saving capabilities as detailed in the documentation.

Network Connectivity (Wi-Fi)

The Honeywell VisionPro 8000 installation manual details Wi-Fi setup for remote access and smart home integration. Access the network settings through the touchscreen menu.

Select your Wi-Fi network from the available list and enter the password‚ following the on-screen instructions in the manual. A stable connection is essential.

Successful connection enables remote control via the Honeywell Home app‚ offering convenience and advanced features as described in the provided documentation.

Programming Basic Settings

The manual guides users through setting system mode (Heat/Cool/Off)‚ temperature scheduling‚ and fan control. These basic settings optimize comfort and efficiency.

Customize schedules to match your lifestyle‚ ensuring optimal temperature regulation. Refer to the Honeywell VisionPro 8000 installation manual for details.

Setting System Mode (Heat/Cool/Off)

Honeywell’s VisionPro 8000 allows easy selection of Heat‚ Cool‚ or Off modes via the touchscreen interface. The manual details how to navigate to this setting.

Users can choose automatic changeover or manual changeover‚ detailed in the installation manual. Selecting the correct mode ensures efficient HVAC operation and desired comfort levels.

Proper mode selection is crucial for energy savings and maintaining a comfortable indoor environment‚ as outlined in the comprehensive Honeywell documentation.

Temperature Scheduling

The Honeywell VisionPro 8000’s manual explains how to program customized temperature schedules for optimal comfort and energy efficiency. Users can set different temperatures for various times of day.

Detailed instructions guide you through creating weekly schedules‚ accommodating diverse lifestyles. This feature‚ outlined in the installation manual‚ maximizes savings and convenience.

Schedule flexibility is a key benefit‚ allowing precise control over your home’s climate‚ as described in the Honeywell product documentation.

Fan Control Settings

The Honeywell VisionPro 8000 installation manual details various fan control options for enhanced comfort. Users can select “Auto” for on-demand circulation or “On” for continuous airflow.

The manual explains how to customize fan operation based on heating or cooling cycles‚ optimizing air distribution. These settings contribute to a more comfortable indoor environment.

Honeywell provides clear instructions for adjusting fan speed and duration‚ ensuring efficient and personalized climate control within your home‚ as per the documentation.

Advanced Configuration Options

The Honeywell VisionPro 8000 installation manual unlocks smart home integration and remote access. Customize settings for energy savings and system flexibility.

Explore detailed instructions for connecting to Honeywell Home‚ enabling control via smartphone or other compatible devices‚ as outlined in the guide.

Smart Home Integration

Honeywell VisionPro 8000’s installation manual details seamless integration with popular smart home platforms. Connect your thermostat for voice control via Amazon Alexa or Google Assistant.

The guide explains setup procedures‚ ensuring compatibility and enabling remote management of your home’s climate. Leverage the Honeywell Home app for enhanced control and automation features.

Explore advanced scenarios like geofencing and customized routines‚ all detailed within the comprehensive documentation for a truly connected home experience.

Remote Access Setup

The Honeywell VisionPro 8000 installation manual provides clear instructions for enabling remote access. Utilize the Honeywell Home mobile app to control your thermostat from anywhere with an internet connection.

Detailed steps guide you through account creation‚ thermostat registration‚ and secure network configuration. Enjoy convenient temperature adjustments and monitoring while away from home.

Troubleshooting tips within the manual address common connectivity issues‚ ensuring a reliable remote access experience for optimal comfort and energy savings.

Energy Saving Features

The Honeywell VisionPro 8000 installation manual highlights several energy-saving features. Smart scheduling allows customized temperature settings based on occupancy and time of day‚ reducing wasted energy.

Geofencing capabilities automatically adjust temperatures when you leave or approach home‚ maximizing efficiency. The manual details how to configure these features for optimal savings.

Learn about utilizing system flexibility and dynamic settings to minimize energy consumption while maintaining a comfortable living environment‚ as outlined in the documentation.

Troubleshooting Common Issues

The Honeywell VisionPro 8000 manual assists with resolving issues like power failures‚ connectivity problems‚ and inaccurate readings.

Decoding error messages is simplified with the manual’s guidance‚ enabling quick resolution of system malfunctions and ensuring optimal performance.

Thermostat Not Powering On

According to the installation manual‚ if your Honeywell VisionPro 8000 fails to power on‚ first verify the power supply connection at the HVAC system.

Check the circuit breaker and ensure it hasn’t tripped. Confirm proper wiring to the thermostat backplate‚ referencing the wiring diagrams in the manual.

A discharged battery can also cause this issue; consider replacement as outlined in the maintenance section of the manual.

Connectivity Problems

The Honeywell VisionPro 8000 installation manual details troubleshooting for connectivity issues. Ensure your Wi-Fi network is functioning correctly and the thermostat is within range.

Verify the correct network password was entered during setup. Restarting both the thermostat and your router can often resolve temporary connection problems.

Consult the manual’s section on network connectivity for advanced troubleshooting steps and potential interference sources.

Incorrect Temperature Readings

The Honeywell VisionPro 8000 installation manual addresses inaccurate temperature displays. Confirm the thermostat isn’t exposed to direct sunlight or drafts‚ impacting sensor readings.

Check for proper airflow around the unit‚ as restricted ventilation can cause discrepancies. Recalibrate the temperature sensor following the manual’s instructions.

Ensure correct wiring to the HVAC system‚ as faulty connections can lead to erroneous temperature reporting.

Understanding System Changeover

The Honeywell VisionPro 8000 installation manual details automatic and manual changeover options. Users can select heating or cooling modes as needed for comfort.

Configure settings via the touchscreen‚ choosing between automated switching or direct control based on your preferences and climate conditions.

Automatic Changeover Configuration

Honeywell VisionPro 8000’s automatic changeover‚ explained in the installation manual‚ intelligently switches between heating and cooling. This feature maintains a consistent temperature without manual adjustments.

The system utilizes setpoints to determine when to shift modes‚ optimizing energy efficiency and comfort. Configuration involves setting desired temperatures for both heating and cooling cycles.

Ensure proper sensor calibration for accurate readings‚ as detailed in the documentation‚ to maximize the effectiveness of this automated function.

Manual Changeover Operation

Honeywell VisionPro 8000’s manual changeover‚ outlined in the installation manual‚ allows users direct control over system mode – selecting Heat‚ Cool‚ or Off as needed.

This is useful when automatic switching isn’t desired‚ or for overriding the programmed schedule. The thermostat interface provides simple selection options for immediate adjustments.

The manual emphasizes that users must actively choose heating or cooling to maintain desired temperatures‚ bypassing automated system decisions.

Using the Touchscreen Interface

The Honeywell VisionPro 8000 features an intuitive touchscreen. The manual details navigating menus for settings‚ display customization‚ and system control with ease.

Users can readily access scheduling‚ temperature adjustments‚ and advanced features through the responsive touchscreen interface.

Navigating the Menu

Honeywell VisionPro 8000’s touchscreen menu is accessed by gentle taps. The manual explains icons representing system mode‚ schedule settings‚ fan control‚ and advanced options.

Swipe gestures allow quick scrolling through options‚ while the ‘back’ and ‘home’ icons ensure easy navigation. Detailed diagrams within the manual illustrate each menu level.

Understanding the menu structure is key to customizing your thermostat and maximizing energy efficiency‚ as outlined in the comprehensive installation guide.

Display Customization

Honeywell VisionPro 8000 allows personalized display settings via the touchscreen menu. The installation manual details options for brightness‚ contrast‚ and screen timeout duration.

Users can select preferred temperature units (Fahrenheit or Celsius) and customize the displayed information‚ such as date‚ time‚ and system status.

These adjustments‚ explained in the manual‚ enhance readability and tailor the thermostat’s interface to individual preferences for optimal user experience.

Maintenance and Care

Honeywell VisionPro 8000 requires minimal upkeep. The installation manual advises regular cleaning with a soft cloth and periodic battery replacement as needed.

Proper care ensures longevity and optimal performance of your thermostat‚ maintaining accurate temperature readings and reliable operation.

Cleaning the Thermostat

Honeywell recommends gently cleaning the VisionPro 8000 touchscreen with a soft‚ dry cloth to remove dust and fingerprints.

Avoid using liquid cleaners or abrasive materials‚ as these can damage the display. The installation manual emphasizes a delicate approach to preserve the touchscreen’s responsiveness and clarity.

Regular‚ gentle cleaning maintains optimal visibility and ensures continued smooth operation of your thermostat’s interface.

Battery Replacement

The Honeywell VisionPro 8000 utilizes batteries to retain settings during power outages‚ as detailed in the installation manual.

Replace batteries when the low battery icon appears on the touchscreen. Use only fresh alkaline batteries of the correct size‚ following the polarity markings within the battery compartment.

Proper battery maintenance ensures uninterrupted operation and preserves programmed schedules.

Reading Error Codes

Honeywell VisionPro 8000 displays error codes to diagnose issues‚ explained in the installation manual. Decoding these messages helps resolve system malfunctions quickly.

Refer to the manual’s troubleshooting section for a complete list and corresponding solutions for each error condition encountered.

Decoding Error Messages

Honeywell VisionPro 8000 error messages‚ detailed in the installation manual‚ provide crucial diagnostic information. These codes pinpoint specific problems within the HVAC system or thermostat itself.

The manual offers a comprehensive table translating each code into a plain-language description of the fault. Understanding these messages is key to efficient troubleshooting and repair‚ minimizing downtime.

Always consult the manual before attempting repairs‚ ensuring accurate diagnosis and safe operation of your Honeywell system.

Resolving Error Conditions

The Honeywell VisionPro 8000 installation manual provides detailed steps for resolving identified error conditions. It guides users through troubleshooting‚ often starting with simple checks like power cycles and wiring confirmations.

For more complex issues‚ the manual directs users to specific component testing procedures. It emphasizes safety precautions and‚ when necessary‚ recommends contacting a qualified HVAC technician.

Following the manual’s guidance ensures safe and effective resolution of system faults‚ restoring optimal performance to your Honeywell thermostat.

Warranty Information

Honeywell provides coverage details within the VisionPro 8000 installation manual. Contact Honeywell support for specific terms and to initiate any warranty claims.

The manual outlines the duration and limitations of the product warranty‚ ensuring customer satisfaction and peace of mind.

Resources and Support

Access online manuals and frequently asked questions at honeywell.com or yourhome.honeywell.com‚ referenced in the VisionPro 8000 installation manual.

The Honeywell Home website offers additional support‚ troubleshooting guides‚ and contact information for expert assistance with your thermostat system.

energy flow in the ecosystem pdf

Ecosystems rely on a continuous energy flow, originating from the sun, and transferred through food chains. Understanding this flow, often detailed in resources like an energy flow in the ecosystem pdf, is crucial.

Defining Ecosystems and Their Components

Ecosystems are dynamic networks encompassing living organisms – biotic components – and their non-living environment – abiotic factors. These systems, detailed in resources like an energy flow in the ecosystem pdf, function through intricate interactions. Key components include producers (plants), consumers (animals), and decomposers (bacteria, fungi).

Energy flow, the central theme, dictates ecosystem structure and function. Abiotic factors, such as sunlight, water, and nutrients, influence the rate of energy capture and transfer. Understanding these components, and their interconnectedness, is vital for comprehending ecosystem stability and resilience, as explored within comprehensive ecological studies.

The Importance of Energy in Ecosystem Function

Energy is the primary driver of all ecological processes, fueling growth, reproduction, and maintaining organization within ecosystems. Resources like an energy flow in the ecosystem pdf highlight how this energy, initially captured by producers, cascades through trophic levels.

Without a constant energy input, ecosystems would collapse. The efficiency of energy transfer dictates the carrying capacity and overall productivity of a system. Understanding these dynamics, as detailed in ecological studies, is crucial for conservation efforts and predicting ecosystem responses to environmental changes. Energy availability directly impacts biodiversity and ecosystem services.

The Sun as the Primary Energy Source

Solar radiation powers nearly all life on Earth, initiating energy flow through ecosystems. An energy flow in the ecosystem pdf details this process, starting with sunlight.

Solar Radiation and Its Role in Life

Solar radiation represents the fundamental input of energy into nearly all ecosystems globally. This energy, arriving as electromagnetic waves, is not uniformly utilized; specific wavelengths are crucial for life processes. The initial capture of this energy is primarily achieved through photosynthesis, a process detailed in resources like an energy flow in the ecosystem pdf.

This captured energy fuels the entire trophic structure, driving growth and reproduction across all organisms. Without the constant influx of solar energy, ecosystems would collapse. Understanding the quantity and quality of solar radiation reaching Earth, and how it’s converted, is vital for comprehending energy flow dynamics.

Photosynthesis: Capturing Solar Energy

Photosynthesis, the cornerstone of most ecosystems, is the process where plants, algae, and some bacteria convert light energy into chemical energy in the form of glucose. This conversion, thoroughly explained in resources like an energy flow in the ecosystem pdf, utilizes chlorophyll to capture specific wavelengths of sunlight.

The resulting glucose fuels the producers’ growth and metabolism, forming the base of the food chain. Oxygen is released as a byproduct, essential for respiration in many organisms. The efficiency of photosynthesis significantly impacts the amount of energy available to higher trophic levels, dictating overall ecosystem productivity.

Trophic Levels and Food Chains

Food chains illustrate energy flow through trophic levels – producers to consumers. An energy flow in the ecosystem pdf details these levels and their interconnectedness.

Producers (Autotrophs) – The First Trophic Level

Producers, like plants, form the foundational first trophic level in any ecosystem. Utilizing solar energy through photosynthesis, they convert inorganic compounds into organic matter, creating the initial energy source. This process is comprehensively explained in resources such as an energy flow in the ecosystem pdf.

These autotrophs are vital as they capture external energy, making it available to the rest of the ecosystem. Without producers, the energy flow would cease, impacting all subsequent trophic levels. Understanding their role is paramount when studying ecosystem dynamics, and detailed diagrams are often found within an energy flow in the ecosystem pdf.

Consumers (Heterotrophs) – Levels Two and Beyond

Consumers, or heterotrophs, occupy trophic levels above producers, obtaining energy by consuming other organisms. These levels include primary consumers, secondary consumers, and higher-level predators. The transfer of energy between these levels is a core concept in ecosystem studies, often visualized in an energy flow in the ecosystem pdf.

Unlike producers, consumers cannot create their own food and rely on the energy stored in organic matter. Detailed explanations of consumer roles and energy transfer efficiencies are commonly found within an energy flow in the ecosystem pdf, illustrating the interconnectedness of life and the importance of each trophic level.

Primary Consumers (Herbivores)

Primary consumers, commonly known as herbivores, form the second trophic level in an ecosystem. They directly obtain energy by consuming producers – plants and other photosynthetic organisms. This initial transfer of energy is fundamental to understanding energy flow, often detailed in resources like an energy flow in the ecosystem pdf.

Herbivores play a crucial role in regulating plant populations and transferring energy to higher trophic levels. An energy flow in the ecosystem pdf typically illustrates how much energy is assimilated by herbivores from plant matter, and how much is lost as heat or waste, demonstrating the inefficiencies inherent in energy transfer.

Secondary Consumers (Carnivores)

Secondary consumers, primarily carnivores, occupy the third trophic level, obtaining energy by consuming primary consumers (herbivores). This predatory relationship is a key component of energy flow within an ecosystem, and is often visually represented in an energy flow in the ecosystem pdf.

Carnivores exhibit adaptations for hunting and digesting animal tissue, reflecting their role in transferring energy further up the food chain. An energy flow in the ecosystem pdf will demonstrate the significant energy loss occurring at this stage, as carnivores are less efficient at converting consumed biomass into their own tissue compared to herbivores.

Tertiary and Quaternary Consumers (Apex Predators)

Tertiary and quaternary consumers represent the highest trophic levels, often referred to as apex predators. These carnivores prey on other carnivores, playing a crucial role in regulating population sizes and maintaining ecosystem stability. An energy flow in the ecosystem pdf illustrates their position at the pinnacle of energy transfer.

Due to the 10% rule, apex predators receive a drastically reduced amount of energy from the initial solar input. Consequently, their populations are typically smaller and more vulnerable to disruptions. Studying their role, as detailed in an energy flow in the ecosystem pdf, is vital for conservation efforts.

Food Webs: Complex Energy Relationships

Food webs depict interconnected food chains, showcasing realistic energy flow. An energy flow in the ecosystem pdf highlights these complex interactions and energy pathways.

Interconnectedness of Food Chains

Food chains rarely exist in isolation; instead, they intertwine to form intricate food webs, representing the true complexity of energy flow within an ecosystem. A comprehensive energy flow in the ecosystem pdf visually demonstrates this interconnectedness, revealing how multiple organisms can occupy various trophic levels simultaneously.

This web-like structure provides stability, as the loss of one species doesn’t necessarily collapse the entire system. Organisms often have diverse diets and roles, buffering against disruptions. Studying these connections, as detailed in such resources, is vital for understanding ecosystem resilience and predicting the consequences of environmental changes. The pdf often illustrates these relationships graphically.

The Role of Omnivores in Food Webs

Omnivores play a critical, yet often underestimated, role in food webs by consuming both plants and animals. This flexible feeding strategy positions them at multiple trophic levels, significantly influencing energy flow. An energy flow in the ecosystem pdf often highlights how omnivores act as crucial links between different food chains.

They efficiently transfer energy from producers to higher-level consumers, and vice versa, stabilizing the ecosystem. Their presence increases the complexity and robustness of the food web. Detailed analyses within the pdf demonstrate how omnivory impacts population dynamics and overall ecosystem health, showcasing their importance beyond simple predator-prey relationships.

Energy Transfer and the 10% Rule

Energy transfer between trophic levels is remarkably inefficient, with only about 10% becoming available to the next level. An energy flow in the ecosystem pdf explains this loss.

Inefficient Energy Transfer Between Trophic Levels

Energy transfer within an ecosystem isn’t a seamless process; it’s characterized by significant losses at each trophic level. A substantial portion of energy is utilized by organisms for life processes like respiration, movement, and maintaining body temperature; This metabolic activity converts energy into unusable heat, dissipating it into the environment;

Furthermore, not all biomass is consumed by the next level – some remains as waste or is unavailable. Consequently, only approximately 10% of the energy stored in one trophic level is transferred to the next. Resources like an energy flow in the ecosystem pdf visually demonstrate this principle, highlighting the diminishing energy available at higher levels.

The Ecological Significance of Energy Loss

Energy loss between trophic levels profoundly shapes ecosystem structure and limits food chain length. The 10% rule dictates that higher trophic levels support fewer organisms due to dwindling energy availability. This explains why apex predators are relatively rare compared to producers or primary consumers.

This energy dissipation also drives nutrient cycling, as waste and dead organisms become substrates for decomposers. Understanding these dynamics, often detailed in an energy flow in the ecosystem pdf, is vital for comprehending ecosystem stability and resilience. Ultimately, energy loss isn’t a flaw, but a fundamental characteristic of ecological systems.

Ecological Pyramids: Visualizing Energy Flow

Ecological pyramids – of energy, biomass, or numbers – graphically represent energy flow through ecosystems, as detailed in an energy flow in the ecosystem pdf.

Pyramids of Energy

Pyramids of energy illustrate the rate of energy flow through each trophic level in an ecosystem. These pyramids, often explored in resources like an energy flow in the ecosystem pdf, are based on the principle that energy transfer is inefficient. Consequently, each successive level contains less energy than the one below it.

Unlike pyramids of biomass or numbers, energy pyramids are never inverted, as energy loss is inevitable with each transfer. The base represents the producers, capturing the most energy from sunlight, while apex predators occupy the narrowest top, receiving the least. Studying these pyramids provides insight into ecosystem stability and productivity, highlighting the fundamental constraints on food chain length.

Pyramids of Biomass

Pyramids of biomass represent the total mass of living organisms at each trophic level within an ecosystem, often detailed in an energy flow in the ecosystem pdf. They illustrate the amount of organic matter present, providing a snapshot of potential energy stored. Typically, these pyramids are widest at the base (producers) and narrow towards apex predators.

However, unlike energy pyramids, biomass pyramids can be inverted in certain ecosystems, such as aquatic environments, where producers (phytoplankton) have a fast turnover rate. Despite potential inversions, they remain valuable tools for understanding ecosystem structure and the distribution of organic material, offering insights into energy storage capacity.

Pyramids of Numbers

Pyramids of numbers graphically depict the population size at each trophic level within an ecosystem, frequently explored in resources like an energy flow in the ecosystem pdf. They showcase the sheer quantity of organisms present, offering a simple visualization of ecosystem structure. Generally, these pyramids are broad at the base (producers) and taper towards higher trophic levels.

However, like biomass pyramids, number pyramids can be inverted. For instance, a single tree supporting numerous herbivores can create an inverted pyramid. Despite this limitation, they provide a quick assessment of population densities and relative abundance, aiding in understanding energy flow dynamics and trophic relationships.

Decomposition and Nutrient Cycling

Decomposers break down organic matter, releasing vital nutrients back into the ecosystem – a process detailed in an energy flow in the ecosystem pdf.

The Role of Decomposers (Detritivores)

Decomposers, including bacteria and fungi, are essential components of ecosystems, functioning as nature’s recyclers. They break down dead organic matter – detritus – from all trophic levels, releasing crucial nutrients back into the environment. This process isn’t simply waste removal; it’s a fundamental step in nutrient cycling, making elements available for producers.

Without decomposers, nutrients would remain locked within dead organisms, halting primary productivity. Resources like an energy flow in the ecosystem pdf often highlight the vital role of detritivores in maintaining ecosystem health and stability. They effectively close the loop, ensuring a continuous flow of energy and matter.

Returning Nutrients to the Ecosystem

Decomposition isn’t just about breaking down organic matter; it’s about liberating essential nutrients – nitrogen, phosphorus, carbon – back into the soil, water, and atmosphere. These nutrients become available for uptake by producers, fueling primary productivity and initiating the energy flow anew. This cyclical process is fundamental to ecosystem sustainability.

An energy flow in the ecosystem pdf will illustrate how decomposers transform complex organic compounds into simpler inorganic forms. This nutrient regeneration sustains life, preventing nutrient depletion and supporting the entire food web. Without this constant return, ecosystems would quickly become barren and unable to support diverse life forms.

Energy Flow in Different Ecosystems

Energy flow varies greatly between terrestrial and aquatic ecosystems, influenced by factors like sunlight penetration and nutrient availability, as detailed in an energy flow in the ecosystem pdf.

Terrestrial Ecosystems

Terrestrial ecosystems, like forests and grasslands, exhibit distinct energy flow patterns. Solar energy fuels primary producers – plants – through photosynthesis. This captured energy then moves up trophic levels via herbivores consuming plants, followed by carnivores preying on herbivores.

Decomposition plays a vital role, returning nutrients to the soil, supporting further plant growth. Factors like temperature, rainfall, and sunlight intensity significantly impact primary productivity, influencing the entire energy flow. Detailed analyses, often found in resources like an energy flow in the ecosystem pdf, illustrate these complex interactions and energy transfer efficiencies within these land-based systems.

Aquatic Ecosystems

Aquatic ecosystems, encompassing oceans, lakes, and rivers, demonstrate unique energy flow dynamics. Phytoplankton, microscopic algae, serve as the primary producers, harnessing solar energy via photosynthesis. This energy is then transferred to zooplankton, small aquatic animals, and subsequently to fish and larger predators.

Decomposition by bacteria and other organisms recycles nutrients, sustaining primary production. Light penetration, water temperature, and nutrient availability are key factors influencing energy flow. Comprehensive studies, often detailed in an energy flow in the ecosystem pdf, reveal the intricate web of interactions and energy transfer efficiencies within these water-based environments.

Human Impact on Energy Flow

Human activities significantly disrupt ecosystem energy flow, impacting food webs and nutrient cycles. Details on these disruptions are often found in an energy flow in the ecosystem pdf.

Disruptions to Food Webs

Food web disruptions, extensively documented in resources like an energy flow in the ecosystem pdf, stem from various human actions. Habitat destruction, overexploitation of species, and the introduction of invasive organisms all cascade through trophic levels. Removing a keystone species can trigger collapses, altering energy pathways.

Pollution, including pesticides and heavy metals, bioaccumulates, impacting predator populations. Climate change further exacerbates these issues, shifting species distributions and altering phenological events. These changes destabilize established energy transfer mechanisms, reducing overall ecosystem resilience. Understanding these complex interactions, as detailed in comprehensive analyses, is vital for effective conservation strategies.

Pollution and Energy Availability

Pollution significantly impacts energy availability within ecosystems, a topic thoroughly explored in resources like an energy flow in the ecosystem pdf. Contaminants reduce primary productivity by hindering photosynthesis in plants and algae. Toxic substances accumulate in organisms, decreasing their energy reserves and reproductive success.

Acid rain, oil spills, and plastic pollution all disrupt energy transfer between trophic levels. Reduced energy at lower levels cascades upwards, impacting apex predators. Furthermore, pollution can alter decomposition rates, affecting nutrient cycling and overall ecosystem health. Mitigating pollution is crucial for maintaining stable energy flows.

Measuring Energy Flow in Ecosystems

Assessing energy flow requires quantifying primary productivity and transfer efficiency, detailed in resources like an energy flow in the ecosystem pdf, using various techniques.

Techniques for Assessing Primary Productivity

Primary productivity, the rate of energy capture by producers, is vital for understanding energy flow. Several techniques are employed for its assessment, often detailed within an energy flow in the ecosystem pdf. Gross primary productivity (GPP) measures total energy captured, while net primary productivity (NPP) accounts for energy used by producers for respiration.

Methods include measuring carbon dioxide uptake during photosynthesis, analyzing biomass accumulation – the increase in organic matter – and utilizing remote sensing technologies to estimate vegetation cover and photosynthetic activity. Radioactive carbon-14 tracing can also track carbon assimilation. These techniques, combined, provide a comprehensive view of energy input into ecosystems.

Quantifying Energy Transfer Efficiency

Energy transfer efficiency between trophic levels is rarely perfect, typically around 10%, a concept often illustrated in an energy flow in the ecosystem pdf. This inefficiency stems from energy lost as heat during metabolic processes, incomplete consumption, and energy stored in indigestible parts.

Researchers quantify this efficiency by comparing the energy content of organisms at successive levels. Biomass measurements and calorimetry – determining energy content through combustion – are key methods. Understanding these efficiencies is crucial for predicting ecosystem responses to disturbances and managing resources. Models based on these efficiencies help forecast population dynamics.

paint by numbers printable pdf

Paint by Numbers, now readily available as printable PDFs, offer a delightful and accessible artistic outlet for all ages, blending creativity with convenience.

These digital versions democratize the art form, allowing instant access to numerous designs from the comfort of your home, fostering relaxation and artistic expression.

What are Paint by Numbers?

Paint by Numbers is a captivating art form where an image is divided into sections, each assigned a specific number corresponding to a particular color.

Traditionally, these kits included a canvas with pre-printed outlines and numbered areas, alongside corresponding paint pots. However, the advent of printable PDFs has revolutionized this hobby.

Now, users can download and print these designs at home, offering a cost-effective and customizable experience. The core concept remains the same: follow the numbers to create a beautiful, finished artwork, regardless of artistic skill.

The Rise of Printable PDFs

The popularity of Paint by Numbers experienced a significant resurgence with the emergence of printable PDF formats.

This shift offered a convenient alternative to traditional kits, eliminating the need for physical stores and pre-packaged materials. Digital downloads provide instant access to a vast library of designs, catering to diverse tastes.

Furthermore, printable PDFs empower users with flexibility – choosing their preferred paper or canvas, paint brands, and printing scale, fostering a personalized artistic journey.

Benefits of Using Printable Paint by Numbers

Printable Paint by Numbers offer affordability, convenience, and creative freedom, allowing artists of all levels to enjoy a relaxing and rewarding artistic experience.

Cost-Effectiveness

Printable Paint by Numbers significantly reduce costs compared to pre-painted canvases or traditional art classes. Downloading a PDF eliminates shipping fees and the markup associated with physical products, making art accessible to a wider audience.

You only pay for the design itself, and can reuse the template multiple times. Furthermore, artists can utilize existing acrylic paints and brushes, minimizing initial investment. This affordability encourages experimentation and allows for exploring various designs without substantial financial commitment, fostering a budget-friendly hobby.

Convenience and Accessibility

Printable Paint by Numbers PDFs offer unparalleled convenience; instant access to designs is available anytime, anywhere with an internet connection and a printer. No waiting for shipping or trips to art stores are required!

This accessibility makes it ideal for spontaneous creative sessions or as a relaxing activity during travel. The digital format allows for easy storage and organization of designs, eliminating clutter. It’s a fantastic option for those with limited space or mobility.

Customization Options

Paint by Numbers printable PDFs increasingly offer exciting customization possibilities, moving beyond pre-defined designs. Some platforms allow users to upload personal photos and transform them into unique paint-by-number templates, creating truly personalized artwork.

Furthermore, users can often adjust the complexity level, choosing between simpler designs for beginners or intricate patterns for experienced artists. Color palette modifications are also emerging, allowing for a tailored artistic experience.

Where to Find Paint by Numbers Printable PDFs

Paint by Numbers printable PDFs are widely available online, ranging from free resources to premium options on platforms like Etsy and dedicated websites.

Exploring these avenues unlocks a vast library of designs to suit every artistic preference and skill level.

Free Printable Options

Numerous websites offer free Paint by Numbers printable PDFs, providing a fantastic starting point for beginners or those seeking budget-friendly options. These resources often feature a diverse selection of simpler designs, ideal for children or quick projects.

However, be mindful of the image quality; free PDFs may have lower resolution compared to paid versions. Websites dedicated to coloring pages and printable activities frequently include paint by number options. A quick online search using keywords like “free paint by number PDF” will reveal a wealth of possibilities, allowing you to download and start painting immediately!

Paid Printable Options – Etsy

Etsy emerges as a prominent platform for paid Paint by Numbers printable PDFs, showcasing a vast collection created by independent artists and designers. This marketplace offers a significantly wider range of themes, complexities, and artistic styles compared to free options.

You’ll discover everything from customizable designs – turning personal photos into paint by numbers – to intricate recreations of famous paintings. While requiring a purchase, Etsy generally guarantees higher image resolution and unique, professionally crafted designs, ensuring a rewarding painting experience.

Paid Printable Options – Dedicated Websites

Several websites specialize specifically in Paint by Numbers printable PDFs, offering curated collections and often, advanced features. These dedicated platforms frequently provide options for customizing difficulty levels, selecting canvas sizes, and even choosing paint color palettes.

Compared to Etsy, these sites may offer more streamlined purchasing and delivery, alongside dedicated customer support. Expect a focus on high-quality images and professionally designed kits, though prices can vary depending on complexity and customization options.

Popular Themes for Paint by Numbers

Paint by Numbers themes are incredibly diverse, ranging from serene landscapes and charming animals to iconic famous paintings and captivating abstract art designs.

Landscapes and Nature Scenes

Landscapes and nature scenes consistently rank among the most beloved Paint by Numbers themes, offering a tranquil escape through art. Printable PDFs allow you to recreate breathtaking vistas – from majestic mountains and serene forests to calming beaches and vibrant meadows.

These designs often feature rich color palettes and varying levels of detail, catering to both beginners and experienced painters. The therapeutic process of bringing these natural wonders to life on canvas provides a relaxing and rewarding experience, fostering a connection with the beauty of the outdoors.

Animals and Wildlife

Paint by Numbers printable PDFs featuring animals and wildlife are incredibly popular, appealing to animal lovers of all ages. You can bring to life majestic lions, playful dolphins, graceful birds, or charming domestic pets with ease and enjoyment.

These designs often showcase intricate details in fur, feathers, and scales, providing a satisfying challenge for painters. The vibrant colors and expressive eyes of these creatures truly come alive on canvas, creating stunning and heartwarming artwork for your home.

Famous Paintings Recreations

Paint by Numbers printable PDFs offer a unique opportunity to recreate iconic masterpieces from art history. Imagine bringing Van Gogh’s “Starry Night” or Monet’s “Water Lilies” to life with your own hands, guided by numbered sections.

These kits provide a simplified approach to understanding composition, color palettes, and brushwork of renowned artists. It’s a fantastic way to appreciate art on a deeper level and create a beautiful, personalized tribute to classic paintings.

Abstract Art Designs

Paint by Numbers printable PDFs aren’t limited to realistic imagery; they brilliantly encompass the world of abstract art! Explore vibrant color combinations and geometric shapes with designs inspired by artists like Kandinsky or Mondrian.

These kits encourage experimentation and allow for a more free-flowing artistic experience, perfect for those seeking a modern and expressive outlet. Abstract designs offer a unique challenge and stunning results, adding a contemporary touch to your painted collection.

Choosing the Right Printable PDF

Selecting a printable PDF requires considering image resolution, complexity, and format to ensure a satisfying painting experience and a beautiful final artwork.

Image Resolution and Quality

Ensuring high image resolution is paramount when selecting a paint by numbers printable PDF. A low-resolution image will result in pixelated lines and blurry numbers, hindering a precise and enjoyable painting process.

Look for PDFs boasting at least 300 DPI (dots per inch) for crisp, clear details. This guarantees defined sections and legible numbers, crucial for accurate color application. Prioritize PDFs sourced from reputable providers who prioritize image quality, delivering a superior artistic experience and a professional-looking finished piece.

Complexity Level – Beginner vs. Advanced

Paint by numbers printable PDFs cater to all skill levels, ranging from beginner-friendly designs to advanced, intricate patterns. Beginners should opt for larger numbered sections and fewer colors, simplifying the process and building confidence.

Advanced painters can challenge themselves with smaller sections, a wider color palette, and more detailed imagery. Consider the number of colors – fewer colors generally indicate easier designs. Carefully assess your experience before choosing a PDF to ensure an enjoyable and fulfilling painting journey.

PDF Format and Print Settings

Paint by numbers printable PDFs are typically designed for standard A4 or US Letter size paper, but verifying dimensions is crucial before printing. Ensure your printer settings are optimized for high-quality output, selecting “photo” or “best” quality for sharp lines and clear numbers.

Avoid scaling the image during printing, as this can distort the numbered sections. Choose a paper weight suitable for acrylic paints to prevent bleed-through; heavier cardstock is recommended. Proper settings guarantee a satisfying painting experience.

Materials Needed for Paint by Numbers

Paint by Numbers requires acrylic paints, a variety of paint brushes in different sizes, and suitable paper or canvas for bringing your chosen design to life!

Acrylic Paints

Acrylic paints are the most commonly recommended medium for paint by numbers, especially with printable PDFs, due to their versatility and ease of use. They offer vibrant colors, quick drying times, and are water-based for simple cleanup.

Beginner kits often include a pre-selected set of acrylics, but experienced painters may prefer to purchase individual colors for greater control. Look for student-grade or artist-grade acrylics depending on your desired level of pigment richness and longevity. Ensure the paints are non-toxic and suitable for the paper or canvas you’ve chosen.

Paint Brushes – Sizes and Types

Selecting the right paint brushes is crucial for successful paint by numbers using printable PDFs. A variety of sizes is essential, ranging from fine detail brushes (sizes 000, 000, 0) for small numbered areas, to larger flat brushes (sizes 4, 6, 8) for broader sections.

Synthetic brushes are generally preferred for acrylics as they hold their shape well and are easy to clean. Round brushes are versatile, while liner brushes excel at precise lines. Invest in a few quality brushes for optimal control and results.

Paper or Canvas

The choice between paper and canvas impacts your paint by numbers experience with printable PDFs. Heavier weight paper (140lb/300gsm) is suitable for practice or simpler designs, minimizing bleed-through. For a more professional feel, stretched canvas or canvas boards are ideal.

Canvas provides texture and durability, enhancing the final artwork. Primed canvas is recommended for better paint adhesion. Consider the size of your PDF and choose a surface accordingly, ensuring a satisfying painting process.

Printing Your Paint by Numbers PDF

Printing your paint by numbers PDF requires careful attention to detail for optimal results, ensuring clear lines and vibrant colors for a fulfilling artistic experience.

Paper Selection – Weight and Texture

Choosing the right paper is crucial for a successful paint by numbers experience. A heavier weight paper, around 90-110lb, prevents bleed-through from acrylic paints, maintaining image clarity. Textured paper, like watercolor paper, adds depth and interest, while smoother options are ideal for detailed work.

Consider the paint’s viscosity; thicker paints necessitate heavier stock. Standard printer paper is generally too thin, leading to warping and potential tears. Experimenting with different textures can elevate your finished artwork, offering a unique aesthetic.

Printer Settings – Quality and Paper Type

Optimal printer settings are vital for vibrant, accurate paint by numbers prints. Select “High Quality” or “Photo” mode for sharp lines and detailed numbering. Crucially, specify your chosen paper type – matte, glossy, or watercolor – within the printer settings for correct ink distribution.

Ensure the color profile is set to RGB for accurate color reproduction. A test print is recommended to verify settings before printing the entire PDF, saving both ink and paper.

Scaling and Orientation

Correct scaling is paramount; ensure your paint by numbers PDF prints at 100% size to maintain accurate number alignment with the design. Avoid “Fit to Page” options, as they distort the image. Orientation should typically be “Portrait” unless the design specifically dictates “Landscape.”

Double-check these settings in your printer dialogue box before printing. Incorrect scaling renders the artwork unpaintable, while wrong orientation misaligns the entire image.

Tips for Successful Painting

Begin with the background sections, then progress to darker colors, layering gradually for depth and vibrancy in your paint by numbers creation.

Starting with the Background

Commencing with the background areas of your paint by numbers printable PDF is a strategic approach for several reasons. Larger background sections often share colors, allowing you to efficiently use your paints and establish a foundational layer.

This method minimizes the risk of accidentally smudging details while working on finer elements later. It also provides a visual framework, making it easier to gauge color placement and overall composition as you progress. Don’t be afraid to apply multiple coats for even coverage!

Working from Dark to Light Colors

A generally recommended technique when tackling your paint by numbers printable PDF is to begin with the darkest shades and progressively move towards lighter hues. This approach prevents accidental smudging of lighter colors by darker ones, preserving the clarity of your artwork.

Darker colors also provide a strong base, allowing subsequent lighter layers to blend seamlessly. It’s easier to layer light over dark than vice versa, achieving richer, more nuanced tones throughout your painting.

Layering Techniques

For a vibrant finish with your paint by numbers printable PDF, consider employing layering techniques. Applying multiple thin coats of paint, rather than one thick coat, yields smoother coverage and richer color depth.

Allow each layer to dry completely before applying the next to prevent muddling. This builds intensity gradually, especially useful for achieving subtle gradients and variations within each numbered section, enhancing the overall visual appeal of your completed artwork.

Troubleshooting Common Issues

Paint by Numbers printable PDFs can sometimes present challenges like paint bleeding, incorrect numbering, or paper wrinkling; solutions exist for a flawless finish!

Paint Bleeding

Paint bleeding occurs when colors unintentionally mix, blurring the defined areas within your Paint by Numbers design. This often happens with thinner paints or when applying excessive pressure with your brush.

To minimize bleeding, use high-quality acrylic paints and avoid overly saturated brushes. Applying multiple thin coats, allowing each to dry completely, is far superior to one thick application.

If bleeding occurs, carefully try to redefine the lines with a fine-tipped brush and the correct color, or consider using a color sealant to prevent further spreading.

Incorrect Numbering

Incorrect numbering on a Paint by Numbers PDF can be incredibly frustrating, disrupting the entire painting process. Errors might include missing numbers, duplicated numbers, or numbers assigned to the wrong sections of the image.

Before starting, carefully compare the numbers on the canvas (or printed PDF) with the color chart. If discrepancies exist, contact the seller or provider for a corrected version.

Alternatively, you can manually adjust the numbering, but this requires careful attention to detail and a good understanding of the image.

Paper Wrinkling

Paper wrinkling is a common issue when working with printable Paint by Numbers PDFs, especially with thinner paper stocks. Moisture from paints can exacerbate this, distorting the image and making precise coloring difficult.

To minimize wrinkling, use heavier weight paper – cardstock is ideal. Secure the paper to a flat, firm surface like a board using painter’s tape. Applying light pressure while painting can also help keep the paper flat.

If wrinkles appear, gently try to smooth them out, but avoid excessive handling.

Software for Creating Your Own Paint by Numbers

MS Paint and Paint.NET empower users to transform images into Paint by Numbers templates, offering varying levels of control and complexity for personalized designs.

MS Paint Basics for Numbering

MS Paint, despite its simplicity, provides a foundational approach to creating Paint by Numbers. Begin by opening your chosen image and reducing the color palette to represent your desired numbered sections.

Utilize the shape tools – primarily rectangles – to meticulously cover areas, filling each with a distinct color corresponding to a number. Then, employ the text tool to clearly label each section with its assigned number, ensuring legibility.

Save the final product as a high-resolution image, ready for printing and painting!

Paint.NET – Advanced Image Editing

Paint.NET offers superior control for crafting Paint by Numbers designs. Leverage its layer functionality to isolate sections for easier numbering and color assignment. Utilize the magic wand tool for quick selection of areas with similar tones.

Employ plugins to automate color reduction and streamline the numbering process, enhancing efficiency. The software’s advanced editing capabilities allow for precise adjustments and a professional finish.

Save your creation as a high-quality PDF for optimal printing results!

Legal Considerations and Copyright

Paint by Number PDFs for personal use are generally permissible, but distributing or commercially exploiting copyrighted images requires explicit permission from the rights holder.

Using Images for Personal Use

Paint by Number printable PDFs are fantastic for individual enjoyment and creative exploration! Downloading and utilizing these designs for your own painting pleasure is typically considered fair use, provided it remains non-commercial.

You can freely print and paint these images for personal decoration, gifting to friends and family, or simply as a relaxing hobby. However, remember that the copyright of the original image still belongs to the artist or rights holder.

Therefore, reselling completed paintings or redistributing the PDF files themselves is generally prohibited without obtaining the necessary licenses or permissions.

Commercial Use Restrictions

Utilizing Paint by Number printable PDFs for commercial gain is generally restricted by copyright laws. Selling completed paintings created from copyrighted designs without permission is a violation of intellectual property rights.

Furthermore, redistributing, reselling, or profiting from the PDF files themselves – even if modified – is strictly prohibited unless you have secured a commercial license from the copyright owner.

Businesses seeking to use these designs must obtain explicit authorization to avoid legal repercussions, ensuring ethical and lawful operation within the creative marketplace.

The Future of Paint by Numbers

Paint by Numbers evolves with digital apps and AI integration, offering dynamic designs and personalized experiences via printable PDFs and beyond.

Digital Paint by Numbers Apps

Digital Paint by Numbers apps represent a significant evolution, moving beyond traditional printable PDFs. These applications offer interactive experiences, often featuring a vast library of images and real-time color suggestions.

Many apps allow users to upload personal photos, converting them into customized paint-by-number projects. Features like zoom functionality, error detection, and automatic color filling enhance the painting process.

Furthermore, some apps integrate with online communities, enabling users to share their artwork and participate in challenges, fostering a collaborative artistic environment.

Integration with AI Technology

AI technology is poised to revolutionize Paint by Numbers, extending beyond simple printable PDFs. Artificial intelligence can now automatically generate complex and unique designs, tailored to individual preferences and skill levels.

AI algorithms can analyze images, creating optimal color palettes and numbering schemes for a seamless painting experience.

Moreover, AI-powered apps can offer personalized guidance, suggesting color choices and identifying potential errors, ultimately enhancing creativity and accessibility for all users.

Resources and Further Learning

Online communities and tutorial videos provide invaluable support for Paint by Numbers enthusiasts, offering tips, inspiration, and a platform for sharing creations.

Explore forums and guides to elevate your artistic journey and connect with fellow painters!

Online Communities and Forums

Engaging with online communities dedicated to Paint by Numbers is a fantastic way to enhance your experience. Platforms like Reddit and Facebook host active groups where enthusiasts share completed artwork, offer advice, and discuss techniques.

These forums are invaluable for troubleshooting, discovering new printable PDF sources, and gaining inspiration from others. Many artists also share custom creations and offer helpful tips for achieving optimal results. Participating fosters a supportive environment for learning and growth, making the hobby even more enjoyable!

Tutorial Videos and Guides

Numerous online resources provide tutorial videos and guides specifically for Paint by Numbers, catering to all skill levels. YouTube channels offer step-by-step demonstrations, covering everything from paint mixing to brush techniques and layering methods.

Websites and blogs often feature detailed written guides, addressing common challenges like paint bleeding or achieving smooth color transitions. These resources are incredibly helpful for beginners and experienced painters alike, ensuring a successful and satisfying artistic journey.

siser easyweed heat transfer vinyl instructions

Siser Easyweed is a popular choice for crafters‚ offering simplicity and durability in heat transfer applications․ It’s renowned for its effortless weeding and strong adhesion;

This vinyl provides a professional finish on various fabrics‚ making it ideal for personalized apparel and creative projects․ It’s a versatile material for beginners and experts․

What is Siser Easyweed?

Siser Easyweed is a single-layer heat transfer vinyl (HTV) celebrated for its user-friendly nature and consistent performance․ It’s constructed from polyurethane‚ providing a soft‚ flexible feel on garments after application․ Unlike some other HTVs‚ Easyweed requires minimal pressure and temperature adjustments for successful bonding․

This makes it exceptionally suitable for both home crafters and professional businesses․ The vinyl’s adhesive properties ensure a durable‚ long-lasting design that withstands repeated washing․ It’s available in a vast spectrum of colors‚ including glitter and stretch options‚ expanding creative possibilities․ Easyweed simplifies the heat transfer process‚ delivering quality results with ease․

Why Choose Siser Easyweed?

Siser Easyweed stands out due to its exceptional ease of use‚ even for beginners․ Its low-tack adhesive allows for effortless weeding‚ saving valuable time and reducing frustration․ The vinyl’s consistent quality ensures reliable adhesion to a wide range of fabrics‚ from cotton to polyester blends․

Furthermore‚ Easyweed offers excellent durability‚ resisting peeling and cracking after numerous washes․ The broad color selection and specialty finishes‚ like glitter and stretch‚ cater to diverse project needs․ Choosing Easyweed means prioritizing a smooth‚ professional finish and a hassle-free crafting experience․

Tools and Materials Needed

Essential tools include a vinyl cutter‚ heat press‚ weeding tools (hook‚ tweezers)‚ Teflon sheet‚ and of course‚ Siser Easyweed vinyl itself for successful application․

Vinyl Cutter Compatibility

Siser Easyweed demonstrates excellent compatibility with a wide array of vinyl cutters‚ enhancing its accessibility for diverse crafting setups․ Popular choices like Cricut‚ Silhouette‚ and Brother ScanNCut machines perform exceptionally well with this material․

When utilizing a vinyl cutter‚ adjusting blade depth and pressure is crucial for clean cuts without damaging the carrier sheet․ Test cuts are highly recommended to optimize settings for your specific cutter and blade․ Proper calibration ensures precise design transfer and minimizes wasted material‚ leading to professional-looking results․ Experimentation is key to achieving optimal performance․

Heat Press Requirements

Siser Easyweed application necessitates a heat press capable of maintaining consistent temperature and pressure․ A flat‚ even platen surface is essential for uniform adhesion․ Clamshell‚ swing-away‚ and draw presses are all suitable options‚ depending on your production needs and workspace․

Ensure your heat press can accurately reach 305°F (150°C)‚ the recommended application temperature․ Consistent pressure‚ ranging from light to medium‚ is vital for a secure bond․ Regularly calibrate your heat press to guarantee accurate readings and reliable performance‚ resulting in durable and professional heat transfers․

Weeding Tools

Weeding is a crucial step after cutting Siser Easyweed‚ requiring specialized tools for precise removal of excess vinyl․ A sharp weeding hook‚ available in various styles‚ is fundamental for lifting intricate design elements․ A light box or bright‚ flat surface significantly aids visibility during this process‚ especially with complex designs․

Additionally‚ tweezers can be helpful for grabbing smaller pieces․ Investing in high-quality weeding tools ensures clean‚ efficient removal‚ preserving the integrity of your design․ Proper illumination and sharp tools contribute to a professional and polished final product․

Design Preparation

Creating a successful heat transfer requires careful design preparation․ This includes designing‚ mirroring‚ and optimizing cut settings for Siser Easyweed vinyl․

Proper preparation ensures a clean cut and a flawless application onto your chosen fabric‚ resulting in a professional finish․

Creating Your Design

Designing for Siser Easyweed begins with selecting or creating your desired artwork․ Utilize graphic design software like Adobe Illustrator‚ Silhouette Studio‚ or Cricut Design Space to craft your image․ Consider the complexity of your design; intricate details require precise cutting settings․

Ensure your design is clean and free of overlapping lines or small‚ disconnected elements that may prove difficult to weed․ Simplify designs when necessary for easier application․ Think about color choices if using multiple Easyweed varieties․ Finally‚ save your design in a compatible file format‚ such as SVG or DXF‚ for seamless importing into your cutting software․

Mirroring Your Design

Mirroring‚ or flipping‚ your design is a crucial step when working with Siser Easyweed․ Because you’ll be applying the vinyl carrier sheet face down onto the fabric‚ the design needs to be reversed․ Most cutting software programs have a “mirror” or “flip horizontal” function․

Activate this feature before sending your design to the cutter․ Failing to mirror will result in a backwards image on your final product․ Double-check this setting‚ especially when working with text or directional graphics․ A quick visual inspection on the software screen can prevent frustrating errors later in the process․

Cutting Settings for Siser Easyweed

Optimal cutting settings depend on your vinyl cutter model‚ blade condition‚ and the specific Easyweed variety․ However‚ a good starting point is a blade depth of around 45-60 degrees‚ with a medium to low force setting․ Perform a test cut before committing to the full design․

This ensures clean cuts without going through the carrier sheet․ Adjust the settings incrementally until the vinyl is cut cleanly‚ leaving the carrier intact․ Refer to Siser’s website or your cutter’s manual for recommended settings as a guide‚ and always prioritize a test cut for best results․

The Application Process: Step-by-Step

Applying Easyweed involves preheating the garment‚ precisely positioning the design‚ and using heat and pressure for a secure bond․ This ensures a lasting result․

Preheating the Garment

Preheating your garment is a crucial first step for successful Siser Easyweed application․ This process removes moisture and wrinkles‚ creating an optimal surface for vinyl adhesion․ Use a heat press or iron to warm the fabric for approximately 2-3 seconds․

Ensure the garment is smooth and dry before proceeding․ This step prepares the fibers‚ allowing the heat-activated adhesive on the Easyweed to bond effectively․ Consistent preheating across the entire application area is vital for uniform results․ A properly preheated garment significantly reduces the risk of vinyl lifting or peeling after washing․

Applying the Vinyl Design

Carefully position your weeded Siser Easyweed design onto the preheated garment‚ ensuring the carrier sheet is facing upwards․ Apply firm‚ even pressure using a heat press or iron․ Maintain a consistent temperature of 305°F (150°C) for optimal bonding․

Avoid shifting the design during the application process‚ as this can lead to misalignment or incomplete adhesion․ Press for the recommended time of 10-15 seconds‚ depending on the fabric type and Easyweed variety․ Consistent pressure distribution is key to achieving a durable and professional-looking result․

Temperature Settings: 305°F (150°C)

Maintaining 305°F (150°C) is crucial for successful Siser Easyweed application․ This temperature ensures the adhesive activates sufficiently to bond with the fabric fibers without causing scorching or damage․ Always verify your heat press accuracy with a temperature probe for consistent results․

Lower temperatures may result in poor adhesion‚ while higher temperatures can melt or distort the vinyl․ For thicker fabrics‚ slightly increased dwell times are preferable to raising the temperature․ Consistent heat application across the entire design is vital for a durable‚ long-lasting transfer․

Pressure Settings: Light to Medium

Applying light to medium pressure with your heat press is key when working with Siser Easyweed․ Too little pressure won’t allow sufficient bonding‚ leading to peeling after washing․ Conversely‚ excessive pressure can cause the vinyl to spread or appear distorted on the fabric․

Adjust your heat press based on the fabric type; lighter materials require less pressure․ A firm‚ even pressure across the entire design is essential․ Test with a small sample first to determine the optimal setting for your specific setup and material combination‚ ensuring a professional finish․

Application Time: 10-15 Seconds

Applying heat for 10-15 seconds is the standard duration for Siser Easyweed‚ but this can vary slightly․ Ensure the entire design receives consistent heat during this period for optimal adhesion․ A longer application time doesn’t necessarily improve results and could potentially scorch the fabric or damage the vinyl․

Pre-pressing the garment for 2-3 seconds before applying the vinyl helps remove moisture and wrinkles․ Monitor the application closely‚ and adjust the time based on your heat press and fabric type․ A quick test press is always recommended to confirm proper bonding․

Peeling the Carrier Sheet

Peeling can be done hot or cold‚ depending on the Easyweed variety․ Gently lift a corner to test; if the vinyl lifts‚ peel slowly and evenly for best results․

Hot Peel vs․ Cold Peel

Understanding whether to hot peel or cold peel your Siser Easyweed carrier sheet is crucial for a successful application․ Generally‚ Easyweed is a “hot peel” vinyl‚ meaning you should attempt to peel the carrier sheet immediately after removing the garment from the heat press‚ while it’s still warm․

However‚ some designs with intricate details or larger areas may benefit from a “cold peel‚” where you allow the vinyl to cool completely before peeling․ A quick test peel in a corner will reveal if it’s ready․ If the vinyl lifts with the carrier‚ it needs more cooling time․ Always refer to the specific Easyweed product instructions‚ as variations exist․

Troubleshooting Peeling Issues

If your Siser Easyweed vinyl is lifting or peeling after application‚ several factors could be at play․ Insufficient heat or pressure are common culprits; ensure your heat press reaches 305°F (150°C) with medium pressure․ Verify the vinyl is properly adhered before peeling – a test peel is vital․

If peeling occurs post-wash‚ re-press the design with a Teflon sheet for added protection․ Bubbling under the vinyl suggests trapped moisture; pre-press the garment longer․ Always weed carefully to avoid tearing the vinyl․ If issues persist‚ consult Siser’s official resources for specific guidance․

Post-Application Care

To maintain your Siser Easyweed design‚ wait 24 hours before washing․ Turn garments inside out and wash in cold water‚ avoiding harsh detergents or bleach․

Washing Instructions

Ensuring the longevity of your Siser Easyweed application requires careful washing practices․ Always turn your garment inside out before placing it in the washing machine; this protects the vinyl from direct abrasion during the wash cycle․ Use a mild detergent and select a cold water setting – hot water can compromise the adhesive properties of the vinyl․

Avoid using bleach or fabric softeners‚ as these can break down the vinyl’s composition and cause it to crack or peel over time․ Gentle cycle is recommended to minimize stress on the applied design․ Following these simple steps will help preserve the vibrancy and integrity of your Siser Easyweed creations for many washes to come․

Drying Instructions

Proper drying techniques are crucial for maintaining the quality of your Siser Easyweed heat transfer vinyl application․ After washing‚ it’s best to avoid high heat‚ which can cause the vinyl to distort or separate from the fabric․ Tumble dry on a low heat setting‚ or even better‚ hang your garment to air dry․

If using a dryer‚ consider turning the garment inside out to further protect the design․ Do not iron directly over the vinyl‚ as the heat can melt or damage it․ Following these drying guidelines will help ensure your Siser Easyweed designs remain vibrant and durable‚ extending the life of your customized apparel․

Advanced Techniques

Explore layering Easyweed for complex designs and utilize its compatibility with diverse fabrics like polyester and cotton blends for unique projects․

Mastering these skills unlocks creative potential and expands your heat transfer vinyl capabilities․

Layering Siser Easyweed

Layering Siser Easyweed allows for intricate‚ multi-colored designs‚ expanding creative possibilities beyond single-color applications․ When layering‚ always apply the first layer first‚ allowing it to fully cool before applying subsequent layers․

It’s crucial to use different Easyweed varieties for optimal adhesion; for example‚ combining Easyweed Stretch with standard Easyweed can create interesting textures and effects․ Remember to adjust heat press settings slightly – a slightly longer application time (around 5-10 seconds extra per layer) and medium to firm pressure are generally recommended․ Always test a small sample before committing to the full design to ensure proper bonding and prevent peeling․

Avoid excessive layering‚ as it can impact the fabric’s breathability and comfort․

Using Siser Easyweed with Different Fabrics

Siser Easyweed performs exceptionally well on cotton‚ polyester‚ and blends‚ but adjustments may be needed for optimal results with unique materials․ For delicate fabrics like rayon or silk‚ a lower temperature setting (around 285°F/140°C) and a shorter application time (5-8 seconds) are recommended to prevent scorching․

With thicker fabrics like denim or fleece‚ increase the application time to 15-20 seconds and use firm pressure․ Always pre-test on a scrap piece of fabric to determine the ideal settings․ Consider using a Teflon sheet or parchment paper to protect both the vinyl and the garment during heat application‚ especially with sensitive materials․

Troubleshooting Common Problems

Common issues with Siser Easyweed include vinyl not sticking‚ peeling after washing‚ or bubbling․ Adjusting temperature‚ pressure‚ and time often resolves these problems effectively․

Vinyl Not Sticking

If your Siser Easyweed isn’t adhering to the fabric‚ several factors could be at play․ First‚ ensure your heat press temperature is accurately set to 305°F (150°C)․ Inconsistent heat is a frequent culprit․

Secondly‚ verify sufficient pressure is being applied – aim for light to medium․ Insufficient pressure prevents proper bonding․ Also‚ confirm the application time is between 10-15 seconds․

Preheating the garment for 2-3 seconds is crucial for removing moisture and preparing the fibers․ Finally‚ check the fabric type; some materials require longer press times or different settings․ A test cut is always recommended!

Vinyl Peeling After Washing

Experiencing peeling after washing suggests an incomplete bond during application․ Double-check that you’re following the recommended temperature of 305°F (150°C) and applying light to medium pressure for the full 10-15 seconds․

Ensure the garment was preheated correctly‚ as this removes moisture hindering adhesion․ Also‚ verify you’re using appropriate washing instructions – turn the garment inside out‚ use mild detergent‚ and avoid harsh chemicals or bleach․

Some fabrics require extra care; consider a post-press to reinforce the bond․ If peeling persists‚ a re-application might be necessary‚ ensuring optimal settings are used․

Bubbling or Wrinkling

Bubbling or wrinkling often indicates inconsistent heat distribution or insufficient pressure during application․ Confirm your heat press platen reaches and maintains 305°F (150°C) evenly across the surface․ Apply medium pressure consistently throughout the 10-15 second application time․

Pre-pressing the garment for 2-3 seconds eliminates moisture‚ preventing steam buildup․ Using a Teflon sheet or parchment paper protects both the vinyl and garment․ Avoid overlapping the heat press‚ ensuring complete coverage․ If issues persist‚ reduce the application time slightly․

Siser Easyweed Varieties

Siser Easyweed comes in diverse options like Stretch‚ Glitter‚ and Electric․ Each variety offers unique textures and finishes for customized apparel projects․

These specialized formulas expand creative possibilities‚ catering to different aesthetic preferences and fabric types;

Easyweed Stretch

Easyweed Stretch is specifically engineered for fabrics with spandex or Lycra content‚ like athletic wear‚ swimwear‚ and leggings․ Its exceptional elasticity ensures the design moves seamlessly with the garment‚ preventing cracking or peeling during wear and washing․

This vinyl maintains a soft hand feel‚ even after application‚ providing comfort․ Recommended settings typically mirror standard Easyweed – 305°F (150°C) with light to medium pressure for 10-15 seconds․ Hot or cold peel is generally suitable‚ but always test a small area first․ It’s a fantastic choice when flexibility is paramount!

Easyweed Glitter

Easyweed Glitter adds a dazzling sparkle to any project! This heat transfer vinyl boasts a vibrant‚ eye-catching finish‚ perfect for creating standout apparel‚ accessories‚ and decorations․ Despite its glittery appearance‚ it remains surprisingly easy to weed‚ though a light tack mat is recommended․

Application requires a slightly warmer temperature – around 305°F (150°C) – and medium pressure for 15-20 seconds․ A cold peel is generally advised to prevent lifting․ Due to the glitter particles‚ a cover sheet is often used during pressing to protect the heat press platen and ensure even adhesion․

Easyweed Electric

Easyweed Electric is a revolutionary heat transfer vinyl known for its incredibly smooth‚ soft hand feel․ Unlike traditional glitter HTV‚ Electric offers a comfortable wear‚ making it ideal for garments worn directly against the skin․ It features a unique‚ metallic sheen that catches the light beautifully‚ providing a premium look․

Application settings are similar to standard Easyweed: 305°F (150°C) with medium pressure for 10-15 seconds‚ followed by a hot peel․ A test cut is always recommended․ This vinyl is a fantastic choice for high-quality‚ comfortable‚ and visually striking designs․

Safety Precautions

Always use caution with a heat press‚ protecting hands and surfaces․ Ensure proper ventilation when handling vinyl‚ and avoid prolonged skin contact․

Heat Press Safety

Operating a heat press requires strict adherence to safety guidelines․ Always wear heat-resistant gloves to protect your hands from burns when handling hot garments or the press itself․ Ensure the heat press is placed on a stable‚ level surface‚ away from flammable materials․

Never leave a heated press unattended․ Be mindful of the hot platen and surrounding areas; accidental contact can cause severe burns․ Keep the workspace clear of obstructions and ensure adequate ventilation․ Regularly inspect the heat press for any damage or malfunctions before each use․ Disconnect the power source when not in use or performing maintenance․

Vinyl Handling Safety

When working with Siser Easyweed‚ prioritize safe handling practices․ Utilize a weeding tool to carefully remove excess vinyl‚ avoiding cuts or scrapes․ Work in a well-ventilated area‚ as some vinyls may release minimal fumes during cutting or heating․ Store vinyl rolls and sheets in a cool‚ dry place‚ away from direct sunlight․

Dispose of vinyl scraps responsibly․ While generally non-toxic‚ avoid ingestion․ Keep vinyl away from small children and pets․ Always wash your hands after handling vinyl‚ especially before eating or touching your face․ Proper storage and careful handling ensure a safe and enjoyable crafting experience․

Resources and Further Learning

Explore Siser’s official website for detailed guides and FAQs․ Numerous online tutorials and vibrant crafting communities offer support and inspiration for your projects․

Siser Official Website

Siser’s official website (siser․com) is the definitive resource for all things Easyweed․ Here‚ you’ll discover comprehensive product information‚ including detailed specifications for each vinyl variety‚ ensuring you select the perfect material for your project․

The website also features a wealth of instructional videos demonstrating cutting‚ weeding‚ and heat application techniques․ Downloadable cutting settings charts are available‚ optimized for various vinyl cutters and software programs․

Furthermore‚ Siser provides helpful FAQs addressing common issues and troubleshooting tips․ You can also find information on upcoming workshops and events‚ connecting you with fellow crafters and Siser experts․ It’s a hub for inspiration and support!

Online Tutorials and Communities

Numerous online platforms offer valuable tutorials and support for Siser Easyweed users․ YouTube channels like “Heat Transfer Warehouse” and “Jennifer Maker” provide step-by-step guides‚ covering everything from basic application to advanced techniques․

Facebook groups dedicated to heat transfer vinyl‚ such as “Heat Transfer Vinyl – Tips & Tricks‚” foster a collaborative environment where crafters share experiences‚ troubleshoot problems‚ and offer advice․

Websites like Silhouette School and Cricut Learn also feature articles and videos specifically addressing Siser Easyweed compatibility with their respective cutting machines․ These communities are invaluable resources for learning and inspiration!

bar to psi conversion chart pdf

Bar to PSI Conversion Chart PDF: A Comprehensive Guide

Discover essential resources for converting bar to PSI‚ including downloadable PDF charts‚ online tools‚ and practical applications for accurate pressure measurements.

Understanding Pressure Units

Pressure‚ a fundamental concept in physics and engineering‚ quantifies the force applied perpendicularly to a surface per unit area. It’s crucial to grasp different units because various fields employ them. The bar (symbol: bar) is a metric unit of pressure‚ slightly greater than atmospheric pressure at sea level. Conversely‚ PSI (pounds per square inch) is an imperial unit‚ widely used in North America for tire pressure and industrial applications.

Understanding these units is vital for accurate measurements and conversions. Different systems—like meteorological‚ hydraulic‚ and industrial—often require switching between bar and PSI. A conversion chart PDF simplifies this process‚ providing quick reference points. Recognizing the context of pressure measurement—whether gauge or absolute—also impacts the conversion and interpretation of results. Accurate conversions ensure safety and efficiency in diverse applications.

What is a Bar?

The bar is a metric unit of pressure‚ defined as 100‚000 Pascals (Pa). It’s commonly used in meteorology and across much of the world for specifying pressures in various systems. Historically‚ it was close to the average atmospheric pressure at sea level‚ though slightly higher. One bar equals approximately 14.5038 pounds per square inch (PSI)‚ making it a convenient reference point for conversions;

Understanding the bar’s relationship to other units‚ like atmospheres and megapascals (MPa)‚ is crucial for comprehensive pressure analysis. A bar to PSI conversion chart PDF often includes these relationships for easy reference. The bar is preferred in many scientific and industrial contexts due to its simplicity and connection to the SI system of units. Utilizing accurate conversion tools ensures precise measurements.

What is PSI?

PSI stands for pounds per square inch‚ an imperial and US customary unit of pressure. It measures the force exerted over a given area – specifically‚ one pound of force acting on one square inch. PSI is widely used in North America for applications like tire pressure‚ industrial processes‚ and hydraulic systems. It’s a familiar unit for many‚ making it essential to understand its conversion to metric units like the bar.

A bar to PSI conversion chart PDF is invaluable for quickly translating between these systems. Knowing that 1 bar is roughly equivalent to 14.5 PSI allows for quick estimations‚ but precise conversions require accurate charts or tools. PSI remains prevalent due to its historical use and ease of understanding in certain industries‚ despite the global shift towards metric measurements.

Why Convert Between Bar and PSI?

Converting between bar and PSI is crucial due to the differing standards used globally. Many European and scientific applications utilize bar‚ a metric unit‚ while industries in North America frequently rely on PSI‚ an imperial unit. A bar to PSI conversion chart PDF bridges this gap‚ enabling seamless communication and operation across international boundaries.

Misinterpreting pressure readings can lead to equipment malfunction‚ safety hazards‚ or inaccurate results. Whether adjusting tire pressure‚ calibrating industrial machinery‚ or interpreting meteorological data‚ accurate conversion is paramount. Having a readily available conversion resource‚ like a downloadable chart‚ ensures consistency and prevents costly errors. Understanding both units facilitates collaboration and avoids misunderstandings in diverse technical fields.

Conversion Factors & Key Relationships

Explore the fundamental relationships between bar and PSI‚ essential for precise calculations and utilizing a bar to PSI conversion chart PDF effectively.

The Core Conversion: 1 Bar to PSI

Understanding the foundational conversion is crucial when working with pressure units. Precisely‚ 1 bar is equivalent to 14.50377 PSI (pounds per square inch). This core relationship forms the basis for all other conversions between these two units. A reliable bar to PSI conversion chart PDF will consistently reflect this value as its starting point.

This conversion isn’t merely a numerical exchange; it represents a difference in the systems used to measure force per unit area. Bar‚ a metric unit‚ is commonly used in scientific and industrial applications‚ while PSI is prevalent in the United States and certain engineering fields. Therefore‚ accurate conversion‚ utilizing a chart or calculator‚ is vital for seamless communication and operation across different sectors. Remember to always verify the source of your conversion chart PDF for accuracy.

Common Conversion Values (0-40 PSI Range)

For quick reference‚ a bar to PSI conversion chart PDF frequently details values within the 0-40 PSI range. Here’s a snapshot: 0 PSI equates to 0 bar‚ 10 PSI is approximately 0.69 bar‚ 20 PSI is around 1.38 bar‚ 30 PSI translates to roughly 2.07 bar‚ and 40 PSI is about 2.76 bar.

This range is particularly relevant for applications like tire inflation‚ where pressures are often specified in PSI‚ but understanding the equivalent bar value can be beneficial. A comprehensive chart PDF will provide more granular values within this range for increased precision. Utilizing these common conversions streamlines tasks and minimizes the need for constant recalculations‚ making a readily available chart invaluable for everyday use and quick estimations.

Conversion Values (40-100 PSI Range)

A bar to PSI conversion chart PDF often expands significantly within the 40-100 PSI range‚ catering to industrial and hydraulic applications. 40 PSI is approximately 2.76 bar‚ 50 PSI equates to roughly 3.45 bar‚ 60 PSI translates to about 4.14 bar‚ 70 PSI is around 4.83 bar‚ 80 PSI is approximately 5.52 bar‚ 90 PSI is roughly 6.21 bar‚ and 100 PSI converts to about 6.90 bar.

This range is crucial for systems demanding higher pressures. Detailed PDF charts provide finer increments for precise adjustments. Understanding these conversions is vital for maintaining equipment safety and optimal performance. Accurate conversion ensures compatibility and prevents potential damage‚ making a reliable chart an essential tool for professionals working with pressurized systems.

Conversion Values (100-200 PSI Range)

Within a bar to PSI conversion chart PDF‚ the 100-200 PSI range is critical for high-pressure applications like certain hydraulic systems and specialized industrial equipment. 100 PSI is approximately 6.90 bar‚ 120 PSI equates to roughly 8.27 bar‚ 140 PSI translates to about 9.65 bar‚ 160 PSI is around 11.03 bar‚ 180 PSI is approximately 12.41 bar‚ and 200 PSI converts to about 13.79 bar.

PDF charts in this range offer granular detail for precise calibration and maintenance. Accurate conversion is paramount to prevent system failures and ensure operational safety. Professionals rely on these charts for consistent and reliable pressure readings‚ vital for complex machinery and critical processes. Utilizing a detailed chart minimizes errors and maximizes efficiency.

Practical Applications of Bar to PSI Conversion

Explore real-world uses of bar to PSI conversions‚ from tire inflation and industrial processes to hydraulic systems and meteorological data.

Tire Pressure Measurement

Maintaining correct tire pressure is crucial for vehicle safety‚ fuel efficiency‚ and tire longevity. Tire pressure is frequently displayed in PSI (pounds per square inch)‚ but many pressure gauges and vehicle documentation‚ particularly in Europe and other regions‚ utilize bar as the standard unit. Therefore‚ a reliable bar to PSI conversion is essential for drivers.

Using a conversion chart or tool ensures accurate inflation‚ preventing underinflation – which leads to increased rolling resistance and potential tire failure – and overinflation‚ which can cause a harsh ride and reduced grip. Downloadable PDF charts provide a quick reference‚ while online converters offer instant calculations. Always consult your vehicle’s tire placard (usually located on the driver’s side doorjamb) for the recommended pressure‚ and convert accordingly before inflating your tires.

Remember to check tire pressure when tires are cold‚ as driving heats them up and increases the pressure reading. Accurate tire pressure contributes significantly to overall vehicle performance and safety.

Industrial Pressure Systems

Across numerous industrial applications‚ precise pressure control is paramount for operational efficiency and safety. Systems utilizing pneumatic or hydraulic power often employ either bar or PSI as the standard unit of measurement. A readily available bar to PSI conversion chart PDF is‚ therefore‚ invaluable for engineers‚ technicians‚ and operators.

Applications range from manufacturing processes and power generation to oil and gas refining. Accurate conversion prevents miscalibration of equipment‚ ensuring optimal performance and preventing potentially hazardous situations. PDF charts offer a convenient offline reference‚ while online conversion tools facilitate quick calculations during maintenance or troubleshooting.

Consistent and accurate pressure readings‚ achieved through reliable conversion‚ contribute to increased productivity‚ reduced downtime‚ and enhanced safety protocols within industrial environments. Utilizing these resources is a best practice for maintaining system integrity.

Hydraulic Systems

Hydraulic systems‚ crucial in construction‚ manufacturing‚ and aerospace‚ rely heavily on precise pressure management. Often‚ components are sourced globally‚ with specifications listed in either bar or PSI. A readily accessible bar to PSI conversion chart PDF becomes essential for seamless integration and maintenance.

Understanding the conversion is vital when diagnosing issues‚ replacing parts‚ or adjusting system parameters. Incorrect pressure readings due to unit misinterpretation can lead to component failure or unsafe operating conditions. PDF charts provide a quick‚ reliable reference point‚ independent of internet connectivity.

Furthermore‚ technicians benefit from having conversion data at their fingertips during field repairs. Utilizing a conversion chart ensures accurate adjustments‚ maximizing system efficiency and prolonging equipment lifespan. Consistent use of these resources promotes safety and operational reliability.

Meteorological Pressure Readings

Weather forecasting and atmospheric studies frequently utilize pressure measurements‚ often reported in millibars (mbar) or hectopascals (hPa)‚ closely related to barometric pressure. Converting these readings to PSI can be necessary when comparing data with systems utilizing imperial units‚ or for audiences more familiar with PSI.

A bar to PSI conversion chart PDF serves as a valuable tool for meteorologists‚ weather enthusiasts‚ and researchers. It facilitates understanding of pressure systems and their impact on weather patterns. Accurate conversion is crucial for correlating atmospheric pressure with other meteorological variables.

Having a readily available PDF chart allows for quick reference during data analysis and interpretation‚ especially in situations where immediate conversion is required. This ensures consistency and avoids errors when presenting or discussing meteorological information with diverse audiences.

Accessing and Utilizing Bar to PSI Conversion Charts

Explore readily available PDF charts and online conversion tools for seamless bar to PSI translations‚ enhancing accuracy and efficiency in various applications.

PDF Chart Availability & Sources

Numerous sources offer downloadable Bar to PSI conversion charts in PDF format‚ catering to diverse needs. A quick online search reveals a wealth of options‚ ranging from simple‚ single-page tables to more comprehensive guides including conversions for other pressure units like mWG‚ kPa‚ MPa‚ and millimeters of mercury. Many engineering websites and pressure measurement equipment manufacturers provide these charts as free resources.

Specifically‚ dedicated pressure conversion websites often host downloadable PDFs. Additionally‚ educational institutions and technical documentation repositories frequently include these charts within larger guides on fluid mechanics or industrial instrumentation. When selecting a PDF chart‚ prioritize clarity‚ accuracy‚ and a suitable pressure range for your intended application. Always verify the source’s reliability to ensure the information is trustworthy and up-to-date‚ avoiding potential errors in critical pressure calculations.

Online Conversion Tools

Beyond static PDF charts‚ a multitude of online conversion tools provide instant Bar to PSI conversions. These tools offer convenience and eliminate the need for manual lookups‚ often incorporating features like unit selection and real-time calculations. Websites like Farnell‚ and numerous general unit converters‚ allow users to input a value in either Bar or PSI and receive the equivalent value immediately.

These digital tools are particularly useful for quick estimations or when dealing with frequently changing pressure values. Many also include conversion capabilities for other pressure units‚ streamlining complex calculations. While offering speed and ease of use‚ it’s crucial to verify the tool’s accuracy‚ especially for critical applications. Cross-referencing results with a trusted PDF chart can provide an additional layer of confidence in the conversion process.

Using a Conversion Table Effectively

When utilizing a Bar to PSI conversion table‚ whether within a PDF or a printed format‚ understanding its structure is key. Tables typically list Bar values in one column and their corresponding PSI equivalents in another‚ facilitating quick lookups. Begin by identifying the closest Bar value to your known pressure.

For precise conversions‚ especially between listed values‚ interpolation may be necessary. This involves estimating the PSI value based on the surrounding data points. Always pay attention to the table’s units and any specified rounding rules. Remember that conversion tables provide approximate values; for critical applications requiring high accuracy‚ consider using a dedicated conversion tool or calculator alongside the table for verification.

Advanced Considerations

Explore nuanced factors like temperature’s impact on pressure readings‚ the distinction between gauge and absolute pressure‚ and ensuring conversion accuracy for reliable results.

Accuracy and Rounding

Achieving precise conversions from bar to PSI necessitates understanding potential inaccuracies. The 1 bar to PSI conversion factor (14.50377 PSI) is inherently a decimal‚ demanding rounding during practical application.

Conversion charts and tools often present values rounded to varying degrees of precision – typically whole numbers or one/two decimal places. This rounding introduces a small margin of error. For applications demanding high accuracy‚ such as industrial calibration or scientific measurements‚ utilizing the full conversion factor and minimizing rounding steps is crucial.

Consider the context of your measurement. A slight difference in PSI may be inconsequential for tire inflation but critical in hydraulic systems. Always assess the required precision and select a conversion method that aligns with those needs. Furthermore‚ be mindful of the source of your conversion chart or tool; reputable sources generally offer greater accuracy.

Temperature Effects on Pressure

Pressure readings are intrinsically linked to temperature. As temperature fluctuates‚ the volume of a gas or liquid changes‚ directly impacting measured pressure. A bar to PSI conversion performed without accounting for temperature variations can yield inaccurate results.

For gases‚ the Ideal Gas Law dictates this relationship – increased temperature leads to increased pressure‚ assuming constant volume. Liquids exhibit a similar‚ though less pronounced‚ effect due to thermal expansion. Therefore‚ conversion charts often assume a standard temperature.

When precise measurements are required‚ especially in industrial or scientific contexts‚ it’s vital to correct pressure readings to a reference temperature. This involves applying temperature compensation formulas or utilizing pressure sensors with built-in temperature correction features. Ignoring temperature effects introduces systematic errors into your bar to PSI conversions.

Absolute vs. Gauge Pressure

Understanding the difference between absolute and gauge pressure is crucial for accurate bar to PSI conversions. Gauge pressure‚ commonly used in everyday applications like tire inflation‚ measures pressure relative to atmospheric pressure. Absolute pressure‚ however‚ is measured relative to a perfect vacuum – zero pressure.

Conversion charts typically specify whether they utilize gauge or absolute pressure. Converting between the two requires adding or subtracting atmospheric pressure (approximately 14.7 PSI or 1.01325 bar) from the gauge pressure reading. Failing to account for this distinction leads to significant errors.

For instance‚ a tire pressure of 32 PSI (gauge) is actually 46.7 PSI (absolute) at sea level. Always verify the pressure type specified in the conversion chart or tool to ensure correct calculations and reliable results when working with bar to PSI conversions.

Resources and Further Information

Explore reliable online calculators‚ downloadable PDF conversion charts‚ and technical documentation for in-depth pressure unit understanding and precise conversions.

Reliable Online Pressure Calculators

Numerous online pressure calculators facilitate quick and accurate conversions between bar and PSI‚ eliminating the need for manual calculations or referencing extensive conversion tables. These tools are particularly useful for professionals and enthusiasts requiring immediate results in various applications. Farnell‚ for instance‚ provides a pressure calculator capable of converting millibars to kilopascals and vice versa‚ demonstrating the breadth of unit conversions available.

Many free online converters instantly translate pressure values‚ supporting units like Pascals‚ bars‚ MPa‚ PSI‚ kg/cm²‚ mm Hg‚ and atmospheres. These calculators often feature user-friendly interfaces‚ allowing for easy input and output of values. Utilizing these resources ensures precision and efficiency when dealing with pressure measurements‚ streamlining workflows and minimizing potential errors. They are invaluable for quick checks and verifying conversions obtained from charts or tables.

Downloadable Conversion Chart PDFs

Accessing Bar to PSI conversion charts in PDF format offers a convenient‚ offline solution for quick reference. These charts typically present a comprehensive table listing equivalent values across a range of pressures‚ from 0 to 200 PSI and beyond. A readily available document provides approximate equivalents between bar‚ mWG‚ kPa‚ MPa‚ and PSI units‚ simplifying pressure unit translations.

Downloading a PDF ensures accessibility even without an internet connection‚ making it ideal for fieldwork or situations where online tools are unavailable. These charts often include additional information‚ such as common conversion factors and key relationships between units. Searching online will reveal numerous sources offering free‚ downloadable conversion charts‚ catering to diverse needs and applications. Saving a chart allows for consistent and reliable conversions whenever needed.

Technical Documentation & Standards

Understanding the underlying standards governing pressure measurements is crucial for accurate conversions. While a simple bar to PSI chart provides quick results‚ detailed technical documentation clarifies the nuances of pressure definitions – absolute versus gauge pressure‚ for instance. Resources from metrology organizations and engineering standards bodies offer precise definitions of bar and PSI‚ ensuring consistency in calculations.

These documents often detail the environmental factors influencing pressure readings‚ such as temperature effects. Furthermore‚ they outline acceptable tolerances and rounding practices for conversions. Accessing these standards guarantees adherence to industry best practices and minimizes errors in critical applications. Referencing such documentation is particularly important in industrial settings and scientific research where precision is paramount‚ supplementing the convenience of a conversion chart PDF.

ge air conditioner user manual

GE air conditioners offer reliable cooling solutions, blending innovation with user-friendly designs. Understanding your model’s features, via the user manual, ensures optimal performance and longevity.

What is a GE Air Conditioner?

GE air conditioners represent a long-standing tradition of quality and innovation in home comfort. These units are designed to provide efficient and reliable cooling, utilizing various technologies to suit diverse needs. A GE air conditioner user manual is your primary resource for understanding the specific features of your model.

From window units offering targeted cooling to portable and central air systems, GE caters to a wide range of spaces and preferences. The user manual details everything from initial setup and operation to maintenance procedures and troubleshooting tips. Familiarizing yourself with the manual ensures you maximize the unit’s performance and extend its lifespan, ultimately enjoying consistent and comfortable climate control.

Types of GE Air Conditioners Available

GE offers a diverse portfolio of air conditioning solutions, each with unique characteristics. Window units provide focused cooling for single rooms, while portable ACs offer flexibility without permanent installation. Central air systems deliver whole-house comfort, and ductless mini-splits are ideal for zoning.

Your GE air conditioner user manual will be specific to the type of unit you own. It’s crucial to consult the correct manual, as installation, operation, and maintenance procedures vary significantly. The manual details features like energy-saving modes, fan speeds, and filter replacement instructions tailored to your specific GE model, ensuring optimal performance and efficiency.

Understanding Your GE Air Conditioner’s Control Panel

Refer to your GE air conditioner user manual to decipher the control panel’s functions. It details button operations for temperature, fan speed, and modes.

Power and Mode Buttons

The power button, as detailed in your GE air conditioner user manual, initiates and terminates operation. Mode buttons cycle through cooling, fan-only, dehumidifying, and auto functions. Cooling mode actively lowers room temperature, while fan-only circulates air without cooling. Dehumidifying reduces moisture, and auto mode intelligently adjusts settings based on room conditions.

Specific models may include energy-saver modes, optimizing efficiency. The manual clarifies each mode’s operation and recommended usage scenarios. Understanding these functions allows for customized comfort and energy conservation. Always consult the manual for precise button layouts and functionalities specific to your GE unit.

Temperature and Fan Speed Settings

Your GE air conditioner user manual explains temperature control, typically ranging from 60°F to 80°F (16°C to 27°C). Lowering the temperature increases cooling intensity. Fan speed settings – low, medium, and high – adjust airflow. Lower speeds are quieter, while higher speeds maximize cooling.

Auto fan speed, if available, automatically adjusts based on temperature. The manual details how these settings interact and impact energy consumption. Experimenting with combinations allows personalized comfort. Precise temperature adjustments and fan speed selection, guided by the manual, optimize performance and efficiency for your specific needs.

Timer and Sleep Functions

The GE air conditioner user manual details timer settings for automated operation. You can program the unit to turn on or off at specific times, conserving energy and ensuring comfort. Sleep mode gradually increases the temperature overnight, preventing excessive cooling and saving energy while you rest.

The manual explains how to set and adjust these functions. Sleep mode often features a pre-set temperature increase schedule. Utilizing these features, as described in the manual, provides convenience and optimizes energy efficiency. Proper programming ensures the unit operates according to your schedule and preferences.

Installation and Setup

Refer to the GE air conditioner user manual for detailed instructions on proper installation. Correct setup is crucial for efficient cooling and optimal unit performance.

Proper Placement for Optimal Cooling

The GE air conditioner user manual emphasizes strategic placement for peak efficiency. Avoid direct sunlight exposure, as it forces the unit to work harder. Ensure adequate airflow around the unit; obstructions hinder cooling.

For window units, select a sturdy window and ensure a secure, level installation to prevent vibrations and potential falls. Portable units benefit from placement near a window for exhaust hose venting, but avoid placing them directly in front of curtains or furniture.

Consider room size when choosing a unit; an undersized unit won’t cool effectively, while an oversized one cycles on and off frequently, wasting energy. Consult the user manual’s guidelines for recommended room sizes.

Window Installation Guide

The GE air conditioner user manual provides detailed window installation instructions. First, ensure the window frame is strong enough to support the unit’s weight. Assemble the side panels, extending them to fit the window opening securely.

Next, carefully lift the AC unit and place it into the window, ensuring it’s level. Secure the unit with mounting brackets and screws, following the user manual’s diagrams precisely.

Proper sealing is crucial; use the provided foam insulation to fill gaps around the unit, preventing air leaks and maximizing cooling efficiency. Finally, lower the window sash against the unit, securing it with the locking mechanism.

Portable AC Unit Setup

The GE air conditioner user manual details a straightforward portable AC setup. Begin by attaching the exhaust hose to the unit’s rear outlet. Then, connect the window kit to a suitable window opening, ensuring a snug fit to prevent hot air recirculation.

Insert the exhaust hose into the window kit adapter, securing it firmly. Place the portable AC unit near a grounded electrical outlet, avoiding obstructions to airflow.

Follow the user manual’s instructions for initial operation, including setting the desired temperature and fan speed. Regularly check the condensate drain tank and empty it as needed.

Maintenance and Cleaning

The GE air conditioner user manual stresses regular filter cleaning for peak efficiency. Coil cleaning and general unit upkeep prolong lifespan and maintain optimal cooling performance.

Filter Cleaning and Replacement

According to the GE air conditioner user manual, maintaining a clean air filter is crucial for efficient operation and air quality. Filters should be inspected monthly, and cleaned or replaced as needed – typically every one to three months, depending on usage. A dirty filter restricts airflow, reducing cooling capacity and potentially causing the unit to work harder, leading to increased energy consumption and possible damage.

The manual details how to access and remove the filter, usually located behind the front grille. Cleaning involves gently washing the filter with mild soap and water, ensuring it’s completely dry before reinstalling. Replacement filters, specified by your model number, are readily available online or at appliance retailers. Always turn off and unplug the unit before performing any maintenance.

Coil Cleaning Procedures

The GE air conditioner user manual emphasizes the importance of cleaning both the evaporator and condenser coils annually to maintain optimal performance. Dirty coils reduce cooling efficiency and can lead to system failures. Begin by disconnecting power to the unit. The evaporator coil, inside the unit, can be cleaned with a commercially available coil cleaner, following the product’s instructions carefully.

For the condenser coil, located outside, gently remove debris with a soft brush or vacuum. Avoid bending the fins. A fin comb can straighten any bent fins. Rinse both coils with water, ensuring no cleaner residue remains. Proper coil cleaning improves airflow and heat transfer, extending the lifespan of your GE air conditioner.

General Unit Cleaning

The GE air conditioner user manual recommends regular exterior cleaning to preserve its appearance and functionality. Wipe down the unit’s casing with a damp cloth and mild detergent. Avoid abrasive cleaners, which can damage the finish. Pay attention to vents and louvers, ensuring they are free from dust and obstructions. For portable units, clean the exterior after each use, especially during peak cooling seasons.

Inspect the drain plug regularly for any buildup. A clean unit not only looks better but also operates more efficiently. Remember to always disconnect the power before cleaning any part of the air conditioner. Consistent general cleaning contributes to the longevity of your GE appliance.

Troubleshooting Common Issues

The GE air conditioner user manual provides solutions for typical problems like poor cooling or leaks. Refer to it first for quick fixes and error code explanations.

Unit Not Cooling Properly

If your GE air conditioner isn’t cooling effectively, the user manual suggests several checks. First, ensure the filter is clean; a clogged filter restricts airflow, reducing cooling capacity. Verify the temperature settings are correct and the unit isn’t in “Fan Only” mode.

Next, inspect the condenser coils (outdoor unit) for debris and clean them if necessary. Confirm proper ventilation around both the indoor and outdoor units. The manual also details troubleshooting steps for potential refrigerant leaks, though these typically require professional service. Finally, check for error codes displayed on the unit, referencing the manual for their specific meanings and recommended actions.

Water Leaks and Drainage

According to the GE air conditioner user manual, minor condensation is normal during operation. However, significant water leaks indicate a problem. First, check the drain hose for clogs or kinks; a blocked hose prevents proper water drainage. The manual illustrates how to locate and clear the drain hose.

Ensure the unit is slightly tilted towards the drain outlet to facilitate water flow. Inspect the drain pan for cracks or damage. If leaks persist, the user manual advises contacting a qualified technician, as internal issues like a frozen evaporator coil or refrigerant problems may be the cause, requiring professional repair.

Error Codes and Their Meanings

The GE air conditioner user manual provides a comprehensive list of error codes displayed on the unit’s control panel. These codes signal specific malfunctions, aiding in troubleshooting. For example, “E1” might indicate a sensor error, while “E2” could signify a compressor issue.

The manual details each code’s meaning and suggests potential solutions, ranging from simple fixes like cleaning the filter to more complex repairs requiring a qualified technician. Ignoring error codes can lead to further damage. Always consult the user manual before attempting any repairs, and prioritize safety by disconnecting power before inspection.

Smart Features and Connectivity

GE air conditioners with Cync compatibility, detailed in the user manual, enable remote control via the Google Home app and voice commands for convenience.

Google Nest Integration

GE air conditioners featuring Cync compatibility seamlessly integrate with the Google Nest ecosystem. The user manual provides step-by-step instructions for linking your appliance to the Google Home app. This connection allows for convenient voice control using Google Assistant, enabling you to adjust settings like temperature and fan speed with simple commands.

Furthermore, integration with Google Nest Hub displays provides a visual interface for managing your air conditioner. You can remotely turn the unit on or off, monitor current conditions, and create customized schedules directly from the Google Home app or compatible devices. Detailed troubleshooting for connectivity issues is also found within the user manual.

Remote Control via Mobile App

GE air conditioners equipped with Wi-Fi capabilities offer remote control functionality through the Cync mobile app. The user manual details the download and setup process for both iOS and Android devices. Once connected, users can manage their air conditioner from anywhere with an internet connection, adjusting temperature, fan speed, and mode settings.

The app also allows for scheduling operation, creating customized cooling profiles to optimize comfort and energy efficiency. Notifications regarding filter maintenance or error codes can be sent directly to your smartphone. Comprehensive instructions for app navigation and troubleshooting common connectivity problems are thoroughly explained within the user manual.

Safety Precautions

GE’s user manual emphasizes electrical safety and proper ventilation. Always follow grounding instructions and avoid operating the unit in hazardous environments for safe use.

Electrical Safety Guidelines

GE air conditioner user manuals consistently prioritize electrical safety. Always ensure the unit is properly grounded to prevent shock hazards, as detailed in the manual’s diagrams. Never operate the AC with a damaged power cord or plug; replacement must be done by qualified personnel.

Avoid using extension cords, as they can overheat and pose a fire risk. The manual stresses the importance of a dedicated circuit to prevent overloading. Disconnect the unit from the power source before any cleaning or maintenance, and never touch the internal components with wet hands. Following these guidelines, outlined in your GE manual, guarantees safe operation and prevents potential electrical incidents.

Proper Ventilation Requirements

GE air conditioner user manuals emphasize the critical role of proper ventilation for efficient operation and indoor air quality. Portable units require venting to the outside, typically through a window kit, to expel hot air. Window units need unobstructed airflow around the unit, both inside and outside the room, as illustrated in the manual.

Restricting airflow reduces cooling capacity and can strain the compressor. The manual cautions against placing objects near the air intake or exhaust vents. Maintaining adequate ventilation prevents moisture buildup, minimizing the risk of mold growth and ensuring optimal performance, as detailed within your GE air conditioner’s guide.

Warranty Information

GE air conditioner user manuals detail warranty coverage, typically one year for parts and labor. Registration is often required for full benefits and claim processing.

GE Air Conditioner Warranty Details

GE air conditioner warranties, as outlined in the user manual, generally provide one year of coverage for both parts and labor against manufacturing defects. Extended warranties are often available for purchase, offering additional protection beyond the initial period.

The standard warranty typically excludes damage resulting from improper installation, misuse, accidents, or natural disasters. It’s crucial to retain proof of purchase for warranty claims. The user manual will specify the exact process for submitting a claim, including required documentation and contact information for GE’s service centers.

Commercial use may void certain warranty provisions, so understanding the terms is vital. Always register your appliance to ensure seamless warranty service when needed.

How to Make a Warranty Claim

To initiate a warranty claim for your GE air conditioner, consult the detailed instructions within the user manual. Typically, you’ll need your model number, serial number, and proof of purchase date. First, contact GE’s customer service department via phone or their website, detailing the issue.

They may request diagnostic information or photos/videos of the problem. If the issue is covered, GE will authorize a service visit from a qualified technician. Keep all communication records. The user manual outlines specific exclusions, so review it carefully before submitting your claim to avoid delays.