Blog

guide construction ossature bois pdf

Digital PDF guides, like Patrick Decanton’s, simplify medium-height wood frame building design and implementation in Canada, offering accessible, illustrated, step-by-step construction stages.

Overview of Wood Frame Building Guides

Wood frame building guides, often available in PDF format, detail techniques like poteau-poutre (post-and-beam) and platform framing. These resources cover essential components – wood, fasteners, and insulation – aligning with standards like NF DTU 31.2 (May 2019) and NF DTU 31.4 (May 2020).

Guides emphasize ATec and DTA compliance, focusing on structural integrity and moisture control (below 20%). They provide multidisciplinary chapters, aiding design and construction, and are supported by expertise from organizations like Cecobois and APEGBC. These guides are crucial for professionals and those seeking to understand modern wood construction practices.

Importance of PDF Format for Construction Documentation

PDF format is vital for wood frame construction documentation due to its universal accessibility and preservation of formatting across devices. Technical guides, like those by Patrick Decanton, benefit from PDF’s ability to integrate illustrations and detailed instructions effectively.

This ensures consistent interpretation of complex building codes – such as NF DTU 31.2 and 31.4 – and ATec/DTA requirements. PDFs facilitate easy sharing among project stakeholders, enabling efficient collaboration and reducing errors; Their digital nature also supports version control and long-term archiving of crucial construction data.

Understanding Wood Frame Construction Techniques

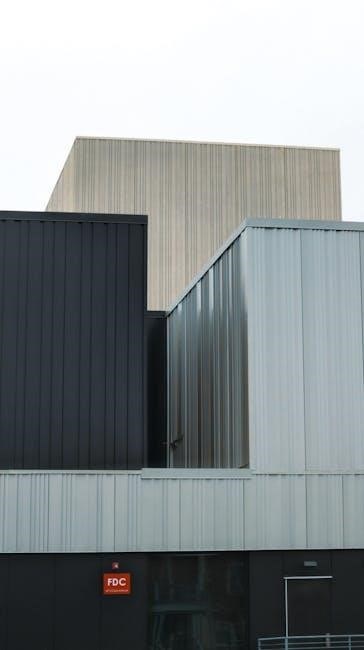
Wood frame construction utilizes methods like poteau-poutre (post-and-beam) and platform framing, employing wood components for structural elements and exterior/interior woodwork.

Poteau-Poutre (Post-and-Beam) System

The poteau-poutre system, a foundational wood frame technique, distinguishes itself through the utilization of substantial solid wood posts (poteaux) and beams (poutres). This construction method relies on these primary structural elements to bear loads, creating a robust and visually appealing framework.

Unlike other systems, the post-and-beam approach often features infill panels between the posts, which can be constructed from various materials. This allows for design flexibility and can contribute to the building’s overall aesthetic.

Guides emphasize adherence to standards like NF DTU 31.2 and 31.4 when implementing this system, ensuring structural integrity and compliance with building regulations. Careful consideration of wood species and connections is crucial for successful implementation.

Platform Framing Method

Platform framing represents a prevalent technique for constructing wood frame buildings, particularly in North America. This method builds the structure floor by floor, creating a series of independent “platforms” supported by the walls below. Each level acts as a base for the subsequent construction phase.

Guides detail the importance of precise measurements and secure connections within this system. Wall segments are constructed and then topped with a platform, typically consisting of joists and sheathing.

Adhering to NF DTU standards and ensuring wood moisture content remains below 20% are vital for platform framing’s success, guaranteeing stability and preventing future issues.

Components of a Wood Frame Structure

Wood frame structures fundamentally rely on several key components working in unison. These include structural wood elements – posts, beams, and joists – forming the building’s skeleton. Exterior and interior woodwork, encompassing siding, sheathing, and interior finishes, provide enclosure and aesthetics.

Crucially, robust fasteners and connectors, detailed in construction guides, secure these elements, ensuring structural integrity. Insulation and airtightness components are also vital, contributing to energy efficiency.

PDF guides emphasize selecting appropriate wood types and adhering to NF DTU 31.2/31.4 standards for each component, guaranteeing a durable and compliant build.

Key Standards and Regulations

Construction must adhere to NF DTU 31.2 (May 2019) and NF DTU 31.4 (May 2020), alongside ATec and DTA compliance, as detailed in PDF guides.

NF DTU 31.2 (May 2019)

NF DTU 31.2, updated in May 2019, provides technical rules for designing and constructing light wood frame buildings, specifically focusing on the “ossature bois” (wood frame) system.

This standard details requirements for wood components used in structural elements, exterior and interior woodwork, and crucial fastener/connector specifications. It emphasizes building the “ossature bois” (facade or wood frame wall) according to its recommendations.

PDF guides referencing this DTU ensure designs meet prescribed technical standards for this application and the composition of the building works, guaranteeing structural integrity and safety.

NF DTU 31.4 (May 2020)

NF DTU 31.4, revised in May 2020, complements DTU 31.2, further refining the technical guidelines for light wood frame construction. It focuses on specific aspects of wood frame building, ensuring adherence to current best practices.

Like DTU 31.2, it dictates standards for materials, connections, and construction methods, particularly concerning the “ossature bois” (wood frame) system. PDF guides incorporating this DTU are vital for compliance.

These standards, alongside ATec and DTA approvals, are essential for ensuring the structural performance and durability of wood frame buildings, as detailed in technical documentation.

ATec and DTA Compliance

ATec (Agrément Technique) and DTA (Dispositif de Tenue au Feu) are crucial certifications for wood frame construction components and systems in France. Compliance with these standards, detailed in PDF guides, validates product performance and safety.

ATec assesses the technical characteristics of innovative building products, while DTA focuses on fire resistance. Utilizing materials and methods with valid ATec/DTA approvals is non-negotiable.

PDF documentation referencing these compliances ensures builders meet regulatory requirements, guaranteeing structural integrity and fire safety, as outlined in NF DTU 31.2 and 31.4.

Design Considerations for Wood Frame Buildings

PDF guides emphasize calculating wall deflection through iterative processes, controlling wood moisture content below 20%, and proportionally calculating wall segment rigidity for stability.

Calculating Wall Deflection (Iteration Process)

Wood frame building guides, often in PDF format, detail a crucial iterative process for calculating wall deflection. This involves initially estimating deflection, then refining the calculation based on the rigidity of each wall segment.

The process isn’t a single calculation; rather, it’s repeated – an iteration – to achieve accuracy. PDF documentation illustrates this with examples, showing deflection calculated for iteration 1, then iteration 4, and so on. Each iteration uses the previous result to improve the estimate.

This method ensures structural integrity by accounting for varying material properties and load distributions within the wall assembly, as outlined in technical guides.

Wood Moisture Content Control (Below 20%)

PDF guides on wood frame construction consistently emphasize strict control of wood moisture content. Maintaining a moisture level below 20% is paramount for structural performance and longevity. This requirement applies to all wood components – structural elements, exterior cladding, and interior finishes.

Technical documentation details the importance of addressing moisture levels before construction begins. PDF resources highlight the need to consider environmental conditions and storage practices to prevent moisture absorption.

Failure to adhere to this guideline can lead to warping, shrinking, and ultimately, structural failure, as detailed in comprehensive construction manuals.

Wall Segment Rigidity and Proportional Calculation

PDF construction guides detail calculating wall deflection through an iterative process, crucial for structural integrity. This involves determining the rigidity of each wall segment and proportionally calculating deflection based on these values. Iteration 1 and subsequent calculations refine the assessment.

These guides emphasize that wall segment deflection must align with NF DTU 31.2 (May 2019) and NF DTU 31.4 (May 2020) standards.

PDF documentation provides formulas and examples to ensure accurate calculations, vital for safe and compliant wood frame building design.

Materials Used in Wood Frame Construction

PDF guides cover wood components for structural elements, exterior/interior woodwork, and essential fasteners/connectors, ensuring compliance with relevant building standards and techniques.

Wood Components for Structural Elements

Wood frame construction utilizes both solid wood (BM) and derived wood products for structural integrity. PDF guides detail the appropriate selection of these components, emphasizing adherence to NF DTU 31.2 (May 2019) and NF DTU 31.4 (May 2020) standards.

These resources clarify the use of posts and beams within the poteau-poutre (post-and-beam) system, alongside materials employed in platform framing. Crucially, guides highlight the importance of wood moisture content, mandating levels below 20% to prevent issues.

Detailed specifications ensure components meet ATec and DTA compliance, guaranteeing structural performance and building safety.

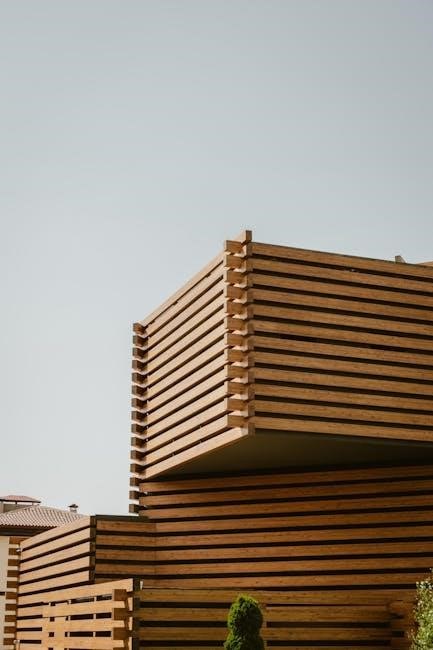
Exterior and Interior Woodwork

Wood frame construction guides, often in PDF format, comprehensively cover both exterior and interior woodwork applications. These resources detail appropriate wood species and treatments for facades (ossature bois) and interior finishes, aligning with NF DTU standards.

Guides emphasize selecting materials that withstand environmental factors, ensuring durability and aesthetic appeal. They also address the integration of woodwork with insulation and airtightness measures, crucial for energy efficiency.

Information on proper installation techniques and finishing options is provided, alongside guidance on wood preservation methods to extend the lifespan of these elements.

Fasteners and Connectors

Wood frame construction PDF guides dedicate significant attention to fasteners and connectors, vital for structural integrity. They detail appropriate types – nails, screws, bolts – and their correct application based on load requirements and wood species.

Guides emphasize adherence to NF DTU 31.2 and 31.4 standards, as well as ATec and DTA compliance, ensuring safe and reliable connections. Information covers connector selection for poteau-poutre and platform framing systems.

Proper fastening techniques are illustrated, highlighting the importance of preventing wood splitting and ensuring long-term joint performance.

Construction Process and Implementation

PDF guides detail multi-disciplinary construction stages, emphasizing insulation, airtightness, and adherence to NF DTU standards for efficient wood frame building.

Step-by-Step Construction Stages

Detailed PDF guides, such as those by Patrick Decanton, break down the wood frame construction process into manageable, illustrated stages. These guides cover everything from initial structural element assembly – utilizing post-and-beam or platform framing – to the crucial steps of exterior and interior woodwork installation.

They meticulously outline procedures for ensuring proper wood moisture content (below 20%) and achieving optimal insulation and airtightness. The guides emphasize adherence to relevant standards like NF DTU 31.2 and 31.4, alongside ATec and DTA compliance, providing a clear roadmap for successful project completion.

Insulation and Airtightness

Comprehensive PDF guides emphasize insulation and airtightness as critical components of wood frame construction. They detail methods for achieving optimal thermal performance and minimizing air leakage, referencing standards like NF DTU 31.2 and 31.4.

These resources illustrate proper techniques for selecting and installing insulation materials, alongside strategies for creating a continuous air barrier. Guides highlight the importance of meticulous detailing around windows, doors, and other penetrations to prevent drafts and moisture intrusion, ultimately contributing to energy efficiency and building durability.

Finishing and Preservation Techniques

PDF guides detail wood preservation methods and exterior/interior finishing options, ensuring longevity and aesthetic appeal, aligned with NF DTU standards and best practices.

Wood Preservation Methods

Comprehensive PDF guides emphasize the critical importance of wood preservation in extending the lifespan of wood frame structures. These resources detail techniques to protect against fungal decay, insect infestation, and moisture damage – key factors impacting structural integrity.

They outline methods for treating wood components, both before and after construction, referencing relevant standards like NF DTU 31.2 and 31.4. Digital documentation often covers the application of preservatives, proper ventilation strategies, and the selection of durable exterior finishes.

Maintaining wood moisture content below 20% is consistently highlighted as a preventative measure, alongside guidance on appropriate wood selection for specific environmental conditions.

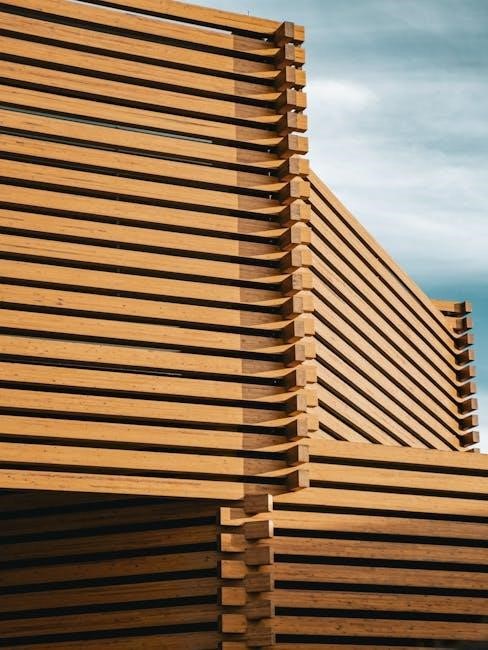
Exterior and Interior Finishing Options

Detailed PDF guides on wood frame construction extensively cover exterior and interior finishing choices, crucial for aesthetics, weather protection, and building performance. They showcase diverse cladding materials, ranging from traditional wood siding to modern composite options, adhering to NF DTU standards.

Technical documentation illustrates proper installation techniques for siding, roofing, and window/door systems, emphasizing airtightness and insulation. Interior finishes discussed include drywall, wood paneling, and flooring, with guidance on moisture control and compatibility with wood frame structures.

These resources often feature examples and best practices for achieving durable, visually appealing, and code-compliant finishes.

Resources and Expertise

Cecobois offers free expertise, while the APEGBC provides information based on bulletins, supporting the design and construction of wood frame buildings.

Centre d’expertise sur la construction commerciale en bois (Cecobois)

Cecobois’s core mission is to provide free access to information and support regarding commercial wood construction. This includes guidance on utilizing wood frame construction techniques, adhering to relevant standards like NF DTU 31.2 (May 2019) and NF DTU 31.4 (May 2020), and ensuring compliance with ATec and DTA regulations.

They play a vital role in promoting best practices and disseminating knowledge to professionals involved in designing and building with wood. Cecobois’s resources are instrumental in navigating the complexities of wood frame construction, contributing to the development of safe, sustainable, and efficient buildings.

APEGBC (Association of Professional Engineers and Geoscientists of British Columbia)

APEGBC provides foundational information underpinning the design and construction of wood frame buildings, particularly in British Columbia. Their bulletins serve as a crucial resource for professionals, informing best practices and technical considerations. The digital guides leverage this information, offering a practical application of APEGBC’s expertise.

These resources support engineers and geoscientists in ensuring structural integrity and adherence to safety standards. APEGBC’s contributions are vital for promoting responsible and innovative wood construction, fostering a robust and reliable building sector.

Digital PDF Guides and Training

Patrick Decanton’s PDF guide offers readily accessible technical information, illustrations, and construction stages for wood frame homes, simplifying the building process.

Patrick Decanton’s Digital Guide

Patrick Decanton’s digital guide, available in PDF format, is specifically designed to facilitate the design and construction of wood frame buildings. This resource is lauded for its accessibility, being both well-illustrated and clearly written to guide professionals and enthusiasts alike.

The guide breaks down complex processes into manageable, step-by-step construction stages, ensuring a smooth workflow. It’s a valuable tool for understanding the nuances of wood frame construction, covering aspects from structural components to finishing techniques.

Decanton, as a trainer in wood frame house construction, brings practical expertise to this comprehensive resource, making it a trusted companion for building projects.

Accessibility of Technical Guides

Technical guides for wood frame construction, including those referencing NF DTU 31.2 and 31.4 standards, are becoming increasingly accessible in digital PDF format. This shift enhances dissemination of crucial information for compliant building practices.

Resources like Cecobois offer free expertise, while guides from professionals like Patrick Decanton provide detailed, illustrated instructions. The APEGBC bulletins further support informed design and implementation.

This widespread availability empowers builders and engineers to adhere to regulations, ensuring structural integrity and promoting sustainable building solutions within the wood frame industry.

navpers 1070/602 pdf

Understanding NAVPERS 1070/602

NAVPERS 1070/602, the Dependency Application/Record of Emergency Data, is a crucial form for service members; access the PDF electronically via NSIPS Report Manager or RED/DA.

What is NAVPERS 1070/602?

NAVPERS 1070/602 is officially termed the Dependency Application/Record of Emergency Data. This vital document serves as the cornerstone for establishing and maintaining accurate dependency information within the Navy’s personnel systems. It’s a legacy form, yet remains critically important despite evolving digital systems. The purpose, as outlined in Standard Operating Procedures, is to provide a standardized process for commands and transaction services.

Essentially, it’s used to document who relies on a service member for financial support – spouses, children, and other eligible dependents. Accessing the form is primarily done electronically; you can find the PDF through the NSIPS Report Manager. Alternatively, you can navigate to RED/DA (Record of Emergency Data/Defense Authorization) and, after clicking ‘continue’, locate and download the NAVPERS 1070/602 from the ‘current approved forms’ section.

Purpose of the Dependency Application/Record of Emergency Data

The NAVPERS 1070/602 form’s primary purpose is to accurately document a service member’s dependents for a multitude of critical functions. This includes eligibility for benefits like healthcare (TRICARE), housing allowances, and financial assistance programs. Maintaining current dependency data is essential for proper pay and allowance calculations, ensuring service members and their families receive the entitlements they deserve.

Furthermore, the Record of Emergency Data portion is vital for contacting family members in times of crisis – deployments, emergencies, or unforeseen circumstances. Accurate contact information is paramount. Accessing and updating this form, often via RED/DA, ensures the Navy has the most current information. Remember to reference the Navy Military Personnel Manual, Source Data System Procedures Guide, and NAVADMIN 098/01 when completing the NAVPERS 1070/602 PDF.

Historical Context & Legacy Systems

The NAVPERS 1070/602, while now largely managed digitally, has a history rooted in paper-based systems. Originally, dependency information was meticulously recorded and maintained on physical documents, creating administrative burdens. The transition to electronic formats, facilitated by systems like NSIPS (Navy Standard Integrated Personnel System) and subsequently RED/DA (Record of Emergency Data/Defense Authorization), aimed to streamline the process and improve data accuracy.

RED/DA represents a significant evolution, allowing service members to directly update and manage their dependency information. However, understanding the legacy context is crucial, as older records may still influence current data. The form itself, even in PDF format, reflects this evolution, adapting to changing regulations and technological advancements. Proper adherence to procedures outlined in the Source Data System Procedures Guide ensures a smooth transition and accurate record-keeping.

Accessing the NAVPERS 1070/602 Form

To obtain the NAVPERS 1070/602 PDF, navigate to NSIPS Report Manager or directly access RED/DA, then click ‘continue’ to view current forms.

Locating the PDF via NSIPS Report Manager

Accessing the NAVPERS 1070/602 form through the Navy Standard Integrated Personnel System (NSIPS) Report Manager provides a direct route to the official PDF document. First, service members must ensure they have the necessary permissions and access to NSIPS. Once logged in, navigate to the section dedicated to electronic service records and dependency data. Within this area, locate and select the option to generate reports.

From the available report options, specifically choose the report associated with the Dependency Application/Record of Emergency Data. This will initiate the process of creating the NAVPERS 1070/602 PDF. The system will then generate the form, which can be downloaded and saved for completion. Remember that report generation times may vary depending on system load and individual account settings. This method offers a convenient way to obtain the form directly from the Navy’s personnel system.

Downloading from RED/DA (Record of Emergency Data/Defense Authorization)

Alternatively, the NAVPERS 1070/602 PDF can be directly downloaded from the Record of Emergency Data/Defense Authorization (RED/DA) system. Begin by accessing the RED/DA website and logging in with your appropriate credentials. After successful login, click the “Continue” button to proceed to the main interface. On the subsequent page, you should find a section labeled “Current Approved Forms.”

Within this section, locate and select Navpers 1070/602. Clicking on this option will initiate the download of the official PDF form. RED/DA provides a straightforward method for obtaining the form, particularly useful for those who frequently update their dependency information. Ensure your browser is configured to allow downloads from the RED/DA domain to avoid any interruption during the process. This direct access simplifies the process of acquiring the necessary document.

Navigating the RED/DA Interface

The RED/DA interface, while functional, requires a specific sequence for accessing the NAVPERS 1070/602 form. Upon logging in, users must click “Continue” to advance beyond the initial screen. This action leads to a dashboard displaying various options, including “Current Approved Forms.” This is the key area for locating the dependency application.

Carefully scan the list of forms presented; Navpers 1070/602 will be listed among them. Selecting this option directly initiates the PDF download. Be aware that the system may occasionally require a refresh if the form doesn’t immediately appear. Familiarizing yourself with this navigation path streamlines the process, minimizing frustration and ensuring quick access to the necessary documentation. Remember to check browser settings to permit downloads from the RED/DA domain.

Completing the NAVPERS 1070/602 Form

Follow instructions in the Navy Military Personnel Manual, Source Data System Procedures Guide, and NAVADMIN 098/01 when filling out the NAVPERS 1070/602 PDF.

General Instructions & References

Successfully navigating the NAVPERS 1070/602 form requires careful attention to detail and adherence to established guidelines. Several key references provide essential instructions for completion. The Navy Military Personnel Manual (NAVMPERSMAN) serves as a foundational resource, outlining policies and procedures related to dependency applications and emergency data.

Furthermore, the Source Data System Procedures Guide offers specific guidance on utilizing the relevant systems, such as NSIPS and RED/DA, to access and submit the form. Crucially, NAVADMIN 098/01 provides updates and clarifications regarding the NAVPERS 1070/602, ensuring personnel are aware of the latest requirements.

Remember to consult these references throughout the completion process. To prompt the system to generate new forms, make an edit within RED/DA, adding remarks like “submitting PG2 due to updates” in the designated tab (typically the 3rd or 4th). This action initiates the form generation, allowing for signing and uploading of the updated NAVPERS 1070/602 PDF.

Required Information & Documentation

Completing the NAVPERS 1070/602, Dependency Application/Record of Emergency Data, necessitates providing comprehensive and accurate information. This includes detailed data concerning all dependents, such as names, dates of birth, Social Security numbers, and relationship to the service member. Supporting documentation is vital; birth certificates, marriage certificates, and court orders establishing legal guardianship are frequently required.

Ensure all submitted documentation is legible and current. The form also requests emergency contact information, including names, addresses, and phone numbers of individuals to be notified in case of emergency. Accessing the NAVPERS 1070/602 PDF via NSIPS Report Manager or RED/DA doesn’t alter these documentation requirements.

Remember, incomplete applications or missing documentation will likely result in processing delays. Double-check all entries against original source documents before submitting the completed NAVPERS 1070/602 form.

Entering Remarks & Submitting Updates

When utilizing RED/DA to manage your NAVPERS 1070/602, Dependency Application/Record of Emergency Data, remember that submitting updates often requires more than just modifying the form directly. The system frequently necessitates an additional edit to prompt regeneration of new forms. Locate the remarks section – typically found within the third or fourth tab – and enter a brief explanation, such as “Submitting PG2 due to updates.”

This remark acts as a trigger, signaling the system to create the latest version of your dependency application. Once generated, you can then digitally sign and upload the updated NAVPERS 1070/602 PDF. Accessing the form via NSIPS Report Manager doesn’t change this update process within RED/DA.

Always retain a copy of your submitted forms and any associated documentation for your records.

Troubleshooting & Common Issues

If facing difficulties, form generation problems in RED/DA may occur; address system errors by re-entering data or contacting support for NAVPERS 1070/602 assistance.

Form Generation Problems in RED/DA

Encountering issues generating the NAVPERS 1070/602 PDF within RED/DA is a common frustration. The system often requires a prompting action to initiate new form creation. A workaround involves making a minor edit within RED/DA – specifically, utilizing the remarks section, typically found on the third or fourth tab.

Entering a brief remark, such as “submitting PG2 due to updates,” signals the system to regenerate the necessary forms. Following this edit, you should be able to successfully sign and upload the updated NAVPERS 1070/602. This process effectively refreshes the available forms, resolving many generation errors. Remember to consult NAVADMIN 098/01 and relevant manuals for detailed guidance, ensuring compliance with established procedures when navigating these system functionalities.

Addressing System Errors

When facing system errors while accessing or generating the NAVPERS 1070/602 PDF, a systematic approach is crucial. Begin by verifying your access permissions within NSIPS and RED/DA. Ensure your profile is correctly configured for dependency application processing. If errors persist, clear your browser’s cache and cookies, or attempt access using a different browser to rule out compatibility issues.

Referencing the Navy Military Personnel Manual, the Source Data System Procedures Guide, and the Defense Joint Military Pay System Procedures Training Guide provides valuable troubleshooting steps. If the problem continues, contact your local personnel support office for assistance. Documenting the specific error message and steps taken will expedite the resolution process, ensuring accurate dependency data management and timely form availability.

Updating Information After Initial Submission

Following the initial submission of your NAVPERS 1070/602 PDF, updates to dependency or emergency data require a deliberate process within RED/DA. The system doesn’t automatically reflect changes; you must initiate another edit within RED/DA to prompt the regeneration of updated forms. Navigate to the relevant tabs – often the third or fourth – and enter remarks indicating the reason for resubmission, such as “submitting PG2 due to updates.”

This action triggers the system to generate new forms, which you can then sign and upload. Remember to retain copies of all submitted documentation. Adherence to NAVADMIN messages (like 098/01) and the Navy Military Personnel Manual ensures compliance and accurate record-keeping for your dependency application.

Key System Interactions

NAVPERS 1070/602 access relies on NSIPS for electronic records and RED/DA for form downloads; NAVADMIN messages, such as 098/01, guide these processes.

The Role of NSIPS (Navy Standard Integrated Personnel System)

NSIPS, the Navy Standard Integrated Personnel System, plays a vital role in managing and accessing the NAVPERS 1070/602 form. Specifically, service members can utilize NSIPS’s Report Manager function to directly download the PDF version of their dependency application and emergency data record. This electronic service record pathway provides a convenient method for obtaining the form without needing to navigate solely through RED/DA.

However, it’s important to understand that NSIPS primarily serves as a repository for the data, and updates or modifications often necessitate interaction with RED/DA to trigger form regeneration. The system’s integration ensures data consistency between personnel records and the associated dependency information. Regularly checking NSIPS allows personnel to verify the accuracy of their recorded data, contributing to a streamlined administrative process and ensuring benefits are correctly administered.

RED/DA Functionality for Form Access

RED/DA (Record of Emergency Data/Defense Authorization) provides direct access to the NAVPERS 1070/602 form. To obtain the PDF, users must log in and click “continue.” This action leads to a page displaying “current approved forms,” where selecting “Navpers 1070/602” initiates the download. RED/DA is often preferred for acquiring the actual form itself, as opposed to simply viewing data within NSIPS.

However, simply accessing the form isn’t always enough. If the system doesn’t automatically generate a current version, a minor edit within RED/DA – such as adding a remark like “submitting PG2 due to updates” in one of the tabs – prompts the system to create new forms. These updated forms can then be signed and uploaded, ensuring the most current dependency information is on file.

Impact of NAVADMIN Messages (e.g., 098/01)

NAVPERS 1070/602 procedures are frequently updated and clarified through NAVADMIN messages, such as NAVADMIN 098/01. These messages often detail changes to required documentation, submission processes, or system functionalities related to dependency applications and emergency data. Staying current with these NAVADMINs is critical for ensuring compliance and avoiding processing delays.

The referenced NAVADMINs provide essential guidance alongside the Navy Military Personnel Manual, Source Data System Procedures Guide, and Defense Joint Military Pay System Procedures Training Guide. These resources collectively define the correct procedures for completing and submitting the form. Ignoring NAVADMIN updates can lead to incomplete applications or incorrect data, potentially impacting benefits and emergency contact information. Regularly checking for new NAVADMINs is therefore a vital part of maintaining accurate records.

Data Security & Privacy

NAVPERS 1070/602 contains sensitive dependency information; adhere to military personnel manuals, Data System Procedures Guides, and prioritize data protection protocols.

Handling Sensitive Dependency Information

NAVPERS 1070/602 demands utmost care due to the highly sensitive nature of the dependency data it contains. This form includes personally identifiable information (PII) regarding family members, encompassing details crucial for benefits eligibility and emergency contact purposes. Strict adherence to established security protocols is paramount when accessing, processing, and storing this information.

Personnel handling these forms must be thoroughly familiar with relevant regulations outlined in the Navy Military Personnel Manual, the Source Data System Procedures Guide, and the Defense Joint Military Pay System Procedures Training Guide. Unauthorized disclosure or misuse of dependency data can have severe consequences, potentially impacting individuals’ benefits and compromising their privacy. Always ensure secure transmission and storage methods, limiting access to authorized personnel only. Remember to follow all guidance from NAVADMIN messages, such as 098/01, regarding data handling procedures.

Compliance with Military Personnel Manuals

NAVPERS 1070/602 processing necessitates strict adherence to governing military personnel manuals. The Navy Military Personnel Manual (NAVMPERSMAN) provides foundational guidance on dependency documentation and eligibility requirements. Furthermore, the Source Data System Procedures Guide details specific procedures for inputting and maintaining dependency data within relevant systems like NSIPS and RED/DA.

Compliance ensures consistency and accuracy in benefits administration. Personnel must consult these manuals for current policies regarding required documentation, acceptable proof of relationships, and procedures for updating dependency information. Deviations from established guidelines can lead to processing delays or incorrect benefit allocations. Staying current with NAVADMIN messages, such as 098/01, is also vital, as these often announce policy changes or clarifications impacting NAVPERS 1070/602 procedures. Proper compliance safeguards both the service member and their dependents.

Data System Procedures Guide Adherence

Strict adherence to the Data System Procedures Guide is paramount when handling NAVPERS 1070/602 forms and associated dependency data. This guide outlines the precise steps for navigating systems like NSIPS Report Manager and RED/DA to locate, download, complete, and submit the form. It details specific field requirements, acceptable input formats, and validation rules to prevent errors.

Following the guide ensures data integrity and facilitates seamless processing. Personnel must understand procedures for generating new forms within RED/DA, often requiring a remark entry (e.g., “submitting PG2 due to updates”) to prompt system regeneration. The guide also clarifies how to address system errors and update information post-submission. Consistent application of these procedures minimizes discrepancies and supports accurate dependency records, crucial for benefit entitlements and emergency contact information.

seat and guide machine

Valve seat and guide machines are essential for engine rebuilding, ensuring optimal performance and longevity․ Robins Machines stands as a world-leading brand, offering
precision tools for valve seat cutting and guide servicing, vital for cylinder head repair․

What is a Seat and Guide Machine?

A seat and guide machine is a specialized tool used in engine repair facilities to precisely recondition valve seats and valve guides within cylinder heads․ These machines enable technicians to restore the critical sealing surfaces that ensure proper combustion and engine efficiency․ They address wear and damage caused by heat, pressure, and the constant movement of valve components․

Robins Machines, a leading manufacturer, produces a range of these machines – from manual models like the SG4 to more advanced options like the SG8E XL for large diesel engines․ The core function involves accurately cutting and resurfacing valve seats to create a perfect seal, and precisely aligning or replacing valve guides to maintain valve stability․

The Importance of Valve Seat and Guide Precision

Precise valve seat and guide work is paramount for optimal engine performance․ Imperfect seals lead to compression loss, reduced power, and increased emissions․ Worn valve guides cause valve wobble, impacting sealing and potentially leading to valve damage․ Accurate reconditioning, using a seat and guide machine, ensures a tight, reliable seal between the valve and seat․

Robins Machines emphasizes this precision in their designs․ Even slight inaccuracies can negate the benefits of a rebuild․ Maintaining correct valve angles, as in a three-angle valve job, is crucial․ Proper guide alignment prevents premature wear and ensures consistent valve operation, maximizing engine life․

Types of Seat and Guide Machines

Seat and guide machines range from manual options for basic repairs to semi-automatic and fully automatic models, like those from Robins Machines, offering increased efficiency and precision․

Manual Seat and Guide Machines

Manual seat and guide machines represent the foundational technology in valve seat servicing․ These machines require the operator to control all aspects of the cutting and guide replacement processes, demanding significant skill and experience․ While offering a lower initial investment, they necessitate more labor-intensive work․ They are suitable for shops handling lower volumes or specializing in classic engine restorations where precision and a craftsman’s touch are paramount․ Though older models might require sourcing replacement parts, they remain a viable option for specific applications, especially considering the potential for cost-effective repairs․

Semi-Automatic Seat and Guide Machines

Semi-automatic seat and guide machines bridge the gap between manual operation and full automation․ These machines typically automate certain functions, such as the cutting head feed or guide driving process, while still requiring significant operator control for positioning and adjustments․ This blend offers increased efficiency and consistency compared to fully manual machines, reducing operator fatigue and potential for error․ They represent a good balance for shops seeking improved productivity without the substantial investment of fully automatic systems, offering a practical upgrade path․

Fully Automatic Seat and Guide Machines

Fully automatic seat and guide machines, like the Robins VR 10-P, represent the pinnacle of valve seat servicing technology․ These machines minimize operator intervention, automating the entire valve refacing and reconditioning process – grinding, cutting, and guide replacement․ They utilize pre-programmed settings and advanced control systems to ensure consistent, high-precision results․ While representing a significant investment, fully automatic machines drastically increase throughput and reduce labor costs, making them ideal for high-volume engine rebuilding operations demanding ultimate efficiency and repeatability․

Key Components of a Seat and Guide Machine

Essential components include the valve seat cutting head, guide driver, precision pilots and cutting tools, and a robust motor with a sophisticated control system for accuracy;

Valve Seat Cutting Head

The valve seat cutting head is the core of the machine, responsible for precisely reshaping the valve seat to the correct angle and finish․ It houses the cutting tools and utilizes a rotating motion to remove material․ Modern heads often feature adjustable capabilities, allowing for variations in seat angles – crucial for a proper three-angle valve job․ The head’s design ensures concentricity with the valve guide, guaranteeing a perfect seal when the valve is seated․ Quality heads, like those found in Robins Machines, prioritize durability and consistent performance, contributing significantly to the overall accuracy of the valve job․

Valve Guide Driver

The valve guide driver is a critical component used for the precise installation and removal of valve guides within the cylinder head․ It ensures the guides are seated squarely and at the correct depth, preventing valve misalignment and potential engine damage․ These drivers often accommodate various guide sizes, requiring interchangeable bushings or adapters․ Proper use of the driver, alongside honing techniques, addresses wear typically found at the top and bottom of valve guides․ Robins Machines’ designs prioritize ease of use and secure guide placement, contributing to a reliable and long-lasting repair․

Pilots and Cutting Tools

Pilots, crucial for guiding the cutting head, ensure accurate valve seat angles․ Both fixed and live pilot systems exist, with carbide pilots being the preferred material due to their exceptional hardness and wear resistance․ Cutting tools themselves vary depending on the machine and application, ranging from specialized cutters for different seat angles to adjustable options for versatility․ Investing in a comprehensive set of pilots can reduce costs compared to live pilot systems, though live pilots offer enhanced precision․ Robins Machines utilizes high-quality pilots and cutting tools for optimal results․

Motor and Control System

Seat and guide machines rely on robust motor and control systems for precise operation․ Older machines may utilize variable speed control, though components can be aged․ Modern systems often employ either DC or three-phase motors, with corresponding controllers․ The cost of motor controllers has significantly decreased in recent years, making upgrades more accessible․ Variable speed control, even for a 1hp motor, can be achieved for under $200, though wiring time adds to the overall expense․ Precise motor control is fundamental to accurate valve seat cutting․

Fixed vs․ Live Pilots

Fixed pilots offer a gradual taper and require fewer sizes, lowering investment costs․ Live pilots provide enhanced accuracy, particularly for worn valve guides, but are pricier․

Advantages of Fixed Pilots

Fixed pilots present a cost-effective solution for valve seat and guide machine operations․ Their gradual taper design efficiently addresses common wear patterns found in valve guides, specifically at the top and bottom sections․ A significant benefit lies in the reduced financial outlay; because fewer pilot sizes are needed compared to live pilot systems, the initial investment is approximately 30% lower;

This makes fixed pilots particularly appealing for shops handling a diverse range of engine types where extensive pilot coverage isn’t immediately necessary․ They offer a reliable and economical approach to valve seat and guide maintenance․

Advantages of Live Pilots

While requiring a larger initial investment, live pilots offer enhanced precision and adaptability in valve seat and guide machining․ Their design allows for more accurate alignment and cutting, particularly crucial when dealing with heavily worn or damaged valve seats․ Though not explicitly detailed in the provided text, the implication is that live pilots facilitate a superior finish and longer-lasting repair․

The ability to accommodate a wider range of valve angles and seat geometries makes them invaluable for specialized engine work and performance applications, justifying the increased cost for professional rebuilders․

Carbide Pilot Material

The selection of carbide as the material for pilots in seat and guide machines isn’t accidental; it’s a necessity for durability and precision․ As stated, regardless of choosing fixed or live pilots, utilizing carbide is paramount․ This exceptionally hard material resists wear and maintains dimensional stability during the cutting process, ensuring accurate valve seat angles․

Carbide pilots withstand the high stresses and temperatures generated during valve seat grinding, extending their lifespan and reducing the frequency of replacement, ultimately contributing to cost-effectiveness and consistent results․

Robins Machines: A Leading Manufacturer

Robins Machines is globally recognized for its simple and smart engine rebuilding solutions, specializing in valve seat and guide machines, ensuring quality and precision․

SG4 Valve Seat and Guide Machine

The SG4 Valve Seat and Guide Machine, manufactured by Robins Machines, represents a foundational tool for engine rebuilders․ It’s designed for precision valve seat cutting and guide replacement, catering to a broad range of engine sizes․ This machine offers a balance of manual operation and accuracy, making it suitable for workshops prioritizing quality workmanship․ It facilitates the restoration of optimal sealing surfaces, crucial for maintaining compression and engine efficiency․ The SG4 is known for its robust construction and reliable performance, embodying the core principles of the Robins brand – simplicity and smart engineering․

SG5 Valve Seat and Guide Machine

The SG5 Valve Seat and Guide Machine, another offering from Robins Machines, builds upon the foundation of the SG4, providing enhanced capabilities for professional engine rebuilders․ While details are limited in readily available sources, the SG5 likely incorporates improvements in precision, efficiency, or versatility; As a product within the Robins lineup, it’s expected to maintain the brand’s commitment to simple, smart design․ It’s intended for valve seat cutting and guide work, contributing to optimal cylinder head performance and longevity․ Further specifications would reveal its specific advantages over the SG4 model․

SG6 Valve Seat and Guide Machine

The SG6 Valve Seat and Guide Machine, manufactured by Robins Machines, continues the company’s tradition of providing robust solutions for engine rebuilding professionals․ Positioned within their product range, the SG6 likely offers a balance of features and affordability․ While specific details are scarce, it’s designed for precision valve seat cutting and guide servicing, crucial for restoring cylinder head performance․ As with other Robins machines, simplicity and reliability are key design principles․ The SG6 contributes to achieving optimal sealing and efficient combustion within engines, ensuring longevity and power․

SG7 Valve Seat and Guide Machine

The SG7 Valve Seat and Guide Machine, a product of Robins Machines, represents a step up in precision and capability within their lineup․ Described as a “Precision Cylinder Head Seat & Guide Honing Machine,” the SG7 focuses on refining valve seat and guide geometry after initial cutting․ This honing process is critical for achieving a perfect seal and smooth valve operation․ It likely incorporates features for accurate guide alignment and seat finishing, contributing to enhanced engine performance and reduced emissions․ Robins emphasizes smart, simple designs, and the SG7 embodies this philosophy․

SG8 Valve Seat Cutting and Guide Machine

The SG8 Valve Seat Cutting and Guide Machine, manufactured by Robins Machines, is a versatile tool designed for comprehensive valve seat and guide servicing․ It combines both cutting and guide work capabilities into a single unit, streamlining the engine rebuilding process․ This machine likely handles a wide range of engine sizes and valve types, offering adjustability for various seat angles․ As a core product in the Robins lineup, the SG8 aims to deliver precision and efficiency, crucial for professional engine repair shops seeking reliable performance․

SG8E XL Large Diesel Seat and Guide Machine

The SG8E XL, from Robins Machines, is specifically engineered for large diesel engine valve seat and guide maintenance․ This machine addresses the demands of heavier-duty applications, offering increased capacity and robustness compared to standard models․ It’s designed to handle the larger components and tighter tolerances common in diesel cylinder heads․ The “XL” designation indicates an extended work envelope, accommodating substantial engine blocks․ Professionals working with diesel engines will find the SG8E a powerful and precise solution for critical repairs․

SG8MTS Manualmatic Seat and Guide Machine

The SG8MTS from Robins Machines represents a blend of manual control and automated assistance, offering versatility for valve seat and guide work․ This “Manualmatic” design allows technicians to perform operations with a combination of hands-on precision and powered functionality․ It’s a cost-effective solution for shops needing a flexible machine capable of handling diverse repair tasks․ The SG8MTS provides a balance between the simplicity of fully manual machines and the efficiency of fully automatic systems, appealing to a broad range of users․

Valve Seat Cutting Techniques

Valve seat cutting often employs a three-angle valve job for optimal sealing and airflow․ Variations in these angles are crucial, impacting engine performance and efficiency․

Three-Angle Valve Job

A three-angle valve job is a cornerstone of precision engine rebuilding, significantly enhancing cylinder head performance․ This technique involves cutting the valve seat at three distinct angles: a primary angle for initial contact, a secondary angle to increase the sealing surface, and a tertiary angle to improve airflow․

This method ensures a superior seal, maximizing compression and minimizing back leakage․ Properly executed, a three-angle valve job contributes to increased horsepower, improved fuel efficiency, and reduced emissions․ Robins Machines’ seat and guide machines facilitate achieving these precise angles consistently, crucial for optimal engine function․

Valve Seat Angle Variations

Valve seat angle variations are critical for tailoring engine performance to specific needs․ While a standard three-angle valve job is common, adjustments to these angles impact airflow and combustion․ Steeper angles generally enhance airflow at high lift, beneficial for performance engines, while shallower angles improve sealing at lower lift, suited for daily drivers․

Seat and guide machines, like those from Robins Machines, allow technicians to precisely adjust these angles․ Understanding the interplay between valve seat geometry and engine characteristics is vital․ Correct angle selection optimizes cylinder head efficiency, maximizing power and responsiveness․

Valve Guide Repair and Replacement

Valve guide repair involves honing or replacing worn guides, crucial for maintaining valve alignment․ Robins SGH7 offers precision honing, ensuring optimal valve control and sealing․

Identifying Worn Valve Guides

Determining if valve guides require attention is a critical step in engine rebuilding․ Worn valve guides manifest through several telltale signs․ Excessive valve stem-to-guide clearance is a primary indicator, often detected during a valve job․ Look for visible wear patterns, particularly at the top and bottom of the guide where the valve spends most of its time reciprocating․

Back-and-forth movement of the valve stem within the guide, beyond acceptable tolerances, confirms wear․ Oil consumption can also increase as worn guides allow oil to seep past the valve seals․ Careful inspection, combined with precision measuring tools, is essential for accurate diagnosis and proper repair using a seat and guide machine․

Valve Guide Honing

Valve guide honing is a precision finishing process performed after guide replacement or when slight wear is present․ Utilizing specialized honing tools within a seat and guide machine, the inner diameter of the guide is carefully refined to achieve the correct interference fit with the valve stem․

This process ensures smooth valve operation and optimal sealing․ Robins SGH7 is a precision cylinder head seat and guide honing machine designed for this purpose․ Honing removes minor imperfections and establishes a consistent bore, crucial for preventing valve sticking and maintaining proper valve alignment․ Proper honing is vital for long-term engine reliability․

Motor Control and Variable Speed

Seat and guide machines often utilize DC or three-phase motors with variable speed controllers, offering flexibility․ Modern controllers are affordable, costing under $200 for a 1hp motor․

DC Motor Controllers

DC motor controllers for seat and guide machines provide precise speed regulation, crucial for different cutting and honing operations․ These controllers manage the voltage and current supplied to the DC motor, allowing operators to adjust the spindle speed to suit the valve seat material and desired finish․ While older machines may have aging controllers, replacements are now significantly more affordable – often under $200 for a 1 horsepower motor․

However, the cost of the controller itself is only part of the equation; wiring and setup require skilled labor, adding to the overall expense․ Proper installation ensures smooth, reliable operation and extends the machine’s lifespan․

Three-Phase Motor Controllers

Three-phase motor controllers, like their DC counterparts, are vital for regulating the speed and power delivered to the motor in seat and guide machines․ They offer robust performance and are commonly found in more powerful or modern machines․ Similar to DC controllers, the price of three-phase options has decreased considerably over time, making upgrades and repairs more accessible․

A variable speed control for a 1hp three-phase motor can also be found for under $200, though, as with DC controllers, the labor cost for wiring and configuration should be factored into the total expense․

Cost Considerations for Motor Controllers

When considering motor controllers for a seat and guide machine, particularly for older models, the cost landscape has shifted favorably․ Historically expensive, both DC and three-phase motor controllers are now significantly more affordable․ A variable speed controller for a 1 horsepower motor, whether DC or three-phase, can be acquired for under $200․

However, it’s crucial to remember that the component cost represents only a portion of the total expense; the time and expertise required for proper wiring and setup are also significant factors․

Adjustable Seat Pocket Cutters

Adjustable seat pocket cutters are a valuable addition to a seat and guide machine, especially for shops performing numerous seat installations, offering increased versatility․

Benefits of Adjustable Cutters

Adjustable seat pocket cutters significantly enhance a machine’s capability, allowing technicians to accommodate a wider range of valve seat angles and sizes without frequent tool changes․ This flexibility is particularly beneficial when working with diverse engine types and cylinder heads․ They streamline the process, reducing setup time and improving overall efficiency in the workshop․

Furthermore, adjustable cutters minimize the need for a large inventory of fixed cutters, representing a cost-effective solution for many repair facilities․ They provide greater precision and control during the cutting process, leading to superior valve seat geometry and improved engine performance․

Applications for Adjustable Cutters

Adjustable seat pocket cutters are invaluable when performing extensive cylinder head repairs, especially for shops handling a high volume of diverse engine work․ They excel in situations requiring frequent seat angle adjustments, such as three-angle valve jobs or when adapting to different valve seat designs․

These cutters are particularly useful for performance engine builds where customized valve angles are crucial for optimizing airflow and maximizing power output․ They also prove essential when restoring older engines with worn or damaged valve seats, offering a versatile solution for various repair scenarios․

Maintenance and Troubleshooting

Regular maintenance—like lubrication and inspection—is key for seat and guide machines․ Common issues, such as motor control failures, can often be resolved with affordable replacements․

Regular Maintenance Procedures

Consistent upkeep extends the lifespan and accuracy of your seat and guide machine․ Prioritize frequent lubrication of all moving parts, referencing the manufacturer’s guidelines for specific points; Regularly inspect belts for wear and tension, and promptly replace any showing signs of damage․ Clean the machine thoroughly after each use, removing metal shavings and debris․ Check electrical connections for looseness or corrosion, ensuring safe operation․ Verify pilot and cutter alignment periodically․ A proactive approach to maintenance minimizes downtime and costly repairs, guaranteeing precision and reliability in your valve jobs․

Common Issues and Solutions

Several issues can arise with seat and guide machines․ Variable speed control malfunctions, particularly in older models, can occur – consider modern, affordable motor controllers as replacements․ Misalignment of cutters or pilots leads to inaccurate cuts; regular checks and adjustments are crucial․ Worn or damaged pilots necessitate replacement, ideally with carbide materials for durability․ Electrical problems, like loose connections, require careful inspection and tightening․ If a motor controller fails, a replacement under $200 is often feasible․ Addressing these promptly prevents further damage and maintains precision․

Future Trends in Seat and Guide Machine Technology

Automation and CNC integration are poised to revolutionize seat and guide machines, alongside the development of advanced materials for cutting tools and increased precision․

Automation and CNC Integration

The integration of automation and CNC (Computer Numerical Control) technology represents a significant leap forward in seat and guide machine capabilities․ Traditionally, these machines relied heavily on manual operation, demanding skilled technicians for precise results․ CNC integration allows for pre-programmed cutting paths, ensuring consistent accuracy and reducing operator fatigue․

This shift towards automation minimizes human error, enhances repeatability, and dramatically improves production efficiency, particularly in high-volume engine rebuilding environments․ Future machines will likely feature robotic arms for tool changes and automated inspection systems, further streamlining the valve seat and guide servicing process․

Advanced Materials and Cutting Tools

Advanced materials are revolutionizing seat and guide machine technology, focusing on durability and precision․ Carbide pilots are already standard, offering exceptional wear resistance during valve seat cutting․ However, research continues into even harder materials for cutting tools, extending their lifespan and maintaining consistent cutting performance․

Furthermore, innovative coating technologies are being applied to cutting tools to reduce friction and heat buildup․ These advancements, coupled with improved machine designs, contribute to finer surface finishes and tighter tolerances, ultimately enhancing the quality and reliability of engine valve jobs․

mercedes 12v battery see owners manual

Mercedes-Benz 12V Battery: A Comprehensive Guide (Referencing Owner’s Manual)

This guide, referencing the official Mercedes-Benz owner’s manual, details the 12V battery system․
It covers starting issues, charging, and maintenance, especially for vehicles with a 48V system․
Consult your manual for specific instructions and warnings related to your model year․

Understanding the 12V Battery’s Role

The 12V battery in your Mercedes-Benz serves as the primary power source for starting the engine and operating essential vehicle systems․ Unlike the 48V system, which handles more demanding functions, the 12V battery powers components like lights, infotainment, and the vehicle’s electronic control units․ Even with the 48V system present, the 12V battery remains crucial for initial startup and maintaining power when the engine is off․

Modern Mercedes-Benz vehicles, particularly those equipped with the 48V technology, utilize a dual-battery system․ The 12V battery doesn’t directly power the 48V components; instead, it initiates the starting process, and the 48V system then takes over once the engine is running․ The vehicle is designed to charge the 12V battery while the engine is operating, indicated by a yellow light on the dashboard․ However, prolonged use of accessories when the engine is off can drain the 12V battery, potentially leading to a “Vehicle Cannot Start” message․ Referencing the owner’s manual is vital for understanding the specific interplay between the 12V and 48V systems in your vehicle․

Location of the 12V Battery

Locating the 12V battery in your Mercedes-Benz is essential for jump-starting or performing maintenance․ While the exact location can vary depending on the model and year, it’s commonly found under the hood․ However, in many newer Mercedes-Benz vehicles, particularly those with 48V systems, the 12V battery is often positioned in the rear of the vehicle, typically under the trunk floor․

Consult your owner’s manual for the precise location specific to your vehicle․ The manual will provide detailed diagrams and instructions, preventing damage during access․ Jump-start connection points are specifically designated on the 12V battery, and using the incorrect terminals can cause serious electrical damage․ It’s crucial to identify the correct battery before attempting any work․ Some models may have protective covers over the terminals, which need to be removed carefully․ Always refer to the owner’s manual before attempting to locate or access the 12V battery to ensure safety and avoid potential issues․

12V Battery Specifications & Types

Mercedes-Benz vehicles utilize various 12V battery types, primarily Absorbent Glass Mat (AGM) batteries․ These batteries are known for their durability, low maintenance, and resistance to vibration․ The owner’s manual specifies the correct battery group size and cold cranking amps (CCA) required for your specific model․ Using a battery with insufficient CCA can lead to starting problems, especially in cold weather․

Battery capacity is typically measured in Amp-hours (Ah), indicating the amount of charge the battery can store․ Newer models, especially those with advanced start-stop systems and 48V architecture, often require higher-capacity AGM batteries․ The manual details the voltage (12V) and physical dimensions for proper fitment․ It’s crucial to adhere to these specifications when replacing the battery․ Using an incorrect type or size can damage the vehicle’s electrical system․ Always consult the owner’s manual to confirm the correct 12V battery specifications for your Mercedes-Benz․

Checking the 12V Battery’s Condition

Regularly assessing your Mercedes-Benz’s 12V battery health is vital for reliable operation․ The owner’s manual recommends visual inspections for corrosion around the terminals, ensuring connections are tight and clean․ A multimeter can measure the battery’s voltage; a fully charged 12V battery should read approximately 12․6 volts․ A reading below 12․4 volts indicates a partial discharge, while below 12․0 volts suggests a significantly discharged battery․

Many auto parts stores offer free battery testing services, providing a more comprehensive assessment of the battery’s cold cranking amps (CCA) and overall health․ Pay attention to any dashboard warning lights related to the electrical system, as these can signal a failing battery․ The manual details the specific warning lights to monitor․ Remember that frequent short trips may not allow the battery to fully recharge, potentially shortening its lifespan․ Proactive monitoring, as outlined in the owner’s manual, helps prevent unexpected breakdowns․

Symptoms of a Failing 12V Battery

Recognizing the signs of a failing 12V battery in your Mercedes-Benz is crucial for preventing unexpected issues․ A common symptom is a slow engine crank during startup, indicating the battery struggles to deliver sufficient power․ Dim headlights or interior lights, especially when the engine is idling, are another telltale sign․ The owner’s manual highlights these as potential indicators․

You might encounter electrical system malfunctions, such as erratic behavior of the infotainment system or power windows․ A “Vehicle Cannot Start” message on the dashboard, as detailed in the manual for 48V systems, often points to a low 12V battery state of charge․ Frequent jump starts needed to start the vehicle are a clear indication of a weakening battery․ A swollen battery case or a noticeable sulfur smell also suggest a problem․ Ignoring these symptoms can lead to a complete battery failure and potential inconvenience․

Jump Starting a Mercedes-Benz (12V System)

Jump starting a Mercedes-Benz with a depleted 12V battery requires careful adherence to the procedure outlined in the owner’s manual to avoid damaging the vehicle’s sensitive electronics․ First, ensure both vehicles are switched off․ Connect the red (positive) cable to the positive terminal of the discharged battery, then to the positive terminal of the assisting battery․ Next, connect the black (negative) cable to the negative terminal of the assisting battery․

Crucially, connect the final black cable to a grounded metal part of the Mercedes-Benz engine block, away from the battery, to minimize spark risk․ Start the assisting vehicle and let it run for a few minutes․ Then, attempt to start the Mercedes-Benz․ If it starts, let both vehicles run connected for several minutes before disconnecting the cables in the reverse order of connection․ Refer to your owner’s manual for specific jump-start connection points, especially for models with a 48V system, as incorrect connection can cause damage․

Using a Battery Charger (12V) ౼ Recommended Practices

When using a 12V battery charger on your Mercedes-Benz, always prioritize safety and follow the recommendations detailed in the owner’s manual․ Utilize a charger specifically approved for Mercedes-Benz vehicles to ensure compatibility and prevent damage to the battery management system․ Disconnect the battery from the vehicle before charging for optimal results and safety, unless the charger is specifically designed for in-vehicle charging․

Connect the charger clips correctly – red to positive, black to negative․ Select the appropriate charging rate based on the battery’s discharge level; a slower charge is generally gentler on the battery․ Regularly monitor the charging process and avoid overcharging, as this can reduce battery lifespan․ After charging, reconnect the battery and allow the vehicle’s system to perform a battery registration process, if required, as outlined in the owner’s manual․ This ensures accurate battery status monitoring․

48V System Interaction & 12V Battery Charging

Modern Mercedes-Benz vehicles equipped with a 48V system utilize a sophisticated interaction between the two voltage levels․ The 48V battery primarily powers high-demand components, while the 12V battery continues to support traditional systems like lights, infotainment, and starting․ Crucially, the 12V battery isn’t directly charged by the 48V system; instead, a DC-DC converter transfers energy from the 48V battery to maintain the 12V battery’s charge․

If the 48V battery’s state of charge is critically low, the vehicle may be unable to start, and a warning message will appear, advising you to switch off non-essential electrical consumers․ Jump-starting in these scenarios requires connecting the charger to the 12V jump-start terminal, allowing the 48V system to indirectly charge both batteries via the converter․ Refer to your owner’s manual for specific jump-starting procedures and approved charger specifications to avoid damaging the integrated system․

Automatic Battery Management System

Mercedes-Benz vehicles incorporate an Automatic Battery Management (ABM) system designed to optimize battery life and performance․ This intelligent system continuously monitors battery voltage, current flow, and temperature to adapt the charging process to the battery’s specific needs․ The ABM system minimizes sulfation, a common cause of battery degradation, by employing adaptive charging algorithms․

The system also manages parasitic drain, reducing power consumption when the vehicle is stationary․ After a battery replacement, the ABM system requires a reset procedure, often performed using diagnostic equipment, to properly recognize the new battery’s characteristics․ Failure to reset the system can lead to inaccurate charge level readings and potentially reduced battery lifespan․ Consult your owner’s manual for detailed instructions on the battery reset procedure specific to your vehicle model and year, ensuring optimal system functionality․

Dashboard Warning Lights Related to 12V Battery

Several dashboard warning lights can indicate issues with the 12V battery or charging system in your Mercedes-Benz․ A battery symbol illuminated in yellow often signifies a charging system malfunction, meaning the alternator may not be adequately charging the battery while the engine is running․ This requires immediate attention to prevent complete battery discharge․ A red battery symbol typically indicates a more severe electrical system problem, potentially impacting critical vehicle functions․

The “Check Engine” light can also illuminate in conjunction with battery-related issues, as the engine control unit relies on a stable power supply․ Furthermore, a message like “Vehicle Cannot Start – See Owner’s Manual” may appear, particularly in models with a 48V system, indicating insufficient 48V battery charge impacting the 12V system’s starting capability․ Always refer to your owner’s manual for a comprehensive explanation of each warning light and recommended actions․

12V Battery Replacement – Step-by-Step Guide

Replacing the 12V battery requires careful attention․ First, ensure the vehicle is switched off and the key removed․ Locate the battery (refer to your owner’s manual for its specific location)․ Disconnect the negative terminal first, then the positive, using appropriate tools․ Carefully remove the battery retaining clamp․ Lift the old battery out, avoiding any contact with acid․

Before installing the new battery, clean the battery tray and terminals․ Position the new battery correctly and secure it with the retaining clamp․ Connect the positive terminal first, then the negative․ Ensure connections are tight․ Crucially, after replacement, the Battery Management System (BMS) must be reset using a compatible diagnostic tool to properly recognize the new battery’s capacity․ Failure to do so can lead to incorrect charging and reduced battery life․ Consult your owner’s manual or a qualified technician for BMS reset procedures․

Resetting the Battery Management System After Replacement

Following a 12V battery replacement in your Mercedes-Benz, resetting the Battery Management System (BMS) is essential․ The BMS monitors and controls the charging process, and needs to be informed of the new battery’s specifications․ Without a reset, the system may undercharge or overcharge the battery, significantly reducing its lifespan and potentially causing issues with vehicle electronics;

The owner’s manual details the specific reset procedure for your vehicle model․ Generally, this involves using a diagnostic scan tool capable of accessing the BMS․ The tool will guide you through a calibration process, where you’ll input the new battery’s type and capacity․ Some models may require a specific coding sequence․ Do not attempt this process without the correct equipment and knowledge․ Incorrect BMS settings can lead to system malfunctions․ A qualified Mercedes-Benz technician can perform this reset accurately and efficiently, ensuring optimal battery performance and vehicle operation․

Preventative Measures to Extend 12V Battery Life

To maximize the lifespan of your Mercedes-Benz 12V battery, several preventative measures are recommended, as outlined in the owner’s manual․ Minimize short trips, as the alternator may not fully recharge the battery during brief drives․ Regularly inspect the battery terminals for corrosion and clean them as needed, ensuring a secure connection․ Avoid leaving electrical accessories, such as interior lights or the radio, on when the engine is off․

Consider disconnecting the battery’s negative terminal if the vehicle will be stored for an extended period – however, be aware this may reset some vehicle settings․ Utilizing a battery tender or trickle charger during prolonged inactivity can maintain optimal charge levels․ Furthermore, be mindful of aftermarket accessories that continuously draw power, even when the vehicle is off․ A portable jump starter is a useful addition for emergencies, but proactive maintenance, following the owner’s manual guidelines, is the best approach to a long-lasting 12V battery․

Impact of Accessories on 12V Battery Drain

Modern Mercedes-Benz vehicles, particularly those with advanced features, can experience significant 12V battery drain from various accessories․ Dashcams, even when seemingly off, often maintain a standby power draw․ Similarly, aftermarket alarms, GPS trackers, and USB charging ports can continuously siphon energy․ The owner’s manual emphasizes the importance of understanding these parasitic drains․ Even the vehicle’s computer systems require a constant, albeit small, current to maintain settings and security features․

Excessive use of accessories while the engine is off, or leaving them active during short trips, can quickly deplete the battery․ It’s recommended to power accessories only when the engine is running or to ensure they are completely switched off when not in use․ Regularly monitoring the battery’s condition and considering a battery management system can help mitigate the impact of these accessory-related drains, preserving battery life and preventing unexpected starting issues․

Troubleshooting “Vehicle Cannot Start” Message

If your Mercedes-Benz displays a “Vehicle Cannot Start” message, the owner’s manual directs you to first attempt a simple reset: switch the vehicle off and then back on․ If the message persists, it signals a potential issue requiring professional attention․ For vehicles equipped with a 48V on-board electrical system, this message often indicates a critically low 48V battery state of charge, preventing starting․

The manual advises switching off all non-essential electrical consumers to conserve power․ In such cases, jump-starting is recommended using a charger approved by Mercedes-Benz, connected to the 12V battery’s jump-start connection point․ The 48V battery then recharges via the vehicle’s voltage converter․ Ignoring this warning and repeatedly attempting to start the vehicle can exacerbate the problem․ Always consult a qualified specialist workshop for diagnosis and repair, especially if jump-starting proves ineffective․

Owner’s Manual Resources for 12V Battery Information

Your Mercedes-Benz owner’s manual is the primary resource for detailed information regarding the 12V battery system․ It provides specific guidance on battery location, specifications, and recommended maintenance procedures tailored to your vehicle’s model year․ Crucially, the manual outlines the correct procedures for jump-starting, particularly important for models featuring the 48V electrical architecture, where the process differs from traditional systems․

The manual also details dashboard warning lights associated with the 12V battery and charging system, enabling early detection of potential issues․ Furthermore, it offers step-by-step instructions for battery replacement and the essential procedure of resetting the battery management system afterward․ Referencing the manual ensures you follow Mercedes-Benz’s recommended practices, safeguarding your vehicle’s electrical integrity and warranty coverage․ Digital versions are often available through the Mercedes me connect portal, offering convenient access to this vital information․

photo dictionary pdf

What is a Photo Dictionary PDF?

Photo Dictionary PDFs are visually-rich resources combining images with corresponding labels, aiding language learning. They’re digital, portable, and offer a dynamic way to build vocabulary.

These PDFs leverage the power of visual association, making them incredibly effective tools for learners of all ages and language backgrounds.

Definition and Core Concept

Photo Dictionaries, particularly in PDF format, represent a unique intersection of visual learning and lexicography. They are essentially illustrated dictionaries where words are directly linked to photographs or detailed images.

This core concept moves beyond simple definitions, offering contextual understanding through visual representation. Instead of merely reading a description, learners see the object or concept.

The PDF format enhances accessibility, allowing for easy distribution, storage, and use across various devices. These dictionaries aren’t just about translation; they’re about building a strong, visual connection to new vocabulary, fostering quicker comprehension and retention.

The Rise of Visual Learning

Visual learning has gained prominence due to cognitive science highlighting the brain’s efficient processing of images. Photo Dictionary PDFs capitalize on this, offering a powerful alternative to traditional text-based learning methods.

This approach resonates with diverse learning styles, particularly benefiting visual learners who thrive on seeing information. The increasing availability of digital resources and the demand for engaging educational tools further fuel this trend.

PDFs provide a convenient platform for delivering high-quality images, making complex concepts more accessible and memorable. They align with modern pedagogical approaches emphasizing interactive and multi-sensory learning experiences;

Popular Photo Dictionary PDFs

Several Photo Dictionary PDFs stand out, including Usborne, Oxford, Longman, DK Ultimate Visual, and Heinle editions. These resources are widely used for effective language acquisition.

Usborne Picture Dictionary

This dictionary effectively introduces foundational vocabulary, making it suitable for young children and those starting their language journey. The Manthan School has a digital flipbook version available online, showcasing its interactive potential. It’s a visually stimulating resource designed to build early language skills.

Oxford Picture Dictionary (3rd Edition)

The Oxford Picture Dictionary (3rd Edition), readily accessible as a PDF via the Internet Archive, is a comprehensive resource for English language learners; It features thousands of illustrations representing a wide range of vocabulary, categorized for easy navigation.

Uploaded by hama h tahir on February 16, 2020, the Internet Archive offers downloadable versions in various formats, including PDF, JP2 ZIP, and TORRENT. This edition is particularly valued for its detailed depictions and practical, real-world context, aiding comprehension and retention.

Longman Photo Dictionary (3rd Edition)

The Longman Photo Dictionary (3rd Edition), available as a downloadable PDF on the Internet Archive, is a highly regarded visual learning tool. It presents a vast collection of photographs paired with clear English labels, designed to enhance vocabulary acquisition and comprehension.

Uploaded on May 15, 2016, this edition focuses on practical, everyday language, making it ideal for learners preparing for real-life communication. The photographic approach provides strong visual cues, facilitating memory and understanding of new words and concepts.

DK Ultimate Visual Dictionary

DK Ultimate Visual Dictionary, accessible via the Internet Archive, is a comprehensive resource boasting over 33,000 annotated images. This PDF provides a detailed exploration of commonly researched objects and places, spanning diverse categories from technology to nature.

Uploaded on February 27, 2022, it’s more than just a vocabulary builder; it’s a visual encyclopedia. The dictionary’s strength lies in its ability to contextualize words within real-world scenarios, fostering deeper understanding and retention for learners of all levels.

Heinle Picture Dictionary (Second Edition)

Heinle Picture Dictionary’s second edition is a valuable resource for language acquisition, offering a visually engaging approach to vocabulary building. It’s designed to support learners with its clear imagery and accessible labeling, enhancing comprehension.

Notably, this dictionary is accompanied by supplementary materials like workbooks and grammar practice exercises. Bilingual support is also a key feature, aiding translation and solidifying understanding. The availability of free sample lessons allows potential users to experience its effectiveness firsthand.

Benefits of Using Photo Dictionary PDFs

Photo Dictionary PDFs significantly boost vocabulary, improve comprehension, and enhance retention through visual association. They are easily accessible, portable learning tools for all.

Enhanced Vocabulary Acquisition

Photo Dictionary PDFs excel at vocabulary building by directly linking words with corresponding images. This visual connection creates a stronger, more memorable association than traditional rote learning.

Instead of simply memorizing definitions, learners instantly grasp the meaning of new words through context. The comprehensive nature of these dictionaries, showcasing thousands of items, allows for rapid expansion of one’s lexicon;

Furthermore, the categorization within these PDFs – grouping related terms visually – reinforces understanding and facilitates recall. This method proves particularly effective for visual learners, accelerating their vocabulary growth.

Improved Language Comprehension

Photo Dictionary PDFs significantly boost language comprehension by providing a visual framework for understanding. Seeing an object alongside its name clarifies meaning, especially for learners encountering unfamiliar concepts.

This visual support bypasses potential translation difficulties and fosters a more intuitive grasp of the language. The dictionaries often present words within contextual scenes, demonstrating practical usage.

Consequently, learners develop a stronger ability to understand spoken and written language, moving beyond simple word recognition to genuine comprehension. This is crucial for effective communication and overall language proficiency.

Visual Association for Better Retention

Photo Dictionary PDFs excel at enhancing memory through visual association. Our brains process and retain images far more effectively than text alone. Linking a word directly to a corresponding picture creates a stronger neural pathway, solidifying the connection.

This method is particularly beneficial for visual learners, but it aids all learners in remembering new vocabulary. Repeated exposure to these image-word pairings reinforces learning over time, leading to improved recall.

The visual cues act as powerful memory triggers, making it easier to retrieve words when needed, fostering long-term retention.

Accessibility and Portability

Photo Dictionary PDFs offer unparalleled accessibility and portability. Being digital files, they can be easily downloaded and accessed on a wide range of devices – smartphones, tablets, laptops, and computers – anytime, anywhere with an internet connection.

Their digital format also allows for easy sharing and integration into digital learning environments, promoting convenient and flexible language study.

Features to Look for in a Photo Dictionary PDF

Essential features include high-quality images, clear labeling, logical categorization, and, ideally, audio pronunciation. These elements maximize learning and comprehension when using a photo dictionary PDF.

High-Quality Images

Sharp, clear imagery is paramount in a photo dictionary PDF. Images should be detailed enough to easily distinguish objects and their features, facilitating accurate identification and association.
Low-resolution or blurry pictures hinder the learning process, making it difficult to grasp the intended concept.

High-quality visuals support vocabulary acquisition by providing a strong visual anchor for new words. The images must be representative and accurately depict the objects they label, avoiding ambiguity. A visually appealing presentation also enhances engagement and motivation for learners of all levels.

Clear and Concise Labeling

Accurate and straightforward labeling is crucial for effective learning within a photo dictionary PDF. Labels should use commonly understood terminology, avoiding jargon or overly complex phrasing.
Concise labels paired with vibrant images create a strong connection between the word and its visual representation.

The font size and style must be easily readable, ensuring clarity for all users. Precise labeling minimizes confusion and reinforces correct vocabulary usage. Consistent labeling throughout the PDF builds confidence and promotes independent learning, making the dictionary a valuable resource.

Categorization and Organization

Effective photo dictionary PDFs utilize logical categorization to streamline the learning process. Grouping related items – like “food,” “animals,” or “vehicles” – allows users to quickly locate specific vocabulary.
Clear organization, often employing alphabetical order within categories, enhances usability.

A well-structured PDF avoids overwhelming the learner. Hierarchical organization, with broader categories branching into subcategories, provides a comprehensive yet manageable learning experience. This systematic approach fosters efficient vocabulary acquisition and reinforces understanding through contextual association.

Audio Pronunciation (if available)

Integrated audio pronunciation significantly elevates the value of a photo dictionary PDF. Hearing the correct pronunciation alongside the visual representation and written word reinforces learning and improves speaking skills.
Native speaker recordings are particularly beneficial, exposing learners to authentic accents and intonation.

This feature is especially crucial for languages with complex phonetic rules. Interactive PDFs may allow users to click on words to hear them spoken, creating a dynamic and engaging learning experience. The inclusion of audio transforms a static visual aid into a powerful multimedia tool.

How to Effectively Use a Photo Dictionary PDF

Maximize learning by actively engaging with the PDF – create flashcards, practice labeling, and integrate it into broader language study for optimal results!

Interactive Learning Techniques

Photo Dictionary PDFs truly shine when used interactively. Create self-testing quizzes by covering the labels and attempting to recall the corresponding words.

Employ a “labeling game” where you point to images and quickly name them. Utilize the visual cues to construct sentences, reinforcing grammar and vocabulary simultaneously.

Consider digital annotation tools to highlight new words or add personal notes directly onto the PDF pages. Regular, active engagement transforms a passive resource into a powerful learning experience, boosting retention and comprehension.

Integrating with Language Courses

Photo Dictionary PDFs serve as excellent supplementary material within structured language courses. Teachers can assign specific sections for homework, focusing on relevant vocabulary themes.

Incorporate images into classroom activities, like “show and tell” or vocabulary-building games. Utilize the visual aids to clarify complex concepts or cultural references.

Encourage students to create their own visual dictionaries, personalizing their learning experience. Seamless integration enhances comprehension, provides context, and reinforces classroom lessons, leading to improved language proficiency.

Self-Study Strategies

Photo Dictionary PDFs empower independent language learning. Dedicate time each day to explore new categories and vocabulary. Create flashcards using images and labels for active recall practice.

Test yourself regularly by covering the labels and attempting to name the objects. Focus on themes relevant to your interests or daily life for increased motivation.

Utilize the PDF’s search function to quickly locate specific words or concepts. Consistent self-study with a photo dictionary builds vocabulary, improves comprehension, and fosters language confidence.

Using for Translation Purposes

Photo Dictionary PDFs serve as valuable translation aids, particularly for concrete nouns. Visually identifying an object first can bypass linguistic barriers, offering immediate understanding.

Confirming translations with the image provides context and reduces ambiguity. These PDFs are especially helpful when encountering unfamiliar objects or needing to describe items visually.

However, remember that translation isn’t solely about words; cultural context matters. Use the dictionary as a starting point, supplementing with other resources for nuanced translations.

Where to Find and Download Photo Dictionary PDFs

Internet Archive

The Internet Archive stands as a valuable, freely accessible digital library, hosting numerous Photo Dictionary PDFs. Resources like the Oxford Picture Dictionary (3rd Edition) and DK’s Ultimate Visual Dictionary are available for download;

Users can choose from various formats, including PDF, JP2 ZIP, and even torrent downloads, catering to different preferences. The platform facilitates both borrowing and streaming, offering flexibility. Contributions from users like “hama h tahir” enrich the collection, ensuring a diverse range of visual dictionaries are readily available for language learners and educators alike.

This online resource allows users to explore the dictionary in a dynamic, page-turning format, enhancing the learning experience. Users can easily share and download the PDF for free, making it a convenient option for educators and students. The platform’s date-stamped entries, like February 16, 2021, indicate ongoing content updates.

Online Retailers (Amazon, etc;)

Photo Dictionary PDFs are widely accessible through major online retailers like Amazon and others. These platforms typically offer both physical copies and digital PDF versions for purchase.

This provides a convenient and secure way to acquire popular titles such as the Oxford Picture Dictionary and the Longman Photo Dictionary. Retailers often feature customer reviews and detailed product descriptions, aiding informed purchasing decisions. Digital versions allow for instant access and portability, while physical copies offer a traditional learning experience.

Educational Websites

Educational websites frequently host or link to Photo Dictionary PDFs as supplementary learning materials. Many institutions offer free resources to support language acquisition, including downloadable dictionaries.

Photo Dictionary PDFs for Specific Languages

Photo Dictionary PDFs aren’t limited to English; resources exist for Spanish, French, and German learners. These multilingual options provide visual support for diverse language acquisition.

English Photo Dictionaries

English Photo Dictionaries are exceptionally prevalent, catering to a vast learner base. Titles like the Usborne Picture Dictionary and the Oxford Picture Dictionary (3rd Edition) are widely recognized and utilized.

These resources often feature thousands of everyday objects and concepts, clearly labeled with English terminology. They are invaluable for ESL/EFL students, providing a strong visual foundation for vocabulary development.

The Longman Photo Dictionary also stands out, offering comprehensive coverage and practical usage examples. These dictionaries are designed to enhance comprehension and fluency in English.

Spanish Photo Dictionaries

Spanish Photo Dictionaries, while potentially less abundant than their English counterparts, are readily available in PDF format. Many general photo dictionaries, like the DK Ultimate Visual Dictionary, include Spanish translations alongside English labels.

These resources are incredibly beneficial for learners acquiring Spanish as a second language, offering a visual link between words and their meanings. They aid in building vocabulary and improving comprehension skills.

Dedicated Spanish-English photo dictionaries specifically target language learners, providing focused vocabulary sets and pronunciation guides.

French Photo Dictionaries

French Photo Dictionaries in PDF format are valuable tools for language acquisition, mirroring the benefits of English versions. Similar to Spanish resources, comprehensive visual dictionaries like DK’s Ultimate Visual Dictionary often incorporate French translations alongside English terminology.

These dictionaries excel at building vocabulary through visual association, making learning more intuitive and memorable. They are particularly helpful for beginners struggling with abstract concepts.

Dedicated French-English photo dictionaries provide targeted vocabulary and pronunciation support, enhancing the learning experience.

German Photo Dictionaries

German Photo Dictionaries, available as PDFs, offer a visually engaging method for mastering the language. Like their English and Spanish counterparts, these resources pair images with German vocabulary, aiding comprehension and retention.

Resources such as the DK Ultimate Visual Dictionary frequently include German translations, broadening their utility. They are especially beneficial for learners seeking to connect words with concrete objects and concepts.

Dedicated German-English photo dictionaries provide focused vocabulary building and pronunciation guidance, accelerating language proficiency.

Photo Dictionary PDFs for Different Age Groups

Photo Dictionary PDFs cater to diverse learners! Early learners benefit from simple visuals, while elementary students use more complex dictionaries. Adult learners appreciate comprehensive resources.

Early Learners (Preschool/Kindergarten)

Photo Dictionary PDFs for preschoolers and kindergarteners prioritize bright, engaging images representing everyday objects – animals, food, colors, and shapes.

These resources typically feature minimal text, focusing on simple word association. The goal is to build foundational vocabulary through visual recognition.

Look for PDFs with large, clear pictures and limited categories to avoid overwhelming young children. Interactive elements, like simple games or coloring pages, can further enhance learning.

These early introductions to visual dictionaries foster a love of language and prepare children for more advanced learning later on.

Elementary School Students

Photo Dictionary PDFs for elementary students expand on preschool versions, introducing more complex vocabulary and thematic categories – like clothing, transportation, or the environment.

These resources often include slightly longer labels and simple sentences to demonstrate word usage in context. Categorization becomes more detailed, aiding organizational skills.

Effective PDFs for this age group incorporate activities like matching games, fill-in-the-blanks, or picture labeling exercises.

They support classroom learning and encourage independent study, building confidence in reading and comprehension skills.

Adult Learners

Photo Dictionary PDFs for adults prioritize comprehensive vocabulary and nuanced language usage, often including idioms and phrasal verbs alongside core terms.

These resources frequently feature detailed categorization, covering professional, academic, and everyday life contexts. They’re invaluable for workplace communication and travel preparation.

Adult learners benefit from PDFs offering contextual examples, allowing them to understand how words function in real-world scenarios.

The portability of PDF format supports self-directed learning and convenient access to language support anytime, anywhere.

Technical Aspects of Photo Dictionary PDFs

Photo Dictionary PDFs vary in file size and compatibility. Search functionality is crucial for quick lookups, while printing considerations impact usability and cost.

File Size and Optimization

Photo Dictionary PDFs, due to their image-rich nature, can be quite large. File size significantly impacts download speed and storage requirements. Optimization techniques, such as image compression, are vital to reduce the PDF’s overall size without sacrificing visual quality.

Efficient optimization ensures smoother viewing on various devices, including tablets and smartphones. Larger files can lead to slower loading times and potential compatibility issues, especially on older systems. Striking a balance between image resolution and file size is key for a user-friendly experience.

Well-optimized PDFs are more accessible and easier to share, enhancing their overall value as a learning resource.

PDF Compatibility

Photo Dictionary PDFs should ideally be compatible across a wide range of devices and operating systems. PDF compatibility ensures accessibility for all users, regardless of their preferred platform – Windows, macOS, Android, or iOS.

Modern PDFs generally adhere to industry standards, but older versions or those with complex features might present challenges. Testing the PDF on various readers (Adobe Acrobat, Preview, online viewers) is crucial. Ensuring compatibility avoids frustrating display errors or functionality issues.

A universally compatible PDF maximizes its reach and usefulness as an educational tool, fostering broader language learning opportunities.

Search Functionality

Photo Dictionary PDFs are significantly enhanced by robust search functionality. This feature allows users to quickly locate specific words or images within the document, saving valuable time and effort.

Optical Character Recognition (OCR) is vital for searchable PDFs, converting image-based text into machine-readable format. Without OCR, searching is limited to metadata or manually added text layers. A well-implemented search tool improves usability, especially in extensive dictionaries.

Efficient search functionality transforms a static resource into a dynamic learning tool, promoting independent exploration and vocabulary discovery.

Printing Considerations

Photo Dictionary PDFs, due to their visual nature, require careful printing considerations. High resolution is crucial to maintain image clarity; lower resolutions result in pixelated or blurry visuals, hindering comprehension.

Color accuracy is also important, as many dictionaries rely on color-coding or specific hues for differentiation. Paper quality impacts the final output – glossy paper enhances color vibrancy, while matte paper reduces glare.

File size can affect printing speed and cost. Test prints are recommended to optimize settings and ensure satisfactory results before large-scale printing.

cheat sheet drug calculation formula for nurses pdf

Navigating medication administration requires precision. Nurses utilize drug calculation resources, including readily available PDF cheat sheets, to ensure patient safety and accurate dosages.

Importance of Accurate Drug Calculations

Patient well-being hinges on precise medication administration. Incorrect drug calculations can lead to severe adverse effects, ranging from ineffective treatment to life-threatening complications. Nurses rely on dependable resources, like comprehensive drug calculation cheat sheets – often available as PDFs – to minimize errors.

These cheat sheets consolidate essential formulas for dosage calculations, conversions, and infusion rates, providing a quick reference during busy clinical shifts. Utilizing these tools isn’t merely about mathematical accuracy; it’s a critical component of patient safety protocols and professional accountability. Consistent, correct calculations demonstrate a commitment to delivering optimal care and upholding ethical nursing practice.

Common Errors in Medication Administration

Medication errors are a significant concern in healthcare. Frequent mistakes include incorrect dosage calculations, wrong route administration, and omissions. A readily accessible drug calculation cheat sheet, often in PDF format, can mitigate these risks. These resources help nurses avoid common pitfalls like misinterpreting doctor’s orders, failing to account for unit conversions (mg to mcg), or miscalculating infusion rates.

Other errors stem from distractions, fatigue, and lack of standardized procedures. Utilizing a cheat sheet promotes consistency and serves as a valuable double-check, reducing reliance on memory alone. Proactive error prevention, aided by these tools, is paramount for patient safety and legal protection.

Basic Drug Calculation Formulas

Essential formulas underpin safe medication practices. Cheat sheets, often in PDF format, consolidate these – dose, conversion, and infusion rate calculations – for quick reference.

Formula for Dose per Kilogram

Calculating dosages based on a patient’s weight is crucial, especially in pediatric care. The fundamental formula is: Dose (mg) = Weight (kg) x Dose per kg.

Numerous drug calculation cheat sheets, frequently available as downloadable PDFs, prominently feature this formula. These resources often include example problems to illustrate its application.

Understanding units is paramount; ensure weight is in kilograms and the desired dose is expressed per kilogram.

Nurses rely on these cheat sheets for rapid, accurate calculations during busy shifts, minimizing potential medication errors.

PDF versions offer portability and easy access at the point of care, reinforcing safe medication administration practices.

Formula for Converting Between Units (mg to mcg, etc.)

Accurate medication administration frequently demands converting between different units of measurement. A core conversion is milligrams (mg) to micrograms (mcg): 1 mg = 1000 mcg.

Drug calculation cheat sheets, often found as convenient PDF downloads, consistently include this vital conversion factor. They also typically cover other common conversions like grams to milligrams, or liters to milliliters.

Nurses utilize these conversions daily when preparing and administering medications.

Understanding these relationships is essential to prevent dosage errors.

PDF cheat sheets provide a quick reference, reducing cognitive load during critical tasks and promoting patient safety.

Formula for Infusion Rate Calculations (Drops per Minute)

Calculating infusion rates, specifically drops per minute (DPM), is crucial for IV medication delivery. The standard formula is: DPM = (Volume in mL x Drop Factor) / Time in Minutes.

Drop factor, representing the number of drops per milliliter, varies based on the IV tubing used – commonly 10, 15, or 20 gtt/mL.

Comprehensive drug calculation cheat sheets, often available as downloadable PDFs, prominently feature this formula.

These resources simplify the process, ensuring accurate and safe fluid administration.

Nurses rely on these quick references to verify infusion rates, minimizing potential errors and optimizing patient care. Accurate DPM calculations are paramount for effective treatment.

Weight-Based Dosage Calculations

Many medications require dosages calculated by patient weight. Cheat sheets provide formulas and conversion tables, ensuring accurate dosing for pediatric and adult patients.

Pediatric Dosage Calculations

Pediatric drug calculations demand extreme accuracy due to significant weight and developmental differences. Cheat sheets are invaluable tools, offering quick access to essential formulas like dose per kilogram (mg/kg/day) and age-based dosing guidelines. These resources often include conversion factors for different units of measurement, crucial for avoiding errors.

PDF cheat sheets specifically designed for pediatric care frequently feature weight bands to simplify calculations, reducing the risk of miscalculations. They also highlight common pediatric medication dosages and potential alerts for age-related contraindications. Nurses rely on these readily available references to verify calculations and ensure safe medication administration to vulnerable pediatric patients, minimizing potential harm and maximizing therapeutic outcomes.

Adult Dosage Calculations Based on Weight

Calculating adult medication dosages based on weight requires precise application of formulas. Cheat sheets, often available as downloadable PDFs, provide nurses with quick access to these essential calculations, primarily focusing on mg/kg. These resources streamline the process, reducing the potential for errors that could compromise patient safety.

PDF cheat sheets for adult weight-based dosing typically include conversion tables (lbs to kg) and common drug dosages expressed in mg/kg/day. They also often feature reminders about ideal body weight versus actual body weight considerations, particularly for obese patients. Having these formulas readily available minimizes calculation time and supports accurate medication administration, ensuring optimal therapeutic effects and minimizing adverse reactions.

IV Flow Rate Calculations

Precise IV flow rate determination is crucial. Nurses rely on PDF cheat sheets containing formulas for drops per minute (DPM) and milliliters per hour (mL/hr).

Calculating Flow Rate in Drops Per Minute (DPM)

Determining the correct infusion rate in drops per minute (DPM) is a fundamental skill for nurses administering intravenous (IV) medications. A reliable cheat sheet PDF will provide the necessary formula: DPM = (Volume in mL x Drop Factor) / Time in Minutes.

The ‘Volume in mL’ represents the total amount of fluid to be infused. The ‘Drop Factor’ – often labeled on the IV tubing – indicates the number of drops delivered per milliliter. ‘Time in Minutes’ specifies the duration of the infusion.

Accurate DPM calculation ensures the patient receives the prescribed medication at the intended rate. Nurses frequently utilize pre-calculated charts within these PDFs for common infusion scenarios, streamlining workflow and minimizing calculation errors. Always double-check your calculations and verify the DPM with another qualified healthcare professional.

Calculating Flow Rate in Milliliters Per Hour (mL/hr)

Precisely calculating the IV flow rate in milliliters per hour (mL/hr) is crucial for consistent medication delivery. A comprehensive drug calculation cheat sheet PDF typically features the formula: mL/hr = (Total Volume in mL) / (Infusion Time in Hours). This straightforward equation allows nurses to quickly determine the required flow rate.

Understanding the total volume ordered and the prescribed infusion time are essential for accurate calculation. Many cheat sheets also include conversion factors for quickly changing between minutes and hours.

Reliable PDFs often present pre-calculated tables for common scenarios, enhancing efficiency. Always verify your calculations and confirm the mL/hr setting with a colleague to minimize potential medication errors and ensure optimal patient care.

Cheat Sheet Components & PDF Resources

Essential cheat sheets consolidate key formulas, conversion tables, and weight-based dosage guidelines, often available as downloadable PDFs for convenient, on-demand access.

Essential Information for a Drug Calculation Cheat Sheet

A comprehensive drug calculation cheat sheet is invaluable for nurses, streamlining the medication administration process and minimizing potential errors. Core components should include fundamental formulas – dose per kilogram, unit conversions (mg to mcg, etc.), and infusion rate calculations (drops per minute, mL/hr).

Weight-based dosage calculations, particularly for pediatric and adult patients, require dedicated sections. Essential conversion factors (pounds to kilograms) and common pediatric dosage ranges must be readily accessible. Furthermore, inclusion of frequently used infusion rates for common medications, like heparin and insulin, is crucial.

Clearly defined abbreviations, normal dosage ranges for common drugs, and quick reference guides for IV flow rate adjustments enhance usability. A well-organized PDF format allows for easy printing and portability, ensuring nurses have immediate access to critical information at the point of care.

Where to Find Reliable PDF Cheat Sheets

Numerous online resources offer free, downloadable drug calculation cheat sheets for nurses. Reputable nursing schools and universities frequently provide these as study aids, ensuring accuracy and adherence to current standards. Websites dedicated to nursing education, like RegisteredNurseRN.com, often host comprehensive PDF guides.

Professional nursing organizations, such as the American Nurses Association (ANA), may link to or endorse reliable resources. Always verify the source’s credibility and date of publication to ensure the information is up-to-date. Beware of unverified sources or those with outdated formulas.

Searching specifically for “nursing drug calculation cheat sheet PDF” on Google Scholar can yield academic resources. Carefully review any downloaded PDF before relying on its contents, cross-referencing with established pharmacology textbooks and institutional protocols.

Advanced Calculations & Considerations

Complex drips, like heparin and insulin, demand specialized formulas. Cheat sheets must clearly outline these, alongside considerations for patient-specific adjustments.

Heparin Drip Calculations

Heparin drips require meticulous calculations due to their narrow therapeutic index. A comprehensive cheat sheet must include the formula: Units/hour = (Weight in kg x Units/kg/hour).

Furthermore, it should detail converting units (Units/hour to mL/hour) using the heparin concentration (Units/mL) – mL/hour = Units/hour / Units/mL.

Crucially, the cheat sheet needs a section on adjusting the drip based on aPTT results, providing clear guidelines for increasing or decreasing infusion rates.

Protocols for bolus doses and potential antidote administration (protamine sulfate) should also be briefly summarized.

Finally, a reminder to always double-check calculations and verify with another qualified nurse is paramount for patient safety.

Insulin Drip Calculations

Insulin drips demand precise calculations to manage blood glucose effectively. A vital cheat sheet component is the formula: Units/hour = Initial rate (typically based on weight – e.g., 0.1 Units/kg/hour).

It must include a clear conversion factor: Units/hour to mL/hour, utilizing the insulin concentration (Units/mL) – mL/hour = Units/hour / Units/mL.

The cheat sheet should detail a sliding scale adjustment protocol based on frequent blood glucose monitoring (e.g., every hour).

Guidelines for escalating or de-escalating the drip rate based on glucose trends are essential.

Potassium monitoring considerations, as insulin shifts potassium intracellularly, should be briefly noted. Always double-check calculations and collaborate with a healthcare provider.

Resources and Tools

Numerous online calculators and mobile apps simplify drug calculations. Downloadable PDF cheat sheets offer quick reference for essential formulas and conversions, aiding accuracy.

Online Drug Calculation Calculators

A wealth of online drug calculation calculators are available to nurses, providing instant solutions for various dosage problems. These tools often incorporate essential formulas, like those found in PDF cheat sheets, for dose per kilogram, unit conversions (mg to mcg), and infusion rate calculations. Websites dedicated to nursing education and pharmacology frequently host these calculators, offering a convenient way to double-check manual calculations and minimize medication errors.

Many calculators allow input of patient weight, desired dose, and available drug concentration, automatically computing the correct volume to administer. Some even feature specialized calculators for complex scenarios like heparin and insulin drips. While incredibly useful, it’s crucial to remember these tools are aids, and nurses must always verify the results using their clinical judgment and understanding of drug calculations principles – mirroring the knowledge reinforced by a good cheat sheet.

Mobile Apps for Drug Calculations

Numerous mobile applications are designed to assist nurses with drug calculations, offering portability and quick access at the point of care. These apps often function similarly to online calculators, incorporating key formulas found in comprehensive PDF cheat sheets – covering dose calculations, unit conversions, and infusion rates. Many apps allow for customization, enabling nurses to save frequently used calculations or patient-specific information.

Features often include built-in safety checks, such as alerts for potentially dangerous dosages. Some apps even offer offline functionality, ensuring access even without an internet connection. While convenient, nurses should always validate app results against their understanding of pharmacology and dosage principles, just as they would when referencing a printed cheat sheet, to maintain patient safety and accuracy.

promariner prosport 20 plus manual

ProMariner ProSport 20 Plus Manual: A Comprehensive Guide

This detailed manual provides essential information for optimal use of your ProMariner ProSport 20 Plus charger,
covering installation, operation, and troubleshooting for enhanced performance and longevity.

The ProMariner ProSport 20 Plus is a sophisticated, microprocessor-controlled battery charger designed for marine and RV applications. It utilizes a sequential, multi-stage charging process to efficiently and safely charge your batteries, maximizing their lifespan and performance. This charger is part of the ProSport series, offering increased power and performance compared to standard chargers.

Designed for versatility, the ProSport 20 Plus is suitable for various battery types, ensuring compatibility with your specific power needs. Its advanced features, including LED indicators, provide clear insight into the charging status and maintenance mode. This manual will guide you through the installation, operation, and troubleshooting of your ProSport 20 Plus, ensuring a seamless charging experience.

Key Features and Benefits

The ProMariner ProSport 20 Plus boasts several key features, including its advanced microprocessor control and sequential multi-stage charging capability. This ensures batteries receive optimal charging, extending their life and maintaining peak performance. The charger’s design incorporates increased power output for faster charging times, a significant benefit for users with demanding power requirements.

Furthermore, the ProSport 20 Plus offers versatile battery compatibility, accommodating various battery types commonly found in marine and RV setups. Clear LED indicators provide real-time feedback on the charging process, simplifying monitoring and troubleshooting. Its robust construction ensures durability in harsh environments, making it a reliable choice for long-term use. Ultimately, it delivers efficient, safe, and intelligent battery management.

Understanding the Charging Process

The ProSport 20 Plus utilizes a sequential multi-stage charging process, optimizing battery health and maximizing charging efficiency for consistent power delivery.

Sequential Multi-Stage Charging Explained

The ProMariner ProSport 20 Plus employs a sophisticated, sequential multi-stage charging process designed to deliver optimal battery care and performance. This isn’t a simple, one-size-fits-all approach; instead, the charger intelligently cycles through distinct phases tailored to the battery’s current state. Initially, a bulk charge rapidly replenishes the battery’s capacity.

As the battery nears full charge, the process transitions to an absorption phase, reducing current to prevent overcharging and maximize longevity; Following absorption, a float stage maintains the battery at 100% charge with a minimal current, compensating for self-discharge. This ensures the battery remains ready for use.

Upon completion of the charging cycle, the charger enters a maintenance mode, indicated by the blue LED, preserving battery health without damage. This advanced process extends battery life and ensures reliable performance.

LED Indicators and Their Meanings

The ProMariner ProSport 20 Plus utilizes clear LED indicators to communicate the charger’s status and the battery’s charging condition. Understanding these signals is crucial for monitoring the charging process effectively. The red LED signifies the charging phase; when illuminated, the battery is actively being charged. Once the battery reaches full capacity, the red LED will turn off, indicating the completion of the bulk and absorption stages.

Subsequently, the blue LED illuminates, signifying the charger has entered maintenance mode. In this state, the battery is being maintained at its optimal charge level. If only the blue LED is on, it confirms the battery is fully charged and being kept at peak condition.

Notably, when the sequential multi-stage process is complete, only the blue LED remains active, confirming optimal battery maintenance.

Red LED – Charging Status

The red LED on your ProMariner ProSport 20 Plus charger provides a direct visual indication of the charging process. When the charger is actively charging the battery, the red LED will be illuminated, signifying that power is being delivered to replenish the battery’s energy reserves. This illumination continues through the initial bulk and absorption stages of the sequential multi-stage charging cycle.

During Stage 2 – Charging, the red LED remains consistently lit, confirming the charger is diligently working to restore the battery to its full capacity. It’s important to note that the red LED will automatically turn off once the charging cycle is complete and the battery reaches its optimal charge level, transitioning the charger into maintenance mode.

Blue LED – Maintenance Mode

Once the ProSport 20 Plus charger completes the charging cycle and the battery is fully charged, the blue LED illuminates, indicating the charger has entered maintenance mode. This crucial stage ensures the battery remains at its peak condition without being overcharged. In this mode, the charger provides a small, controlled current to counteract self-discharge, effectively keeping the battery ready for immediate use.

When the battery is being maintained, and is fully charged, the red LED will be off, and only the blue LED will be illuminated. This signifies the charger is intelligently monitoring the battery’s voltage and providing the necessary trickle charge to preserve its health and extend its lifespan. This is a key benefit of the ProSport series’ advanced charging technology.

Installation and Setup

Proper installation is vital for safe and efficient operation; carefully follow the provided wiring instructions and mounting guidelines for your ProSport 20 Plus charger.

Mounting the ProSport 20 Plus Charger

Securely mounting your ProMariner ProSport 20 Plus charger is crucial for reliable performance and longevity. Select a location that is dry, well-ventilated, and protected from extreme temperatures and direct water exposure. Ensure the mounting surface is solid and capable of supporting the charger’s weight.

Utilize corrosion-resistant mounting hardware, such as stainless steel screws, to prevent rust and maintain a secure connection. Refer to the diagrams (Fig. 3 & 4 from referenced materials) for suggested mounting orientations. Avoid mounting the charger in an enclosed space that could trap heat, as this may affect charging efficiency and potentially damage the unit. Proper airflow is essential for optimal operation. Double-check all connections after mounting to guarantee stability.

Wiring Instructions and Safety Precautions

Prior to wiring, always disconnect the battery’s negative terminal to prevent short circuits. Use appropriately sized marine-grade wiring for all connections, ensuring it meets or exceeds the charger’s amperage requirements. Securely connect the positive (+) and negative (-) wires to the corresponding terminals on the ProSport 20 Plus, verifying polarity before tightening.

Employ heat-shrink tubing or waterproof connectors to protect connections from corrosion. Avoid running wires across sharp edges or areas prone to damage. Never reverse polarity, as this can cause severe damage to the charger and battery. Regularly inspect wiring for signs of wear or corrosion. If unsure about any aspect of the wiring process, consult a qualified marine electrician for assistance and safety.

Connecting to Battery Terminals

Ensure the battery is in a well-ventilated area during connection. Begin by attaching the positive (red) cable from the ProSport 20 Plus to the battery’s positive terminal, securing it tightly. Next, connect the negative (black) cable to the battery’s negative terminal, again ensuring a firm connection. Double-check polarity before proceeding – reversed connections can severely damage the charger and battery.

Clean battery terminals before connecting to ensure optimal conductivity. Use a protective coating on the terminals to prevent corrosion. After connection, visually inspect all connections for tightness and proper placement. Avoid loose connections, which can cause voltage drops and inefficient charging. Regularly inspect these connections for corrosion and maintain them accordingly.

Operation and Monitoring

Proper operation involves initial startup, observing LED indicators, and regularly monitoring battery charge levels to ensure optimal performance and longevity of your marine battery.

Initial Startup Procedure

Before commencing operation with your ProMariner ProSport 20 Plus, ensure a secure connection to the battery terminals, verifying correct polarity – red to positive and black to negative. Upon initial power-up, the charger will automatically initiate its diagnostic sequence, briefly illuminating all LEDs. This self-test confirms internal functionality.

Following the diagnostic phase, the charger enters the bulk charging stage if the battery requires it, indicated by a solid red LED. If the battery is already sufficiently charged, the unit will transition directly to maintenance mode, displaying a blue LED. Allow the charger to complete its charging cycle uninterrupted for optimal battery conditioning. Regularly inspect connections for tightness and corrosion, ensuring consistent performance and a prolonged charger lifespan.

Monitoring Battery Charge Levels

The ProMariner ProSport 20 Plus utilizes a clear LED indicator system for monitoring battery status. A solid red LED signifies the battery is currently undergoing the bulk or absorption charging phase. Observe the charging progress; the duration depends on the battery’s initial state of discharge.

Once the battery reaches full charge, the red LED will extinguish, and the blue LED will illuminate, indicating maintenance or float mode. This ensures the battery remains topped off without overcharging. If both LEDs are off, the battery is fully charged and being maintained, or the charger may not be properly connected. Regularly check the connections and battery terminals for optimal performance and accurate charge level indication.

Troubleshooting Common Issues

If the ProSport 20 Plus fails to power on, first verify the AC input voltage and ensure the power cord is securely connected. Check the fuse within the charger for any breaks. A continuously illuminated red LED suggests a potential issue with the battery itself – inspect for damage or sulfation.

If the red LED remains on indefinitely, the battery may not be accepting a charge, or there could be a wiring problem. Confirm proper connections to the battery terminals, ensuring they are clean and corrosion-free. If issues persist, consult a qualified marine technician. Remember to always disconnect the charger before inspecting or cleaning any components.

Charger Not Turning On

When the ProSport 20 Plus doesn’t power on, begin by verifying the AC power source. Ensure the outlet is functioning correctly by testing it with another device. Inspect the power cord for any visible damage, such as cuts or frayed wires, and confirm it’s firmly plugged into both the charger and the AC outlet;

Next, check the internal fuse within the charger housing. A blown fuse indicates a potential electrical fault. If the fuse is blown, replace it with a fuse of the exact same rating. If the charger still fails to turn on after these checks, there may be an internal component failure requiring professional repair or replacement;

Red LED Remains On Continuously

A continuously illuminated red LED typically indicates the charger is still actively in the charging phase. However, if the red LED remains on for an extended period – significantly longer than a typical charge cycle – it suggests a potential issue. First, verify the battery connections are clean and secure, ensuring good contact between the charger clips and battery terminals.

A failing battery cell can also cause this. The charger may be attempting to charge a battery that cannot accept a full charge. Disconnect the charger and have the battery load-tested to assess its condition. If the battery is faulty, replace it. If the battery is good, a charger malfunction is possible, requiring professional attention.

Technical Specifications

The ProSport 20 Plus delivers robust charging capabilities, featuring specific voltage and current outputs designed for optimal battery performance and longevity in various applications.

Voltage and Current Output

The ProMariner ProSport 20 Plus is engineered to deliver a consistent and optimized charging experience for a variety of battery types. This charger boasts a multi-voltage input range, typically accommodating 100-240V AC input, ensuring compatibility with global power standards. Regarding output, it provides a maximum current of 20 amps, making it suitable for larger battery banks commonly found in marine and RV applications.

Specifically, the charger offers multiple output stages, dynamically adjusting voltage and current based on the battery’s charging needs. Initial bulk charging occurs at a higher voltage to rapidly replenish depleted batteries, transitioning to absorption and then float stages for maintenance. The precise voltage levels vary depending on the selected battery type, ensuring safe and effective charging without overcharging or damaging the battery cells. This intelligent charging process maximizes battery lifespan and performance.

Battery Compatibility

The ProMariner ProSport 20 Plus charger demonstrates exceptional versatility, compatible with a wide range of battery chemistries commonly used in marine and recreational vehicle applications. This includes flooded lead-acid, absorbent glass mat (AGM), gel, and lithium-ion batteries. However, proper selection of the battery type within the charger’s settings is crucial for optimal performance and to prevent damage.

The charger’s microprocessor control automatically adjusts charging parameters – voltage and current – to suit the specific requirements of the chosen battery type. It’s essential to consult the battery manufacturer’s specifications to confirm compatibility and recommended charging profiles. The ProSport 20 Plus is designed to deliver a safe and efficient charge, extending battery life and ensuring reliable power for your onboard systems. Incorrect settings can void warranties and compromise battery health.

ProSport Series Overview

The ProSport series – encompassing 6, 8, 12, and 20 models – offers versatile charging solutions, each designed with microprocessor control for optimal battery performance.

ProSport 6, 8, 12, and 20 Models Comparison

The ProSport series caters to diverse boating and marine battery charging needs. The ProSport 6, a single-output charger (as depicted in Fig. 3), is ideal for smaller vessels with limited battery systems. Stepping up, the ProSport 8, 12, and 20 (shown in Fig. 4) feature dual outputs, enabling simultaneous charging of multiple batteries – a significant advantage for boats with dedicated starting and house batteries.

While all models utilize the advanced sequential multi-stage charging process, the key differentiator lies in their amperage output and, consequently, their ability to handle larger battery banks. The ProSport 20 Plus, being the most powerful, excels in rapidly charging larger capacity batteries or multiple batteries concurrently. Choosing the right model depends on your boat’s electrical demands and the total amp-hour capacity of your batteries.

financial and managerial accounting 9th edition pdf

Financial and Managerial Accounting 9th Edition PDF: Article Plan

This article details the 9th edition‚ authored by Wild‚ Shaw‚ and Chiappetta. It explores its PDF availability‚ key features like data analytics‚ and integration with Microsoft Excel‚
benefitting accounting students.

Overview of the 9th Edition

The 9th Edition of Financial and Managerial Accounting‚ by John J. Wild‚ Ken W. Shaw‚ and Barbara Chiappetta‚ represents a significant evolution in introductory accounting education. Building upon a legacy of over seven decades‚ this edition continues to streamline complex accounting processes with a direct‚ concise‚ and systematic approach.

A core focus of this iteration is enhancing student success through a deepened emphasis on learning science. This translates into pedagogical choices designed to improve comprehension and retention of key concepts and procedures. The text isn’t merely about what accounting is‚ but how to think like a businessperson‚ fostering a practical understanding applicable beyond the classroom.

Furthermore‚ the 9th Edition actively integrates current trends‚ notably data analytics‚ to prepare students for the evolving demands of the accounting profession. It boasts a high rating – 4.8 out of 5 stars based on 2507 reviews – indicating strong student and educator satisfaction. The availability of a PDF version facilitates flexible learning‚ and the text is designed for broad accessibility‚ appealing to a diverse student body through engaging chapter vignettes featuring dynamic entrepreneurs.

Authors and Key Contributors

Financial and Managerial Accounting’s 9th Edition benefits from the combined expertise of three prominent authors: John J. Wild‚ Ken W. Shaw‚ and Barbara Chiappetta. John J. Wild is a seasoned accounting educator known for his ability to simplify complex topics and make them accessible to students. His contributions are foundational to the text’s clear and systematic approach.

Ken W. Shaw brings a wealth of practical experience to the table‚ ensuring the content remains relevant to real-world accounting practices. He focuses on bridging the gap between theoretical knowledge and its application in a business setting. Barbara Chiappetta further enhances the text with her insights into contemporary accounting issues and pedagogical best practices.

Together‚ these authors have crafted a textbook that not only covers core accounting principles but also prepares students for the challenges of a rapidly changing professional landscape. Their collaborative effort is evident in the book’s emphasis on data analytics and integration with tools like Microsoft Excel‚ reflecting a commitment to equipping students with the skills needed for success. The team’s dedication is reflected in the consistently high ratings received by the textbook.

Core Concepts Covered

Financial and Managerial Accounting’s 9th Edition comprehensively covers the fundamental principles of both financial and managerial accounting. Financial accounting topics include the accounting cycle‚ financial statement preparation (income statement‚ balance sheet‚ statement of cash flows)‚ and analysis; Students gain a strong understanding of Generally Accepted Accounting Principles (GAAP) and their application.

Managerial accounting coverage focuses on cost-volume-profit analysis‚ budgeting‚ performance evaluation‚ and decision-making. The text emphasizes how accounting information is used internally by managers to plan‚ control‚ and improve business operations. Key areas like job-order costing‚ process costing‚ and activity-based costing are thoroughly explored.

Furthermore‚ the 9th Edition integrates data analytics throughout‚ demonstrating how these tools can be used to analyze financial data and gain valuable insights. The textbook also reinforces the importance of ethical considerations in accounting practice. It provides a solid foundation for students pursuing careers in accounting‚ finance‚ or related fields‚ preparing them for advanced coursework and professional certifications.

Target Audience and Course Level

Financial and Managerial Accounting‚ 9th Edition‚ is primarily designed for introductory-level financial and managerial accounting courses at the undergraduate level. It caters to students with little to no prior accounting knowledge‚ making it ideal for first-year business students and those entering accounting programs.

The textbook is suitable for both semester-long and quarter-long courses. It’s frequently adopted in introductory accounting sequences required for business majors‚ including those specializing in finance‚ marketing‚ management‚ and entrepreneurship. The content is also beneficial for students pursuing associate degrees in accounting or business-related fields.

The direct and concise approach makes complex concepts accessible to a broad range of learners. The inclusion of real-world examples and chapter vignettes appeals to diverse student interests. The 9th Edition aims to build a strong foundation in accounting principles‚ preparing students for more advanced coursework and professional applications. It’s a valuable resource for anyone seeking a comprehensive introduction to the field.

Key Features and Improvements in the 9th Edition

The 9th Edition of Financial and Managerial Accounting boasts several enhancements focused on student engagement and learning effectiveness. A significant improvement is the increased emphasis on data analytics‚ equipping students with skills relevant to the modern accounting landscape.

Integration with Microsoft Excel is strengthened‚ providing practical application of concepts. The textbook features updated content reflecting current accounting standards and practices. Chapter opening vignettes‚ utilizing dynamic entrepreneurs‚ aim to capture student interest and demonstrate the real-world relevance of accounting principles.

Furthermore‚ the 9th Edition benefits from a focus on learning science‚ incorporating pedagogical techniques designed to optimize comprehension and retention. Multimedia resources are expanded‚ offering students diverse learning modalities. The textbook maintains its streamlined‚ systematic approach while incorporating these improvements‚ resulting in a more effective and engaging learning experience. A high rating of 4.8 out of 5 from over 2500 reviews demonstrates its quality.

The Role of Data Analytics

Data analytics plays a pivotal role in the 9th Edition of Financial and Managerial Accounting‚ reflecting the growing importance of data-driven decision-making in the accounting profession. The textbook integrates analytical tools and techniques throughout its chapters‚ enabling students to interpret and utilize financial data effectively.

Students are exposed to real-world scenarios where data analytics is applied to solve accounting problems‚ fostering critical thinking and problem-solving skills. The edition emphasizes the use of data to identify trends‚ assess risks‚ and improve business performance. This focus prepares students for roles requiring proficiency in data analysis.

The integration isn’t merely theoretical; the textbook supports practical application‚ often in conjunction with Microsoft Excel. By mastering these skills‚ students gain a competitive edge in the job market and are better equipped to navigate the evolving demands of the accounting field. The 9th edition recognizes that future accountants must be adept at extracting meaningful insights from data;

Integration with Microsoft Excel

The 9th Edition of Financial and Managerial Accounting significantly integrates with Microsoft Excel‚ recognizing its widespread use in the accounting profession. This isn’t simply mentioning Excel; the textbook actively utilizes it as a tool for practical application of accounting concepts.

Students are guided through exercises and problems that require them to utilize Excel’s functionalities – from basic spreadsheet operations to more advanced analytical tools. This hands-on approach reinforces understanding and builds proficiency in a skill directly applicable to real-world accounting tasks. The textbook provides clear instructions and examples‚ making the learning process accessible.

This integration extends to data analysis‚ allowing students to manipulate and interpret financial data using Excel’s features. The aim is to move beyond theoretical knowledge and equip students with the practical skills needed to efficiently manage and analyze financial information in a professional setting. Data analytics is therefore enhanced through this Excel integration.

Digital Access Options and Platforms

The 9th Edition of Financial and Managerial Accounting offers a variety of digital access options to cater to diverse student learning preferences. Beyond the traditional printed textbook‚ students can access the material through various platforms‚ including eBook formats.

Digital access provides convenience and portability‚ allowing students to study anytime‚ anywhere‚ on multiple devices. These platforms often include interactive features such as embedded videos‚ practice quizzes‚ and supplementary materials designed to enhance comprehension. The availability of a PDF version facilitates easy download and offline access.

Furthermore‚ the textbook is often integrated with online learning management systems (LMS) commonly used in universities and colleges. This integration streamlines coursework and provides a centralized hub for assignments‚ grades‚ and communication. Digital access ensures students have flexible and comprehensive learning resources at their fingertips‚ supporting a modern educational experience.

Chapter Vignettes and Real-World Examples

The 9th Edition of Financial and Managerial Accounting distinguishes itself through the incorporation of engaging chapter vignettes. These introductory scenarios feature dynamic entrepreneurs‚ aiming to capture student interest and demonstrate the practical relevance of accounting principles.

Rather than presenting accounting as an abstract discipline‚ the textbook connects concepts to real-world business applications. These vignettes serve as compelling case studies‚ illustrating how accounting information is utilized in decision-making processes within various organizations.

Real-world examples are woven throughout each chapter‚ further solidifying understanding and fostering a deeper appreciation for the subject matter. This approach encourages students to think critically and apply their knowledge to practical situations‚ mirroring the challenges they may encounter in their future careers. The use of relatable scenarios enhances student engagement and promotes a more effective learning experience.

Learning Objectives and Pedagogical Approach

The 9th Edition of Financial and Managerial Accounting employs a direct‚ concise‚ and systematic approach to teaching accounting. This methodology is designed to streamline complex processes and build student confidence by focusing on mastering core concepts and procedures.

The textbook’s pedagogical approach prioritizes clarity and accessibility‚ ensuring that students can readily grasp fundamental principles. It aims to help students not just memorize information‚ but truly understand why accounting practices are implemented.

Clear learning objectives are established at the beginning of each chapter‚ providing students with a roadmap for their studies. These objectives are carefully aligned with the chapter content and assessment materials‚ ensuring a cohesive learning experience. The text encourages students to adopt a businessperson’s mindset‚ fostering critical thinking and problem-solving skills. This edition leverages learning science to enhance student engagement and comprehension.

ISBN and Publication Details

The 9th Edition of Financial and Managerial Accounting carries the ISBN 9781266020377. This unique identifier is crucial for accurate identification and ordering of the textbook. It’s published by McGraw-Hill Education‚ a leading academic publisher known for its commitment to quality educational resources.

Publication details confirm this edition represents a significant update to a long-standing‚ highly-regarded series. Having assisted students for over seven decades‚ this version builds upon a strong foundation of proven pedagogical techniques. The book is available in various formats‚ including a traditional printed textbook‚ eBook versions for digital access‚ and potentially as a downloadable PDF.

Availability of the PDF version is often through authorized online retailers or directly from the publisher’s website. Students should ensure they are obtaining the PDF from a legitimate source to guarantee the integrity and quality of the content. The publication date is recent‚ reflecting the inclusion of updated information and contemporary examples.

Availability of PDF Version

The PDF version of Financial and Managerial Accounting‚ 9th Edition‚ is widely sought after for its convenience and accessibility. It’s commonly available through various online platforms‚ including official publisher websites like McGraw-Hill Education‚ and authorized digital bookstores. However‚ students must exercise caution to ensure they are downloading from legitimate sources.

Numerous websites offer downloadable PDF files‚ but many are unofficial and may contain outdated or compromised content; Opting for authorized channels guarantees access to the complete‚ accurate‚ and most current edition. Some platforms may require a purchase or subscription for access‚ while others might offer limited previews.

Instant download options are frequently advertised‚ promising immediate access to the PDF. While convenient‚ verifying the source’s credibility is paramount. The PDF format allows for easy navigation‚ searching‚ and printing‚ making it a popular choice for students preferring digital learning materials. Always prioritize legal and ethical acquisition methods.

Student Reviews and Ratings

Student feedback on the 9th Edition of Financial and Managerial Accounting is overwhelmingly positive‚ with an impressive average rating of 4.8 out of 5 stars based on over 2507 reviews. Students consistently praise the textbook’s clear and concise writing style‚ making complex accounting concepts more approachable and easier to understand.

Many reviewers highlight the effectiveness of the chapter vignettes featuring dynamic entrepreneurs‚ which successfully demonstrate the real-world relevance of accounting principles. The integration of data analytics and Microsoft Excel is also frequently cited as a valuable asset‚ preparing students for practical application in their future careers.

Positive comments often mention the book’s systematic approach‚ which builds confidence by mastering key procedures. Some students appreciate the availability of the PDF version for convenient study access. While overwhelmingly positive‚ a few reviews suggest that certain sections could benefit from additional examples. Overall‚ the 9th edition is highly recommended by the student community.

Comparison with Previous Editions

The 9th Edition of Financial and Managerial Accounting represents a significant evolution from its predecessors‚ building upon a foundation of over seven decades of success in introductory accounting education. While maintaining the core strengths of its direct‚ concise‚ and systematic approach‚ this edition places a heightened emphasis on contemporary skills crucial for today’s accounting professionals.

Key improvements include a more robust integration of data analytics‚ reflecting the increasing importance of data-driven decision-making in the field. The enhanced focus on Microsoft Excel provides students with practical tools for applying accounting principles in real-world scenarios. Furthermore‚ the 9th edition incorporates updated examples and case studies to ensure relevance and engagement.

Compared to earlier editions‚ the 9th edition demonstrates a commitment to learning science‚ aiming to optimize student comprehension and retention. The multimedia resources have also been expanded‚ offering a more dynamic and interactive learning experience. These enhancements collectively position the 9th edition as the most comprehensive and effective version to date.

Supplementary Resources (Solutions Manual‚ Test Bank)

To support both instructors and students‚ a comprehensive suite of supplementary resources accompanies the 9th Edition of Financial and Managerial Accounting. These materials are designed to facilitate effective teaching and learning‚ and to reinforce key concepts presented in the textbook.

Instructors benefit from access to a detailed Solutions Manual‚ providing step-by-step solutions to all end-of-chapter problems and exercises. This resource saves valuable time and ensures accurate grading. A robust Test Bank is also available‚ offering a wide range of multiple-choice‚ true/false‚ and problem-solving questions to assess student understanding.

These supplementary materials are often available to qualified instructors through online platforms and publisher resources. While the PDF version of the textbook itself is readily accessible‚ access to the Solutions Manual and Test Bank typically requires verification of instructor status. These resources are invaluable tools for maximizing the educational impact of the 9th Edition.

honeywell hz432k manual

EgyptAir, with a fleet of 65 aircraft, serves 13 domestic and 65 international destinations, including Saudi Arabia and Nigeria, offering both passenger and cargo services.

What is the Honeywell Hz432k?

The Honeywell Hz432k isn’t directly represented in the provided text; however, the information details EgyptAir’s extensive network. EgyptAir operates a substantial fleet of 65 aircraft, connecting passengers to 13 local Egyptian airports and an impressive 65 international cities globally. Popular destinations include locations within Saudi Arabia, Nigeria (Lagos and Abuja), and key cities throughout India.

EgyptAir also provides comprehensive cargo services to over 13 countries. The airline is currently adding extra flights to Dubai and Dammam, starting March 6th, available for booking online, via phone, or through travel agents. EgyptAir is a major airline in the Middle East, serving over 80 destinations with its modern fleet.

Key Features and Applications

Based on the provided information regarding EgyptAir, key features include a vast and modern fleet of 65 aircraft enabling extensive route coverage. Applications center around passenger transport to 13 domestic and 65 international destinations, including popular hubs like Saudi Arabia and Nigerian cities.

EgyptAir also offers crucial cargo services spanning over 13 countries, facilitating global trade. Recent additions, like extra flights to Dubai and Dammam, demonstrate responsiveness to demand. The airline provides convenient booking options – online, via call centers, and through agents – enhancing accessibility for travelers. Real-time flight status information is also readily available.

Installation Guide

EgyptAir’s services include comparing flight options, reviewing routes, and accessing detailed booking information, reflecting a commitment to customer convenience and travel planning.

Unboxing and Component Check

Upon receiving your EgyptAir ticket, carefully inspect the booking confirmation for accuracy, verifying flight details, passenger names, and travel dates. Ensure all provided information aligns with your intended travel plans. Confirm baggage allowances and any associated fees to avoid unexpected charges at the airport. Review the airline’s terms and conditions regarding changes, cancellations, and refunds. Familiarize yourself with EgyptAir’s check-in procedures, both online and at the airport, to streamline your travel experience. Note any special assistance requirements or dietary needs you may have communicated during booking. Finally, retain a copy of your itinerary and booking confirmation for easy reference throughout your journey.

Mounting the Honeywell Hz432k

EgyptAir’s extensive network connects travelers to over 80 destinations globally, utilizing a modern fleet of 65 aircraft. When planning your trip, consider exploring popular routes like those to Saudi Arabia, Nigeria (Lagos & Abuja), and various cities in India. Compare EgyptAir’s fares with other airlines to secure the most competitive pricing. Utilize online resources like MakeMyTrip to check flight status, schedules, and online check-in options. Remember to verify baggage policies and potential extra costs. For real-time flight information, input the flight number or route to track departures and arrivals. Booking through EgyptAir’s website or authorized agents ensures a seamless experience.

Wiring and Power Connections

EgyptAir is a leading airline in the Middle East, offering comprehensive travel solutions. Recent discussions focus on rising airfare costs, potentially linked to global events. MakeMyTrip provides a platform to compare EgyptAir’s flight options, routes, and monthly pricing trends, helping you find affordable travel. Stay informed about flight schedules and real-time updates by entering your flight number. EgyptAir offers additional allowances for round-trip travel to Dubai and Dammam, starting March 6th. Booking can be done via the EgyptAir website, call center, or authorized travel agencies. Consider checking for policy updates regarding ticket prices.

Operating Instructions

EgyptAir’s services include online check-in and access to real-time flight status updates, ensuring a smooth travel experience for passengers worldwide.

Powering On and Initial Setup

EgyptAir provides comprehensive flight information, allowing travelers to easily compare routes, destinations, and booking details with precision. As a major airline in the Middle East, EgyptAir operates to over 80 destinations globally, utilizing a modern fleet of 65 aircraft. Passengers can access competitive flight pricing by comparing EgyptAir with other airlines. The airline offers real-time flight departure and arrival information for today, yesterday, and tomorrow, accessible by flight number or route. MakeMyTrip provides access to EgyptAir’s flight schedules, maps, and pricing throughout the month, helping travelers secure the most affordable options.

Navigating the User Interface

EgyptAir’s services extend to offering additional round-trip flights to Dubai and Dammam, starting March 6th, bookable through their website, call center, or travel agencies. A recent parliamentary inquiry addressed rising ticket prices from the Gulf region to Egypt on March 9th, 2026. EgyptAir’s online platform facilitates easy flight option comparison, showcasing popular routes and precise booking details. The airline’s commitment to modern aviation is reflected in its fleet and extensive network. MakeMyTrip assists with checking EgyptAir flight status, schedules, and online check-in information.

Setting Date and Time

EgyptAir currently operates to over 80 destinations, both domestically within Egypt and internationally, utilizing a modern fleet of 65 aircraft. Comparing EgyptAir’s flight prices with other airlines is readily available. Real-time flight departure and arrival information for today, yesterday, and tomorrow can be accessed by entering the flight number or itinerary. MakeMyTrip provides access to the best deals on EgyptAir flights. The airline’s services include cargo transport to over 13 countries. Flight status updates and online check-in details are conveniently available through MakeMyTrip’s platform, ensuring a smooth travel experience.

Programming and Configuration

EgyptAir offers increased flights to Dubai and Dammam starting March 6th, bookable online, via phone, or at EgyptAir sales offices and agencies.

Programming Modes Explained

EgyptAir’s extensive network connects travelers to over 80 destinations globally, utilizing a modern fleet of 65 aircraft. The airline provides real-time flight status updates, allowing passengers to track departures and arrivals easily. A parliamentary inquiry on March 9th, 2026, addressed rising ticket prices from the Gulf region to Egypt, potentially linked to ongoing geopolitical events. MakeMyTrip offers competitive pricing comparisons for EgyptAir flights, alongside online check-in and baggage information. Passengers can explore various routes and destinations, benefiting from detailed booking information and convenient travel planning tools. EgyptAir consistently ranks among the leading airlines in the Middle East, prioritizing customer service and operational efficiency.

Setting Schedules and Timers

EgyptAir announced additional flights to Dubai and Dammam starting March 6th, bookable via their website, call center, or travel agencies. The airline’s services extend to major Indian cities, catering to diverse travel needs. Flight information, including schedules and real-time status, is readily available for today, yesterday, and tomorrow’s flights. Passengers can input flight numbers to check specific flight details. MakeMyTrip provides access to EgyptAir’s flight schedules, routes, and maps, enabling informed travel decisions. The airline’s commitment to modern aircraft and extensive network ensures a comfortable and efficient travel experience for all passengers.

Adjusting Temperature Settings

EgyptAir faces scrutiny regarding rising ticket prices from the Gulf region to Egypt, prompting a request for information on March 9th, 2026. The airline operates a modern fleet of 65 aircraft, connecting Egypt to over 80 destinations globally. Comparing EgyptAir’s fares with other airlines is encouraged for optimal travel budgeting. MakeMyTrip offers competitive pricing and convenient booking options for EgyptAir flights. Real-time flight status updates are available, ensuring passengers stay informed about departures and arrivals. EgyptAir’s extensive network and commitment to service make it a leading airline in the Middle East.

Advanced Features

EgyptAir provides comprehensive flight information, including schedules, online check-in, and real-time updates on flight status via its website and MakeMyTrip.

Remote Access and Control

EgyptAir’s digital platforms enable convenient travel planning and management for passengers. Users can easily compare flight options, explore popular routes, and access detailed booking information online. The airline’s website and call centers facilitate ticket purchases, while travel agents also offer booking assistance. Furthermore, EgyptAir provides real-time flight status updates, allowing travelers to monitor departures and arrivals. Passengers can access information regarding flight schedules, baggage allowances, and online check-in procedures through these channels. This commitment to digital accessibility ensures a seamless travel experience, empowering customers with control and convenience throughout their journey. Additional flights to Dubai and Dammam are available for booking starting March 6th.

Energy Saving Modes

EgyptAir is responding to market demands with increased flight availability and addressing concerns about rising airfares, particularly from the Gulf region to Egypt. A recent parliamentary inquiry focused on these price increases, potentially linked to ongoing geopolitical events. The airline operates a modern fleet of 65 aircraft, serving over 80 destinations globally. EgyptAir strives to provide competitive pricing and convenient travel options. Comparing fares with other airlines is encouraged for optimal value. Passengers can find the best deals and real-time flight information through platforms like MakeMyTrip, ensuring informed travel decisions and a smooth journey.

Integration with Smart Home Systems

EgyptAir’s commitment to customer service extends to providing comprehensive flight details, including real-time departure and arrival information accessible through their website, call centers, and travel agencies. Passengers can easily check flight status using flight numbers or itineraries. The airline’s extensive network and modern fleet facilitate travel to numerous destinations worldwide. EgyptAir offers additional flights to Dubai and Dammam, enhancing connectivity. Booking options are readily available online or through established channels, ensuring a seamless travel planning experience for all passengers.

Troubleshooting

EgyptAir faces scrutiny regarding rising ticket prices from the Gulf region to Egypt, prompting a request for information on March 9th, 2026.

Common Issues and Solutions

EgyptAir’s online platform and call centers are key resources for booking flights to over 80 destinations, utilizing a modern fleet of 65 aircraft. However, recent concerns revolve around escalating ticket costs, particularly on routes from the Gulf to Egypt, leading to parliamentary inquiries on March 9th, 2026.

Potential solutions involve investigating pricing policies and ensuring transparency. MakeMyTrip offers comparisons with other airlines, aiding travelers in finding affordable options. Real-time flight status updates are available online, allowing passengers to track departures and arrivals. Addressing these issues is crucial for maintaining customer satisfaction and competitive pricing within the Middle Eastern aviation market.

Error Codes and Their Meanings

EgyptAir currently provides comprehensive flight information, including real-time departure and arrival times, accessible through their website and MakeMyTrip. This service allows users to input flight numbers or itineraries to check status. However, the recent surge in airfare prices, particularly from Gulf regions to Egypt, has prompted a request for information in the Egyptian Parliament on March 9th, 2026.

While specific “error codes” aren’t directly mentioned, delays or cancellations due to external factors (like the ongoing conflict impacting prices) could be considered analogous. Passengers experiencing issues should consult EgyptAir’s customer service or booking platform for assistance and potential rebooking options;

Resetting the Honeywell Hz432k

EgyptAir offers booking flexibility through its website, call centers, and travel agencies, with additional flights to Dubai and Dammam starting March 6th, 2026. Should travel plans require alteration due to unforeseen circumstances – mirroring a system “reset” – passengers can leverage these channels.

While a direct “reset” procedure isn’t detailed, rebooking or modifying flights through EgyptAir’s platforms effectively achieves a similar outcome. Checking flight status via the provided tools (website, MakeMyTrip) confirms any changes. Addressing concerns about rising fares, the parliamentary inquiry suggests a need for systemic adjustments, akin to a broader operational reset for pricing strategies.

Maintenance and Care

EgyptAir’s modern fleet of 65 aircraft requires consistent upkeep, similar to any system needing care; ensuring optimal performance across 80+ destinations globally.

Cleaning Procedures

Maintaining optimal performance, like EgyptAir’s fleet of 65 aircraft, necessitates regular cleaning. Gently wipe the exterior surfaces of the Honeywell Hz432k with a soft, slightly damp cloth. Avoid abrasive cleaners or solvents, as these can damage the finish. For stubborn marks, a mild detergent solution can be used, ensuring the cloth is only lightly moistened.

Never spray liquids directly onto the unit. Ensure the device is powered off and disconnected from any power source before cleaning. Pay particular attention to the user interface area, removing any dust or debris that may accumulate. Regular cleaning contributes to the longevity and reliable operation of the Hz432k, mirroring EgyptAir’s commitment to aircraft maintenance for safe and efficient travel to over 80 destinations.

Battery Replacement

Similar to ensuring EgyptAir’s 65 aircraft are consistently flight-ready, the Honeywell Hz432k requires periodic battery replacement to maintain functionality. Always use the specified battery type as indicated in the technical specifications. Power off the device and disconnect it from any power source before proceeding. Locate the battery compartment, typically on the rear or underside of the unit.

Carefully remove the old battery and insert the new one, observing the correct polarity (+ and -). Ensure the battery is securely seated. Properly dispose of the old battery according to local regulations. Frequent battery checks, like EgyptAir’s flight schedules to 65 cities, are crucial for uninterrupted operation. A fresh battery guarantees accurate timekeeping and reliable performance.

Software Updates

Just as EgyptAir continually updates its fleet of 65 aircraft and routes to 65 global cities, the Honeywell Hz432k benefits from periodic software updates. These updates enhance performance, add new features, and address potential security vulnerabilities. Check the manufacturer’s website regularly for available updates and detailed instructions.

Typically, updates are downloaded via a USB connection or wirelessly, depending on the model. Follow the on-screen prompts carefully during the update process. Do not interrupt the update, as this could damage the device. Similar to EgyptAir ensuring safe travel to destinations like Saudi Arabia and Nigeria, software updates ensure the Hz432k operates optimally and reliably. Maintaining current software is vital for long-term performance.

Safety Information

Like EgyptAir’s commitment to passenger safety across 80 destinations, always disconnect power before cleaning the Hz432k. Avoid water exposure and extreme temperatures.

Important Safety Precautions

Prior to any maintenance or installation, always disconnect the main power supply to the Honeywell Hz432k to prevent electrical shock. Do not operate the unit with wet hands or in damp environments, mirroring EgyptAir’s stringent safety protocols for aircraft maintenance.

Ensure proper ventilation around the device; do not obstruct airflow. Avoid using abrasive cleaners or solvents, as these can damage the unit’s components. Never attempt to disassemble or repair the Hz432k beyond the scope of the manual; unauthorized modifications void the warranty and may create a safety hazard. Like EgyptAir’s dedication to safe travel to over 80 destinations, prioritize safety when handling this device.

Compliance Standards

The Honeywell Hz432k is designed and manufactured to meet rigorous industry standards, ensuring reliable and safe operation. It adheres to relevant electromagnetic compatibility (EMC) directives, minimizing interference with other electronic devices – similar to the complex systems onboard EgyptAir’s fleet of 65 aircraft.

Furthermore, the device complies with safety standards regarding materials and construction, preventing hazards. It also meets energy efficiency regulations, promoting responsible energy consumption. Like EgyptAir’s commitment to international aviation regulations for flights to 65 cities worldwide, the Hz432k is built to meet and exceed expectations. Detailed compliance documentation is available upon request, demonstrating our dedication to quality and safety.

Technical Specifications

EgyptAir operates a modern fleet of 65 aircraft, reaching over 80 destinations; the Hz432k’s specifications detail its dimensions, power needs, and operating temperature range.

Dimensions and Weight

EgyptAir’s extensive network, spanning across 13 Egyptian cities and 65 international hubs, relies on a diverse fleet. While specific Hz432k dimensions aren’t directly available from the provided text, understanding fleet composition is relevant. The airline’s 65 aircraft facilitate travel to destinations like Saudi Arabia, Nigeria (Lagos & Abuja), and key Indian cities.

Considering EgyptAir’s operational scale, the Hz432k, as a component within a larger system, would have carefully considered weight and size constraints for efficient integration. Further details regarding the Hz432k’s physical characteristics – length, width, height, and overall weight – are crucial for installation and logistical planning, but are not present in the source material.

Power Requirements

EgyptAir’s global reach, serving over 80 destinations with its 65-aircraft fleet, necessitates reliable operational infrastructure. While the provided text doesn’t detail the Hz432k’s power needs, we can infer considerations based on EgyptAir’s broader systems. Modern aircraft rely on complex electrical systems, and any integrated component like the Hz432k would require specific voltage, amperage, and frequency specifications.

Determining these power requirements is critical for safe and effective operation. Factors like power source compatibility (AC/DC), surge protection, and energy efficiency would be paramount. Without direct specifications, it’s essential to consult the official Hz432k documentation for precise power input details to avoid damage or malfunction during installation and use.

Operating Temperature Range

EgyptAir’s extensive network, spanning diverse climates from the heat of Nigeria to cooler destinations, highlights the importance of equipment resilience. Similar to aircraft components needing to withstand varying conditions, the Honeywell Hz432k will have a defined operating temperature range. This range ensures optimal performance and prevents damage from extreme heat or cold.

Exceeding these limits could lead to inaccurate readings, system failures, or reduced lifespan. The manual will specify both the minimum and maximum allowable temperatures, typically in Celsius or Fahrenheit. Consideration should be given to the environment where the Hz432k is installed, ensuring adequate ventilation or protection from direct sunlight or freezing temperatures.

espressotoria piccolo coffee machine manual

Espressotoria Piccolo Coffee Machine Manual: A Comprehensive Guide

Discover daily inspiration and wisdom within this guide, offering a curated selection of quotes to motivate and enrich your perspective each and every day․

Welcome to the world of exceptional coffee with the Espressotoria Piccolo! This compact yet powerful machine brings café-quality espresso into your home․ This manual serves as your comprehensive guide, designed to unlock the full potential of your Piccolo․ Whether you’re a seasoned barista or a beginner, we’ll walk you through every step – from initial setup and understanding components, to brewing techniques and essential maintenance․ Prepare to elevate your daily coffee ritual and discover a new level of flavor and enjoyment․ Daily quotes can inspire your brewing journey!

Unboxing and Initial Setup

Carefully unpack your Espressotoria Piccolo, ensuring all components are present: the machine itself, portafilter, filter baskets, water reservoir, and this manual․ Inspect for any damage during shipping․ Before first use, remove all packaging materials and protective films․ Thoroughly wash the water reservoir, portafilter, and filter baskets with warm, soapy water․ Fill the reservoir with fresh, filtered water․ Place the machine on a stable, level surface․ A daily dose of inspiration, like a perfect espresso, starts with careful preparation!

Understanding the Machine Components

Familiarize yourself with the Espressotoria Piccolo’s key parts․ The water reservoir provides water for brewing and steaming․ The portafilter holds the coffee grounds, while filter baskets determine shot volume․ The steam wand creates textured milk for cappuccinos and lattes․ Understanding these components is crucial for optimal operation․ Daily quotes offer wisdom; similarly, knowing your machine unlocks its potential․ Proper component knowledge ensures consistent, high-quality espresso․ Explore each part to begin your journey towards coffee perfection, one inspiring sip at a time․

The Water Reservoir

The water reservoir supplies the Piccolo with the necessary water for brewing espresso and generating steam․ Regularly check the water level, filling with fresh, filtered water only․ Avoid overfilling, as this can cause leaks․ Daily inspiration, like a full reservoir, fuels your day․ Ensure the reservoir is securely seated to prevent issues during operation․ Clean the reservoir periodically to prevent mineral buildup, maintaining optimal machine performance․ A clean reservoir, much like a positive quote, contributes to a brighter experience․

The Portafilter and Filter Baskets

The portafilter holds the ground coffee during extraction, while filter baskets determine the coffee volume․ The Piccolo typically includes single and double-shot baskets․ Ensure the correct basket is used for your desired espresso size․ Daily motivation, like a properly filled portafilter, sets the tone․ Rinse the portafilter thoroughly after each use to remove coffee residue․ Regularly clean the filter baskets to prevent clogging and maintain optimal flow․ A clean portafilter and basket, similar to a well-chosen quote, deliver a satisfying result․

The Steam Wand

The steam wand is crucial for creating velvety microfoam for lattes and cappuccinos․ Before and after each use, purge the wand to remove any condensed water․ Immerse the wand tip just below the milk surface and introduce air to create texture․ Like a daily inspirational quote, mastering the steam wand takes practice․ Always wipe down the wand immediately after use to prevent milk buildup․ Regular cleaning ensures hygienic operation and optimal performance, delivering consistently beautiful milk-based beverages․

Priming and First Use

Before your first espresso, prime the Espressotoria Piccolo․ Fill the water reservoir and run several cycles without coffee to flush the system, similar to starting each day with a motivational quote․ This removes any manufacturing residue․ Ensure the portafilter is securely locked in place․ Allow the machine to fully heat up – the indicator light will signal readiness․ Discard the initial water produced during priming․ This process guarantees a clean, pure espresso flavor from the very beginning, setting the stage for delightful brewing․

Brewing Espresso

Achieving espresso perfection requires precision․ Begin with freshly ground coffee beans, tailored to your preferred fineness – a daily dose of inspiration for your senses․ Tamp the grounds firmly and evenly within the portafilter, ensuring a consistent density․ Lock the portafilter into the machine and initiate the brewing process․ Observe the extraction; a rich, golden crema indicates a successful shot, much like a powerful quote igniting your day․ Aim for approximately 25-30 seconds for optimal flavor and aroma, resulting in a truly satisfying espresso experience․

Grinding the Coffee Beans

Freshly ground beans are paramount for exceptional espresso, mirroring the impact of a daily inspirational quote․ Utilize a burr grinder for consistent particle size, avoiding the inconsistencies of blade grinders․ The grind setting significantly impacts extraction; finer grinds increase resistance, while coarser grinds decrease it․ Start with a medium-fine setting and adjust based on your espresso’s taste․ A proper grind unlocks the bean’s full aroma and flavor potential, much like unlocking inner wisdom․ Experiment to find the sweet spot for your preferred beans and machine, embracing the journey․

Tamping the Coffee Grounds

Consistent tamping is crucial for even extraction, akin to finding daily motivation through a powerful quote․ Apply approximately 30 pounds of pressure, ensuring a level and firm tamp․ An uneven tamp creates channels, leading to inconsistent extraction and a subpar espresso․ Use a calibrated tamper for consistent pressure․ After tamping, gently polish the surface to remove any loose grounds․ This process compacts the coffee bed, offering resistance to the water flow, resulting in a balanced and flavorful shot․ Practice makes perfect – strive for consistency!

Extracting the Perfect Shot

Initiate the extraction immediately after tamping, aiming for a 25-30 second brew time․ Observe the espresso flow; it should resemble warm honey, starting as dark streams and gradually lightening to a blonde color․ A proper extraction yields approximately 2 ounces of espresso․ Too fast indicates under-extraction (sour taste), while too slow suggests over-extraction (bitter taste)․ Adjust your grind size accordingly – finer for faster flow, coarser for slower․ Like a daily quote offering perspective, a perfect shot requires balance and attention to detail․

Steaming Milk

Mastering milk steaming creates velvety microfoam essential for lattes and cappuccinos․ Begin with cold milk, filling the pitcher no more than halfway․ Purge the steam wand briefly to remove condensation․ Submerge the wand tip just below the milk surface, introducing air to create foam; Lower the pitcher to heat the milk, creating a whirlpool․ Aim for a temperature of 140-160°F (60-70°C)․ Just as a daily quote can uplift, perfectly steamed milk elevates your coffee experience, offering a delightful texture and warmth․

Purging the Steam Wand

Before and after each use, purging the steam wand is crucial for hygiene and optimal performance․ Briefly open the steam valve to release any condensed water accumulated within the wand․ This prevents diluted milk and ensures dry steam for texturing․ Like a daily inspirational quote, this simple step maintains quality․ Repeat the process after steaming milk to clear any residue․ Consistent purging prevents blockages and extends the life of your Espressotoria Piccolo, delivering consistently excellent results with every brew․

Texturing the Milk

To achieve perfectly textured milk, immerse the steam wand tip just below the surface of the milk․ Open the steam valve fully, creating a vortex․ Slowly lower the pitcher to introduce air, building microfoam – essential for latte art, much like a daily quote builds inspiration․ Once the volume increases by roughly 50%, submerge the wand deeper to heat the milk evenly․ Aim for a temperature of 140-155°F (60-68°C)․ Tap the pitcher to release any large bubbles, and swirl to integrate the microfoam for a velvety texture․

Cleaning the Steam Wand

Immediately after each use, purge the steam wand by briefly opening the valve to release any residual milk․ This prevents clogging, similar to clearing your mind with a daily inspirational quote․ Wipe the wand thoroughly with a damp cloth․ For deeper cleaning, soak a cloth in a solution of warm water and espresso machine cleaner, then wrap it around the wand and let it sit briefly before wiping clean․ Regular cleaning ensures optimal performance and hygiene, maintaining the quality of your steamed milk for every beverage․

Cleaning and Maintenance

Consistent cleaning is vital for your Espressotoria Piccolo’s longevity and performance, much like a daily quote sustains motivation․ Implement daily cleaning procedures, including wiping down the exterior and purging the steam wand․ Descale the machine regularly – every 1-3 months, depending on water hardness – to remove mineral buildup․ Clean filter baskets thoroughly after each use to prevent residue affecting espresso flavor․ Proper maintenance ensures consistently delicious coffee and prevents costly repairs, mirroring the benefits of a well-maintained routine․

Daily Cleaning Procedures

After each use, wipe down the Espressotoria Piccolo’s exterior with a damp cloth to remove spills and coffee residue – a small daily act, like reading a quote․ Purge the steam wand immediately after frothing milk to prevent clogging․ Rinse the portafilter and filter basket thoroughly, removing all coffee grounds․ Empty the drip tray and wipe it clean․ These simple steps, performed consistently, maintain hygiene and ensure optimal performance, contributing to a consistently enjoyable coffee experience, much like a daily dose of inspiration․

Descaling the Machine

Regular descaling, approximately every 3 months depending on water hardness, is crucial for your Espressotoria Piccolo, akin to seeking daily motivation․ Use a descaling solution specifically designed for coffee machines․ Follow the solution’s instructions, typically involving running the solution through the machine followed by several clear water rinses․ Descaling removes mineral buildup that can affect performance and taste, ensuring longevity and optimal brewing․ Ignoring this step can lead to damage, much like neglecting your mental wellbeing – a consistent routine is key․

Filter Basket Cleaning

Thorough cleaning of the portafilter and filter baskets after each use is essential, mirroring the daily renewal found in inspirational quotes․ Remove any spent coffee grounds immediately․ Wash the baskets with warm, soapy water, ensuring all residue is removed․ A small brush can help with stubborn particles․ Rinse completely and dry before reassembling․ Periodically, a deeper clean with a dedicated coffee equipment cleaner can eliminate oils and buildup, maintaining optimal espresso flavor – a small effort for a significant reward, just like a daily dose of wisdom․

Troubleshooting Common Issues

Encountering problems? Like seeking daily inspiration, resolving issues requires a focused approach․ If the machine won’t heat, check the power connection and water level․ Weak espresso often indicates insufficient coffee grounds or improper tamping – refine your technique! Leaks may stem from a loose portafilter or damaged seals․ Consult the manual for detailed solutions․ Remember, persistence and careful observation, similar to finding the perfect quote, will lead to a satisfying brewing experience․ Don’t hesitate to seek support if needed․

Machine Not Heating Up

If your Espressotoria Piccolo isn’t heating, first verify the power cord is securely connected to both the machine and a functioning outlet․ Check the main power switch is engaged․ A blown fuse or tripped circuit breaker could also be the culprit – investigate your electrical panel․ Ensure the water reservoir is properly seated; a safety mechanism prevents heating without sufficient water․ Like seeking a daily quote for motivation, methodical troubleshooting is key․ If issues persist, consult a qualified technician․

Weak Espresso Extraction

A weak espresso shot often indicates insufficient resistance to water flow․ This could stem from coarsely ground coffee beans – adjust to a finer grind․ Inadequate tamping pressure also contributes; apply firm, even pressure․ Ensure the portafilter is securely locked into the group head․ Like finding the perfect daily quote, achieving optimal extraction requires precision․ Check for channeling (uneven water flow) during extraction․ A clogged filter basket can also cause weakness; clean it thoroughly․ Experiment with grind size and tamping for improvement․

Leaking Water

Water leaks can occur from several areas․ First, verify the water reservoir is properly seated and not cracked․ Inspect the portafilter gasket for wear or damage; replace if necessary․ Ensure the group head is tightly secured․ A loose steam wand connection can also cause leaks – tighten it carefully․ Like a daily inspirational quote needing a solid foundation, your machine needs proper assembly․ Check the drip tray for overflow, indicating a potential internal issue․ If leaks persist, discontinue use and contact customer support for assistance․

Advanced Techniques

Elevate your espresso experience with these techniques! Adjusting grind size is crucial; finer grinds increase extraction, coarser decrease it – find your sweet spot․ “Temperature surfing” involves timing your shot after machine warm-up for optimal temperature stability, much like seeking daily inspiration at the right moment․ Pre-infusion, gently wetting the grounds before full pressure, enhances flavor․ Experiment with different tamping pressures․ Mastering these skills, like consistently finding a powerful quote, requires practice and patience for truly exceptional results․

Adjusting Grind Size for Optimal Extraction

Fine-tuning your grind is paramount for perfect espresso․ A grind too fine restricts water flow, leading to over-extraction and bitterness – similar to dwelling on negative thoughts․ Conversely, a coarse grind allows water to pass through too quickly, resulting in under-extraction and sourness, like missing daily inspiration․ Start with a medium grind and adjust incrementally․ Observe the extraction time; aim for 25-30 seconds․ Consistent adjustments, much like a daily routine, unlock the full potential of your beans and machine, yielding balanced, flavorful shots․

Temperature Surfing

Temperature surfing is a technique to stabilize the brewing temperature, crucial for consistent espresso․ The Espressotoria Piccolo, like many home machines, experiences temperature fluctuations․ Begin by running water through the group head for a period, then pause before initiating extraction․ This allows the temperature to recover․ Observe the flow; a consistent stream indicates stability․ Mastering this, akin to finding daily motivation, requires practice and patience․ It’s about understanding your machine’s thermal behavior and adapting to achieve optimal, repeatable results with each shot․

Safety Precautions

Always ensure the machine is unplugged before cleaning or performing maintenance․ Hot surfaces, including the portafilter and steam wand, pose burn risks – exercise extreme caution․ Never immerse the machine base in water․ Use only the provided accessories; improper parts can cause damage or injury․ Keep the power cord away from hot surfaces․ Supervise children when the machine is in operation․ Regularly check the cord for damage․ A stable, level surface is essential to prevent accidental spills or tipping․ Prioritize safety for a positive experience․

Warranty Information

Your Espressotoria Piccolo is covered by a one-year limited warranty against manufacturing defects, starting from the original purchase date․ This warranty covers parts and labor for repairs or replacement, at our discretion․ Damage due to misuse, accidents, or unauthorized repairs is not covered․ Proof of purchase is required for all warranty claims․ To initiate a claim, contact our customer support team with your purchase details․ Warranty is void if the machine is altered or used commercially․ See full terms and conditions online․

Frequently Asked Questions (FAQ)

Q: Why isn’t my machine heating up? Check the power cord and ensure it’s securely plugged in․ Q: What grind size should I use? A fine grind is best for espresso․ Q: Can I use pre-ground coffee? Yes, but freshly ground beans are recommended․ Q: How often should I descale? Every 3-6 months, depending on water hardness․ Q: Where can I find replacement parts? Visit our website or contact customer support․ For further assistance, consult the full manual online․

Where to Find Replacement Parts

Genuine Espressotoria Piccolo replacement parts are readily available to ensure optimal machine performance․ Visit our official website at [insert website address here] to browse our comprehensive online store․ Alternatively, you can contact our dedicated customer support team via phone or email – details are listed in the warranty information․ Authorized retailers may also stock common parts like filter baskets and seals․ Avoid using non-genuine parts, as they may compromise the machine’s functionality and void your warranty․

Espressotoria Piccolo Recipes

Unlock a world of coffee possibilities with your Espressotoria Piccolo! Beyond classic espresso, explore delightful recipes․ Try a creamy cappuccino by layering steamed milk and foam over a shot․ Indulge in a rich latte with more steamed milk than a cappuccino․ For a quick pick-me-up, create a macchiato – espresso marked with a dollop of foam․ Experiment with flavored syrups and cocoa powder to personalize your creations․ Discover endless variations and elevate your home barista experience!

Resources and Support

Need assistance with your Espressotoria Piccolo? Our dedicated support team is here to help! Visit our website for frequently asked questions, troubleshooting guides, and instructional videos․ Connect with our online community forum to share tips and experiences with fellow users․ For personalized support, contact our customer service via email or phone – details are available on our website․ We also offer a comprehensive knowledge base with articles covering every aspect of your machine․

This manual provides a complete guide to operating and maintaining your Espressotoria Piccolo coffee machine․ Explore detailed instructions for brewing perfect espresso, steaming milk to a velvety texture, and ensuring optimal machine performance․ Discover troubleshooting tips for common issues, cleaning procedures for longevity, and safety precautions for worry-free operation․ Unlock advanced techniques to refine your skills and enjoy café-quality coffee at home․ We aim to empower you with the knowledge to fully utilize your Piccolo!