Mercury Mariner Outboard Manual: A Comprehensive Guide
Navigating your Mercury Mariner requires a dedicated resource; this manual, spanning models like the 1989 15Hp and 25Hp, unlocks features and ensures optimal performance.
Mercury Mariner outboards have a long-standing reputation for reliability and performance on the water, serving boaters for decades. These engines, ranging in horsepower from compact 15Hp models to more powerful options, are designed for a diverse range of applications – from small fishing boats and inflatables to larger recreational vessels. Understanding the specifics of your particular Mariner engine is crucial for safe and efficient operation.
This is where a dedicated owner’s or service manual becomes invaluable. Whether you’ve recently acquired a classic 1989 model or a newer version, accessing the correct documentation provides a detailed overview of the engine’s features, functionality, and maintenance requirements. Properly utilizing the manual ensures you can maximize your boating experience and maintain the longevity of your Mercury Mariner outboard.
Understanding Manual Importance
A Mercury Mariner outboard manual isn’t merely a collection of pages; it’s a vital tool for responsible ownership. It provides critical insights into the engine’s operation, safety precautions, and maintenance schedules, directly impacting performance and lifespan. Ignoring the manual can lead to improper operation, potentially causing damage or even hazardous situations on the water.
Specifically, manuals detail how to make the most of your product, offering a comprehensive overview of features. Whether it’s a user manual for a new owner or a service manual for detailed repairs, understanding the information within is paramount. Regular review ensures you’re equipped to address issues proactively, preventing minor problems from escalating into costly repairs and keeping your Mariner running smoothly for years to come.
Manual Types & Availability
Discover the distinctions between owner’s and service manuals, and explore options for locating the correct guide – both in print and digital formats – today!
Owner’s Manual vs. Service Manual
Understanding the difference between an owner’s manual and a service manual is crucial for Mercury Mariner outboard maintenance. The owner’s manual provides a foundational overview, detailing basic operation, safety precautions, and routine maintenance tasks like checking fluid levels or replacing a fuel filter. It’s designed for the everyday user, offering guidance on maximizing the outboard’s lifespan through preventative care.
Conversely, a service manual is a comprehensive, in-depth resource intended for qualified mechanics. It includes detailed diagrams, troubleshooting procedures, repair instructions, and specifications for nearly every component of the outboard. Tasks covered in a service manual extend to complex repairs like carburetor rebuilding, lower unit servicing, or cylinder head removal. While an owner can attempt some procedures from a service manual, it’s generally recommended to leave intricate repairs to professionals equipped with the proper tools and expertise. Essentially, the owner’s manual teaches you how to use the outboard, while the service manual teaches you how to fix it.
Finding the Correct Manual (Year & HP)
Locating the precise manual for your Mercury Mariner outboard is paramount, as components and procedures vary significantly between years and horsepower ratings. A manual designed for a 1989 15Hp model will differ substantially from one for a newer, higher-horsepower engine. Always verify that the manual explicitly states the correct year and HP of your outboard before attempting any maintenance or repairs.
Resources for finding the correct manual include the official Mercury Marine website, online marketplaces specializing in marine manuals, and dedicated outboard motor forums. When searching, be precise with your engine’s details – year, horsepower, and even the specific model number if available. Incorrect manuals can lead to improper procedures, potentially causing damage to your engine or even personal injury. Double-checking compatibility is a small step that can save considerable trouble and expense down the line.
Digital Manuals & Online Resources
Accessing information for your Mercury Mariner outboard has become increasingly convenient with the proliferation of digital manuals and online resources. While physical copies remain valuable, digital versions offer portability and searchability, allowing quick access to specific information when needed. Numerous websites host downloadable manuals, often available for free or a small fee.
Furthermore, online forums dedicated to Mercury Mariner outboards are treasure troves of knowledge, with experienced owners sharing troubleshooting tips, repair guides, and even scanned copies of manuals. YouTube channels also provide visual demonstrations of maintenance procedures. However, always cross-reference information from online sources with official Mercury documentation to ensure accuracy and safety. Utilizing these digital tools can significantly enhance your ability to maintain and repair your outboard effectively.

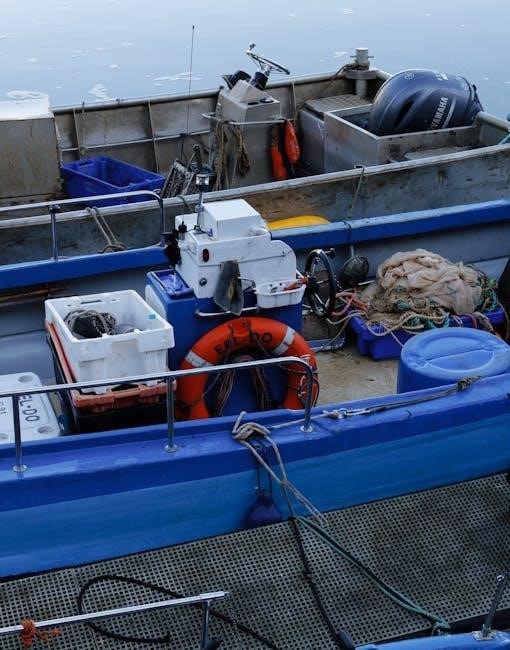
Essential Components & Systems
Understanding the Mariner’s fuel, ignition, and cooling systems—along with steering and shift mechanisms—is crucial for effective maintenance and troubleshooting of your outboard.
Fuel System Overview (Carburetor & Fuel Pump)
The Mercury Mariner’s fuel system relies on a precise interplay between the carburetor and fuel pump to deliver a consistent fuel-air mixture for optimal combustion. The fuel pump draws fuel from the tank, ensuring a steady supply to the carburetor.
Carburetors meticulously blend fuel with air, adjusting the mixture based on engine demand – idle, mid-range, or full throttle. Regular inspection and cleaning of the carburetor are vital, as deposits can restrict fuel flow and impair performance.
Fuel lines and filters must be checked for cracks, leaks, or blockages. A clogged fuel filter restricts fuel delivery, leading to starting difficulties or reduced power. Understanding this system allows for effective diagnosis of fuel-related issues, ensuring reliable operation and preventing potential damage.
Ignition System Explained
The Mercury Mariner’s ignition system is crucial for initiating combustion within the engine cylinders. It typically comprises components like the flywheel magneto, ignition coil, condenser, and spark plugs. The flywheel magneto generates electricity as the engine rotates, providing the power source for ignition.
The ignition coil amplifies this voltage, creating a high-voltage pulse sent to the spark plugs. A properly functioning condenser stabilizes the ignition circuit, ensuring a strong spark. Spark plugs then ignite the fuel-air mixture, driving the piston and powering the outboard.
Regular inspection of these components is vital. Worn spark plugs, a faulty coil, or a damaged condenser can lead to misfires, starting problems, or reduced engine performance. Maintaining a robust ignition system guarantees reliable starts and efficient operation.
Cooling System Details (Water Pump & Thermostat)
Mercury Mariner outboards rely on a robust cooling system to prevent overheating and ensure longevity. This system centers around a water pump, responsible for circulating water throughout the engine block and exhaust passages. The water pump’s impeller draws water in and forces it through cooling channels, absorbing heat.
A thermostat regulates engine temperature by controlling the flow of coolant. When the engine reaches its optimal operating temperature, the thermostat opens, allowing coolant to circulate through the exhaust system, dissipating heat.
Regularly inspect the water pump impeller for wear or damage, and verify the thermostat functions correctly. A failing water pump or a stuck thermostat can quickly lead to overheating, potentially causing severe engine damage. Consistent maintenance is key.
Steering & Shift Mechanisms
Mercury Mariner outboards employ various steering and shift mechanisms, depending on the model year and horsepower. Common steering systems include tiller arms for smaller engines and cable-operated steering for larger ones. Understanding your specific system is crucial for safe and responsive boat handling.
Shift mechanisms typically involve a shift cable connecting the control lever to the lower unit. This cable engages or disengages gears, allowing for forward, neutral, and reverse operation. Proper cable adjustment is vital for smooth and accurate shifting.
Regularly inspect steering linkages and shift cables for wear, corrosion, or damage. Lubricate moving parts to ensure smooth operation. Addressing any issues promptly will prevent steering or shifting problems while on the water, enhancing safety and control.
Maintenance Procedures
Consistent upkeep, including oil changes, spark plug checks, and fuel filter replacements, is paramount for extending the life and reliability of your Mariner outboard.
Regular Maintenance Schedule
Establishing a consistent maintenance schedule is crucial for the longevity and peak performance of your Mercury Mariner outboard. After each use, flush the cooling system with fresh water to remove salt and debris, preventing corrosion. Every 10 hours of operation, inspect the propeller for damage and ensure proper lubrication of all moving parts.
A more thorough inspection should occur every 50 hours, including checking the fuel lines, connections, and filter for leaks or blockages. Annually, or every 100 hours (whichever comes first), perform a complete oil change for both the engine and gearcase, replacing the spark plugs and inspecting the ignition system. Don’t neglect the steering and shift linkages, ensuring smooth and responsive operation. Following this schedule diligently will minimize downtime and maximize your enjoyment on the water, safeguarding your investment for years to come.
Oil Change Procedures (Gearcase & Engine)
Performing regular oil changes is vital for both the engine and gearcase of your Mercury Mariner. For the engine, warm it up briefly, then remove the drain plug, allowing the old oil to fully drain. Replace the plug with a new gasket and refill with the manufacturer’s recommended oil type and quantity.
For the gearcase, locate the fill and drain plugs – typically on the lower unit. With the boat in neutral, remove the drain plug first, followed by the fill plug to allow air to enter. Once drained, replace the drain plug and slowly fill with gearcase oil until it appears at the fill hole. Replace the fill plug securely. Always dispose of used oil responsibly, adhering to local regulations. Consistent oil changes ensure optimal lubrication and protect vital components.

Spark Plug Replacement & Inspection
Maintaining optimal spark plug condition is crucial for efficient engine combustion. Begin by disconnecting the spark plug wires, noting their positions for correct reinstallation. Use a spark plug socket to carefully remove each plug, inspecting the electrodes for wear, fouling, or damage. A properly gapped plug ensures optimal spark.
To replace, select the correct spark plug specified for your Mercury Mariner model. Gap the new plug to the manufacturer’s specifications using a spark plug gapping tool. Carefully thread the new plug into the cylinder head, tightening to the recommended torque; Reconnect the spark plug wires, ensuring a secure fit. Regular inspection and replacement contribute to smooth operation and prevent performance issues.
Fuel Filter Replacement
Protecting your Mercury Mariner’s fuel system requires periodic fuel filter replacement. Locate the fuel filter, typically found in the fuel line between the fuel tank and the carburetor. Before disassembly, relieve fuel system pressure to prevent spills. Carefully disconnect the fuel lines from the filter, using appropriate tools to avoid damage.
Install the new fuel filter, ensuring correct flow direction as indicated by the arrow on the filter housing. Securely reconnect the fuel lines, verifying a tight seal to prevent leaks; After replacement, prime the fuel system by operating the fuel pump. Regularly changing the fuel filter prevents contaminants from reaching the carburetor, ensuring optimal engine performance and longevity.
Troubleshooting Common Issues
Diagnosing problems like starting failures, poor performance, overheating, or electrical faults is crucial; this section provides basic checks and solutions for your Mariner.
Engine Won’t Start – Diagnosis
When your Mercury Mariner refuses to start, a systematic approach is essential. First, verify the fuel supply – is the tank full and the fuel line unobstructed? Next, inspect the spark plugs; are they clean, properly gapped, and firing correctly? A weak spark indicates potential ignition system issues, possibly a faulty coil or magneto.
Check the kill switch; ensure it’s not engaged. Confirm the propeller spins freely, ruling out internal engine seizure. Low compression can also prevent starting, requiring further investigation. Don’t overlook the simple things – a discharged battery or corroded connections can halt operation. Utilizing a spark tester and compression gauge will aid in pinpointing the root cause, allowing for targeted repairs and a swift return to the water.
Poor Performance – Causes & Solutions
Experiencing diminished power from your Mercury Mariner? Several factors could be at play. A clogged fuel filter restricts fuel flow, leading to sluggish response. Dirty or worn spark plugs create incomplete combustion, reducing efficiency. Inspect the carburetor for debris or varnish buildup, hindering proper fuel-air mixture.
Additionally, a failing fuel pump struggles to deliver adequate fuel pressure. Compression loss within the cylinders significantly impacts performance. Check the propeller for damage – a bent or nicked blade reduces thrust. Regularly inspecting and maintaining these components is crucial. Addressing these issues, from simple cleaning to component replacement, will restore your Mariner’s optimal power and ensure a smooth boating experience.
Overheating Problems – Identification & Fixes
Overheating is a serious concern for Mercury Mariner outboards, potentially causing significant engine damage. Identifying overheating early is vital; watch for the temperature warning light or steam emanating from the engine. A primary culprit is often a malfunctioning water pump, failing to circulate coolant effectively. Inspect the thermostat for proper operation – a stuck thermostat restricts coolant flow.
Furthermore, a blocked cooling passage, often due to corrosion or debris, hinders heat dissipation. Ensure the water intake is clear of obstructions. Regularly flushing the cooling system prevents buildup. If overheating persists, inspect the cylinder head gasket for leaks. Promptly addressing these issues prevents catastrophic engine failure and extends the life of your Mariner.
Electrical System Faults – Basic Checks
Electrical issues can quickly disable your Mercury Mariner. Begin with a visual inspection of all wiring, searching for corrosion, loose connections, or damaged insulation. Check the battery terminals for cleanliness and tightness; a weak connection hinders starting. Utilize a multimeter to test the battery voltage – it should be within the manufacturer’s specified range.
Inspect the fuses and circuit breakers; a blown fuse indicates a short circuit. Examine the ignition system components, including the coil and spark plugs, for proper functionality. Don’t overlook the kill switch, ensuring it’s not accidentally engaged. Addressing these basic checks often resolves common electrical faults, restoring your outboard’s operation and preventing further complications.

Repair & Overhaul Information
Detailed guides cover lower unit service, carburetor rebuilding, cylinder head work, and propeller maintenance – essential for restoring peak Mercury Mariner performance.
Lower Unit Service & Repair
The lower unit, housing the gears and propeller shaft, demands meticulous attention. Regular servicing prevents costly failures and ensures smooth operation. Begin by disconnecting the shift linkage and removing the lower unit, carefully noting the alignment marks. Inspect the gears for wear or damage, paying close attention to the forward, reverse, and pinion gears.
Check the water pump impeller for cracks or deterioration – a faulty impeller leads to overheating. Replace the seals and O-rings during reassembly, using marine-grade grease to lubricate the components. Proper gear case oil level is crucial; replenish with the manufacturer’s recommended fluid.
Always torque the mounting bolts to the specified values to prevent leaks and ensure a secure connection. Addressing minor issues promptly can prevent major overhauls, extending the life of your Mercury Mariner’s lower unit.
Carburetor Rebuild Guide
A carburetor rebuild restores optimal fuel delivery, addressing issues like rough idling or poor performance. Begin by carefully disassembling the carburetor, noting the position of all jets, needles, and linkages. Soak the components in carburetor cleaner to dissolve varnish and deposits. Inspect each part for wear or damage, replacing worn needles, seats, and gaskets.
Pay close attention to the float level, adjusting it according to the manufacturer’s specifications. Clean the jets thoroughly using fine wire, ensuring they are free of obstructions. Reassemble the carburetor, lubricating moving parts with a light oil.
Proper adjustment of the idle mixture and high-speed screws is vital for smooth operation; consult your manual for specific settings. A well-maintained carburetor ensures efficient fuel combustion and reliable engine performance.
Cylinder Head Removal & Inspection
Cylinder head removal is a complex procedure, requiring careful attention to detail. Begin by disconnecting the spark plugs and exhaust manifold. Loosen the head bolts in a crisscross pattern to prevent warping. Once removed, inspect the cylinder head for cracks, especially around the combustion chambers and valve seats.
Check the valve guides and valve faces for wear or damage, and consider valve replacement if necessary. Inspect the head gasket for signs of leakage or deterioration. Ensure the cylinder head surface is flat using a straightedge; machining may be required if warping is present.
Proper torque specifications are crucial during reassembly; consult your manual. A damaged cylinder head can lead to compression loss and engine failure.
Propeller Maintenance & Replacement
Regular propeller inspection is vital for optimal performance and preventing damage. Check for bent blades, nicks, or cracks, which can significantly reduce efficiency and create vibration. Inspect the shear pins for corrosion or damage; these are designed to break before causing more serious harm to the drivetrain.
When replacing a propeller, ensure it matches your engine’s horsepower and gear ratio. Using the incorrect propeller can strain the engine and reduce speed. Remove the retaining nut and washer, then slide the old propeller off the shaft.
Lubricate the shaft before installing the new propeller, and tighten the retaining nut to the manufacturer’s specified torque. Always carry a spare shear pin and propeller.