Guide

private tour guide seattle

What is a Private Tour Guide in Seattle?

Private tour guides in Seattle offer personalized experiences, catering to individual interests and providing in-depth knowledge of the city’s attractions and history.

Defining Private Tours

Private tours in Seattle fundamentally differ from large group excursions, offering a bespoke experience tailored to your specific preferences. Unlike standardized itineraries, a private guide crafts a journey reflecting your interests – be it history, food, music, or flight. These tours prioritize flexibility; you dictate the pace and focus, allowing for spontaneous detours and extended exploration of captivating spots.

Essentially, you’re commissioning a local expert for a personalized adventure. This contrasts sharply with pre-packaged tours where schedules are rigid and interaction limited. Private tours often involve smaller groups, or even solo travelers, fostering a more intimate and engaging experience. They represent an investment in a uniquely curated Seattle exploration.

Benefits of Hiring a Private Guide

Hiring a private guide in Seattle unlocks a wealth of advantages. You gain a personalized itinerary, avoiding crowded tourist traps and discovering hidden gems. A local expert provides insightful commentary, enriching your understanding of the city’s culture, history, and landmarks – like Pike Place Market or the Museum of Flight.

Flexibility is paramount; adjust the tour on the fly based on your interests. Enjoy a more intimate experience with dedicated attention, fostering deeper engagement. Private guides often handle logistics, including transportation, maximizing your time. They can also offer recommendations for dining and entertainment, enhancing your overall Seattle visit. Ultimately, it’s a stress-free, immersive exploration.

Popular Seattle Attractions to Explore with a Guide

Seattle’s iconic attractions – Pike Place Market, the Museum of Flight, Space Needle, EMP Museum, and Pacific Science Center – come alive with a knowledgeable private guide.
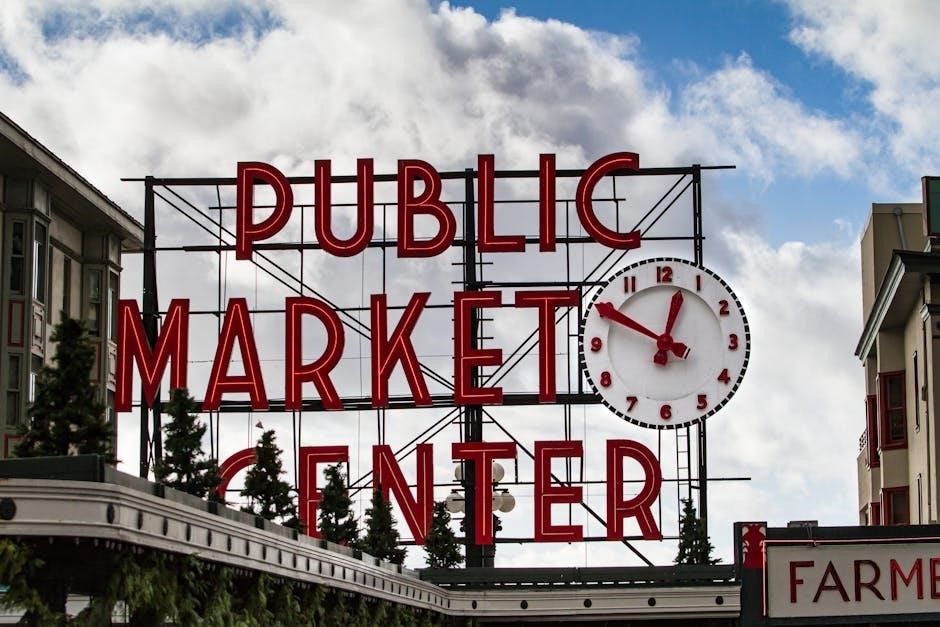
Pike Place Market

Pike Place Market, a vibrant and historic public market, is best experienced with a private guide who can navigate its bustling aisles and reveal hidden gems. A guide provides insights into the market’s origins, the local farmers and artisans, and the unique culinary offerings.

Beyond the famous fish throwing, discover the original Starbucks, sample local produce, and learn about the market’s role in Seattle’s cultural landscape. A private tour ensures you don’t miss the best spots, avoiding crowds and maximizing your time. Guides can tailor the experience to your tastes, focusing on food, flowers, or the market’s fascinating history. It’s a truly immersive way to experience the heart of Seattle!
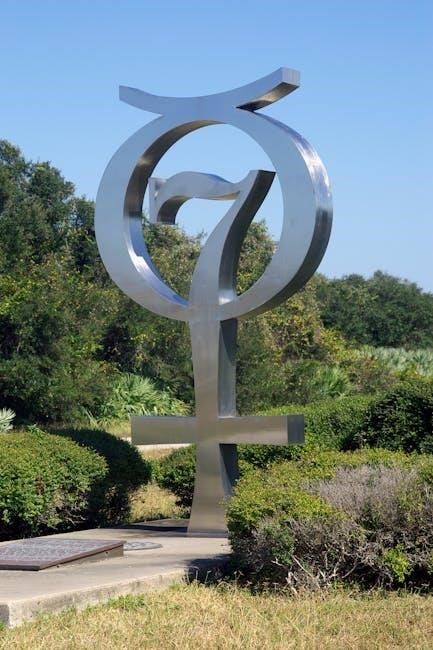
Museum of Flight

The Museum of Flight, a premier aerospace museum, benefits greatly from a private guide’s expertise. With vast exhibits spanning the history of flight, a guide can curate a focused and enriching experience, highlighting key artifacts and stories. They can delve into the science behind aviation, explain the evolution of aircraft, and share captivating anecdotes about pioneering pilots and engineers.

A private tour allows you to bypass general admission queues and access specialized knowledge, making the complex history more accessible. Guides can tailor the tour to specific interests – from early aircraft to space exploration – ensuring a personalized and memorable visit. Discover the museum’s hidden treasures and gain a deeper appreciation for the wonders of flight.
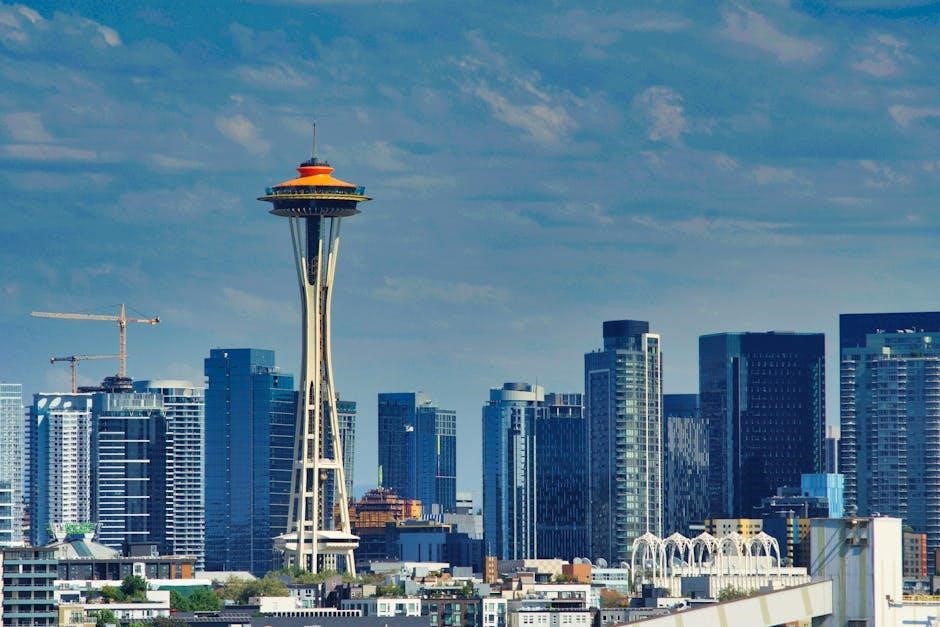
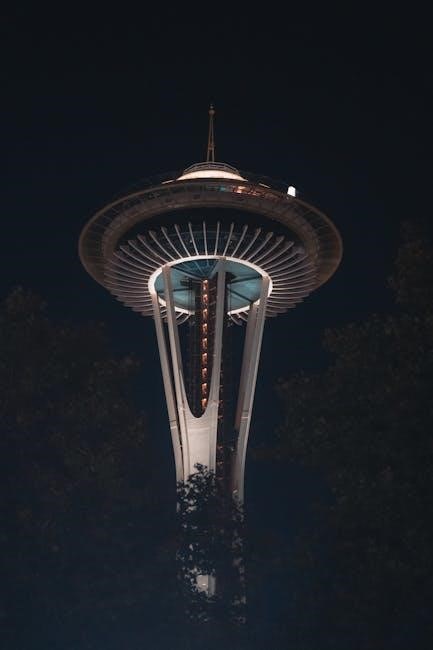
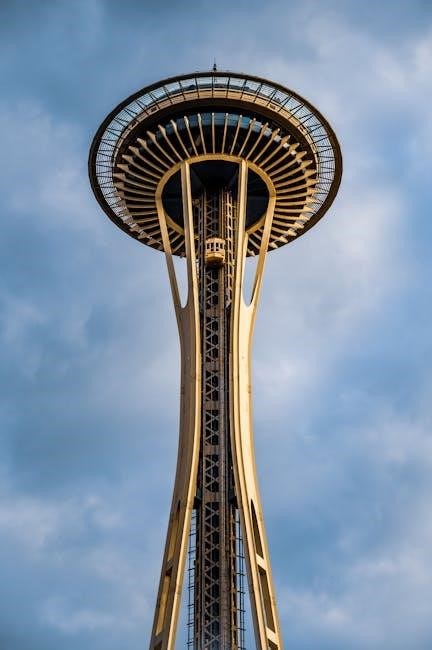
Space Needle

The Space Needle, Seattle’s iconic landmark, offers breathtaking panoramic views, but a private guide elevates the experience beyond simply observing the scenery. A knowledgeable guide provides historical context, detailing the Needle’s construction for the 1962 World’s Fair and its significance in Seattle’s cultural landscape. They can point out key landmarks visible from the observation deck, sharing stories about the city’s neighborhoods and history.

Furthermore, a guide can navigate the crowds, ensuring optimal viewing opportunities and providing insights into the architectural design and engineering marvels of the structure. They can also discuss the recent renovations and the future of this beloved Seattle icon, creating a truly immersive and informative visit.

EMP Museum (Museum of Pop Culture)

The EMP Museum (Museum of Pop Culture), with its striking architecture, is a vibrant exploration of contemporary culture, and a private guide unlocks its full potential. Navigating exhibits dedicated to music, science fiction, and pop culture can be overwhelming; a guide provides curated insights, focusing on your specific interests. They can delve into the history of iconic musicians, dissect the themes of beloved films, and explain the cultural impact of various movements.

A guide enhances the experience by sharing behind-the-scenes stories and offering a deeper understanding of the artifacts on display, making the museum come alive. They can tailor the tour to your preferences, ensuring a personalized and engaging visit.

Pacific Science Center

The Pacific Science Center is an interactive wonderland, and a private guide transforms a potentially chaotic visit into an educational adventure. With numerous exhibits spanning science, technology, engineering, and mathematics, it’s easy to feel lost. A knowledgeable guide expertly navigates the center, prioritizing exhibits aligned with your interests – whether it’s the laser dome, the tropical rainforest, or the live science demonstrations.

They can explain complex scientific concepts in an accessible way, fostering a deeper understanding and sparking curiosity. A guide also manages time effectively, ensuring you experience the highlights without feeling rushed, making it ideal for families and inquisitive minds.

Types of Private Tours Available

Seattle’s private tours encompass city explorations, historical walks, culinary adventures, and even extended day trips to nearby destinations like Vancouver, BC.
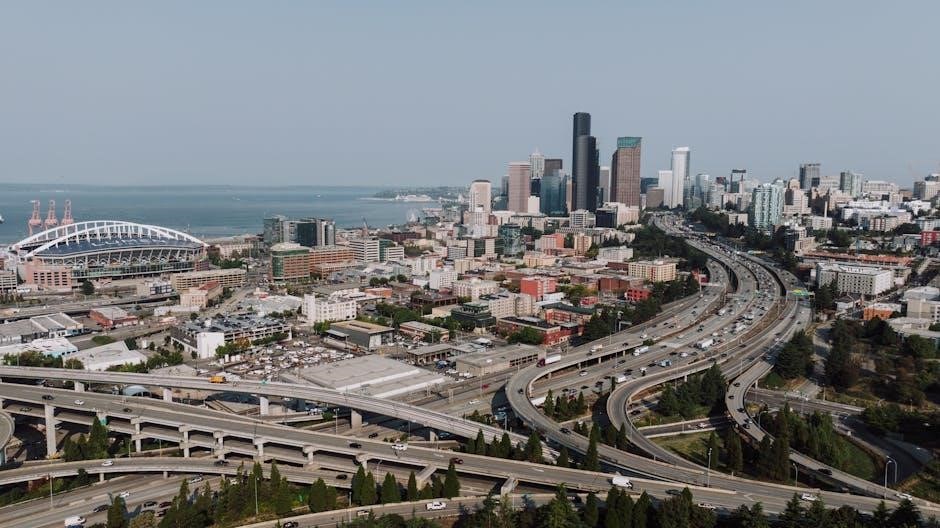
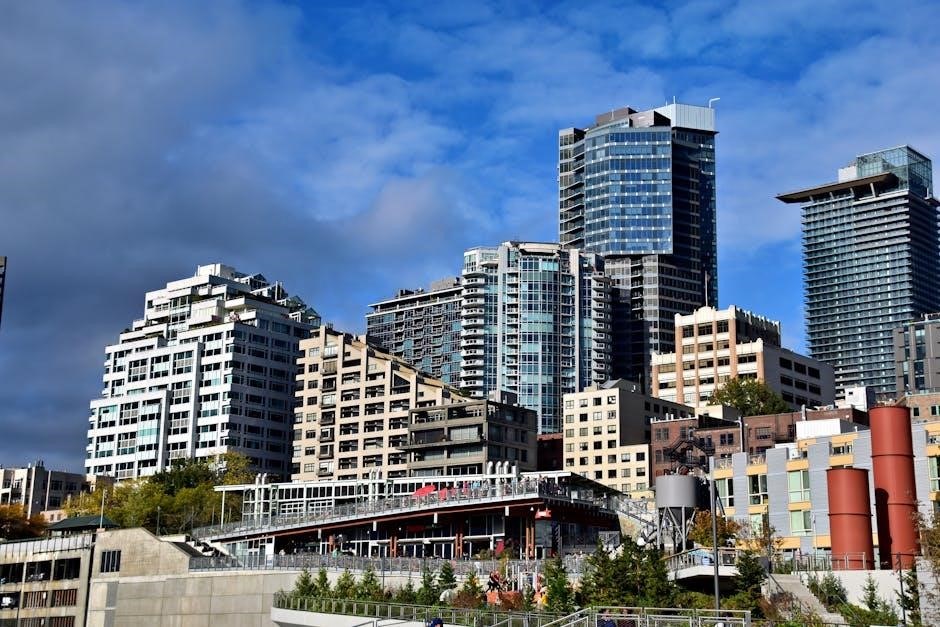
Seattle City Tours

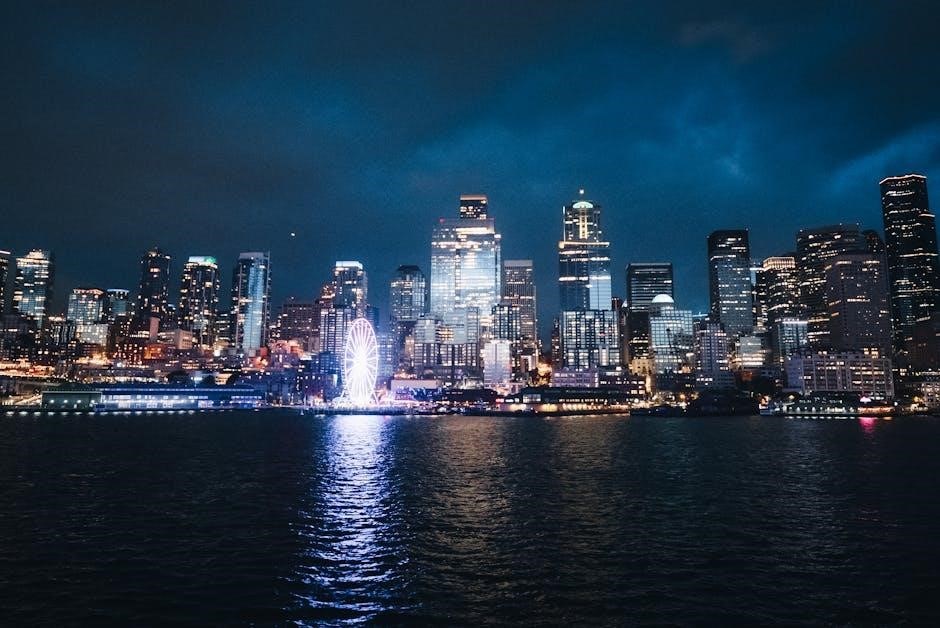
Seattle City Tours with a private guide provide a flexible and immersive way to discover the Emerald City’s iconic landmarks and hidden gems. These tours are fully customizable, allowing you to prioritize attractions like Pike Place Market, the Space Needle, and the waterfront.

Unlike larger group tours, a private guide can tailor the itinerary to your specific interests, whether it’s architecture, history, or local culture. Transportation is often included, offering convenient access to various neighborhoods. Expect a detailed exploration of Seattle’s diverse districts, accompanied by insightful commentary and personalized recommendations. Many tours can be arranged to depart directly from your hotel, maximizing your time and comfort.

Historical Walking Tours

Historical Walking Tours led by a private guide unlock Seattle’s rich past, revealing stories behind its landmarks and neighborhoods. These tours delve into the city’s origins as a logging settlement, its transformation following the Great Fire, and its role in the Klondike Gold Rush.

A knowledgeable guide will bring history to life, sharing anecdotes and insights not found in guidebooks. Explore Pioneer Square’s Victorian architecture, learn about the Underground Tour’s fascinating history, and discover the stories of Seattle’s early pioneers. These tours are a fantastic way to experience the city at a slower pace, fostering a deeper connection to its heritage and cultural evolution. Comfortable shoes are highly recommended!
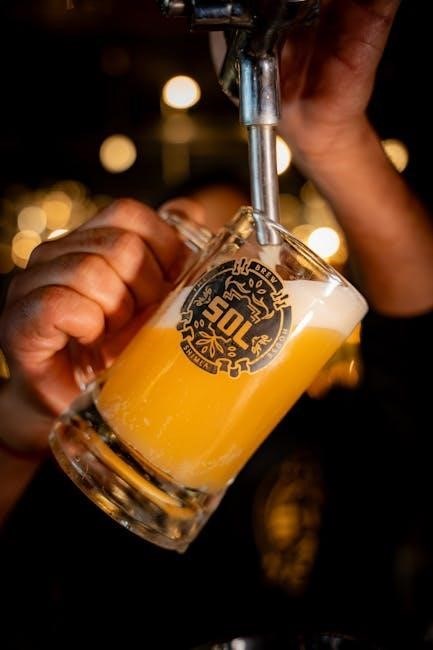
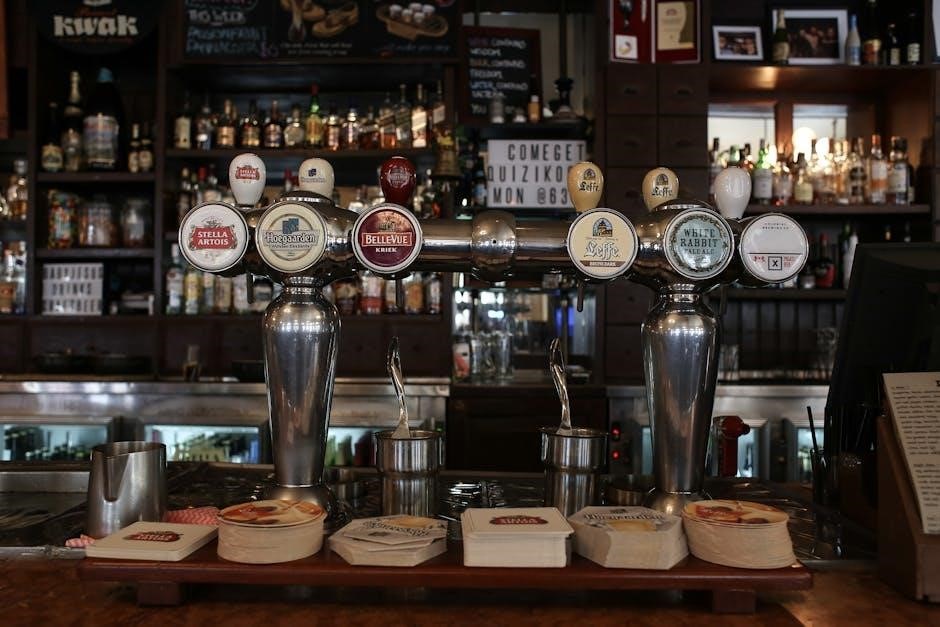
Food & Drink Tours

Food & Drink Tours with a private guide offer a delicious exploration of Seattle’s vibrant culinary scene. From the iconic Pike Place Market, brimming with fresh produce and local delicacies, to trendy neighborhoods boasting innovative restaurants and craft breweries, a guide tailors the experience to your palate.

Savor fresh seafood, artisanal cheeses, and locally roasted coffee. Discover hidden gems and learn about the stories behind Seattle’s food producers. Many tours include tastings at multiple establishments, providing a comprehensive overview of the city’s diverse flavors. Whether you’re a foodie or simply enjoy good eats, a private food tour is a flavorful and memorable way to experience Seattle.

Day Trips from Seattle (Vancouver, BC)

Day Trips to Vancouver, BC, with a private guide provide a seamless and enriching experience beyond Seattle’s city limits. Avoid the complexities of international travel logistics – your guide handles transportation and border crossings, maximizing your time exploring Vancouver’s highlights.

Discover iconic landmarks like Gastown’s Steam Clock, Stanley Park’s scenic seawall, and Granville Island Market’s bustling atmosphere. A private guide offers personalized insights into Vancouver’s history, culture, and hidden gems, tailoring the itinerary to your interests. Enjoy a comfortable and informative journey, creating lasting memories of both Seattle and its Canadian neighbor. Car pickup from Seattle is often included!

Cost of Private Tours in Seattle

Private tour costs vary, with self-guided walking tours starting around US$8 per person, while full-day excursions, like Vancouver trips, can exceed $88.80.

Factors Influencing Price

Several key elements determine the cost of a private tour in Seattle. Tour duration is a primary factor; longer tours naturally command higher fees. The number of participants also plays a significant role, as some guides charge per person or offer tiered pricing.

Transportation needs impact the price, with tours requiring vehicle rental or extensive travel incurring additional expenses. The guide’s expertise and experience level are also considered, as specialized knowledge often justifies a premium. Furthermore, inclusions like entrance fees to attractions (Museum of Flight, EMP Museum, Pacific Science Center) or pre-booked reservations will be factored into the overall cost. Finally, the type of tour – a simple city walk versus a full-day excursion to Vancouver, BC – significantly influences the final price.

Average Price Ranges (2026 Estimates)

For private tours in Seattle in 2026, expect a varied price landscape. Basic Seattle city tours, lasting around 3-4 hours, may range from $200 to $400. More comprehensive, full-day explorations (approximately 12.5 hours, potentially including a Vancouver day trip) could fall between $888 and $1500, depending on inclusions and transportation.

Historical walking tours, typically shorter in duration, might cost $150-$300. Food & Drink tours, factoring in tasting expenses, generally range from $250 to $500. Remember these are estimates; prices fluctuate based on the factors previously mentioned. Some operators offer “pay what you feel” options, particularly for self-guided walking tours, starting around $8 per person.

“Pay What You Feel” Options & Budget Tours

For travelers seeking affordable exploration, Seattle offers intriguing “pay what you feel” tour options, particularly for self-guided walking routes. These allow you to determine the tour’s value based on your experience, with starting points around $8 per person. While not traditional private tours, they provide flexibility.

Budget-conscious visitors can also find group walking tours at lower price points. Independent guides sometimes offer discounted rates or shorter, focused itineraries. Exploring options beyond established companies can reveal hidden gems. Remember to carefully assess inclusions and ensure the tour aligns with your interests, even with budget choices.

Finding and Booking a Private Tour Guide

Seattle private tour guides are readily available through online platforms like Viator and GetYourGuide, as well as through dedicated local tour companies and independent guides.

Online Platforms (Viator, GetYourGuide)

Viator and GetYourGuide are popular online marketplaces connecting travelers with Seattle private tour guides. These platforms offer a wide selection of tours, ranging from city explorations to specialized themed experiences. Users can easily compare prices, read reviews from previous customers, and check availability for specific dates.

The convenience of these platforms lies in their centralized booking system and secure payment processing. Many tours listed on Viator and GetYourGuide offer free cancellation policies, providing flexibility for travelers. You’ll find options for full-day excursions, including day trips to Vancouver, BC, departing from Seattle.

Filtering options allow you to refine your search based on your interests, budget, and group size. Be sure to carefully review the tour details, including what is included and excluded, before making a reservation. These platforms often showcase tours with ratings exceeding 4.5 stars, indicating high customer satisfaction.

Local Tour Companies

Seattle boasts numerous local tour companies specializing in private tours. These companies often provide a more personalized and intimate experience compared to larger platforms. They frequently employ local guides with extensive knowledge of the city’s hidden gems and cultural nuances. Many offer customized itineraries tailored to your specific interests, whether it’s exploring Pike Place Market, the Museum of Flight, or the Space Needle.

Directly booking with a local company can sometimes offer greater flexibility and the opportunity to negotiate pricing. They may also provide unique tour options not found on larger platforms, such as specialized food & drink tours or historical walking tours. Researching and comparing different local companies is crucial to find the best fit for your needs.

Look for companies with positive online reviews and a strong reputation for customer service. Some companies even offer “pay what you feel” options for budget travelers.

Independent Guides

Seattle also offers the option of hiring independent tour guides, often found through online platforms or word-of-mouth. These guides typically operate as freelancers, providing a highly personalized and flexible tour experience. They can often customize itineraries to a greater extent than larger companies, focusing on niche interests or off-the-beaten-path locations.

When choosing an independent guide, thorough vetting is essential. Carefully check reviews and ratings, and communicate directly with the guide to discuss your expectations and preferences. Confirm their knowledge of Seattle’s attractions, including the EMP Museum and Pacific Science Center, and their ability to provide engaging commentary.

Independent guides may offer competitive prices, but it’s crucial to clarify all inclusions and exclusions upfront, including transportation and entrance fees.

What to Expect on Your Tour

Seattle private tours vary in duration, from a few hours to full-day excursions like a Vancouver day trip, with transportation options readily available.

Tour Duration & Itinerary

Private tour durations in Seattle are remarkably flexible, adapting to your preferences. Options range from concise two-hour explorations focusing on a single attraction, like Pike Place Market, to comprehensive full-day adventures – approximately 12.5 hours – extending even to destinations like Vancouver, BC.

Itineraries are collaboratively designed, ensuring alignment with your interests. A Seattle city tour might encompass iconic landmarks, while a specialized tour could delve into the Museum of Flight or the EMP Museum. Expect detailed planning, including scheduled stops, estimated timings, and opportunities for spontaneous exploration. Guides often incorporate local insights and hidden gems, enriching the overall experience. Remember to discuss your priorities with your guide beforehand to craft a truly personalized journey.

Transportation Options

Seattle offers diverse transportation for private tours, catering to varying budgets and preferences. Walking tours are popular for exploring compact areas like downtown and Pike Place Market, providing an immersive experience. For longer distances or multi-attraction itineraries, private car service is a convenient option, offering door-to-door comfort.

Public transportation, including buses and the Link light rail, presents a cost-effective alternative, with options like a $6 all-day pass for unlimited rides. Some tours may incorporate a combination of methods, utilizing public transport for certain segments and private vehicles for others. Discuss your preferred mode of transport with your guide during the planning phase to ensure a seamless and enjoyable tour experience.

Meeting Points & Logistics

Private tour meeting points in Seattle are typically flexible, often arranged at your hotel, a central landmark like Pike Place Market, or a convenient public transportation hub. Clear communication with your guide beforehand is crucial to confirm the exact location and time. Consider potential traffic congestion, especially during peak hours, when planning your arrival.

Logistically, most guides handle all the details, including pre-booked tickets and transportation arrangements. However, it’s wise to confirm inclusions and exclusions beforehand. Be prepared to share any dietary restrictions or mobility concerns with your guide to ensure a comfortable and personalized experience. Promptness is appreciated, allowing you to maximize your tour time and fully enjoy Seattle’s offerings.

Tips for Choosing the Right Guide

Seattle guide selection requires checking reviews, considering personal interests, and confirming tour inclusions—ensuring a tailored experience that aligns with your preferences and budget.

Check Reviews and Ratings

Before booking a private tour guide in Seattle, thoroughly investigate online reviews and ratings. Platforms like Viator and GetYourGuide showcase valuable feedback from previous clients, offering insights into the guide’s expertise, personality, and overall tour quality. Pay attention to recurring themes – consistently positive comments regarding knowledge, communication skills, and ability to cater to individual needs are excellent indicators.

Conversely, be mindful of negative reviews, but consider the context. A single unfavorable experience doesn’t necessarily disqualify a guide, but a pattern of complaints warrants caution. Look for detailed reviews that explain why a tour was unsatisfactory. Don’t solely rely on star ratings; read the written comments to gain a comprehensive understanding of what to expect. A guide with numerous, detailed, and positive reviews is generally a safe bet for a memorable Seattle experience.

Consider Your Interests

Selecting a Seattle private tour guide should align with your personal passions. Seattle boasts diverse attractions, from the iconic Pike Place Market and the Museum of Flight to the vibrant EMP Museum and the Pacific Science Center. Are you a history buff eager to explore Seattle’s past through a historical walking tour? Or perhaps a foodie desiring a culinary adventure, sampling local delicacies?

Maybe you’re fascinated by aviation and want an in-depth exploration of the Museum of Flight. Some guides specialize in specific areas, offering unparalleled expertise. Don’t hesitate to inquire about a guide’s knowledge and experience related to your interests. A well-matched guide will transform your tour from a generic sightseeing trip into a truly enriching and personalized experience, maximizing your enjoyment of the Emerald City.

Confirm Inclusions & Exclusions

Before finalizing your Seattle private tour, meticulously confirm what’s included and excluded. Understand if entrance fees to attractions like the Space Needle, EMP Museum, or Museum of Flight are covered, or if those are separate expenses. Clarify transportation details – is it provided, or are you responsible for getting to meeting points?

Inquire about gratuity policies; some tours include it, while others expect a “pay what you feel” contribution after the experience. Day trips to Vancouver, BC, for example, may not include border crossing fees or meals. A clear understanding of these details prevents unexpected costs and ensures a smooth, enjoyable tour. Don’t hesitate to ask specific questions to avoid any misunderstandings.

cscs study guide pdf

CSCS Study Guide PDF: A Comprehensive Plan

Navigating the construction industry demands a valid CSCS card, and a dedicated study guide PDF is crucial for success. Resources like Ryan Grellas’ tests and The Movement system offer valuable preparation. Caspero Casino’s focus on fast payouts mirrors the need for efficient exam preparation, ensuring you’re ready to confidently tackle the challenges and achieve certification within the specified timeframe.

What is the CSCS Card?

The Construction Skills Certification Scheme (CSCS) card is a nationally recognised qualification verifying a worker’s training and competence within the UK construction industry. It’s essentially proof that individuals possess the necessary skills and knowledge to perform their job safely and effectively on a construction site. Obtaining a CSCS card isn’t just about having a piece of plastic; it’s a legal requirement for many sites, ensuring a baseline level of health and safety awareness amongst all personnel.

Like Caspero Casino’s commitment to secure transactions, the CSCS card provides assurance – in this case, assurance of competency. Different card levels exist, reflecting varying roles and responsibilities. Preparation, much like utilizing a comprehensive study guide PDF, is key to passing the required health and safety test. Without a valid CSCS card, access to many construction sites is prohibited, hindering employment opportunities and career progression. It’s a fundamental element of working within the UK construction sector.

Understanding the Different CSCS Card Levels

CSCS cards aren’t one-size-fits-all; they’re tiered to reflect diverse job roles. The Red Card is for trainees, demonstrating enrollment in a recognised course. The Green Card is for labourers, requiring proof of relevant experience. The Blue Skilled Worker card is for those with NVQ qualifications, and the Gold Card signifies supervisory roles. Just as Caspero Casino offers varied gaming options, CSCS provides tailored cards.

Choosing the correct card level is vital, and a good study guide PDF will clarify the requirements for each. The level dictates the necessary qualifications and the health and safety test you must pass. Understanding these distinctions is crucial, as applying for the wrong card will result in rejection. Like ensuring secure transactions at Caspero, the CSCS scheme prioritises correct identification and verification of skills, maintaining industry standards and safety protocols.

Why You Need a CSCS Study Guide PDF

Passing the CSCS exam requires dedicated preparation, and a study guide PDF is an invaluable tool. The exam covers crucial health and safety regulations, construction site risks, and legal responsibilities. Attempting the test without thorough study significantly reduces your chances of success, potentially delaying your entry onto construction sites.

A PDF offers flexibility – study anytime, anywhere. Resources like Ryan Grellas’ materials demonstrate the benefit of focused practice. Similar to Caspero Casino’s commitment to a smooth user experience, a well-structured guide streamlines your learning. It consolidates essential information, providing a clear path to understanding the complex topics. Investing in a quality guide is investing in your career, ensuring you’re equipped with the knowledge to work safely and effectively;

Where to Find Reliable CSCS Study Guide PDFs

Locating trustworthy CSCS study guide PDFs is paramount. Official CSCS resources, available through the CITB website, provide the most accurate and up-to-date information; However, third-party providers also offer valuable materials, such as those highlighted by Ryan Grellas, known for focused practice tests.

Exercise caution when downloading from unofficial sources; ensure the content aligns with the latest exam syllabus (as of 02/06/2026). Just as Caspero Casino prioritizes secure transactions, prioritize reliable sources. Look for guides with positive reviews and clear content organization. Comparing multiple resources can enhance your understanding. Remember, a comprehensive guide, similar to a well-curated online casino catalog, should cover all key exam topics effectively.

Official CSCS Resources

The CITB (Construction Industry Training Board) website is the primary source for official CSCS study guide PDFs and related materials. These resources are meticulously maintained to reflect the current exam standards, ensuring accuracy and relevance – akin to Caspero Casino’s commitment to updated game selections.

You’ll find practice questions, detailed syllabus outlines, and information on exam booking procedures. While potentially less flashy than third-party options, the official materials offer unparalleled reliability. Consider them the foundational element of your preparation. Just as Caspero Casino emphasizes data security, the CITB prioritizes the integrity of its certification process. Utilizing these resources provides a solid base, comparable to building a secure online gaming platform.

Third-Party Study Guide Providers

Numerous companies offer CSCS study guide PDFs, often providing a more streamlined or visually engaging learning experience. Providers like Ryan Grellas and The Movement system, mentioned in recent discussions, are popular choices, mirroring Caspero Casino’s diverse game offerings to cater to varied preferences.

These guides frequently include extensive practice questions, mock exams simulating the touchscreen format, and detailed explanations of key concepts. However, it’s crucial to verify the provider’s reputation and ensure their materials are up-to-date, much like checking a casino’s licensing and certifications. While potentially offering faster learning, prioritize accuracy and relevance – a principle Caspero Casino applies to its swift payout processing.

Key Topics Covered in the CSCS Exam

A comprehensive CSCS study guide PDF must cover core areas to ensure preparedness. Health and Safety Basics form the foundation, encompassing hazard identification and risk assessment – akin to Caspero Casino’s data security measures. Construction Site Safety Regulations are vital, detailing legal requirements and safe working practices.

Understanding Construction Risks and Hazards is paramount, including topics like working at height, manual handling, and electricity. Preparation should mirror Caspero’s commitment to secure transactions, demanding thorough knowledge. Effective guides will break down complex regulations, offering clarity and practical application, much like a well-structured online casino platform provides accessible gaming options.

Health and Safety Basics

A robust CSCS study guide PDF prioritizes Health and Safety Basics, establishing a foundational understanding. This includes recognizing common site hazards – mirroring Caspero Casino’s proactive security measures. Key areas encompass hazard identification, risk assessment, and control measures, demanding a systematic approach.

Understanding your responsibilities as a worker, and those of your employer, is crucial. The guide should detail safe manual handling techniques, proper use of PPE (Personal Protective Equipment), and emergency procedures. Just as Caspero Casino ensures protected transactions, a solid grasp of these basics safeguards wellbeing on site. Effective guides present this information clearly, fostering a safety-conscious mindset.

Construction Site Safety Regulations

A comprehensive CSCS study guide PDF meticulously covers Construction Site Safety Regulations, mirroring the strict standards Caspero Casino applies to data security and certifications. This section delves into legislation like the Construction (Design and Management) Regulations 2015 (CDM 2015), outlining duties of clients, designers, and contractors.

Understanding topics like working at height, excavation safety, and electrical safety is paramount. The guide should explain permit-to-work systems, safe systems of work, and the importance of site signage. Just as Caspero Casino prioritizes fast, protected transactions, adherence to these regulations ensures a safe working environment. Detailed explanations and real-world examples are vital for effective learning and exam success.

Understanding Construction Risks and Hazards

A robust CSCS study guide PDF dedicates significant attention to Understanding Construction Risks and Hazards, akin to Caspero Casino’s commitment to a secure gaming platform. It details common dangers like falls from height, struck-by incidents involving vehicles or materials, and exposure to hazardous substances.

The guide should explain risk assessment processes – identifying hazards, evaluating risks, and implementing control measures. It must cover topics like manual handling, noise and vibration, and the safe use of power tools. Just as Caspero Casino offers immediate cashbacks to mitigate player risk, understanding and controlling construction hazards is crucial for preventing accidents and ensuring worker wellbeing. Practical examples and case studies enhance comprehension and exam preparation.

Effective Study Techniques for the CSCS Exam

Leveraging a CSCS study guide PDF effectively requires strategic techniques. Utilizing practice questions, similar to Caspero Casino’s “Spin to Win” bonus, provides immediate feedback and identifies knowledge gaps. Creating a study schedule, mirroring the casino’s organized platform, ensures consistent progress.

Mock exam strategies are vital; simulate exam conditions to build confidence and time management skills. Break down complex topics into manageable chunks, and actively recall information rather than passively rereading. Resources like Ryan Grellas’ tests and The Movement system’s materials complement the PDF. Treat studying like a game – consistent effort yields rewards, just as Caspero Casino’s loyalty program benefits players.

Utilizing Practice Questions

Practice questions are the cornerstone of CSCS exam preparation when using a study guide PDF. They mirror the exam’s format, building familiarity and reducing anxiety. Think of it like Caspero Casino’s instant cashbacks – immediate reinforcement for correct answers. Resources like Ryan Grellas’ tests provide a diverse question bank, while The Movement system offers focused practice.

Analyze incorrect answers to pinpoint weak areas, treating each mistake as a learning opportunity. Don’t just memorize; understand the why behind the correct answer. Regularly assess your progress with timed practice sessions, simulating exam pressure. Just as Caspero Casino prioritizes secure transactions, ensure your practice is focused and reliable, leading to a confident and successful exam outcome.

Creating a Study Schedule

A well-structured study schedule is vital when utilizing a CSCS study guide PDF. Treat it like Caspero Casino’s loyalty program – consistent effort yields rewards. Allocate specific time slots for each key topic, ensuring balanced coverage. Break down the material into manageable chunks, preventing overwhelm. Prioritize areas where you feel less confident, dedicating extra time for focused revision.

Incorporate regular breaks to maintain concentration, mirroring Caspero’s innovative Spin to Win bonus – a refreshing change of pace. Review your schedule weekly, adjusting as needed based on your progress. Consistency is key; even short, focused study sessions are more effective than infrequent marathon sessions. A disciplined approach, like Caspero’s fast payouts, will maximize your chances of success.

Mock Exam Strategies

Utilizing mock exams alongside your CSCS study guide PDF is paramount for success, akin to Caspero Casino’s commitment to player experience. Treat each practice test as a real exam – simulate the timed conditions and minimize distractions. Analyze your results meticulously, identifying areas of weakness. Don’t just review the correct answers; understand why incorrect options were wrong.

Focus on time management during mock exams, mirroring Caspero’s promise of lightning-fast payouts. Practice answering questions quickly and efficiently. Review the questions you struggled with, revisiting the relevant sections of your study guide. Embrace mistakes as learning opportunities, much like Caspero’s cashback offers compensate for losses. Regular mock exams build confidence and familiarize you with the exam format.

Specific Areas to Focus On in Your Study Guide

Prioritize key areas within your CSCS study guide PDF, mirroring Caspero Casino’s focus on diverse gambling options. Concentrate on understanding construction site safety regulations, hazard identification, and risk assessment. Pay close attention to topics like working at height, manual handling, and electrical safety. Ensure a firm grasp of health and safety documentation, including risk assessments and method statements.

Don’t overlook the importance of understanding your rights and responsibilities on site. Familiarize yourself with common construction plant and equipment, and safe operating procedures. Like Caspero’s commitment to secure transactions, prioritize understanding safety protocols. Review emergency procedures and first aid basics. A comprehensive study, similar to Caspero’s varied game catalog, will maximize your chances of success.

Understanding the Exam Format

The CSCS exam, delivered via a touchscreen interface, primarily consists of multiple choice questions. Your study guide PDF should prepare you for this format. Expect questions covering a broad range of health and safety topics, mirroring the diverse options at Caspero Casino. Familiarize yourself with the question types and practice answering under timed conditions.

Passing score requirements vary depending on the specific CSCS card level. A thorough understanding of the material, reinforced by practice tests, is essential. Like Caspero’s commitment to fast payouts, efficiency is key – manage your time effectively during the exam. Focus on understanding the core principles rather than rote memorization. Preparation, akin to Caspero’s secure platform, builds confidence and increases your likelihood of success.

Multiple Choice Questions

The CSCS exam heavily relies on multiple choice questions, demanding a strategic approach to answering. Your study guide PDF should include numerous practice questions mirroring the exam’s style. Like navigating the diverse game selection at Caspero Casino, you’ll encounter a variety of scenarios and questions testing your knowledge.

Each question presents several options, only one of which is correct. Carefully read each option, eliminating those you know are incorrect. Don’t rush; Caspero Casino prioritizes secure transactions, and you should prioritize accuracy. Understand the wording of the question and look for keywords. A well-prepared study guide will help you identify common pitfalls and improve your test-taking skills, ensuring you confidently select the correct answer.

Passing Score Requirements

Understanding the passing score is vital when utilizing your CSCS study guide PDF. While the exact percentage can vary slightly, a consistent score of 42 out of 50 is generally required to pass the exam. This translates to achieving approximately 84% accuracy. Just as Caspero Casino offers immediate cashbacks to enhance player experience, a solid understanding of the required score boosts your confidence.

Your study guide should emphasize consistently achieving this benchmark through practice tests. Don’t solely focus on memorization; aim for comprehension. Like Caspero’s commitment to fast payouts, a clear understanding of the material leads to quicker, more accurate responses. Familiarize yourself with the scoring system and identify areas where you consistently struggle, dedicating extra study time accordingly.

Resources Beyond the PDF: Online Courses & Apps

Supplementing your CSCS study guide PDF with online courses and mobile apps significantly enhances your preparation. Platforms offer interactive learning experiences, mirroring Caspero Casino’s innovative Spin to Win bonus – adding excitement and engagement. Resources like those mentioned – Ryan Grellas’ materials and The Movement system – provide focused practice and detailed explanations.

These digital tools often include mock exams, progress tracking, and personalized feedback, addressing weaknesses identified during self-study. Apps allow for convenient learning on-the-go, similar to Caspero’s focus on accessible gaming. Consider video tutorials and online forums for collaborative learning and clarification of complex concepts. Leveraging these resources alongside your PDF maximizes your chances of success on the CSCS exam.

Common Mistakes to Avoid During the Exam

During the CSCS exam, several common pitfalls can hinder success, despite diligent study with your PDF guide. Rushing through questions is a frequent error; carefully read each one, mirroring Caspero Casino’s emphasis on secure transactions – precision is key. Misinterpreting questions due to unfamiliar terminology is another issue; utilize glossaries and practice applying terms in context.

Failing to manage your time effectively can lead to unanswered questions. Practice mock exams, like those offered by resources such as Ryan Grellas, to build pacing skills. Don’t second-guess yourself excessively; trust your initial instincts after careful consideration. Ignoring the negative marking system can also be detrimental. Avoid leaving questions blank, and prioritize answering all questions to the best of your ability.

Renewing Your CSCS Card: What You Need to Know

CSCS card renewal isn’t automatic; proactive steps are essential, much like maintaining a consistent study schedule with your PDF guide. Typically, renewal requires completing a relevant health and safety qualification within the last five years, demonstrating continued professional development – akin to Caspero Casino’s commitment to innovative features.

You’ll need to provide proof of competency, often through a touch-screen test or a recognized training course. Ensure your details are up-to-date on the CSCS online portal. Failing to renew before expiry means you can’t legally work on-site. Resources like those highlighted by exam takers (Ryan Grellas materials) can aid refresher learning. Allow ample time for processing, and be aware of any updated requirements, mirroring the need for swift payouts at Caspero Casino.

The Importance of Continued Professional Development (CPD)

CPD is vital for maintaining a valid CSCS card and staying current with evolving industry standards, much like Caspero Casino’s commitment to innovative features and player experience. Simply passing the initial exam isn’t enough; demonstrating ongoing learning is key. This can include short courses, workshops, or even reading industry publications – supplementing your initial CSCS study guide PDF.

Regular CPD enhances your skills and knowledge, improving site safety and efficiency. It also fulfills the renewal requirements for your card. Think of it as continuous improvement, mirroring the fast payout technology at Caspero. Resources used for initial study, like those from Ryan Grellas, can be revisited. Prioritizing CPD demonstrates professionalism and a dedication to best practices within the construction sector.

CSCS Study Guide PDF: Cost and Value

The cost of a CSCS study guide PDF varies significantly, ranging from free online resources to comprehensive paid packages. While free options exist, investing in a quality, well-structured guide – similar to Caspero Casino’s commitment to a premium gaming experience – often yields better results. Paid guides, like those offered by Ryan Grellas, typically include practice questions and detailed explanations.

The value lies in exam success and avoiding costly retakes. Consider the potential earnings lost without a valid CSCS card. A good study guide PDF streamlines your preparation, focusing on key topics and mirroring the exam format. It’s an investment in your career, much like Caspero’s focus on secure transactions and player satisfaction, ensuring a worthwhile return.

Latest Updates to the CSCS Exam (as of 02/06/2026)

As of February 6th, 2026, the CSCS exam maintains its focus on core construction safety principles, but subtle updates require diligent preparation. While specific changes aren’t detailed in available information, staying current is vital – mirroring Caspero Casino’s commitment to updated security certifications. Resources like Ryan Grellas’ materials are likely adapting to these shifts.

The touchscreen exam format remains prevalent, demanding familiarity with the interface. Focus on understanding construction risks and regulations, as these areas consistently feature prominently. A comprehensive study guide PDF should reflect these updates, offering relevant practice questions. Prioritize continuous professional development (CPD), similar to Caspero’s community engagement, to remain informed about evolving industry standards and exam criteria.

Preparing for the CSCS Touchscreen Exam

The CSCS touchscreen exam demands a different approach than traditional paper-based tests. Familiarize yourself with the interface – practice navigating and selecting answers digitally. A quality study guide PDF should incorporate practice questions mirroring the touchscreen format, allowing you to build confidence and speed.

Focus on efficient time management; the exam is timed. Like Caspero Casino’s promise of fast payouts, aim for quick and accurate responses. Utilize resources like Ryan Grellas’ tests to simulate exam conditions. Prioritize understanding core concepts over rote memorization. Remember, the exam assesses practical knowledge, so apply your learning to real-world construction scenarios. A well-structured PDF will aid in this focused preparation.

Troubleshooting Common Issues with CSCS Registration & Exams

CSCS registration and exam processes can sometimes present challenges. A comprehensive study guide PDF often includes links to official CSCS resources for resolving common issues – lost passwords, booking problems, or discrepancies in your application.

If encountering difficulties, first consult the official CSCS website’s FAQ section. Like Caspero Casino prioritizing secure transactions, ensure your personal details are accurate during registration. If problems persist, contact the CSCS helpline directly. Remember to have your registration number readily available. Utilizing practice tests, similar to those offered by Ryan Grellas, can highlight areas of weakness and prevent exam-day surprises, minimizing potential for re-tests due to insufficient preparation.

beers criteria 2023 pocket guide

The 2023 AGS Beers Criteria represent an expert consensus, offering guidance for potentially inappropriate medications (PIMs) in older adults.
This updated resource aids healthcare professionals in optimizing medication regimens and promoting safer prescribing practices.

What are the Beers Criteria?

The Beers Criteria are explicitly defined lists of potentially inappropriate medications (PIMs) for older adults. Developed by the American Geriatrics Society (AGS), these criteria aren’t absolute contraindications, but rather flags for cautious clinical evaluation. They highlight medications generally avoided due to higher risk of adverse effects in this population.

The criteria categorize PIMs based on conditions where alternatives are typically preferred, or where the risk outweighs the benefit. The 2023 update builds upon previous versions, incorporating new evidence and refining existing recommendations. It’s a dynamic tool, continually evolving to reflect the latest understanding of geriatric pharmacotherapy. The goal is to enhance patient safety and optimize medication use in older individuals.

Purpose and Importance of the Update

The 2023 update to the AGS Beers Criteria addresses the evolving landscape of medication use and the growing population of older adults. Many older patients take multiple medications, increasing the risk of drug interactions and adverse events. This update aims to minimize harm by providing clinicians with current, evidence-based guidance on potentially inappropriate medications.

The revisions incorporate new research, clarify existing recommendations, and expand the list of medications requiring dose adjustments based on renal function – notably adding Baclofen and NSAIDs. Furthermore, the release of the AGS Beers Criteria Alternatives List supports safer prescribing by offering viable treatment options. Ultimately, the update strives to improve the quality of care for older adults.

Target Audience: Healthcare Professionals

The AGS Beers Criteria are primarily intended for use by healthcare professionals involved in the care of older adults. This includes physicians, pharmacists, nurses, and other clinicians who prescribe, dispense, or monitor medications. The criteria serve as a valuable tool for comprehensive medication review and deprescribing efforts.

While not rigid rules, the Beers Criteria offer guidance to facilitate informed clinical decision-making. Professionals should consider individual patient factors, such as comorbidities and functional status, alongside the criteria; The goal is to optimize medication regimens, minimize potential harms, and enhance the overall well-being of older patients. Effective implementation requires ongoing education and a commitment to patient-centered care.

Key Changes in the 2023 Update

The 2023 update includes new medications, modifications to existing entries, and clarified rationales, particularly regarding renal function adjustments for drugs like baclofen and rivaroxaban.

New Medications Added to the List

The 2023 AGS Beers Criteria update incorporated several new medications deemed potentially inappropriate for older adults. While a comprehensive list requires consulting the full criteria, key additions focus on minimizing risks associated with polypharmacy and age-related physiological changes. Notably, certain nonsteroidal anti-inflammatory drugs (NSAIDs) received increased scrutiny, leading to their inclusion under specific circumstances.

The expert panel carefully reviewed emerging evidence to identify medications with limited benefit or substantial harm potential in geriatric populations. This proactive approach aims to enhance patient safety and optimize medication regimens. The additions aren’t blanket prohibitions, but rather flags for careful consideration and individualized assessment. Healthcare professionals should always weigh the risks and benefits within the context of each patient’s unique health profile.

Modifications to Existing Medication Entries

The 2023 update to the Beers Criteria didn’t solely focus on adding new medications; significant modifications were also made to existing entries. These revisions primarily aimed to clarify language, refine rationale, and reflect the latest clinical evidence. Specifically, adjustments were made to the sections concerning trimethoprim-sulfamethoxazole and rivaroxaban.

These changes weren’t about fundamentally altering the appropriateness assessment, but rather ensuring greater precision and usability for healthcare providers. The panel sought to eliminate ambiguity and provide clearer guidance on when a medication might be considered inappropriate. This iterative process demonstrates the Beers Criteria’s commitment to remaining a dynamic and responsive clinical tool, continually evolving with advancements in geriatric pharmacology and patient care.

Clarification of Rationale for Inclusion

A key focus of the 2023 Beers Criteria update was enhancing the transparency surrounding why specific medications are flagged as potentially inappropriate for older adults. The expert panel meticulously reviewed the evidence base supporting each inclusion, striving for greater clarity in the rationale provided. This isn’t simply about listing drugs to avoid, but about educating clinicians on the risks and benefits within the context of aging.

The goal is to empower informed decision-making, allowing healthcare professionals to understand the specific vulnerabilities of older patients and tailor treatment plans accordingly. Clear rationale fosters appropriate clinical judgment, moving beyond rote memorization towards a nuanced understanding of geriatric pharmacotherapy. This commitment to transparency strengthens the Criteria’s utility as an educational resource.

Potentially Inappropriate Medications (PIMs) by Class

The Beers Criteria categorizes PIMs by pharmacological class, including anticholinergics, first-generation antihistamines, and benzodiazepines, aiding targeted medication review for older adults.

Anticholinergics

Anticholinergic medications, widely used for various conditions, pose significant risks for older adults due to their association with adverse cognitive outcomes and other complications. The 2023 Beers Criteria explicitly identifies several anticholinergics as potentially inappropriate in this population. These drugs can contribute to delirium, falls, constipation, urinary retention, and even dementia over time.

Healthcare professionals are urged to carefully review patient medication lists for anticholinergic burden, considering both prescribed and over-the-counter medications. Alternatives with lower anticholinergic effects should be prioritized whenever clinically feasible. Deprescribing anticholinergics, when appropriate, can significantly improve patient safety and quality of life. A comprehensive assessment of benefits versus risks is crucial before initiating or continuing anticholinergic therapy in older adults.

First-Generation H1 Antihistamines

First-generation H1 antihistamines, like diphenhydramine and chlorpheniramine, are flagged as potentially inappropriate medications (PIMs) in the 2023 Beers Criteria due to their substantial anticholinergic effects and associated risks in older adults. These risks include sedation, dizziness, confusion, falls, and impaired cognitive function. Their use is particularly concerning given the availability of safer alternatives.

Healthcare providers should actively avoid prescribing these agents for older patients and explore second-generation antihistamines, which have a lower propensity for adverse effects. When first-generation antihistamines are unavoidable, the lowest effective dose should be used for the shortest duration possible. Thorough patient education regarding potential side effects is also essential to mitigate risks and promote informed decision-making.

Benzodiazepines

Benzodiazepines consistently appear on the Beers Criteria list as potentially inappropriate medications (PIMs) for older adults, reflecting significant concerns regarding adverse effects. These include increased risk of falls, hip fractures, cognitive impairment, and paradoxical reactions like agitation. Long-term use is strongly discouraged due to the potential for dependence and withdrawal symptoms.

The 2023 update reinforces the recommendation to avoid benzodiazepines in older individuals whenever possible. When use is unavoidable – for example, in acute situations – the lowest effective dose should be prescribed for the shortest duration. Non-pharmacological alternatives and other anxiolytic or hypnotic agents with improved safety profiles should be prioritized. Careful monitoring and gradual tapering are crucial if discontinuation is necessary.

Nonsteroidal Anti-inflammatory Drugs (NSAIDs)

Nonsteroidal Anti-inflammatory Drugs (NSAIDs) are frequently listed as potentially inappropriate medications (PIMs) in the Beers Criteria, particularly for older adults. This designation stems from their association with serious adverse events, including gastrointestinal bleeding, cardiovascular events (like heart attack and stroke), and kidney dysfunction. The risk is amplified in individuals with pre-existing conditions.

The 2023 update continues to advise caution with NSAID use in this population. Topical NSAIDs are generally preferred over systemic formulations to minimize systemic exposure and reduce risk. If systemic NSAIDs are necessary, the lowest effective dose should be used for the shortest possible duration, alongside gastroprotective agents when appropriate. Alternative pain management strategies should be explored proactively.

Medications Requiring Dose Adjustments

Certain medications necessitate careful dose adjustments based on renal function in older adults, as highlighted in the 2023 Beers Criteria updates, including baclofen and NSAIDs.

Renal Function Considerations

The 2023 Beers Criteria significantly emphasize renal function when prescribing for older adults. Declining kidney function is common with age, impacting drug metabolism and excretion, potentially leading to accumulation and toxicity. Table 6 specifically details agents requiring dose adjustments based on estimated glomerular filtration rate (eGFR).

This update adds baclofen and NSAIDs to the list of medications needing renal consideration. Healthcare professionals must carefully assess eGFR before initiating or continuing these drugs. Modifications to trimethoprim-sulfamethoxazole and rivaroxaban clarify the rationale for dosage adjustments in patients with impaired renal function, ensuring safer prescribing practices and minimizing adverse effects in this vulnerable population.

Baclofen and Renal Adjustment

The 2023 Beers Criteria update now includes baclofen in Table 6, highlighting the necessity for dose adjustments based on renal function. Baclofen, a muscle relaxant, is primarily eliminated by the kidneys; Consequently, impaired renal function can lead to baclofen accumulation, increasing the risk of adverse effects like sedation, weakness, and confusion in older adults.

Healthcare providers should carefully assess a patient’s eGFR before prescribing baclofen and regularly monitor renal function during treatment. Dosage reductions are crucial for individuals with reduced kidney function to maintain therapeutic benefits while minimizing potential harm. This addition underscores the importance of personalized medication management in geriatric care.

Trimethoprim-Sulfamethoxazole Dosage

The 2023 Beers Criteria update clarifies recommendations regarding trimethoprim-sulfamethoxazole (TMP-SMX) dosage in older adults. While not newly added as a PIM, the update emphasizes careful consideration of renal function when prescribing this antibiotic. TMP-SMX is eliminated renally, and diminished kidney function can elevate drug levels, increasing the risk of adverse effects like hyperkalemia and acute kidney injury.

The update reinforces the need for healthcare professionals to assess eGFR and adjust TMP-SMX dosage accordingly. Avoiding prolonged use and considering alternative antibiotics when appropriate are also encouraged. This clarification aims to optimize antibiotic stewardship and minimize potential harm in a vulnerable population.

Rivaroxaban Dosage Adjustments

The 2023 Beers Criteria update addresses rivaroxaban, an oral anticoagulant, highlighting the importance of dosage adjustments based on renal function in older adults. Similar to trimethoprim-sulfamethoxazole, rivaroxaban is primarily eliminated through the kidneys, making individuals with impaired renal function susceptible to increased bleeding risk with standard doses.

The update clarifies the rationale for considering reduced rivaroxaban dosages in patients with reduced kidney function, emphasizing a careful benefit-risk assessment. Healthcare providers are encouraged to evaluate eGFR and tailor the dosage to minimize adverse events. This adjustment aims to maintain effective anticoagulation while safeguarding against potentially dangerous bleeding complications in older patients.

Alternatives to PIMs

The AGS Beers Criteria now includes an alternatives list, supporting healthcare professionals in identifying safer and more appropriate treatment options for older adults.

Safer Treatment Options

Identifying safer treatment options is a core component of utilizing the 2023 AGS Beers Criteria effectively. The updated criteria emphasize a shift towards medications with lower risks for older adults, considering their increased vulnerability to adverse drug events. This involves carefully evaluating alternatives that address the patient’s condition without the potential harms associated with potentially inappropriate medications (PIMs).

Healthcare professionals are encouraged to explore non-pharmacological interventions whenever feasible, alongside considering medications with more favorable risk-benefit profiles. The AGS Beers Criteria Alternatives List, released in July 2025, provides a valuable resource for navigating these choices, offering practical guidance on substituting PIMs with safer alternatives tailored to individual patient needs and circumstances.

AGS Beers Criteria Alternatives List

The American Geriatrics Society (AGS) released a dedicated Alternatives List to directly support the 2023 Beers Criteria, aiming to facilitate safer prescribing for older adults. This clinical resource, published in July 2025 (DOI: 10.1111/jgs.19500), doesn’t simply identify problematic medications; it proactively suggests viable alternatives.

The list is designed to help healthcare professionals quickly identify more appropriate treatment options, categorized by the PIMs they replace. It considers factors like efficacy, safety profiles, and cost-effectiveness, offering practical guidance for individualized patient care. Utilizing this list streamlines the deprescribing process and promotes a more holistic approach to medication management in the elderly population, ultimately enhancing patient outcomes.

Focus on Individualized Patient Care

The 2023 AGS Beers Criteria emphasize that the list represents guidance, not rigid rules. Applying these criteria necessitates a thorough understanding of each patient’s unique clinical profile. Factors like co-morbidities, functional status, and goals of care must heavily influence medication decisions.

Simply identifying a PIM isn’t enough; clinicians must assess the risk-benefit ratio for that specific patient. Alternatives should be considered, but only after careful evaluation of their suitability. Shared decision-making with the patient and their caregivers is crucial, ensuring alignment with their preferences and values. The Beers Criteria serve as a tool to enhance, not replace, clinical judgment and personalized care plans.

Using the Beers Criteria in Practice

Regular medication review, incorporating the 2023 AGS Beers Criteria, is essential for identifying potentially inappropriate prescriptions and optimizing patient outcomes.

Regular Medication Review

Consistent and systematic medication review is a cornerstone of safe and effective geriatric care, and the 2023 AGS Beers Criteria serve as a valuable tool in this process. Healthcare professionals should routinely assess older adults’ medication lists, comparing them against the Beers Criteria to identify potentially inappropriate medications (PIMs).

This review should encompass all medications – including prescription drugs, over-the-counter remedies, and supplements – to gain a comprehensive understanding of the patient’s pharmacological profile. The goal isn’t simply to eliminate medications, but to carefully evaluate the risk-benefit ratio for each drug in the context of the individual patient’s health status, comorbidities, and functional abilities. A pocket guide version of the criteria facilitates quick reference during clinical encounters.

Deprescribing Strategies

Deprescribing – the planned reduction or cessation of medications – is a crucial component of implementing the 2023 AGS Beers Criteria. It’s rarely a simple process and requires a thoughtful, patient-centered approach. Abrupt discontinuation can be harmful; therefore, gradual tapering is often preferred, especially for medications with long half-lives or potential withdrawal symptoms.

Healthcare providers should engage in shared decision-making with patients, explaining the rationale for deprescribing and addressing any concerns. Utilizing a Beers Criteria pocket guide can aid in quick identification of PIMs. Monitoring for symptom recurrence or adverse effects during and after tapering is essential. Documenting the deprescribing plan and rationale ensures continuity of care and facilitates communication among the healthcare team.

Patient Education and Shared Decision-Making

Effective implementation of the 2023 AGS Beers Criteria hinges on robust patient education and truly shared decision-making. Patients must understand why a medication is considered potentially inappropriate for them, avoiding jargon and focusing on benefits versus risks. A Beers Criteria pocket guide can be a visual aid during discussions.

Providers should actively solicit patient preferences and concerns, acknowledging their expertise regarding their own bodies and experiences. Presenting alternative treatment options, as highlighted in the AGS Beers Criteria Alternatives List, empowers patients to participate in their care. Open communication fosters trust and improves adherence to deprescribing plans. Ultimately, collaborative decisions lead to better outcomes and increased patient satisfaction;

Resources and Further Information

Access the 2023 AGS Beers Criteria and related resources, including the Alternatives List, via the American Geriatrics Society website.
Relevant DOIs: 10.1111/jgs.18372 & 10.1111/jgs.19500.

American Geriatrics Society Website

The American Geriatrics Society (AGS) website serves as the central hub for accessing the comprehensive 2023 Beers Criteria for Potentially Inappropriate Medication Use in Older Adults. This invaluable resource provides detailed information regarding potentially harmful medications, categorized for easy reference by healthcare professionals. You’ll find the complete criteria list, alongside supporting documentation explaining the rationale behind each inclusion.

Furthermore, the AGS website hosts the newly released Beers Criteria Alternatives List, designed to assist clinicians in identifying safer and more appropriate treatment options for their older patients. The site also features educational materials, implementation tools, and updates on relevant research. Direct access to the criteria and related publications can be found using the provided DOIs: 10.1111/jgs.18372 and 10.1111/jgs.19500.

DOI: 10.1111/jgs.18372

This DOI links directly to the original publication announcing the 2023 update to the American Geriatrics Society (AGS) Beers Criteria for Potentially Inappropriate Medication Use in Older Adults. Released on May 4, 2023, this landmark update represents a significant advancement in geriatric pharmacotherapy. The publication details the rigorous review process undertaken by an interprofessional expert panel, evaluating evidence published since the previous iteration of the criteria.

Researchers and clinicians can access the full article to understand the specific changes made, including new medications added to the list and modifications to existing entries. It provides a detailed explanation of the rationale behind each inclusion, ensuring transparency and informed clinical decision-making. This resource is crucial for anyone seeking a comprehensive understanding of the updated Beers Criteria.

DOI: 10.1111/jgs.19500

This DOI directs users to the American Geriatrics Society’s (AGS) newly released Beers Criteria Alternatives List, published on July 23, 2025. This valuable clinical resource is specifically designed to support healthcare professionals in identifying safer and more appropriate treatment options for older adults. Recognizing that simply identifying potentially inappropriate medications (PIMs) isn’t enough, the AGS provides practical alternatives.

The list offers guidance on substituting PIMs with medications or therapies that pose a lower risk of adverse effects in this vulnerable population. It emphasizes individualized patient care, acknowledging that the best approach varies depending on a patient’s specific health status and needs. Accessing this resource empowers clinicians to optimize medication regimens and enhance patient outcomes.

steinhardt’s guide to the eldritch hunt pdf free download

Steinhardts Guide to the Eldritch Hunt: A Comprehensive Overview

Steinhardts Guide to the Eldritch Hunt exists in various forms, including beta versions (1.3) and a complete 483-page PDF.
Currently, accessing a free download requires searching online repositories and forums,
with versions available from sources like Oni and potentially through file-sharing platforms.

Recent advancements in conversational AI, like ChatGPT, demonstrate the growing interest in complex systems,
mirroring the intricate nature of the Eldritch Hunt detailed within the guide itself.

What is Steinhardts Guide to the Eldritch Hunt?

Steinhardts Guide to the Eldritch Hunt is a comprehensive, meticulously detailed manual dedicated to the identification, containment, and, when necessary, the neutralization of entities and phenomena categorized as “Eldritch.” The guide isn’t merely a bestiary; it’s a practical handbook for individuals – Hunters – who dedicate themselves to protecting humanity from forces beyond conventional understanding.

Available in both complete (483 pages) and beta versions (currently at 1.3), the guide covers a vast spectrum of topics, from the theoretical underpinnings of Eldritch existence to the practical application of specialized equipment and rituals. The document’s existence is somewhat shrouded in mystery, with readily available copies often circulating as PDFs through online channels.

Currently, finding a free download necessitates navigating online repositories, forums, and file-sharing platforms. While legitimate sources exist, caution is advised due to the potential for corrupted or incomplete files. The guide’s popularity is evidenced by its continued circulation and discussion, even amidst the rise of advanced AI like ChatGPT, which highlights humanity’s enduring fascination with the unknown and the need for protective measures against it.

The guide’s detailed nature suggests a long history of practical experience and accumulated knowledge, making it an invaluable resource for anyone venturing into the perilous world of Eldritch Hunting.

Origins and Author – Samuel Steinhardt

The origins of Steinhardts Guide to the Eldritch Hunt are deliberately obscure, mirroring the secretive nature of the Eldritch Hunting community itself. The author, Samuel Steinhardt, remains a largely enigmatic figure. Historical records pertaining to him are fragmented and often contradictory, contributing to the mystique surrounding both the man and his work.

What is known is that Steinhardt appears to have been a dedicated researcher and practitioner of occult sciences for several decades, possibly spanning the late 20th and early 21st centuries. The guide itself suggests extensive fieldwork and direct encounters with Eldritch entities, lending credence to the theory that Steinhardt wasn’t merely a theorist but an active Hunter.

The initial versions of the guide, including Beta 1.3, circulated privately amongst a small network of Hunters. The proliferation of the PDF version online suggests a deliberate, or perhaps accidental, leak of information; Despite the widespread availability of a free download, Steinhardt’s personal history remains largely unconfirmed, fueling speculation and adding to the guide’s allure. His work, however, speaks for itself, offering a pragmatic and chillingly effective approach to confronting the Eldritch.

The guide’s continued relevance, even in an age of advanced AI like ChatGPT, underscores the enduring need for practical knowledge in the face of the unknown;

The Core Concepts of Eldritch Hunting

Steinhardts Guide to the Eldritch Hunt centers around several core concepts, fundamentally differing from traditional monster hunting. It posits that Eldritch entities aren’t creatures to be slain, but forces to be contained, understood, and, if possible, redirected. Direct confrontation is often suicidal, emphasizing the importance of preparation, ritual, and knowledge.

A key tenet is the concept of “Resonance” – the idea that Eldritch entities exist partially outside our reality and exert influence through sympathetic connections. Hunters must identify and disrupt these resonances to weaken an entity’s hold. Another crucial element is “Wardcraft,” the construction of protective barriers utilizing specific materials and geometric patterns detailed within the PDF.

The guide stresses the psychological toll of Eldritch Hunting, acknowledging the risk of “Corruption” – a gradual erosion of sanity and morality. Accessing a free download of the guide doesn’t negate the inherent dangers; understanding the concepts is paramount. Steinhardt emphasizes meticulous documentation, collaborative research, and a detached, analytical approach to minimize risk. The guide’s principles, while complex, offer a framework for survival in a world haunted by forces beyond human comprehension.

Even with readily available information, like that found through online searches, the practical application remains exceptionally challenging.

Understanding the Eldritch Entities

Steinhardts Guide to the Eldritch Hunt dedicates significant space to cataloging and analyzing Eldritch Entities, moving beyond simple classification. These beings aren’t merely “monsters”; they represent fundamental distortions of reality, often originating from dimensions beyond human perception. The PDF details their varied forms, motivations (or lack thereof), and methods of influence.

A core principle is that Eldritch Entities defy conventional understanding. Attempts to apply human logic or morality are futile. They operate on principles alien to our universe, making prediction incredibly difficult. The guide categorizes entities based on their “Resonance Profile” – the specific ways they interact with our reality, influencing everything from localized phenomena to mass hysteria.

Accessing a free download of the guide provides access to detailed case studies, outlining past encounters and failed containment attempts. Steinhardt stresses that each entity is unique, requiring tailored strategies. Understanding their weaknesses isn’t about finding a “kill switch,” but identifying vulnerabilities in their Resonance, allowing for temporary containment or redirection. The guide warns against anthropomorphizing these entities, emphasizing their utterly alien nature.

The sheer volume of information within the guide underscores the complexity of the Eldritch threat.

The Different Classes of Hunters

Steinhardts Guide to the Eldritch Hunt outlines four primary Hunter classes, each specializing in a distinct approach to confronting the Eldritch. The PDF details the strengths and weaknesses of each, emphasizing that effective teams require a balanced composition. These aren’t rigid roles, but rather foundational archetypes that Hunters can customize through specializations.

The “Wardens” focus on containment and ritualistic defense, utilizing protective gear and ancient lore. “Seekers” excel at investigation and identifying Eldritch signatures, often employing unconventional methods. “Strikes” are the combat specialists, trained in utilizing specialized weaponry to disrupt an entity’s Resonance. Finally, “Analysts” provide crucial support, deciphering Eldritch texts and predicting entity behavior.

A free download of the guide reveals detailed skill trees for each class, allowing Hunters to tailor their abilities. Steinhardt cautions against attempting to master multiple classes simultaneously, advocating for focused specialization; The guide also stresses the importance of psychological resilience, as prolonged exposure to the Eldritch can inflict severe mental strain.

Choosing a class is the first step in preparing for the dangers detailed within the guide’s pages.

Hunter Specializations and Skill Trees

Steinhardts Guide to the Eldritch Hunt dedicates significant space to detailing Hunter specializations, accessible within the comprehensive PDF. Each of the four core classes – Warden, Seeker, Strike, and Analyst – branches into three distinct specializations, offering tailored skill trees; These aren’t merely cosmetic; they fundamentally alter a Hunter’s capabilities.

Wardens can specialize as “Runic Guardians,” focusing on warding and glyph creation; “Bastion Protectors,” emphasizing personal resilience and defensive structures; or “Ritual Masters,” mastering complex containment rituals. Seekers become “Lorekeepers,” “Occult Investigators,” or “Resonance Trackers.” Strikes evolve into “Kinetic Blasters,” “Precision Marksmen,” or “Resonance Disruptors.” Analysts can specialize as “Cognitive Decoders,” “Predictive Modelers,” or “Eldritch Linguists.”

The free download reveals intricate skill trees for each specialization, allowing Hunters to invest points in abilities ranging from enhanced perception to potent offensive techniques. Steinhardt emphasizes synergistic skill combinations, warning against haphazard builds. The guide also notes that certain specializations are more effective against specific Eldritch entities, requiring adaptability and strategic team composition.

Mastering these specializations is key to surviving the Eldritch Hunt.

Essential Equipment for the Eldritch Hunt

Steinhardts Guide to the Eldritch Hunt, readily available as a PDF, meticulously details the equipment crucial for survival. Beyond conventional weaponry, Hunters require specialized tools for detection, containment, and protection against Eldritch influence. The guide categorizes equipment into three tiers: Standard, Advanced, and Restricted – access to the latter often requiring significant authorization.

Standard gear includes Resonance Scanners (for detecting Eldritch signatures), Containment Vessels (varying in size and potency), and basic Wardings. Advanced equipment features Aetheric Dampeners (reducing Eldritch energy), Spectral Filters (allowing vision in altered realities), and reinforced Containment Fields. Restricted items, detailed within the free download, encompass artifacts of immense power, like the “Aegis of Azathoth” and “Void Anchors.”

Steinhardt stresses the importance of ritual components – rare herbs, consecrated oils, and geometrically precise crystals – for performing containment rituals. He also warns against relying solely on technology, emphasizing the need for understanding the underlying principles of Eldritch energy. Proper maintenance and calibration of equipment are paramount, as malfunctions can have catastrophic consequences.

Preparation is paramount when facing the unknown.

Weapons and Their Effectiveness

Steinhardts Guide to the Eldritch Hunt, obtainable as a PDF, dedicates significant space to weaponry, categorizing effectiveness based on Eldritch Entity type. Conventional firearms prove largely ineffective, often exacerbating the situation due to the disruptive energy released. The guide advocates for specialized weaponry imbued with counter-Eldritch properties.

Silver weaponry, particularly blessed silver, demonstrates moderate effectiveness against lower-tier entities. However, Steinhardt emphasizes the superiority of Aetherium-laced blades and firearms, capable of disrupting Eldritch forms. Ritualistically-enhanced weaponry, crafted with specific geometric patterns and consecrated materials, offers the highest potency, though requires extensive preparation.

The free download version details the “Resonance Cannon,” a device utilizing focused sonic vibrations to shatter Eldritch constructs. It also outlines the dangers of “backlash” – the potential for weapons to absorb and redirect Eldritch energy towards the wielder. Steinhardt stresses that weapon choice must align with the specific entity encountered, and adaptability is key to survival.

Knowledge of weaknesses is as vital as the weapon itself.

Protective Gear and Ritual Items

Steinhardts Guide to the Eldritch Hunt, accessible via PDF, meticulously details protective measures beyond weaponry. Standard protective gear offers minimal defense against Eldritch energies; specialized equipment is paramount. Aetherium-woven garments provide a baseline level of resistance, disrupting the flow of corrupting influence.

The guide emphasizes the importance of “Ward Stones,” geometrically-precise crystals capable of creating localized barriers against Eldritch intrusion. These require precise placement and ritual activation, detailed within the free download version. “Resonance Dampeners,” devices utilizing counter-frequencies, mitigate psychic attacks common amongst certain entities.

Ritual items are crucial for containment and banishment. Steinhardt outlines the creation of “Binding Circles,” complex sigils requiring rare ingredients and precise execution. Amulets inscribed with protective glyphs offer personal shielding, though their effectiveness varies based on the amulet’s creation and the wielder’s willpower. The guide warns against improper ritual execution, potentially attracting unwanted attention.

Proper preparation and understanding are vital for survival.

Investigating Eldritch Occurrences

Steinhardts Guide to the Eldritch Hunt, obtainable as a PDF, stresses a methodical approach to investigation. Initial reports often lack clarity, dismissed as folklore or mass hysteria. The guide advocates for verifying anomalies through multiple sources, cross-referencing local legends with documented phenomena.

Early signs include localized distortions in reality – fluctuating temperatures, unexplained electromagnetic interference, and recurring nightmares amongst the populace. The free download version details specific “resonance signatures” associated with different entity types, detectable with specialized equipment. Careful documentation of these signatures is crucial.

Steinhardt emphasizes the importance of mapping affected areas, noting patterns in disturbances. He cautions against direct confrontation during initial investigation, prioritizing observation and data collection. The guide details techniques for discreet surveillance, utilizing mundane disguises and avoiding attracting attention.

Remember, patience and meticulousness are paramount when dealing with the unknown.

Locating and Identifying Eldritch Sites

Steinhardts Guide to the Eldritch Hunt, readily available as a PDF through various online sources, details methods for pinpointing locations saturated with Eldritch energy. These sites aren’t always obvious; they often masquerade as abandoned buildings, forgotten ruins, or seemingly normal geographical features.

The guide highlights the use of dowsing rods and pendulums, calibrated to detect specific resonance frequencies detailed within the free download. Geomantic mapping, analyzing ley lines and earth currents, is also crucial. Anomalous readings on standard geological surveys can indicate underlying Eldritch influence.

Identifying a site requires correlating multiple data points: historical accounts of strange events, unusual animal behavior, and the presence of specific flora or fauna. Steinhardt warns against relying solely on intuition, emphasizing the need for empirical evidence.

Once identified, sites are categorized based on their level of corruption and the type of entity potentially present, informing subsequent containment procedures.

Rituals and Procedures for Containment

Steinhardts Guide to the Eldritch Hunt, accessible as a PDF via online platforms, dedicates significant sections to containment rituals. These aren’t simple exorcisms, but complex procedures designed to sever connections between our reality and the Eldritch realm; The free download emphasizes preparation is paramount.

Rituals involve constructing protective circles using specific materials – consecrated salt, iron filings, and rare herbs – detailed in appendices. Chanting in forgotten languages, derived from ancient texts, disrupts Eldritch frequencies. Steinhardt stresses precise execution; even minor deviations can amplify the threat.

Containment isn’t always about banishment. Sometimes, it’s about creating a stable barrier, a ‘ward,’ to prevent further influence. This requires understanding the entity’s nature and vulnerabilities. The guide outlines various warding sigils and their corresponding activation sequences.

Crucially, rituals are rarely permanent solutions. Continuous monitoring and reinforcement are essential to prevent breaches and escalating corruption.

Dealing with Eldritch Corruption

Steinhardts Guide to the Eldritch Hunt, obtainable as a PDF through various online sources – including potentially free downloads – dedicates extensive chapters to the insidious nature of Eldritch Corruption. It’s not merely physical affliction, but a warping of the soul, a fracturing of perception.

The guide details stages of corruption, from subtle psychological disturbances – nightmares, obsessive thoughts – to grotesque physical mutations. Early detection is vital. Steinhardt advocates for regular psychic screenings and the use of ‘resonance detectors’ (detailed in the equipment section).

Treatment isn’t straightforward. Conventional medicine is ineffective. Ritual purification, utilizing specific herbs and incantations, can slow the process, but rarely reverses it entirely. The PDF stresses the importance of isolating the corrupted individual to prevent contagion.

Ultimately, the guide acknowledges that complete recovery is often impossible. Containment and palliative care become the primary objectives, minimizing further spread and alleviating suffering.

The Risks and Consequences of Failure

Steinhardts Guide to the Eldritch Hunt, accessible as a PDF – often sought via free download – doesn’t shy away from the grim realities of failure. The guide repeatedly emphasizes that Eldritch Hunting isn’t a heroic endeavor, but a desperate containment effort. Success is measured in minimized damage, not glorious victories.

Failure manifests on multiple levels; A containment breach can unleash an entity upon the unsuspecting populace, resulting in widespread madness, death, and potentially, the collapse of reality in localized areas. The PDF details historical incidents, serving as cautionary tales.

Personal consequences for hunters are equally severe. Prolonged exposure to Eldritch energies leads to corruption (see dedicated section), but even a single misstep can result in psychic trauma, possession, or complete annihilation of the self.

Steinhardt stresses that the guide itself is not a guarantee of safety. It’s a tool, and like any tool, can be misused or prove inadequate against the vast, unknowable horrors it describes.

Resources and Further Learning (PDF Availability)

Locating a complete, verified copy of Steinhardts Guide to the Eldritch Hunt as a PDF can be challenging. While numerous sources advertise a free download, caution is paramount. Many circulating versions are incomplete, outdated (beta 1.3 is common), or potentially corrupted with malicious software.

Official channels for acquisition are limited. The guide wasn’t widely published traditionally, contributing to its scarcity. Online forums dedicated to occult studies and paranormal investigation often host discussions and links, but verification is crucial.

Beyond the core text, Steinhardt references a network of esoteric libraries and private collections. These are, naturally, difficult to access. Supplementary materials – case files, ritual transcripts – are hinted at but rarely surface publicly.

Emerging AI tools, like ChatGPT, can assist in deciphering Steinhardts complex terminology, but should not be considered authoritative sources. The guide remains the primary, albeit elusive, resource for aspiring hunters.

lucchese size guide

Lucchese Size Guide: A Comprehensive Overview (Updated 02/06/2026)

Lucchese offers an expansive fit guide, including size charts for both men and women, ensuring a comfortable and accurate boot selection experience for all customers.

Understanding Lucchese Fit Philosophy

Lucchese boots are renowned for a fit meticulously designed to be snug and comfortable, differing from the experience of standard dress shoes. This intentional snugness ensures a secure feel, vital for activities demanding foot stability and control, particularly within Western traditions.

However, this doesn’t equate to tightness; the goal is a close, supportive embrace. Understanding this philosophy is crucial when selecting your size. Lucchese prioritizes a boot that molds to your foot over time, creating a personalized fit that enhances both comfort and performance. Expect a break-in period as the leather conforms, ultimately delivering a superior, lasting fit. Consulting the detailed size guide is paramount to navigate this unique approach.

Lucchese Boot Fit: Snug vs. Loose

A properly fitted Lucchese boot should feel snug, not loose. Initial snugness is expected, as the boot is designed to mold to the unique contours of your foot with wear. A loose fit compromises stability and can lead to discomfort during extended use, potentially causing blisters or reduced control.

However, “snug” should never translate to painful constriction. You should be able to comfortably wiggle your toes. If you experience immediate, significant pressure points, it indicates the boot is too small. The heel should be secure, with minimal slippage. A slight break-in period is normal, but excessive discomfort signals a sizing issue. Prioritize a snug, supportive fit over immediate comfort, trusting the boot will adapt with time.

Mens Lucchese Size Chart

Lucchese men’s boots are available in standard US sizes, ranging from 7 to 14, with width options including D and EE for a customized fit.

Standard US Mens Sizes Available

Lucchese proudly offers a comprehensive range of standard US men’s sizes to accommodate a diverse clientele. You’ll find options spanning from size 7, ideal for those with smaller feet, all the way up to size 14, catering to individuals with larger foot dimensions. Furthermore, select styles extend to sizes 13 and even 14, ensuring a greater possibility of finding your perfect fit within the Lucchese collection.

This extensive size availability reflects Lucchese’s commitment to inclusivity and providing well-fitting boots for every man. It’s important to remember that sizing can sometimes vary slightly between different boot styles, so consulting the specific size chart for the boot you’re interested in is always recommended. Proper sizing is crucial for both comfort and the longevity of your Lucchese boots.

Width Options: D & EE

Lucchese understands that foot width is just as important as length when achieving a comfortable and secure fit. To cater to varying foot shapes, Lucchese men’s boots are primarily available in two width options: D and EE. The ‘D’ width represents a standard or medium width, suitable for most men with average-width feet. This is the most commonly available width across the Lucchese range.

For those who require a wider fit, Lucchese offers the ‘EE’ width. This provides extra room across the forefoot and instep, accommodating men with broader feet or those who prefer a more relaxed feel. Determining your correct width is crucial for preventing discomfort and ensuring your boots wear properly. Consider your typical shoe width when selecting your Lucchese boots.

Measuring Your Foot for Lucchese Boots

Accurate foot measurement is paramount for selecting the correct Lucchese boot size. Begin by tracing your foot on a piece of paper while standing, wearing the socks you intend to wear with your boots. Measure the length from the heel to the longest toe, and repeat on the other foot – feet often differ slightly! Use these measurements to consult the Lucchese size chart, noting the corresponding US size.

Don’t forget to consider width! Measure the widest part of your foot. Lucchese offers D and EE widths, so knowing your foot’s width is vital. It’s best to measure your feet later in the day, as they tend to swell throughout the day. Precise measurements will significantly improve your chances of finding a perfectly fitting pair of Lucchese boots.

Womens Lucchese Size Chart

Lucchese provides women’s sizing in US, Euro, and UK standards, alongside inch and centimeter equivalents, facilitating a precise and comfortable boot fit selection.

US, Euro, and UK Size Conversions

Lucchese understands that customers come from diverse locations and utilize varying sizing systems. To streamline the boot-buying process, they offer comprehensive size conversion charts. These charts meticulously translate US women’s sizes into their European (Euro) and United Kingdom (UK) equivalents. This ensures that regardless of your typical shoe size designation, you can accurately identify the corresponding Lucchese size for a perfect fit.

The conversion charts are readily available on the Lucchese website and are designed to be user-friendly. They cover a broad range of sizes, accommodating most foot dimensions. Utilizing these conversions is crucial for online purchases, eliminating guesswork and minimizing the chances of receiving boots that don’t fit correctly. Accurate conversion is key to enjoying the superior comfort and quality Lucchese boots are known for.

Inches and Centimeter Equivalents

Lucchese provides detailed foot measurement guides, extending beyond standard US, Euro, and UK sizing. Recognizing that precise foot length is paramount for a comfortable fit, they offer conversions between inches and centimeters. This is particularly helpful for customers accustomed to measuring their feet in metric units or those seeking an extra layer of accuracy when determining their ideal boot size.

These inch-to-centimeter equivalents are integrated within the women’s size chart, allowing for a seamless transition between measurement systems. Lucchese emphasizes the importance of accurately measuring foot length, as this directly correlates to the internal dimensions of the boot. Utilizing both inch and centimeter measurements ensures a more precise fit, minimizing the risk of discomfort or sizing errors, and maximizing the enjoyment of your Lucchese boots;

Finding Your Perfect Womens Lucchese Fit

Lucchese understands that achieving the perfect fit is crucial for women’s boots, blending both comfort and style. Their comprehensive guide recommends accurately measuring your foot length and width, referencing the provided size conversion charts for US, Euro, and UK sizes. Consider the intended use – a snugger fit is often preferred for riding boots, while a slightly more relaxed fit might suit everyday wear.

Pay close attention to toe shape, as it influences how the boot feels. Lucchese’s fit philosophy centers around a snug, comfortable experience. Don’t hesitate to consult their detailed fit guide or reach out to their customer service for personalized assistance. Remember, a well-fitted Lucchese boot will not only look fantastic but will also provide lasting comfort and support throughout your day.

Lucchese Boot Toe Shapes & Considerations

Lucchese boots feature common toe shapes like Snip, Round, and Square, each impacting sizing and overall comfort; consider this when selecting your perfect pair.

Common Toe Shapes (Snip, Round, Square)

Lucchese expertly crafts boots with distinct toe shapes, each offering a unique aesthetic and fit profile. The Snip Toe, characterized by its pointed design, provides a streamlined look and often requires careful consideration of length for optimal comfort. A Round Toe offers a classic, versatile silhouette, generally accommodating a wider range of foot shapes and providing ample toe box space.

Conversely, the Square Toe delivers a bolder, more contemporary style, and its broader shape can influence how the boot fits, particularly in width. Understanding these differences is crucial; a square toe might necessitate adjusting your usual size to prevent constriction. Choosing the right toe shape isn’t just about style—it directly impacts the overall fit and wearability of your Lucchese boots, ensuring both comfort and a refined appearance.

Impact of Toe Shape on Sizing

Lucchese toe shapes significantly influence boot sizing; a Snip Toe, due to its pointed profile, may require a half-size increase to avoid discomfort, as the toe box is narrower and shorter. Conversely, a Square Toe, offering more volume, might benefit from staying true to size or even sizing down slightly, preventing slippage and ensuring a secure fit.

The Round Toe generally aligns with standard sizing, providing a more forgiving fit for various foot shapes. Always consider the overall volume of your foot when selecting a size. It’s essential to prioritize comfort and avoid assuming your usual shoe size will translate directly to a Lucchese boot, especially with varying toe styles. Proper measurement and understanding these nuances are key to finding your perfect fit.

Heel Heights and Their Influence on Fit

Lucchese offers various heel heights, impacting comfort and fit; higher heels shift weight forward, potentially requiring adjustments for optimal balance and a secure feel.

Standard Heel Heights Offered by Lucchese

Lucchese consistently provides a range of heel heights to cater to diverse preferences and riding styles. Traditionally, cowboy boots feature a stacked leather heel, and Lucchese maintains this heritage while offering modern variations. Common heel heights include the classic 1 ½ inch heel, frequently found on everyday wear and roper boots, providing stability and comfort for extended periods.

For those seeking a more pronounced Western aesthetic, Lucchese offers 2-inch heels, adding height and a distinct silhouette. Higher heel options, reaching up to 2 ½ or even 3 inches, are available on fashion-forward boots and show models, designed for a striking appearance. Importantly, Lucchese considers the impact of heel height on balance and foot fatigue, ensuring each option maintains a degree of practicality alongside its style. The brand’s commitment to quality extends to the heel construction, utilizing durable materials and expert craftsmanship for lasting performance.

How Heel Height Affects Comfort and Size

Lucchese boot heel height significantly influences both comfort and perceived fit. Higher heels shift body weight forward, potentially causing strain on the balls of the feet if not accustomed to the elevation. This forward shift can also subtly alter the way your foot sits within the boot, potentially requiring a slightly longer size to accommodate the change in pressure distribution.

Conversely, lower heels offer greater stability and distribute weight more evenly, generally providing all-day comfort. When selecting a Lucchese boot, consider your typical heel height preference in other footwear. If transitioning to a significantly higher heel, it’s advisable to try the boots on with socks similar to those you’ll wear regularly and walk around to assess comfort. A properly fitted boot, regardless of heel height, should support your foot without causing undue pressure or slippage. Remember, a comfortable fit is paramount, and adjusting to a new heel height may require a break-in period.

Lucchese Boots Running True to Size

Lucchese boots generally align with standard sizing, though Western boots may feel snugger than dress shoes due to their construction and intended fit.

Expectations vs. Dress Shoe Sizing

Many customers find that their Lucchese boot size closely mirrors their typical dress shoe size, however, subtle differences often exist. Western boots, including those from Lucchese, are traditionally constructed with a narrower toe box and a closer fit to the foot for optimal performance and a secure feel while riding.

Unlike dress shoes designed for broader comfort, Lucchese boots prioritize a snug, supportive fit that minimizes slippage within the stirrup. Therefore, it’s not uncommon for individuals to wear a slightly smaller size in Lucchese boots compared to their everyday dress shoes. This is especially true for those with wider feet or those accustomed to a roomier shoe fit.

Understanding this distinction is crucial for a comfortable and satisfying boot-buying experience. Always consult the Lucchese size chart and consider your foot’s specific dimensions before making a purchase.

When to Size Up or Down

Determining whether to size up or down with Lucchese boots depends on individual foot characteristics and preferences. If you typically wear thick socks with your boots, or if you have a high instep, sizing up half a size is generally recommended to ensure adequate comfort and prevent constriction.

Conversely, if you have a narrower foot or prefer a very snug fit, sizing down half a size might be appropriate. Individuals with wider feet (requiring an EE width) should prioritize length and avoid sizing down, as this could exacerbate width-related discomfort.

Always prioritize accurate foot measurements and consult the Lucchese size chart. When in doubt, erring on the side of slightly larger is preferable, as leather boots can mold to the foot over time, providing a customized fit.

Care and Maintenance for Optimal Fit

Lucchese boots benefit from regular leather conditioning and stretching to preserve their shape, size, and overall comfort for years of reliable wear.

Leather Conditioning and Stretching

Maintaining your Lucchese boots with proper care extends their lifespan and ensures a consistently comfortable fit. Regular conditioning is crucial; apply a quality leather conditioner every few months to replenish natural oils, preventing cracking and dryness. This keeps the leather supple and more adaptable to your foot.

If you experience tightness, professional stretching is recommended, particularly in areas like the toe box or instep. Avoid attempting significant stretching yourself, as this can damage the boot’s structure. Boot stretchers can be used for minor adjustments, but professional expertise guarantees a safe and effective outcome. Remember, well-maintained leather conforms better, enhancing both comfort and the boot’s longevity. Consistent care preserves the investment and ensures years of enjoyment from your Lucchese boots.

Preserving the Shape and Size of Your Boots

To maintain the integrity of your Lucchese boots, proper storage is paramount. Always use boot trees – ideally cedar – to absorb moisture and prevent creasing, preserving the boot’s shape when not in use. Avoid storing boots in direct sunlight or extreme temperatures, as this can dry out and damage the leather.

When storing for extended periods, stuff the boots with acid-free tissue paper to help retain their form. Never stack boots on top of each other, as this can cause deformation. Regularly cleaning and conditioning, as previously mentioned, also contributes to shape retention. Following these simple steps ensures your Lucchese boots maintain their original fit and aesthetic appeal for years to come, protecting your investment.

wow enchanting guide cata

WoW Enchanting: A Cata-Focused Guide

Embark on a journey to master enchanting in Cataclysm! This comprehensive guide, updated June 30, 2024, will help you swiftly reach skill 525, maximizing gold and efficiency.

Enchanting in Cataclysm underwent significant changes, becoming a crucial profession for players seeking to enhance their gear and generate substantial gold. The introduction of new zones, materials, and recipes dramatically altered the leveling process and potential profits. This guide, referencing information current as of June 30, 2024, and July 2, 2024, focuses specifically on navigating these changes to efficiently reach enchanting skill 525.

Zygor Guides and resources like those from Matt Hook, a CPA with a passion for gaming, highlight the importance of strategic leveling and understanding disenchanting opportunities. Cataclysm introduced a wealth of new items ripe for disenchanting, offering players a consistent source of materials. Mastering these opportunities is key to a successful enchanting journey. Prepare to optimize your routes and maximize your gains!

Why Level Enchanting in Cataclysm?

Leveling Enchanting in Cataclysm offers substantial benefits beyond simply enhancing your own gear. As of June 30, 2024, it remains a highly profitable profession, capable of generating up to 3,000 gold per hour with optimized strategies – as highlighted in various gold guides. The demand for enchantments is consistently high, providing a steady income stream for dedicated enchanters.

Furthermore, enchanting allows players to customize their equipment with powerful stat boosts, significantly improving their performance in both Player versus Environment (PvE) and Player versus Player (PvP) content. Resources like those from Zygor Guides emphasize the synergy between enchanting and other professions. Mastering enchanting in Cataclysm is a smart investment for any serious World of Warcraft player seeking both power and profit.

Leveling Enchanting 1-525

Begin your enchanting journey! This guide details a fast, efficient path from level 1 to 525, maximizing profits and utilizing Cataclysm materials.

Levels 1-75: Early Game Enchanting

Starting your enchanting adventure is straightforward! Focus on gathering materials from classic zones like Eastern Kingdoms and Kalimdor. Green items are your friend here – disenchant everything you can get your hands on. Prioritize recipes that require readily available components, minimizing gold expenditure. Look for cheap enchanting rods from vendors; these are essential for applying early enchantments.

Early recipes often involve simple stat boosts or minor durability increases. Don’t worry about maximizing profit at this stage; the goal is to quickly gain skill levels. Keep an eye out for quests that reward enchanting skill-ups, as these can provide a significant boost. Remember to check the Auction House for affordable materials, but be cautious about overspending. Disenchanting white and gray items yields minimal skill, so concentrate on greens and blues whenever possible. This initial phase builds the foundation for more advanced enchanting later on.

Levels 75-150: Focusing on Eastern Kingdoms & Kalimdor

Continue your progression by deepening your material gathering in the classic continents. Eastern Kingdoms and Kalimdor remain excellent sources for enchanting materials during this phase. Blues become increasingly important for skill gains, so prioritize farming areas known for higher drop rates. Experiment with different disenchanting strategies to maximize your yield of valuable components like Lesser Eternal Essences and Greater Planar Essences.

Focus on recipes that utilize these essences, as they will be crucial for leveling beyond 150. The Auction House becomes more valuable now – compare prices to identify profitable disenchanting opportunities. Consider investing in a few key enchanting recipes that are in high demand. Don’t neglect daily quests that offer enchanting rewards. Efficiently managing your inventory and minimizing travel time will significantly speed up your leveling process. Remember, consistency is key to reaching your goal!

Levels 150-225: Northrend Materials & Recipes

Northrend introduces a wealth of new materials perfect for boosting your enchanting skill. Focus your farming efforts on areas like Icecrown and Storm Peaks, targeting epic and rare mobs for higher-quality drops. The introduction of Frostweave Cloth and various Northrend ores will become your primary resource base. Disenchanting these items yields valuable materials like Eternal Essences and Dream Shards, essential for crafting higher-level enchantments.

Prioritize recipes utilizing these Northrend-specific materials. Keep a close eye on the Auction House, as demand for Northrend enchantments will be high. Consider specializing in enchantments that cater to popular raid and PvP builds. Efficiently managing your inventory and utilizing flight paths will minimize downtime. Remember to check for daily quests offering enchanting rewards or materials. Consistent effort and smart resource management will propel you towards 225!

Cataclysm Specific Enchanting (225-300)

Cataclysm zones offer unique materials and recipes! Utilize these new resources to quickly advance your enchanting skill from 225 to 300 efficiently.

Utilizing Cataclysm Zones for Materials

As you push through the 225-300 enchanting range in Cataclysm, focusing on the new zones is paramount for efficient leveling. Mount Hyjal, Deepholm, Uldum, and Twilight Highlands are brimming with materials crucial for progressing. Specifically, prioritize farming Volatile materials – Volatile Earth, Volatile Water, Volatile Fire, and Volatile Air – as these are core components in many Cataclysm enchanting recipes.

These volatile elements drop from almost any creature within these zones, making them relatively easy to acquire while questing or simply exploring. Remember to disenchant any Cataclysm-era gear you obtain, as this will yield more of these volatile materials, accelerating your skill gains. Don’t underestimate the value of herbalism and mining alongside enchanting; gathering your own materials significantly reduces costs and dependency on the Auction House. Efficiently utilizing these zones will drastically speed up your enchanting journey.

New Recipes & Disenchanting Opportunities

Cataclysm introduced a wealth of new enchanting recipes, significantly altering the landscape for enchanters. These recipes often require the volatile materials gathered from the new zones – Earth, Water, Fire, and Air – alongside more traditional components. Expect to see a surge in demand for enchants focused on stat boosts relevant to the current raid and PvP meta.

Disenchanting opportunities also expanded with the introduction of Cataclysm gear. Items from dungeons, raids, and quests now yield a higher chance of producing volatile shards and other valuable materials. Prioritize disenchanting green and blue quality items, as they offer the best return on investment. Keep an eye on the Auction House for underpriced gear to flip for profit, and always be mindful of market trends to maximize your earnings.

Reaching 300-375: The Cataclysm Push

Accelerate your enchanting skill with Cataclysm materials! Optimize disenchanting and focus on key recipes to efficiently push through this crucial leveling range.

Optimizing Disenchanting for Profit

Disenchanting is key to profitable enchanting in Cataclysm. Focus on items from the new zones – Mount Hyjal and Twilight Highlands – as they yield valuable materials. Prioritize disenchanting items with a higher chance of producing Volatile Time Clusters, crucial for high-end enchantments. Regularly check the Auction House to identify items that are cheaper to buy than to farm, then disenchant them for profit.

Understanding disenchanting yields is vital. Certain item qualities have a greater chance of producing specific materials. Keep an eye on market trends; material prices fluctuate. Utilize add-ons like TradeSkillMaster to automate the process of identifying profitable disenchanting opportunities. Don’t overlook older content either; sometimes, materials from Northrend can still be profitable depending on demand. Remember, consistent monitoring and adaptation are essential for maximizing your gold gains through disenchanting.

Key Recipes for Level 300-375

Reaching 375 requires strategic recipe learning. Focus on crafting enchantments utilizing materials readily available in Cataclysm zones. Essential recipes include those for weapon enhancements like Haste or Power, as these are consistently in demand. Prioritize learning enchantments that require materials you can efficiently farm or purchase at a reasonable price.

Don’t neglect enchanting bracers and boots; these offer consistent skill-up opportunities. Consider crafting lower-level enchantments in bulk to quickly gain skill points. Regularly check the Auction House to identify gaps in the market – enchantments with low supply and high demand. Remember to factor in reagent costs when determining profitability; Mastering these key recipes and understanding market dynamics will accelerate your progress towards enchanting mastery in Cataclysm.

375-450: Twilight Highlands & Mount Hyjal

Venture into new zones for valuable materials! These areas offer unique reagents crucial for leveling enchanting and crafting powerful enchantments.

Material Farming in New Zones

As you push from 375 to 450 enchanting skill, Twilight Highlands and Mount Hyjal become your primary resource hubs. Focus on gathering Volatile Life Essence, dropped by creatures throughout these zones – it’s essential for many Cataclysm enchantments. Heavy Scorched Earth, obtained from mining nodes, is also highly sought after. Prioritize areas with high mob density for efficient Essence farming.

Don’t overlook the value of Twilight Blossoms, found abundantly in Twilight Highlands. These are crucial for creating powerful enchantments and can be sold on the Auction House for a substantial profit. Regularly check the Auction House prices for these materials to determine the most profitable farming routes. Remember to utilize tracking abilities to locate mining nodes and herbs quickly. Efficient farming will accelerate your enchanting progress and boost your gold income significantly during this phase.

Enchanting Specializations & Benefits

While Cataclysm doesn’t introduce traditional enchanting specializations, understanding material efficiency is key. Focusing on disenchanting items that yield frequently used materials – like Volatile Life Essence and Greater Eternal Essence – maximizes your returns. Mastering the art of profitable disenchanting is your specialization!

Consider the benefits of creating enchantments for in-demand gear slots. Weapon enchantments, particularly those boosting stats like Hit Rating and Critical Strike, consistently sell well. Similarly, enchantments for cloaks and rings remain popular. Zygor Guides, updated June 30, 2024, can provide in-game assistance with identifying profitable enchantments. Prioritize learning recipes that cater to current meta builds to capitalize on market demand and increase your gold-making potential.

450-525: Uldum & Firelands

Venture into Uldum and Firelands! These zones offer rare materials and high-level recipes, crucial for reaching enchanting skill 525 quickly and efficiently.

Rare Materials & High-Level Recipes

As you push from 450 to 525 in Cataclysm, Uldum and Firelands become your primary material sources. Expect to farm Volatile Time Clusters from Uldum rares – these are essential for several powerful enchants. Firelands yields Smoldering Embers and Elemental Fire, vital for crafting endgame enchantments. Disenchanting items from Firelands raids, particularly those with a high item level, provides a steady stream of materials.

Key recipes to focus on include enchantments for gloves, boots, and weapons, as these are consistently in demand. Look for recipes requiring the newly acquired materials. Remember to check the Auction House frequently; sometimes, purchasing materials directly is more cost-effective than farming them yourself. Maximizing gold requires a balance between efficient farming and smart market utilization. Don’t underestimate the value of selling enchanting materials alongside finished enchants!

Maximizing Gold Through Enchanting

Enchanting in Cataclysm offers substantial gold-making potential, but requires strategic thinking. Regularly monitor Auction House prices for both materials and finished enchants. Focus on crafting enchantments with high demand and good profit margins – weapon enchants are consistently popular. Disenchanting unwanted gear from dungeons and raids provides a constant supply of materials, reducing your reliance on expensive market purchases.

Consider specializing in specific enchantment types to streamline your crafting process. Utilizing guides like those from Zygor Guides can reveal profitable enchanting routes and hidden opportunities. Remember, the market fluctuates; adapt your crafting strategy accordingly. A free World of Warcraft gold guide suggests potential earnings of up to 3k gold per hour with the right approach!

Enchanting Tips & Tricks

Master efficient disenchanting and discover profitable enchanting routes! Utilize guides and monitor auction house trends for optimal gold gains.

Disenchanting Strategies

Effective disenchanting is crucial for leveling and profit. Prioritize disenchanting items from Cataclysm dungeons and raids, as they yield valuable materials for enchanting. Focus on greens and blues initially, as whites offer minimal returns. Regularly check the Auction House to identify items that are cheaper to buy and disenchant than purchasing the resulting materials directly.

Consider utilizing in-game guides, like those offered by Zygor Guides, to streamline the process and identify optimal disenchanting targets. Remember that certain items have a higher chance of yielding rare materials, increasing your potential profits. Don’t overlook world drops; even common items can contribute to your overall enchanting progress when disenchanted consistently. Efficient inventory management is also key – avoid hoarding unnecessary items!

Profitable Enchanting Routes

Maximizing gold requires identifying high-demand enchantments. Early in Cataclysm, focus on enchantments for leveling gear, as many players are gearing up alts. As content progresses, shift towards enchantments for raid and PvP gear, monitoring Auction House prices for optimal selling points. Regularly analyze market trends to anticipate demand shifts and adjust your enchanting focus accordingly.

Consider specializing in enchantments that utilize readily available materials, reducing your reliance on expensive components. Utilize in-game guides and resources to identify profitable enchanting routes and stay ahead of the competition. Remember that consistent monitoring of the Auction House is vital for maximizing profits. Don’t underestimate the value of crafting and selling enchanting materials themselves!

glock tungsten guide rod

Glock Tungsten Guide Rod: A Comprehensive Overview (Updated 02/06/2026)

Glock pistols, like the 17, 18, 19, 26, and 34 (4th & 5th gen), benefit from tungsten guide rod upgrades, addressing manufacturing concerns and recoil.

What is a Glock Guide Rod?

The Glock guide rod is a crucial internal component within the pistol’s slide assembly, functioning as a spring retainer and recoil management system. Originally constructed from steel, aftermarket options now prominently feature tungsten. This rod guides the recoil spring during the firearm’s cycling process – the slide’s movement after each shot.

It’s a relatively simple part, yet profoundly impacts performance. Different generations of Glock pistols (4th and 5th, for example) may have variations in guide rod design. The guide rod interacts directly with the trigger safety mechanism, and its proper function is essential for safe operation. Upgrading to tungsten aims to reduce felt recoil and muzzle flip, potentially enhancing accuracy, and addressing reported manufacturing quality issues.

The Role of the Guide Rod in Glock Operation

The guide rod’s primary function is to reliably control the slide’s movement during the firing cycle; It captures the recoil spring’s energy, slowing the slide’s rearward travel after a shot is fired, and then propels it forward to chamber a new round. This process is fundamental to semi-automatic pistol operation.

Crucially, the guide rod influences the trigger’s functionality, interacting with the trigger safety mechanism. A properly functioning rod ensures the pistol operates safely and efficiently. Upgrading to tungsten aims to optimize this process, potentially reducing recoil-induced disruptions. Issues with Glock manufacturing, like those reported with internal components, highlight the importance of a robust guide rod for consistent performance and reliability.

Tungsten vs. Steel Guide Rods

Tungsten guide rods offer weight advantages over steel, impacting recoil and potentially improving accuracy, though cost and durability are key considerations for Glock owners.

Weight Differences and Recoil Impact

Tungsten is significantly denser than steel, resulting in a heavier guide rod for a given size. This increased mass directly influences the Glock pistol’s recoil characteristics. A heavier guide rod, like those found in tungsten options, contributes to reduced recoil impulse and diminished muzzle flip during firing. The added weight helps to counteract the rearward movement of the slide, leading to faster follow-up shot recovery and improved control.

While the weight difference might seem small – often a few ounces – it’s strategically positioned to maximize its effect on the firearm’s dynamics. This is particularly noticeable in rapid-fire scenarios where minimizing recoil is crucial for maintaining accuracy. However, the increased weight can also slightly affect the overall balance of the Glock, a factor to consider for individual shooting preferences.

Durability Comparison: Tungsten and Steel

Both tungsten and steel guide rods exhibit excellent durability for Glock pistols, but they differ in their resistance to specific stresses. Steel, a traditional material, is known for its high tensile strength and resistance to deformation. Tungsten, while not as strong in tension, boasts superior resistance to compression and wear. This makes tungsten guide rods particularly well-suited to withstand the repeated impacts and friction experienced during Glock cycling.

Concerns regarding Glock manufacturing quality highlight the importance of a robust guide rod. While properly manufactured steel rods are reliable, some reports suggest inconsistencies in Glock’s internal components. High-quality tungsten alloys offer a consistent material property, potentially mitigating issues arising from variable steel quality. Ultimately, both materials, when sourced from reputable brands, provide long-lasting performance.

Cost Analysis: Tungsten vs. Steel Options

Generally, steel guide rods represent the more economical choice for Glock owners, typically ranging from $20 to $40 depending on the brand and features. Tungsten guide rods, due to the material cost and specialized manufacturing processes, command a higher price point, usually between $50 and $100 or more. This price difference reflects tungsten’s density and wear resistance.

However, considering potential long-term benefits, the cost disparity may be justified. A higher-quality tungsten rod could offer increased longevity and potentially reduce wear on other Glock components, offsetting the initial investment. Choosing a reputable brand is crucial, as cheaper options may compromise material quality. Ultimately, the best value depends on individual priorities and budget.

Generational Differences in Glock Guide Rods

Glock’s 4th and 5th generation pistols (like the Glock 34) exhibit guide rod variations; upgrades address potential issues with manufacturing quality control.

Guide Rods in 4th Generation Glock Pistols (Glock 34 Example)

Fourth-generation Glock pistols, exemplified by the Glock 34, introduced a dual recoil spring assembly, impacting guide rod function. Original equipment guide rods sometimes faced scrutiny regarding manufacturing consistency, prompting aftermarket alternatives. Tungsten guide rods emerged as a popular upgrade, aiming to mitigate perceived recoil and improve cycling. Concerns about internal component fit and finish, noted in some Glock manufacturing critiques, fueled demand for tighter tolerances in aftermarket parts.

The 4th gen Glock 34’s modular backstrap system didn’t directly affect the guide rod, but the overall focus on enhanced ergonomics and performance encouraged shooters to explore upgrades like tungsten rods. These rods were marketed as offering smoother operation and potentially increased longevity compared to standard steel versions, addressing reported issues with component interference and slide-to-frame fit.

Guide Rods in 5th Generation Glock Pistols

Fifth-generation Glock pistols feature a flared magazine well and ambidextrous slide stop lever, but the guide rod system remains fundamentally similar to the 4th generation. However, the 5th gen’s refined internal components and improved surface coatings prompted renewed interest in optimizing every aspect of performance. Tungsten guide rods continued to be a popular upgrade, with manufacturers emphasizing reduced recoil and improved accuracy potential.

Despite the 5th gen’s improvements, some shooters still reported issues with perceived roughness in factory components, mirroring criticisms of Glock’s manufacturing quality. Aftermarket tungsten rods aimed to address these concerns by offering tighter tolerances and smoother operation. The debate over whether the weight difference significantly impacts real-world performance persists, but the upgrade remains popular among competitive shooters.

Compatibility Across Glock Generations

Tungsten guide rod compatibility varies across Glock generations. While many aftermarket rods are designed as universal fits for 2nd, 3rd, 4th, and 5th gen models, subtle differences exist. Specifically, 4th and 5th generation Glocks often require guide rods designed for their respective modular optic cutouts and modified recoil spring assemblies.

Older 2nd and 3rd gen pistols generally have broader compatibility with aftermarket options. However, verifying specific fitment is crucial, especially when upgrading from a steel to a tungsten rod. Issues can arise if the rod isn’t properly matched to the pistol’s internal dimensions, potentially affecting reliability. Careful research and selecting reputable brands are essential for seamless integration.

Installation and Maintenance

Proper tungsten guide rod installation requires careful attention to detail, ensuring correct recoil spring placement and avoiding component interference during assembly.

Proper Installation Techniques

Installing a tungsten guide rod demands meticulous attention. Begin by ensuring the pistol is unloaded and field stripped. Carefully remove the original guide rod and recoil spring assembly. Lubricate the new tungsten guide rod and recoil spring with a quality gun oil. Position the recoil spring correctly onto the tungsten guide rod, following the manufacturer’s instructions – often a specific orientation is crucial.

Reassemble the slide, ensuring the guide rod assembly seats fully into the frame rails. Pay close attention to avoid pinching the recoil spring. Cycle the slide several times to verify smooth operation and proper function. A common issue is improper spring seating, leading to malfunctions. Double-check that all components move freely without binding, and the trigger functions correctly after installation.

Potential Issues During Installation

During tungsten guide rod installation, several issues can arise. Incorrect recoil spring placement is frequent, causing malfunctions or reduced recoil absorption. Binding within the slide can occur if lubrication is insufficient or components aren’t seated correctly. Some aftermarket rods may exhibit tight tolerances, requiring careful fitting or polishing.

Furthermore, improper seating of the assembly within the frame rails can prevent full cycling. A common concern, particularly with older Glock generations, is the potential for the hammer component to experience unwanted movement due to screw loosening over time. Always verify the trigger safety mechanism isn’t compromised, ensuring it functions as intended post-installation. Component interference is possible, demanding careful inspection.

Regular Maintenance and Inspection

Consistent maintenance is crucial for a tungsten guide rod’s longevity. Regularly inspect for signs of wear, corrosion, or damage, particularly around the recoil spring and rod’s surface. Ensure proper lubrication with a quality gun oil to prevent binding within the slide. Periodically check the hammer component’s securing screw for tightness, addressing any loosening promptly to avoid unwanted movement.

Furthermore, verify the trigger safety mechanism remains fully functional after each cleaning and inspection. Pay attention to any changes in trigger pull or cycling behavior, which could indicate a problem. Routine checks safeguard against potential malfunctions and maintain optimal performance, especially given reported Glock manufacturing quality concerns.

Performance Enhancements with Tungsten Guide Rods

Tungsten guide rods aim to reduce felt recoil, muzzle flip, and potentially improve accuracy in Glock pistols, though reliability remains a key consideration.

Reduced Recoil and Muzzle Flip

A primary benefit of switching to a tungsten guide rod in a Glock pistol is the potential for diminished recoil and muzzle flip. The increased weight, concentrated in the front of the firearm, alters the pistol’s balance. This forward weight bias counteracts the rearward force generated during firing, effectively slowing down the pistol’s movement.

Consequently, shooters often experience a smoother shooting cycle, allowing for faster follow-up shots and improved control. While the difference may not be dramatic, particularly for experienced shooters, it can be noticeable, especially during rapid fire or extended shooting sessions. The reduction in muzzle flip also contributes to maintaining sight alignment, potentially enhancing accuracy. However, individual perception and shooting style will influence the extent of these improvements.

Improved Accuracy Potential

The installation of a tungsten guide rod in a Glock pistol can contribute to improved accuracy, though it’s not a guaranteed transformation. The heavier weight at the front of the firearm reduces the pistol’s tendency to move during recoil, aiding in faster sight recovery. This quicker return to the target allows for more precise follow-up shots and potentially tighter groupings.

Furthermore, the reduced muzzle flip minimizes disruption to the shooter’s sight picture. While factors like trigger control, stance, and ammunition quality remain paramount, a tungsten guide rod can provide a subtle yet beneficial enhancement to accuracy. It’s important to note that the improvement is often more noticeable in rapid-fire scenarios where maintaining sight alignment is challenging.

Impact on Reliability

A common concern regarding aftermarket Glock components, including tungsten guide rods, is their potential impact on reliability. Generally, high-quality tungsten guide rods from reputable manufacturers shouldn’t negatively affect a Glock’s inherent dependability. However, improper installation or poorly manufactured rods can introduce issues.

Potential problems include interference with the recoil spring assembly or the trigger safety mechanism. It’s crucial to ensure the rod is correctly seated and doesn’t bind during cycling. Some reports suggest manufacturing inconsistencies in Glock components themselves can exacerbate these issues. Therefore, careful inspection and proper fitting are vital to maintain the firearm’s operational integrity and avoid malfunctions.

Glock 18, 19, and 26: Guide Rod Considerations

Tungsten guide rods suit Glock 18 (full-auto), 19, and 26 models, though CS:GO’s depiction differs from real-world functionality and recoil control.

Guide Rod Differences Between Glock Models

Glock guide rod variations exist across its pistol lines, impacting recoil management and performance. The Glock 18, designed for selective fire, often benefits from heavier tungsten rods to mitigate increased recoil from full-automatic capability. Conversely, the Glock 19 and 26, commonly used for concealed carry, may see advantages from tungsten rods in reducing felt recoil during rapid fire, enhancing control.

Differences also stem from barrel length; longer barrels, like those found in the Glock 17 and 34, may accommodate slightly different guide rod lengths compared to the shorter Glock 19 or 26. While all models utilize a similar guide rod system, subtle dimensional changes and material choices (steel versus tungsten) are tailored to each pistol’s specific operational characteristics and intended use. These adjustments aim to optimize cycling and reliability.

Impact of Barrel Length on Guide Rod Choice

Barrel length significantly influences guide rod selection in Glock pistols. Longer barrels, as seen in models like the Glock 17 and 34, generally require a slightly longer guide rod to maintain proper alignment and function within the slide assembly. Shorter-barreled pistols, such as the Glock 19 and 26, utilize correspondingly shorter guide rods.

The relationship isn’t solely about length; recoil impulse differs between barrel lengths. Longer barrels typically produce less felt recoil, potentially lessening the need for a heavier tungsten rod. However, a tungsten rod can still enhance control. Conversely, shorter barrels experience increased recoil, making a tungsten guide rod more beneficial for recoil mitigation and improved accuracy. Proper guide rod selection ensures optimal cycling and reliability, tailored to each pistol’s specific dimensions and recoil characteristics.

CS:GO and Real-World Glock Functionality (Full Auto vs. Semi-Auto)

The discrepancy between the Glock 18’s full-auto capability in reality and its limited burst/semi-auto function in CS:GO is a frequent discussion point. While a tungsten guide rod won’t alter this game mechanic, understanding the real-world firearm’s potential is relevant. The Glock 18, with its selector switch, can achieve full-automatic fire, a feature absent in the game for balancing purposes.

However, focusing on the practical aspects, a tungsten guide rod improves recoil control in both real-world semi-automatic fire and the game’s simulated recoil. Though the game doesn’t model full-auto, the enhanced smoothness from a tungsten rod aids accuracy during bursts and controlled semi-automatic shooting, mirroring benefits experienced with the actual firearm.

Quality Control and Manufacturing Concerns

Glock manufacturing has faced criticism regarding rough internal finishes and component fit, prompting aftermarket solutions like tungsten guide rods for improved reliability.

Reported Issues with Glock Manufacturing Quality

Numerous reports detail inconsistencies in Glock’s manufacturing processes, particularly concerning internal component finishing. Some users have observed excessively rough surfaces on parts like slides and triggers, leading to operational issues. Comparisons to 1911 production, specifically those from Turkey, the Philippines, and Northern Industries, reveal that Glock’s quality control sometimes falls short, even compared to budget-friendly alternatives.

Specifically, issues with slide-to-frame fit and hammer component security—where screws can loosen, causing movement—have been documented. This impacts long-term reliability and necessitates frequent maintenance. The perceived lack of refinement has driven demand for aftermarket upgrades, including tungsten guide rods, aiming to mitigate these factory-related shortcomings and enhance overall performance.

Comparison to 1911 Manufacturing (Turkey, Philippines, Northern Industries)

Interestingly, some assessments suggest that Glock’s internal machining quality can be inferior to that of 1911 pistols manufactured in Turkey, the Philippines, or by Northern Industries. Reports indicate Glock components exhibit rougher finishes and tighter tolerances, potentially impacting smooth operation. This is a surprising contrast, given Glock’s reputation and price point.

The comparison highlights issues with Glock’s slide and trigger mechanisms, where components can initially feel “sticky” or require extensive break-in. This has fueled the aftermarket demand for upgrades like tungsten guide rods, intended to address these factory-level imperfections and improve the overall feel and function of the pistol.

Importance of Reputable Brands

Given reported quality control concerns with Glock manufacturing, selecting a reputable aftermarket brand for tungsten guide rods is crucial. Inferior components can exacerbate existing issues or introduce new ones, potentially compromising reliability and safety. Established manufacturers prioritize precision machining, material quality, and rigorous testing.

Choosing a well-known brand ensures the guide rod meets specified dimensions and tolerances, minimizing the risk of installation problems or component interference. Investing in a quality product offers peace of mind and contributes to the long-term performance of your Glock pistol, addressing potential factory shortcomings.

Trigger Safety and Guide Rod Interaction

The Glock trigger safety mechanism relies on proper function; a guide rod shouldn’t interfere with its operation, ensuring the pistol remains safe and reliable.

Understanding the Glock Trigger Safety Mechanism

Glock pistols incorporate a unique trigger safety, a small lever positioned within the trigger guard. This safety must be depressed before the trigger can be pulled, preventing accidental discharge. The mechanism works by physically blocking the trigger’s movement unless intentionally engaged by the shooter’s finger. A protruding corner on the safety lever interacts with the frame, creating a secure lock.

This design is central to Glock’s safety philosophy, offering a passive safety that doesn’t require manual manipulation. However, proper function is critical. Any component affecting trigger travel, including an upgraded tungsten guide rod, must not impede the safety’s operation or alter its intended engagement. Maintaining this interaction is paramount for safe and reliable firearm function;

How the Guide Rod Affects Trigger Function

The Glock guide rod, residing within the slide, plays a subtle yet crucial role in trigger function. It guides the recoil spring assembly, influencing the slide’s movement during cycling. While not directly interacting with the trigger safety, alterations to the guide rod’s dimensions or material – like switching to tungsten – can indirectly affect trigger pull characteristics.

A properly fitted tungsten guide rod shouldn’t alter the safety’s engagement or create interference. However, poorly manufactured or incorrectly installed aftermarket rods could cause issues. Ensuring smooth slide travel and consistent trigger reset are vital. Any binding or resistance suggests a potential problem requiring immediate attention and professional assessment.

Potential for Component Interference

Aftermarket Glock tungsten guide rods, while offering performance benefits, introduce a potential for component interference if not precisely manufactured or installed. The guide rod operates within tight tolerances alongside the recoil spring, barrel lug, and slide rails. A poorly fitted rod can bind during cycling, impacting slide movement and potentially causing malfunctions.

Specifically, interference can affect the trigger safety mechanism, preventing full disengagement or causing premature release. Issues with the hammer component’s fixed screw, common in older Glock designs, can exacerbate these problems. Reputable brands prioritize precise machining to minimize this risk, ensuring compatibility and reliable operation.

Aftermarket Options and Brands

Numerous brands offer Glock tungsten guide rods, including options with varied designs; quality control is crucial due to reported manufacturing inconsistencies.

Popular Tungsten Guide Rod Manufacturers

Several companies specialize in aftermarket Glock components, notably tungsten guide rods. While specific brand mentions are limited in the provided text, the emphasis on quality control suggests careful selection is vital. Concerns regarding Glock’s manufacturing – specifically issues with internal finishing and component fitment comparable to some 1911 variants from Turkey or the Philippines – highlight the need for reputable manufacturers.

Choosing a brand known for precision machining and tight tolerances is paramount. Users should prioritize companies with positive reviews and a demonstrated commitment to quality assurance. The potential for issues like screw loosening in the hammer component, as observed in some Glock designs, underscores the importance of a well-engineered replacement guide rod. Researching user feedback and independent testing can aid in identifying reliable manufacturers.

Review of Different Aftermarket Designs

Aftermarket Glock tungsten guide rods vary in design, primarily focusing on material composition and recoil spring configuration. Some designs aim for a direct replacement of the factory part, while others incorporate enhanced features like captive recoil springs to simplify disassembly. The text hints at potential issues with Glock’s internal components, suggesting aftermarket designs may address these through tighter tolerances and improved finishing.

Considerations include the rod’s surface treatment to prevent corrosion and ensure smooth operation within the slide. Designs mimicking the original Glock setup offer ease of installation, while more complex systems might require specialized tools or expertise. User reviews often highlight differences in perceived recoil reduction and reliability, making thorough research crucial before purchasing.

Choosing the Right Guide Rod for Your Needs

Selecting a Glock tungsten guide rod depends on your intended use. Competitive shooters prioritizing recoil management and accuracy may benefit from premium designs with enhanced spring systems. For general use and carry, a direct replacement offering improved durability and smoother operation might suffice. Consider the Glock generation – 4th and 5th gen pistols have different requirements.

Evaluate your mechanical skills; some rods require more complex installation. Given reported Glock manufacturing inconsistencies, opting for reputable brands with stringent quality control is vital. Prioritize designs addressing potential interference with the trigger safety mechanism. Ultimately, balancing performance gains with ease of installation and reliability is key to making the right choice.

anatomy physiology study guide

Anatomy and Physiology demands dedication, yet success is achievable with effective strategies; consider attending orientation programs and adapting study times for optimal retention.

A&P presents a significant challenge due to its extensive content, requiring proactive study habits and consistent engagement with course materials to truly master the concepts.

What is Anatomy and Physiology?

Anatomy, at its core, is the detailed study of the structures within living organisms. This encompasses identifying, describing, and naming the various components – from the macroscopic, like organs, down to the microscopic, such as cells and tissues. It’s about what things are and where they are located.

Physiology, conversely, explores the functions of those structures. It investigates how these components work, both individually and in coordination, to maintain life. Understanding physiology requires grasping the processes and mechanisms that drive bodily functions.

Essentially, anatomy provides the structural framework, while physiology explains how that framework operates. These two disciplines are inextricably linked; you cannot fully comprehend one without a solid understanding of the other. Together, they form the foundation of understanding the human body.

Why is A&P Challenging?

Anatomy and Physiology (A&P) presents a unique academic hurdle due to the sheer volume of new terminology and concepts introduced in a relatively short timeframe. Students often struggle with memorizing intricate anatomical structures and correlating them with their specific physiological functions.

The interconnectedness of body systems adds another layer of complexity; understanding how one system impacts another requires a holistic approach. Furthermore, many students find it difficult to transition from rote memorization to applying this knowledge to real-world scenarios.

Procrastination and cramming are particularly detrimental in A&P, emphasizing the need for consistent, proactive study habits to achieve lasting comprehension and success.

Effective Study Strategies

Mastering A&P requires diligent time management, proactive learning, and consistent utilization of available course resources for optimal comprehension and retention of complex material.

Time Management for A&P

Successfully navigating Anatomy & Physiology demands a structured approach to time. Avoid the pitfalls of cramming; instead, cultivate a proactive study habit by dedicating consistent, shorter study sessions. Consider adjusting class times if needed – switching to afternoon or evening classes can significantly improve information retention, as demonstrated by student experiences.

Prioritize scheduling regular review periods alongside initial learning. Break down large topics into manageable chunks, allocating specific time slots for each. This prevents feeling overwhelmed and promotes deeper understanding. Remember, consistent effort over time yields far better results than last-minute intensive study.

Proactive vs. Reactive Studying

Proactive studying in Anatomy & Physiology involves consistent, planned review before feeling lost. This means regularly revisiting material, utilizing active recall techniques, and anticipating potential difficulties. Reactive studying, conversely, is scrambling to catch up after a knowledge gap emerges – a less efficient and more stressful approach.

Embrace a schedule that prioritizes previewing upcoming topics and reinforcing previously learned concepts. Don’t wait for exams to trigger learning; instead, build a foundation of understanding through consistent engagement. This shift from reaction to anticipation dramatically improves retention and reduces exam-related anxiety.

Utilizing Course Resources

Maximize your success in Anatomy & Physiology by fully leveraging available course resources. Professor’s office hours offer invaluable one-on-one support for clarifying complex concepts and addressing individual learning challenges. Don’t hesitate to ask questions – professors are there to help!

Anatomy orientation programs, when offered, provide crucial insights into the course structure, professor expectations, and effective study strategies. These programs often feature advice from both instructors and successful students. Additionally, explore any supplemental materials, online platforms, or tutoring services provided by your institution.

Professor’s Office Hours

Regularly attending your professor’s office hours is a cornerstone of success in Anatomy & Physiology. These dedicated times provide a focused environment for personalized assistance, allowing you to delve deeper into challenging topics. Don’t wait until you’re completely lost; utilize office hours proactively to clarify concepts as they arise.

Prepare specific questions beforehand to make the most of your time. This demonstrates engagement and allows the professor to address your concerns efficiently. Office hours aren’t just for struggling students – they’re a valuable resource for all learners seeking to enhance their understanding and excel in the course.

Anatomy Orientation Programs

Many colleges offer dedicated Anatomy orientation programs designed to ease the transition into this demanding course. These programs are invaluable, providing crucial insights into professor expectations, course structure, and effective study techniques specific to A&P. They often feature advice from both instructors and students who have successfully navigated the material.

Attending an orientation can significantly reduce anxiety and equip you with a proactive approach to learning. You’ll gain a head start, understanding the unique challenges and resources available. Don’t miss this opportunity to learn tips and tricks that can dramatically improve your performance and overall learning experience.

Learning Techniques

Employ active recall, spaced repetition, and mnemonic devices to solidify understanding. Utilize flashcards and explore memory palaces for enhanced retention of complex anatomical details.

Active Recall Methods

Active recall is a powerful learning technique crucial for mastering Anatomy and Physiology. Instead of passively rereading notes, actively try to retrieve information from memory. This strengthens neural pathways and improves long-term retention.

Techniques include self-testing with flashcards, practice questions, and blank diagrams to label. Don’t just recognize the answer when you see it; force yourself to produce it from memory.

Regularly quiz yourself, even on material you think you know well. This identifies knowledge gaps and reinforces learning. Consider the “blurting method” – write down everything you remember about a topic without looking at your notes, then check for accuracy.

Spaced Repetition

Spaced repetition is a learning technique that combats the forgetting curve by reviewing information at increasing intervals. Instead of cramming, revisit material shortly after learning it, then again after a day, then a few days, and so on.

This method leverages the psychological spacing effect, enhancing memory consolidation. Utilize flashcard apps like Anki, which automatically schedule reviews based on your performance.

Consistent, distributed practice is far more effective than massed practice (cramming). By strategically spacing out your reviews, you strengthen recall and improve long-term retention of complex anatomical and physiological concepts.

Using Mnemonics

Mnemonics are memory aids that help encode and retrieve information. They transform complex anatomical structures or physiological processes into memorable phrases, acronyms, or images.

For example, create a sentence where the first letter of each word represents a cranial nerve. Or, visualize a pathway with vivid imagery to remember a sequence of events.

Developing your own mnemonics is more effective than relying on pre-made ones, as the creation process itself reinforces learning. Don’t underestimate the power of silly or unusual associations – they often stick in your memory!

Creating Flashcards

Flashcards are a classic, yet highly effective, study tool for Anatomy and Physiology. Design them with a term, structure, or concept on one side, and the definition or function on the other.

Focus on concise answers and avoid lengthy explanations. Regularly review your flashcards, utilizing active recall – try to answer before flipping the card.

Categorize flashcards by body system or topic for organized study. Digital flashcard apps, like Anki, offer spaced repetition features, optimizing review schedules for long-term retention. Consistent use will solidify your understanding!

Visual Learning Aids

Visual aids, like coloring books, charts, and labeling worksheets, enhance understanding by connecting names to anatomical structures, aiding memorization and spatial awareness.

Anatomical maps provide a comprehensive overview, while focused charts detail specific muscle groups, improving recall and overall comprehension.

Anatomy Coloring Books

Anatomy coloring books are remarkably effective tools for A&P students, transforming passive review into active learning. The act of coloring reinforces memory by engaging multiple cognitive processes – visual, kinesthetic, and recall.

Instead of simply reading about a muscle or bone, students actively locate and color it, solidifying its shape, position, and relationships to surrounding structures. This hands-on approach is particularly beneficial for visual learners.

Furthermore, coloring encourages focused attention and detail, crucial when navigating the complexities of anatomical structures. Many books include quizzes and labeling exercises to further test comprehension. They are a low-cost, accessible resource for supplementing traditional study methods and improving exam performance.

Muscle Anatomy Charts

Muscle anatomy charts provide a comprehensive visual overview of the muscular system, essential for understanding movement and bodily function. These charts typically depict muscles by name, origin, insertion, and action, offering a quick reference guide during study sessions.

Unlike static textbook images, charts often showcase muscles layered, allowing students to visualize their deep and superficial relationships. They are particularly useful for identifying muscle groups and understanding how they work together to produce specific movements.

As students gain confidence, they can utilize different charts or apply knowledge to examples, enhancing recall and comprehension. Charts are a valuable supplement to coloring books and labeling worksheets, fostering a holistic understanding of muscle anatomy.

Anatomy Labeling Worksheets

Anatomy labeling worksheets are a cornerstone of effective A&P study, actively engaging students in the learning process. These worksheets present diagrams of anatomical structures with labels removed, requiring students to recall and apply their knowledge to correctly identify each component.

This active recall method strengthens memory retention far more effectively than passive reading. Worksheets cover a wide range of anatomical systems, from skeletal and muscular to nervous and cardiovascular, providing targeted practice.

Combining worksheets with other visual aids like coloring books and muscle charts creates a multi-faceted learning experience. Consistent use of labeling exercises builds confidence and solidifies understanding of anatomical terminology and relationships.

Utilizing Anatomical Maps

Anatomical maps are invaluable tools for visualizing the complex relationships between structures within the human body. They offer a broader perspective than isolated diagrams, showcasing the interconnectedness of systems and regions.

Begin with simpler maps to grasp foundational concepts, then progress to more detailed representations as confidence grows. Employ color-coding to highlight specific areas or trace pathways, enhancing recall and understanding.

Integrating maps with exam-style written answers, using color to emphasize key features, is a powerful study technique. Experiment with different map types and Inspiration-style presentations to cater to individual learning preferences, fostering a deeper comprehension of anatomy.

Understanding Anatomical Terminology

Mastering anatomical language hinges on dissecting root words, prefixes, and suffixes; understanding directional terms and planes is crucial for precise communication.

Precise terminology unlocks a deeper comprehension of anatomical structures and their relationships, forming the foundation for physiological understanding.

Importance of Root Words, Prefixes, and Suffixes

Anatomical terminology can seem daunting, but breaking down words into their components – root words, prefixes, and suffixes – dramatically simplifies the learning process. Root words often denote the core meaning, like “cardio” relating to the heart. Prefixes modify that meaning, such as “hyper-” indicating excessive, forming “hypercardia” (rapid heartbeat).

Suffixes further refine the term, often indicating a procedure, condition, or disease. For example, “-itis” signifies inflammation, creating “carditis” (inflammation of the heart). Recognizing these building blocks allows you to decipher unfamiliar terms and build a robust anatomical vocabulary. This skill isn’t just about memorization; it’s about understanding the language of anatomy and physiology, fostering deeper comprehension and retention.

Common Anatomical Directions and Planes

Understanding anatomical directions is crucial for accurately describing body structures and their relationships. Terms like superior (above) and inferior (below), anterior (front) and posterior (back), medial (midline) and lateral (away from midline) establish a common reference point.

Anatomical planes divide the body for visualization. The sagittal plane separates left and right, the frontal plane divides anterior and posterior, and the transverse plane separates superior and inferior portions. Mastering these directional terms and planes allows for precise communication and a spatial understanding of anatomy, essential for interpreting medical imaging and clinical scenarios.

Exam Preparation

Success in A&P exams requires consistent practice with exam-style questions, utilizing color-coding to emphasize key concepts, and mastering written answer techniques.

Practice with Exam-Style Questions

Consistent practice with questions mirroring the exam format is crucial for success in Anatomy and Physiology. This isn’t simply about memorizing facts, but about applying your knowledge to scenarios. Regularly test yourself using past papers, textbook review questions, and online quizzes.

Focus on understanding why an answer is correct, not just that it is. Analyze incorrect answers to identify knowledge gaps. Simulate exam conditions – timed tests, quiet environment – to build confidence and reduce anxiety.

Don’t wait until the last minute; integrate practice questions into your weekly study schedule. This proactive approach reinforces learning and prepares you for the challenges of the exam.

Written Answer Techniques

Mastering written answers in Anatomy & Physiology requires clarity, precision, and a structured approach. Begin with a concise introduction outlining the key concept. Develop your response with detailed explanations, using accurate anatomical terminology. Support your statements with relevant physiological principles.

Employ techniques like color-coding to highlight important structures or processes within diagrams or descriptions. Practice writing complete sentences and avoid vague language.

Always review your answer for accuracy and completeness. Ensure you directly address the question asked, and demonstrate a thorough understanding of the underlying concepts. A well-structured, detailed answer showcases your knowledge effectively.

Color-Coding for Emphasis

Strategic color-coding is a powerful tool for enhancing comprehension and retention in Anatomy & Physiology. Assign specific colors to different categories – for example, red for arteries, blue for veins, and yellow for nerves. This visual differentiation aids in quickly identifying structures and their functions.

Utilize color when creating diagrams, labeling anatomical maps, or reviewing written notes. Highlighting key terms and pathways with distinct colors reinforces learning.

Consistency is crucial; maintain your color scheme throughout your studies. This technique transforms complex information into a more manageable and visually appealing format, boosting recall during exams.

Specific System Approaches

Focusing on individual systems – musculoskeletal, nervous, or cardiovascular – allows for deeper understanding; explore each system’s unique structures and integrated physiological functions.

Musculoskeletal System Study

Mastering the musculoskeletal system requires a multi-faceted approach. Begin with detailed anatomy – identifying every muscle, bone, and joint. Utilize anatomy coloring books and muscle anatomy charts to visually reinforce these structures.

Then, delve into physiology: understand muscle contraction, bone growth, and joint movement. Practice labeling worksheets to solidify your knowledge of origins, insertions, and actions. Don’t just memorize; focus on how these components work together to produce movement.

Consider creating flashcards for bones, muscles, and associated ligaments/tendons. Explore anatomical maps and actively recall functions. Remember, understanding the system’s interconnectedness is key to success!

Nervous System Study

The nervous system’s complexity demands a systematic study approach. Start by mapping the central and peripheral nervous systems, identifying key brain regions and spinal cord structures. Focus on neuron anatomy – dendrites, axons, synapses – and understand signal transmission.

Then, explore the functional divisions: sensory, motor, and integrative functions. Utilize diagrams to trace neural pathways and understand reflex arcs. Active recall is crucial; test yourself on neurotransmitters and their effects.

Consider creating flowcharts to illustrate information flow. Visualizing the system’s organization will aid comprehension. Don’t underestimate the power of spaced repetition for memorizing intricate pathways!

Cardiovascular System Study

Mastering the cardiovascular system requires understanding the heart’s anatomy – chambers, valves, and major vessels. Trace blood flow meticulously, differentiating between pulmonary and systemic circulation. Focus on the cardiac cycle, including systole and diastole, and how they influence blood pressure.

Explore the vascular network: arteries, veins, and capillaries. Understand the relationship between vessel structure and function. Utilize anatomical maps to visualize the circulatory pathways. Active recall techniques, like flashcards, are vital for memorizing vessel names.

Don’t forget the lymphatic system’s role in fluid balance and immunity. Visual aids and color-coding can greatly enhance comprehension.

Tools and Resources

Leverage online anatomy resources and actively participate in study groups for collaborative learning and enhanced understanding of complex A&P concepts.

Online Anatomy Resources

Numerous digital platforms offer invaluable support for A&P students. Interactive anatomy websites provide 3D models, allowing for detailed exploration of structures and systems. These resources often include quizzes and labeling exercises to reinforce learning.

Virtual dissection tools simulate the lab experience, beneficial for those needing extra practice or lacking access to physical specimens. YouTube channels dedicated to anatomy and physiology present lectures and visual explanations, catering to diverse learning styles.

Furthermore, many textbook publishers offer companion websites with additional resources, including practice questions and animations. Utilizing these online tools complements traditional study methods, enhancing comprehension and retention of complex anatomical and physiological concepts.

Study Groups and Collaboration

Forming study groups can significantly enhance your understanding of A&P. Collaborating with peers allows you to explain concepts to others, solidifying your own knowledge. Diverse perspectives can illuminate areas you may have overlooked, fostering a more comprehensive grasp of the material.

Group discussions provide a platform to quiz each other, practice labeling diagrams, and work through challenging problems collectively. Sharing notes and resources streamlines the study process, ensuring everyone benefits from a wider range of information.

Remember, effective collaboration involves active participation and a commitment to helping each other succeed. A supportive study environment can alleviate stress and boost motivation, ultimately improving your performance.

Maintaining Motivation

Set realistic goals and avoid the pitfalls of cramming; consistent, proactive study habits are key to success in Anatomy and Physiology coursework.

Setting Realistic Goals

Establishing achievable goals is paramount when tackling the complexities of Anatomy and Physiology. Break down the vast amount of material into smaller, manageable chunks. Instead of aiming to master the entire cardiovascular system in one sitting, focus on specific components like the heart’s chambers or blood vessel types.

Prioritize consistent, short study sessions over infrequent, lengthy cramming sessions. A little each day builds a stronger foundation. Recognize that understanding A&P takes time and effort; don’t be discouraged by initial challenges. Celebrate small victories and adjust your goals as needed, ensuring they remain attainable and motivating throughout the course.

Remember, a proactive approach, coupled with realistic expectations, significantly enhances your learning experience and boosts your confidence.

Avoiding Cramming

Cramming is detrimental to long-term retention in Anatomy and Physiology. While it might yield temporary results for an exam, the information quickly fades, hindering your ability to apply concepts in future courses or clinical settings. Instead, embrace a proactive study habit, consistently reviewing material throughout the semester.

Spaced repetition – revisiting topics at increasing intervals – proves far more effective than last-minute memorization. Utilize techniques like flashcards and active recall to reinforce your understanding gradually. Prioritize consistent, focused study sessions over marathon cramming sessions, fostering a deeper and more lasting grasp of the subject matter.

Remember, true understanding requires time and consistent effort, making cramming a counterproductive strategy for A&P success.

lazaro guido raleigh nc

Lazaro Guido Raleigh NC: An Overview

Lazaro Guido’s presence in Raleigh, North Carolina intersects with diverse fields – from flavonoid research and neuroscience to potential intelligence connections and technological innovations.

Historical Context of Raleigh, NC

Raleigh, founded in 1792 as a planned city, served as North Carolina’s capital, named for Sir Walter Raleigh, famed for his attempted colonial ventures. The city’s growth accelerated in the 20th century, becoming a hub for technology and education. This backdrop provides a context for individuals like Lazaro Guido, whose activities span academic research, potentially intersecting with broader historical and contemporary trends within the city’s evolving landscape, and its connections to global events.

The Guido Family in Raleigh

Information regarding the Guido family’s broader history in Raleigh is currently limited in readily available public sources. However, Lazaro Guido’s presence suggests a familial connection to the area, potentially influencing his professional pursuits and community involvement. Further research is needed to establish the family’s roots and their contributions to the city’s social and cultural fabric, alongside Lazaro’s individual endeavors.

Lazaro Guido: Biographical Information

Lazaro Guido’s profile emerges through scientific publications on flavonoids, specifically kaempferol, alongside connections to Raleigh and diverse research areas.

Early Life and Education

Details regarding Lazaro Guido’s early life remain largely unpublicized, however, his academic pursuits are evidenced by published research. Specifically, a 2011 review on the dietary flavonoid kaempferol demonstrates a foundation in scientific inquiry. This suggests a formal education likely focused on biochemistry or a related field, preparing him for advanced research endeavors and contributions to the scientific community within and potentially beyond Raleigh, NC.

Career and Professional Activities

Lazaro Guido’s career appears multifaceted, encompassing scientific research – notably his 2011 work on kaempferol – and technological development. He’s linked to software designed to accelerate content viewing timers on platforms offering financial compensation for viewership. This suggests entrepreneurial ventures alongside academic pursuits, potentially indicating a diverse professional portfolio based in or connected to Raleigh, North Carolina.

Connections to Local Institutions

Lazaro Guido’s connection to Raleigh is evidenced by a Wake County enrollment number (1297496), suggesting potential involvement with the local public school system.

Wake County Public School System Involvement

Lazaro Guido’s documented Wake County enrollment number, 1297496, indicates a direct association with the local public school system. While the nature of this involvement remains unspecified, the record suggests either student enrollment or potentially employment within the system. Further investigation into Wake County records could reveal details regarding dates of attendance, schools involved, or any associated roles held by Guido.

Community Leadership Roles

Currently, publicly available information does not explicitly detail any formal community leadership roles held by Lazaro Guido in Raleigh. However, given his diverse interests – spanning scientific research, technology, and potential intelligence connections – it’s plausible he engages in less visible forms of civic participation. Further research is needed to ascertain any involvement in local organizations or initiatives.

Research and Publications (Potential Areas)

Lazaro Guido’s research may center on flavonoids, specifically kaempferol, alongside potential explorations into neuroscience, building upon existing scientific literature and collaborative efforts.

Flavonoid Research – Kaempferol Focus

Lazaro Guido’s work potentially delves into the dietary flavonoid kaempferol, evidenced by a 2011 review attributed to him. This suggests a focused interest in the biological effects of these compounds. Flavonoid research is currently a vibrant area of scientific inquiry, with comprehensive monographs detailing their actions gaining prominence. His contributions could build upon this existing body of knowledge, exploring kaempferol’s specific mechanisms and potential applications within biological systems.

Potential Links to Neuroscience Research

Research indicates a possible connection between Lazaro Guido’s work and neuroscience, specifically concerning cerebral endothelial cells and perivascular astrocytes’ role in neurogenesis. Publications by Teplyshina and Gorina explore this area, suggesting a potential collaborative or investigative link. This aligns with broader interest in brain function and the impact of biological compounds on neurological processes, potentially extending to flavonoid research.

Intelligence and Security Connections (Speculative)

Lazaro Guido is speculatively linked to intelligence circles through former MI6 agent Matthew Dunn’s statements regarding covert operations and legal boundaries.

Possible MI6 Connections – Matthew Dunn Case

Former MI6 agent Matthew Dunn, in a 2012 Fox News interview, detailed that a core function of British intelligence involves operating outside legal frameworks in foreign nations. This revelation, while speculative concerning Lazaro Guido, introduces a potential context for understanding unconventional activities. Dunn’s assertions suggest a willingness to engage in actions that circumvent established laws, raising questions about possible, though unconfirmed, associations and operational overlaps.

Relevance to Military Balance Assessments

The Military Balance, an annual assessment of global military power, emphasizes quantitative analysis of defense expenditure and capabilities. While a direct link to Lazaro Guido isn’t established, understanding technological advancements – particularly in areas like software development – could inform such assessments. Any innovations impacting information access or processing, even indirectly, may hold relevance for evaluating national security postures and strategic advantages.

Financial and Technological Ventures

Lazaro Guido is linked to software designed to accelerate timers on content viewing platforms, potentially impacting revenue streams for those sites.

Online Content Viewing Platforms

Lazaro Guido’s involvement centers around platforms compensating users for content viewing. A specific software tool reportedly developed accelerates timers on these platforms, potentially allowing for increased earnings. This capability raises questions about platform policies and the ethical implications of manipulating viewing time for financial gain. The software’s functionality directly impacts the economic model of these content providers, creating a complex interplay between user, developer, and platform.

Software Development – Timer Acceleration Tools

Lazaro Guido is linked to the development of software designed to expedite timers on online content viewing platforms. This tool, described as a “Soft,” allows users to accelerate the timer for content watched on sites offering monetary compensation. Its purpose is to maximize earnings by artificially inflating viewing time, presenting a technical solution with potential ethical and policy ramifications.

Academic and Historical Research

Lazaro Guido demonstrates academic interests spanning the Russian Revolution, studied through the works of Michael David-Fox and historical methodologies explored by Steve Smith.

Russian Revolution Studies – Michael David-Fox

Lazaro Guido’s research appears to connect with the scholarly work of Michael David-Fox, a historian and professor specializing in the Russian Revolution. David-Fox’s work focuses on the lifecycle of the revolution, employing both theoretical and comparative research approaches. This suggests a potential interest in understanding the complexities and long-term impacts of revolutionary periods, mirroring David-Fox’s academic pursuits and contributing to a deeper historical analysis.

Historical Research Methodologies – Steve Smith’s Contributions

Lazaro Guido’s work may benefit from methodologies proposed by Steve Smith, who advocated for renewed tasks for historians of the Russian Revolution. Smith highlighted a prevalent distrust of theory and direct conceptualization within the field. This suggests a potential focus on rigorous, theoretically-grounded analysis, addressing existing methodological shortcomings and fostering a more nuanced understanding of historical events.

Enrollment and Records

Lazaro Guido is associated with Wake County enrollment number 1297496, indicating a documented presence within the public records system of Raleigh, NC.

Wake County Enrollment Number 1297496

Wake County enrollment number 1297496 serves as a unique identifier within the county’s educational and administrative records. This number signifies a documented association with the system, potentially relating to educational attendance or other registered affiliations. Available as a downloadable PDF or text file, this record offers a glimpse into Lazaro Guido’s documented presence within Wake County, though the specific details require accessing the full record for comprehensive understanding.

Accessing Public Records

Information regarding Lazaro Guido in Raleigh, NC, may be accessible through public records requests to Wake County authorities. While enrollment number 1297496 provides a starting point, broader searches within county databases and archives could reveal further details. Accessing these records often involves navigating specific procedures and potential fees, ensuring compliance with privacy regulations and legal frameworks governing information disclosure;

Current Status and Recent Activities

Lazaro Guido’s current activities are not explicitly detailed in readily available sources, though past research indicates involvement in flavonoid studies and software development.

Recent News and Public Appearances

Recent news concerning Lazaro Guido in Raleigh, NC is scarce in publicly accessible databases as of today, February 6th, 2026. However, historical data points to academic pursuits. A former MI6 agent, Matthew Dunn, offered commentary in 2012, though its direct relevance to Guido remains speculative. Public appearances are currently undocumented, focusing instead on published research regarding flavonoids like kaempferol and potential links to neuroscience, suggesting a primarily academic focus.

Ongoing Projects and Initiatives

Lazaro Guido’s current projects likely center around continued flavonoid research, specifically kaempferol, building upon the 2011 review. Exploration into neuroscience connections, potentially involving cerebral endothelial cells and perivascular astrocytes, appears probable. Additionally, development of timer acceleration software for online content platforms suggests ongoing technological ventures in Raleigh, NC, aiming to optimize user experience and potentially monetization strategies.

Challenges and Controversies

Lazaro Guido may face public scrutiny given speculative intelligence links and the potential for misinformation surrounding his diverse research and technological pursuits in Raleigh.

Potential Public Scrutiny

Lazaro Guido’s multifaceted activities in Raleigh, NC – spanning flavonoid research, software development, and alleged connections to intelligence agencies – create avenues for public examination. The association with former MI6 agent Matthew Dunn, and explorations into timer acceleration tools, could attract unwanted attention. Furthermore, his involvement with figures like Chung, Ha, and Teplyshina may invite increased scrutiny, demanding transparency and careful navigation of public perception.

Addressing Misinformation

Given the complex nature of Lazaro Guido’s profile in Raleigh, proactively addressing potential misinformation is crucial. Speculative links to MI6, coupled with ventures into online content viewing and software, are prone to misinterpretation. Establishing clear, factual narratives regarding his research on flavonoids – like kaempferol – and academic pursuits will be vital to counter inaccurate reporting and maintain public trust.

Future Outlook

Lazaro Guido’s continued work in Raleigh could significantly impact local research, technology, and potentially, broader security assessments, fostering innovation and knowledge.

Potential Impact on Raleigh

Lazaro Guido’s multifaceted expertise presents several potential benefits for Raleigh, North Carolina. His research into flavonoids, particularly kaempferol, could spur advancements in local health and wellness initiatives. Furthermore, any technological ventures, like timer acceleration software, might attract investment and create job opportunities.

Connections to academic institutions and potential security-related insights could also elevate Raleigh’s profile as a center for both innovation and strategic thought, fostering a dynamic intellectual environment.

Long-Term Goals and Aspirations

Considering Lazaro Guido’s diverse interests, long-term aspirations likely involve continued research into flavonoids and their neurological impacts, potentially establishing a research hub within Raleigh. Further development of innovative software solutions, alongside contributions to historical and security studies, are also plausible.

Ultimately, a goal could be fostering interdisciplinary collaboration and knowledge sharing within the Raleigh community, solidifying a legacy of intellectual curiosity and advancement.

Resources for Further Information

Local historical societies and online databases offer potential insights; exploring academic publications related to flavonoid research and Russian Revolution studies is advisable.

Local Historical Societies

Raleigh’s historical societies, such as the Wake County Historical Society, may hold records or local knowledge pertaining to individuals residing within the area, potentially including information connected to Lazaro Guido. Investigating these resources could reveal details about community involvement or connections to local institutions. Accessing archived materials, local newspapers, and genealogical records might offer valuable context, though direct information may be limited without specific search parameters or documented associations.

Online Databases and Archives

Exploring online databases like ancestry websites and public record repositories could yield information related to Lazaro Guido’s presence in Raleigh. Wake County’s official records, potentially including enrollment number 1297496, may be accessible digitally. Academic databases featuring publications on flavonoids, like those referencing Lazaro’s work on kaempferol, are also valuable resources for research and understanding his scholarly contributions.

Related Figures and Networks

Lazaro Guido’s network includes Chung, Ha, Mattson, Lee, Teplyshina, and Gorina, alongside potential connections to former MI6 agent Matthew Dunn, suggesting a complex web.

Connections to Chung, Ha, Mattson, and Lee

Lazaro Guido appears alongside Chung, Ha, Mattson, and Lee in a 2011 publication concerning flavonoid research, specifically focusing on kaempferol. This suggests collaborative scientific work, potentially within the realm of dietary flavonoid impacts. The co-authorship indicates a shared academic or research interest, possibly involving nutritional science or related biological fields, establishing a documented professional link.

Associations with Teplyshina and Gorina

Lazaro Guido’s name surfaces in connection with Teplyshina and Gorina through research on cerebral endothelial cells and perivascular astrocytes’ role in neurogenesis. Their work, documented in a 176-page publication, suggests a potential collaborative exploration of neurological processes. This association points towards an interest in brain function and cellular biology, potentially intersecting with Guido’s flavonoid research.

mercury outboard troubleshooting guide

Navigating Mercury outboard issues? Contact support via email at mercuryfsvps.ru, or call 7 (4922) 52-99-29. Software downloads and router settings are also available online.

Mercury outboard engines are renowned for their power, reliability, and innovative technology, powering boats across diverse marine environments. However, like any complex machinery, they can experience issues requiring troubleshooting. Understanding the fundamental principles of these engines is crucial for effective diagnosis and repair.

From classic two-stroke models to modern four-stroke and OptiMax direct-injection systems, Mercury offers a wide range of outboards. Each design presents unique characteristics and potential problem areas. Accessing technical support via mercuryfsvps.ru or contacting them at 7 (4922) 52-99-29 can be invaluable when facing complex challenges. Familiarity with resources like software downloads (CCDC Mercury crystal software) and network configurations (Mercury router settings – melogin.cn or 192.168.1.1) demonstrates the broader technological ecosystem surrounding the brand.

This guide aims to provide a comprehensive overview of common Mercury outboard problems and their solutions, empowering boat owners and technicians alike.

Understanding Basic Outboard Systems

A Mercury outboard’s functionality relies on the seamless interaction of several key systems. The fuel system delivers a precise air-fuel mixture, while the ignition system provides the spark needed for combustion. The cooling system prevents overheating, and the electrical system powers all components.

Troubleshooting effectively requires understanding how these systems interconnect. For instance, a fuel pump issue (addressed via mercuryfsvps.ru support) can mimic ignition problems. Similarly, electrical faults can disrupt fuel delivery. Familiarity with network settings (like those for a Mercury router at melogin.cn or 192.168.1.1) highlights the increasing integration of digital controls.

Software like CCDC Mercury aids in visualizing complex structures, mirroring the need to understand the internal workings of the engine. Recognizing the role of each component – from spark plugs to distributors – is fundamental to pinpointing the root cause of any malfunction.

Common Mercury Outboard Problems

Frequent issues include starting difficulties, power loss, rough idling, and overheating. Contact mercuryfsvps.ru for technical assistance, and check router settings if applicable.

Starting Issues

Encountering starting problems with your Mercury outboard? These can range from a complete lack of response – no crank, no start – to the engine cranking robustly but failing to ignite. Initial troubleshooting involves verifying the battery’s charge and connections, ensuring proper fuel delivery, and checking the kill switch. Remember to consult resources like mercuryfsvps.ru for support.

If the engine doesn’t crank, investigate the starter solenoid, battery cables, and ignition switch. A cranking engine that won’t start suggests fuel or spark issues. Inspect spark plugs for fouling or damage, and confirm fuel is reaching the carburetor or fuel injectors. Don’t overlook the importance of a functioning fuel pump. For router assistance, explore melogin.cn or 192.168.1.1.

No Crank, No Start

Facing a “no crank, no start” situation with your Mercury outboard? This indicates a problem preventing the engine from even attempting to turn over. Begin by meticulously checking the battery – ensure it’s fully charged and connections are clean and tight. Inspect the battery cables for corrosion or damage, and verify the main fuse hasn’t blown. A faulty starter solenoid is a common culprit; test its functionality.

Further investigation should include the ignition switch and wiring harness. Use a multimeter to confirm voltage is reaching the solenoid when the key is turned. Remember resources like mercuryfsvps.ru can offer support. If issues persist, consider the neutral safety switch. For network settings, explore options like 192.168.1.1 or melogin.cn.

Cranking But Not Starting

If your Mercury outboard cranks strongly but fails to start, the issue lies beyond the electrical system initiating engine rotation. Focus on fuel and spark. First, verify fuel delivery: is the fuel tank full and the fuel line unobstructed? Inspect the fuel filter for clogging. Next, check for spark at the spark plugs. A weak or absent spark indicates a problem with the ignition coil or distributor (on older models).

Consider a flooded engine – try drying the cylinders by cranking with the throttle wide open. Remember support is available at mercuryfsvps.ru. Router settings, if relevant to onboard systems, can be accessed via 192.168.1.1 or melogin.cn; Don’t overlook the possibility of a faulty safety lanyard switch.

Performance Issues

Experiencing diminished performance from your Mercury outboard? Several factors can contribute to loss of power, rough idling, or overheating. A loss of power often points to fuel delivery problems – a clogged fuel filter, failing fuel pump, or carburetor issues (older models) are common culprits. Rough idling can stem from dirty carburetors, incorrect idle mixture settings, or vacuum leaks.

Overheating is a serious concern; check for a blocked water intake, a faulty impeller, or a malfunctioning thermostat. Remember, technical support is available via mercuryfsvps.ru. While seemingly unrelated, ensure onboard network settings (accessible via 192.168.1.1 or melogin.cn) aren’t interfering with diagnostic tools. Regular maintenance is key to preventing these issues.

Loss of Power

Sudden or gradual power loss in your Mercury outboard demands investigation. Begin by inspecting the fuel system – a clogged fuel filter is a frequent offender. Verify the fuel pump is delivering adequate pressure, and for older models, examine the carburetor for debris or improper settings. Ensure proper spark plug function; weak spark diminishes combustion.

Consider compression testing to rule out internal engine issues. While troubleshooting, remember that network connectivity (using addresses like 192.168.1.1) shouldn’t impact engine performance directly, but could affect diagnostic tool access. Contact mercuryfsvps.ru for specialized support. Don’t overlook the possibility of a restricted exhaust or a failing propeller. Consistent maintenance prevents many power loss scenarios.

Rough Idling

A rough idle in your Mercury outboard signals an imbalance in engine operation. Start by checking the carburetor (older models) for dirt or varnish buildup, impacting fuel-air mixture delivery. Newer models require inspection of fuel injectors for clogging or malfunction. Verify proper spark plug condition and gap; inconsistent spark causes misfires.

Inspect the idle speed adjustment screw for correct settings. While seemingly unrelated, ensure network settings (like accessing melogin.cn) aren’t diverting attention from core engine diagnostics. Contact mercuryfsvps.ru for specialized assistance. A vacuum leak or low compression can also contribute to rough idling. Regular maintenance, including fuel stabilizer, minimizes these issues. Remember to check for proper propeller pitch and condition as well.

Overheating

Overheating is a critical issue demanding immediate attention in your Mercury outboard. Begin by inspecting the water intake for obstructions – weeds, plastic, or marine growth. Check the cooling system’s telltale indicator for consistent water flow. A failing water pump is a common culprit, requiring replacement. Examine the thermostat for proper operation; a stuck thermostat restricts coolant circulation.

Ensure the engine’s exhaust ports are clear. While troubleshooting, remember unrelated network configurations (like mercury router settings at melogin.cn) won’t resolve engine problems. Contact mercuryfsvps.ru for expert guidance. Low oil levels can also contribute to overheating. Regularly flush the cooling system to prevent corrosion and maintain optimal performance. Ignoring overheating can lead to severe engine damage.

Troubleshooting Fuel System

Fuel system issues require careful inspection. Address fuel pump problems, carburetor concerns (older models), or fuel injector faults (newer engines). Check lines and filters too.

Fuel Pump Problems

Diagnosing fuel pump issues is crucial for outboard performance. A failing fuel pump can manifest as difficulty starting, loss of power, or stalling, especially under load. Begin by verifying fuel delivery; disconnect the fuel line at the carburetor or fuel injector rail (depending on the engine type) and briefly activate the engine.

If no fuel flows, investigate the pump itself. Check for obstructions in the fuel pickup tube or fuel filter. A common issue is a clogged filter restricting fuel flow. Inspect the fuel pump diaphragm for cracks or tears, which can cause a loss of prime. Electrical connections to the fuel pump should be clean and secure.

Use a multimeter to confirm the pump is receiving voltage during cranking. If voltage is present but the pump doesn’t operate, the pump is likely faulty and requires replacement. Remember to always disconnect the battery before working on the fuel system.

Carburetor Issues (Older Models)

For older Mercury outboards, carburetor problems are a frequent cause of running issues. Symptoms include hard starting, rough idling, poor acceleration, and black smoke. Begin by inspecting the carburetor for visible damage or leaks. A common culprit is a clogged main jet or pilot jet, restricting fuel flow.

Disassemble the carburetor carefully, noting the position of all parts. Clean all jets and passages thoroughly with carburetor cleaner and compressed air. Pay close attention to the float level; an incorrect float level can significantly affect fuel mixture. Inspect the float for leaks or damage.

Ensure the carburetor gaskets are in good condition to prevent air leaks. Reassemble the carburetor, ensuring all screws are tightened properly. If problems persist, a professional carburetor rebuild may be necessary.

Fuel Injector Problems (Newer Models)

Newer Mercury outboards utilize fuel injection, introducing a different set of potential issues. Common symptoms of fuel injector problems include poor fuel economy, misfires, and difficulty starting. A key diagnostic step is checking for proper fuel pressure at the fuel rail. Low pressure indicates a potential problem with the fuel pump or filter.

Fuel injectors can become clogged with debris, restricting fuel flow. Fuel injector cleaner added to the fuel tank can sometimes resolve minor clogs. However, severely clogged injectors may require professional cleaning or replacement.

Inspect the fuel injector wiring and connectors for damage or corrosion. A faulty electrical connection can prevent the injector from operating correctly. Use a multimeter to test the injector’s resistance and ensure it falls within the manufacturer’s specifications.

Fuel Line and Filter Inspection

A crucial step in Mercury outboard troubleshooting is a thorough inspection of the fuel system’s lines and filter. Begin by visually examining the fuel lines for cracks, kinks, or signs of deterioration. Replace any damaged lines immediately to prevent fuel leaks and ensure proper fuel delivery.

The fuel filter plays a vital role in preventing contaminants from reaching the engine. A clogged fuel filter restricts fuel flow, leading to performance issues. Replace the fuel filter regularly as part of your routine maintenance schedule.

Check all fuel line connections to ensure they are tight and secure. Loose connections can cause fuel leaks and air intake, disrupting the fuel supply. Inspect the fuel tank vent to ensure it’s not blocked, as a blocked vent can create a vacuum, hindering fuel flow.

Troubleshooting Ignition System

Ignition problems require checking spark plugs, coils, and older models’ distributors/modules. Ensure proper spark for reliable starting and performance, addressing any electrical faults.

Spark Plug Issues

Diagnosing spark plug problems is crucial for optimal outboard engine performance. Begin by visually inspecting the spark plugs for fouling – carbon buildup, oil residue, or corrosion. A fouled plug hinders spark generation, leading to starting difficulties or misfires.

Next, check the spark plug gap using a feeler gauge, ensuring it matches the manufacturer’s specifications (consult your engine’s manual). An incorrect gap weakens the spark. Remove the spark plug and examine the electrode for wear or damage; replace if necessary.

To test for spark, disconnect the spark plug wire, insert a known good spark plug, ground the plug’s body against the engine block, and pull the starter cord. A strong, blue spark indicates a healthy ignition system. A weak or absent spark points to issues with the spark plug itself, the ignition coil, or wiring. Remember to always disconnect the battery before working on the ignition system!

Ignition Coil Problems

A failing ignition coil can severely impact your Mercury outboard’s performance. These coils are responsible for transforming the battery’s low voltage into the high voltage needed to create a spark at the spark plugs. Symptoms of a bad coil include difficult starting, engine misfires, and a noticeable loss of power, especially at higher RPMs.

Testing an ignition coil requires a multimeter to check its primary and secondary resistance. Compare the readings to the specifications in your engine’s service manual. Significant deviations indicate a faulty coil. Visually inspect the coil for cracks, corrosion, or signs of overheating.

If a coil tests bad, replacement is usually the only option. Ensure the replacement coil is the correct part number for your engine model. Always disconnect the battery before working on the ignition system and follow proper safety procedures when handling electrical components.

Distributor/Ignition Module (Older Models)

For older Mercury outboards utilizing a distributor and ignition module, troubleshooting involves checking several key components. The distributor cap and rotor are prone to wear and corrosion, leading to weak spark or misfires. Inspect these for cracks, carbon tracking, and ensure the rotor tip is in good condition.

The ignition module itself can fail, causing a complete loss of spark. Testing requires specialized equipment to verify its functionality. A faulty module often presents with no-start conditions or intermittent engine performance. Check the wiring connections to the module for looseness or corrosion.

Proper timing is crucial. Verify the distributor is correctly aligned according to the engine’s specifications. Incorrect timing can lead to poor performance and potential engine damage. Replacement of worn components is often necessary to restore reliable ignition.

Troubleshooting Electrical System

Electrical faults are common. Inspect batteries, wiring for corrosion, and check fuses/circuit breakers. Mercury support is reachable via mercuryfsvps.ru or 7 (4922) 52-99-29.

Battery Issues

A weak or dead battery is a frequent cause of starting problems. Begin by verifying the battery terminals are clean and securely connected, free from corrosion which can impede electrical flow. Use a voltmeter to check the battery’s voltage; a fully charged 12-volt battery should read approximately 12.6 volts. If the voltage is significantly lower, attempt to charge the battery using a suitable marine battery charger.

If the battery fails to hold a charge, it may be internally damaged and require replacement. Consider load testing the battery to assess its ability to deliver sufficient current under load. Also, ensure the battery is appropriately sized for your Mercury outboard engine’s electrical demands. Remember to consult the engine’s manual for specific battery requirements. For further assistance with Mercury components, reach out to support at mercuryfsvps.ru or call 7 (4922) 52-99-29.

Wiring Problems and Corrosion

Corrosion and damaged wiring are common culprits behind electrical malfunctions in marine environments. Thoroughly inspect all wiring connections for signs of corrosion, fraying, or loose connections. Pay close attention to connections near the battery, starter solenoid, and engine components. Use a wire brush or sandpaper to clean corroded terminals, and apply a corrosion-inhibiting spray to prevent future issues.

Check for damaged wiring insulation and repair or replace any compromised wires. A multimeter can be used to test for continuity in wiring circuits, identifying breaks or shorts. Ensure all connections are properly secured and waterproofed to prevent moisture intrusion. Remember, addressing wiring issues promptly is crucial for maintaining reliable engine operation. For technical support regarding Mercury components, contact mercuryfsvps.ru or call 7 (4922) 52-99-29.

Fuse and Circuit Breaker Checks

A blown fuse or tripped circuit breaker often indicates an electrical overload or short circuit. Begin by locating the fuse box or circuit breaker panel, typically found near the battery. Visually inspect each fuse for a broken filament or each breaker for a tripped position. Replace any blown fuses with fuses of the exact same amperage rating – never use a higher amperage fuse, as this could cause further damage.

If a circuit breaker has tripped, reset it by flipping it to the “off” position and then back to “on”. If the fuse blows or breaker trips again immediately, there’s a short circuit that needs investigation. For technical assistance with Mercury systems, reach out to mercuryfsvps.ru or call 7 (4922) 52-99-29. Remember safety first when dealing with electrical components!

Maintenance and Prevention

Proactive care prevents issues. Follow a regular schedule, winterize properly, and utilize the correct fuel and oil for optimal Mercury outboard performance and longevity.

Regular Maintenance Schedule

Consistent upkeep is crucial for a reliable Mercury outboard. Implement a schedule including pre-season checks – inspecting belts, hoses, and connections. After each use, flush the engine with fresh water to remove salt and debris.

Every 100 hours (or annually), change the engine oil and filter, inspect spark plugs, and lubricate all moving parts. Annually, examine the fuel lines and filter for cracks or blockages. Every three years, replace the water pump impeller to prevent overheating.

Don’t neglect the lower unit gear oil; change it every year or as recommended in your owner’s manual. Regularly check and tighten all bolts and fasteners. Maintaining detailed records of all maintenance performed will help identify potential issues early and ensure optimal performance.

Winterization Procedures

Proper winterization protects your Mercury outboard from freezing damage. Begin by flushing the cooling system with freshwater, then introduce a marine-grade antifreeze solution to displace all water. This prevents cracking of engine blocks and manifolds.

Next, stabilize the fuel by adding a fuel stabilizer to the fuel tank, then run the engine briefly to circulate the treated fuel throughout the system. Change the engine oil and filter, and fog the engine cylinders with fogging oil to prevent corrosion during storage.

Disconnect the battery and store it in a cool, dry place. Grease all lubrication points and inspect hoses and belts for wear. Cover the outboard to protect it from the elements, ensuring adequate ventilation to prevent moisture buildup.

Using Correct Fuel and Oil

Employing the right fuel and oil is crucial for Mercury outboard longevity. Always adhere to the manufacturer’s recommendations regarding octane rating and fuel type – typically 87 octane unleaded is sufficient, but check your engine’s manual. Ethanol-containing fuels can cause issues, so consider ethanol-free options if available, especially for older models.

Regarding oil, Mercury outboards often require specific types of two-stroke or four-stroke oil. Using the incorrect oil can lead to engine damage, reduced performance, and increased emissions. Synthetic oils generally offer superior protection and lubrication.

Regularly check oil levels and ensure proper oil-to-fuel ratios (for two-stroke engines). Avoid using automotive oils, as they aren’t formulated for the marine environment. Consistent use of quality fuel and oil minimizes wear and tear, extending the life of your outboard.