Australia

espressotoria piccolo coffee machine manual

Espressotoria Piccolo Coffee Machine Manual: A Comprehensive Guide

Discover daily inspiration and wisdom within this guide, offering a curated selection of quotes to motivate and enrich your perspective each and every day․

Welcome to the world of exceptional coffee with the Espressotoria Piccolo! This compact yet powerful machine brings café-quality espresso into your home․ This manual serves as your comprehensive guide, designed to unlock the full potential of your Piccolo․ Whether you’re a seasoned barista or a beginner, we’ll walk you through every step – from initial setup and understanding components, to brewing techniques and essential maintenance․ Prepare to elevate your daily coffee ritual and discover a new level of flavor and enjoyment․ Daily quotes can inspire your brewing journey!

Unboxing and Initial Setup

Carefully unpack your Espressotoria Piccolo, ensuring all components are present: the machine itself, portafilter, filter baskets, water reservoir, and this manual․ Inspect for any damage during shipping․ Before first use, remove all packaging materials and protective films․ Thoroughly wash the water reservoir, portafilter, and filter baskets with warm, soapy water․ Fill the reservoir with fresh, filtered water․ Place the machine on a stable, level surface․ A daily dose of inspiration, like a perfect espresso, starts with careful preparation!

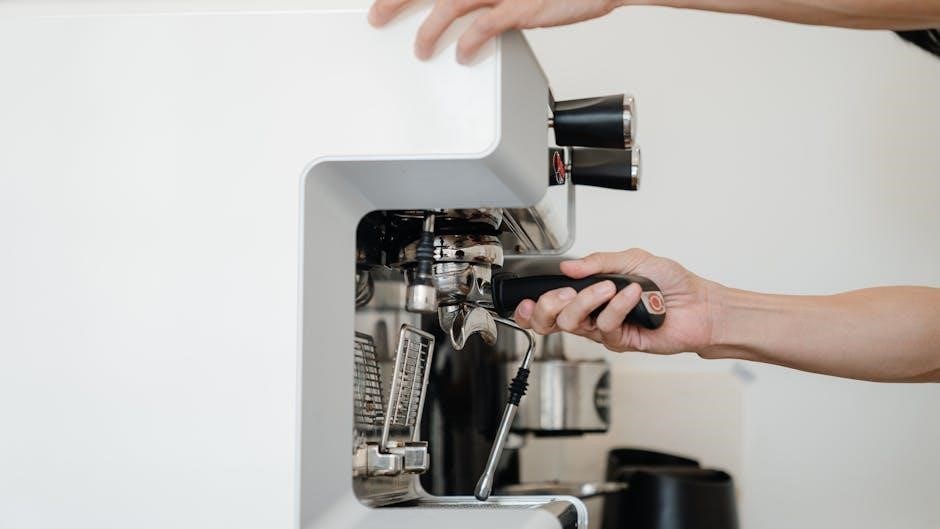
Understanding the Machine Components

Familiarize yourself with the Espressotoria Piccolo’s key parts․ The water reservoir provides water for brewing and steaming․ The portafilter holds the coffee grounds, while filter baskets determine shot volume․ The steam wand creates textured milk for cappuccinos and lattes․ Understanding these components is crucial for optimal operation․ Daily quotes offer wisdom; similarly, knowing your machine unlocks its potential․ Proper component knowledge ensures consistent, high-quality espresso․ Explore each part to begin your journey towards coffee perfection, one inspiring sip at a time․

The Water Reservoir

The water reservoir supplies the Piccolo with the necessary water for brewing espresso and generating steam․ Regularly check the water level, filling with fresh, filtered water only․ Avoid overfilling, as this can cause leaks․ Daily inspiration, like a full reservoir, fuels your day․ Ensure the reservoir is securely seated to prevent issues during operation․ Clean the reservoir periodically to prevent mineral buildup, maintaining optimal machine performance․ A clean reservoir, much like a positive quote, contributes to a brighter experience․

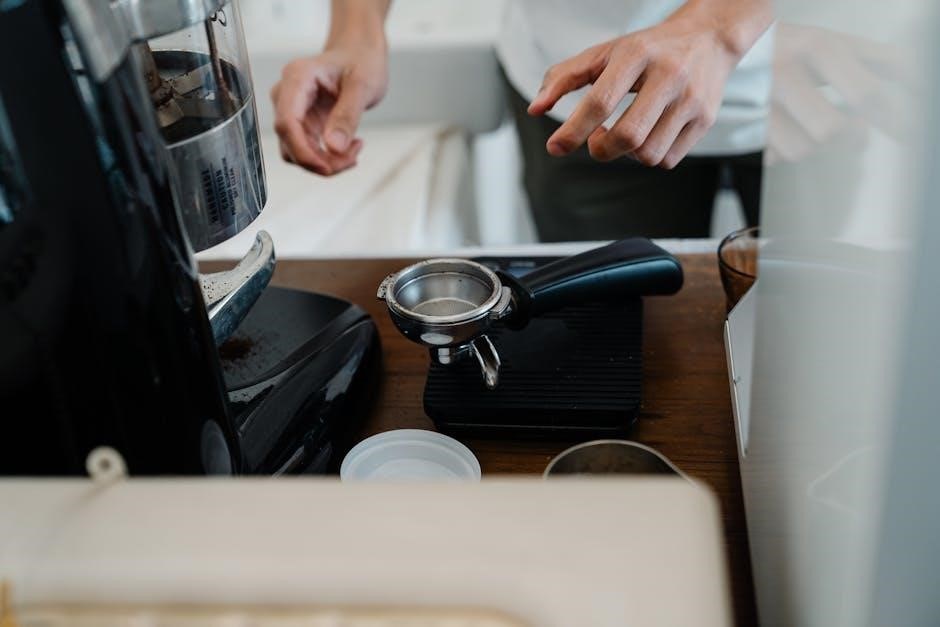
The Portafilter and Filter Baskets

The portafilter holds the ground coffee during extraction, while filter baskets determine the coffee volume․ The Piccolo typically includes single and double-shot baskets․ Ensure the correct basket is used for your desired espresso size․ Daily motivation, like a properly filled portafilter, sets the tone․ Rinse the portafilter thoroughly after each use to remove coffee residue․ Regularly clean the filter baskets to prevent clogging and maintain optimal flow․ A clean portafilter and basket, similar to a well-chosen quote, deliver a satisfying result․

The Steam Wand

The steam wand is crucial for creating velvety microfoam for lattes and cappuccinos․ Before and after each use, purge the wand to remove any condensed water․ Immerse the wand tip just below the milk surface and introduce air to create texture․ Like a daily inspirational quote, mastering the steam wand takes practice․ Always wipe down the wand immediately after use to prevent milk buildup․ Regular cleaning ensures hygienic operation and optimal performance, delivering consistently beautiful milk-based beverages․

Priming and First Use

Before your first espresso, prime the Espressotoria Piccolo․ Fill the water reservoir and run several cycles without coffee to flush the system, similar to starting each day with a motivational quote․ This removes any manufacturing residue․ Ensure the portafilter is securely locked in place․ Allow the machine to fully heat up – the indicator light will signal readiness․ Discard the initial water produced during priming․ This process guarantees a clean, pure espresso flavor from the very beginning, setting the stage for delightful brewing․
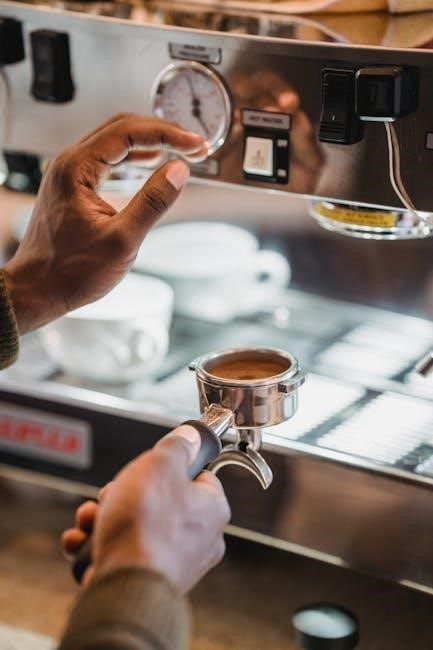
Brewing Espresso

Achieving espresso perfection requires precision․ Begin with freshly ground coffee beans, tailored to your preferred fineness – a daily dose of inspiration for your senses․ Tamp the grounds firmly and evenly within the portafilter, ensuring a consistent density․ Lock the portafilter into the machine and initiate the brewing process․ Observe the extraction; a rich, golden crema indicates a successful shot, much like a powerful quote igniting your day․ Aim for approximately 25-30 seconds for optimal flavor and aroma, resulting in a truly satisfying espresso experience․

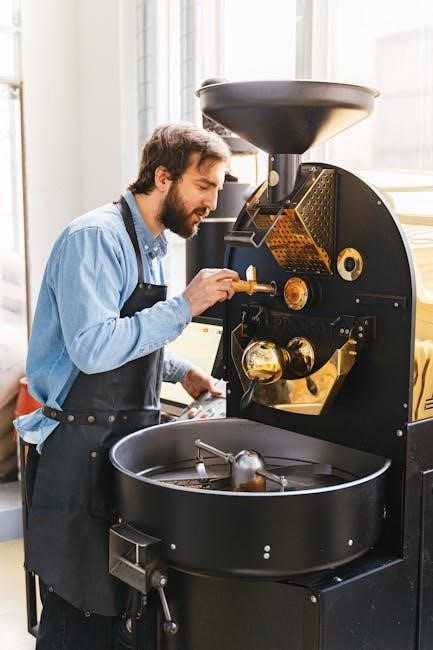
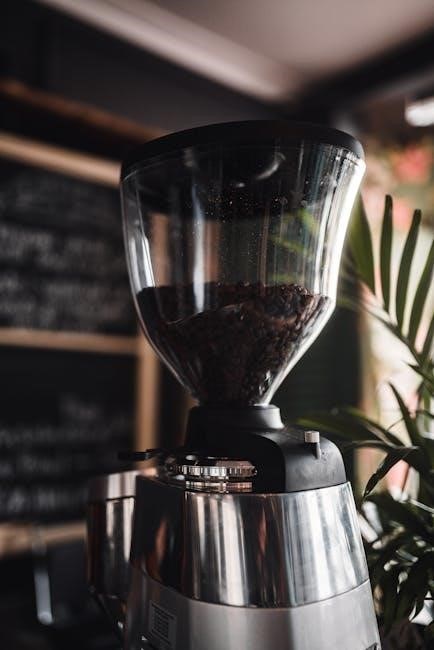
Grinding the Coffee Beans

Freshly ground beans are paramount for exceptional espresso, mirroring the impact of a daily inspirational quote․ Utilize a burr grinder for consistent particle size, avoiding the inconsistencies of blade grinders․ The grind setting significantly impacts extraction; finer grinds increase resistance, while coarser grinds decrease it․ Start with a medium-fine setting and adjust based on your espresso’s taste․ A proper grind unlocks the bean’s full aroma and flavor potential, much like unlocking inner wisdom․ Experiment to find the sweet spot for your preferred beans and machine, embracing the journey․

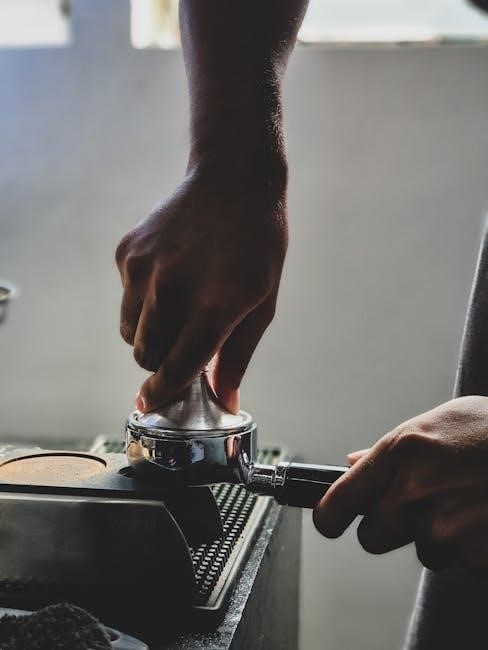
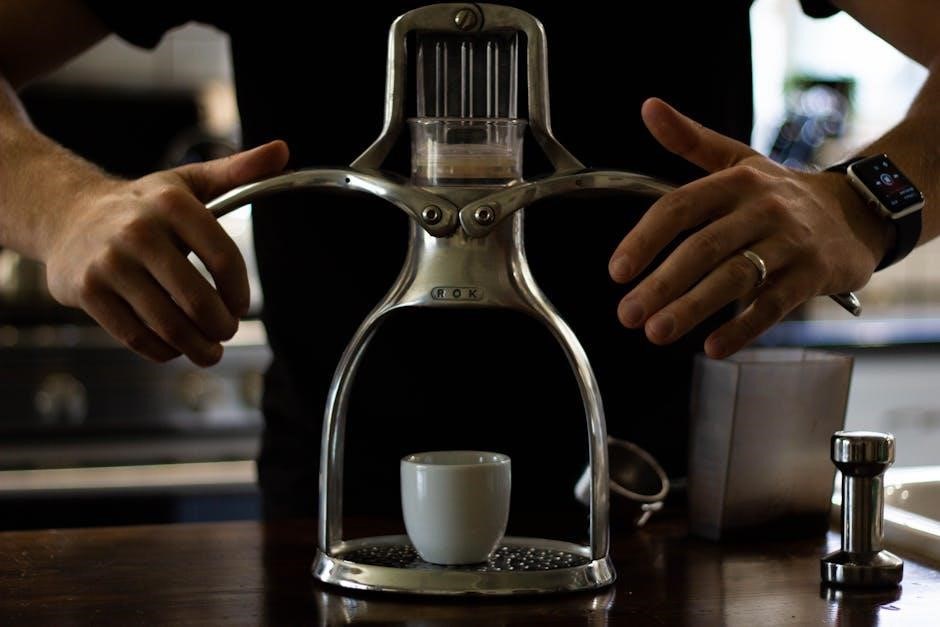
Tamping the Coffee Grounds

Consistent tamping is crucial for even extraction, akin to finding daily motivation through a powerful quote․ Apply approximately 30 pounds of pressure, ensuring a level and firm tamp․ An uneven tamp creates channels, leading to inconsistent extraction and a subpar espresso․ Use a calibrated tamper for consistent pressure․ After tamping, gently polish the surface to remove any loose grounds․ This process compacts the coffee bed, offering resistance to the water flow, resulting in a balanced and flavorful shot․ Practice makes perfect – strive for consistency!

Extracting the Perfect Shot

Initiate the extraction immediately after tamping, aiming for a 25-30 second brew time․ Observe the espresso flow; it should resemble warm honey, starting as dark streams and gradually lightening to a blonde color․ A proper extraction yields approximately 2 ounces of espresso․ Too fast indicates under-extraction (sour taste), while too slow suggests over-extraction (bitter taste)․ Adjust your grind size accordingly – finer for faster flow, coarser for slower․ Like a daily quote offering perspective, a perfect shot requires balance and attention to detail․
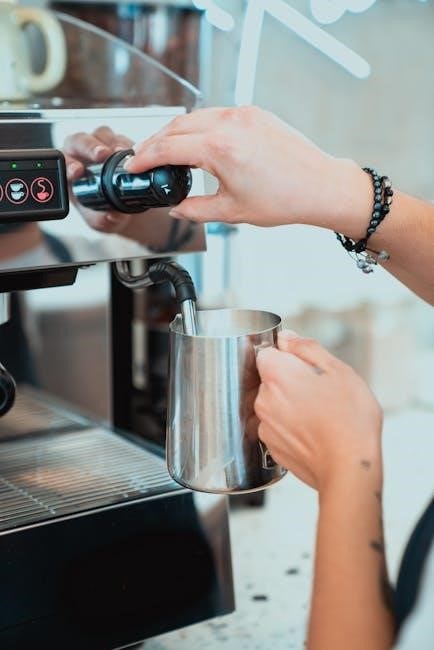
Steaming Milk

Mastering milk steaming creates velvety microfoam essential for lattes and cappuccinos․ Begin with cold milk, filling the pitcher no more than halfway․ Purge the steam wand briefly to remove condensation․ Submerge the wand tip just below the milk surface, introducing air to create foam; Lower the pitcher to heat the milk, creating a whirlpool․ Aim for a temperature of 140-160°F (60-70°C)․ Just as a daily quote can uplift, perfectly steamed milk elevates your coffee experience, offering a delightful texture and warmth․

Purging the Steam Wand

Before and after each use, purging the steam wand is crucial for hygiene and optimal performance․ Briefly open the steam valve to release any condensed water accumulated within the wand․ This prevents diluted milk and ensures dry steam for texturing․ Like a daily inspirational quote, this simple step maintains quality․ Repeat the process after steaming milk to clear any residue․ Consistent purging prevents blockages and extends the life of your Espressotoria Piccolo, delivering consistently excellent results with every brew․

Texturing the Milk

To achieve perfectly textured milk, immerse the steam wand tip just below the surface of the milk․ Open the steam valve fully, creating a vortex․ Slowly lower the pitcher to introduce air, building microfoam – essential for latte art, much like a daily quote builds inspiration․ Once the volume increases by roughly 50%, submerge the wand deeper to heat the milk evenly․ Aim for a temperature of 140-155°F (60-68°C)․ Tap the pitcher to release any large bubbles, and swirl to integrate the microfoam for a velvety texture․

Cleaning the Steam Wand

Immediately after each use, purge the steam wand by briefly opening the valve to release any residual milk․ This prevents clogging, similar to clearing your mind with a daily inspirational quote․ Wipe the wand thoroughly with a damp cloth․ For deeper cleaning, soak a cloth in a solution of warm water and espresso machine cleaner, then wrap it around the wand and let it sit briefly before wiping clean․ Regular cleaning ensures optimal performance and hygiene, maintaining the quality of your steamed milk for every beverage․

Cleaning and Maintenance

Consistent cleaning is vital for your Espressotoria Piccolo’s longevity and performance, much like a daily quote sustains motivation․ Implement daily cleaning procedures, including wiping down the exterior and purging the steam wand․ Descale the machine regularly – every 1-3 months, depending on water hardness – to remove mineral buildup․ Clean filter baskets thoroughly after each use to prevent residue affecting espresso flavor․ Proper maintenance ensures consistently delicious coffee and prevents costly repairs, mirroring the benefits of a well-maintained routine․

Daily Cleaning Procedures

After each use, wipe down the Espressotoria Piccolo’s exterior with a damp cloth to remove spills and coffee residue – a small daily act, like reading a quote․ Purge the steam wand immediately after frothing milk to prevent clogging․ Rinse the portafilter and filter basket thoroughly, removing all coffee grounds․ Empty the drip tray and wipe it clean․ These simple steps, performed consistently, maintain hygiene and ensure optimal performance, contributing to a consistently enjoyable coffee experience, much like a daily dose of inspiration․

Descaling the Machine

Regular descaling, approximately every 3 months depending on water hardness, is crucial for your Espressotoria Piccolo, akin to seeking daily motivation․ Use a descaling solution specifically designed for coffee machines․ Follow the solution’s instructions, typically involving running the solution through the machine followed by several clear water rinses․ Descaling removes mineral buildup that can affect performance and taste, ensuring longevity and optimal brewing․ Ignoring this step can lead to damage, much like neglecting your mental wellbeing – a consistent routine is key․

Filter Basket Cleaning

Thorough cleaning of the portafilter and filter baskets after each use is essential, mirroring the daily renewal found in inspirational quotes․ Remove any spent coffee grounds immediately․ Wash the baskets with warm, soapy water, ensuring all residue is removed․ A small brush can help with stubborn particles․ Rinse completely and dry before reassembling․ Periodically, a deeper clean with a dedicated coffee equipment cleaner can eliminate oils and buildup, maintaining optimal espresso flavor – a small effort for a significant reward, just like a daily dose of wisdom․

Troubleshooting Common Issues

Encountering problems? Like seeking daily inspiration, resolving issues requires a focused approach․ If the machine won’t heat, check the power connection and water level․ Weak espresso often indicates insufficient coffee grounds or improper tamping – refine your technique! Leaks may stem from a loose portafilter or damaged seals․ Consult the manual for detailed solutions․ Remember, persistence and careful observation, similar to finding the perfect quote, will lead to a satisfying brewing experience․ Don’t hesitate to seek support if needed․

Machine Not Heating Up

If your Espressotoria Piccolo isn’t heating, first verify the power cord is securely connected to both the machine and a functioning outlet․ Check the main power switch is engaged․ A blown fuse or tripped circuit breaker could also be the culprit – investigate your electrical panel․ Ensure the water reservoir is properly seated; a safety mechanism prevents heating without sufficient water․ Like seeking a daily quote for motivation, methodical troubleshooting is key․ If issues persist, consult a qualified technician․

Weak Espresso Extraction

A weak espresso shot often indicates insufficient resistance to water flow․ This could stem from coarsely ground coffee beans – adjust to a finer grind․ Inadequate tamping pressure also contributes; apply firm, even pressure․ Ensure the portafilter is securely locked into the group head․ Like finding the perfect daily quote, achieving optimal extraction requires precision․ Check for channeling (uneven water flow) during extraction․ A clogged filter basket can also cause weakness; clean it thoroughly․ Experiment with grind size and tamping for improvement․

Leaking Water

Water leaks can occur from several areas․ First, verify the water reservoir is properly seated and not cracked․ Inspect the portafilter gasket for wear or damage; replace if necessary․ Ensure the group head is tightly secured․ A loose steam wand connection can also cause leaks – tighten it carefully․ Like a daily inspirational quote needing a solid foundation, your machine needs proper assembly․ Check the drip tray for overflow, indicating a potential internal issue․ If leaks persist, discontinue use and contact customer support for assistance․

Advanced Techniques

Elevate your espresso experience with these techniques! Adjusting grind size is crucial; finer grinds increase extraction, coarser decrease it – find your sweet spot․ “Temperature surfing” involves timing your shot after machine warm-up for optimal temperature stability, much like seeking daily inspiration at the right moment․ Pre-infusion, gently wetting the grounds before full pressure, enhances flavor․ Experiment with different tamping pressures․ Mastering these skills, like consistently finding a powerful quote, requires practice and patience for truly exceptional results․

Adjusting Grind Size for Optimal Extraction

Fine-tuning your grind is paramount for perfect espresso․ A grind too fine restricts water flow, leading to over-extraction and bitterness – similar to dwelling on negative thoughts․ Conversely, a coarse grind allows water to pass through too quickly, resulting in under-extraction and sourness, like missing daily inspiration․ Start with a medium grind and adjust incrementally․ Observe the extraction time; aim for 25-30 seconds․ Consistent adjustments, much like a daily routine, unlock the full potential of your beans and machine, yielding balanced, flavorful shots․

Temperature Surfing

Temperature surfing is a technique to stabilize the brewing temperature, crucial for consistent espresso․ The Espressotoria Piccolo, like many home machines, experiences temperature fluctuations․ Begin by running water through the group head for a period, then pause before initiating extraction․ This allows the temperature to recover․ Observe the flow; a consistent stream indicates stability․ Mastering this, akin to finding daily motivation, requires practice and patience․ It’s about understanding your machine’s thermal behavior and adapting to achieve optimal, repeatable results with each shot․

Safety Precautions

Always ensure the machine is unplugged before cleaning or performing maintenance․ Hot surfaces, including the portafilter and steam wand, pose burn risks – exercise extreme caution․ Never immerse the machine base in water․ Use only the provided accessories; improper parts can cause damage or injury․ Keep the power cord away from hot surfaces․ Supervise children when the machine is in operation․ Regularly check the cord for damage․ A stable, level surface is essential to prevent accidental spills or tipping․ Prioritize safety for a positive experience․

Warranty Information

Your Espressotoria Piccolo is covered by a one-year limited warranty against manufacturing defects, starting from the original purchase date․ This warranty covers parts and labor for repairs or replacement, at our discretion․ Damage due to misuse, accidents, or unauthorized repairs is not covered․ Proof of purchase is required for all warranty claims․ To initiate a claim, contact our customer support team with your purchase details․ Warranty is void if the machine is altered or used commercially․ See full terms and conditions online․

Frequently Asked Questions (FAQ)

Q: Why isn’t my machine heating up? Check the power cord and ensure it’s securely plugged in․ Q: What grind size should I use? A fine grind is best for espresso․ Q: Can I use pre-ground coffee? Yes, but freshly ground beans are recommended․ Q: How often should I descale? Every 3-6 months, depending on water hardness․ Q: Where can I find replacement parts? Visit our website or contact customer support․ For further assistance, consult the full manual online․

Where to Find Replacement Parts

Genuine Espressotoria Piccolo replacement parts are readily available to ensure optimal machine performance․ Visit our official website at [insert website address here] to browse our comprehensive online store․ Alternatively, you can contact our dedicated customer support team via phone or email – details are listed in the warranty information․ Authorized retailers may also stock common parts like filter baskets and seals․ Avoid using non-genuine parts, as they may compromise the machine’s functionality and void your warranty․

Espressotoria Piccolo Recipes

Unlock a world of coffee possibilities with your Espressotoria Piccolo! Beyond classic espresso, explore delightful recipes․ Try a creamy cappuccino by layering steamed milk and foam over a shot․ Indulge in a rich latte with more steamed milk than a cappuccino․ For a quick pick-me-up, create a macchiato – espresso marked with a dollop of foam․ Experiment with flavored syrups and cocoa powder to personalize your creations․ Discover endless variations and elevate your home barista experience!

Resources and Support

Need assistance with your Espressotoria Piccolo? Our dedicated support team is here to help! Visit our website for frequently asked questions, troubleshooting guides, and instructional videos․ Connect with our online community forum to share tips and experiences with fellow users․ For personalized support, contact our customer service via email or phone – details are available on our website․ We also offer a comprehensive knowledge base with articles covering every aspect of your machine․

This manual provides a complete guide to operating and maintaining your Espressotoria Piccolo coffee machine․ Explore detailed instructions for brewing perfect espresso, steaming milk to a velvety texture, and ensuring optimal machine performance․ Discover troubleshooting tips for common issues, cleaning procedures for longevity, and safety precautions for worry-free operation․ Unlock advanced techniques to refine your skills and enjoy café-quality coffee at home․ We aim to empower you with the knowledge to fully utilize your Piccolo!

panasonic air conditioner remote manual

Panasonic Air Conditioner Remote Manual: A Comprehensive Guide

Navigating your Panasonic AC is easy! This guide details compatible remotes – A75C2297‚ A75C4147‚ CWA75C4567‚ and CS-S9PKR – for optimal climate control and user experience.

Understanding Your Panasonic Remote

Your Panasonic air conditioner remote is the central command for comfort. It utilizes infrared (IR) technology to communicate with your unit‚ allowing wireless control of temperature‚ fan speed‚ and operational modes. Identifying the correct remote model is crucial for compatibility; several options exist‚ including the A75C2297‚ A75C4147‚ CWA75C4567‚ and CS-S9PKR‚ each potentially supporting different Panasonic AC models.

The remote’s layout is designed for intuitive use‚ typically featuring dedicated buttons for power‚ temperature adjustment‚ fan control‚ and mode selection. The LCD screen on models like the CWA75C4567 provides clear feedback on your settings. Understanding the function of each button – from setting timers to activating sleep mode – unlocks the full potential of your air conditioning system. Replacement remotes are readily available online‚ ensuring continued control if your original is lost or damaged. Proper battery installation and maintenance are also key to reliable operation.

Remote Control Model Numbers: A Key Identifier

Panasonic remote control model numbers are essential for ensuring compatibility and finding the correct replacement. Key identifiers include A75C2297‚ A75C4147‚ CWA75C4147‚ A75C3830‚ CWA75C4567‚ and CWA75C4149‚ alongside models like CS-S9PKR and CS-RE18PKR. These numbers aren’t interchangeable; using an incorrect remote may result in limited or no functionality.

When purchasing a replacement‚ always verify the model number against your existing remote or the compatible models list provided by the manufacturer or retailer. Amazon listings frequently specify compatibility with various Panasonic AC units‚ such as CS-A12CKPG and CU-A12CKP6G. The model number dictates the features and functions supported‚ so accurate identification is paramount. It’s also crucial to note variations like CWA75C4147 versus A75C4147‚ as even slight differences can impact performance. Keeping this number handy simplifies troubleshooting and ensures a seamless user experience.

Common Panasonic Remote Models

Several Panasonic remote models are frequently encountered‚ each designed for specific air conditioner series. The A75C2297 is a widely compatible replacement‚ supporting models like CS-A12CKPG and CS-C9CKPG. A75C4147 & CWA75C4147 are often found together‚ offering broad compatibility and requiring no setup. For mini-split systems‚ the CWA75C4567 stands out with its LCD screen and thermostatic control.

The CS-S9PKR‚ often paired with CWA75C4149‚ is another common pairing‚ frequently available on platforms like eBay. These remotes generally offer full functionality‚ including temperature control‚ fan speed adjustment‚ and mode selection. When seeking a replacement‚ verifying compatibility with your specific AC unit is crucial. Amazon offers numerous options‚ often listing multiple compatible models per remote. Understanding these common models streamlines the replacement process and ensures continued control over your Panasonic air conditioning system.

A75C2297 & Compatible Models

The A75C2297 is a popular replacement remote for a wide range of Panasonic air conditioners. It’s frequently cited as compatible with models in the CS-A and CS-C series‚ specifically the CS-A12CKPG‚ CS-A9CKPG‚ CS-C12CKPG‚ and CS-C9CKPG. Beyond these‚ it also supports units like the CU-A12CKP6G and CU-A9CKP6G.

Available on platforms like Amazon‚ the A75C2297 is often sold as a direct replacement‚ eliminating the need for complex programming. It’s a cost-effective solution for lost or malfunctioning remotes. When purchasing‚ double-check the listed compatible models to ensure a perfect fit. While generally reliable‚ some users may find slight variations in button layout compared to the original remote. However‚ core functionalities like power‚ temperature control‚ and mode selection remain consistent‚ providing seamless operation for supported Panasonic AC units.

A75C4147 & CWA75C4147: Features & Compatibility

The A75C4147 and its equivalent‚ CWA75C4147‚ serve as versatile replacements for Panasonic air conditioner remotes. Offered on platforms like Amazon‚ these remotes boast a “no setup” design – simply insert batteries and begin use. They are designed to work seamlessly with a broad spectrum of Panasonic AC units‚ offering convenient control without the hassle of programming.

These remotes provide full functionality‚ encompassing power‚ temperature adjustment‚ fan speed control‚ and mode selection. They are particularly useful when the original remote is lost or damaged. While specific model compatibility lists can vary‚ the A75C4147/CWA75C4147 is a frequently recommended solution for many Panasonic air conditioning systems. Users appreciate the ease of use and direct replacement capability‚ making it a practical choice for maintaining comfortable indoor climate control. Always verify compatibility with your specific AC model before purchase.

CWA75C4567: Mini-Split Remote Overview

The Panasonic CWA75C4567 is specifically engineered for Panasonic indoor mini-split ductless air conditioning systems. This remote distinguishes itself with its integrated LCD screen‚ providing clear visual feedback of settings and operations. Utilizing infrared (IR) technology‚ it ensures reliable communication with the indoor unit‚ allowing for precise control over your home’s climate.

A key feature of the CWA75C4567 is its thermostatic temperature control‚ enabling users to set and maintain desired temperatures with accuracy. The remote’s design prioritizes user-friendliness‚ with intuitive button layouts for easy navigation. It’s ideal for those seeking detailed control over their mini-split system‚ offering features beyond basic on/off and temperature adjustments. This remote is a direct replacement option‚ ensuring compatibility and restoring full functionality to your ductless air conditioning setup.

CS-S9PKR & CWA75C4149 Remote Details

The Panasonic CS-S9PKR and CWA75C4149 remote controls are designed for specific Panasonic AC air conditioner models‚ offering a reliable solution for managing your indoor climate. These remotes are readily available for purchase‚ often found on online marketplaces like eBay‚ with multiple units frequently available. They serve as direct replacements for lost or damaged originals‚ restoring full functionality to your air conditioning system.

These remotes are designed for straightforward use – no complex programming or setup is required. Simply insert batteries and begin controlling your AC unit. Compatibility extends to models like CS-RE18PKR‚ ensuring a broad range of applicability. When purchasing‚ it’s advisable to verify compatibility with your specific AC model number to guarantee a perfect fit and seamless operation. These remotes provide essential control over temperature‚ fan speed‚ and operating modes‚ enhancing your comfort and convenience.

Basic Remote Functions

Panasonic air conditioner remotes offer intuitive control over your indoor environment. The Power Button initiates operation‚ turning the unit on or off with a simple press. Temperature Control allows precise adjustments for both cooling and heating‚ typically displayed and adjusted in Celsius. Utilize the up and down arrows to select your desired comfort level.

Fan Speed Settings provide options ranging from low to high‚ or even automatic‚ to customize airflow. The Mode Selection button cycles through essential functions: Auto for intelligent climate management‚ Cool for dedicated cooling‚ Dry to dehumidify‚ and Heat for warming your space. These core functions are universally present across most Panasonic remote models‚ ensuring ease of use. Familiarizing yourself with these basics unlocks the full potential of your air conditioning system‚ providing personalized comfort throughout the year.

Power Button & Operation

The Power Button is the primary control for your Panasonic air conditioner. Located prominently on the remote‚ a single press initiates the unit’s operation‚ bringing it to life from standby mode. A subsequent press will power the unit down‚ returning it to standby. Ensure the remote is directed towards the indoor unit’s receiver for reliable communication.

Operation is straightforward: point the remote and press the Power button. The indoor unit will respond with an indicator light and fan activation (depending on previous settings). If the unit doesn’t respond‚ check the batteries (see Battery Information section). Some models may feature a momentary delay before activation. Consistent‚ direct aiming is key for optimal performance. The power button’s responsiveness is fundamental to controlling your comfort‚ making it the most frequently used function on your Panasonic remote.

Temperature Control: Cooling & Heating

Panasonic remotes offer precise temperature adjustments for both cooling and heating modes. Typically‚ dedicated “Cool” and “Heat” buttons select the desired operation. Once selected‚ the “Temp Up” (▲) and “Temp Down” (▼) buttons modify the set temperature. The display shows the target temperature‚ allowing for accurate climate control.

Cooling mode lowers the room temperature‚ while heating mode raises it. The remote allows setting temperatures within a specific range‚ often 16°C to 30°C (61°F to 86°F)‚ though this varies by model. Some remotes display temperatures in Celsius or Fahrenheit – check your model’s settings. The “Cool” mode‚ as noted in operating instructions‚ can be set between 26°C and 28°C. Adjustments are typically made in 1°C or 1°F increments‚ providing granular control over your comfort. Consistent temperature settings contribute to energy efficiency.

Fan Speed Settings

Panasonic air conditioner remotes provide multiple fan speed options to customize airflow and comfort. Common settings include “Auto‚” “Low‚” “Medium‚” and “High.” The “Auto” setting automatically adjusts fan speed based on the temperature difference between the setpoint and the room temperature‚ optimizing both comfort and energy efficiency.

Selecting “Low” provides a gentle breeze‚ ideal for quiet operation and maintaining a consistent temperature. “Medium” offers a balanced airflow‚ suitable for most situations. “High” delivers maximum cooling or heating power‚ quickly adjusting the room temperature. Some models feature additional settings like “Quiet” or “Jet” mode for specialized airflow control. The remote’s display typically indicates the currently selected fan speed. Experimenting with different settings allows you to find the perfect balance between comfort and energy savings‚ tailoring the airflow to your specific needs and preferences.

Mode Selection: Auto‚ Cool‚ Dry‚ Heat

Your Panasonic remote offers versatile operating modes for diverse climate control needs. “Auto” mode intelligently selects cooling or heating based on the room temperature‚ maintaining your desired setpoint. “Cool” mode actively lowers the room temperature‚ providing refreshing relief during warmer weather. The temperature can be adjusted within a range‚ often 26°C to 28°C as indicated in operating instructions.

“Dry” mode functions as a dehumidifier‚ reducing humidity without significantly altering the temperature – ideal for damp environments. “Heat” mode warms the room‚ providing comfortable warmth during colder seasons. Switching between modes is typically done via dedicated buttons on the remote. Understanding each mode’s function allows you to optimize your air conditioner’s performance and energy consumption‚ ensuring a comfortable and efficient indoor climate tailored to your specific requirements and the prevailing weather conditions.

Advanced Features & Settings

Panasonic remotes offer a suite of advanced features beyond basic operation. The “Timer” function allows you to schedule the air conditioner to turn on or off at specific times‚ enhancing convenience and potentially saving energy. “Sleep Mode” gradually adjusts the temperature during the night‚ providing a comfortable sleeping environment while optimizing power usage. This mode often increases the temperature slightly while cooling‚ or decreases it during heating.

“Energy Saving Mode” further optimizes efficiency by adjusting the compressor speed and fan settings. Precise “Airflow Direction Control” lets you adjust vertical and horizontal vanes to distribute air evenly throughout the room. These settings are typically controlled via dedicated buttons on the remote. Utilizing these advanced features allows for a personalized and efficient cooling or heating experience‚ maximizing comfort and minimizing energy consumption‚ ultimately contributing to lower utility bills and a more sustainable lifestyle.

Timer Function: Setting Schedules

The timer function on your Panasonic remote allows for customized scheduling of your air conditioner’s operation. Typically‚ you’ll find dedicated “Timer” or “On/Off” buttons. Setting a timer involves programming a specific time for the unit to either start cooling or heating (On timer) or to automatically shut off (Off timer). Some models offer both options‚ providing flexible control over your climate.

Programming usually requires pressing the timer button‚ then using the number pad or arrow keys to input the desired time. Confirm your selection with an “Enter” or “Set” button. Advanced models may allow for multiple timer settings per day‚ or even different schedules for weekdays and weekends. Refer to your specific remote model’s instructions for detailed steps‚ as the process can vary slightly. Utilizing the timer function maximizes comfort and energy savings by ensuring the AC operates only when needed.

Sleep Mode: Comfort & Energy Saving

Panasonic air conditioner remotes often feature a “Sleep Mode” designed to enhance comfort during nighttime use while simultaneously optimizing energy consumption. When activated‚ this mode gradually increases (in cooling) or decreases (in heating) the set temperature over several hours. This mimics the body’s natural temperature fluctuations during sleep‚ preventing overcooling or overheating.

The gradual temperature adjustment avoids discomfort and reduces energy waste. Typically‚ Sleep Mode is activated with a dedicated button on the remote. Some models allow you to customize the rate of temperature change or the duration of the sleep cycle. The goal is to maintain a comfortable sleeping environment without unnecessarily running the AC at a constant‚ energy-intensive setting. Consult your remote’s manual for specific settings and customization options related to Sleep Mode functionality.

Energy Saving Mode: Optimizing Efficiency

Panasonic air conditioners frequently include an “Energy Saving Mode”‚ a feature designed to minimize power consumption without significantly compromising cooling or heating performance. This mode intelligently adjusts the compressor speed and fan settings to operate at optimal efficiency levels. It often works by slightly increasing the set temperature in cooling mode or decreasing it in heating mode – adjustments typically imperceptible to the user.

Activating Energy Saving Mode‚ usually via a dedicated button on the remote‚ allows the unit to automatically balance comfort and energy conservation. Some models may feature an “Eco” setting that performs a similar function. This mode is particularly beneficial during periods of moderate weather when full cooling or heating capacity isn’t required. By reducing energy usage‚ you can lower your electricity bills and minimize your environmental impact. Refer to your specific remote’s manual for detailed instructions and customization options related to Energy Saving Mode.

Airflow Direction Control: Vertical & Horizontal

Panasonic remote controls offer precise airflow direction control‚ allowing you to customize how cool or warm air is distributed throughout the room. Typically‚ dedicated buttons on the remote manage both vertical and horizontal airflow. Vertical swing adjusts the louvers to move air up and down‚ while horizontal swing controls side-to-side movement.

Many models feature auto-swing functionality‚ which automatically oscillates the louvers for wider coverage. You can often set the vertical airflow direction to specific angles or positions‚ ensuring comfortable airflow without directly blowing on occupants. Some advanced remotes allow independent control of vertical and horizontal airflow‚ providing even greater customization. Properly adjusting airflow direction maximizes comfort and efficiency by delivering conditioned air where it’s needed most‚ avoiding cold or warm spots. Consult your remote’s manual for specific button layouts and available settings.

Troubleshooting Common Issues

Encountering problems with your Panasonic AC remote? Start with the basics: check the batteries! Weak or depleted batteries are the most frequent cause of remote malfunction. If the remote isn’t connecting‚ ensure there’s a clear line of sight to the air conditioner’s IR sensor – obstructions can interfere with the signal.

Display issues on the LCD screen often indicate low batteries‚ but occasionally may signal a remote hardware problem. Incorrect temperature displays might require calibration (refer to your model’s manual for instructions). If the remote still doesn’t work after a battery change‚ try resetting the air conditioner itself. For persistent issues‚ consider purchasing a compatible replacement remote – models like A75C2297 and A75C4147 are readily available. Remember to consult the full manual for detailed troubleshooting steps specific to your Panasonic AC model.

Remote Not Working: Battery Check

Is your Panasonic AC remote unresponsive? The very first step in troubleshooting is always a battery check. This is the most common reason for a non-functional remote. Ensure the batteries are inserted correctly‚ observing the proper polarity (+ and -). Even if the batteries appear to have some charge‚ they might not be providing enough power for reliable operation;

Try replacing the batteries with a fresh set of the recommended type (see the ‘Battery Information & Replacement’ section). Avoid mixing old and new batteries‚ or different battery types. Low-quality batteries can also cause intermittent issues. After replacing the batteries‚ point the remote directly at the air conditioner’s receiver and try again. If the remote still doesn’t respond‚ proceed to check for obstructions or IR sensor problems‚ as detailed in other troubleshooting sections.

Remote Not Connecting: IR Sensor Issues

If a fresh battery set doesn’t resolve the issue‚ the problem might lie with the infrared (IR) sensor. The remote communicates with the air conditioner using an invisible beam of infrared light. Obstructions blocking this signal will prevent connection. Ensure there’s a clear line of sight between the remote and the air conditioner’s IR receiver – typically located on the front panel of the indoor unit.

Check for anything blocking the signal‚ such as furniture‚ decorations‚ or even direct sunlight. Try moving closer to the air conditioner while aiming the remote. Clean both the remote’s IR emitter and the air conditioner’s IR receiver with a soft‚ dry cloth. Dust or grime can interfere with the signal. If the issue persists‚ a faulty IR sensor on either the remote or the air conditioner itself might be the cause‚ potentially requiring professional repair or replacement.

Display Problems: LCD Screen Troubleshooting

A malfunctioning LCD screen on your Panasonic remote can hinder operation‚ displaying faded characters‚ missing segments‚ or a completely blank screen. First‚ ensure the issue isn’t simply due to low batteries; replace them with fresh ones. If the display remains problematic‚ gently try pressing the buttons on the remote – sometimes‚ a stuck button can cause display errors.

Avoid exposing the remote to extreme temperatures or direct sunlight‚ as this can damage the LCD. If the screen appears damaged (cracked or leaking)‚ the remote likely needs replacement. While some minor display issues might be temporary‚ persistent problems usually indicate internal component failure. Cleaning the screen with a soft‚ dry cloth can sometimes improve visibility‚ but avoid using liquids or harsh chemicals. Consider purchasing a compatible replacement remote if troubleshooting fails.

Incorrect Temperature Display: Calibration

If your Panasonic remote shows a temperature significantly different from the actual room temperature‚ calibration might be necessary. While many Panasonic remotes don’t offer direct user calibration‚ verifying the remote’s sensor isn’t obstructed is crucial. Ensure nothing blocks the infrared signal path between the remote and the indoor unit.

Sometimes‚ the issue isn’t the remote itself but the indoor unit’s temperature sensor. Compare the remote’s reading with a reliable thermometer placed near the indoor unit. If they consistently differ‚ the indoor unit may require professional servicing. Resetting the remote by removing and reinserting the batteries can occasionally resolve minor discrepancies. Refer to the operating instructions (F568979) for specific details related to your model. If problems persist‚ consider a replacement remote or contacting Panasonic support.

Battery Information & Replacement

Maintaining proper battery function is vital for your Panasonic air conditioner remote. The recommended battery type is typically AAA or AA‚ depending on the specific remote model (A75C2297‚ A75C4147‚ CWA75C4567‚ CS-S9PKR). Avoid mixing old and new batteries‚ or different battery types. Crucially‚ do not use rechargeable (Ni-Cd) batteries‚ as they may not provide sufficient voltage and can damage the remote.

To replace the batteries‚ locate the battery compartment‚ usually on the back of the remote. Slide the compartment cover open‚ remove the old batteries‚ and insert new ones‚ ensuring correct polarity (+ and -). Replace the compartment cover securely. Weak batteries can cause erratic operation or a non-responsive remote. Regularly check battery levels‚ especially if you notice decreased range or functionality. Amazon offers replacement remotes‚ ensuring continued control of your AC unit.

Recommended Battery Type

Selecting the correct battery type is crucial for optimal performance of your Panasonic air conditioner remote (models A75C2297‚ A75C4147‚ CWA75C4567‚ and CS-S9PKR). While specific requirements can vary slightly between models‚ the most commonly recommended battery type is AAA. Some older or larger remote models may utilize AA batteries. Always verify the battery compartment markings for confirmation.

Alkaline batteries are generally preferred due to their longer lifespan and consistent voltage output compared to other types. Avoid using heavy-duty or carbon-zinc batteries‚ as they may not provide sufficient power. Importantly‚ Panasonic explicitly advises against using rechargeable (Ni-Cd) batteries. These can deliver inconsistent voltage and potentially damage the remote’s internal circuitry. Using the correct battery ensures reliable operation and prevents potential issues with remote functionality‚ as highlighted by available replacement remotes on platforms like Amazon.

Battery Replacement Procedure

Replacing the batteries in your Panasonic remote (compatible models include A75C2297‚ A75C4147‚ CWA75C4567‚ and CS-S9PKR) is a straightforward process. First‚ locate the battery compartment‚ typically on the back of the remote. You may need to slide a small cover or press a release button to open it.

Remove the old batteries‚ noting the correct polarity (+ and -) indicated inside the compartment. Insert new AAA (or AA‚ if applicable) alkaline batteries‚ ensuring they are aligned with the polarity markings. Close the battery compartment cover securely. If the remote still doesn’t function‚ double-check the battery polarity and ensure the batteries are fresh. Avoid mixing old and new batteries. Proper battery installation‚ using the recommended type‚ guarantees consistent operation of your air conditioner remote‚ as supported by readily available replacement options online.

Safety Precautions

When using your Panasonic air conditioner remote (models A75C2297‚ A75C4147‚ CWA75C4567‚ CS-S9PKR and others)‚ prioritize safety. Avoid exposing the remote to extreme temperatures or humidity‚ as this can damage internal components. Do not disassemble the remote; there are no user-serviceable parts inside.

Keep the remote away from water and other liquids to prevent short circuits. Use only the recommended battery type (typically AAA or AA alkaline) and avoid mixing old and new batteries. Do not use rechargeable (Ni-Cd) batteries‚ as they may not provide sufficient voltage or could leak. Handle the remote with care; dropping it can cause damage; Always follow these guidelines to ensure safe and reliable operation of your Panasonic remote‚ maintaining optimal control over your air conditioning system.

nsw vets golf 2024 schedule pdf

NSW Veteran Golf 2024 Schedule: A Comprehensive Overview

The 2024 NSW Veteran Golfers Association Week of Golf program features around 50 events․
This comprehensive schedule caters to both male and female senior golfers throughout New South Wales, offering diverse opportunities․

NSW Veteran Golf represents a thriving community dedicated to providing enjoyable and competitive golfing experiences for mature-aged players across New South Wales․ The association orchestrates a robust calendar of events, culminating in the highly anticipated Week of Golf program․ This program, a cornerstone of the NSW veteran golfing scene, encompasses approximately 50 tournaments designed specifically for men and women golfers who embrace the spirit of the game later in life․

The 2024 schedule builds upon a long tradition of fostering camaraderie and skill development within the veteran golfing community․ It’s a testament to the enduring popularity of golf among seniors, offering a platform for social interaction, healthy competition, and the continued pursuit of golfing excellence․ The association’s commitment extends to ensuring accessibility and inclusivity, welcoming golfers of all skill levels to participate and enjoy the benefits of veteran golf in NSW․ Detailed information regarding the complete program is readily available․

What is the NSW Veteran Golfers Association?

The NSW Veteran Golfers Association (NVGA) is the governing body responsible for promoting and administering veteran golf throughout New South Wales․ Established to cater to the growing number of senior golfers, the NVGA organizes a comprehensive program of events, ensuring opportunities for competition and social interaction for players aged 55 and over․ The association’s core mission revolves around fostering a welcoming and inclusive environment where veteran golfers can continue to enjoy the sport they love․

With a network spanning across the state, the NVGA collaborates with numerous golf clubs to host tournaments and championships․ They manage a detailed annual schedule, including the popular Week of Golf program, which features around 50 events․ The association also provides support and resources to affiliated clubs, promoting best practices and ensuring consistent standards․ Information regarding membership, events, and the latest updates can be found through their official channels, including the readily available 2024 schedule PDF․

The 2024 Week of Golf Program

The 2024 NSW Veteran Golfers Association’s Week of Golf program represents the pinnacle of the annual calendar for many senior golfers in New South Wales․ This extensive program, detailed in the 2024 schedule PDF, comprises approximately 50 individual veteran golf events strategically located across various golf clubs throughout the state․ Designed to cater to both men and women, the program offers a diverse range of competitive and social golfing opportunities․

Events within the Week of Golf program vary in format, including individual stroke play, stableford, and team competitions, ensuring there’s something for every golfer’s preference․ The program’s popularity stems from its inclusive nature and the chance to connect with fellow veteran golfers from across NSW․ The complete schedule, accessible as a PDF, outlines dates, locations, event details, and entry requirements, allowing participants to plan their involvement effectively․ It’s a cornerstone of veteran golf in the region․

Key Dates and Locations for 2024

The 2024 NSW Veteran Golfers Association schedule PDF details a year brimming with activity․ While a complete listing requires consulting the official document, key dates are spread throughout the year, with a significant concentration during the traditional golfing season․ Events commence early in the year and continue through to December, offering consistent opportunities for participation․

Locations are equally diverse, encompassing a wide geographical spread across New South Wales․ Clubs hosting events range from well-known metropolitan courses to charming regional layouts․ Stonecutters Ridge Golf Club is notably featured, hosting a lunch event on July 8th, as indicated in recent updates․ The PDF provides a comprehensive list of venues, allowing golfers to select events convenient to their location․ Accessing the schedule is crucial for planning, as dates and locations are subject to change․ The document ensures golfers stay informed about where and when to play․

Tournament Formats

The 2024 NSW Veteran Golfers Association schedule PDF outlines a variety of tournament formats designed to cater to diverse preferences and skill levels․ The program encompasses events for men, women, and mixed teams, ensuring inclusivity for all veteran golfers․ While the PDF provides specific details for each tournament, common formats include individual stroke play, stableford, and four-person ambrose․

Men’s events frequently feature traditional stroke play competitions, testing golfers’ overall scoring ability․ Women’s events often incorporate stableford scoring, emphasizing consistent performance across all holes․ Mixed events commonly utilize the popular ambrose format, promoting teamwork and social interaction․ The schedule PDF clearly indicates the format for each event, allowing participants to choose competitions aligning with their strengths and enjoyment․ Variations within these formats may also exist, adding further interest and challenge throughout the year․ Detailed rules and conditions of play are typically available at each event․

Men’s Events

The 2024 NSW Veteran Golfers Association schedule PDF details a robust calendar of events specifically tailored for male veteran golfers across New South Wales․ These competitions span a wide range of formats, primarily focusing on individual stroke play and stableford, offering challenges for all skill levels․ Numerous tournaments are strategically located at premier golf clubs throughout the state, providing varied playing experiences․

The schedule highlights opportunities for competitive play, fostering camaraderie amongst participants․ Many events incorporate handicap systems, ensuring fair competition regardless of playing ability․ The PDF outlines key dates, locations, and entry requirements for each men’s tournament․ Expect a mix of single-day events and multi-day championships, catering to different time commitments․ These events are designed to promote both sporting excellence and social interaction within the veteran golfing community, as detailed within the comprehensive schedule document․

Women’s Events

The 2024 NSW Veteran Golfers Association schedule PDF showcases a dedicated series of events designed for female veteran golfers throughout New South Wales․ These tournaments mirror the men’s events in their diversity, primarily featuring individual stroke and stableford competitions, accommodating various playing strengths․ A significant number of these events are hosted at highly-regarded golf courses, offering enjoyable and challenging rounds․

The schedule emphasizes inclusivity and provides a platform for women to showcase their golfing talents․ Handicap systems are consistently applied to ensure equitable competition․ The PDF clearly outlines crucial details such as event dates, locations, and registration procedures for each women’s tournament․ Participants can anticipate a blend of one-day competitions and extended championships, fitting diverse schedules․ These events aim to cultivate a supportive and competitive environment, promoting both athletic achievement and social connections within the veteran women’s golfing sphere, as comprehensively presented in the schedule․

Mixed Events

The 2024 NSW Veteran Golfers Association schedule PDF details a selection of mixed events, fostering camaraderie and inclusive competition between male and female veteran golfers across New South Wales․ These events typically adopt a four-person ambrose or stableford format, encouraging teamwork and social interaction alongside individual skill․ The schedule highlights a commitment to providing opportunities for golfers of all abilities to participate and enjoy the game together․

Mixed events are strategically interspersed throughout the year, offering a refreshing change of pace from individual stroke play․ The PDF provides clear information regarding event dates, course locations, and specific team composition guidelines․ These tournaments often feature relaxed atmospheres and social gatherings, enhancing the overall golfing experience․ Handicapping systems are carefully applied to ensure fairness, allowing teams with varying skill levels to compete on a level playing field․ The schedule demonstrates the Association’s dedication to creating a welcoming and enjoyable environment for all veteran golfers, promoting both sporting excellence and social bonds․

Eligibility Criteria for Participation

The 2024 NSW Veteran Golfers Association schedule PDF outlines specific eligibility requirements for participation in all sanctioned events․ Generally, golfers must be aged 55 years or older to compete in veteran tournaments across New South Wales․ However, certain events may have age restrictions differing slightly, clearly indicated within the detailed schedule․ Participants must hold a current Golf Australia handicap, ensuring a standardized measure of playing ability․

The PDF emphasizes that golfers must be financial members of an affiliated golf club, demonstrating a commitment to the sport and adherence to established golfing protocols․ Furthermore, adherence to the Association’s code of conduct is mandatory, promoting fair play and respectful behavior on and off the course․ Specific tournament formats may impose additional criteria, such as maximum handicap limits, to ensure competitive balance․ Detailed information regarding eligibility is readily available within the schedule, allowing prospective participants to confirm their suitability before registering․ The Association strives for inclusivity while maintaining the integrity of its competitions․

Registration Process and Fees

The 2024 NSW Veteran Golfers Association schedule PDF details the registration process for each tournament, typically requiring online submission through the Association’s official website․ Participants will need to create an account or log in to an existing one to access the registration portal․ The PDF provides direct links to each event’s registration page, streamlining the application process․ Required information includes personal details, Golf Australia handicap, affiliated club membership, and event selections․

Tournament entry fees vary depending on the event’s prestige, location, and prize pool, with specific costs clearly outlined in the schedule․ Payment is generally accepted via credit card or electronic funds transfer (EFT)․ Early bird discounts may be available for registrations completed before a specified date, encouraging prompt participation․ The schedule also notes any applicable refund policies․ Registration closes one week prior to each event, allowing sufficient time for event organization․ Confirmation of registration will be sent via email, including essential event details and contact information․

Notable Tournaments in the 2024 Schedule

The 2024 NSW Veteran Golfers Association schedule PDF highlights several key tournaments attracting significant participation․ Among these, the event at Stonecutters Ridge Golf Club on July 8th, as noted in recent communications, stands out as a popular fixture․ This tournament typically features a stableford format and offers a challenging course layout for players of all skill levels․ The schedule PDF details the tee times, competition rules, and prize distribution for this event․

Other prominent tournaments include those hosted at prestigious clubs across NSW, offering opportunities to compete against fellow veteran golfers in a friendly yet competitive environment․ The schedule indicates events with varying entry fees and handicap requirements, catering to a diverse range of players․ Detailed information regarding each tournament, including course details, accommodation options, and social events, is readily available within the comprehensive schedule PDF․ These events foster camaraderie and celebrate the spirit of veteran golf in New South Wales․

Stonecutters Ridge Golf Club Event

The NSW Veteran Golfers Association’s 2024 schedule PDF specifically details the event at Stonecutters Ridge Golf Club, scheduled for Thursday, July 8th․ Ken Atkins is organizing a lunch gathering in conjunction with the tournament, fostering a social atmosphere alongside the competition․ This event is a highly anticipated fixture, known for its well-maintained course and welcoming environment for veteran golfers․

The schedule PDF provides crucial details regarding the event format, likely a stableford competition, and outlines the handicap requirements for participation․ It also includes information on entry fees, prize money, and the contact details for event organizers․ Players can find details on tee times and the day’s itinerary within the document․ Stonecutters Ridge offers a challenging yet enjoyable golfing experience, making it a popular choice for veteran golfers seeking a competitive and social outing․ The PDF serves as the central resource for all event-related information․

Understanding the Schedule PDF

The 2024 NSW Veteran Golfers Association schedule PDF is the central repository for all tournament information․ It’s meticulously organized, detailing over 50 events across New South Wales for senior golfers․ The document clearly outlines key dates, locations, and tournament formats – men’s, women’s, and mixed events are all individually listed․

Each event entry within the PDF typically includes the host club, contact information for the event organizer, entry fees, and specific handicap requirements․ Understanding the PDF’s structure is crucial for efficient planning․ Players can quickly identify events aligning with their skill level and location preferences; The PDF also often contains details regarding registration deadlines and any special conditions of play․ It’s a comprehensive guide designed to streamline the participation process for veteran golfers, ensuring a smooth and enjoyable golfing experience throughout the year․

Accessing the Official 2024 Schedule PDF

The official 2024 NSW Veteran Golfers Association schedule PDF is readily accessible through the Association’s official channels․ Typically, it’s prominently featured on their website’s homepage, often within a “News” or “Events” section․ A direct link to the PDF download is usually provided for immediate access․

Alternatively, the schedule PDF may be distributed via email to registered members of the NSW Veteran Golfers Association․ Ensure your membership is current to receive these updates directly․ Checking affiliated golf clubs’ websites is another avenue, as they frequently post the schedule for their members․ Social media platforms associated with the Association may also share links to the PDF․ Downloading and saving the PDF to your device allows for offline viewing and convenient reference when planning your participation in the 2024 Week of Golf program․

Recent Updates and Changes (as of 02/06/2026)

As of today, February 6th, 2026, the 2024 NSW Veteran Golf schedule remains largely consistent with the originally published PDF․ However, minor adjustments have been implemented based on course availability and unforeseen circumstances․ Notably, the Stonecutters Ridge Golf Club event, initially scheduled for July 8th, 2024, experienced a slight modification to its tee-off times due to a pre-booked function․

Furthermore, several golfers reported intermittent issues accessing Instagram, potentially impacting communication regarding event updates․ The Association advises checking the official website for the most accurate information․ While the core program of approximately 50 events remains intact, members are encouraged to regularly review the latest version of the schedule PDF, available on the NSW Veteran Golfers Association website, to confirm event details and any last-minute changes․ Any significant alterations will be communicated via email to registered members․

Contact Information for NSW Veteran Golf

For inquiries regarding the 2024 schedule, event registrations, or any related matters, please reach out to the NSW Veteran Golfers Association through the following channels․ Direct email correspondence can be sent to the association’s dedicated email address, which is readily available on their official website․ Alternatively, members can connect via phone during business hours; the contact number is also listed on the website’s ‘Contact Us’ page․

Please note that due to high volumes of inquiries, especially concerning the PDF schedule, response times may vary․ The association encourages members to first consult the frequently asked questions (FAQ) section on the website, as many common queries are addressed there․ For urgent matters or technical difficulties accessing the schedule PDF, a dedicated support line is available․ Social media channels, including Facebook, may also provide updates, but official communication remains through the website and direct contact methods․

Related Golfing Events in NSW

Beyond the NSW Veteran Golfers Association’s extensive 2024 program, New South Wales boasts a vibrant golfing calendar with numerous events catering to diverse skill levels and age groups․ Regional golf associations frequently host tournaments, offering opportunities for competitive play and camaraderie․ Several golf clubs across the state organize open days and championships, welcoming both members and visitors․

For golfers seeking broader competitive experiences, Golf NSW oversees a range of amateur and professional tournaments throughout the year․ These events often coincide with or complement the veteran golfers’ schedule, providing additional playing options․ Information regarding these events, including entry details and schedules, can be found on the Golf NSW website․ Furthermore, local pro shops and golf clubs are excellent resources for discovering smaller, community-based golfing events happening near you․ Checking club newsletters and online event listings will reveal a wealth of opportunities․

Resources for Veteran Golfers

Veteran golfers in NSW have access to a growing network of support and information․ The NSW Veteran Golfers Association website serves as a central hub for schedules, event details, and association news․ Golf NSW also provides resources tailored to senior players, including information on handicapping, course access, and relevant competitions․ Many golf clubs throughout the state actively promote veteran golf programs and offer dedicated tee times and social events․

For golfers seeking to improve their game, numerous coaching clinics and workshops are available, often specifically designed for seniors․ Local pro shops can connect players with qualified instructors․ Online resources, such as golf instruction videos and articles, can supplement on-course learning․ Additionally, connecting with fellow veteran golfers through club memberships and social groups fosters a supportive community and provides opportunities for shared learning and enjoyment of the game․

hip replacement exercises after 6 weeks pdf

Article Plan: Hip Replacement Exercises After 6 Weeks

This comprehensive plan details a rehabilitation program‚ focusing on strengthening‚ range of motion‚ and functional exercises post-surgery․
It’s designed for continued progress‚
emphasizing walking and consistent follow-up appointments with your surgeon․

Following a total hip replacement‚ regaining strength‚ flexibility‚ and function is crucial for a successful recovery․ This article outlines a progressive exercise program specifically designed for individuals 6 weeks post-operation․
It’s important to remember that rehabilitation is a journey‚ and consistency is key․ This plan builds upon the foundation established in the initial post-operative phase‚ transitioning towards more demanding activities․

The exercises detailed here are a general guide; however‚ individual progress varies․ Frequent follow-up appointments with your surgeon are essential to monitor your recovery and adjust the program as needed․ Walking remains a cornerstone of rehabilitation‚ aiming for 15-30 minutes‚ two to three times daily․
Avoid prolonged sitting – remember to stand‚ stretch‚ and walk frequently․ This program aims to prepare you for a return to a healthy‚ active lifestyle․

Understanding the 6-Week Post-Op Stage

At six weeks post-op‚ the initial acute healing phase has subsided‚ allowing for a more aggressive‚ yet controlled‚ rehabilitation approach․ While pain and swelling may still be present‚ they should be gradually decreasing․ This stage focuses on building strength in the muscles surrounding the hip joint – including the glutes‚ quadriceps‚ and hamstrings – to improve stability and function․

Expect to continue experiencing some discomfort during and after exercise‚ but it should be manageable and not debilitating․ A key goal is to increase range of motion and flexibility‚ preparing the hip for everyday activities․ Progressive strengthening‚ targeting hip abductors‚ flexors‚ and adductors‚ is vital․ Remember‚ this phase bridges the gap between initial recovery and a return to more demanding functional movements‚ requiring patience and adherence to the prescribed program․

Goals of Exercise After 6 Weeks

The primary goals at this stage are to maximize hip strength and restore a functional range of motion‚ enabling a return to daily activities with confidence․ Specifically‚ we aim to improve muscle control around the hip joint‚ enhancing stability during walking and weight-bearing․ Increasing quadriceps strength is crucial for effective gait and stair climbing‚ while gluteal strengthening supports hip extension and prevents limping․

Furthermore‚ the program seeks to minimize stiffness and pain‚ promoting a more natural and comfortable movement pattern․ A significant objective is to build endurance‚ allowing for prolonged periods of activity without excessive fatigue․ Ultimately‚ the goal is to prepare you for a long-term maintenance exercise program‚ ensuring continued hip health and preventing future complications․ Consistent effort and adherence to precautions are key to achieving these objectives․

Phase 1: Strengthening Exercises (Weeks 6-8)

This phase focuses on rebuilding muscle strength around the hip‚ including gluteals‚ quadriceps‚ and hamstrings․ Progressive overload is key to achieving optimal results․

Gluteal Strengthening

Strengthening the gluteal muscles is crucial for hip stability and proper gait after a total hip replacement․ Weak glutes can contribute to limping or instability․ Begin with gluteal sets – simply squeezing your buttocks together and holding for five to ten seconds‚ repeating ten to fifteen times․

Progress to side-lying hip abduction․ Lying on your side with your operated leg on top‚ slowly lift your leg towards the ceiling‚ keeping your knee straight․ Perform ten to fifteen repetitions․ Avoid rotating your hip during this exercise․ As you gain strength‚ consider adding ankle weights‚ starting with one pound and gradually increasing․

Bridging is another excellent exercise․ Lie on your back with your knees bent and feet flat on the floor․ Lift your hips off the ground‚ squeezing your glutes at the top․ Hold for a few seconds and slowly lower back down․ Repeat ten to fifteen times․ Ensure your core is engaged throughout the exercise to protect your lower back․

Quadriceps Strengthening

Rebuilding quadriceps strength is paramount for regaining full function after hip replacement surgery․ Begin with quad sets: tighten your thigh muscle‚ pressing the back of your knee into the bed or floor‚ and hold for five to ten seconds․ Repeat this ten to fifteen times‚ several times a day․

Short arc quads are the next progression․ Place a rolled towel under your knee while lying on your back․ Slowly straighten your knee‚ lifting your foot off the floor․ Hold for a few seconds and slowly lower․ Perform ten to fifteen repetitions․

Straight leg raises are also beneficial․ Lie on your back with one leg bent and the other straight․ Slowly lift the straight leg six to twelve inches off the ground‚ keeping it straight․ Hold for a few seconds and slowly lower․ Repeat ten to fifteen times․ Focus on controlled movements and avoid arching your back․ Progressive strengthening is key‚ building towards full leg extension․

Hamstring Strengthening

Strengthening the hamstrings is crucial for hip stability and overall leg function post-surgery․ Begin with hamstring sets while lying on your stomach․ Gently press your heel down into the surface‚ tightening your hamstring muscle․ Hold for five to ten seconds‚ repeating ten to fifteen times‚ several times daily․

Bridging exercises are an excellent progression․ Lie on your back with knees bent and feet flat on the floor․ Lift your hips off the floor‚ squeezing your glutes and hamstrings․ Hold for a few seconds and slowly lower․ Aim for ten to fifteen repetitions․

Heel slides are another effective exercise․ Lie on your back with legs extended․ Slowly slide your heel towards your buttocks‚ bending your knee․ Keep your heel in contact with the surface throughout the movement․ Repeat ten to fifteen times․ Controlled movements are vital‚ avoiding any pain․ Consistent practice will improve hamstring strength and flexibility․

Hip Abductor & Adductor Exercises

Strengthening hip abductors and adductors enhances stability and improves walking patterns after hip replacement․ Side-lying leg lifts target abductors․ Lie on your side with the operative leg on top‚ keeping it straight․ Slowly lift your leg towards the ceiling‚ maintaining control․ Repeat ten to fifteen times․

Resistance band exercises are beneficial for both abductors and adductors․ Secure a resistance band around your ankles․ For abduction‚ step sideways against the band’s resistance․ For adduction‚ bring your legs together against the band․ Perform ten to fifteen repetitions for each․

Clamshells are another effective abductor exercise․ Lie on your side with knees bent and feet together․ Keeping your feet together‚ lift your top knee‚ engaging your hip abductors․ Hold briefly and lower․ Aim for ten to fifteen repetitions․ Focus on controlled movements and avoid pain․

Phase 2: Range of Motion & Flexibility Exercises

This phase focuses on regaining hip movement and reducing stiffness through gentle stretches․ Consistent practice is key to improving flexibility and function post-surgery․

Hip Flexion Exercises

Hip flexion exercises are crucial for regaining the ability to lift your leg‚ essential for activities like walking and climbing stairs․ Begin seated‚ gently sliding your operated leg backward‚ keeping your heel on the surface as much as possible․ Aim to achieve a comfortable range of motion without forcing the movement or experiencing pain․

As you progress‚ you can perform this exercise lying on your back‚ bringing your knee towards your chest․ Support your thigh with a towel if needed․ Another variation involves seated hip flexion with resistance‚ using a resistance band looped around your foot․ Slowly pull your leg forward against the band’s resistance‚ maintaining control throughout the movement․

Remember to focus on controlled movements and avoid any sudden jerks․ Perform 10-15 repetitions of each exercise‚ 2-3 times a day․ Gradually increase the resistance or range of motion as your strength and flexibility improve․ Always listen to your body and stop if you feel any sharp pain․

Hip Extension Exercises

Hip extension exercises are vital for strengthening the gluteal muscles and hamstrings‚ which are key for propelling you forward during walking and other activities․ Begin lying face down with your operated leg straight․ Gently lift your leg off the surface‚ keeping your knee straight and squeezing your gluteal muscles․ Avoid arching your back excessively․

As you gain strength‚ you can add ankle weights to increase the challenge․ Another effective exercise is standing hip extension‚ using a resistance band looped around your ankles․ Slowly extend your leg backward against the band’s resistance‚ maintaining a controlled movement․ Focus on engaging your gluteal muscles throughout the exercise․

Perform 10-15 repetitions of each exercise‚ 2-3 times daily․ Ensure you maintain proper form to avoid strain․ Listen to your body and cease if you experience any discomfort․ Gradual progression is key to building strength and restoring full hip function․

Hip Internal & External Rotation

These exercises improve hip mobility and address potential stiffness following surgery․ Begin lying on your back with your knees bent and feet flat on the floor․ Slowly rotate your operated leg inward (internal rotation)‚ keeping your heel on the floor․ Then‚ rotate your leg outward (external rotation)‚ again maintaining heel contact․

Resistance bands can enhance these exercises․ Secure a band around your ankles and perform the rotations against the band’s resistance․ Focus on controlled movements and avoid forcing the rotation beyond your comfortable range․ Another variation involves seated rotations‚ maintaining good posture․

Aim for 10-15 repetitions of each rotation‚ 2-3 times daily․ Pay attention to any pain and modify the exercise accordingly․ Consistent performance of these rotations will help restore normal hip movement and prevent stiffness‚ contributing to improved function and reduced discomfort․

Hip Abduction & Adduction Stretches

These stretches enhance flexibility and range of motion in the hip‚ crucial for regaining normal gait and function․ Begin with hip abduction – lying on your side‚ gently lift your operated leg towards the ceiling‚ keeping your knee straight․ Avoid rotating your hip; focus on a straight upward movement․

For adduction‚ lie on your back with knees bent․ Gently let your operated leg fall inward towards the midline of your body‚ keeping your shoulder flat on the floor․ A slight stretch should be felt in the inner thigh․ Use a towel or strap if needed to assist the movement․

Hold each stretch for 20-30 seconds‚ repeating 2-3 times per session․ Remember to breathe deeply throughout the stretch․ These stretches‚ performed consistently‚ will improve hip flexibility‚ reduce muscle tension‚ and contribute to a more natural and pain-free movement pattern․

Phase 3: Functional Exercises

This phase focuses on real-world activities‚ including walking progression‚ stair climbing‚ and standing exercises․ Balance work is also key‚ restoring confidence and independence․

Walking Progression

Initially‚ aim for 15-minute walks two to three times daily‚ gradually increasing duration to 30 minutes‚ also two to three times a day by the end of six weeks․ This consistent approach is paramount for regaining strength and endurance․ Remember to avoid prolonged sitting – stand‚ stretch‚ and walk after each hour․

Focus on proper gait mechanics: heel strike‚ followed by a smooth roll through the foot․ Maintain a comfortable pace‚ prioritizing form over speed․ As strength improves‚ incorporate gentle inclines and varied terrain․ Listen to your body and adjust the intensity accordingly․ Walking is arguably the most important exercise post-replacement‚ promoting circulation‚ muscle activation‚ and overall functional recovery․ Regular walking contributes significantly to a successful and lasting outcome‚ fostering independence and a return to an active lifestyle․ Consistent effort yields substantial benefits․

Stair Climbing Technique

Mastering stair climbing is crucial for regaining functional independence․ Begin with a stable handrail for support‚ and always lead with your stronger leg․ Focus on a controlled ascent‚ ensuring your entire foot makes contact with each step before shifting your weight․ Avoid rushing; prioritize a slow‚ deliberate motion․

When descending‚ the same principles apply – lead with the stronger leg and maintain control․ Small steps are preferable to large strides‚ minimizing stress on the new hip joint․ As confidence grows‚ gradually reduce reliance on the handrail․ Remember to alternate leading legs with each repetition․ Stair climbing strengthens key muscle groups‚ including the glutes‚ quadriceps‚ and hamstrings‚ contributing to overall stability and mobility․ Practice regularly‚ but stop if you experience pain․ This exercise is a significant milestone in your recovery journey․

Standing Hip Exercises

Standing exercises enhance stability and strength‚ building upon the foundation established in earlier phases․ Begin with gentle hip abductions – slowly lifting your leg out to the side‚ keeping your body upright and core engaged․ Follow with hip extensions‚ carefully moving your leg backward while maintaining balance․

These movements target the hip abductors‚ adductors‚ and gluteal muscles‚ vital for proper hip function․ Perform these exercises near a stable surface for support if needed․ Focus on controlled movements‚ avoiding any jerking or sudden motions․ Gradually increase the number of repetitions as your strength improves․ Remember to maintain good posture throughout each exercise․ Standing exercises are excellent for simulating everyday activities‚ preparing you for a return to a more active lifestyle․ Consistency is key to achieving optimal results․

Balance Exercises

Regaining balance is crucial after hip replacement surgery‚ as it impacts gait and prevents falls․ Start with simple exercises like standing on one leg for short durations‚ gradually increasing the hold time as your stability improves․ Utilize a sturdy chair or countertop for support initially․

Progress to more challenging exercises‚ such as tandem stance – placing one foot directly in front of the other‚ heel to toe․ Incorporate gentle weight shifts‚ moving your weight from side to side while maintaining your balance․ Focus on engaging your core muscles to enhance stability․ These exercises strengthen the muscles responsible for maintaining equilibrium․ Practice in a safe environment‚ free from obstacles․ Consistent balance training will improve your confidence and reduce your risk of falls‚ contributing to a successful recovery and a return to independent living․

Important Considerations

Prioritize pain management‚ adhere to hip precautions‚ and avoid overexertion during exercises․ Always include proper warm-up and cool-down routines for optimal recovery․

Pain Management During Exercise

Experiencing some discomfort is normal during rehabilitation‚ but sharp or increasing pain signals a need to adjust your exercise routine․ Mild soreness that subsides with rest is generally acceptable‚ indicating muscle adaptation․ However‚ consistently exceeding a tolerable pain level can hinder progress and potentially cause setbacks․

Utilize prescribed pain medication as directed by your surgeon to manage discomfort before‚ during‚ or after exercise sessions․ Ice packs applied for 15-20 minutes post-exercise can effectively reduce inflammation and alleviate pain․ Communicate openly with your physical therapist about your pain levels; they can modify exercises or suggest alternative approaches․

Listen to your body and don’t push through significant pain․ Prioritize proper form over the number of repetitions․ Gradually increase the intensity and duration of exercises as your strength and tolerance improve․ Remember‚ consistent‚ pain-managed exercise is key to a successful recovery․

Hip Precautions (Review)

While many precautions lessen after six weeks‚ maintaining awareness is crucial for hip joint stability and preventing dislocation․ Avoid excessive bending at the hip – generally‚ beyond 90 degrees – especially when sitting or reaching for objects․ Refrain from crossing your legs at the knees‚ as this can strain the hip joint․

Internal rotation of the operated leg should be limited; avoid twisting your foot inward while the leg is extended․ Be mindful of reaching for the floor or tying shoes without proper assistance or adaptive devices․ Your surgeon’s specific guidelines take precedence‚ as precautions can vary based on the surgical approach used․

Continue to use assistive devices‚ like a raised toilet seat or grab bars‚ as needed․ Gradually progress towards independence‚ but always prioritize safe movement patterns․ Regularly review these precautions with your physical therapist to ensure continued adherence and optimal healing․

Avoiding Overexertion

Post-six weeks‚ enthusiasm can lead to doing too much‚ too soon․ Listen attentively to your body and recognize the difference between discomfort and pain․ Mild muscle soreness is expected‚ but sharp‚ persistent pain signals overexertion․ Avoid pushing through pain‚ as this can hinder healing and potentially cause complications․

Gradually increase the intensity and duration of exercises‚ following your physical therapist’s guidance․ Don’t compare your progress to others; everyone heals at their own pace․ Incorporate rest days into your routine to allow muscles to recover and rebuild․ Alternate activity with rest‚ avoiding prolonged periods of exertion․

Be mindful of fatigue; stop exercising if you feel excessively tired․ Prioritize proper form over completing a high number of repetitions․ Remember that consistency‚ not intensity‚ is key to long-term success․

Warm-up and Cool-down Routines

Prior to each exercise session‚ a thorough warm-up is crucial․ Begin with 5-10 minutes of low-impact cardiovascular activity‚ such as walking‚ to increase blood flow to the muscles․ Follow this with gentle range-of-motion exercises‚ like ankle pumps‚ leg swings‚ and hip circles‚ preparing the joint for more strenuous activity․

A proper cool-down is equally important‚ preventing muscle soreness and promoting flexibility․ Spend 5-10 minutes performing the same range-of-motion exercises as your warm-up‚ but at a slower pace․ Static stretches‚ holding each stretch for 20-30 seconds‚ can further enhance flexibility․

Focus on stretching the glutes‚ quadriceps‚ hamstrings‚ and hip flexors․ Remember to breathe deeply throughout both the warm-up and cool-down․ These routines are vital for optimizing recovery and preventing injury․

Long-Term Maintenance

Consistent exercise‚ two to three times weekly‚ is key for sustained strength and a healthy lifestyle․ Regular follow-ups with your surgeon are also essential․

Continuing Exercise Beyond 8 Weeks

Maintaining a regular exercise routine is paramount for long-term hip health and function following total hip replacement․ While the initial 8-week program provides a strong foundation‚ it’s crucial to transition into a sustainable‚ ongoing exercise plan․ This doesn’t necessarily mean continuing the exact same exercises indefinitely‚ but rather adapting and progressing them․

Focus should remain on the core principles established during rehabilitation: strengthening the muscles surrounding the hip (glutes‚ quadriceps‚ hamstrings‚ abductors‚ and adductors)‚ maintaining a good range of motion‚ and incorporating functional movements into daily life․ Consider incorporating low-impact activities like swimming‚ cycling‚ or walking into your routine․

Gradually increase the intensity and duration of your exercises as your strength and endurance improve․ Listen to your body and avoid pushing yourself too hard‚ especially in the beginning․ Regularly reassess your progress and adjust your program accordingly․ Continued adherence to a maintenance program will help prevent stiffness‚ pain‚ and further deterioration of the joint‚ ultimately maximizing the longevity of your hip replacement․

Lifestyle Modifications for Hip Health

Beyond dedicated exercise‚ several lifestyle adjustments can significantly contribute to the long-term health of your hip replacement․ Maintaining a healthy weight is crucial‚ as excess weight places increased stress on the artificial joint․ Prioritize a balanced diet rich in calcium and vitamin D to support bone health and overall well-being․

Avoid prolonged sitting; remember to stand‚ stretch‚ and walk periodically – ideally‚ avoid sitting for longer than one hour at a time․ Modify activities that place excessive strain on your hip‚ such as heavy lifting or high-impact sports․ Consider using assistive devices‚ like a cane or walker‚ when needed‚ especially on uneven terrain․

Pay attention to your posture and body mechanics during daily activities․ Regularly assess your home environment for potential hazards‚ such as loose rugs or slippery floors‚ and make necessary modifications to prevent falls; These proactive steps‚ combined with consistent exercise‚ will help ensure a successful and lasting outcome from your hip replacement surgery․

When to Contact Your Surgeon

While post-operative exercise is vital‚ recognizing potential complications and knowing when to seek medical attention is equally important․ Contact your surgeon immediately if you experience a sudden increase in pain‚ redness‚ swelling‚ or warmth around the surgical site – these could indicate an infection․

Report any new or worsening drainage from the incision‚ as well as any signs of a blood clot‚ such as calf pain‚ swelling‚ or shortness of breath․ Difficulty with walking‚ instability‚ or a feeling that the hip is dislocating requires prompt evaluation․

Don’t hesitate to reach out if you have concerns about your progress or experience any unusual symptoms․ Frequent follow-up appointments are necessary to monitor your recovery‚ but don’t wait for a scheduled visit if you suspect a problem․ Your surgeon is your best resource for addressing any concerns and ensuring a successful long-term outcome․

social and community services award pay guide

Social and Community Services Award Pay Guide ─ 2025/2026

This guide details crucial 2025/2026 pay updates for the SCHADS Award, ensuring fair compensation and compliance with the 3.5% wage increase for workers.

The Social, Community, Home Care and Disability Services Industry Award 2010 (SCHADS Award) is a cornerstone of fair employment within this vital sector. It establishes minimum employment conditions, including wages, allowances, and working hours, for a broad range of professionals dedicated to supporting vulnerable individuals and communities. Understanding the SCHADS Award is paramount for both employers and employees to ensure legal compliance and equitable treatment.

This award specifically addresses the unique demands and responsibilities inherent in social and community services work. It recognizes the dedication and skill required to deliver essential services, promoting a stable and motivated workforce. Regular updates, like the 3.5% wage increase effective July 1, 2025, reflect the evolving economic landscape and the value placed on these crucial roles. Employers, such as Jobs Australia Limited, must diligently adhere to these changes.

What is the Social, Community, Home Care and Disability Services Industry Award 2010?

The Social, Community, Home Care and Disability Services Industry Award 2010 (SCHADS Award) is a legally binding document outlining the terms and conditions of employment for individuals working within these sectors. It’s a national award, meaning it applies across Australia, and is managed by the Fair Work Commission. The award covers a diverse range of roles, from direct care workers supporting individuals with disabilities to administrative staff within community organizations.

Essentially, the SCHADS Award sets minimum standards for pay rates based on classification levels, hours of work, and various allowances. It ensures employees receive fair remuneration for their skills and contributions. Employers are legally obligated to comply with the award’s provisions, and resources like those offered by Jobs Australia Limited assist in navigating its complexities. Staying updated with changes, such as the recent 3.5% wage increase, is crucial for continued compliance.

Who Does the SCHADS Award Cover?

The SCHADS Award encompasses a broad spectrum of employees within the social and community services sector. This includes workers providing direct support to individuals with disabilities, those in aged care facilities, and personnel involved in community development programs. It extends to employees in roles such as disability support workers, home care assistants, youth workers, and social housing officers.

Crucially, the award applies regardless of the employer’s organizational structure – whether they are non-profit organizations, government agencies, or private providers. It generally covers employees who are not covered by another modern award or registered agreement. Understanding your specific classification within the SCHADS framework is vital to ensure you receive the correct minimum wage, as determined by the 3.5% increase, and appropriate entitlements;

2025/2026 Pay Rate Increases

Significant updates for 2025/2026 include a nationwide 3.5% wage increase, impacting all classifications under the Social, Community, Home Care and Disability Services Award.

Overview of the 3.5% Wage Increase

The 3.5% wage increase, effective July 1, 2025, represents a substantial adjustment to minimum pay rates across all classifications within the Social, Community, Home Care and Disability Services (SCHADS) Award. This increase is designed to address cost of living pressures and recognize the valuable contributions of workers in this vital sector. Employers are legally obligated to implement these changes, ensuring all employees receive the correct updated remuneration.

This adjustment impacts a broad range of roles, from direct care workers to administrative staff, and is a key component of maintaining a fair and sustainable workforce. It’s crucial for organizations to review their payroll systems promptly to guarantee accurate and timely payment of the increased rates. Failure to comply with the SCHADS Award can result in significant penalties. Resources are available to assist employers in navigating these changes and ensuring full compliance with the updated pay scales.

Effective Date of the Pay Increase: July 1, 2025

The 3.5% wage increase stipulated by the SCHADS Award will be implemented starting July 1, 2025. This signifies the first full pay period commencing on or after this date will reflect the updated pay rates for all covered employees. Employers must ensure their payroll systems are accurately adjusted to incorporate these changes, avoiding any delays or underpayments.

It is vital to proactively prepare for this transition, reviewing employee classifications and corresponding pay points to guarantee correct application of the new rates. Any back pay owed, resulting from the increase, should be calculated and distributed in accordance with the Award’s guidelines. Clear communication with staff regarding the implementation date and expected changes to their pay is also highly recommended, fostering transparency and trust within the organization.

SCHADS Award Pay Rates by Classification

Detailed pay rates are structured by classification levels—1 through 4— and further defined by pay points within each level, ensuring equitable compensation.

Level 1 Pay Rates

Level 1 represents entry-level positions within the Social, Community, Home Care and Disability Services sector, typically involving tasks under close supervision. These roles often require foundational skills and are crucial for service delivery. The 2025/2026 SCHADS Award outlines specific pay points within Level 1, reflecting experience and demonstrated competency.

Pay Point 1 signifies the starting salary for new entrants, while subsequent pay points – 2, 3, and 4 – represent incremental increases based on accrued experience and skill development. Employers are obligated to progress employees through these pay points as they gain proficiency. Accurate classification and adherence to these rates are vital for compliance. Understanding these rates ensures fair compensation for vital frontline workers, contributing to a stable and motivated workforce within the sector. Regular review of the SCHADS Award is recommended to stay updated on any changes.

Pay Point 1 ⎻ Level 1

Pay Point 1 within Level 1 of the SCHADS Award defines the minimum hourly rate for employees commencing their roles in the social and community services sector. This entry-level point is typically assigned to individuals new to the industry or those undertaking introductory positions with limited prior experience. As of July 1, 2025, with the 3.5% wage increase, the hourly rate at Pay Point 1 is $25.63.

This rate applies to a standard 38-hour work week, with adjustments for part-time or casual employment calculated proportionally. Employers must ensure all eligible employees are paid at least this minimum rate, adhering to the Award’s stipulations. Accurate record-keeping and transparent payroll practices are essential for compliance. This foundational rate acknowledges the valuable contribution of entry-level staff to the sector’s vital services.

Pay Point 2 ⎻ Level 1

Advancing to Pay Point 2 within Level 1 of the SCHADS Award signifies an employee’s demonstrated competence and increasing contribution to their role. This progression typically occurs after a period of satisfactory performance and the acquisition of foundational skills. Effective July 1, 2025, following the 3.5% wage increase, the hourly rate for Pay Point 2 is $26.56.

This rate reflects a recognition of growing experience and responsibility within the position. Like Pay Point 1, this applies to a standard 38-hour week, with proportional adjustments for varied employment types. Employers are obligated to ensure accurate and timely payment of this increased rate to eligible employees. Maintaining detailed performance records is crucial for justifying progression to this pay point and ensuring fair compensation.

Pay Point 3 ⎻ Level 1

Reaching Pay Point 3 in Level 1 of the SCHADS Award demonstrates a solid grasp of core job functions and a consistent ability to perform tasks independently. This progression acknowledges increased proficiency and reliability. As of July 1, 2025, with the implemented 3.5% wage increase, the hourly rate for Pay Point 3 is $27.47.

This rate signifies a valuable contribution to the team and a growing level of expertise. It applies to full-time employees working 38 ordinary hours weekly, with adjustments for part-time and casual arrangements. Employers must diligently update payroll systems to reflect these changes. Documented evidence of skill development and consistent positive performance reviews are essential for supporting advancement to this pay point, ensuring equitable compensation practices.

Pay Point 4 ⎻ Level 1

Attaining Pay Point 4 within Level 1 of the SCHADS Award signifies a high level of competence and a demonstrated capacity for independent work with minimal supervision. This represents substantial growth and a valuable asset to any social or community service organization. Effective July 1, 2025, incorporating the 3.5% wage increase, the hourly rate for Pay Point 4 is $28.38.

This rate acknowledges consistent high performance, proactive problem-solving, and a commitment to quality service delivery. It’s applicable to full-time roles (38 hours/week) with pro-rata adjustments for part-time and casual staff. Employers are legally obligated to ensure accurate payroll updates. Achieving this pay point typically requires documented evidence of advanced skills and consistently exceeding expectations, reinforcing fair and transparent compensation.

Level 2 Pay Rates

Level 2 within the SCHADS Award encompasses roles demanding greater autonomy and responsibility than Level 1 positions. Employees at this level typically handle more complex tasks, potentially involving limited supervision of others or specialized duties. The 2025/2026 pay rates reflect this increased skill set and contribution, incorporating the mandated 3.5% wage increase.

These rates are structured across four pay points, acknowledging incremental experience and performance. Employers must diligently apply these updated rates to ensure compliance. Level 2 roles often require demonstrated proficiency in specific program areas and a capacity for independent decision-making. Accurate classification is vital for fair compensation, and resources are available to assist in determining the correct level for each position.

Pay Point 1 ⎻ Level 2

Pay Point 1 within Level 2 of the SCHADS Award represents the entry point for employees newly transitioned into roles requiring increased responsibility and skill; This classification typically suits individuals demonstrating foundational competence in their area, actively developing their expertise, and requiring moderate guidance. The minimum hourly rate, effective July 1, 2025, reflects the 3.5% increase, ensuring fair compensation.

Employees at this point are expected to consistently apply established procedures and contribute to team goals. While independent work is encouraged, regular supervision and support are generally available. Employers must accurately assess employee capabilities to ensure correct placement at Pay Point 1, adhering to the Award’s guidelines for progression and fair remuneration.

Pay Point 2 ─ Level 2

Advancing to Pay Point 2 within Level 2 of the SCHADS Award signifies demonstrated competence and increasing independence for employees. Individuals at this stage consistently apply learned skills, requiring less direct supervision while contributing effectively to team objectives. This progression acknowledges a growing ability to handle routine tasks and problem-solve within established frameworks.

The updated hourly rate, reflecting the 3.5% increase from July 1, 2025, recognizes this enhanced skill level and responsibility. Employers should assess employee performance against defined criteria to justify movement to Pay Point 2, ensuring fairness and compliance with the Award. Continued professional development is often encouraged to support further growth and potential advancement within the classification system.

Pay Point 3 ─ Level 2

Reaching Pay Point 3 in Level 2 of the SCHADS Award demonstrates a solid grasp of core duties and a growing capacity for independent work. Employees at this level typically handle more complex tasks with minimal supervision, actively contributing to problem-solving and process improvement within their teams. This progression signifies a reliable and valuable member of the workforce.

The 2025/2026 pay rate increase of 3.5% acknowledges this increased skill and responsibility. Employers must ensure accurate implementation of the new rates, reflecting the employee’s demonstrated capabilities. Regular performance reviews are crucial for identifying opportunities for continued growth and potential advancement to higher classifications, fostering a supportive and rewarding work environment.

Pay Point 4 ─ Level 2

Attaining Pay Point 4 within Level 2 of the SCHADS Award signifies a high level of competence and consistent performance. Individuals at this stage demonstrate a comprehensive understanding of their role, often taking initiative and mentoring colleagues. They are capable of handling complex situations independently and contributing significantly to team objectives, showcasing strong problem-solving skills.

With the 3.5% wage increase for 2025/2026, employers are obligated to adjust pay rates accordingly, recognizing the employee’s valuable contributions. This pay point often serves as a stepping stone towards Level 3, encouraging continued professional development. Regular feedback and opportunities for skill enhancement are vital to support career progression within the social and community services sector.

Level 3 Pay Rates

Level 3 within the SCHADS Award represents a significant advancement, demanding a higher degree of autonomy and specialized skills. Employees at this level typically manage more complex tasks, potentially including limited supervision of others or responsibility for specific program components. They demonstrate a strong commitment to professional development and actively seek opportunities to enhance their expertise within the social and community services field.

The 2025/2026 pay rate adjustments, incorporating the 3.5% increase, reflect the increased responsibilities and skill set required at Level 3. Employers must ensure accurate implementation of these rates across all pay points. Understanding the specific duties and expectations associated with Level 3 is crucial for both employees and employers to maintain fair compensation and promote a motivated workforce.

Pay Point 1 ─ Level 3

Pay Point 1 for Level 3 under the SCHADS Award signifies an entry point into roles requiring demonstrated competence and increasing independence. Employees at this stage generally apply established procedures to a range of tasks, requiring sound judgement and problem-solving skills. They contribute to team goals and may participate in the training of less experienced staff, though under direct guidance.

As of July 1, 2025, with the 3.5% wage increase applied, the minimum hourly rate for Pay Point 1, Level 3 is crucial for employers to accurately reflect in payroll. This rate acknowledges the expanded skillset and responsibilities compared to lower levels. Regular review of job descriptions against award classifications is vital to ensure correct placement and fair remuneration for all staff.

Pay Point 2 ⎻ Level 3

Advancing to Pay Point 2 within Level 3 of the SCHADS Award demonstrates a consolidation of skills and a greater capacity for independent work. Employees at this level typically manage a defined workload, exercising discretion and initiative within established guidelines. They contribute actively to service planning and may take on limited supervisory responsibilities, guiding and supporting colleagues.

The 2025/2026 pay rate increase of 3.5% directly impacts this pay point, reflecting the increased value of these contributions. Employers must ensure accurate implementation of this updated rate from July 1, 2025. Maintaining clear documentation of employee responsibilities and aligning them with the award classification is essential for compliance and fostering a fair work environment. Regular performance reviews support progression to higher pay points.

Pay Point 3 ─ Level 3

Reaching Pay Point 3 in Level 3 signifies a substantial level of expertise and autonomy within the SCHADS framework. Individuals at this stage demonstrate a comprehensive understanding of service delivery, consistently applying advanced skills to complex situations. They often lead small teams, providing mentorship and guidance to less experienced staff, and actively participate in program development and evaluation.

The 3.5% wage increase for 2025/2026 acknowledges the significant contributions of employees at this level. Accurate payroll adjustments are crucial, effective July 1, 2025. Employers should prioritize professional development opportunities to support continued growth and skill enhancement. Clear role definitions and regular performance appraisals are vital for recognizing achievements and facilitating progression within the award structure, ensuring fair remuneration.

Pay Point 4 ─ Level 3

Attaining Pay Point 4 within Level 3 of the SCHADS Award represents a high degree of proficiency and independent operation. Employees at this level typically manage complex cases with minimal supervision, demonstrating exceptional problem-solving abilities and a deep understanding of relevant legislation and best practices. They are often involved in strategic planning and contribute significantly to service improvement initiatives.

The 2025/2026 wage increase of 3.5% reflects the value placed on these advanced skills and responsibilities. Employers must ensure accurate implementation of the new rates from July 1, 2025. Continued professional development is essential, alongside robust performance management systems. This level requires individuals who can effectively advocate for clients and contribute to a positive and ethical work environment, deserving appropriate compensation.

Employment Types Under the SCHADS Award

The SCHADS Award recognizes three primary employment structures: full-time (38 hours), part-time, and casual positions, each with distinct entitlements and conditions.

Full-Time Employment (38 Ordinary Hours Per Week)

Full-time employment under the SCHADS Award is defined as a commitment to a guaranteed 38 ordinary hours of work weekly, or an averaged 38 hours over a four-week period. This employment type provides the most comprehensive set of entitlements, including annual leave, sick leave, and public holidays, as outlined within the Award.

Employees engaged in full-time roles are also eligible for various allowances and benefits, dependent on their specific classification and duties. Employers are obligated to maintain accurate records of hours worked and ensure compliance with all relevant provisions of the SCHADS Award regarding overtime and penalty rates. Understanding these entitlements is crucial for both employers and employees to foster a fair and productive work environment. Full-time positions offer stability and a predictable work schedule, contributing to a balanced lifestyle.

Part-Time Employment

Part-time employment within the SCHADS Award framework involves a regular, consistent schedule of less than 38 ordinary hours per week. These positions maintain proportional entitlements to full-time employees, calculated on a pro-rata basis. This includes access to annual leave, sick leave, and public holidays, though the accrual rates will be adjusted to reflect the reduced working hours.

Employers must clearly define the expected hours of work for part-time employees, and any variations to this schedule should be mutually agreed upon. Part-time workers are also covered by the Award’s provisions regarding penalty rates and allowances, applicable to the hours they actually work. This employment type offers flexibility for both the employee and employer, accommodating diverse needs and lifestyles while ensuring fair compensation.

Casual Employment

Casual employment under the SCHADS Award offers flexibility for both employers and employees, characterized by an irregular pattern of work. Unlike full-time or part-time roles, casual employees do not have a guaranteed number of hours. However, they are entitled to a casual loading of 25% on top of the base hourly rate, compensating for the lack of benefits like paid leave.

This loading is crucial, as casuals don’t accrue annual leave or sick leave entitlements. Employers must provide reasonable notice of shifts, and casuals have the right to decline work without penalty. The Award ensures casual employees receive fair compensation for the unpredictable nature of their employment, while allowing organizations to adapt to fluctuating service demands effectively.

Understanding SCHADS Classifications

Accurate classification is vital for correct pay; it’s determined by skill, responsibility, and complexity of tasks within the social and community services sector.

How to Determine Your Correct Classification

Determining your correct SCHADS Award classification requires a careful assessment of your duties and responsibilities. Begin by thoroughly reviewing your job description and comparing it against the detailed classification guidelines outlined within the Award itself. Consider the level of independent judgment, problem-solving, and accountability inherent in your role.

Level 1 typically involves routine tasks under direct supervision, while higher levels demand increasing autonomy and expertise. Factors like qualifications, experience, and the complexity of client interactions also play a significant role. If uncertainty persists, consult with your employer, a union representative, or utilize the resources available through Jobs Australia Limited (jaja.com.au) for guidance. Accurate classification ensures you receive the appropriate minimum wage as stipulated by the Award.

Resources for Classification Assistance

Navigating SCHADS Award classifications can be complex; fortunately, several resources offer valuable assistance. Jobs Australia Limited (jaja.com.au, 1800 331 915) provides comprehensive support, including detailed information and guidance on the Award’s requirements. Their website features a pay rate viewer to help verify correct entitlements.

Additionally, your union representative, if applicable, is an excellent source of advice and advocacy. The Fair Work Ombudsman also offers general information about workplace rights and obligations. Utilize online ‘Pay and Conditions Tools’ to calculate rates, factoring in Equal Remuneration Order adjustments. Remember to consult the official SCHADS Award document for definitive classification descriptions and ensure your employer is utilizing the most up-to-date pay tables, reflecting the 3.5% increase from July 1, 2025.