Author: leonard

fisher paykel oven instruction manual

Fisher Paykel Oven Instruction Manual: A Comprehensive Guide

This manual details operation for Fisher & Paykel ovens, ranging from Series 5 to Series 9, including pyrolytic and steam models.
Prices vary from $1,199 to $6,250.

Understanding Your Fisher Paykel Oven

Fisher & Paykel ovens are renowned for their innovative features and stylish designs, offering a range of models to suit diverse culinary needs. From the compact 60cm Series 5 to the expansive 120cm Series 7 and the premium Series 9, each oven delivers exceptional performance. Key technologies include pyrolytic self-cleaning, steam baking for moist results, and precise temperature control.

Understanding your specific model – whether freestanding like the OR90SDBSIPX1 or built-in like the OB60SC7CEX4 – is crucial. These ovens boast varying capacities, from standard 60L to a generous 115L, impacting cooking versatility. Familiarizing yourself with the control panel and available functions will unlock the full potential of your appliance, ensuring optimal cooking outcomes.

Model Identification and Variations

Fisher & Paykel offers a diverse oven lineup, categorized into Series 5, 7, and 9, each presenting distinct features and price points. The Series 5, exemplified by the OB60SC7CEX4 (around $1,199), provides essential cooking functions. Series 7 models, such as the OB90S9MEX4, offer enhanced capabilities. The premium Series 9, including the OB60SMPTDG1 ($3,799), boasts pyrolytic cleaning and advanced controls.

Variations extend to oven type – freestanding (OR90SDBSIPX1, ~$4,803) versus built-in (OB60SL9DEX1). Capacity also differs, ranging from 60L to 115L (OB76DDEPX3). Identifying your exact model number, found on the appliance’s data plate, is vital for accessing specific instructions and parts information. This ensures compatibility when referencing this manual or contacting customer support.

Safety Precautions

Prioritize safety when operating your Fisher & Paykel oven. Always supervise children near the appliance, as surfaces become extremely hot during and after use. Never touch heating elements or interior surfaces while hot. Exercise caution when opening the oven door, directing steam or hot air away from your face and body.

Avoid using abrasive cleaners or sharp objects that could damage the oven’s surfaces. Ensure proper ventilation during pyrolytic cleaning cycles, as high temperatures are reached. Disconnect the oven from the power supply before performing any maintenance or cleaning. If the oven malfunctions, do not attempt self-repair; contact a qualified technician for assistance.

Initial Setup and Installation

Proper installation is crucial for optimal performance. Before installation, verify the oven’s electrical requirements match your home’s supply. Ensure the oven is level and securely installed according to local building codes. For wall ovens, confirm adequate support and ventilation are in place. Remove all packaging materials, including protective films, from both the interior and exterior of the appliance.

Connect the oven to a dedicated electrical circuit. Test the oven’s functionality after installation, verifying all features operate correctly. Refer to the detailed installation guide included with your specific model (OB60SMPTDG1, OB60SC7CEX4, OR90SDBSIPX1, or OB76DDEPX3) for precise instructions.

Control Panel Overview

The Fisher & Paykel oven control panel provides intuitive operation. It typically features a digital display showcasing temperature, cooking time, and selected functions. A function selection dial allows easy navigation through various cooking modes like Bake, Roast, and Pyrolytic Clean. Temperature controls, often utilizing tactile buttons or a dial, enable precise temperature adjustments.

The display incorporates symbols and indicators to communicate oven status, such as preheating progress or active functions. Familiarize yourself with these indicators for efficient use. Models like the OB60SMPTDG1 and OB60SC7CEX4 may have slightly differing layouts, but core functionality remains consistent.

Display Symbols and Indicators

The Fisher & Paykel oven display utilizes several symbols for clear communication. A key symbol indicates the oven is preheating, often accompanied by a progress bar. Active function icons, such as a loaf for Bake or a chicken for Roast, illuminate when a mode is selected. Temperature indicators display both set and actual oven temperatures.

Warning symbols alert users to hot surfaces or potential issues. Timer indicators show remaining cooking time. Specific models, like the OB76DDEPX3, may feature additional symbols for advanced functions like the food probe. Understanding these indicators ensures safe and efficient oven operation, preventing unexpected results.

Function Selection Dial

The Function Selection Dial is central to operating your Fisher & Paykel oven. This dial allows users to choose from a variety of cooking modes, including Bake, Roast, Pyrolytic Clean, and Steam Bake (on applicable models). Rotating the dial cycles through available functions, displayed clearly on the oven’s control panel.

Models like the OB60SC7CEX4 offer seven distinct functions, while more advanced Series 9 ovens provide expanded options. Precise selection is crucial for achieving desired cooking results. The dial’s responsiveness and clear labeling contribute to a user-friendly experience, ensuring effortless control over your oven’s capabilities.

Temperature Control Settings

Fisher & Paykel ovens feature precise temperature control, essential for optimal cooking. Temperature adjustments are typically made via the control panel, often in conjunction with the Function Selection Dial. Users can set temperatures in Fahrenheit or Celsius, depending on the model and user preference.

The ovens boast a wide temperature range, accommodating everything from gentle proofing to high-heat roasting. Accurate temperature maintenance is vital for consistent results. Some models, like the OB60SMPTDG1, offer advanced temperature settings for specialized cooking tasks. Careful monitoring and adjustment ensure perfectly cooked dishes every time.

Oven Functions Explained

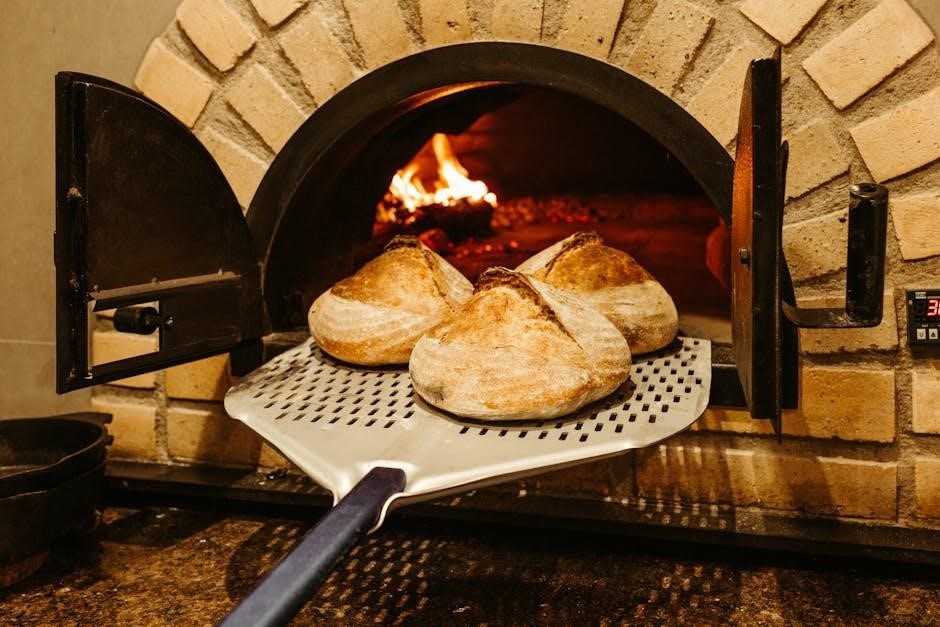
Fisher & Paykel ovens offer a diverse range of functions to cater to various cooking needs. Core functions include Bake, ideal for cakes and pastries, and Roast, designed for meats and vegetables. The Pyrolytic Cleaning Cycle utilizes high heat to self-clean the oven interior, reducing manual effort.

Select models feature Steam Bake, enhancing moisture retention for succulent results. A Proofing Function provides a warm, controlled environment for dough rising. The OB60SC7CEX4 boasts seven functions, while higher-end models like the OB76DDEPX3 offer even greater versatility. Understanding each function unlocks the oven’s full potential.

Bake Function

The Bake function on your Fisher & Paykel oven is primarily designed for consistent, all-around heating, making it perfect for baking cakes, cookies, breads, and other pastries. It operates by utilizing the oven’s heating elements to maintain a stable temperature throughout the cavity.

For optimal results, preheat the oven thoroughly before placing your baked goods inside. Ensure even heat distribution by positioning racks in the center of the oven. This function is suitable for dishes requiring gentle, consistent heat, avoiding direct browning or searing. Experiment with temperatures to achieve desired results!

Roast Function

The Roast function on your Fisher & Paykel oven is specifically engineered for achieving beautifully browned and succulent roasted meats and vegetables. It utilizes a higher temperature and often incorporates a convection element to circulate hot air, ensuring even cooking and crispy exteriors.

When roasting, consider using a roasting rack within a pan to allow for air circulation around the food. This promotes even browning and prevents steaming. Adjust roasting times based on the weight of the meat and desired level of doneness. Utilize a food probe for precise internal temperature monitoring for perfect results every time!

Pyrolytic Cleaning Cycle

The Pyrolytic Cleaning Cycle is a self-cleaning feature available on select Fisher & Paykel oven models, like the Series 9 OB60SMPTDG1. This high-temperature process efficiently burns off food residue, leaving behind only a light ash that can be easily wiped away.

Before initiating the cycle, remove all racks and accessories. Ensure the oven door can lock securely. The cycle duration can vary, often exceeding two hours, and generates significant heat. Avoid opening the door during operation; After completion, allow the oven to cool completely before wiping the interior. Always refer to the full manual for specific safety precautions and cycle details.

Steam Bake Function (if applicable)

The Steam Bake function, found on certain Fisher & Paykel models, introduces moisture into the oven cavity during baking. This creates a humid environment, promoting a crispier crust and a softer interior for breads, pastries, and even meats. To utilize this feature, ensure the water reservoir is filled before starting the cycle.

The amount of steam can often be adjusted to suit the recipe. Steam bake is ideal for achieving professional-quality results, particularly with delicate items. Refer to your specific model’s manual for detailed instructions on water reservoir filling and steam level settings. Always exercise caution when working with steam.

Proofing Function

The Proofing function on your Fisher & Paykel oven provides a warm, humid environment ideal for yeast doughs to rise. This function maintains a consistent, low temperature – typically around 86°F (30°C) – and introduces gentle humidity to prevent the dough from drying out and forming a skin.

To activate, select the Proofing setting on the control panel. Ensure the oven is empty except for the dough. Proofing times will vary depending on the recipe and desired rise. Regularly check the dough’s progress. This feature ensures optimal dough development for breads, rolls, and other baked goods, resulting in a lighter, fluffier texture.

Using the Oven – Basic Operation

Operating your Fisher & Paykel oven is straightforward. Begin by selecting your desired function using the function dial – Bake, Roast, or another appropriate setting. Next, set the temperature using the temperature control settings. Always preheat the oven before placing food inside; this ensures even cooking.

Utilize the timer function to set a cooking duration, and the oven will automatically turn off when the time elapses. Properly position oven racks and accessories for optimal airflow and cooking results. Remember to always use oven mitts when handling hot racks or dishes. Familiarize yourself with the oven’s features for a seamless cooking experience.

Preheating the Oven

Proper preheating is crucial for consistent baking and roasting results with your Fisher & Paykel oven. Select the desired cooking function and temperature using the control panel. Allow sufficient time for the oven to reach the set temperature – typically 10-15 minutes, though this can vary depending on the model and temperature.

The oven will signal when preheating is complete, often with an audible tone or a visual indicator on the display. Avoid opening the oven door during preheating, as this releases heat and prolongs the process. A fully preheated oven ensures food cooks evenly and achieves the desired texture and flavor.

Setting the Timer

The timer function on your Fisher & Paykel oven allows you to conveniently track cooking time. Access the timer settings through the control panel, typically using dedicated timer buttons or the function selection dial. You can set a countdown timer for the total cooking duration, or utilize a delayed start function to begin cooking at a later time.

The oven will alert you when the timer reaches zero, usually with an audible alarm. Some models offer multiple timer settings, enabling you to monitor different dishes simultaneously. Remember to reset the timer after each use. Accurate timer settings are essential for perfectly cooked meals.

Using Oven Racks and Accessories

Proper rack placement is crucial for optimal cooking results in your Fisher & Paykel oven. Generally, position racks in the lower third for roasting and baking, and the upper third for broiling. Utilize all available rack levels for multi-level cooking, ensuring adequate space around dishes for air circulation.

Accessories like baking trays, roasting pans, and the food probe (if applicable) enhance oven functionality. Always use oven-safe cookware and avoid placing items directly on the oven floor. Refer to your model’s specific instructions for accessory compatibility and recommended rack positions. Careful accessory use maximizes cooking efficiency.

Advanced Features

Fisher & Paykel ovens boast several advanced features designed to elevate your cooking experience. Multi-level cooking allows simultaneous preparation of multiple dishes, saving time and energy. The food probe function, available on select models, precisely monitors internal food temperature for perfect results.

Slow cook mode provides consistent, low-temperature cooking for tender, flavorful meals. Pyrolytic cleaning, found in Series 9 models, simplifies oven maintenance with its self-cleaning cycle. Explore these features to unlock the full potential of your appliance, achieving professional-quality results with ease and convenience.

Multi-Level Cooking

Fisher & Paykel ovens with multi-level cooking capability offer enhanced efficiency for preparing complete meals. This feature allows you to cook multiple dishes simultaneously at different temperatures, optimizing oven space and reducing cooking time. Utilize various oven rack positions to ensure even heat distribution and prevent flavor transfer between foods.

Carefully consider the cooking requirements of each dish when arranging them within the oven. This advanced function is particularly useful for large gatherings or when preparing complex recipes. Experiment with different rack placements to achieve optimal results and streamline your meal preparation process.

Food Probe Functionality

The food probe feature, available on select Fisher & Paykel models, ensures precise cooking by continuously monitoring the internal temperature of your food. Insert the probe into the thickest part of the meat or poultry, and set your desired final temperature within the oven’s control panel. The oven will automatically switch to a holding mode once the target temperature is reached, preventing overcooking and maintaining optimal juiciness.

This functionality is ideal for roasts, poultry, and other dishes where accurate internal temperature is crucial. Regularly clean the probe with a damp cloth to maintain hygiene and ensure accurate readings. Refer to your specific model’s instructions for detailed guidance on probe placement and usage.

Slow Cook Mode

Certain Fisher & Paykel oven models offer a convenient Slow Cook mode, perfect for preparing tender, flavorful meals with minimal effort. This function maintains a low and consistent temperature over an extended period, ideal for braising meats, simmering stews, and creating rich, slow-cooked dishes. Simply select the Slow Cook setting on the control panel, set the desired cooking time, and let the oven do the rest.

Utilize oven-safe cookware when using Slow Cook mode. This feature provides a gentle cooking process, preserving moisture and enhancing the natural flavors of your ingredients. Always consult your model’s specific instructions for optimal results and recommended cooking times.

Cleaning and Maintenance

Maintaining your Fisher & Paykel oven ensures optimal performance and longevity. Many models feature a pyrolytic cleaning cycle, a self-cleaning function that heats the oven to extremely high temperatures, reducing food residue to ash. Follow the specific pyrolytic cleaning procedure outlined in your model’s manual for safe and effective operation. For ovens without pyrolytic cleaning, manual cleaning is required.

Regularly wipe down the interior with a damp cloth and mild detergent. Stainless steel exteriors benefit from specialized stainless steel cleaners to prevent streaks and maintain their shine. Always disconnect power before cleaning and avoid abrasive cleaners.

Pyrolytic Cleaning Procedure

The pyrolytic self-cleaning cycle is a high-temperature process, so preparation is key. Remove all racks, baking stones, and any cookware from the oven cavity before initiating the cycle. Wipe up any large spills or loose debris. Ensure the kitchen is well-ventilated, as the process may produce odors. Select the pyrolytic cleaning function on the control panel and choose the desired cleaning duration – typically ranging from 2 to 4 hours, depending on soil level.

Once started, the oven door will automatically lock for safety. Do not attempt to open it during the cycle. After completion, allow the oven to cool completely before wiping away the remaining ash with a damp cloth.

Manual Cleaning Instructions

For regular maintenance, or if you prefer not to use the pyrolytic cycle, manual cleaning is effective. Begin by ensuring the oven is cool. Remove racks and accessories, washing them separately with warm, soapy water. Create a cleaning solution using baking soda and water to form a paste. Apply this paste to the interior surfaces, avoiding heating elements and the oven door seals.

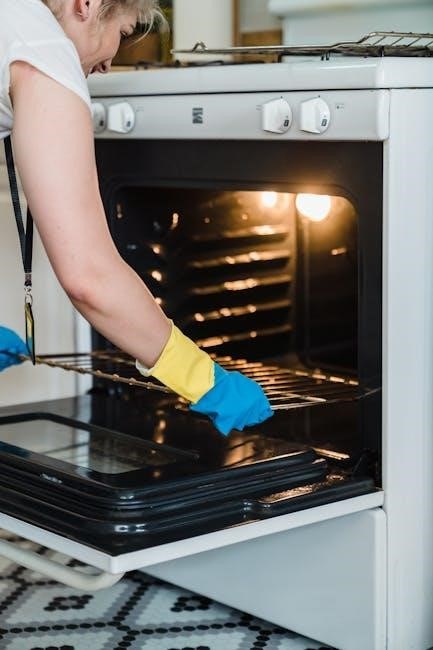
Allow the paste to sit for at least 30 minutes to loosen grime. Then, wipe down the interior with a damp cloth, rinsing frequently. For stubborn stains, use a non-abrasive cleaner. Finally, dry the oven thoroughly before replacing the racks.

Stainless Steel Care

Maintaining the stainless steel exterior of your Fisher & Paykel oven ensures lasting beauty. Regularly wipe down the surface with a soft cloth and warm, soapy water, following the grain of the stainless steel. Avoid abrasive cleaners, scouring pads, or steel wool, as these can scratch the surface. For fingerprints or smudges, use a stainless steel cleaner specifically designed for appliances.

Apply the cleaner sparingly and wipe in the direction of the grain. Rinse with a damp cloth and dry thoroughly to prevent water spots. Periodic polishing with a microfiber cloth will enhance the shine and protect the finish. Avoid chlorine-based cleaners.

Troubleshooting Common Issues

If your Fisher & Paykel oven isn’t heating, first check the power supply and ensure the oven is properly connected. Verify the control panel is set correctly and the desired function is selected. If error codes appear on the display, consult the manual for specific meanings and recommended actions. Door issues, such as difficulty closing or sealing, may require professional attention.

For pyrolytic cleaning cycle problems, ensure the door is fully locked before initiating. If issues persist, contact Fisher & Paykel support. Always disconnect power before attempting any self-repair.

Oven Not Heating

If your Fisher & Paykel oven fails to heat, begin by verifying the power supply – check the circuit breaker and ensure the oven is securely plugged in. Confirm the control panel displays a heating function and the correct temperature is set. A common issue is an accidentally activated child lock, preventing operation. Inspect the oven’s element for any visible damage or breaks; a faulty element won’t generate heat.

If these checks don’t resolve the problem, consult the error code display (if any) and refer to the full instruction manual for specific troubleshooting steps. Contacting a qualified technician is recommended for complex electrical issues.

Error Codes and Their Meanings

Fisher & Paykel ovens utilize error codes to diagnose internal issues. While specific codes vary by model, common errors indicate problems with the temperature sensor, heating element, or control board. A flashing error code on the display requires immediate attention; consult your oven’s specific instruction manual for a complete list and corresponding solutions.

Some codes may suggest a need for professional service. Ignoring error codes can lead to further damage or unsafe operation. Always disconnect the power supply before attempting any self-repair, and prioritize safety when addressing oven malfunctions. Referencing the manual is crucial for accurate interpretation.

Door Issues and Solutions

Fisher & Paykel oven door problems can range from simple alignment issues to more complex latch or hinge failures. If the door doesn’t close properly, ensure nothing obstructs the seal. A misaligned door impacts cooking temperature and energy efficiency. For doors that are difficult to open or close, check the hinges for looseness or damage; tightening screws may resolve the issue.

If the door glass is cracked, immediately discontinue use and contact a qualified technician. Never attempt to repair glass yourself. A faulty door latch can prevent the oven from operating; consult the manual for specific latch replacement instructions. Prioritize safety and professional assistance for significant door malfunctions.

Specific Model Information

Fisher & Paykel offers a diverse range of oven models, each with unique features. The OB60SMPTDG1 (Series 9 Minimal Pyrolytic) is priced around $4,399, offering advanced pyrolytic cleaning. The OB60SC7CEX4 (Series 5 Contemporary) provides seven functions at a more accessible $1,199. For larger kitchens, the OR90SDBSIPX1 freestanding electric oven/stove, though currently unavailable, previously retailed for $4,803.

The OB76DDEPX3, a 120cm electric wall oven, boasts a substantial 115-liter capacity. Refer to specific model manuals for detailed instructions, as features and controls vary. Always confirm compatibility of accessories and cleaning methods with your particular model.

OB60SMPTDG1 – Series 9 Minimal Pyrolytic Oven

The Series 9 Minimal Pyrolytic Oven (OB60SMPTDG1) represents Fisher & Paykel’s premium offering, currently available for approximately $4,399 (or $3,799 with a limited-time offer). This 60cm oven features a sleek, minimalist design and advanced pyrolytic self-cleaning technology, eliminating the need for harsh chemicals. It offers precise temperature control and multiple cooking functions for versatile meal preparation.

Users benefit from intuitive controls and a spacious interior. Detailed instructions regarding specific function usage, including pyrolytic cleaning cycles, are found in the dedicated model manual. Ensure proper ventilation during pyrolytic cleaning and always follow safety guidelines.

OB60SC7CEX4 – Series 5 Contemporary Oven

The Fisher & Paykel 60cm Series 5 Contemporary Oven (OB60SC7CEX4) is a reliable and versatile appliance, priced around $1,199. This 7-function oven provides a balance of performance and affordability, making it a popular choice for many kitchens. It features a contemporary design that seamlessly integrates into modern kitchen aesthetics.

The oven offers essential cooking modes for everyday use, and the instruction manual details each function’s optimal settings. Users should consult the manual for guidance on utilizing features like the special setting for achieving a crisp finish. Proper care and maintenance, as outlined in the manual, will ensure longevity.

OR90SDBSIPX1 – Freestanding Electric Oven/Stove

The Fisher & Paykel OR90SDBSIPX1 is a premium freestanding electric oven/stove, currently listed with an RRP of $4,803 (as of November 2016, availability may vary). This model is notably large, offering a substantial 90cm width and a generous capacity for family-sized meals. The instruction manual is crucial for understanding its advanced features and maximizing cooking performance.

Due to its size (115 Litres gross capacity), the manual provides detailed guidance on multi-level cooking and utilizing the oven’s full potential. Users should carefully review the safety precautions and installation instructions before operation. Regular cleaning, as described in the manual, will maintain its appearance and functionality.

OB76DDEPX3 – 120cm Electric Wall Oven

The Fisher & Paykel OB76DDEPX3 is a large-capacity, 120cm electric wall oven, representing a significant investment in kitchen appliances. As one of the most expensive models, detailed instruction manual comprehension is vital. It boasts a gross capacity of 115 Litres, ideal for extensive meal preparation and entertaining. The manual outlines specific features tailored to this expansive size.

Users should prioritize reviewing the installation guidelines to ensure proper and safe integration into their kitchen cabinetry. The manual details advanced functionalities, potentially including pyrolytic cleaning and specialized cooking modes. Consistent adherence to the cleaning instructions will preserve the oven’s performance and longevity.

you are my sunshine sheet music pdf

You Are My Sunshine Sheet Music PDF: A Comprehensive Guide (Updated 02/06/2026)

Discover readily available PDF sheet music for “You Are My Sunshine” from various online sources, including Musescore and Sheet Music Plus, for diverse instruments.

Historical Context of “You Are My Sunshine”

“You Are My Sunshine” emerged in the early 20th century, gaining significant traction through Jimmie Davis’s recordings in the 1930s. Its origins are somewhat debated, with claims of authorship from multiple individuals. The song quickly became a beloved standard, resonating deeply with audiences during challenging times.

The availability of sheet music, initially in physical form, allowed widespread performance and cemented its place in American musical culture. Today, digitized versions, particularly PDFs, ensure continued accessibility for musicians of all levels, preserving its legacy for generations.

Origins and Authorship Debate

The true origins of “You Are My Sunshine” remain shrouded in mystery, with several individuals claiming authorship. Paul Polenko is often credited, having copyrighted a version in 1939, but earlier versions existed. Jimmie Davis popularized the song, further complicating the narrative.

Despite the debate, the widespread availability of sheet music – now largely in PDF format – hasn’t diminished its appeal. Musicians continue to perform and share arrangements, regardless of the contested origins, ensuring the song’s enduring presence;

Jimmie Davis and the Song’s Popularization

Jimmie Davis, a Louisiana governor and country music star, significantly boosted “You Are My Sunshine’s” fame through recordings and performances. His rendition became the definitive version for many, driving demand for sheet music.

Consequently, numerous arrangements – now frequently found as downloadable PDFs – emerged, catering to various skill levels and instruments. The song’s accessibility, coupled with Davis’s popularity, cemented its place in American musical culture, ensuring continued sheet music availability.

Finding “You Are My Sunshine” Sheet Music Online

Locating “You Are My Sunshine” sheet music PDFs is remarkably easy today. Websites like Musescore.com offer a vast library of free, user-submitted arrangements for piano, guitar, and other instruments.

Alternatively, platforms such as Sheet Music Plus provide both free and paid options, often with professionally arranged, high-quality PDFs. A quick online search using keywords like “You Are My Sunshine sheet music PDF” yields numerous results, catering to diverse musical needs.

Popular Websites Offering Free Sheet Music

Musescore.com stands out as a premier destination for free “You Are My Sunshine” sheet music, boasting a large community-driven collection in PDF format. Users can find arrangements for various instruments, including piano, guitar, and flute.

Other websites offering free options include traditional sheet music archives and forums dedicated to music sharing. However, quality and accuracy can vary, so careful review is recommended before use.

Sheet Music Plus and Paid Options

Sheet Music Plus provides a vast catalog of “You Are My Sunshine” arrangements, offering both digital and printed sheet music in PDF format. While not free, these options generally guarantee higher quality and accuracy compared to solely relying on free sources.

Paid arrangements often include more complex instrumentation, different skill levels, and officially licensed versions, ensuring legal and reliable access to the music.

Musescore.com as a Resource

Musescore.com stands out as a prominent platform for accessing free “You Are My Sunshine” sheet music in PDF format. It boasts a large community of users who contribute arrangements for various instruments – piano, guitar, flute, and more.

Users can download, print, and share these scores, making it a valuable resource for musicians of all levels. However, quality can vary, so previewing before downloading is recommended.

Sheet Music Formats: PDF vs. MIDI

When searching for “You Are My Sunshine” sheet music, you’ll encounter two primary formats: PDF and MIDI. PDFs offer a visually accurate representation of traditional sheet music, ideal for printing and playing directly.

MIDI files, conversely, contain digital instructions for musical notes; they require a compatible player and don’t display traditional notation. While PDFs are great for readability, MIDI allows for tempo adjustments and instrument changes.

Understanding PDF Sheet Music

PDF sheet music for “You Are My Sunshine” provides a static, visually faithful reproduction of the musical score. This format is universally accessible, requiring only a PDF reader – readily available on most devices.

PDFs are excellent for printing, allowing musicians to have a physical copy for practice or performance. However, unlike MIDI, PDFs don’t offer interactive features like adjustable tempo or instrument sounds. Ensure the PDF is high-resolution for clear readability.

Benefits of MIDI Files

MIDI files for “You Are My Sunshine” offer distinct advantages over PDFs. They aren’t image-based, but contain instructions for playing the music, allowing tempo adjustments and instrument sound changes.

This interactivity is ideal for learning and experimentation. MIDI files are also smaller in size than PDFs. While they don’t visually represent the score like a PDF, they’re excellent for digital practice and can often be imported into music software for further editing.

Converting Between Formats

Converting between PDF and MIDI formats for “You Are My Sunshine” sheet music is achievable, though not always perfect. Online converters can transform MIDI to PDF for visual notation, but accuracy may vary.

Conversely, converting PDF to MIDI is more complex, often requiring Optical Music Recognition (OMR) software. These tools scan the PDF and attempt to interpret the notes, which can be prone to errors, especially with handwritten or complex arrangements.

Different Arrangements for Various Instruments

“You Are My Sunshine” sheet music appears in arrangements for numerous instruments. Piano sheet music ranges from beginner-friendly simplified versions to advanced, fully orchestrated scores. Guitarists can find chord charts and tablature, catering to different skill levels.

Ukulele arrangements offer simplified chord progressions, while flute and other instrumentalists can access adapted sheet music often found on platforms like Musescore.com, providing diverse options for performance and learning.

Piano Sheet Music – Beginner to Advanced Levels

Piano sheet music for “You Are My Sunshine” spans a wide spectrum of difficulty. Beginner arrangements typically feature simplified melodies and basic chord progressions, ideal for novice players. Intermediate levels introduce more complex harmonies and rhythms.

Advanced scores may include elaborate introductions, counter-melodies, and sophisticated accompaniment patterns. Numerous websites, including Sheet Music Plus, offer downloadable PDF versions catering to all skill levels, ensuring accessibility for every pianist.

Guitar Sheet Music – Chords and Tabs

Guitarists seeking “You Are My Sunshine” sheet music will find abundant resources online. Options range from simple chord charts perfect for beginners strumming basic progressions, to full tablature arrangements detailing finger placements.

Websites like Musescore.com provide downloadable PDF versions of both chord and tab arrangements. These cater to various playing styles and skill levels, allowing guitarists to easily learn and perform this beloved classic.

Ukulele Sheet Music – Simplified Versions

Ukulele players will appreciate the simplified sheet music readily available for “You Are My Sunshine.” Due to the instrument’s four strings, arrangements are often easier to grasp than guitar or piano versions.

Numerous websites, including Musescore.com, offer free downloadable PDF sheet music specifically tailored for ukulele. These arrangements typically focus on basic chords, making the song accessible to beginners and enjoyable for all skill levels.

Flute and Other Instrument Arrangements

Beyond standard instruments, “You Are My Sunshine” sheet music is available for flute and a variety of others. Musescore.com stands out as a central hub, hosting arrangements for diverse instruments beyond piano, guitar, and ukulele.

These arrangements often require some musical proficiency to interpret, but provide unique opportunities for instrumentalists to enjoy this classic tune. PDF downloads are commonly available, catering to musicians seeking arrangements beyond the typical formats.

Sheet Music Difficulty Levels Explained

“You Are My Sunshine” sheet music comes in varying difficulty levels, catering to musicians of all skill sets. Arrangements are generally categorized into beginner, intermediate, and advanced levels, influencing complexity and technique required.

Beginner versions simplify chords and melodies, while intermediate arrangements introduce more intricate patterns. Advanced sheet music often includes embellishments and challenging passages, demanding greater musical expertise. Level 2 arrangements, like those found on Musescore, offer a balanced challenge.

Level 1: Beginner Arrangements

For newcomers, Level 1 “You Are My Sunshine” sheet music focuses on simplicity. These arrangements typically feature basic chords, often utilizing only a few, and a straightforward melody line. Expect simplified rhythms and minimal ornamentation, making it ideal for those just starting their musical journey.

PDF versions readily available online prioritize ease of play, allowing beginners to quickly learn and enjoy this classic tune. These arrangements are perfect for piano, guitar, or ukulele.

Level 2: Intermediate Arrangements

Intermediate sheet music for “You Are My Sunshine” builds upon the basics, introducing slightly more complex chords and rhythms. Expect to encounter some chord changes and potentially basic accompaniment patterns, demanding a greater understanding of musical notation.

PDF downloads at this level often include more detailed arrangements for piano, guitar, and other instruments, offering a richer harmonic texture and a more nuanced melodic interpretation. These versions challenge players to refine their technique.

Level 3: Advanced Arrangements

Advanced “You Are My Sunshine” sheet music PDFs present significant challenges for seasoned musicians. Expect intricate harmonies, complex rhythms, and potentially elaborate introductions and endings. These arrangements often feature sophisticated voicings and embellishments.

Piano arrangements may include advanced techniques like arpeggios and complex chord inversions, while guitar versions could incorporate fingerpicking patterns and advanced chord shapes. These PDFs demand a high level of musical proficiency and interpretive skill.

Copyright and Legal Considerations

“You Are My Sunshine” generally falls into the public domain, meaning many sheet music PDFs are freely available. However, specific arrangements – particularly newer or more complex ones – may still be under copyright.

When using sheet music for performance, understanding usage rights is crucial. While public domain status allows free performance, commercial use (e.g., selling recordings or arrangements) might require licensing. Always verify the copyright status of the specific PDF you intend to use.

Public Domain Status of “You Are My Sunshine”

The original composition of “You Are My Sunshine” is largely considered to be in the public domain, allowing for widespread distribution of sheet music PDFs without copyright restrictions. This explains the abundance of free resources available online.

However, be mindful that arrangements of the song – particularly those with unique harmonies or instrumentation – may be protected by copyright. Always check the specific PDF’s licensing information before use, especially for commercial purposes.

Using Sheet Music for Performance

Downloaded “You Are My Sunshine” sheet music PDFs are excellent for personal practice and performance. Whether you’re a beginner or advanced musician, ensure the PDF is clearly legible and accurately reflects your chosen arrangement.

For public performances, while the original song is public domain, remember that specific arrangements might require licensing. Always verify the terms of use associated with the PDF before performing for an audience or recording your rendition.

Licensing for Commercial Use

Although “You Are My Sunshine” itself is in the public domain, commercially utilizing specific sheet music arrangements—particularly those found as PDFs—requires careful consideration.

Arrangements may be copyrighted, even if the underlying melody isn’t. If you intend to sell recordings, create derivative works, or use the sheet music in a for-profit context, obtaining the appropriate license from the arranger or publisher is crucial to avoid legal issues.

Printing “You Are My Sunshine” Sheet Music

When printing downloaded “You Are My Sunshine” sheet music PDFs, optimize settings for clarity. Select “Fit to Page” to avoid cropping, and ensure high resolution for legible notation.

Consider paper quality; thicker stock prevents bleed-through. Standard 8.5 x 11 inch paper works well, but explore legal size for larger arrangements. Binding options range from simple stapling to spiral binding for durability and ease of use during practice or performance.

Optimizing PDF Print Settings

To achieve the best results when printing “You Are My Sunshine” sheet music PDFs, access your printer’s settings. Choose “High Quality Print” for sharper notation. Select “Fit to Page” to prevent any cropping of the musical score, ensuring all elements are visible.

Experiment with grayscale options to conserve ink, but verify readability. Preview the print before finalizing to confirm proper layout and avoid wasted paper – a crucial step for clear practice!

Paper Size and Quality

Standard 8.5 x 11 inch paper is generally suitable for printing “You Are My Sunshine” sheet music PDFs, though larger sizes like 11×17 can reduce page turns. For longevity, consider using a heavier weight paper – 24lb or higher – to prevent bleed-through and withstand frequent handling.

Bright white paper enhances readability, while matte finishes minimize glare during practice sessions. Archival-quality paper is ideal for preserving treasured arrangements.

Binding Options for Sheet Music

For a collection of “You Are My Sunshine” sheet music PDFs, several binding options exist. Three-hole punching and placing the sheets in a binder offers flexibility to add or remove pages easily. Spiral binding creates a lay-flat book, ideal for piano players.

Alternatively, consider using sheet music clips or folders for individual pages. Professional binding services provide a polished, durable finish for frequently used arrangements.

Troubleshooting Common Sheet Music Issues

When dealing with “You Are My Sunshine” sheet music PDFs, illegibility can occur due to poor scanning or low resolution. Try downloading from a different source or adjusting display settings. Formatting errors, like misplaced notes, might require finding an alternative version.

If issues persist, consider converting the PDF to a different format or using a dedicated sheet music reader application for optimal viewing and printing results.

Dealing with Illegible PDFs

Illegible “You Are My Sunshine” sheet music PDFs often stem from low-quality scans or problematic optical character recognition (OCR). Zooming in can sometimes clarify faint notes, but a different source is often best.

Try searching for the same arrangement on Musescore or Sheet Music Plus, as these platforms frequently offer cleaner versions. Converting the PDF to an image format might also improve readability, though it prevents editing.

Fixing Formatting Errors

Formatting issues in “You Are My Sunshine” sheet music PDFs, like misplaced notes or incorrect beaming, can hinder playability. While direct editing within a PDF is limited, specialized PDF editors can sometimes adjust elements.

Alternatively, consider re-downloading from a different source; Musescore often provides user-submitted corrections. If the errors are minor, manually notating corrections on a printed copy might be the most practical solution for performance.

Finding Alternative Versions

If your initial “You Are My Sunshine” sheet music PDF proves unsatisfactory due to errors or arrangement preferences, explore diverse online repositories. Musescore.com hosts numerous user-submitted arrangements, offering variations for piano, guitar, and other instruments.

Sheet Music Plus and similar platforms also present multiple editions, potentially including simplified or more complex versions. Searching for arrangements by specific artists, like Johnny Cash, can yield unique interpretations.

“You Are My Sunshine” in Popular Culture

The enduring popularity of “You Are My Sunshine” has cemented its place in numerous films and television shows, frequently appearing as a poignant musical cue. Iconic artists like Johnny Cash have delivered memorable covers, inspiring countless arrangements available as sheet music PDFs.

This widespread cultural presence fuels continued demand for accessible sheet music, catering to musicians of all levels seeking to perform this beloved classic.

Notable Covers by Johnny Cash and Others

Johnny Cash’s rendition of “You Are My Sunshine” remains a particularly celebrated cover, readily available as sheet music in various arrangements – often found as downloadable PDFs. Many artists have contributed their interpretations, increasing the diversity of sheet music options.

These popular versions drive demand for accurate and accessible sheet music PDFs, catering to musicians wanting to learn and perform these iconic arrangements.

Use in Film and Television

The song’s frequent appearances in film and television have consistently renewed interest in “You Are My Sunshine” sheet music, particularly in PDF format for easy access.

Demand surges when the song is featured prominently, prompting musicians to seek out arrangements for performance or practice. This exposure fuels the availability of diverse sheet music versions online, catering to varying skill levels and instrumental preferences, often downloadable as PDFs.

The Song’s Enduring Appeal

“You Are My Sunshine’s” timeless quality ensures consistent demand for its sheet music, with PDF versions being particularly popular due to their accessibility and portability.

Generations continue to connect with the song’s heartfelt lyrics, driving ongoing searches for arrangements suitable for piano, guitar, ukulele, and other instruments. The readily available PDF sheet music allows musicians of all levels to learn and share this beloved classic, perpetuating its legacy.

Microsoft 365/Office Sign-in Limits & Verification

Accessing “You Are My Sunshine” sheet music PDFs through Microsoft 365 may be impacted by device sign-in limits; exceeding five devices can trigger automatic sign-outs.

Account verification processes, particularly if Google cannot confirm your identity, might restrict sensitive actions for a seven-day period, potentially delaying PDF downloads or printing. Ensuring account security and staying within device limits guarantees uninterrupted access to desired sheet music resources.

Understanding Device Limits

When seeking “You Are My Sunshine” sheet music PDFs, remember Microsoft 365/Office has sign-in limits impacting access. Exceeding five devices prompts automatic sign-outs, hindering PDF viewing and printing.

Signing into Windows with a work or school account automatically links to Microsoft 365, potentially contributing to device count. Managing these limits ensures seamless access to online sheet music resources for practicing and enjoying this classic tune.

Account Verification Processes

Accessing “You Are My Sunshine” sheet music PDFs online may trigger Google account verification. If identity cannot be confirmed, a 7-day period begins with limited sensitive action capabilities.

During this timeframe, you can still view and download sheet music, but updating account information is restricted. Post 7 days, access to sensitive actions resumes even without immediate verification, ensuring continued enjoyment of the music.

Accessing Sensitive Information

While downloading “You Are My Sunshine” sheet music PDFs, Google may require verification if accessing sensitive account information. This precaution safeguards your data during online transactions or account modifications.

Specifically, updating payment details linked to Sheet Music Plus or similar platforms triggers this process. Successful verification ensures secure access to your account and continued ability to purchase and download desired sheet music arrangements.

Resources for Learning to Play “You Are My Sunshine”

Alongside readily available sheet music PDFs, numerous online resources aid in learning “You Are My Sunshine.” Explore online piano tutorials offering step-by-step guidance, complementing the visual sheet music.

Guitar chord websites simplify accompaniment, while ukulele lesson resources provide simplified arrangements. Utilizing these tools alongside downloaded PDFs accelerates learning, enabling musicians of all levels to enjoy this classic tune.

Online Piano Tutorials

Complementing PDF sheet music, online piano tutorials offer a dynamic learning experience for “You Are My Sunshine.” Many platforms provide visual demonstrations, breaking down the song into manageable sections.

These tutorials often synchronize with the sheet music, highlighting notes as they’re played, aiding comprehension. Beginners benefit from slowed-down tempos and explanations of basic techniques, while advanced players can refine their performance.

Guitar Chord Websites

Alongside sheet music, guitar chord websites are invaluable resources for playing “You Are My Sunshine.” Numerous sites offer chord diagrams, strumming patterns, and simplified arrangements tailored for guitarists of all skill levels.

These resources often include tabs, making it easier to learn the melody and accompaniment. Many websites also provide variations and alternate tunings, allowing for personalized interpretations of this classic tune, enhancing the PDF experience.

Ukulele Lesson Resources

For ukulele players, simplified sheet music and dedicated lesson resources are plentiful online. Many websites specialize in ukulele arrangements of popular songs, including “You Are My Sunshine,” offering chord charts and strumming guides.

These resources often cater to beginners, providing easy-to-follow tutorials and simplified versions of the song. Complementing the PDF sheet music, these lessons help ukulele enthusiasts quickly learn and enjoy playing this beloved classic.

it book stephen king pdf

Article Plan: “IT Book Stephen King PDF” (as of 02/06/2026 16:57:08)

This article details the search for “IT” by Stephen King in PDF format, exploring legality, safe sources, and alternative digital formats like EPUB and MOBI.

Stephen King’s “IT” captivates readers with its terrifying narrative and exploration of childhood fears, driving a persistent online search for accessible PDF copies today.

Why “IT” Remains a Cornerstone of Horror

“IT” transcends typical horror tropes, delving into the psychological impact of trauma and the enduring power of childhood experiences. King masterfully blends supernatural terror with relatable human vulnerabilities, creating a uniquely unsettling atmosphere. The novel’s exploration of fear itself – how it manifests, how it controls, and how it can be overcome – resonates deeply with readers across generations.

Derry, Maine, becomes a character itself, a breeding ground for evil that mirrors societal anxieties. This blend of personal and collective fears elevates “IT” beyond a simple monster story. The Losers’ Club, flawed and relatable, embodies resilience and the strength found in unity. Consequently, the enduring search for a convenient “IT” PDF reflects the novel’s continued cultural relevance and widespread appeal, solidifying its place as a cornerstone of the horror genre.

The Search for “IT” PDF Downloads: A Common Trend

The prevalence of searches for an “IT” Stephen King PDF highlights a desire for accessible and immediate reading experiences. Readers often seek digital copies for convenience – portability on devices, instant access, and cost-effectiveness. This trend is amplified by the novel’s length; a digital format offers a more manageable reading experience than a hefty physical book.

However, this demand fuels a market for unofficial downloads, raising concerns about legality and security. The ease of sharing PDFs online contributes to copyright infringement. Consequently, understanding the risks associated with these downloads – malware, viruses, and legal repercussions – is crucial for potential readers. The widespread search demonstrates both the book’s enduring popularity and the challenges of digital content distribution.

Understanding the Novel “IT”

“IT” centers on the Losers’ Club confronting an ancient evil in Derry, Maine, a terrifying entity that exploits childhood fears and leaves a lasting impact.

Synopsis: Derry, Maine, and the Losers’ Club

Stephen King’s “IT” unfolds in the fictional town of Derry, Maine, a place plagued by a history of unexplained disappearances and a pervasive sense of dread. The narrative primarily follows a group of outcast children, self-proclaimed “Losers,” who band together during the summer of 1958 after witnessing terrifying events linked to a shape-shifting entity they call “IT.”

This entity often manifests as Pennywise the Dancing Clown, preying on the fears of its victims. The Losers – Bill Denbrough, Beverly Marsh, Richie Tozier, Eddie Kaspbrak, Stan Uris, Ben Hanscom, and Mike Hanlon – discover that IT resurfaces every 27 years to feed on the town’s inhabitants. They initially confront and seemingly defeat IT, making a pact to return if it ever reappears. Years later, as adults, they are compelled to fulfill their promise and face IT once more, revisiting the traumas of their childhoods.

Key Themes: Childhood Trauma, Fear, and Memory

“IT” profoundly explores the lasting impact of childhood trauma, showcasing how formative experiences shape adult lives. The novel delves into the individual fears of each Loser, demonstrating how these anxieties are exploited by IT to instill terror and control. King masterfully portrays fear not as a singular emotion, but as a complex and multifaceted force.

Memory plays a crucial role, both as a source of strength and vulnerability. The Losers must collectively remember their past encounters with IT to stand a chance against it in their adult years. However, the suppression and distortion of traumatic memories also contribute to the town’s cyclical pattern of horror. Ultimately, “IT” examines the power of collective memory and the importance of confronting one’s demons.

Legality and Ethics of Downloading PDFs

Downloading unauthorized PDF copies of “IT” violates copyright law, disrespects Stephen King’s work, and potentially exposes users to malware risks.

Copyright Laws and Stephen King’s Work

Stephen King’s “IT” is protected by international copyright laws, granting exclusive rights to the author and publisher regarding reproduction and distribution. Downloading a PDF without purchasing it constitutes copyright infringement, a legal offense with potential penalties. These laws exist to incentivize creative work and ensure authors are compensated for their intellectual property.

Copyright extends to all forms of the work, including digital formats like PDFs. Sharing these files, even without profit, remains illegal. Respecting copyright is crucial for supporting authors like Stephen King and fostering a sustainable literary ecosystem. Legal avenues for accessing “IT” include purchasing official eBooks or borrowing from libraries, ensuring compliance with copyright regulations and ethical consumption.

Risks Associated with Unofficial PDF Downloads (Malware, Viruses)

Downloading “IT” PDFs from unofficial sources poses significant security risks. These websites often harbor malware, viruses, and other malicious software disguised within the file or embedded in the download process. Such threats can compromise your device, steal personal information, and lead to identity theft. Unofficial PDFs frequently lack security protocols, making them vulnerable to exploitation.

The allure of a “free” download can be deceptive, masking hidden dangers. Even seemingly legitimate sites can be compromised. Protecting yourself requires caution: avoid suspicious websites, utilize robust antivirus software, and prioritize legal purchasing options. Prioritizing digital safety is paramount when seeking digital copies of Stephen King’s novel, safeguarding your data and device integrity.

Where to Find Legal Digital Copies of “IT”

Legitimate eBook retailers like Amazon Kindle and Barnes & Noble Nook offer “IT” for purchase. Subscription services, such as Scribd and Kindle Unlimited, may also provide access.

Official eBook Retailers (Amazon Kindle, Barnes & Noble Nook)

Amazon Kindle and Barnes & Noble Nook are premier platforms for legally acquiring the digital version of Stephen King’s “IT.” These retailers provide a secure and reliable purchasing experience, ensuring you receive a genuine copy free from malware or viruses often associated with unofficial downloads.

Purchasing through these channels directly supports the author and the publishing industry. Both platforms offer convenient reading apps for various devices – smartphones, tablets, and e-readers – allowing you to enjoy “IT” on the go. Prices may vary, and occasional sales or promotions can offer cost savings.

Furthermore, these retailers often provide features like adjustable font sizes, built-in dictionaries, and note-taking capabilities, enhancing your reading experience. Consider checking both platforms for the best available price and format compatibility with your preferred devices.

Subscription Services Offering “IT” (Scribd, Kindle Unlimited)

Subscription services like Scribd and Kindle Unlimited present alternative, cost-effective avenues to access Stephen King’s “IT” digitally. These platforms operate on a monthly fee basis, granting subscribers access to a vast library of eBooks, including popular titles like “IT.”

Scribd boasts a diverse collection, while Kindle Unlimited is particularly advantageous for Amazon users, seamlessly integrating with Kindle devices and apps. However, availability can fluctuate; “IT” may be included one month and removed the next, depending on licensing agreements.

Before subscribing, verify that “IT” is currently available within the service’s catalog. These subscriptions are ideal for avid readers who consume multiple books monthly, offering significant value compared to individual purchases; Remember to evaluate your reading habits to determine if a subscription aligns with your needs.

Exploring Free and Legal Resources

Discover legitimate avenues for accessing “IT” without cost, including the Internet Archive and public library digital lending programs, ensuring ethical reading.

Internet Archive: Availability and Access

The Internet Archive offers a digitized copy of Stephen King’s “IT,” allowing users to borrow it for free, though access may be time-limited. As of today, the listing details a substantial 1156-page novel, presented for borrowing, not direct download.

Users can access this resource through a free account creation process on the Internet Archive website. Borrowing functions similarly to a library, with potential waitlists depending on current demand. It’s crucial to respect the Archive’s lending terms and conditions.

While a convenient option, availability can fluctuate, and the digital format may not always be ideal for all devices. The Archive’s mission centers around universal access to knowledge, making it a valuable, albeit sometimes constrained, resource.

Public Libraries: Digital Lending Options

Many public libraries now offer extensive digital lending programs, including eBooks and audiobooks, potentially providing access to Stephen King’s “IT” in a digital format. These services typically require a valid library card, obtainable through local residency or registration.

Popular platforms like Libby (by OverDrive) and Hoopla are frequently used by libraries to distribute digital content. Users can browse available titles, borrow them for a set period, and read them on various devices. Availability varies significantly based on library funding and licensing agreements;

Checking your local library’s website or app is the best way to determine if “IT” is currently available for digital lending. This represents a legal and often free avenue to enjoy the novel.

Formats Available for “IT”

“IT” is widely available in PDF, EPUB, and MOBI formats, each offering unique reading experiences based on device compatibility and user preference.

PDF: Advantages and Disadvantages

PDF (Portable Document Format) offers universal readability across various devices and operating systems, preserving the original formatting of Stephen King’s “IT”; This makes it ideal for maintaining the intended layout, including fonts and images, crucial for a complex novel. However, PDFs are often less adaptable to different screen sizes; text reflowing can be limited, potentially hindering readability on smaller devices like e-readers or smartphones.

Furthermore, PDF files can be larger in size compared to other eBook formats like EPUB or MOBI, requiring more storage space. While widely supported, PDFs lack some interactive features found in more modern eBook formats. The ease of unauthorized copying and distribution is also a significant disadvantage, contributing to copyright concerns surrounding “IT” PDF downloads.

EPUB and MOBI: Alternative eBook Formats

EPUB and MOBI represent popular alternatives to PDF for reading Stephen King’s “IT” digitally. EPUB, a widely supported open standard, excels in reflowable text, adapting seamlessly to various screen sizes and fonts – enhancing readability on e-readers and mobile devices. MOBI, primarily associated with Amazon’s Kindle ecosystem, offers similar adaptability and efficient compression, resulting in smaller file sizes.

Unlike PDFs, these formats prioritize reading experience over strict formatting preservation. While some minor layout differences might occur, the adjustable text size and customizable fonts significantly improve accessibility. Both EPUB and MOBI generally offer better DRM (Digital Rights Management) options, potentially offering more robust copyright protection compared to easily copied PDFs, when purchased legally.

Texas A&M University ─ A Tangential Connection (Due to Internet Search Results)

Texas A&M University appears in searches related to “IT” PDF downloads, likely due to its online presence and university library resources, though unrelated to the novel.

Brief Overview of Texas A&M University

Texas A&M University, established in 1876 as the Agricultural and Mechanical College of Texas, stands as the flagship institution of the Texas A&M System. Located in College Station, it’s a public, land-grant research university with a rich history and significant impact. The university boasts a large student body and a comprehensive range of academic programs, spanning engineering, business, liberal arts, and sciences.

Known for its strong traditions, particularly those stemming from its military roots, Texas A&M fosters a unique campus culture. It’s a major research hub, contributing significantly to advancements in various fields. The university system itself comprises eleven institutions, each with distinct missions, but all united under the A&M banner. Recent news highlights include credit rating upgrades and adjustments to academic programs.

Relevance (or Lack Thereof) to the “IT” PDF Search

The frequent appearance of Texas A&M University in search results related to “IT” by Stephen King in PDF format is largely coincidental and stems from broader web indexing patterns. It appears the university’s website is often highly ranked, leading to its inclusion in searches with diverse keywords. There is no direct connection between the university’s academic offerings, research, or activities and Stephen King’s novel or its digital distribution.

This demonstrates how search algorithms can sometimes surface irrelevant results, driven by website authority rather than topical relevance. Users seeking the “IT” PDF are likely encountering Texas A&M’s website due to its strong online presence, not because of any specific content related to the book itself. It highlights the importance of refining search queries.

Common Search Queries Related to “IT” PDF

Users frequently search for “It Stephen King PDF free download” or “It by Stephen King PDF,” indicating a strong desire for accessible, digital copies of the novel.

“It Stephen King PDF Free Download” ౼ Analysis

The query “It Stephen King PDF free download” reveals a prevalent user intent: obtaining the novel without cost. This search term highlights the appeal of digital convenience alongside a desire to avoid purchase. However, pursuing free downloads carries significant risks. Many websites offering such downloads host malware, viruses, or illegal copies, violating copyright laws.

Furthermore, the quality of these unofficial PDFs is often compromised, featuring formatting errors or incomplete text. Legitimate sources, like official eBook retailers or subscription services, provide a secure and high-quality reading experience. The allure of a “free download” must be weighed against the potential dangers and ethical considerations of accessing copyrighted material illegally. Users should prioritize legal and safe alternatives.

“It by Stephen King PDF” ౼ Understanding User Intent

The search phrase “It by Stephen King PDF” demonstrates a clear desire for a digital version of the iconic horror novel, specifically in the Portable Document Format. Users likely prefer PDFs for their consistent formatting across devices and ease of access. This query suggests a preference for reading on computers, tablets, or smartphones, rather than a physical copy.

However, the intent isn’t solely about format; it’s about immediate access to the complete novel. The user is actively seeking a readily available, digital rendition of “IT.” Understanding this intent is crucial for directing them towards legitimate sources offering legal PDF copies, or suggesting alternative eBook formats like EPUB or MOBI, ensuring a safe and ethical reading experience.

Identifying Safe and Reliable Websites

Prioritize sites with “HTTPS” and valid SSL certificates, verifying secure connections. Check user reviews and ratings for trustworthiness before downloading any “IT” PDF.

Checking Website Security (HTTPS, SSL Certificates)

When seeking a “IT” PDF, website security is paramount. Always look for “HTTPS” in the URL, indicating a secure connection. This encrypts data transferred between your device and the website, protecting your personal information from potential interception.

Equally important is verifying the website’s SSL certificate. A valid SSL certificate confirms the site’s identity and assures you that you’re interacting with the legitimate source, not a malicious imposter. Most browsers display a padlock icon in the address bar to signify a secure connection and a valid certificate.

Avoid sites lacking these security features at all costs. Downloading from insecure websites significantly increases the risk of malware, viruses, and identity theft. Prioritizing secure websites is a crucial step in protecting yourself while searching for digital copies of Stephen King’s “IT”.

Reading User Reviews and Ratings

Before downloading an “IT” PDF from any website, thoroughly examine user reviews and ratings. These provide valuable insights into the site’s reliability and the quality of the files offered; Look for patterns – consistent complaints about malware, broken downloads, or misleading content are major red flags.

Pay attention to the source of the reviews. Independent review sites and forums often offer more unbiased opinions than testimonials directly on the website itself. A lack of reviews, or overwhelmingly positive but generic feedback, should also raise suspicion.

User experiences can reveal hidden dangers; Reviews might warn about intrusive ads, deceptive download links, or files containing viruses. Prioritizing sites with positive reputations and transparent user feedback significantly reduces your risk.

greek god family tree pdf

Navigating the intricate relationships within Greek mythology can be daunting; a family tree offers clarity, visually representing the lineage of gods, titans, and heroes.

UsefulCharts provides a comprehensive visual guide, while resources like Reddit’s r/coolguides showcase attempts to map these complex connections, often highlighting the challenges.

Understanding this structure, often resembling a dramatic saga, helps appreciate the stories and the roles of deities like Zeus, Athena, and Aphrodite, as detailed in online resources.

The Complexity of Greek Mythology

Greek mythology isn’t a linear narrative; it’s a collection of evolving stories with regional variations and conflicting accounts, making a definitive family tree a significant challenge. The relationships between gods are often fluid, with multiple parentage claims and overlapping generations, as evidenced by attempts to chart these connections.

Primordial deities like Chaos, Gaia, and Uranus represent abstract concepts, lacking clear personalities in some versions, further complicating genealogical mapping. Even seemingly straightforward lineages, like those of Zeus, are riddled with numerous offspring – gods, heroes, and nymphs – creating a sprawling network. The sheer volume of characters and their interconnectedness, as noted by those who’ve attempted similar charts, highlights the inherent complexity.

PDF versions of Greek god family trees often simplify these nuances for clarity, but understanding the underlying ambiguity is crucial for appreciating the richness of the mythology.

Why a Family Tree is Useful

A Greek god family tree provides a crucial framework for understanding the relationships and power dynamics within the pantheon, transforming a collection of stories into a cohesive system. Visualizing these connections clarifies how different deities interact and influence events, aiding comprehension of complex myths.

PDF charts, like those available online, offer a readily accessible overview, especially for students and enthusiasts navigating the vastness of Greek mythology. They help distinguish between generations – Primordial deities, Titans, and Olympians – and trace the lineage of heroes like Hercules and Perseus.

Furthermore, a family tree highlights the recurring themes of succession, conflict, and divine intervention, enriching the reading experience and fostering a deeper appreciation for the narratives.

The Primordial Deities

Initially, Chaos reigned, giving way to Gaia (Earth) and Uranus (Sky), the first parents, whose offspring—the Titans—populated the earliest stages of creation.

Chaos: The Primordial Void

Representing the initial state of existence, Chaos wasn’t a deity in the traditional sense, but rather the boundless, formless void from which everything emerged. Often described as an abstract concept, it predates personality or defined characteristics within the earliest Greek cosmologies.

Interestingly, some accounts attribute intelligence to Chaos, even portraying it as female, responsible for laying the cosmic egg that birthed the first beings. However, it’s crucial to understand that this is a later interpretation, as the original concept was simply the absence of order.

As the foundational element, Chaos isn’t typically featured prominently in detailed family tree charts, serving more as the origin point rather than a direct ancestor. Its role is fundamental, yet elusive, marking the beginning of the divine lineage.

Gaia: Mother Earth

Emerging from Chaos, Gaia is the primordial goddess representing Earth, the fertile mother of all life. She is a central figure in Greek cosmology, giving birth to Uranus (Sky), Pontus (Sea), and the Titans, establishing the foundational generations of deities.

Gaia’s role extends beyond simple creation; she actively participates in the mythological narratives, often aiding her children in conflicts against the oppressive Uranus. Her connection to the land and its bounty makes her a powerful and revered figure.

Family tree charts consistently place Gaia as a primary ancestor, with her offspring branching out to populate the divine world. Understanding her significance is crucial for tracing the lineage of gods and heroes, as she is the source of much of their power and existence.

Uranus: Father Sky

Born from Gaia, Uranus embodies the sky and heavens, becoming her consort and fathering the Titans, Cyclopes, and Hecatoncheires. However, he feared his powerful children and imprisoned them within Gaia’s womb, causing immense suffering and ultimately leading to rebellion.

Uranus’s tyrannical rule and fear of being overthrown are central to the early myths, setting the stage for the Titanomachy – the war between the Titans and the Olympians. His actions directly fueled the conflict that reshaped the divine order.

Family tree depictions show Uranus as a key progenitor, though his reign was short-lived. Charts often highlight his conflict with Gaia and his children, illustrating the power struggles inherent in the Greek pantheon’s origins.

Cronus and Rhea: The Titans

Cronus, son of Uranus and Gaia, overthrew his father to become ruler of the Titans, ushering in a golden age. He married Rhea, also a Titan, and together they produced the first generation of Olympians: Zeus, Hera, Poseidon, Hades, Demeter, and Hestia.

However, haunted by a prophecy foretelling his own overthrow by a child, Cronus swallowed each of his offspring whole. Rhea, devastated, saved Zeus by hiding him in Crete, presenting Cronus with a stone wrapped in swaddling clothes instead.

Family tree charts prominently feature Cronus and Rhea, illustrating their central role in the transition from the Titans to the Olympian gods. Their story embodies themes of fate, rebellion, and the cyclical nature of power.

The First Generation of Olympians

Zeus, Poseidon, Hades, Hera, Demeter, and Hestia—children of Cronus and Rhea—comprised the powerful first Olympian generation, reshaping the divine order.

Zeus: King of the Gods

Zeus, the paramount deity of the Olympian pantheon, ascended to power by overthrowing his father, Cronus, a pivotal event in Greek mythology. As the god of the sky, lightning, thunder, law, order, and justice, his influence permeated all aspects of mortal and divine life.

Born from the union of Cronus and Rhea, Zeus narrowly escaped his father’s attempt to devour his children, a fate shared by his siblings. His reign marked a shift from the Titans’ rule to the Olympians’, establishing a new cosmic order.

Numerous myths detail Zeus’s complex relationships and extensive offspring, including Athena, Apollo, Artemis, Ares, Aphrodite, Hermes, Hephaestus, and Dionysus, solidifying his legacy as a prolific progenitor and central figure in the Greek god family tree. His stories are frequently explored in resources detailing Greek mythology.

Hera: Queen of the Gods

Hera, revered as the Queen of the Gods and goddess of marriage, women, childbirth, and family, held a position of immense power and authority alongside her husband, Zeus. She was fiercely protective of marriage and family, often punishing those who violated its sanctity.

As the sister and wife of Zeus, Hera’s lineage connected her directly to the Titan lineage, being the daughter of Cronus and Rhea. Despite her regal status, Hera endured a tumultuous marriage marked by Zeus’s frequent infidelities, fueling her legendary jealousy and vengeful nature.

Her role within the Olympian family tree is significant, and her interactions with heroes and mortals often shaped their destinies. Resources exploring Greek mythology frequently depict Hera as a complex and formidable goddess, embodying both power and passionate emotion.

Poseidon: God of the Sea

Poseidon, the formidable God of the Sea, earthquakes, storms, and horses, commanded immense power over the aquatic world. Brother to Zeus and Hades, he completed the division of the cosmos, claiming dominion over the seas, a realm teeming with both beauty and danger.

Born to Cronus and Rhea, Poseidon’s lineage placed him firmly within the first generation of Olympians. He was often depicted wielding a trident, capable of stirring the seas into violent storms or calming them to peaceful tranquility. His temperament mirrored the ocean itself – unpredictable and powerful.

Family trees of Greek deities consistently highlight Poseidon’s importance, showcasing his numerous offspring with various goddesses and mortals. He played a crucial role in many myths, often clashing with other gods and influencing the fates of heroes.

Hades: God of the Underworld

Hades, often misunderstood, reigned as the God of the Underworld, a realm of the deceased. Though frequently associated with darkness and death, he wasn’t considered evil, but rather a stern and unwavering ruler maintaining the natural order. He was a brother to Zeus and Poseidon, completing the division of the universe.

Born to the Titans Cronus and Rhea, Hades’ position within the Olympian pantheon was significant, despite his isolation. He rarely left his kingdom, preferring to govern the souls of the departed. Depictions often show him with his helm of invisibility, a gift from the Cyclopes.

Greek god family trees invariably include Hades, illustrating his complex relationships and the inhabitants of his shadowy domain. His wife, Persephone, and their story are central to understanding the cycle of seasons.

Demeter: Goddess of Agriculture

Demeter, a pivotal figure in Greek mythology, embodied the nurturing power of agriculture, harvest, and nourishment. She ensured the earth’s fertility, providing sustenance for both gods and mortals. As a daughter of the Titans Cronus and Rhea, she played a crucial role in the Olympian family dynamic.

Her most famous myth revolves around her daughter, Persephone, and Hades. Demeter’s grief over Persephone’s abduction caused winter, highlighting the connection between her emotions and the seasons. This story is frequently depicted in Greek god family tree charts.

Representations of Demeter often showcase her holding sheaves of wheat or a cornucopia, symbolizing abundance. She was highly revered, particularly by women, and her worship was integral to agricultural societies.

The Children of Zeus

Zeus, king of the gods, fathered numerous offspring – both gods and heroes – with various goddesses and mortals, creating a complex familial web.

Charts detailing the Greek god family tree prominently feature Athena, Apollo, Artemis, Ares, Aphrodite, Hermes, Hephaestus, and Dionysus, Zeus’s divine children.

Athena: Goddess of Wisdom

Athena, a central figure in the Greek pantheon, emerged fully grown from the head of Zeus, a testament to her unique birth and divine power. She embodies wisdom, strategic warfare, and crafts, often depicted with an owl, her sacred animal, symbolizing keen intellect.

Family trees consistently place Athena as a first-generation Olympian, directly descended from Zeus, though lacking a mother in the traditional sense. Her influence extends beyond intellect; she’s a patron goddess of heroes and cities, notably Athens, which bears her name and honors her with the Parthenon.

Resources like online charts and PDF family trees highlight Athena’s importance, showcasing her position within the Olympian hierarchy. She represents a fascinating blend of power, intelligence, and strategic thinking, making her a compelling figure in Greek mythology and a frequent subject of study.

Apollo: God of Music and Light

Apollo, a radiant deity, embodies a diverse range of attributes – music, poetry, light, healing, and prophecy – making him one of the most versatile and revered gods in the Greek pantheon. He is often depicted with a lyre, symbolizing his musical prowess, and a bow and arrow, representing his skill as a hunter.

Family trees consistently show Apollo as a child of Zeus and Leto, and twin brother to Artemis. His lineage places him firmly within the first generation of Olympians, highlighting his significant role in the divine order. PDF charts detailing Greek deities invariably feature Apollo prominently.

Online resources emphasize Apollo’s multifaceted nature, showcasing his influence on various aspects of Greek life. He represents order, harmony, and intellectual pursuits, making him a central figure in mythology and a popular subject for exploration within family tree diagrams.

Artemis: Goddess of the Hunt

Artemis, the fiercely independent goddess of the hunt, wilderness, wild animals, the Moon, and archery, stands as a powerful figure in Greek mythology. Often depicted with a bow and arrow, and accompanied by a hunting dog or deer, she embodies self-sufficiency and a connection to the natural world.

Family tree representations consistently position Artemis as the daughter of Zeus and Leto, and twin sister to Apollo. This sibling relationship is crucial, as they share certain attributes while maintaining distinct domains. PDF charts dedicated to Greek gods always include Artemis’s prominent place;

Resources highlight Artemis’s role as a protector of young girls and childbirth, alongside her more commonly known association with the hunt. Her unwavering dedication to her chosen path makes her a compelling figure within the complex web of familial connections detailed in mythological family trees.

Ares: God of War

Ares, the often-brutal and impetuous god of war, represents the chaotic and violent aspects of battle, differing significantly from Athena’s strategic warfare. He is frequently depicted with weapons like spears, helmets, and shields, embodying raw physical power and aggression.

Family tree charts consistently show Ares as the son of Zeus and Hera, though their relationship was often strained due to his contentious nature. PDF resources detailing Greek deities invariably include Ares, highlighting his role in conflicts and his often-negative portrayal.

Mythological accounts frequently depict Ares as disliked by many of the other gods, reflecting his unrestrained and destructive tendencies. Despite this, he held a significant position within the pantheon, and his lineage is a key component of understanding the broader family dynamics.

Aphrodite: Goddess of Love

Aphrodite, the radiant goddess of love, beauty, pleasure, and procreation, holds a central position in Greek mythology, captivating both gods and mortals with her allure. Family tree charts illustrate her complex origins, with accounts varying between being born from the sea foam created by Uranus’s severed genitals or as the daughter of Zeus and Dione.

PDF resources dedicated to Greek deities consistently detail Aphrodite’s influence on desire and passion. Her marriage to Hephaestus was famously unhappy, leading to numerous affairs, notably with Ares, resulting in offspring like Eros (Cupid).

Visual representations often depict her with symbols like doves, swans, and roses, embodying her association with beauty and affection. Understanding her lineage is crucial when exploring the interconnectedness of the Olympian gods.

Hermes: Messenger of the Gods

Hermes, the swift-footed messenger of the gods, occupies a unique and vital role in the pantheon, facilitating communication between Olympus and the mortal realm. Greek god family tree PDFs consistently showcase his parentage as the son of Zeus and Maia. He’s often depicted with winged sandals, a caduceus, and a traveler’s hat, symbolizing his speed and role as a guide.

Beyond his messenger duties, Hermes was also a god of commerce, thieves, travelers, sports, athletes, and border crossings, making him incredibly versatile. Charts illustrate his connections to other deities through these various roles.

Resources highlight his cleverness and trickery, often assisting other gods in their schemes. His lineage and multifaceted nature are key to understanding his importance within the mythological framework.

Hephaestus: God of the Forge

Hephaestus, the skilled god of the forge, metalworking, craftsmanship, and volcanoes, holds a distinctive position within the Olympian family. Greek god family tree PDFs typically depict his parentage as varying – either the son of Hera alone (a response to Zeus’s solitary creation of Athena) or of Zeus and Hera together.

Notably, he is often described as physically imperfect, being lame, which contributes to his association with craftsmanship as a skill developed through necessity. Charts illustrate his workshop beneath volcanoes, where he crafted magnificent weapons and objects for the gods.

Resources emphasize his role as the divine smith, creating Achilles’ shield and other iconic items. His unique origin and artistic talents make him a compelling figure in Greek mythology.

Dionysus: God of Wine

Dionysus, the god of wine, festivals, ecstasy, and theatre, occupies a unique space in the Olympian pantheon. Family tree charts consistently show him as the son of Zeus and Semele, a mortal princess. His birth is famously unusual; Semele was incinerated by Zeus’s true form, and the infant Dionysus was rescued and raised by nymphs.

Representations often depict him with thyrsus (a staff topped with a pinecone) and accompanied by satyrs and maenads, highlighting his association with wild, ecstatic rituals. PDFs detailing Greek deities emphasize his dual nature – capable of both benevolent generosity and destructive frenzy.

His influence extended beyond wine, encompassing liberation, ritual madness, and the arts, making him a complex and fascinating figure in mythology.

Other Important Deities & Offspring

Beyond the core Olympians, numerous deities and heroes populate Greek myths; family tree PDFs detail figures like Hestia, Eros, and the Muses, alongside demigods.

Hestia: Goddess of the Hearth

Hestia, sister to Zeus, Poseidon, Hades, Hera, and Demeter, held a profoundly important position in ancient Greek life, though often overlooked in grand narratives focused on Olympian power struggles.

Representing the sacred flame and domestic tranquility, Hestia was the goddess of the hearth, the symbolic center of the home and, by extension, the state;

Unlike her siblings who actively intervened in mortal affairs, Hestia remained largely detached, preferring to maintain the sanctity of the home and public hearths.

Family tree charts, including those available as PDFs, often show her as a foundational deity, a daughter of Cronus and Rhea, and a vital component of the divine lineage.

Ancient Greek women particularly revered Hestia, recognizing her importance in maintaining the stability and warmth of their households, a testament to her enduring influence.

Her presence ensured peace and order, and sacrifices were made to her before any other deity, highlighting her primacy in religious practice.

Eros (Cupid): God of Love

Eros, known as Cupid in Roman mythology, embodies the primal force of love, desire, and attraction, playing a significant role in numerous Greek myths and legends.

His parentage varies across accounts; Hesiod depicts him as a primordial deity, born from Chaos, while later traditions identify him as a son of Aphrodite and Ares, or even Hermes.

Family tree charts, often found in PDF format, reflect this ambiguity, showcasing multiple possible lineages depending on the source material consulted.

Represented with wings and a bow and arrow, Eros inflicts both passionate love and agonizing longing, impacting both gods and mortals alike.

He is often depicted as mischievous and playful, intervening in the lives of others to ignite romantic connections, sometimes with chaotic results.

Eros’s influence extends beyond romantic love, encompassing desire in its broadest sense, making him a powerful and complex figure within the Greek pantheon.

The Muses: Goddesses of Arts and Sciences

The Muses, daughters of Zeus and Mnemosyne (the Titaness of Memory), were nine goddesses presiding over the arts and sciences, inspiring creativity in all its forms.

Each Muse governed a specific discipline: Calliope (epic poetry), Clio (history), Erato (lyric poetry), Euterpe (music), Melpomene (tragedy), Polyhymnia (hymns), Terpsichore (dance), Thalia (comedy), and Urania (astronomy).

Greek god family tree PDFs frequently depict them as a collective, often linked directly to Zeus, emphasizing their divine parentage and elevated status.

Artists and poets consistently invoked the Muses for inspiration, believing their presence guaranteed artistic excellence and insightful knowledge.

They were considered essential figures in education and intellectual pursuits, fostering a culture of learning and artistic expression.

Their influence permeated all aspects of Greek society, solidifying their importance within the mythological framework.

Notable Heroes & Demigods (Hercules, Perseus)

Heroes like Hercules (Heracles) and Perseus, prominent figures in Greek mythology, demonstrate the offspring resulting from unions between gods and mortals.

Hercules, son of Zeus and Alcmene, is famed for his Twelve Labors, showcasing immense strength and enduring hardship, often detailed in family tree charts.

Perseus, born of Zeus and Danaë, is celebrated for slaying Medusa, a monstrous Gorgon, a tale frequently illustrated in visual representations of the gods’ lineage.

Greek god family tree PDFs often highlight these demigods, illustrating how divine ancestry influenced their extraordinary abilities and destinies.

These figures weren’t simply gods; they embodied human struggles and triumphs, bridging the gap between the divine and mortal realms.

Their stories served as moral lessons and sources of inspiration for ancient Greeks, solidifying their place in mythology.

Resources for Further Exploration

Explore online family tree charts, downloadable PDFs, and books on Greek mythology for deeper insights into the complex relationships of gods and heroes!

Online Family Tree Charts

Numerous websites offer interactive and static Greek god family tree charts, providing a visual representation of the deities’ lineage. UsefulCharts is frequently cited as a particularly comprehensive resource, offering a detailed and well-organized depiction of the relationships between gods, titans, and primordial beings.

Reddit’s r/coolguides often features shared charts, sparking discussions about their accuracy and completeness, acknowledging the inherent complexities of Greek mythology. These charts vary in scope, some focusing solely on the Olympians, while others attempt to encompass the entire pantheon, from Chaos to the offspring of the major gods.

Searching for “Greek god family tree PDF” yields downloadable charts suitable for offline study or printing. These PDFs often present information in a structured format, making it easier to trace the connections between different deities and understand their roles within the mythological framework.

PDF Downloads of Greek God Family Trees

A search for “Greek god family tree PDF” reveals a wealth of downloadable resources catering to various learning preferences. These documents offer a convenient, offline method for studying the complex relationships within Greek mythology, allowing for focused exploration without internet access.

Many PDFs present the information in a structured, hierarchical format, clearly illustrating the lineage from primordial deities like Chaos and Gaia, through the Titans, and finally to the Olympians and their offspring. Some include detailed annotations explaining the roles and attributes of each god and goddess.

The availability of these PDFs is particularly useful for students and enthusiasts seeking a portable and printable resource. However, it’s important to note that different charts may present slightly varying interpretations of the mythology, reflecting the diverse nature of ancient Greek storytelling.

Books on Greek Mythology

Delving into Greek mythology through books provides a comprehensive understanding beyond simple family tree charts. While a PDF can illustrate lineage, books offer rich narratives, exploring the personalities, myths, and cultural significance of each deity; Classic works like Edith Hamilton’s “Mythology” remain foundational texts, providing accessible retellings of ancient stories.

More specialized books focus on specific aspects, such as the Olympian gods or heroic sagas, offering deeper insights into their roles and relationships. These resources often include genealogical tables, complementing the narrative with visual representations of the family tree.

Exploring these texts enhances comprehension, moving beyond memorization of names to an appreciation of the complex web of interactions that shaped Greek mythology, enriching the understanding gained from a PDF chart.

nuwave oven instructions manual

NuWave Oven Instructions Manual: A Comprehensive Guide

Welcome! This manual provides detailed guidance for optimal NuWave Oven use, covering setup, operation, and maintenance; Explore cooking modes and digital control features for delicious results.

Understanding Your NuWave Oven

The NuWave Oven represents a revolutionary approach to cooking, utilizing innovative technology to deliver faster, more efficient, and healthier meal preparation. Unlike conventional ovens, the NuWave employs a unique combination of conduction, convection, and microwave energy – though it doesn’t feel like a microwave oven. This allows food to cook from the inside out, preserving moisture and nutrients while reducing cooking times significantly.

It’s designed for versatility, capable of roasting, baking, broiling, and even steaming. The oven’s sealed environment traps heat and moisture, resulting in remarkably tender and flavorful dishes. Understanding these core principles is key to maximizing your cooking experience. The NuWave Oven isn’t simply an appliance; it’s a system designed to simplify and enhance your culinary endeavors. Familiarizing yourself with its capabilities will unlock a world of possibilities in the kitchen, offering a convenient alternative to traditional cooking methods.

Unboxing and Initial Setup

Carefully remove the NuWave Oven and all included components from the packaging. Verify that you have the oven base, cooking dome, extension ring (if included), power head, and this instruction manual. Inspect each item for any signs of damage during shipping. If damage is present, contact customer support immediately.

Before first use, thoroughly clean the cooking dome and any removable parts with warm, soapy water. Rinse and dry completely. Place the oven base on a stable, heat-resistant surface, ensuring adequate ventilation around the unit. Attach the power head to the oven base, ensuring a secure connection. If using the extension ring, attach it to the cooking dome before placing the dome onto the base. A brief ‘burn-off’ period – running the oven empty for a few minutes – is recommended to eliminate any manufacturing odors.

Component Identification

Oven Base: The main housing unit providing the heating element and structural support. Ensure it rests on a heat-resistant, stable surface during operation.

Cooking Dome: Constructed from durable, heat-resistant material, this dome covers the food during cooking, trapping moisture and promoting even heat distribution.

Power Head: This detachable unit contains the fan and heating element controls. It securely connects to the oven base to initiate the cooking process.

Extension Ring: (Optional) Increases the oven’s capacity, allowing for cooking larger food items or greater quantities. It attaches to the cooking dome.

Control Panel: Features digital buttons for setting time, temperature, and selecting cooking modes. Familiarize yourself with each button’s function. The manual details each control.

Rack: (If included) Provides elevated cooking surface within the dome, ideal for draining fats or achieving crispier results.

Powering On and Basic Operation

Initial Power-Up: Before first use, ensure the NuWave Oven is placed on a level, heat-resistant surface. Connect the Power Head firmly to the Oven Base; a click confirms secure attachment.

Power Connection: Plug the oven into a grounded electrical outlet. The control panel will illuminate, indicating power is supplied. Avoid using extension cords if possible.

Dome Placement: Position the Cooking Dome onto the Oven Base. Ensure it sits securely and evenly. The Extension Ring, if used, should be attached before the dome.

Food Preparation: Place your food directly onto the rack (if using) or the oven base. Avoid overcrowding to ensure even cooking.

Starting a Cook Cycle: Once food is inside and the dome is in place, use the Control Panel to set the desired time and temperature, or select a preset program. Press ‘Start’ to begin.

Monitoring Progress: The oven will automatically shut off when the timer reaches zero. Carefully remove the dome using oven mitts, as it will be hot.

Cooking Modes Explained

The NuWave Oven offers versatile cooking modes designed for diverse culinary needs. Understanding each mode unlocks optimal results. Roast Mode utilizes high heat to brown and crisp foods, ideal for meats and poultry, creating a flavorful exterior while retaining moisture.

Bake Mode provides consistent, all-around heat, perfect for cakes, cookies, and casseroles. It mimics traditional oven baking but with faster cooking times. Broil Mode delivers intense, direct heat from above, excellent for melting cheese or browning the tops of dishes.

Steam Mode introduces moisture during cooking, resulting in tender and juicy foods. This is particularly effective for vegetables and fish. Each mode adjusts the heating element’s power and fan speed for specific outcomes.

Experimenting with these modes allows you to achieve professional-quality results with ease. Refer to the recipe charts for suggested modes and settings for various dishes.

Roast Mode Instructions

To utilize Roast Mode effectively, begin by placing your seasoned food directly on the NuWave Oven’s cooking surface, or within a compatible roasting rack. Ensure adequate space around the food for even heat circulation. Select “Roast” on the digital control panel.

Set the desired temperature – typically between 300°F and 450°F (149°C — 232°C) – depending on the type of food. Cooking time will vary based on the weight and thickness of the item. For poultry, a temperature probe is recommended for accurate doneness.

The NuWave Oven’s Roast Mode circulates hot air, creating a crispy exterior and juicy interior. Regularly check the food’s progress, flipping halfway through for even browning. Basting with juices or marinades during roasting enhances flavor and moisture.

Always use oven mitts when handling hot food and the cooking surface. Refer to recipe guides for specific roasting times and temperatures for optimal results.

Bake Mode Instructions

For baking with your NuWave Oven, utilize compatible baking dishes – glass, ceramic, or metal pans work well. Lightly grease the dish to prevent sticking, or line with parchment paper. Select the “Bake” function on the digital control panel.

Set the temperature according to your recipe, generally ranging from 250°F to 400°F (121°C — 204°C). Baking times may be slightly shorter than conventional ovens due to the NuWave’s efficient heating. Begin checking for doneness about 75% of the way through the recommended baking time.

The NuWave Oven’s Bake Mode provides consistent heat for evenly cooked cakes, cookies, casseroles, and more. Avoid overcrowding the oven; allow space for air circulation. For layered baking, rotate the dish halfway through for uniform results.

Always use oven mitts when handling hot dishes. Experiment with baking times to find what works best for your favorite recipes within the NuWave Oven.

Broil Mode Instructions

The Broil function on your NuWave Oven delivers intense, direct heat from above, perfect for browning and crisping foods. Use a broil-safe pan, ensuring it’s not overly deep to allow for optimal heat penetration. Position the rack closer to the heating element for more intense broiling, or further away for gentler results.

Select the “Broil” setting on the control panel and set the desired time. Broiling times are typically short – monitor food closely to prevent burning. For thinner cuts of meat or vegetables, start with a shorter time and add more as needed.

Broil Mode is ideal for finishing steaks, melting cheese on gratins, or browning the tops of casseroles. Always leave the oven door slightly ajar during broiling to prevent overheating and ensure proper ventilation.

Exercise caution as the oven and food will be extremely hot. Use oven mitts and appropriate utensils. Regular cleaning after broiling is recommended to remove any splatters or residue.

Steam Mode Instructions

Utilizing the Steam Mode on your NuWave Oven unlocks a healthier cooking method, preserving nutrients and enhancing flavors. This mode introduces moisture into the cooking chamber, resulting in tender and succulent dishes. Ensure the water reservoir is filled to the designated level before initiating the steam function.

Select “Steam” on the control panel and set the appropriate cooking time. Steam mode is exceptionally well-suited for vegetables, fish, and poultry. Consider adding herbs or lemon slices to the water reservoir for infused flavor.

For optimal results, use the provided steaming rack to elevate food above the water level, preventing it from becoming soggy. Monitor the water level during longer cooking cycles and replenish if necessary.

Caution: Steam can be very hot. Exercise extreme care when opening the oven door after steaming. Always use oven mitts and avoid direct contact with the steam. Regular descaling of the water reservoir is recommended to maintain optimal performance.

Using the Digital Control Panel

The digital control panel is the central hub for operating your NuWave Oven, offering precise control over cooking parameters. Familiarize yourself with the buttons for power, time, temperature, and mode selection. The bright, clear display provides real-time feedback during operation.

Navigating the menu is intuitive; simply press the corresponding buttons to adjust settings. The panel allows for both manual input and the selection of pre-programmed cooking cycles. Utilize the ‘Start’ button to initiate the cooking process and ‘Stop’ to pause or cancel.

For customized cooking, manually set the desired time and temperature. The panel supports both Fahrenheit and Celsius units. Explore the preset programs for convenient cooking of common dishes. Remember to consult the cooking charts for recommended settings.

Regularly clean the control panel with a soft, damp cloth to maintain its responsiveness and appearance. Avoid using abrasive cleaners, as they may damage the surface.

Setting Time and Temperature

Precisely controlling time and temperature is crucial for achieving optimal cooking results with your NuWave Oven. The digital control panel allows for adjustments in one-minute increments for time and five-degree increments for temperature.

To set the cooking time, press the ‘Time’ button and use the arrow keys to increase or decrease the desired duration. Confirm your selection by pressing ‘Time’ again. Similarly, adjust the temperature using the ‘Temp’ button and arrow keys, confirming with another press of ‘Temp’.

The oven supports both Fahrenheit (°F) and Celsius (°C) temperature scales. To switch between them, consult the oven’s settings menu, typically accessed through a dedicated ‘Settings’ button or a combination of button presses.

Always refer to recipes or cooking charts for recommended time and temperature settings for specific foods. Experimentation may be necessary to fine-tune settings to your personal preferences. Accurate settings ensure perfectly cooked meals every time;

Utilizing Preset Programs

The NuWave Oven features a variety of convenient preset programs designed to simplify cooking common dishes. These programs automatically set the optimal time and temperature for foods like chicken, beef, potatoes, and even desserts, eliminating guesswork.

To access the preset programs, press the ‘Program’ button on the digital control panel. Use the arrow keys to scroll through the available options until you find the desired setting. Once selected, press ‘Start’ to begin cooking.

While preset programs offer a convenient starting point, remember that cooking times may vary depending on the quantity and thickness of the food. It’s always a good practice to check for doneness using a food thermometer.

Customization is also possible. After selecting a preset, you can often adjust the time or temperature slightly to better suit your preferences. Explore the manual for details on modifying preset settings for personalized results.

Adjusting Cooking Settings

The NuWave Oven’s digital control panel allows for precise adjustments to cooking settings, providing flexibility for various recipes. You can modify both the cooking time and temperature to achieve desired results. To adjust the time, press the ‘Time’ button, then use the up or down arrow keys to increase or decrease the duration.

Similarly, to change the temperature, press the ‘Temp’ button and utilize the arrow keys. The display will show the current setting, and each press of the arrow key will adjust it in pre-defined increments. Always confirm the new settings before starting the cooking process.

For more granular control, some models offer a ‘Power Level’ adjustment, allowing you to fine-tune the intensity of the cooking process. Experimenting with these settings can significantly impact the final outcome of your dishes.

Remember to save your preferred settings for future use. Refer to the manual for specific instructions on how to store custom cooking profiles within the NuWave Oven’s memory.

Cleaning and Maintenance

Regular cleaning is crucial for maintaining the performance and longevity of your NuWave Oven. After each use, allow the oven to cool completely before commencing cleaning. The cooking surface and removable parts, such as the extender ring and dome, are typically dishwasher safe, offering a convenient cleaning option.

For stubborn food residue, a mild detergent and warm water solution can be used with a non-abrasive sponge or cloth. Avoid using harsh chemicals or scouring pads, as these can damage the non-stick coating. The exterior of the oven can be wiped down with a damp cloth.

Periodically inspect the vent openings to ensure they are free from obstructions. Proper ventilation is essential for efficient operation. Avoid immersing the base unit in water or any other liquid.

Proper maintenance, including regular cleaning, will ensure your NuWave Oven continues to deliver optimal cooking performance for years to come. Refer to the full manual for detailed cleaning instructions specific to your model.

Troubleshooting Common Issues

If your NuWave Oven isn’t heating, first ensure it’s properly plugged in and the power outlet is functioning. Check the digital control panel to confirm the timer is set and the desired cooking mode is selected. A common issue is an incorrect temperature setting – verify it’s appropriate for your recipe.

Food not cooking evenly? Ensure food isn’t overcrowded and is positioned correctly on the cooking surface. Utilize the extender ring for larger portions. If using the roast or bake modes, consider rotating the food halfway through the cooking process.

Error messages on the display indicate specific problems. Consult the full instruction manual for a detailed explanation of each error code and recommended solutions. Avoid attempting repairs yourself; contact customer support for assistance.

For steam mode issues, ensure the water reservoir is filled to the correct level. Regular cleaning and descaling can prevent buildup that affects steam production. Always refer to the manual for specific troubleshooting steps.

Safety Precautions

Always operate the NuWave Oven on a stable, heat-resistant surface, away from flammable materials. Never immerse the base unit in water or any other liquid to prevent electric shock. Ensure the oven is unplugged before cleaning or performing any maintenance.

Exercise caution when handling hot surfaces, including the cooking surface, the lid, and cooked food. Use oven mitts or pot holders to avoid burns. Do not touch the heating element directly during or immediately after use.

Never operate the oven with a damaged cord or plug. If the appliance malfunctions, discontinue use and contact qualified service personnel. Avoid using extension cords, as they may not be rated for the oven’s power requirements.

Keep the oven out of reach of children. Supervise its use by individuals unfamiliar with its operation. Do not attempt to modify or disassemble the oven, as this could create a safety hazard and void the warranty.

Recipe Ideas and Cooking Charts

Unlock a world of culinary possibilities with your NuWave Oven! Explore diverse recipes, from perfectly roasted chicken and crispy vegetables to delectable desserts. Utilize the included cooking charts as a starting point, adjusting times and temperatures to your preference.

Experiment with different proteins – steak, pork chops, fish – and discover how the NuWave Oven delivers consistently juicy and flavorful results. Try baking cakes, cookies, and even pizzas with ease, achieving professional-quality outcomes.

Consider utilizing the roast, bake, broil, and steam modes to tailor your cooking to specific dishes. Online resources and cookbooks offer a wealth of NuWave Oven-specific recipes. Don’t be afraid to adapt traditional recipes for optimal performance.

Remember that cooking times may vary based on food thickness and initial temperature. Regularly check for doneness and adjust accordingly. Enjoy the convenience and versatility of your NuWave Oven!

wire guides

Wire guides are essential components, facilitating efficient and organized wiring in diverse applications, from simple connections to complex systems.

These guides ensure proper wire placement, protection, and overall system reliability, becoming a crucial element in modern electrical engineering and manufacturing.

What are Wire Guides?

Wire guides are specialized components designed to direct and support wires or cables during installation and operation. They aren’t merely conduits; they actively manage the wire’s path, preventing damage and ensuring correct positioning within a system. These guides come in various forms, including roller type guides, cable guide clips, and more specialized designs like strain relief wire guides.

Essentially, a wire guide acts as a pathway, simplifying the process of introducing wiring through difficult or confined spaces. They are integral to maintaining the integrity of electrical connections and preventing premature wear or failure. The core construction often utilizes materials like fiber, wire strand, or even independent wire rope cores, each offering different levels of flexibility and strength depending on the application’s demands. Their purpose extends beyond simple direction; they contribute significantly to the longevity and performance of the entire electrical assembly.

The Importance of Using Wire Guides

Employing wire guides is paramount for maintaining the reliability and longevity of electrical systems. Without them, wires are susceptible to abrasion, bending stress, and potential damage during installation and throughout their operational lifespan. This is especially critical in applications involving frequent movement or vibration, where wire fatigue can quickly lead to failure.

Wire guides minimize these risks by providing a controlled pathway, reducing strain on connections, and protecting the cable from external factors. They are vital in wire processing machines, ensuring consistent and accurate wire placement. Furthermore, proper wire management facilitated by guides contributes to easier troubleshooting and maintenance, ultimately reducing downtime and associated costs. Ignoring their use can compromise the entire system’s performance and safety, making them an indispensable component in modern electrical engineering.

Types of Wire Guides

Wire guides encompass a diverse range, including roller types, cable guide clips, strain relief options, thermoplastic secured guides, snap-in, and clip wire guides.

Roller Type Wire Guides

Roller type wire guides are specifically designed to address the issue of excessive wear on drilling lines, a common problem in various industrial applications. These guides are available in two primary types, each offering unique benefits depending on the specific needs of the operation.

The functionality of these guides centers around the use of rollers, which minimize friction as the wire or cable passes through. This reduction in friction significantly extends the lifespan of the wireline, reducing the frequency of replacements and associated downtime. They are particularly useful in scenarios involving high-speed or repetitive wire movement.

The construction typically involves a robust frame supporting the roller assembly, ensuring durability and consistent performance even under demanding conditions. Proper selection and maintenance of roller type guides are crucial for maximizing their effectiveness and ensuring the longevity of the wireline system.

Purpose of Roller Type Guides

The primary purpose of roller type wire guides is to mitigate and prevent excessive wear on drilling lines and similar cables subjected to frequent use and tension. This wear can lead to costly downtime, reduced operational efficiency, and potential safety hazards.

These guides actively reduce friction between the wireline and the guide itself, extending the cable’s service life. They are invaluable in applications where cables are repeatedly pulled, guided, or subjected to abrasive forces. By minimizing contact stress, roller guides contribute to a more reliable and consistent operation.

Furthermore, they help maintain the integrity of the wireline, preventing damage that could compromise its strength and performance. Ultimately, the use of these guides translates to reduced maintenance costs and improved overall system reliability.

Description and Functionality

Roller-type wire-line guides are available in two primary configurations, each designed to optimize cable management and protection. These guides feature a series of rollers strategically positioned to support and direct the wireline’s movement. The rollers themselves are typically constructed from durable materials like hardened steel or specialized polymers, ensuring longevity and resistance to wear.

Functionally, the rollers minimize friction as the wireline passes through the guide, reducing stress and extending the cable’s lifespan. The guide’s housing provides a secure channel, preventing the wireline from kinking or becoming damaged.

Different designs accommodate varying wireline diameters and operational loads, offering versatility across numerous applications. Proper installation and maintenance are crucial for optimal performance, ensuring smooth and reliable wireline operation.

Cable Guide Clips

Cable guide clips represent a straightforward yet effective method for securing and directing wires and cables along a designated path. These clips are typically constructed from materials like nylon, plastic, or metal, offering a balance of durability and ease of installation. Their primary function is to prevent cables from sagging, tangling, or experiencing undue stress, thereby protecting them from damage.

Installation usually involves simply clipping the guide around the cable and then fastening it to a mounting surface using screws, nails, or adhesive. Different clip designs cater to various cable diameters and bundle sizes, ensuring a secure fit.

They are widely used in both residential and industrial settings, providing a cost-effective solution for cable management and organization.

Strain Relief Wire Guides

Strain relief wire guides are specifically engineered to mitigate stress on electrical connections and cables, preventing damage caused by pulling, bending, or vibration. These guides are crucial in applications where wires are subject to movement or external forces, such as within machinery or during frequent handling.

They function by securely clamping the cable jacket, distributing tensile forces and preventing them from being directly applied to the delicate wire terminations. This protection extends the lifespan of connections and reduces the risk of electrical failure.

Common materials include flexible plastics and rubber compounds, designed to accommodate various cable sizes and provide a robust grip. Proper strain relief is a vital component of safe and reliable electrical systems.

Thermoplastic Secured Wire Guides

Thermoplastic secured wire guides offer a robust and versatile solution for cable management, utilizing the properties of thermoplastic materials for durable and reliable wire routing. These guides are often designed for semi-permanent or permanent installations, providing a secure pathway for wires in various environments.

The thermoplastic construction provides excellent resistance to abrasion, chemicals, and temperature fluctuations, making them suitable for demanding industrial applications. They are commonly secured using screws, clips, or adhesive backing, ensuring a firm attachment to mounting surfaces.

These guides are available in a wide range of shapes and sizes to accommodate different cable diameters and routing configurations, contributing to organized and protected wiring systems.

Snap-In Wire Guides

Snap-in wire guides represent a convenient and efficient method for quickly securing and routing wires, particularly in applications requiring frequent adjustments or maintenance. These guides feature a design that allows them to be easily snapped into place within pre-existing mounting points or panels.

Their installation doesn’t typically require tools, streamlining the assembly process and reducing downtime. The snap-in mechanism provides a secure hold, preventing wires from becoming dislodged during operation or vibration.

Commonly constructed from durable plastics, snap-in guides offer good resistance to environmental factors and are available in various sizes to accommodate different wire bundles. They are ideal for applications where flexibility and ease of installation are paramount.

Clip Wire Guides

Clip wire guides offer a straightforward and cost-effective solution for securing wires and cables along a designated path. These guides typically consist of a clip-style body, often made from plastic or metal, that firmly grips the wire without damaging the insulation.

Installation usually involves simply clipping the guide onto the wire and then mounting the guide to a surface using screws, adhesives, or other fasteners. This method allows for easy repositioning or removal of wires as needed.

Clip guides are versatile and suitable for a wide range of applications, including cable management in electronics, automotive wiring, and general industrial use. They provide a basic level of protection and organization for wires, preventing tangling and strain.

Wire Guide Materials and Construction

Wire guides utilize diverse materials, including fiber, wire strand, and independent wire rope cores, impacting flexibility and strength. Outer jackets further enhance durability.

Core Types

Wire guide cores are fundamental to their performance characteristics, with several options available to suit different application needs. Fiber cores offer maximum flexibility, making them ideal for delicate wiring scenarios where bending is frequent; However, this flexibility comes at the cost of reduced strength and load-bearing capacity.

Conversely, wire strand cores provide a significant increase in tensile strength and durability, making them suitable for applications requiring robust support and resistance to pulling forces. These cores are constructed from multiple strands of wire twisted together, enhancing their overall strength.

Finally, independent wire rope cores represent the highest level of strength and stability. These cores utilize a miniature wire rope construction, offering exceptional load-bearing capabilities and resistance to deformation. They are commonly used in demanding applications where reliability and longevity are paramount, ensuring consistent performance under stress.

Fiber Cores

Fiber cores within wire guides are specifically engineered to prioritize flexibility, making them exceptionally well-suited for applications demanding frequent bending and intricate routing of wires. Constructed from tightly wound fibers, these cores excel in scenarios where minimizing stress on the wire insulation is critical.

However, it’s important to acknowledge that this enhanced flexibility is achieved with a trade-off in overall strength. Fiber cores possess a lower tensile strength compared to other core types, such as wire strand or independent wire rope cores. Consequently, they are not recommended for applications involving significant pulling forces or heavy loads.

Despite this limitation, fiber cores remain a popular choice for delicate wiring processes, offering a balance between maneuverability and protection, ensuring the integrity of sensitive electrical connections.

Wire Strand Cores

Wire strand cores represent a robust alternative within wire guide construction, offering a significant increase in tensile strength compared to fiber cores. These cores are comprised of multiple strands of wire twisted together, creating a durable and resilient central support structure. This enhanced strength makes them ideal for applications where wires are subjected to substantial pulling forces during installation or operation.

While not as flexible as fiber cores, wire strand cores provide a commendable balance between strength and maneuverability. They are well-suited for applications requiring moderate bending without compromising the wire guide’s ability to withstand stress.

The construction of wire strand cores ensures reliable performance in demanding environments, making them a versatile choice for a wide range of wiring applications.

Independent Wire Rope Cores

Independent wire rope cores represent the pinnacle of strength and durability in wire guide construction. Unlike wire strand cores, these cores utilize a fully formed wire rope – a helix of wire strands – as the central support. This construction delivers exceptional tensile strength and resistance to deformation, making them ideal for the most demanding applications.

While offering the least flexibility among core types, independent wire rope cores excel in scenarios requiring maximum load-bearing capacity and unwavering stability. They are frequently employed in heavy-duty applications where wire guides are subjected to extreme forces or harsh environmental conditions.

The robust nature of these cores ensures long-lasting performance and reliability, even under significant stress, solidifying their position as a premium choice for critical wiring systems.

Outer Jacket Materials

The outer jacket material of a wire guide is paramount, providing crucial protection against abrasion, chemicals, temperature fluctuations, and environmental factors. Selecting the appropriate material directly impacts the guide’s longevity and performance within its intended application.

Common materials include Polyvinyl Chloride (PVC), known for its cost-effectiveness and general-purpose resistance; Polyethylene (PE), offering excellent electrical insulation and moisture resistance; and Thermoplastic Polyurethane (TPU), prized for its flexibility, durability, and resistance to oils and solvents.

Furthermore, specialized materials like Fluoropolymers (e.g., Teflon) are utilized in extreme environments demanding exceptional chemical and thermal resistance. The jacket’s composition must complement the core material and application requirements, ensuring optimal wire guide functionality and lifespan.

Applications of Wire Guides

Wire guides find extensive use in wire processing machines, electrical connector assemblies, and the creation of robust and organized wiring harnesses.

Wire Processing Machines

Wire guides are integral components within wire processing machines, playing a critical role in maintaining wire tension, alignment, and smooth movement during various manufacturing stages. These machines often utilize wire jig assemblies featuring multiple wire clamps arranged in a stack, ensuring precise wire positioning.

The guides effectively manage wire flow through cutting, stripping, terminating, and coiling processes, enhancing operational efficiency and product quality. They minimize friction and prevent wire damage, contributing to reduced downtime and waste. Different wire guide types, like roller guides and clips, are selected based on the specific machine function and wire characteristics;

Properly installed wire guides contribute to consistent and repeatable results, vital for high-volume production environments. They are essential for achieving accurate wire lengths, clean cuts, and reliable terminations, ultimately improving the overall performance of the finished product.

Electrical Connector Assemblies

Wire guides are crucial in electrical connector assemblies, ensuring accurate wire insertion and secure connections. They facilitate the precise routing of wires into connector housings, preventing damage and maintaining signal integrity. Specialized wire guide assemblies are designed for use with connectors featuring jack screws, creating a sealed and reliable connection.

These guides help overcome challenges presented by tight spaces and complex connector designs, simplifying the assembly process and reducing the risk of errors. They accommodate various wire gauges and insulation types, offering versatility in different applications. The use of appropriate wire guides is particularly important in high-density connectors.

By providing controlled wire placement, wire guides contribute to consistent connector performance and long-term reliability, essential for critical electronic systems.

Wiring Harnesses

Wire guides play a vital role in the creation of robust and organized wiring harnesses. A wiring harness, essentially a bundled collection of wires, benefits significantly from the controlled routing and support provided by these guides; They maintain wire separation, preventing tangling and ensuring each wire reaches its designated termination point without obstruction.

Within a harness, wire guides contribute to strain relief, protecting wires from bending, twisting, and potential damage during installation and operation. They are particularly useful in defining and maintaining the shape of wire segments within the harness, ensuring consistent performance.

Wire jigs, utilizing multiple aligned wire clamps, are employed in wire processing machines to facilitate harness construction, demonstrating the integration of guides into automated manufacturing processes.

Standard Wire Segments

Wire guides are integral to maintaining the integrity of standard wire segments within larger assemblies. These segments, representing defined lengths of wire connecting various components, require precise routing and support to ensure reliable performance. Wire guides achieve this by providing a defined pathway, preventing unwanted movement or stress on the wire.

In applications like wire processing machines, guides are used to position wire segments accurately during manufacturing. The use of a portyal type Ba attachment, alongside offset tracks with 4.0m spacing, exemplifies how guides define and maintain wire segment placement.

This controlled positioning is crucial for consistent quality and efficient assembly, particularly in high-volume production environments where precision is paramount. Properly guided wire segments contribute to the overall durability and functionality of the final product.

Wire Guide Usage and Installation

Cable guides simplify wiring installation, especially in challenging spaces, directing wires efficiently and securely. Proper installation ensures optimal protection and functionality.

Introducing Wiring Through Difficult Spaces

Wire guides excel at navigating complex routing scenarios where direct wire passage is impractical or impossible. These guides are specifically designed to introduce and direct wiring through hard-to-reach areas within machinery, equipment, and infrastructure.

Their application is vital in environments with tight bends, obstructions, or limited access points. By providing a smooth, low-friction pathway, wire guides minimize stress on the wires themselves, preventing damage and ensuring signal integrity. This is particularly crucial in applications involving sensitive electronics or high-frequency signals.

Effectively, they act as conduits, guiding the wires around obstacles and through confined spaces, simplifying the installation process and reducing the risk of errors. The use of appropriate wire guides significantly improves the reliability and longevity of the entire wiring system.

Securing and Protecting Wires

Wire guides don’t merely direct cables; they actively contribute to securing and protecting them from potential damage. Beyond routing, these guides provide crucial support, preventing wires from sagging, chafing, or becoming dislodged due to vibration or movement.

This is especially important in industrial settings and within machinery where constant operation can lead to wear and tear. By firmly holding wires in place, wire guides minimize the risk of short circuits, insulation breakdown, and signal interference.

Furthermore, certain wire guide designs, like strain relief types, specifically address the issue of stress concentration at connection points, extending the lifespan of both the wires and associated components. Proper securing translates directly into enhanced system reliability and reduced maintenance needs.

Wire Connectors and Their Purposes

Wire connectors establish reliable electrical connections, and numerous types exist for diverse applications, ranging from basic joining to specialized sealing requirements.

Common Wire Connector Types

Wire connectors are incredibly diverse, but several types are frequently encountered across various applications. Wire nuts, also known as push-in connectors, are a staple for joining two or more wires, providing insulation through a plastic shell. Crimp connectors utilize compression to create a secure connection, often used with specialized crimping tools for reliability.

Quick disconnects, or spade connectors, allow for easy connection and disconnection of wires, ideal for applications requiring frequent maintenance or component replacement. Butt connectors create a strong, insulated joint when wires are crimped within the connector’s metal sleeve. Terminal blocks offer a modular solution for connecting multiple wires, commonly found in control panels and electrical distribution systems.

Furthermore, screw terminals secure wires using screws, providing a robust and adjustable connection. These common types demonstrate the breadth of options available for establishing safe and effective electrical pathways.

Niche Wire Connectors

Beyond common types, a range of niche wire connectors cater to specialized applications. IDC (Insulation Displacement Connectors) are frequently used in telecommunications and data networking, piercing through insulation to establish a connection without stripping wires. Magnatic connectors offer a convenient, touchless connection, ideal for frequently connected/disconnected devices and harsh environments.

Splice connectors provide a permanent, environmentally sealed joint, often used in automotive or marine applications. Anderson Powerpole connectors are popular in amateur radio and power distribution, offering a secure, polarized connection. Barrier strips, similar to terminal blocks, are used for signal separation and organization in sensitive circuits.

Coded connectors prevent incorrect connections through physical keying, enhancing safety in critical systems. These specialized connectors demonstrate the industry’s ability to address unique wiring challenges.

Future Trends in Wire Guide Technology

Advancements in materials and integration with smart systems are poised to revolutionize wire guide technology, enhancing efficiency and automation.

Advancements in Materials

Wire guide material science is experiencing significant innovation, moving beyond traditional polymers and metals. Researchers are exploring high-performance thermoplastics offering superior durability, temperature resistance, and chemical compatibility. These new materials reduce friction, extending the lifespan of both the guide and the wires passing through them.

Furthermore, self-lubricating polymers are gaining traction, minimizing wear and tear and reducing the need for external lubrication. Composites, incorporating carbon fiber or graphene, are being investigated for increased strength-to-weight ratios, crucial in applications where space and weight are limited. The development of bio-based and recyclable materials also addresses growing sustainability concerns, aligning with eco-friendly manufacturing practices. These material advancements directly translate to improved performance, reliability, and environmental responsibility in wire management systems.

Integration with Smart Systems

Wire guides are evolving beyond passive components, increasingly integrating with smart systems for enhanced functionality and monitoring. Embedding sensors within wire guides allows for real-time data collection on wire tension, wear, and potential failure points. This data can be transmitted wirelessly for predictive maintenance, minimizing downtime and optimizing performance.

Furthermore, smart wire guides can incorporate automated adjustment mechanisms, adapting to varying wire diameters or routing configurations. Integration with machine learning algorithms enables self-optimization, improving efficiency and reducing manual intervention. These intelligent systems contribute to Industry 4.0 initiatives, fostering greater automation, connectivity, and data-driven decision-making in manufacturing and assembly processes. The future of wire management lies in these interconnected, responsive solutions.

nsw vets golf 2024 schedule pdf

NSW Veteran Golf 2024 Schedule: A Comprehensive Overview

The 2024 NSW Veteran Golfers Association Week of Golf program features around 50 events․
This comprehensive schedule caters to both male and female senior golfers throughout New South Wales, offering diverse opportunities․

NSW Veteran Golf represents a thriving community dedicated to providing enjoyable and competitive golfing experiences for mature-aged players across New South Wales․ The association orchestrates a robust calendar of events, culminating in the highly anticipated Week of Golf program․ This program, a cornerstone of the NSW veteran golfing scene, encompasses approximately 50 tournaments designed specifically for men and women golfers who embrace the spirit of the game later in life․

The 2024 schedule builds upon a long tradition of fostering camaraderie and skill development within the veteran golfing community․ It’s a testament to the enduring popularity of golf among seniors, offering a platform for social interaction, healthy competition, and the continued pursuit of golfing excellence․ The association’s commitment extends to ensuring accessibility and inclusivity, welcoming golfers of all skill levels to participate and enjoy the benefits of veteran golf in NSW․ Detailed information regarding the complete program is readily available․

What is the NSW Veteran Golfers Association?

The NSW Veteran Golfers Association (NVGA) is the governing body responsible for promoting and administering veteran golf throughout New South Wales․ Established to cater to the growing number of senior golfers, the NVGA organizes a comprehensive program of events, ensuring opportunities for competition and social interaction for players aged 55 and over․ The association’s core mission revolves around fostering a welcoming and inclusive environment where veteran golfers can continue to enjoy the sport they love․

With a network spanning across the state, the NVGA collaborates with numerous golf clubs to host tournaments and championships․ They manage a detailed annual schedule, including the popular Week of Golf program, which features around 50 events․ The association also provides support and resources to affiliated clubs, promoting best practices and ensuring consistent standards․ Information regarding membership, events, and the latest updates can be found through their official channels, including the readily available 2024 schedule PDF․

The 2024 Week of Golf Program

The 2024 NSW Veteran Golfers Association’s Week of Golf program represents the pinnacle of the annual calendar for many senior golfers in New South Wales․ This extensive program, detailed in the 2024 schedule PDF, comprises approximately 50 individual veteran golf events strategically located across various golf clubs throughout the state․ Designed to cater to both men and women, the program offers a diverse range of competitive and social golfing opportunities․

Events within the Week of Golf program vary in format, including individual stroke play, stableford, and team competitions, ensuring there’s something for every golfer’s preference․ The program’s popularity stems from its inclusive nature and the chance to connect with fellow veteran golfers from across NSW․ The complete schedule, accessible as a PDF, outlines dates, locations, event details, and entry requirements, allowing participants to plan their involvement effectively․ It’s a cornerstone of veteran golf in the region․

Key Dates and Locations for 2024

The 2024 NSW Veteran Golfers Association schedule PDF details a year brimming with activity․ While a complete listing requires consulting the official document, key dates are spread throughout the year, with a significant concentration during the traditional golfing season․ Events commence early in the year and continue through to December, offering consistent opportunities for participation․

Locations are equally diverse, encompassing a wide geographical spread across New South Wales․ Clubs hosting events range from well-known metropolitan courses to charming regional layouts․ Stonecutters Ridge Golf Club is notably featured, hosting a lunch event on July 8th, as indicated in recent updates․ The PDF provides a comprehensive list of venues, allowing golfers to select events convenient to their location․ Accessing the schedule is crucial for planning, as dates and locations are subject to change․ The document ensures golfers stay informed about where and when to play․

Tournament Formats

The 2024 NSW Veteran Golfers Association schedule PDF outlines a variety of tournament formats designed to cater to diverse preferences and skill levels․ The program encompasses events for men, women, and mixed teams, ensuring inclusivity for all veteran golfers․ While the PDF provides specific details for each tournament, common formats include individual stroke play, stableford, and four-person ambrose․

Men’s events frequently feature traditional stroke play competitions, testing golfers’ overall scoring ability․ Women’s events often incorporate stableford scoring, emphasizing consistent performance across all holes․ Mixed events commonly utilize the popular ambrose format, promoting teamwork and social interaction․ The schedule PDF clearly indicates the format for each event, allowing participants to choose competitions aligning with their strengths and enjoyment․ Variations within these formats may also exist, adding further interest and challenge throughout the year․ Detailed rules and conditions of play are typically available at each event․

Men’s Events

The 2024 NSW Veteran Golfers Association schedule PDF details a robust calendar of events specifically tailored for male veteran golfers across New South Wales․ These competitions span a wide range of formats, primarily focusing on individual stroke play and stableford, offering challenges for all skill levels․ Numerous tournaments are strategically located at premier golf clubs throughout the state, providing varied playing experiences․

The schedule highlights opportunities for competitive play, fostering camaraderie amongst participants․ Many events incorporate handicap systems, ensuring fair competition regardless of playing ability․ The PDF outlines key dates, locations, and entry requirements for each men’s tournament․ Expect a mix of single-day events and multi-day championships, catering to different time commitments․ These events are designed to promote both sporting excellence and social interaction within the veteran golfing community, as detailed within the comprehensive schedule document․

Women’s Events

The 2024 NSW Veteran Golfers Association schedule PDF showcases a dedicated series of events designed for female veteran golfers throughout New South Wales․ These tournaments mirror the men’s events in their diversity, primarily featuring individual stroke and stableford competitions, accommodating various playing strengths․ A significant number of these events are hosted at highly-regarded golf courses, offering enjoyable and challenging rounds․

The schedule emphasizes inclusivity and provides a platform for women to showcase their golfing talents․ Handicap systems are consistently applied to ensure equitable competition․ The PDF clearly outlines crucial details such as event dates, locations, and registration procedures for each women’s tournament․ Participants can anticipate a blend of one-day competitions and extended championships, fitting diverse schedules․ These events aim to cultivate a supportive and competitive environment, promoting both athletic achievement and social connections within the veteran women’s golfing sphere, as comprehensively presented in the schedule․

Mixed Events

The 2024 NSW Veteran Golfers Association schedule PDF details a selection of mixed events, fostering camaraderie and inclusive competition between male and female veteran golfers across New South Wales․ These events typically adopt a four-person ambrose or stableford format, encouraging teamwork and social interaction alongside individual skill․ The schedule highlights a commitment to providing opportunities for golfers of all abilities to participate and enjoy the game together․

Mixed events are strategically interspersed throughout the year, offering a refreshing change of pace from individual stroke play․ The PDF provides clear information regarding event dates, course locations, and specific team composition guidelines․ These tournaments often feature relaxed atmospheres and social gatherings, enhancing the overall golfing experience․ Handicapping systems are carefully applied to ensure fairness, allowing teams with varying skill levels to compete on a level playing field․ The schedule demonstrates the Association’s dedication to creating a welcoming and enjoyable environment for all veteran golfers, promoting both sporting excellence and social bonds․

Eligibility Criteria for Participation

The 2024 NSW Veteran Golfers Association schedule PDF outlines specific eligibility requirements for participation in all sanctioned events․ Generally, golfers must be aged 55 years or older to compete in veteran tournaments across New South Wales․ However, certain events may have age restrictions differing slightly, clearly indicated within the detailed schedule․ Participants must hold a current Golf Australia handicap, ensuring a standardized measure of playing ability․

The PDF emphasizes that golfers must be financial members of an affiliated golf club, demonstrating a commitment to the sport and adherence to established golfing protocols․ Furthermore, adherence to the Association’s code of conduct is mandatory, promoting fair play and respectful behavior on and off the course․ Specific tournament formats may impose additional criteria, such as maximum handicap limits, to ensure competitive balance․ Detailed information regarding eligibility is readily available within the schedule, allowing prospective participants to confirm their suitability before registering․ The Association strives for inclusivity while maintaining the integrity of its competitions․

Registration Process and Fees

The 2024 NSW Veteran Golfers Association schedule PDF details the registration process for each tournament, typically requiring online submission through the Association’s official website․ Participants will need to create an account or log in to an existing one to access the registration portal․ The PDF provides direct links to each event’s registration page, streamlining the application process․ Required information includes personal details, Golf Australia handicap, affiliated club membership, and event selections․

Tournament entry fees vary depending on the event’s prestige, location, and prize pool, with specific costs clearly outlined in the schedule․ Payment is generally accepted via credit card or electronic funds transfer (EFT)․ Early bird discounts may be available for registrations completed before a specified date, encouraging prompt participation․ The schedule also notes any applicable refund policies․ Registration closes one week prior to each event, allowing sufficient time for event organization․ Confirmation of registration will be sent via email, including essential event details and contact information․

Notable Tournaments in the 2024 Schedule

The 2024 NSW Veteran Golfers Association schedule PDF highlights several key tournaments attracting significant participation․ Among these, the event at Stonecutters Ridge Golf Club on July 8th, as noted in recent communications, stands out as a popular fixture․ This tournament typically features a stableford format and offers a challenging course layout for players of all skill levels․ The schedule PDF details the tee times, competition rules, and prize distribution for this event․

Other prominent tournaments include those hosted at prestigious clubs across NSW, offering opportunities to compete against fellow veteran golfers in a friendly yet competitive environment․ The schedule indicates events with varying entry fees and handicap requirements, catering to a diverse range of players․ Detailed information regarding each tournament, including course details, accommodation options, and social events, is readily available within the comprehensive schedule PDF․ These events foster camaraderie and celebrate the spirit of veteran golf in New South Wales․

Stonecutters Ridge Golf Club Event

The NSW Veteran Golfers Association’s 2024 schedule PDF specifically details the event at Stonecutters Ridge Golf Club, scheduled for Thursday, July 8th․ Ken Atkins is organizing a lunch gathering in conjunction with the tournament, fostering a social atmosphere alongside the competition․ This event is a highly anticipated fixture, known for its well-maintained course and welcoming environment for veteran golfers․

The schedule PDF provides crucial details regarding the event format, likely a stableford competition, and outlines the handicap requirements for participation․ It also includes information on entry fees, prize money, and the contact details for event organizers․ Players can find details on tee times and the day’s itinerary within the document․ Stonecutters Ridge offers a challenging yet enjoyable golfing experience, making it a popular choice for veteran golfers seeking a competitive and social outing․ The PDF serves as the central resource for all event-related information․

Understanding the Schedule PDF

The 2024 NSW Veteran Golfers Association schedule PDF is the central repository for all tournament information․ It’s meticulously organized, detailing over 50 events across New South Wales for senior golfers․ The document clearly outlines key dates, locations, and tournament formats – men’s, women’s, and mixed events are all individually listed․

Each event entry within the PDF typically includes the host club, contact information for the event organizer, entry fees, and specific handicap requirements․ Understanding the PDF’s structure is crucial for efficient planning․ Players can quickly identify events aligning with their skill level and location preferences; The PDF also often contains details regarding registration deadlines and any special conditions of play․ It’s a comprehensive guide designed to streamline the participation process for veteran golfers, ensuring a smooth and enjoyable golfing experience throughout the year․

Accessing the Official 2024 Schedule PDF

The official 2024 NSW Veteran Golfers Association schedule PDF is readily accessible through the Association’s official channels․ Typically, it’s prominently featured on their website’s homepage, often within a “News” or “Events” section․ A direct link to the PDF download is usually provided for immediate access․

Alternatively, the schedule PDF may be distributed via email to registered members of the NSW Veteran Golfers Association․ Ensure your membership is current to receive these updates directly․ Checking affiliated golf clubs’ websites is another avenue, as they frequently post the schedule for their members․ Social media platforms associated with the Association may also share links to the PDF․ Downloading and saving the PDF to your device allows for offline viewing and convenient reference when planning your participation in the 2024 Week of Golf program․

Recent Updates and Changes (as of 02/06/2026)

As of today, February 6th, 2026, the 2024 NSW Veteran Golf schedule remains largely consistent with the originally published PDF․ However, minor adjustments have been implemented based on course availability and unforeseen circumstances․ Notably, the Stonecutters Ridge Golf Club event, initially scheduled for July 8th, 2024, experienced a slight modification to its tee-off times due to a pre-booked function․

Furthermore, several golfers reported intermittent issues accessing Instagram, potentially impacting communication regarding event updates․ The Association advises checking the official website for the most accurate information․ While the core program of approximately 50 events remains intact, members are encouraged to regularly review the latest version of the schedule PDF, available on the NSW Veteran Golfers Association website, to confirm event details and any last-minute changes․ Any significant alterations will be communicated via email to registered members․

Contact Information for NSW Veteran Golf

For inquiries regarding the 2024 schedule, event registrations, or any related matters, please reach out to the NSW Veteran Golfers Association through the following channels․ Direct email correspondence can be sent to the association’s dedicated email address, which is readily available on their official website․ Alternatively, members can connect via phone during business hours; the contact number is also listed on the website’s ‘Contact Us’ page․

Please note that due to high volumes of inquiries, especially concerning the PDF schedule, response times may vary․ The association encourages members to first consult the frequently asked questions (FAQ) section on the website, as many common queries are addressed there․ For urgent matters or technical difficulties accessing the schedule PDF, a dedicated support line is available․ Social media channels, including Facebook, may also provide updates, but official communication remains through the website and direct contact methods․

Related Golfing Events in NSW

Beyond the NSW Veteran Golfers Association’s extensive 2024 program, New South Wales boasts a vibrant golfing calendar with numerous events catering to diverse skill levels and age groups․ Regional golf associations frequently host tournaments, offering opportunities for competitive play and camaraderie․ Several golf clubs across the state organize open days and championships, welcoming both members and visitors․

For golfers seeking broader competitive experiences, Golf NSW oversees a range of amateur and professional tournaments throughout the year․ These events often coincide with or complement the veteran golfers’ schedule, providing additional playing options․ Information regarding these events, including entry details and schedules, can be found on the Golf NSW website․ Furthermore, local pro shops and golf clubs are excellent resources for discovering smaller, community-based golfing events happening near you․ Checking club newsletters and online event listings will reveal a wealth of opportunities․

Resources for Veteran Golfers

Veteran golfers in NSW have access to a growing network of support and information․ The NSW Veteran Golfers Association website serves as a central hub for schedules, event details, and association news․ Golf NSW also provides resources tailored to senior players, including information on handicapping, course access, and relevant competitions․ Many golf clubs throughout the state actively promote veteran golf programs and offer dedicated tee times and social events․

For golfers seeking to improve their game, numerous coaching clinics and workshops are available, often specifically designed for seniors․ Local pro shops can connect players with qualified instructors․ Online resources, such as golf instruction videos and articles, can supplement on-course learning․ Additionally, connecting with fellow veteran golfers through club memberships and social groups fosters a supportive community and provides opportunities for shared learning and enjoyment of the game․

2d and 3d shapes worksheets pdf

Article Plan: 2D and 3D Shapes Worksheets PDF

This article details a plan for creating resources on 2D and 3D shapes, including printable worksheets for kindergarten and beyond, sourced from sites like Kids-Flashcards.com and 3 Dinosaurs.

Understanding geometric shapes is fundamental in early childhood education. This exploration begins with differentiating between two-dimensional (2D) and three-dimensional (3D) forms. Printable worksheets offer an engaging method to introduce these concepts, covering shapes like triangles, rectangles, and spheres. Resources, such as those available as PDF downloads, provide interactive activities.

These worksheets often involve cutting, pasting, and identifying shapes, fostering crucial skills. Learning about shape attributes, like sides and vertices, is also key. Furthermore, understanding the difference between 2D and 3D shapes lays a foundation for more advanced geometry concepts. Sites like Kids-Flashcards.com and 3 Dinosaurs offer valuable materials.

What are 2D Shapes?

Two-dimensional (2D) shapes are flat surfaces that only have length and width. They exist on a plane and lack depth. Common examples, frequently featured in kindergarten worksheets, include circles, squares, triangles, and rectangles. These shapes are easily represented on paper and are fundamental to understanding geometry. Printable resources often focus on shape recognition and drawing.

Worksheets typically ask children to identify 2D shapes within pictures or to sort them based on their properties. Activities might involve counting sides or vertices. Understanding 2D shapes is a building block for grasping more complex geometric concepts. Resources from sites like Kids-Flashcards.com provide excellent visual aids and practice exercises.

Common 2D Shapes and Their Properties

Several 2D shapes are foundational in early geometry education, often highlighted in printable worksheets. Circles are defined by all points being equidistant from a center, lacking straight sides. Squares possess four equal sides and four right angles. Triangles have three sides and three angles, varying in types (equilateral, isosceles, scalene). Rectangles feature four right angles and opposite sides of equal length.

Worksheets frequently focus on identifying these shapes and their attributes. Activities may involve counting sides, recognizing angles, or differentiating between shapes. Resources from platforms like 3 Dinosaurs offer shape lacing cards and printable activities to reinforce these concepts. Understanding these properties is crucial for further geometric exploration.

Circles

Circles represent a fundamental 2D shape, distinguished by all points being equidistant from a central point. Worksheets often introduce circles through simple recognition tasks, asking children to identify them amongst other shapes. More advanced activities might involve drawing circles using templates or freehand. Understanding that a circle has no sides or corners is a key concept.

Printable resources, such as those found on Kids-Flashcards.com, frequently include circle-focused exercises. These can range from coloring circles to tracing their outlines. The concept of radius and diameter, while more complex, can be subtly introduced through visual representations on worksheets. Mastering circle recognition builds a foundation for understanding more complex shapes.

Squares

Squares are a cornerstone 2D shape, defined by four equal sides and four right angles. Worksheets commonly begin with identifying squares amongst a variety of shapes, reinforcing visual recognition. Activities progress to counting the sides of a square, solidifying the understanding of its properties. Children learn that all sides must be equal for a shape to qualify as a square.

Printable square worksheets, available from resources like 3 Dinosaurs, often include tasks like coloring squares, tracing their outlines, and differentiating them from rectangles. More challenging exercises might involve identifying squares within complex images or patterns. Understanding squares is crucial as they form the basis for many other geometric concepts and real-world objects.

Triangles

Triangles, fundamental 2D shapes, are characterized by three sides and three angles. Worksheets introduce various types – equilateral, isosceles, and scalene – helping children discern differences based on side and angle measurements. Initial exercises focus on recognizing triangles amidst other shapes, building foundational visual skills.

Printable triangle worksheets, often found on platforms like Kids-Flashcards.com, include activities like coloring, tracing, and identifying triangles in everyday objects. More advanced worksheets may involve classifying triangles by their angles (acute, obtuse, right). Understanding triangles is essential, as they are building blocks for more complex polygons and appear frequently in architecture and design.

Rectangles

Rectangles, a cornerstone of 2D geometry, possess four sides and four right angles. Worksheets emphasize that opposite sides are equal in length, differentiating them from squares. Early activities involve identifying rectangles in pictures and real-world scenarios – doors, books, and tables are common examples.

Printable rectangle worksheets, readily available as PDFs, often include tasks like drawing rectangles with specific dimensions, calculating perimeter, and comparing rectangles of varying sizes. Resources like those found through online searches offer shape sorting exercises, where children categorize rectangles alongside other quadrilaterals. Mastering rectangles builds a strong base for understanding area and more complex geometric concepts.

What are 3D Shapes?

Three-dimensional shapes, unlike their 2D counterparts, possess length, width, and height, occupying space. These shapes are often referred to as solids. Understanding 3D shapes is crucial for developing spatial reasoning skills, essential in fields like engineering and architecture. Worksheets focusing on 3D shapes move beyond flat representations, introducing concepts like faces, edges, and vertices.

Printable resources often depict 3D shapes from various angles, challenging children to visualize them in their entirety. Activities include identifying 3D shapes from images and matching them to real-world objects. Exploring 3D shapes through hands-on activities, like building with blocks, complements worksheet practice effectively.

Common 3D Shapes and Their Properties

Several fundamental 3D shapes frequently appear in educational materials. Cubes boast six equal square faces, while spheres are perfectly round. Cylinders feature two circular bases connected by a curved surface, and cones have a circular base tapering to a point. Triangular prisms possess triangular faces, and pyramids have a polygonal base and triangular sides.

Worksheets often focus on identifying these shapes and their unique properties – the number of faces, edges, and vertices. Resources like those found on Kids-Flashcards.com detail these attributes for 14 different 3D shapes. Understanding these properties builds a strong foundation for geometry and spatial reasoning.

Cubes

Cubes are foundational 3D shapes, characterized by six identical square faces. Worksheets frequently challenge students to identify cubes amongst other 3D objects, and to count their faces, edges, and vertices – a cube has 6 faces, 12 edges, and 8 vertices. Printable resources often include nets of cubes, allowing children to construct them, reinforcing spatial understanding.

Activities may involve recognizing cubes in real-world objects, like dice or building blocks. Understanding cubes is crucial for developing geometric reasoning skills. Resources like those available as PDF downloads emphasize the cube’s symmetrical nature and its role in building more complex 3D structures.

Spheres

Spheres, perfectly round 3D shapes, present a unique challenge for young learners. Unlike shapes with flat faces, spheres have a continuous surface. Worksheets often focus on identifying spheres from images and relating them to everyday objects like balls or globes. Activities may involve differentiating spheres from cylinders or cones, emphasizing their lack of edges and vertices.

Printable resources can include coloring activities featuring spheres, or tasks requiring students to describe their properties. Understanding spheres builds spatial reasoning and visualization skills. PDF worksheets frequently highlight the sphere’s symmetry and its role in various real-world applications, from sports equipment to planetary models.

Cylinders

Cylinders, characterized by two circular bases connected by a curved surface, are a common 3D shape found in many everyday objects. Worksheets dedicated to cylinders often focus on identifying them from pictures and real-world examples like cans or tubes. Activities may involve counting the faces, edges, and vertices – a key skill for understanding 3D geometry.

PDF resources frequently include tasks where students differentiate cylinders from cones or prisms. Some worksheets utilize “shape nets,” allowing children to construct cylinders from a 2D template. These exercises reinforce spatial reasoning and visualization. Learning about cylinders helps build a foundation for understanding volume and surface area concepts later on.

Cones

Cones, defined by a circular base and a single vertex, present a unique challenge in 3D shape recognition. Worksheets often depict cones alongside similar shapes like cylinders, requiring students to carefully observe and differentiate their features. Identifying cones in real-world objects – ice cream cones, party hats – is a common activity.

PDF resources frequently include exercises focused on counting the faces, edges, and vertices of a cone. Shape nets for cones are also prevalent, enabling children to build the shape and understand its 2D representation. Understanding cones is crucial for grasping concepts related to volume and spatial visualization. Worksheets may also explore the difference between right circular cones and oblique cones.

Difference Between 2D and 3D Shapes

The fundamental distinction lies in dimensionality: 2D shapes exist on a flat plane (length and width), while 3D shapes occupy space (length, width, and height). Worksheets emphasize this contrast through visual comparisons and hands-on activities. 2D shapes, like squares and triangles, are flat representations, whereas 3D shapes, such as cubes and spheres, have volume.

PDF resources often include exercises asking students to identify whether an object is 2D or 3D. Understanding this difference is foundational for geometry. Worksheets may also present 2D nets that can be folded to create 3D shapes, illustrating the relationship between the two. Recognizing real-world examples of both types of shapes reinforces the concept.

Benefits of Using Worksheets for Learning Shapes

Shape worksheets, particularly in PDF format, offer a structured and engaging way to build foundational geometry skills. They provide repeated practice, crucial for solidifying shape recognition and understanding properties. Printable resources are cost-effective and accessible, suitable for both classroom and home learning. Worksheets cater to various learning styles through visual, kinesthetic (cutting/pasting), and analytical activities.

Furthermore, they allow for individualized learning, enabling students to progress at their own pace. Resources like those from Kids-Flashcards.com and 3 Dinosaurs offer diverse exercises, from simple identification to more complex sorting and net construction. This reinforces spatial reasoning and problem-solving abilities, preparing students for advanced mathematical concepts.

Worksheet Activities for 2D Shapes

Numerous engaging activities can be incorporated into 2D shape worksheets. Shape recognition exercises ask children to identify circles, squares, triangles, and rectangles from a group of images. Shape sorting activities challenge them to categorize shapes based on attributes like sides and corners. Cutting and pasting activities, highlighted in resources, enhance fine motor skills while reinforcing shape identification.

Worksheets can also include coloring exercises, where specific shapes must be colored according to instructions. More advanced activities involve drawing shapes or completing patterns using 2D forms. These printable resources, often available as PDFs, provide a fun and interactive way to learn foundational geometry concepts, preparing students for more complex spatial reasoning tasks.

Shape Recognition Activities

Shape recognition forms the cornerstone of early geometry learning. Worksheets dedicated to this skill present children with a variety of 2D shapes – circles, squares, triangles, and rectangles – often mixed with other images. The core task involves identifying and circling or coloring the specified shapes. Variations include “find the…” activities, where children locate a certain shape within a complex picture.

These exercises build visual discrimination skills and reinforce shape names. Printable resources frequently feature pictures alongside shapes, connecting geometric forms to real-world objects. Some worksheets ask children to draw lines connecting matching shapes, further solidifying recognition. These activities, readily available as PDFs, are crucial for developing a strong foundation in geometric concepts.

Shape Sorting Activities

Shape sorting worksheets challenge children to categorize 2D shapes based on their attributes. These activities typically involve cutting out shapes and then gluing them into designated columns or sections labeled with specific criteria – such as number of sides or corners. Worksheets might ask students to sort shapes by color, size, or type (e.g., all triangles together).

More advanced sorting tasks could involve identifying shapes that don’t belong in a group, promoting critical thinking. Printable PDFs often include pre-cut shapes for convenience, or require scissor skills practice. These exercises reinforce understanding of shape properties and develop logical reasoning. They are a fun and effective way to solidify shape identification and classification skills, preparing children for more complex geometric concepts.

Worksheet Activities for 3D Shapes

Worksheets focusing on 3D shapes build spatial reasoning skills. Activities include identifying shapes from various perspectives – front, side, and top views – enhancing visualization abilities. Printable resources often feature images of real-world objects (balls, boxes, cones) and ask children to match them to the corresponding 3D shape name.

Another common activity involves recognizing 3D shapes from their nets (2D patterns that fold into 3D forms). Worksheets may also present scenarios where students determine which 3D shape can be constructed from a given net. These exercises promote understanding of 3D shape properties and their relationship to 2D representations, fostering a deeper comprehension of geometry.

Identifying 3D Shapes from Images

Worksheets dedicated to image identification are crucial for mastering 3D shapes. These typically present a series of pictures depicting cubes, spheres, cylinders, cones, and other 3D objects. Students are tasked with correctly naming each shape, reinforcing visual recognition skills. Variations include worksheets with multiple-choice options or requiring students to draw lines connecting shapes to their names.

More advanced exercises might show 3D shapes in different orientations or partially obscured, challenging students to recognize them regardless of perspective. Some resources incorporate real-world examples, asking children to identify the 3D shapes present in everyday objects, bridging the gap between abstract concepts and practical application.

Matching 3D Shapes to Real-World Objects

Connecting geometric forms to tangible items solidifies understanding. Worksheets focusing on this skill present 3D shapes alongside pictures of everyday objects – a ball for a sphere, a box for a cube, a can for a cylinder, and so on. Students draw lines to match each shape to its corresponding real-world representation.

These activities enhance spatial reasoning and demonstrate the relevance of geometry in daily life. More complex worksheets might include multiple objects per shape, requiring careful consideration. Some resources ask students to list real-world examples for each shape, fostering creative thinking and reinforcing shape properties. This practical application is key to long-term retention.

Using Shape Nets to Create 3D Shapes

Shape nets are 2D patterns that, when folded, form 3D shapes. Worksheets provide these nets – for cubes, pyramids, cylinders, and more – as a hands-on learning tool; Students cut out the nets, fold along the lines, and tape or glue them to construct the 3D object. This activity bridges the gap between flat representations and solid forms.

Printable 3D shape net cards are readily available, ideal for classroom or homeschooling. Understanding nets develops spatial visualization skills and reinforces knowledge of shape faces, edges, and vertices. Some worksheets challenge students to identify the 3D shape a net will create before folding, enhancing predictive abilities.

Free Printable 2D Shapes Worksheets for Kindergarten

Numerous free printable 2D shapes worksheets are available for kindergarteners, focusing on shape recognition and basic skills. These resources often feature colorful illustrations of triangles, rectangles, ovals, and hexagons, making learning engaging. Activities commonly include tracing shapes, coloring, and identifying shapes within pictures.

Many worksheets instruct children to cut out shapes and objects, then paste them onto designated areas, reinforcing fine motor skills alongside shape knowledge. These resources aim to build a foundational understanding of geometry. Websites offer diverse options, catering to different learning styles and skill levels, ensuring a fun and effective introduction to 2D geometry.

Free Printable 3D Shape Worksheets

A wealth of free printable 3D shape worksheets are accessible online, designed to help children grasp spatial reasoning and geometric concepts. These resources typically cover cubes, spheres, cylinders, and cones, often presenting them through visual aids and interactive exercises. Worksheets frequently involve identifying 3D shapes from images or matching them to real-world objects.

Furthermore, many printable sets include 3D shape nets – flattened patterns that can be folded to construct the shapes, enhancing hands-on learning. These materials are valuable for both classroom instruction and homeschooling, providing a fun and effective way to explore three-dimensional geometry and develop spatial skills.

Where to Find 2D and 3D Shapes Worksheets PDF

Numerous online platforms offer free downloadable 2D and 3D shapes worksheets in PDF format. Kids-Flashcards.com provides resources focusing on two-dimensional forms, ideal for foundational learning. 3 Dinosaurs offers printable shape lacing cards, allowing for creative and engaging practice. General online searches reveal a variety of options, including worksheets targeting shape recognition, sorting, and net construction.

Additionally, educational websites and teacher resource hubs often host collections of geometry worksheets. These resources cater to different grade levels and learning styles, ensuring accessibility for diverse learners. Downloading PDFs allows for easy printing and repeated use, making them a convenient tool for educators and parents alike.

Worksheet Resources: Kids-Flashcards.com

Kids-Flashcards.com presents a valuable collection of educational materials, notably focusing on two-dimensional shapes. The platform offers resources designed to aid in shape identification and understanding fundamental geometric concepts. Their materials, available as downloadable PDFs, are particularly useful for introducing shapes to young learners.

The website’s offerings appear geared towards early childhood education, providing a solid foundation in geometry. While the provided information specifically highlights 2D shapes, it suggests a commitment to visually engaging learning tools. Educators and parents can leverage these resources to supplement classroom instruction or provide at-home learning activities, fostering a strong grasp of basic shapes.

Worksheet Resources: 3 Dinosaurs

3 Dinosaurs offers a range of free printable resources, including shape lacing cards, designed to enhance shape recognition skills. These materials are readily available for download and printing, making them a convenient option for both classroom use and homeschooling environments. The platform’s focus is on providing accessible and engaging educational content for young children.

Users are granted permission to download and print the shape lacing cards for personal or educational purposes, promoting widespread access to learning tools. This resource is particularly beneficial for developing fine motor skills alongside shape identification. 3 Dinosaurs consistently delivers well-structured and visually appealing worksheets, supporting a playful approach to learning geometry.

Tips for Using Shape Worksheets Effectively

To maximize learning, start with simple shape recognition activities before progressing to more complex tasks like sorting or identifying 3D shapes from images. Encourage children to relate shapes to real-world objects, reinforcing their understanding through practical application. Vary the activities to maintain engagement and cater to different learning styles.

Consider incorporating hands-on activities alongside worksheets, such as building with blocks or creating shape collages. Provide positive reinforcement and focus on effort rather than just correct answers. Adapt the worksheets to suit the child’s individual pace and skill level, offering support when needed. Regularly review previously learned shapes to solidify retention.

Adapting Worksheets for Different Learning Levels

For beginners, focus on basic 2D shape recognition with simple worksheets featuring clear, large images. Gradually introduce 3D shapes, starting with cubes and spheres. Provide assistance with cutting and pasting activities, and simplify sorting tasks by reducing the number of options.

For more advanced learners, introduce worksheets that require identifying shapes within complex designs or creating their own patterns. Challenge them with shape nets to construct 3D models. Encourage independent work and problem-solving, offering guidance only when necessary. Utilize worksheets that incorporate symmetry or geometric concepts to extend their understanding;

Utilizing 2D and 3D shapes worksheets, readily available as free PDFs from resources like Kids-Flashcards.com and 3 Dinosaurs, provides a dynamic and engaging learning experience. These resources cater to diverse learning styles, fostering shape recognition, spatial reasoning, and problem-solving skills.

By adapting worksheets to suit individual learning levels, educators and parents can ensure effective comprehension. From basic identification to constructing 3D models with nets, worksheets offer a progressive path to mastery. Consistent practice and interactive activities solidify understanding, building a strong foundation in geometry for future mathematical exploration.

24 week half marathon training plan pdf

Embarking on a half marathon journey requires dedication, and a structured plan is key! This 24-week program provides a comprehensive approach, building endurance and speed.

What is a Half Marathon?

A half marathon is a road running event covering a distance of 13.1 miles (21.1 kilometers) – precisely half the distance of a full marathon. It’s a challenging yet achievable goal for runners of varying experience levels, representing a significant step up from 5k and 10k races. Successfully completing a half marathon demands considerable physical preparation, including consistent running, strength training, and proper nutrition.

Many find the half marathon distance appealing because it requires a substantial commitment without the extreme demands of a full marathon. It’s a fantastic way to test your endurance, improve your fitness, and experience the thrill of long-distance running. The 24-week training plan is designed to progressively prepare you for this exciting challenge, building a solid foundation and maximizing your potential for success. It’s a journey of dedication and self-improvement!

Why Choose a 24-Week Plan?

Opting for a 24-week half marathon training plan offers a significant advantage: gradual progression. This extended timeframe allows for a slower, more sustainable build-up of mileage and intensity, minimizing the risk of injury – a crucial factor for long-term running success. Unlike shorter plans, a 24-week approach accommodates runners with varying starting points, including those new to consistent running.

This duration provides ample opportunity to establish a strong base, incorporate strength training, and refine your nutrition strategy. It also allows for flexibility to adjust the plan based on your individual progress and life commitments. The longer timeline fosters mental preparedness, building confidence and reducing pre-race anxiety. It’s about more than just completing 13.1 miles; it’s about enjoying the process and developing a lasting love for running!

Prerequisites: Current Running Level

Before diving into this 24-week half marathon plan, honestly assess your current running fitness. Ideally, you should comfortably run a 5k (3.1 miles) without stopping, and ideally be able to complete it in around 24:30 or a 10k in 50 minutes. A consistent running base of at least 25 miles per week is also beneficial, though adaptable for those starting from a lower mileage.

This plan isn’t designed for complete beginners; some running experience is essential. If you’re new to running, consider a shorter “Couch to 5k” program first to build a foundational level of fitness. Prior experience with shorter distances like 5k and 10k will significantly improve your success and enjoyment; Be prepared to dedicate time to consistent training and prioritize recovery to avoid injury and maximize results.

Phase 1: Base Building (Weeks 1-8)

This initial phase focuses on establishing a solid running foundation, gradually increasing mileage with easy runs and incorporating strength training for injury prevention.

Week 1-4: Establishing a Foundation

The first four weeks are crucial for building a base level of fitness, preparing your body for the demands ahead. Focus on consistency over intensity, prioritizing easy-paced runs to build aerobic capacity. Begin with three runs per week, gradually increasing the duration of each run by no more than 10% each week. Include one short run, one medium-length run, and one long run, ensuring adequate recovery between sessions.

Don’t underestimate the importance of rest days! These allow your muscles to repair and rebuild. Incorporate cross-training activities like swimming or cycling to maintain fitness without stressing your running muscles. Pay attention to your body and don’t push through pain. This phase is about establishing a sustainable routine and building a solid foundation for future training. Remember to listen to your body and adjust the plan as needed.

Week 5-8: Increasing Mileage Gradually

As you progress into weeks five through eight, the focus shifts to incrementally increasing your weekly mileage. Continue prioritizing easy runs for the majority of your training, but begin to subtly extend the distance of your long run each week. A good rule of thumb is the 10% rule – never increase your total weekly mileage by more than 10%. This minimizes the risk of injury and allows your body to adapt.

Introduce short, easy-paced interval sessions to gently stimulate speed development. Remember, these aren’t all-out sprints; they’re controlled efforts. Continue incorporating cross-training and strength training to support your running. Pay close attention to any signs of fatigue or discomfort, and don’t hesitate to take extra rest days when needed. Consistency remains key, but smart progression is paramount during this phase.

Importance of Easy Runs

Easy runs form the bedrock of any successful half marathon training plan, constituting a significant portion of your weekly mileage. These runs should be conversational pace – you should be able to hold a comfortable conversation without gasping for air. They build aerobic capacity, strengthen muscles and tendons, and improve your body’s efficiency at using fat as fuel.

Don’t underestimate their value! Easy runs aren’t “wasted” effort; they’re crucial for recovery and adaptation. Resist the urge to push the pace on every run. Maintaining a truly easy effort allows your body to recover from harder workouts and prepares you for the demands of longer distances. Prioritize these runs, and you’ll build a solid foundation for success, minimizing injury risk and maximizing endurance.

Incorporating Strength Training

Strength training is a vital, often overlooked, component of a comprehensive half marathon plan. It’s not about building bulk; it’s about enhancing running economy, preventing injuries, and improving performance. Focus on exercises that strengthen your core, glutes, and legs – the powerhouses of running.

Include exercises like squats, lunges, planks, and calf raises 2-3 times per week. These build strength and stability, reducing the risk of common running injuries. Don’t neglect upper body strength, as it contributes to good running form. Remember to start with bodyweight exercises and gradually add resistance as you get stronger. Prioritize proper form over lifting heavy weights to avoid injury and maximize benefits. A strong body is a resilient body!

Phase 2: Building Endurance (Weeks 9-16)

Now, we focus on increasing your long run distance and introducing speed work! This phase builds a strong aerobic base for sustained running performance.

Long Run Progression

The cornerstone of half marathon training is the long run, progressively increasing in distance each week to build endurance. Starting conservatively, gradually add mileage – typically no more than 10% per week – to avoid injury. This phase, weeks 9-16, sees your long runs extending from around 6-8 miles to potentially 10-12 miles, depending on your initial fitness level and the plan’s specifics.

These longer efforts teach your body to efficiently utilize fat as fuel and strengthen your cardiovascular system. Don’t prioritize pace during long runs; focus on completing the distance comfortably. Incorporate walk breaks if needed, especially in the early stages of progression. Remember to practice your race day nutrition and hydration strategies during these longer runs to dial in what works best for you. Consistent, gradual increases are far more effective – and safer – than attempting to jump mileage too quickly. Listen to your body and adjust as needed!

Tempo Runs: Finding Your Lactate Threshold

Tempo runs are sustained efforts at a comfortably hard pace, designed to improve your lactate threshold – the point at which lactic acid begins to accumulate rapidly in your muscles. This translates to running faster for longer. Typically, a tempo run includes a warm-up, 20-40 minutes at tempo pace, and a cool-down.

Finding your tempo pace is crucial; it should feel challenging but sustainable. A good indicator is a pace you could maintain for roughly an hour in a race. Initially, start with shorter tempo segments and gradually increase the duration. These runs build mental toughness alongside physical endurance. Don’t confuse tempo runs with interval training – tempo runs are continuous, while intervals involve bursts of speed with recovery periods. Consistent tempo work will significantly enhance your half marathon performance, allowing you to push through fatigue and maintain a strong pace.

Interval training introduces high-intensity bursts of running interspersed with recovery periods, dramatically improving speed and cardiovascular fitness. These workouts are key to boosting your pace and efficiency. A typical interval session might involve 6-8 repetitions of 400m runs at a fast pace, followed by equal recovery jogs.

As the plan progresses, intervals can be lengthened (e.g., 800m, 1km) or the recovery periods shortened to increase the challenge. Proper warm-up and cool-down are essential to prevent injury. Interval training isn’t about sprinting; it’s about running at a challenging, but controlled, pace. Focus on maintaining good form throughout each repetition. Integrating speed work into your routine will enhance your leg turnover and overall running economy, ultimately leading to a faster half marathon time. Remember to listen to your body and adjust the intensity as needed.

Nutrition for Endurance

Fueling your body correctly is paramount during a 24-week half marathon training plan. Endurance running demands a strategic approach to nutrition, focusing on sustained energy levels. Prioritize complex carbohydrates like whole grains, fruits, and vegetables to provide a steady release of glucose. Adequate protein intake is crucial for muscle repair and recovery, approximately 0.5-0.8 grams per pound of body weight.

Hydration is equally vital; drink water consistently throughout the day, especially before, during, and after runs. Experiment with energy gels or chews during longer runs to determine what works best for you. Avoid processed foods, excessive sugar, and unhealthy fats. A balanced diet supports your training, prevents fatigue, and optimizes performance. Pay attention to your body’s signals and adjust your intake accordingly, ensuring you’re adequately fueled for each workout and recovery period.

Phase 3: Peak Training (Weeks 17-20)

This phase maximizes mileage and introduces focused workouts, preparing your body for race day demands. Intensity increases, building strength and endurance simultaneously.

Maximum Mileage Weeks

During weeks 17 through 20, you’ll encounter your highest weekly mileage, a crucial component of peak training. This isn’t about simply running more; it’s about strategically increasing volume to enhance your body’s capacity for endurance. Expect to reach peak distances, potentially exceeding those run previously in the plan. Remember, gradual progression is paramount – avoid sudden jumps in mileage to minimize injury risk.

These weeks are designed to stress your cardiovascular system and musculoskeletal structure, forcing adaptation and improvement. Pay close attention to recovery, ensuring adequate sleep and nutrition to support the increased demands. Don’t be afraid to adjust the plan slightly based on how your body responds. Listen to signals of fatigue or pain, and prioritize rest when needed. Successfully navigating these maximum mileage weeks will build the confidence and physical preparedness necessary for a strong finish.

Race Pace Workouts

Integrating race pace workouts into your training is vital for familiarizing your body with the intended speed for the half marathon. These sessions aren’t about all-out sprinting; they’re about sustained effort at your goal pace, building both physical and mental endurance. Expect intervals where you run for specific durations at race pace, interspersed with recovery periods.

These workouts help refine your pacing strategy and improve your lactate threshold, delaying fatigue during the race. Gradually increase the duration of these race pace intervals as you progress through the peak training phase. Practice maintaining consistent form and breathing throughout these efforts. Remember to warm up thoroughly before each session and cool down afterward. Mastering race pace will translate directly into improved performance on race day, allowing you to execute your strategy with confidence.

Hill Training for Strength

Incorporating hill training is a fantastic way to build strength, power, and endurance, all crucial for half marathon success. Running uphill forces your muscles to work harder, improving your cardiovascular fitness and leg strength. Begin with shorter hill repeats – running up a moderate incline for a set time or distance, followed by a recovery jog down.

As you progress, increase the length or steepness of the hills, or the number of repetitions. Hill workouts also improve your running form, encouraging a more efficient stride. Don’t underestimate the benefit of downhill running, but approach it cautiously to avoid excessive impact. Remember to warm up before hill sessions and cool down afterward. Stronger legs mean more power and resilience throughout your half marathon, helping you conquer any course challenges.

Monitoring Your Body

Throughout your 24-week half marathon training, consistently monitoring your body is paramount. Pay close attention to any aches, pains, or unusual fatigue – these are signals your body sends. Don’t ignore them! Learn to differentiate between normal muscle soreness and potential injury. Tracking your resting heart rate can also provide valuable insights into your recovery and overall fitness level.

Keep a training log to record your mileage, pace, and how you feel during and after each run. This helps identify patterns and potential issues before they escalate. Prioritize sleep and nutrition, as these are fundamental to recovery. Listening to your body and adjusting your training plan accordingly is far more effective than pushing through pain, which could lead to setbacks and injuries.

Phase 4: Tapering & Race Preparation (Weeks 21-24)

Now is the time to reduce volume and focus on recovery! Strategic tapering preserves energy, while final preparations ensure you’re physically and mentally ready.

Week 21-22: Reducing Volume

As you enter weeks 21 and 22, the core principle is reduction – significantly decreasing your overall running mileage. This isn’t about stopping; it’s about allowing your body to fully recover and store energy for race day. Expect a roughly 50-60% reduction in weekly mileage compared to your peak training weeks. Long runs should be shortened considerably, focusing on maintaining a comfortable, conversational pace.

Continue with shorter, easy runs to keep your legs feeling fresh and maintain some level of cardiovascular fitness. Don’t introduce any new or intense workouts during this phase. The goal is to minimize stress on your muscles and joints. Prioritize sleep, nutrition, and hydration to support the recovery process. Resist the urge to “make up” for lost mileage; trust the plan and allow your body to adapt. This strategic reduction is crucial for arriving at the starting line feeling strong and prepared.

Week 23: Final Preparations

Week 23 marks the final refinement stage before your half marathon. Mileage remains reduced, but focus shifts to maintaining sharpness without inducing fatigue. Include a few very short, race-pace efforts – perhaps a couple of strides during easy runs – to remind your legs of the desired speed. Avoid any strenuous workouts or long runs; the priority is preservation.

This is the time to finalize all logistical details: confirm race registration, plan your travel and accommodation, and prepare your race-day kit. Practice your race-day nutrition and hydration strategy during your shorter runs. Mentally rehearse the race, visualizing success and anticipating potential challenges. Ensure you have comfortable, well-tested running shoes and apparel. Prioritize rest and quality sleep. A calm, organized approach will boost your confidence and set you up for a positive race experience.

Week 24: Race Week Strategy

Race week is about minimizing stress and maximizing energy. Reduce running to very easy, short jogs – primarily to loosen muscles and maintain blood flow. Avoid any intense workouts. Focus on hydration, consuming electrolytes, and eating familiar, carbohydrate-rich foods. Prioritize sleep; aim for at least eight hours each night.

Review the race course map and logistics. Plan your race-day transportation and warm-up routine. Prepare your race-day outfit and gear the night before. Visualize a successful race, focusing on positive self-talk. Avoid trying anything new – stick to what you’ve practiced during training. Manage pre-race anxiety with relaxation techniques. Trust your preparation and remember to enjoy the experience! A well-executed race week sets the stage for achieving your half marathon goals.

Race Day Nutrition & Hydration

Proper fueling and hydration are crucial for half marathon success. Start race day with a familiar breakfast, consumed 2-3 hours before the start, focusing on carbohydrates. Avoid high-fat or high-fiber foods that could cause digestive issues. Sip water consistently in the hours leading up to the race, but don’t overhydrate.

During the race, utilize aid stations to take small, frequent sips of water or sports drink. Consider energy gels or chews around mile 6 and mile 10, practicing with them during training to ensure tolerance. Replenish electrolytes lost through sweat. Avoid experimenting with new nutrition on race day. Listen to your body’s cues and adjust intake accordingly. Post-race, prioritize rehydration and consume a snack with carbohydrates and protein to aid recovery.

Injury Prevention & Recovery

Prioritize listening to your body, incorporating rest, and utilizing stretching. Addressing discomfort early prevents setbacks, ensuring consistent progress throughout your 24-week training journey.

Common Running Injuries

As you progress through your 24-week half marathon training plan, understanding potential injuries is crucial for sustained success. Shin splints, characterized by pain along the shinbone, are frequent, often stemming from increased mileage or improper footwear. Runner’s knee, or patellofemoral pain syndrome, manifests as discomfort around the kneecap, frequently linked to muscle imbalances or overuse.

Plantar fasciitis, causing heel pain, arises from inflammation of the tissue on the bottom of your foot. Achilles tendinitis, an inflammation of the Achilles tendon, can develop with rapid increases in training intensity. Stress fractures, tiny cracks in the bone, are a serious concern, typically resulting from repetitive impact.

Being proactive is key; proper warm-ups, cool-downs, and gradual increases in mileage can significantly reduce risk. Addressing pain promptly, rather than pushing through it, is vital for preventing minor issues from escalating into more serious problems. Consider consulting a physical therapist for personalized guidance and injury prevention strategies.

The Role of Rest and Recovery

Integral to your 24-week half marathon training plan is recognizing the paramount importance of rest and recovery. Running stresses your body, and adequate recovery allows muscles to repair and rebuild, preventing injury and maximizing performance gains. Rest days aren’t simply ‘days off’; they are active components of your training schedule;

Prioritize 7-9 hours of quality sleep each night to facilitate muscle recovery and hormonal balance. Incorporate active recovery, such as light walking or swimming, on rest days to promote blood flow without further stressing your muscles. Nutrition plays a vital role; consume a balanced diet rich in protein and carbohydrates to replenish energy stores.

Listen to your body’s signals; don’t hesitate to take an extra rest day if you’re feeling overly fatigued or experiencing pain. Ignoring these signals can lead to overtraining and setbacks. Recovery isn’t a luxury; it’s a necessity for achieving your half marathon goals safely and effectively.

Stretching and Flexibility

Integrating stretching and flexibility exercises into your 24-week half marathon training plan is crucial for injury prevention and improved running efficiency. Consistent stretching increases range of motion, reduces muscle stiffness, and enhances overall performance. Dynamic stretching, involving controlled movements, is ideal before runs to prepare muscles for activity.

Focus on major muscle groups used in running, including hamstrings, quadriceps, calves, hip flexors, and glutes. Static stretching, holding stretches for 30 seconds, is best performed after runs when muscles are warm. Consider incorporating yoga or Pilates into your routine to further improve flexibility and core strength.

Remember, flexibility is not a one-time fix; it requires consistent effort. Prioritize stretching several times a week, even on rest days, to maintain optimal muscle health and minimize the risk of strains or tears throughout your training journey.

Listening to Your Body

Throughout your 24-week half marathon training, prioritizing self-awareness is paramount. Your body communicates its needs – learn to interpret these signals to prevent injury and optimize performance. Don’t rigidly adhere to the plan if experiencing pain; modify or rest when necessary.

Distinguish between muscle soreness, a normal response to training, and pain, which indicates a potential problem. Pay attention to fatigue levels, sleep quality, and overall well-being. Ignoring persistent discomfort can lead to setbacks, derailing your progress.

Embrace rest days as integral to recovery, not as signs of weakness. Adjust mileage or intensity based on how you feel, and don’t hesitate to consult a healthcare professional if concerns arise. A successful training plan is adaptable, responding to your individual needs and limitations.

weider 2980 x manual

Weider 2980 X Manual: A Comprehensive Guide

This guide provides detailed instructions, parts lists, safety precautions, and workout routines for the Weider 2980 X home gym system, ensuring optimal use.

The Weider 2980 X is a popular home gym system designed for comprehensive full-body workouts. This manual serves as your primary resource for understanding, assembling, operating, and maintaining this versatile fitness equipment. Whether you’re a seasoned fitness enthusiast or just beginning your journey, this guide will provide the necessary information to maximize your workout potential and ensure safe usage.

This system boasts a robust construction and a variety of exercise options, catering to diverse fitness levels. Before commencing any exercise program, carefully review the safety precautions outlined within this manual. Familiarize yourself with all components and their functions, utilizing the detailed parts list and diagrams provided. Proper assembly and regular maintenance are crucial for longevity and optimal performance.

Understanding the Weider 2980 X System

The Weider 2980 X functions as a multi-gym, integrating various exercise stations into a single unit. It features a weight stack system allowing adjustable resistance for diverse exercises targeting all major muscle groups. Understanding the interconnectedness of these stations – including the chest press, leg developer, and bicep curl – is key to effective training.

The system’s design prioritizes biomechanical efficiency, promoting proper form and minimizing strain. Familiarize yourself with the range of motion for each exercise and the corresponding weight settings. This manual details how to safely adjust the weight stack and utilize the included exercise chart for guided workouts. Consistent use, coupled with proper understanding, unlocks the full potential of the 2980 X.

Product Features and Specifications

The Weider 2980 X boasts a robust steel frame, adjustable weight stack, and multiple workout stations, delivering a comprehensive and versatile home gym experience.

Key Features of the Weider 2980 X

The Weider 2980 X stands out with its high and low pulley systems, enabling a diverse range of exercises targeting various muscle groups. Its weight stack, adjustable up to a substantial capacity, caters to users of all fitness levels; The inclusion of a leg developer and crunch station further expands workout possibilities.

Constructed with a durable steel frame, the 2980 X ensures stability and longevity. Comfortable, contoured seating enhances user experience during extended workout sessions. The system’s design prioritizes versatility, allowing for both strength training and cardio-focused routines. Detailed exercise charts, often available as a PDF, guide users through proper form and technique. Replacement parts, like the BASE (267646) and STABILIZER (267638), are readily accessible, ensuring continued functionality.

Technical Specifications: Dimensions & Weight Capacity

The Weider 2980 X boasts impressive specifications designed for effective home workouts. While precise dimensions vary slightly, expect a footprint of approximately 79” length x 48” width x 82” height. This substantial size accommodates a full range of motion for various exercises.

The system supports a maximum user weight capacity of 300 lbs, ensuring stability and safety for a wide range of individuals. The weight stack typically offers up to 80 lbs of resistance, adjustable in increments to suit different strength levels. It’s crucial to verify these specifications with the official manual or Weider’s website, referencing your specific model/serial number for accurate details. Proper assembly, utilizing all 88 parts, is vital to achieving these performance standards.

Assembly and Setup

Proper assembly, utilizing the 88 parts and included diagram, is crucial for safe and effective use of the Weider 2980 X home gym system.

Unboxing and Parts Inventory

Carefully unpack all components from the shipping carton, checking them against the detailed parts list (containing 88 unique parts) to ensure everything is present. Lay out all items on a protected surface to prevent scratches or damage during assembly.

Refer to the diagram provided within the manual to visually identify each part. Pay close attention to smaller components like M8 and M10 locknuts, washers, and button screws – these are easily misplaced.

Verify quantities match the parts list; discrepancies should be reported to customer support immediately. Note the BASE (part 267646) and STABILIZER (part 267638) as key structural elements. A thorough inventory now will save time and frustration later in the assembly process.

Step-by-Step Assembly Instructions

Begin by attaching the BASE (267646) and STABILIZER (267638) components, utilizing M12 nuts and large washers as indicated in the diagram. Ensure proper alignment before fully tightening. Proceed systematically through each stage, referencing the visual guide for correct part placement and fastener types.

Pay close attention to the order of assembly; skipping steps can lead to instability or require disassembly. Use the appropriate tools (see ‘Tools Required for Assembly’) and avoid over-tightening bolts, which could damage threads.

Double-check connections after each step to confirm secure fastening. A well-executed assembly guarantees a safe and effective workout experience with your Weider 2980 X system.

Tools Required for Assembly

Successful assembly of your Weider 2980 X necessitates a few essential tools. A standard adjustable wrench is crucial for tightening various nuts and bolts, including M8, M10, and M12 sizes. A socket wrench set, encompassing multiple sizes, will expedite the process and provide greater leverage.

A Phillips head screwdriver is needed for securing certain components, while a rubber mallet can assist with gently aligning parts without causing damage. Consider having a level handy to ensure the gym is stable and balanced on the floor.

Finally, work gloves are recommended to protect your hands during assembly. Having these tools prepared beforehand will streamline the setup and ensure a smooth, frustration-free experience.

Parts List and Identification

This section details all 88 components of the Weider 2980 X, utilizing diagrams for easy identification and providing part numbers for replacements.

Detailed Parts List (88 Parts)

The Weider 2980 X system comprises 88 distinct parts, each crucial for functionality and user safety. This comprehensive list, referencing the model WESY1938.0, includes items like the BASE (part 267646), currently priced at $292.49, and the STABILIZER (part 267638).

Further components encompass various nuts – M8 Locknut (58 qty), M10 Locknut (56 qty), M12 Nut (82 qty) – alongside washers (Large Washer 78 qty, M10 Washer 57 qty). Also included are M10 x 25mm Button screws and numerous other fasteners essential for secure assembly.

Accessing a complete parts list and diagram requires your equipment’s model/serial number. This detailed inventory ensures accurate identification when ordering replacements, maintaining the gym’s performance and longevity.

Identifying Parts Using the Diagram

Accurate part identification is vital for successful assembly and maintenance of your Weider 2980 X. The provided diagram serves as a visual key, correlating each component with a unique part number. This ensures you select the correct replacement when needed, avoiding compatibility issues.

Referencing the diagram alongside the detailed parts list (containing 88 parts) allows for precise matching. Locate the part in question on the diagram, then cross-reference it with the corresponding number in the list.

Having your equipment’s model/serial number readily available is crucial when accessing the complete diagram online, guaranteeing you’re viewing the correct version for your specific unit.

Common Replacement Parts: BASE (267646) & STABILIZER (267638)

The BASE (part number 267646) and STABILIZER (part number 267638) are frequently requested replacement parts for the Weider 2980 X. Due to their critical role in structural integrity, these components may experience wear and tear over time with consistent use.

The BASE provides the foundational support for the entire system, while the STABILIZER ensures rigidity and prevents unwanted movement during workouts. Regularly inspect these parts for cracks, damage, or loosening.

Current pricing for the BASE is approximately $292.49. When ordering, always verify compatibility with your specific Weider 2980 X model using the serial number for accurate part selection.

Exercise Chart and Workout Routines

Explore a comprehensive exercise chart (PDF available) and sample routines tailored for various muscle groups, maximizing your Weider 2980 X workout experience.

Weider 2980 X Exercise Chart PDF

Accessing the Weider 2980 X Exercise Chart in PDF format provides a visually detailed guide to performing exercises correctly and safely on your home gym. This chart illustrates proper form for each exercise, targeting specific muscle groups. It’s an invaluable resource for both beginners and experienced fitness enthusiasts.

The PDF chart typically includes clear diagrams and step-by-step instructions, ensuring you understand the correct technique to avoid injury and maximize results. You can easily download and print the chart for convenient access during your workouts. It’s designed to help you create a structured and effective fitness plan, utilizing all the capabilities of the Weider 2980 X system. Finding this resource online will significantly enhance your training experience.

Sample Workout Routines for Different Muscle Groups

The Weider 2980 X allows for versatile training, and pre-designed workout routines maximize its potential. These routines are categorized by muscle group – chest, back, legs, shoulders, and arms – offering balanced fitness development. Each routine details specific exercises, sets, repetitions, and rest periods, catering to varying fitness levels.

Beginner routines focus on foundational movements and lighter resistance, while advanced routines incorporate more challenging exercises and heavier weights. Utilizing these routines ensures proper muscle engagement and prevents plateaus. Remember to warm up before each workout and cool down afterward. Consistency is key; aim for at least three workouts per week to see noticeable improvements in strength and muscle tone. Adapt the routines to your individual needs and goals.

Adjusting the Weight System for Optimal Resistance

The Weider 2980 X’s weight system is designed for customizable resistance, crucial for progressive overload. Weight adjustments are typically made via a weight selector pin, allowing users to easily increase or decrease the load. Start with a weight that allows for proper form throughout the entire exercise range of motion. Gradually increase the weight as strength improves, ensuring controlled movements.

Proper weight selection prevents injury and maximizes muscle engagement. Avoid ego lifting – prioritize form over weight. The system accommodates various fitness levels, from beginners to experienced lifters. Regularly reassess your weight settings to maintain a challenging yet safe workout. Refer to the exercise chart for recommended weight ranges for each exercise.

Maintenance and Safety

Regular inspection of the Weider 2980 X is vital for safe operation; adhere to the maintenance schedule and always prioritize safety precautions during use.

Regular Maintenance Schedule

To ensure the longevity and safe operation of your Weider 2980 X, a consistent maintenance schedule is crucial. Monthly, inspect all bolts and screws, tightening any that have loosened during use. Carefully examine the cable system for any signs of fraying or wear, replacing cables immediately if damage is detected.

Every three months, clean the frame with a damp cloth and mild detergent, avoiding abrasive cleaners. Lubricate all pivot points with a silicone-based lubricant to maintain smooth operation. Annually, thoroughly inspect the weight plates and pulleys for damage, and consider replacing worn parts. Regularly check the stability of the base and stabilizer components, ensuring they remain securely fastened. Following this schedule will help prevent issues and maximize your workout experience.

Safety Precautions During Use

Prioritize safety when operating the Weider 2980 X. Always inspect the machine before each use, ensuring all parts are secure and functioning correctly. Never exceed the maximum weight capacity, and use appropriate weight plates for your fitness level. Maintain a firm grip on handles and attachments during exercises.

Be mindful of your surroundings, keeping children and pets away from the equipment during operation. Avoid wearing loose clothing that could get caught in moving parts. If you experience any pain or discomfort, stop exercising immediately. Familiarize yourself with the emergency stop mechanism and know how to use it. Proper form is essential; consult resources for correct exercise techniques to prevent injuries.

Troubleshooting Common Issues

If encountering resistance issues, verify proper weight plate loading and cable alignment. Squeaking noises often indicate a need for lubrication on pivot points or cables – use silicone-based lubricant. For stability concerns, ensure the unit is on a level surface and all bolts are tightened securely.

Cable fraying requires immediate replacement; do not continue use. If a part is missing or damaged, refer to the parts list and ordering information. Difficulty adjusting weight may stem from a faulty selector pin – inspect for damage. Always disconnect power before inspecting electrical components. If problems persist, consult Weider’s customer support for assistance and potential repair options;

Parts Availability and Ordering

Genuine Weider 2980 X replacement parts are readily available online and through authorized retailers, utilizing your model/serial number for accurate ordering.

Where to Find Replacement Parts

Locating replacement parts for your Weider 2980 X is straightforward. Several online retailers specialize in fitness equipment components, offering a wide selection of parts specifically for this model. A quick internet search using terms like “Weider 2980 X parts” will yield numerous options.

Authorized Weider retailers also carry replacement parts, ensuring authenticity and quality. Checking the official Weider website can direct you to approved vendors in your region. Furthermore, some fitness equipment repair services stock common replacement parts like the BASE (267646) and STABILIZER (267638).

Before ordering, always have your Weider 2980 X model and serial number readily available to guarantee compatibility and avoid incorrect purchases. Many websites offer parts diagrams to assist in identification.

Using the Model/Serial Number for Parts Identification

Your Weider 2980 X’s model and serial number are crucial for accurate parts identification. This information ensures you order components specifically designed for your system, preventing compatibility issues and frustrating returns. The model number, often “WESY1938.0”, distinguishes the general system, while the serial number provides unique details about your specific unit.

Locate the label typically found on the frame of the gym. When contacting retailers or using online parts finders, providing both numbers is highly recommended. Many websites request this information to display a tailored parts list and diagram for your machine.

Accurate identification streamlines the process, saving time and ensuring you receive the correct replacement parts for a successful repair.

Current Pricing for Common Parts

Replacement parts for the Weider 2980 X vary in price depending on the component and retailer. As of February 2024, a BASE (part #267646) typically costs around $292.49, while a STABILIZER (part #267638) is priced approximately at the same value. Smaller components like M8 Locknuts or M10 Washers are significantly cheaper, often costing just a few dollars each.

Pricing fluctuates based on supplier, shipping costs, and availability. Online retailers specializing in fitness equipment parts generally offer competitive rates. It’s advisable to compare prices from multiple sources before making a purchase.

Remember to factor in potential shipping fees when calculating the total cost of your replacement parts.

Weider Brand Information

Weider is dedicated to supporting fitness and health goals, setting high standards for quality in sports nutrition and equipment manufacturing.

Weider’s Commitment to Fitness

Weider has a long-standing commitment to empowering individuals on their fitness journeys. For decades, the brand has focused on providing innovative and accessible fitness solutions, ranging from nutritional supplements to comprehensive home gym systems like the 2980 X. This dedication stems from a belief that everyone deserves the opportunity to achieve their health and wellness aspirations.

The company consistently invests in research and development to create products that deliver tangible results. Weider strives to offer not just equipment, but a complete ecosystem of support, including workout guidance and resources. Their aim is to inspire and motivate users to embrace a healthier lifestyle, fostering a community centered around fitness and well-being. Quality and customer satisfaction remain paramount in their approach.

Weider Product Quality Standards

Weider upholds rigorous quality standards throughout the design and manufacturing of its fitness equipment, including the 2980 X. These standards encompass material selection, structural integrity, and performance testing. Each component undergoes scrutiny to ensure durability and reliability, meeting or exceeding industry benchmarks.

The company employs stringent quality control processes at every stage of production, from initial prototyping to final assembly. This includes comprehensive testing for weight capacity, stress resistance, and overall functionality. Weider prioritizes user safety, adhering to strict safety regulations and certifications. Their commitment extends to providing clear and accurate documentation, like the 2980 X manual, to facilitate proper usage and maintenance, ensuring a long-lasting and safe fitness experience.

Weider Support and Resources

Weider provides extensive support resources for 2980 X owners, aiming to maximize user satisfaction. Online Manual Access offers a readily available digital copy of the comprehensive manual, including parts diagrams and troubleshooting guides. Dedicated Customer Support Contact Information is available via phone and potentially email, assisting with inquiries and resolving issues promptly.

Furthermore, Weider’s website features frequently asked questions (FAQs) and potentially video tutorials demonstrating proper assembly, usage, and maintenance procedures. Access to Related Weider Products allows users to explore complementary fitness equipment. The availability of replacement parts, identified using the model/serial number, ensures the longevity of the 2980 X system, fostering a positive and supported fitness journey.

Additional Resources

Explore online manuals, direct customer support contacts, and discover related Weider fitness products to enhance your 2980 X experience fully.

Online Manual Access

Accessing the Weider 2980 X manual online offers a convenient and readily available resource for users. Should you misplace the physical copy, or prefer a digital format for easy searching and portability, numerous online platforms host the complete guide.

Many websites dedicated to fitness equipment provide downloadable PDF versions of the manual. Before downloading, ensure the source is reputable to guarantee the accuracy and completeness of the document. Having your model/serial number handy will streamline the search process, allowing you to quickly locate the correct manual version for your specific 2980 X system.

This digital accessibility ensures you always have the information needed for assembly, maintenance, safety, and effective workout routines at your fingertips.

Customer Support Contact Information

For dedicated assistance with your Weider 2980 X, reaching out to customer support is a valuable option. While specific contact details may vary, Weider generally provides support through multiple channels.

Typically, you can find contact information – including phone numbers and email addresses – on the official Weider Fitness website. Look for a “Support” or “Contact Us” section. Be prepared to provide your model and serial number when contacting support; this will help them quickly address your specific inquiry regarding the 2980 X manual or any related issues.

Additionally, some online retailers who sell the Weider 2980 X may offer their own customer support resources. Utilizing these avenues ensures prompt and effective resolution to any questions or concerns.

Related Weider Products

Beyond the Weider 2980 X, Weider offers a comprehensive range of fitness equipment designed to cater to diverse workout preferences and fitness levels. Exploring these options can enhance your overall home gym experience.

Consider the Weider Pro series, known for its robust construction and advanced features, providing a step up in functionality. Weider also manufactures various weight benches, dumbbells, and resistance training systems, allowing for customized workout routines.

For those seeking cardio options, Weider provides treadmills, elliptical trainers, and exercise bikes. Checking the official Weider Fitness website will reveal the latest product offerings and allow you to compare specifications and features to find the perfect complement to your 2980 X system.