Author: leonard

a modern guide to granny squares

Granny squares‚ a timeless crochet staple‚ are experiencing a vibrant resurgence! This guide explores contemporary techniques‚ breathing new life into this classic craft for modern makers.

The History of the Granny Square

Historically‚ granny squares emerged in the 19th century as a resourceful way to utilize leftover yarn scraps‚ gaining significant popularity during the Great Depression. These humble beginnings saw them adorning blankets and garments‚ offering warmth and practicality.

The name “granny square” reflects their association with older generations and traditional crafting. However‚ the modern revival isn’t simply a nostalgic throwback; it’s a reimagining. Contemporary designers are pushing boundaries‚ experimenting with color‚ texture‚ and construction‚ transforming this vintage motif into something fresh and exciting for today’s crocheters.

Why Granny Squares are Making a Comeback

Several factors contribute to the renewed interest in granny squares. Their modular nature makes them incredibly versatile – perfect for projects of any size‚ from blankets to clothing and accessories. The portability of individual squares appeals to modern‚ on-the-go lifestyles.

Furthermore‚ the rise of social media and online crafting communities has fueled inspiration and pattern sharing. Designers are showcasing innovative techniques‚ attracting a new generation of crocheters. Plus‚ the inherent charm and handmade aesthetic resonate with a desire for unique‚ sustainable creations.

Materials and Tools for Modern Granny Squares

Successful projects require selecting appropriate yarn‚ hooks‚ and accessories. Explore diverse yarn weights‚ hook sizes‚ and helpful tools like stitch markers for precision.

Yarn Choices: From Classic to Contemporary

Traditionally‚ granny squares utilized cotton yarn for durability and vibrant color. However‚ modern crochet embraces a wider spectrum! Acrylic yarns offer affordability and easy care‚ while wool provides warmth and texture.

For a luxurious feel‚ consider blends like cotton-acrylic or merino wool. Experiment with variegated or self-striping yarns for instant visual interest. Weight selection impacts the square’s drape – DK or worsted weight are popular choices‚ but don’t be afraid to explore!

Crochet Hook Sizes and Selection

Hook size is crucial for achieving the desired fabric density in your granny squares. Generally‚ a hook size corresponding to your yarn weight is recommended – check the yarn label! For classic cotton yarn‚ a 3.5mm or 4mm hook works well.

Experimentation is key! A smaller hook creates tighter stitches‚ while a larger hook results in a looser‚ drapier fabric. Ergonomic hooks can reduce hand fatigue during lengthy projects. Consider a set with various sizes for versatility.

Essential Accessories: Stitch Markers‚ Scissors‚ and Yarn Needles

Beyond yarn and a hook‚ several accessories elevate your granny square experience. Stitch markers are invaluable for marking the beginning of rounds or complex stitch patterns‚ preventing errors. Sharp scissors are essential for clean yarn cuts.

Yarn needles (also called tapestry needles) are used to weave in loose ends securely‚ creating a polished finish. A row counter can also be helpful for tracking progress‚ especially in intricate designs.

Basic Granny Square Construction

Mastering the foundation is key! We’ll begin with the classic granny square‚ exploring both solid and hollow center variations for diverse design possibilities.

The Classic Granny Square Pattern

The iconic pattern begins with a magic ring or chain-four starting point. Work double crochet clusters into the ring‚ separated by chain spaces to form the initial square’s corners. Subsequent rounds build upon this foundation‚ increasing the clusters and chains to expand the square’s size.

Each round typically involves working three double crochet stitches‚ chain two‚ and repeating this sequence around the previous round’s corners. Consistent tension is crucial for maintaining a flat‚ even square. Changing colors between rounds adds visual interest and allows for creative designs.

Variations on the Classic: Solid vs. Hollow Centers

Classic granny squares feature open‚ “hollow” centers created by the chain spaces between clusters. A modern twist involves filling these spaces with additional crochet stitches – typically double crochet – to create a “solid” center.

Solid centers offer a denser fabric‚ reducing gaps and providing a different aesthetic. Hollow centers showcase texture and lightness. The choice impacts the overall look and feel of the finished project‚ influencing drape and warmth. Both styles remain popular‚ catering to diverse preferences.

Modern Granny Square Techniques

Explore innovative stitches and colorwork! Techniques like two-toned designs and varied stitch heights elevate the traditional granny square‚ offering a contemporary aesthetic.

Two-Toned Granny Squares for a Contemporary Look

Achieving a modern aesthetic with granny squares is easily done through strategic color blocking. By utilizing two complementary or contrasting yarn shades within each square‚ a visually dynamic effect emerges. Consider alternating colors each round‚ or dedicating specific rounds to a single hue.

Interspersing two-toned squares with neutral shades‚ like white or cream‚ further enhances the contemporary vibe‚ creating a sophisticated and balanced design. This technique adds depth and interest‚ moving beyond the traditionally colorful granny square appearance‚ and offering a fresh take on a beloved classic.

Using Different Stitch Heights (Double Crochet Focus)

Elevate your granny squares beyond the traditional treble crochet by experimenting with stitch heights! Focusing on double crochet (US terminology) creates a denser fabric and a slightly different visual texture. This subtle change modernizes the square’s appearance‚ offering a less open‚ more substantial feel.

Alternating rounds of double and treble crochet‚ or even incorporating half-double crochet‚ adds intriguing dimension. This variation allows for unique textural play and a departure from the conventional granny square aesthetic‚ resulting in a contemporary design.

Incorporating Texture: Bobbles‚ Popcorns‚ and Cables

Transform your granny squares with tactile elements! Bobbles and popcorn stitches introduce delightful three-dimensional bumps‚ adding playful texture and visual interest. Strategically placed‚ they create focal points within the square’s design‚ moving beyond flat surfaces.

For a more sophisticated touch‚ explore miniature cable stitches. These add subtle definition and a refined aesthetic. Combining these textural techniques with varied stitch heights results in truly unique and modern granny squares‚ showcasing advanced crochet skills.

Project Ideas for Modern Granny Squares

Unleash creativity! From cozy blankets and stylish sweaters to trendy bags and vibrant accessories‚ modern granny squares offer endless project possibilities for all skill levels.

Granny Square Blankets and Throws

Granny square blankets remain a beloved project‚ but modern designs elevate this classic. Explore two-toned palettes‚ incorporating double crochet for a fresh aesthetic. Consider varying square layouts – traditional grids‚ diagonal designs‚ or even freeform arrangements.

Border variations‚ from simple single crochet to elaborate shell stitches‚ add a polished finish. Experiment with yarn weights for different textures and drape. These blankets are perfect for gifting or adding handmade warmth to your home!

Granny Square Clothing: Sweaters‚ Cardigans‚ and Ponchos

Granny squares aren’t just for blankets! Modern crochet fashion embraces this technique for unique garments. Construct sweaters and cardigans by joining squares‚ offering customizable fit and color blocking opportunities. Ponchos are a simpler entry point‚ showcasing square arrangements beautifully.

Consider yarn choice carefully – drape is key for clothing. Explore different joining methods for seamless or intentionally visible seams. Don’t be afraid to experiment with texture and stitch patterns within each square!

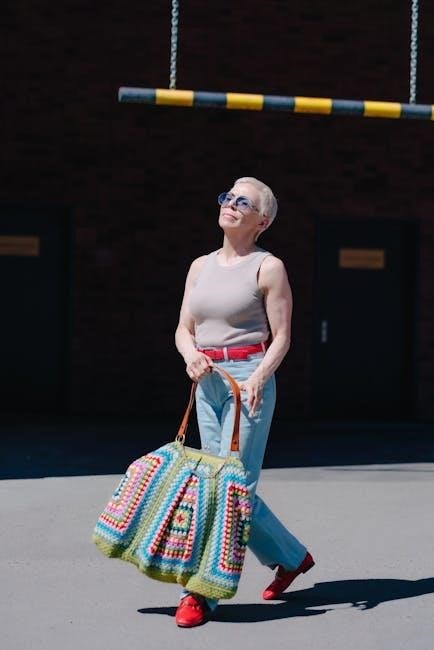
Accessories: Bags‚ Hats‚ and Scarves

Granny squares excel in creating stylish accessories! Bags benefit from the square’s structure – line with fabric for durability. Hats and beanies can be constructed from smaller squares‚ offering vibrant colorwork possibilities. Scarves are perhaps the easiest project‚ showcasing square arrangements and texture.

Experiment with different border techniques to finish edges neatly. Consider adding handles or closures to bags for functionality. Play with yarn weights for varied accessory styles!

Finding Granny Square Patterns

Numerous online resources offer free and paid granny square patterns‚ catering to all skill levels and design preferences – explore websites and designer collections!

Top Websites and Resources for Free Patterns

For abundant free patterns‚ Ravelry stands out as a vast community-driven platform‚ boasting thousands of user-submitted granny square designs. LoveCrafts also provides a curated selection‚ frequently updated with trendy options.

Websites like Yarnspirations and Red Heart offer patterns alongside yarn purchases‚ ideal for project planning. Don’t overlook blogs dedicated to crochet; many designers generously share their granny square creations for free‚ fostering a collaborative spirit within the crafting world.

Paid Pattern Designers and Collections

For uniquely designed and thoroughly tested granny square patterns‚ consider supporting independent designers on platforms like Etsy and LoveCrafts. Many offer detailed instructions‚ including video tutorials‚ enhancing the crafting experience.

Collections from designers often feature cohesive sets‚ simplifying blanket or garment construction. Look to Ravelry pattern stores for curated bundles. Investing in paid patterns often grants access to exclusive designs and designer support‚ elevating your crochet projects.

Advanced Granny Square Techniques

Mastering seamless joining and intricate border variations will elevate your granny square projects‚ creating professional-looking blankets‚ garments‚ and accessories with refined details.

Joining Methods: Seamless vs. Visible Seams

Choosing the right joining method dramatically impacts the final look of your project. Visible seams‚ created with techniques like slip stitching or crocheting joins‚ offer a charming‚ rustic aesthetic and are quick to execute.

Conversely‚ seamless joins – involving careful weaving of yarn tails or specialized techniques – create a smoother‚ more polished finish‚ ideal for garments or blankets where drape is key. Consider the project’s style and desired texture when selecting your preferred method; both offer unique advantages!

Border Variations for a Polished Finish

A well-chosen border elevates a granny square project from charmingly handmade to beautifully refined. Simple single crochet borders provide a neat edge‚ while shell stitch borders add delicate texture and visual interest.

For a bolder statement‚ explore picot or scallop edging. Consider contrasting colors or incorporating textured stitches like bobbles or cables. The border isn’t merely a finishing touch; it’s an opportunity to personalize and enhance the overall design!

Troubleshooting Common Granny Square Issues

Don’t despair! Uneven edges or mistakes are easily fixed with careful weaving and adjustments. Consistent tension is key to achieving uniform squares.

Dealing with Uneven Edges

Uneven edges are a common frustration for crochet beginners‚ but easily addressed! Maintaining consistent tension throughout each stitch is paramount; looser tension often leads to stretching. Blocking your finished squares—gently wetting and pinning them to shape—can dramatically even out edges.

If edges remain wonky‚ carefully examine your stitch count in each round. A missed or added stitch throws off symmetry. Don’t be afraid to frog (rip out) a round and redo it for a cleaner finish. Practice makes perfect!

Fixing Mistakes and Weaving in Ends

Mistakes happen! Don’t despair – carefully “frog” (rip out) stitches back to the error. Use a yarn needle to gently pull the yarn‚ avoiding damage. Secure loose ends by weaving them back into the wrong side of your work‚ following the direction of the stitches.

Avoid creating bulk by weaving ends sporadically; instead‚ travel several stitches before securing. A neat finish is crucial for a professional-looking granny square project.

The Future of Granny Squares

Innovation continues! Expect exciting trends blending sustainability with unique designs‚ pushing creative boundaries and solidifying the granny square’s enduring appeal in crochet.

Emerging Trends in Granny Square Design

Contemporary granny square designs are moving beyond traditional aesthetics. We’re seeing a surge in geometric patterns‚ incorporating unexpected color palettes – think muted tones and bold contrasts. Designers are experimenting with three-dimensional elements‚ adding texture through bobbles‚ and utilizing unusual yarn weights for unique effects.

Furthermore‚ the incorporation of mosaic crochet and intarsia techniques within the squares themselves is gaining popularity‚ creating intricate and visually stunning pieces. The focus is shifting towards artistic expression and personalized designs‚ moving away from purely functional creations.

Granny Squares and Sustainable Crochet

Modern crocheters increasingly prioritize sustainability‚ and granny squares perfectly align with this ethos. Utilizing yarn scraps minimizes waste‚ transforming leftover materials into beautiful projects. Choosing eco-friendly yarns – organic cotton‚ recycled fibers‚ or plant-based alternatives – further reduces environmental impact.

The modular nature of granny squares also promotes mindful making and slow fashion‚ encouraging repair and repurposing over disposable consumption. This conscious approach breathes new life into a beloved craft‚ making it relevant for a greener future.

bunion exercises pdf

Understanding Bunions and Exercise

Numerous online resources, like those from Liebscher & Bracht, offer free PDF guides detailing exercises for bunion (hallux valgus) relief, reaching over 2.5 million users.

These guides present simple techniques aimed at reducing pain and improving mobility, with a focus on strengthening key foot and calf muscles.

Accessing these PDFs provides a convenient way to learn and implement exercises for managing bunions, potentially improving quality of life and function.

What is a Bunion?

A bunion, medically known as hallux valgus, is a bony bump that forms on the joint at the base of your big toe. This condition develops when the big toe begins to deviate towards the second toe, causing the bone at the base of the big toe to protrude. While often associated with age, bunions can develop at any time, and are more common in women.

Interestingly, the term “bunion” originates from the Greek word for turnip, likely referencing the bump’s shape. Approximately one in four individuals will develop a bunion before the age of 65, with that rate increasing to one in three after 65.

Resources like those offering bunion exercise PDFs, such as those from Liebscher & Bracht, often explain that while exercises can’t eliminate the bony protrusion, they can significantly alleviate pain and improve foot function. Understanding the underlying cause is crucial when considering exercise plans found in these guides.

Bunion Prevalence and Risk Factors

Bunions are surprisingly common, affecting roughly 25% of adults before age 65, a figure that climbs to 33% for those over 65. Women are disproportionately affected, being more than twice as likely as men to develop this condition. This disparity may be linked to footwear choices, often favoring shoes with narrow toe boxes and high heels.

While the exact cause isn’t always clear, several risk factors contribute to bunion development. These include genetics – a family history increases your likelihood – and certain medical conditions;

PDF guides detailing bunion exercises, like those offered by Liebscher & Bracht, often emphasize that while exercises can’t alter genetic predisposition, they can mitigate symptoms and improve foot mechanics. These resources highlight that strengthening specific foot and calf muscles can help support the arch and reduce stress on the big toe joint, potentially slowing progression.

The Impact of Bunions on Daily Life

Bunions can significantly disrupt everyday activities, extending beyond mere discomfort. They can lead to pain while walking, running, or even standing for extended periods. This pain can limit mobility and participation in activities people enjoy, impacting overall quality of life.

More seriously, untreated bunions can result in infection, immobility, and impaired function. The altered foot mechanics can also contribute to problems in other areas of the body, like the knees, hips, and back.

Fortunately, resources like downloadable PDF exercise guides, such as those from Liebscher & Bracht, offer proactive strategies. These guides emphasize that targeted exercises can alleviate pain, improve range of motion, and potentially delay the need for more invasive interventions like surgery. They empower individuals to manage their condition and maintain an active lifestyle.

Key Muscles for Bunion Management

Strengthening five key muscles – three in the foot and two in the calf – is crucial, as highlighted in the Journal of Orthopaedic & Sports Physical Therapy.

Foot Muscles to Strengthen

Targeting specific foot muscles is paramount for bunion management, as identified in research focusing on pain reduction and improved mobility. Strengthening these muscles provides essential support for body weight and forward motion, directly impacting the alignment of the big toe.

These key muscles work synergistically to stiffen the foot’s arch, preventing inward rolling – a common contributor to bunion progression. While specific muscle names weren’t explicitly detailed in the provided text, the emphasis is on reinforcing these foundational structures.

PDF resources, such as those offered by Liebscher & Bracht, likely detail exercises designed to isolate and strengthen these crucial foot muscles. Implementing these exercises, alongside calf strengthening, forms a comprehensive approach to bunion care, potentially delaying or even avoiding surgical intervention.

Consistent strengthening builds a more stable and supportive foot foundation, alleviating pressure on the bunion and promoting healthier biomechanics.

Calf Muscles to Strengthen

Alongside foot muscle strengthening, addressing calf muscle imbalances is crucial for effective bunion management. Research highlights that strengthening two key calf muscles contributes significantly to lessening pain and enhancing movement in individuals with bunions.

The calf muscles play a vital role in supporting body weight and facilitating forward motion, working in conjunction with the foot muscles to maintain proper biomechanics. Tight or weak calf muscles can exacerbate bunion symptoms by altering foot mechanics and increasing pressure on the big toe joint.

PDF guides, like those available from Liebscher & Bracht, often incorporate calf-focused exercises into their bunion relief programs. These exercises aim to improve flexibility and strength, restoring a more balanced muscle relationship between the foot and lower leg.

Targeted calf strengthening supports the arch of the foot and contributes to overall lower limb stability, ultimately reducing stress on the bunion.

Bunion Exercises: A Comprehensive Plan

PDF resources, such as those from Liebscher & Bracht, detail exercises like toe extensions, curls, and marble pick-ups for bunion pain relief and mobility.

Toe Extension Exercises

Toe extension exercises, frequently detailed within bunion exercise PDFs like those offered by Liebscher & Bracht, are a foundational component of a comprehensive management plan. These exercises specifically target the muscles responsible for straightening the big toe, counteracting the inward bending characteristic of a bunion.

To perform this exercise, sit comfortably with your feet flat on the floor. Slowly extend your big toe away from the other toes, holding the extended position for several seconds. Repeat this movement multiple times, focusing on controlled motion and avoiding any sharp pain.

PDF guides often recommend incorporating variations, such as extending all toes simultaneously or using resistance bands to increase the challenge. Consistent practice of toe extension exercises can help improve toe alignment, reduce stiffness, and alleviate discomfort associated with bunions.

Toe Curl Exercises

Toe curl exercises, commonly illustrated in bunion-focused PDF resources, are designed to strengthen the intrinsic muscles within the foot. These muscles play a crucial role in supporting the arch and maintaining proper toe alignment, directly addressing the biomechanical imbalances often associated with bunions.

The exercise involves sitting comfortably and placing a small towel flat on the floor. Using only your toes, attempt to curl the towel towards you, gradually gathering it underneath your foot. Repeat this curling motion several times, focusing on engaging the toe muscles and maintaining control.

Many PDF guides, such as those from Liebscher & Bracht, suggest variations like adding a slight resistance or performing the exercise with marbles instead of a towel. Regular toe curl exercises can enhance foot strength, improve flexibility, and contribute to pain reduction.

Marble Pick-Up Exercise

The marble pick-up exercise, frequently detailed in bunion exercise PDF guides, is a targeted activity to enhance the dexterity and strength of the toe muscles. This exercise specifically addresses the intrinsic muscles responsible for toe control and arch support, often weakened in individuals with bunions.

To perform this exercise, sit comfortably with your feet flat on the floor. Scatter approximately ten to twenty marbles in front of you. Using only your toes, attempt to pick up one marble at a time and transfer it to a designated container.

PDF resources emphasize focusing on isolating the toe movement and avoiding using your foot to scoop or push the marbles. This exercise improves fine motor control, strengthens the foot muscles, and can contribute to alleviating bunion-related discomfort.

Towel Curl Exercise

The towel curl exercise, commonly illustrated in bunion exercise PDF guides, is a simple yet effective method for strengthening the intrinsic muscles of the foot. These muscles play a crucial role in supporting the arch and maintaining proper toe alignment, often compromised by bunions.

To begin, sit comfortably with your feet flat on the floor. Place a small towel directly under your foot. Using only your toes, attempt to scrunch the towel towards you, curling it underneath your foot. Focus on actively engaging your toe muscles throughout the movement.

PDF guides often recommend repeating this exercise 10-15 times per foot, several times a day. This exercise enhances foot muscle strength, improves flexibility, and can help alleviate pain associated with bunions by promoting better foot mechanics.

Big Toe Abduction Exercise

Bunion exercise PDF resources frequently highlight the big toe abduction exercise as a cornerstone of treatment. This exercise specifically targets the muscles responsible for moving the big toe away from the second toe, counteracting the inward deviation characteristic of a bunion.

To perform this exercise, sit comfortably with your feet flat on the floor. Gently attempt to move your big toe outwards, away from the other toes, while keeping the rest of your foot stationary. You may feel resistance, but avoid forcing the movement.

PDF guides typically suggest holding this abducted position for 5-10 seconds, then slowly returning to the starting position. Repeat 10-15 times per foot, multiple times daily. Consistent practice can improve big toe range of motion and reduce bunion-related discomfort.

Calf Raises

While often overlooked in bunion-specific exercise PDFs, calf raises are crucial for overall foot and ankle health, indirectly benefiting bunion management. Strengthening calf muscles supports proper foot biomechanics and reduces strain on the big toe joint.

To perform calf raises, stand with your feet flat on the floor, shoulder-width apart. Slowly rise up onto your toes, lifting your heels off the ground as high as comfortably possible. Focus on controlled movement, engaging your calf muscles throughout the exercise.

PDF resources recommend holding the elevated position for a second or two, then slowly lowering your heels back to the floor. Begin with 10-15 repetitions, gradually increasing the number of sets and reps as your strength improves. Variations, like single-leg calf raises, can further challenge the muscles.

Creating a Bunion Exercise Routine

PDF guides, like those from Liebscher & Bracht, suggest incorporating toe, foot, and calf exercises for a comprehensive routine, promoting pain relief and mobility.

Warm-up Exercises

Before beginning a bunion exercise routine, a proper warm-up is crucial to prepare the muscles and joints, enhancing effectiveness and minimizing injury risk. Many PDF guides, such as those detailing Liebscher & Bracht’s techniques, emphasize gentle movements to increase blood flow.

Simple ankle rotations – clockwise and counterclockwise – are excellent for loosening the joint. Toe points and flexes, performed slowly and deliberately, prepare the toe muscles for more strenuous activity.

Calf stretches, holding each stretch for approximately 20-30 seconds, improve flexibility in the calf muscles, which directly impact foot mechanics. A gentle foot roll, using a tennis ball or foam roller, can also help release tension in the plantar fascia.

These warm-up exercises should be performed for 5-10 minutes before commencing the main bunion exercises, ensuring muscles are pliable and ready for work.

Cool-down Exercises

Following a bunion exercise session, a cool-down period is vital for gradually returning muscles to their resting state, preventing stiffness and soreness. Many downloadable PDF resources, like those from therapeutic exercise programs, advocate for gentle stretches.

Repeat the calf stretches performed during the warm-up, holding each for a slightly longer duration – around 30-45 seconds. Gentle toe extensions and curls help to release tension in the toe muscles, promoting recovery.

A soft self-massage of the foot, focusing on the bunion area, can improve circulation and reduce inflammation. Ankle rotations, performed slowly and with minimal resistance, further aid in muscle relaxation.

These cool-down exercises, lasting 5-10 minutes, complement the main routine, enhancing flexibility and minimizing post-exercise discomfort, contributing to long-term bunion management.

Frequency and Duration of Exercises

PDF guides detailing bunion exercises, such as those offered by Liebscher & Bracht, generally recommend consistency for optimal results. Aim for performing the exercise routine 3-5 times per week, allowing for rest days in between to facilitate muscle recovery.

Each exercise session should ideally last between 15-20 minutes, including the warm-up and cool-down phases. Begin with a lower number of repetitions – perhaps 10-12 per exercise – and gradually increase as strength and flexibility improve.

Listen to your body; if you experience pain, reduce the intensity or stop the exercise. Consistency is more important than pushing yourself too hard, especially in the initial stages.

Long-term adherence to a regular exercise schedule, guided by reputable PDF resources, is key to managing bunion symptoms and improving foot function.

Bunion Exercise PDF Resources

Liebscher & Bracht provide a free PDF guide with six exercises for hallux valgus, utilized by over 2.5 million people globally for relief.

Liebscher & Bracht Bunion Exercise Guide

Liebscher & Bracht offer a comprehensive, freely downloadable PDF guide specifically designed for individuals experiencing bunion discomfort, also known as hallux valgus. This resource has already assisted over 2.5 million people worldwide in their journey towards pain relief and improved foot function.

The guide details six simple yet effective exercises rooted in their unique therapeutic techniques. These exercises are designed to address the underlying muscular imbalances often contributing to bunion development and pain. The focus isn’t solely on the big toe, but on a holistic approach to foot and lower leg mechanics.

Users can expect clear instructions and illustrations accompanying each exercise, making it accessible for individuals of varying fitness levels. The guide emphasizes a proactive approach to bunion management, empowering individuals to take control of their health and potentially avoid or delay the need for more invasive interventions. It’s a valuable starting point for those seeking non-surgical options.

Finding Reputable Bunion Exercise PDFs

When searching for bunion exercise PDFs online, prioritizing reputable sources is crucial for ensuring safety and effectiveness. Look for resources originating from established medical institutions, physiotherapy clinics, or organizations specializing in foot health. The Liebscher & Bracht guide is a strong starting point, offering a well-structured program.

Be cautious of PDFs lacking clear author credentials or those promoting unrealistic claims. Cross-reference information with trusted sources like the Mayo Clinic or the Journal of Orthopaedic & Sports Physical Therapy, which highlight the importance of strengthening specific foot and calf muscles.

Always review the exercises with a healthcare professional before starting, especially if you have underlying health conditions. A reputable PDF will emphasize proper form and caution against pushing through pain. Prioritize guides that focus on strengthening supporting muscles rather than solely targeting the bunion itself for optimal, long-term results.

Beyond Exercises: Additional Bunion Care

While exercises are beneficial, combining them with proper footwear and orthotics is vital for comprehensive bunion management, enhancing PDF exercise outcomes.

Proper Footwear

Selecting appropriate footwear is crucial when managing bunions, complementing the benefits gained from exercises detailed in PDF guides like those offered by Liebscher & Bracht. Footwear should prioritize a wide toe box, allowing ample space for the toes to splay naturally and avoiding compression of the bunion.

High heels and pointed-toe shoes should be avoided as they exacerbate the condition, increasing pressure on the big toe joint. Opt for shoes made from soft, flexible materials that conform to the foot’s shape, minimizing friction and irritation.

Consider shoes with adjustable closures, such as laces or straps, to customize the fit and accommodate swelling. Properly fitted footwear reduces stress on the bunion, supporting the effectiveness of exercises and overall bunion care, as outlined in various online resources and PDF guides.

Orthotics and Arch Support

Utilizing orthotics and arch support can significantly enhance bunion management, working synergistically with exercises found in resources like the Liebscher & Bracht PDF guides. Orthotics help redistribute pressure away from the bunion, reducing pain and slowing its progression.

Arch support is particularly important, as a flattened arch can contribute to inward rolling of the foot, exacerbating stress on the big toe joint. Custom or over-the-counter orthotics can provide this necessary support, improving foot biomechanics.

Combining orthotic use with targeted foot and calf strengthening exercises – as detailed in available PDFs – offers a comprehensive approach. This combination addresses both the structural and muscular aspects of bunion discomfort, promoting long-term relief and improved foot function.

Pain Management Strategies

Alongside bunion exercises detailed in PDF resources like those from Liebscher & Bracht, implementing effective pain management strategies is crucial. While exercises aim to strengthen supporting muscles and improve biomechanics, immediate pain relief may require additional methods.

Over-the-counter pain relievers, such as ibuprofen or naproxen, can help reduce inflammation and alleviate discomfort. Applying ice packs to the affected area for 15-20 minutes several times a day can also provide temporary relief.

Furthermore, proper footwear – avoiding high heels and tight-fitting shoes – is essential. Combining these strategies with consistent exercise, as outlined in accessible PDFs, creates a holistic approach to managing bunion pain and improving overall foot health, potentially delaying the need for surgical intervention.

When to Seek Professional Help

If pain persists despite exercises from PDFs, or if immobility develops, consult a podiatrist. Surgical options exist, with varying methods needing expert evaluation.

Consulting a Podiatrist

While bunion exercise PDFs from sources like Liebscher & Bracht can offer relief, a podiatrist provides a crucial, personalized assessment. They can determine the severity of your bunion and whether exercises alone are sufficient, or if further intervention is needed.

A podiatrist will evaluate your foot structure, gait, and range of motion, considering factors not addressed in general PDF guides. They can diagnose underlying issues contributing to the bunion and tailor a treatment plan specifically for you.

Don’t hesitate to seek professional guidance if you’ve diligently followed exercise routines from PDFs without significant improvement, or if pain worsens. A podiatrist can also discuss potential complications and guide you through all available treatment options, including surgical considerations.

They can also advise on appropriate footwear and orthotics, complementing the exercises found in PDF resources, for a comprehensive approach to bunion management.

Bunion Surgery Options

If conservative treatments, including exercises detailed in PDFs like those from Liebscher & Bracht, fail to provide adequate relief, surgical intervention may be considered. Multiple surgical methods exist, and understanding these is crucial.

Different approaches address varying aspects of the bunion deformity, focusing on realigning the big toe joint. Some methods involve cutting and reshaping the bone, while others focus on soft tissue adjustments. Recent discussions highlight that doctors offer differing methods.

It’s vital to consult with a podiatrist experienced in various techniques to determine the most suitable option for your specific case. Comparing approaches, recovery times, and potential complications is essential.

Even post-surgery, exercises – potentially building upon those initially found in PDFs – are often prescribed to restore strength and mobility. A comprehensive approach, combining surgery with rehabilitation, yields the best outcomes.

hip replacement exercises after 6 weeks pdf

Article Plan: Hip Replacement Exercises After 6 Weeks

This comprehensive plan details a rehabilitation program‚ focusing on strengthening‚ range of motion‚ and functional exercises post-surgery․
It’s designed for continued progress‚
emphasizing walking and consistent follow-up appointments with your surgeon․

Following a total hip replacement‚ regaining strength‚ flexibility‚ and function is crucial for a successful recovery․ This article outlines a progressive exercise program specifically designed for individuals 6 weeks post-operation․
It’s important to remember that rehabilitation is a journey‚ and consistency is key․ This plan builds upon the foundation established in the initial post-operative phase‚ transitioning towards more demanding activities․

The exercises detailed here are a general guide; however‚ individual progress varies․ Frequent follow-up appointments with your surgeon are essential to monitor your recovery and adjust the program as needed․ Walking remains a cornerstone of rehabilitation‚ aiming for 15-30 minutes‚ two to three times daily․
Avoid prolonged sitting – remember to stand‚ stretch‚ and walk frequently․ This program aims to prepare you for a return to a healthy‚ active lifestyle․

Understanding the 6-Week Post-Op Stage

At six weeks post-op‚ the initial acute healing phase has subsided‚ allowing for a more aggressive‚ yet controlled‚ rehabilitation approach․ While pain and swelling may still be present‚ they should be gradually decreasing․ This stage focuses on building strength in the muscles surrounding the hip joint – including the glutes‚ quadriceps‚ and hamstrings – to improve stability and function․

Expect to continue experiencing some discomfort during and after exercise‚ but it should be manageable and not debilitating․ A key goal is to increase range of motion and flexibility‚ preparing the hip for everyday activities․ Progressive strengthening‚ targeting hip abductors‚ flexors‚ and adductors‚ is vital․ Remember‚ this phase bridges the gap between initial recovery and a return to more demanding functional movements‚ requiring patience and adherence to the prescribed program․

Goals of Exercise After 6 Weeks

The primary goals at this stage are to maximize hip strength and restore a functional range of motion‚ enabling a return to daily activities with confidence․ Specifically‚ we aim to improve muscle control around the hip joint‚ enhancing stability during walking and weight-bearing․ Increasing quadriceps strength is crucial for effective gait and stair climbing‚ while gluteal strengthening supports hip extension and prevents limping․

Furthermore‚ the program seeks to minimize stiffness and pain‚ promoting a more natural and comfortable movement pattern․ A significant objective is to build endurance‚ allowing for prolonged periods of activity without excessive fatigue․ Ultimately‚ the goal is to prepare you for a long-term maintenance exercise program‚ ensuring continued hip health and preventing future complications․ Consistent effort and adherence to precautions are key to achieving these objectives․

Phase 1: Strengthening Exercises (Weeks 6-8)

This phase focuses on rebuilding muscle strength around the hip‚ including gluteals‚ quadriceps‚ and hamstrings․ Progressive overload is key to achieving optimal results․

Gluteal Strengthening

Strengthening the gluteal muscles is crucial for hip stability and proper gait after a total hip replacement․ Weak glutes can contribute to limping or instability․ Begin with gluteal sets – simply squeezing your buttocks together and holding for five to ten seconds‚ repeating ten to fifteen times․

Progress to side-lying hip abduction․ Lying on your side with your operated leg on top‚ slowly lift your leg towards the ceiling‚ keeping your knee straight․ Perform ten to fifteen repetitions․ Avoid rotating your hip during this exercise․ As you gain strength‚ consider adding ankle weights‚ starting with one pound and gradually increasing․

Bridging is another excellent exercise․ Lie on your back with your knees bent and feet flat on the floor․ Lift your hips off the ground‚ squeezing your glutes at the top․ Hold for a few seconds and slowly lower back down․ Repeat ten to fifteen times․ Ensure your core is engaged throughout the exercise to protect your lower back․

Quadriceps Strengthening

Rebuilding quadriceps strength is paramount for regaining full function after hip replacement surgery․ Begin with quad sets: tighten your thigh muscle‚ pressing the back of your knee into the bed or floor‚ and hold for five to ten seconds․ Repeat this ten to fifteen times‚ several times a day․

Short arc quads are the next progression․ Place a rolled towel under your knee while lying on your back․ Slowly straighten your knee‚ lifting your foot off the floor․ Hold for a few seconds and slowly lower․ Perform ten to fifteen repetitions․

Straight leg raises are also beneficial․ Lie on your back with one leg bent and the other straight․ Slowly lift the straight leg six to twelve inches off the ground‚ keeping it straight․ Hold for a few seconds and slowly lower․ Repeat ten to fifteen times․ Focus on controlled movements and avoid arching your back․ Progressive strengthening is key‚ building towards full leg extension․

Hamstring Strengthening

Strengthening the hamstrings is crucial for hip stability and overall leg function post-surgery․ Begin with hamstring sets while lying on your stomach․ Gently press your heel down into the surface‚ tightening your hamstring muscle․ Hold for five to ten seconds‚ repeating ten to fifteen times‚ several times daily․

Bridging exercises are an excellent progression․ Lie on your back with knees bent and feet flat on the floor․ Lift your hips off the floor‚ squeezing your glutes and hamstrings․ Hold for a few seconds and slowly lower․ Aim for ten to fifteen repetitions․

Heel slides are another effective exercise․ Lie on your back with legs extended․ Slowly slide your heel towards your buttocks‚ bending your knee․ Keep your heel in contact with the surface throughout the movement․ Repeat ten to fifteen times․ Controlled movements are vital‚ avoiding any pain․ Consistent practice will improve hamstring strength and flexibility․

Hip Abductor & Adductor Exercises

Strengthening hip abductors and adductors enhances stability and improves walking patterns after hip replacement․ Side-lying leg lifts target abductors․ Lie on your side with the operative leg on top‚ keeping it straight․ Slowly lift your leg towards the ceiling‚ maintaining control․ Repeat ten to fifteen times․

Resistance band exercises are beneficial for both abductors and adductors․ Secure a resistance band around your ankles․ For abduction‚ step sideways against the band’s resistance․ For adduction‚ bring your legs together against the band․ Perform ten to fifteen repetitions for each․

Clamshells are another effective abductor exercise․ Lie on your side with knees bent and feet together․ Keeping your feet together‚ lift your top knee‚ engaging your hip abductors․ Hold briefly and lower․ Aim for ten to fifteen repetitions․ Focus on controlled movements and avoid pain․

Phase 2: Range of Motion & Flexibility Exercises

This phase focuses on regaining hip movement and reducing stiffness through gentle stretches․ Consistent practice is key to improving flexibility and function post-surgery․

Hip Flexion Exercises

Hip flexion exercises are crucial for regaining the ability to lift your leg‚ essential for activities like walking and climbing stairs․ Begin seated‚ gently sliding your operated leg backward‚ keeping your heel on the surface as much as possible․ Aim to achieve a comfortable range of motion without forcing the movement or experiencing pain․

As you progress‚ you can perform this exercise lying on your back‚ bringing your knee towards your chest․ Support your thigh with a towel if needed․ Another variation involves seated hip flexion with resistance‚ using a resistance band looped around your foot․ Slowly pull your leg forward against the band’s resistance‚ maintaining control throughout the movement․

Remember to focus on controlled movements and avoid any sudden jerks․ Perform 10-15 repetitions of each exercise‚ 2-3 times a day․ Gradually increase the resistance or range of motion as your strength and flexibility improve․ Always listen to your body and stop if you feel any sharp pain․

Hip Extension Exercises

Hip extension exercises are vital for strengthening the gluteal muscles and hamstrings‚ which are key for propelling you forward during walking and other activities․ Begin lying face down with your operated leg straight․ Gently lift your leg off the surface‚ keeping your knee straight and squeezing your gluteal muscles․ Avoid arching your back excessively․

As you gain strength‚ you can add ankle weights to increase the challenge․ Another effective exercise is standing hip extension‚ using a resistance band looped around your ankles․ Slowly extend your leg backward against the band’s resistance‚ maintaining a controlled movement․ Focus on engaging your gluteal muscles throughout the exercise․

Perform 10-15 repetitions of each exercise‚ 2-3 times daily․ Ensure you maintain proper form to avoid strain․ Listen to your body and cease if you experience any discomfort․ Gradual progression is key to building strength and restoring full hip function․

Hip Internal & External Rotation

These exercises improve hip mobility and address potential stiffness following surgery․ Begin lying on your back with your knees bent and feet flat on the floor․ Slowly rotate your operated leg inward (internal rotation)‚ keeping your heel on the floor․ Then‚ rotate your leg outward (external rotation)‚ again maintaining heel contact․

Resistance bands can enhance these exercises․ Secure a band around your ankles and perform the rotations against the band’s resistance․ Focus on controlled movements and avoid forcing the rotation beyond your comfortable range․ Another variation involves seated rotations‚ maintaining good posture․

Aim for 10-15 repetitions of each rotation‚ 2-3 times daily․ Pay attention to any pain and modify the exercise accordingly․ Consistent performance of these rotations will help restore normal hip movement and prevent stiffness‚ contributing to improved function and reduced discomfort․

Hip Abduction & Adduction Stretches

These stretches enhance flexibility and range of motion in the hip‚ crucial for regaining normal gait and function․ Begin with hip abduction – lying on your side‚ gently lift your operated leg towards the ceiling‚ keeping your knee straight․ Avoid rotating your hip; focus on a straight upward movement․

For adduction‚ lie on your back with knees bent․ Gently let your operated leg fall inward towards the midline of your body‚ keeping your shoulder flat on the floor․ A slight stretch should be felt in the inner thigh․ Use a towel or strap if needed to assist the movement․

Hold each stretch for 20-30 seconds‚ repeating 2-3 times per session․ Remember to breathe deeply throughout the stretch․ These stretches‚ performed consistently‚ will improve hip flexibility‚ reduce muscle tension‚ and contribute to a more natural and pain-free movement pattern․

Phase 3: Functional Exercises

This phase focuses on real-world activities‚ including walking progression‚ stair climbing‚ and standing exercises․ Balance work is also key‚ restoring confidence and independence․

Walking Progression

Initially‚ aim for 15-minute walks two to three times daily‚ gradually increasing duration to 30 minutes‚ also two to three times a day by the end of six weeks․ This consistent approach is paramount for regaining strength and endurance․ Remember to avoid prolonged sitting – stand‚ stretch‚ and walk after each hour․

Focus on proper gait mechanics: heel strike‚ followed by a smooth roll through the foot․ Maintain a comfortable pace‚ prioritizing form over speed․ As strength improves‚ incorporate gentle inclines and varied terrain․ Listen to your body and adjust the intensity accordingly․ Walking is arguably the most important exercise post-replacement‚ promoting circulation‚ muscle activation‚ and overall functional recovery․ Regular walking contributes significantly to a successful and lasting outcome‚ fostering independence and a return to an active lifestyle․ Consistent effort yields substantial benefits․

Stair Climbing Technique

Mastering stair climbing is crucial for regaining functional independence․ Begin with a stable handrail for support‚ and always lead with your stronger leg․ Focus on a controlled ascent‚ ensuring your entire foot makes contact with each step before shifting your weight․ Avoid rushing; prioritize a slow‚ deliberate motion․

When descending‚ the same principles apply – lead with the stronger leg and maintain control․ Small steps are preferable to large strides‚ minimizing stress on the new hip joint․ As confidence grows‚ gradually reduce reliance on the handrail․ Remember to alternate leading legs with each repetition․ Stair climbing strengthens key muscle groups‚ including the glutes‚ quadriceps‚ and hamstrings‚ contributing to overall stability and mobility․ Practice regularly‚ but stop if you experience pain․ This exercise is a significant milestone in your recovery journey․

Standing Hip Exercises

Standing exercises enhance stability and strength‚ building upon the foundation established in earlier phases․ Begin with gentle hip abductions – slowly lifting your leg out to the side‚ keeping your body upright and core engaged․ Follow with hip extensions‚ carefully moving your leg backward while maintaining balance․

These movements target the hip abductors‚ adductors‚ and gluteal muscles‚ vital for proper hip function․ Perform these exercises near a stable surface for support if needed․ Focus on controlled movements‚ avoiding any jerking or sudden motions․ Gradually increase the number of repetitions as your strength improves․ Remember to maintain good posture throughout each exercise․ Standing exercises are excellent for simulating everyday activities‚ preparing you for a return to a more active lifestyle․ Consistency is key to achieving optimal results․

Balance Exercises

Regaining balance is crucial after hip replacement surgery‚ as it impacts gait and prevents falls․ Start with simple exercises like standing on one leg for short durations‚ gradually increasing the hold time as your stability improves․ Utilize a sturdy chair or countertop for support initially․

Progress to more challenging exercises‚ such as tandem stance – placing one foot directly in front of the other‚ heel to toe․ Incorporate gentle weight shifts‚ moving your weight from side to side while maintaining your balance․ Focus on engaging your core muscles to enhance stability․ These exercises strengthen the muscles responsible for maintaining equilibrium․ Practice in a safe environment‚ free from obstacles․ Consistent balance training will improve your confidence and reduce your risk of falls‚ contributing to a successful recovery and a return to independent living․

Important Considerations

Prioritize pain management‚ adhere to hip precautions‚ and avoid overexertion during exercises․ Always include proper warm-up and cool-down routines for optimal recovery․

Pain Management During Exercise

Experiencing some discomfort is normal during rehabilitation‚ but sharp or increasing pain signals a need to adjust your exercise routine․ Mild soreness that subsides with rest is generally acceptable‚ indicating muscle adaptation․ However‚ consistently exceeding a tolerable pain level can hinder progress and potentially cause setbacks․

Utilize prescribed pain medication as directed by your surgeon to manage discomfort before‚ during‚ or after exercise sessions․ Ice packs applied for 15-20 minutes post-exercise can effectively reduce inflammation and alleviate pain․ Communicate openly with your physical therapist about your pain levels; they can modify exercises or suggest alternative approaches․

Listen to your body and don’t push through significant pain․ Prioritize proper form over the number of repetitions․ Gradually increase the intensity and duration of exercises as your strength and tolerance improve․ Remember‚ consistent‚ pain-managed exercise is key to a successful recovery․

Hip Precautions (Review)

While many precautions lessen after six weeks‚ maintaining awareness is crucial for hip joint stability and preventing dislocation․ Avoid excessive bending at the hip – generally‚ beyond 90 degrees – especially when sitting or reaching for objects․ Refrain from crossing your legs at the knees‚ as this can strain the hip joint․

Internal rotation of the operated leg should be limited; avoid twisting your foot inward while the leg is extended․ Be mindful of reaching for the floor or tying shoes without proper assistance or adaptive devices․ Your surgeon’s specific guidelines take precedence‚ as precautions can vary based on the surgical approach used․

Continue to use assistive devices‚ like a raised toilet seat or grab bars‚ as needed․ Gradually progress towards independence‚ but always prioritize safe movement patterns․ Regularly review these precautions with your physical therapist to ensure continued adherence and optimal healing․

Avoiding Overexertion

Post-six weeks‚ enthusiasm can lead to doing too much‚ too soon․ Listen attentively to your body and recognize the difference between discomfort and pain․ Mild muscle soreness is expected‚ but sharp‚ persistent pain signals overexertion․ Avoid pushing through pain‚ as this can hinder healing and potentially cause complications․

Gradually increase the intensity and duration of exercises‚ following your physical therapist’s guidance․ Don’t compare your progress to others; everyone heals at their own pace․ Incorporate rest days into your routine to allow muscles to recover and rebuild․ Alternate activity with rest‚ avoiding prolonged periods of exertion․

Be mindful of fatigue; stop exercising if you feel excessively tired․ Prioritize proper form over completing a high number of repetitions․ Remember that consistency‚ not intensity‚ is key to long-term success․

Warm-up and Cool-down Routines

Prior to each exercise session‚ a thorough warm-up is crucial․ Begin with 5-10 minutes of low-impact cardiovascular activity‚ such as walking‚ to increase blood flow to the muscles․ Follow this with gentle range-of-motion exercises‚ like ankle pumps‚ leg swings‚ and hip circles‚ preparing the joint for more strenuous activity․

A proper cool-down is equally important‚ preventing muscle soreness and promoting flexibility․ Spend 5-10 minutes performing the same range-of-motion exercises as your warm-up‚ but at a slower pace․ Static stretches‚ holding each stretch for 20-30 seconds‚ can further enhance flexibility․

Focus on stretching the glutes‚ quadriceps‚ hamstrings‚ and hip flexors․ Remember to breathe deeply throughout both the warm-up and cool-down․ These routines are vital for optimizing recovery and preventing injury․

Long-Term Maintenance

Consistent exercise‚ two to three times weekly‚ is key for sustained strength and a healthy lifestyle․ Regular follow-ups with your surgeon are also essential․

Continuing Exercise Beyond 8 Weeks

Maintaining a regular exercise routine is paramount for long-term hip health and function following total hip replacement․ While the initial 8-week program provides a strong foundation‚ it’s crucial to transition into a sustainable‚ ongoing exercise plan․ This doesn’t necessarily mean continuing the exact same exercises indefinitely‚ but rather adapting and progressing them․

Focus should remain on the core principles established during rehabilitation: strengthening the muscles surrounding the hip (glutes‚ quadriceps‚ hamstrings‚ abductors‚ and adductors)‚ maintaining a good range of motion‚ and incorporating functional movements into daily life․ Consider incorporating low-impact activities like swimming‚ cycling‚ or walking into your routine․

Gradually increase the intensity and duration of your exercises as your strength and endurance improve․ Listen to your body and avoid pushing yourself too hard‚ especially in the beginning․ Regularly reassess your progress and adjust your program accordingly․ Continued adherence to a maintenance program will help prevent stiffness‚ pain‚ and further deterioration of the joint‚ ultimately maximizing the longevity of your hip replacement․

Lifestyle Modifications for Hip Health

Beyond dedicated exercise‚ several lifestyle adjustments can significantly contribute to the long-term health of your hip replacement․ Maintaining a healthy weight is crucial‚ as excess weight places increased stress on the artificial joint․ Prioritize a balanced diet rich in calcium and vitamin D to support bone health and overall well-being․

Avoid prolonged sitting; remember to stand‚ stretch‚ and walk periodically – ideally‚ avoid sitting for longer than one hour at a time․ Modify activities that place excessive strain on your hip‚ such as heavy lifting or high-impact sports․ Consider using assistive devices‚ like a cane or walker‚ when needed‚ especially on uneven terrain․

Pay attention to your posture and body mechanics during daily activities․ Regularly assess your home environment for potential hazards‚ such as loose rugs or slippery floors‚ and make necessary modifications to prevent falls; These proactive steps‚ combined with consistent exercise‚ will help ensure a successful and lasting outcome from your hip replacement surgery․

When to Contact Your Surgeon

While post-operative exercise is vital‚ recognizing potential complications and knowing when to seek medical attention is equally important․ Contact your surgeon immediately if you experience a sudden increase in pain‚ redness‚ swelling‚ or warmth around the surgical site – these could indicate an infection․

Report any new or worsening drainage from the incision‚ as well as any signs of a blood clot‚ such as calf pain‚ swelling‚ or shortness of breath․ Difficulty with walking‚ instability‚ or a feeling that the hip is dislocating requires prompt evaluation․

Don’t hesitate to reach out if you have concerns about your progress or experience any unusual symptoms․ Frequent follow-up appointments are necessary to monitor your recovery‚ but don’t wait for a scheduled visit if you suspect a problem․ Your surgeon is your best resource for addressing any concerns and ensuring a successful long-term outcome․

patella fracture rehabilitation exercises pdf

Patella Fracture Rehabilitation Exercises: A Comprehensive Guide

Navigating recovery demands a structured approach‚ often utilizing downloadable patella fracture rehabilitation exercises PDF guides for consistent‚ informed progress post-surgery or injury.

Understanding Patella Fractures

Patella fractures‚ commonly known as kneecap fractures‚ disrupt the smooth articulation of the knee joint‚ impacting mobility and function. These injuries often result from direct trauma – falls‚ vehicle accidents‚ or sports-related impacts – but can also occur due to underlying conditions weakening the bone. Understanding the fracture’s specifics is crucial for tailoring a rehabilitation plan‚ often detailed in patella fracture rehabilitation exercises PDF resources.

Fracture severity varies significantly‚ ranging from stable‚ non-displaced breaks to comminuted fractures with multiple fragments. The patella’s role in extending the knee and leveraging quadriceps muscle force means even minor fractures can cause substantial pain and disability. Successful recovery hinges on restoring knee range of motion‚ strength‚ and stability‚ guided by progressive exercises outlined in comprehensive rehabilitation protocols and readily available as downloadable patella fracture rehabilitation exercises PDF guides.

Types of Patella Fractures

Patella fractures aren’t uniform; classification dictates rehabilitation approaches‚ often detailed within patella fracture rehabilitation exercises PDF materials. Stable‚ non-displaced fractures involve a single break without fragment separation‚ allowing for conservative management. Displaced fractures see bone fragments shift‚ potentially requiring surgical intervention (ORIF). Comminuted fractures involve multiple fragments‚ demanding more complex surgical repair and a prolonged recovery.

Stress fractures‚ hairline cracks from repetitive strain‚ are less common but require rest and gradual reloading. Open fractures‚ where bone penetrates the skin‚ pose a higher infection risk and necessitate immediate medical attention. Rehabilitation protocols‚ frequently found as patella fracture rehabilitation exercises PDF downloads‚ are adjusted based on fracture type‚ surgical approach‚ and individual patient factors. Understanding these distinctions is vital for optimizing healing and regaining full function.

Post-Operative Considerations (ORIF)

Open Reduction Internal Fixation (ORIF) significantly impacts rehabilitation; detailed patella fracture rehabilitation exercises PDF guides often specifically address post-ORIF care. Initial focus centers on wound management‚ infection prevention‚ and pain control. Weight-bearing restrictions are common‚ typically progressing from non-weight-bearing to partial‚ then full weight-bearing as guided by the surgeon and physical therapist.

Immobilization‚ usually with a knee immobilizer or hinged brace‚ protects the repair. Early mobilization‚ guided by a patella fracture rehabilitation exercises PDF protocol‚ is crucial to prevent stiffness. Swelling management‚ utilizing ice and elevation‚ is paramount. Adherence to the prescribed protocol‚ including specific exercises outlined in the PDF‚ is vital for optimal healing and restoring knee function post-surgery.

Phase 1: Initial Rehabilitation (0-4 Weeks)

The initial phase (0-4 weeks) prioritizes pain and swelling reduction‚ protected healing‚ and regaining initial range of motion. A patella fracture rehabilitation exercises PDF will detail gentle exercises like ankle pumps‚ quad sets‚ and heel slides. Weight-bearing is typically restricted‚ often starting with non-weight-bearing or toe-touch weight-bearing‚ guided by physician approval.

Bracing or immobilization is standard‚ protecting the fracture site. Early range of motion exercises‚ as outlined in the PDF‚ focus on achieving 0-15 degrees of knee flexion. Emphasis is placed on maintaining muscle activation without stressing the repair. Consistent adherence to the patella fracture rehabilitation exercises PDF protocol during this phase is crucial for establishing a foundation for subsequent rehabilitation stages.

Weight-Bearing Protocol

Weight-bearing progression is meticulously controlled during the initial phases‚ detailed within a patella fracture rehabilitation exercises PDF. Typically‚ Phase 1 (0-4 weeks) begins with non-weight-bearing or toe-touch weight-bearing‚ utilizing crutches for support. The PDF will specify gradual increases‚ potentially transitioning to partial weight-bearing as tolerated‚ always prioritizing pain levels and fracture stability.

Full weight-bearing is usually delayed until adequate healing is observed on follow-up imaging. Maintaining knee extension during weight-bearing is often emphasized. The patella fracture rehabilitation exercises PDF will outline specific criteria for advancing weight-bearing‚ such as pain-free range of motion and adequate quadriceps control. Strict adherence to this protocol minimizes stress on the healing fracture and optimizes recovery.

Bracing and Immobilization

Initial immobilization‚ often with a knee immobilizer‚ is a cornerstone of patella fracture rehabilitation exercises PDF guidance. This phase‚ typically lasting 0-4 weeks‚ protects the fracture site and minimizes pain. The PDF will detail the specific type of brace utilized – often transitioning to a hinged knee brace allowing controlled range of motion.

Brace wear is generally continuous‚ removed only during supervised physical therapy sessions. The patella fracture rehabilitation exercises PDF will specify weaning criteria‚ based on radiographic evidence of healing and clinical assessment. Proper brace fitting and education on its use are crucial. The goal is to gradually restore knee mobility while maintaining fracture stability‚ as outlined within the detailed protocol provided in the PDF resource.

Range of Motion Exercises (Weeks 0-4)

Early range of motion (ROM)‚ detailed in patella fracture rehabilitation exercises PDF materials‚ is vital to prevent stiffness. Initially‚ focus on gentle ankle pumps and quadriceps sets – isometric contractions – to maintain muscle activation without stressing the fracture; The PDF will likely prescribe heel slides‚ cautiously progressing the knee’s flexion within a pain-free arc.

Active-assisted range of motion (AAROM)‚ utilizing a towel or therapist assistance‚ is introduced as tolerated. The patella fracture rehabilitation exercises PDF emphasizes avoiding forced flexion or extension. Goals for weeks 0-4 typically include achieving 0-70 degrees of flexion. Consistent‚ gentle movements‚ guided by the PDF’s instructions‚ are key to restoring knee function and minimizing long-term complications.

Phase 2: Intermediate Rehabilitation (4-8 Weeks)

Phase 2‚ as outlined in a comprehensive patella fracture rehabilitation exercises PDF‚ builds upon initial gains. Active-assisted range of motion (AAROM) continues‚ aiming for 0-90 degrees of knee flexion. Strengthening exercises are progressively introduced‚ starting with short-arc quads and straight leg raises. The PDF will detail proper form to avoid stressing the healing fracture.

Gentle hamstring curls and calf raises are added‚ focusing on controlled movements. Weight-bearing is gradually increased‚ often transitioning from touch-down weight-bearing to partial weight-bearing as tolerated. The patella fracture rehabilitation exercises PDF stresses monitoring for pain and swelling‚ adjusting the protocol accordingly. Proprioceptive exercises‚ like balance work‚ are initiated to improve joint stability and neuromuscular control.

Active-Assisted Range of Motion (AAROM)

AAROM‚ detailed within a patella fracture rehabilitation exercises PDF‚ is crucial during this phase. It involves the patient initiating movement while the therapist assists‚ maximizing range without causing undue stress. Initially‚ focus on achieving 0-60 degrees of knee flexion‚ utilizing heel slides or a continuous passive motion (CPM) machine as indicated in the PDF.

The patella fracture rehabilitation exercises PDF emphasizes gentle‚ pain-free movements. As strength improves‚ the assisted range increases towards 90 degrees. The therapist guides the patient‚ ensuring proper technique and preventing compensatory movements. Regular monitoring of swelling and pain levels is vital‚ adjusting the AAROM intensity accordingly. The PDF will likely include illustrations demonstrating correct form and progression guidelines.

Strengthening Exercises (Weeks 4-8)

Strengthening exercises‚ as outlined in a patella fracture rehabilitation exercises PDF‚ begin cautiously during weeks 4-8. Initial focus is on quadriceps activation without significant knee flexion‚ utilizing isometric exercises like quad sets and straight leg raises. The PDF will detail proper form to avoid patellofemoral stress.

Progress to short-arc quads (0-45 degrees) and hamstring curls‚ gradually increasing resistance with ankle weights or resistance bands‚ as the PDF suggests. Calf raises are also introduced. A key component‚ detailed in the PDF‚ is avoiding open-chain exercises initially‚ prioritizing closed-chain activities to minimize stress on the healing fracture. Pain monitoring is crucial; exercises should be pain-free or cause minimal discomfort‚ guiding progression based on individual tolerance.

Phase 3: Advanced Rehabilitation (8-12 Weeks)

Phase 3‚ detailed within a patella fracture rehabilitation exercises PDF‚ concentrates on restoring full function and preparing for return to activity. Progressive strengthening exercises are paramount‚ including lunges‚ step-ups‚ and squats – initially with bodyweight‚ then adding resistance. The PDF emphasizes controlled movements and proper form to prevent re-injury.

Proprioceptive training‚ also outlined in the PDF‚ is vital for regaining balance and coordination‚ utilizing wobble boards or balance pads. Plyometrics‚ like jump squats‚ may be introduced cautiously. The PDF will specify criteria for advancing to higher-impact activities. Continued focus on hamstring and calf strengthening is maintained. This phase aims to achieve near-normal strength‚ range of motion‚ and functional capacity‚ guided by the individualized protocol within the PDF.

Progressive Strengthening Exercises

A patella fracture rehabilitation exercises PDF will detail a carefully sequenced progression of strengthening. Initially‚ focus on isometric quadriceps contractions‚ holding for 5-10 seconds‚ multiple repetitions. Progress to short-arc quads‚ then straight leg raises‚ gradually increasing resistance with ankle weights. Lunges and step-ups are introduced‚ emphasizing controlled descent and ascent.

The PDF outlines increasing repetitions and sets as strength improves. Squats‚ starting with partial squats and progressing to full squats‚ are crucial. Hamstring curls and calf raises are integrated to address surrounding muscle groups. Resistance bands provide versatile options for adding challenge. The PDF stresses proper form to avoid compensatory movements and ensure targeted muscle activation‚ minimizing risk of re-injury during this critical strengthening phase.

Proprioceptive Training

A comprehensive patella fracture rehabilitation exercises PDF emphasizes restoring proprioception – your body’s awareness of its position in space. This begins with simple balance exercises‚ like standing on a stable surface with eyes open‚ then closed‚ progressing to unstable surfaces like foam pads or wobble boards. Single-leg stance is a key component‚ increasing duration as balance improves.

The PDF details exercises incorporating perturbations (small‚ controlled disturbances) to challenge reactive stability. Agility drills‚ such as cone drills and figure-eight runs‚ are introduced gradually. These exercises retrain the neuromuscular system to respond quickly and efficiently to unexpected movements‚ crucial for preventing re-injury. The PDF highlights the importance of performing these drills in a safe environment‚ with appropriate supervision‚ to maximize effectiveness and minimize risk.

Return to Activity Considerations

A detailed patella fracture rehabilitation exercises PDF outlines a phased return to activity‚ emphasizing gradual progression to avoid setbacks. Initial considerations involve pain levels‚ swelling‚ and range of motion. Low-impact activities like cycling or swimming are introduced before weight-bearing exercises. The PDF stresses the importance of functional testing – simulating movements required for specific activities – to assess readiness.

Return to sport requires achieving full‚ pain-free range of motion‚ adequate strength (typically 80-90% compared to the uninjured leg)‚ and successful completion of agility drills. The PDF often includes a checklist to guide this process. It cautions against rushing the return‚ as premature activity can lead to re-injury. Individual factors‚ such as sport demands and fracture severity‚ influence the timeline‚ necessitating personalized rehabilitation plans.

Specific Exercises for Patella Fracture Rehab

A comprehensive patella fracture rehabilitation exercises PDF details a progression of movements. Early exercises focus on quadriceps setting‚ heel slides‚ and short-arc quads to restore initial range of motion without stressing the fracture site. As healing progresses‚ the PDF introduces straight leg raises‚ hamstring curls‚ and calf raises to rebuild strength.

Later-stage exercises include step-ups‚ lunges‚ and squats‚ carefully monitored for proper form and pain. Proprioceptive exercises‚ like single-leg stance and wobble board activities‚ are crucial for regaining balance and coordination. The PDF often includes illustrations and detailed instructions for each exercise‚ emphasizing correct technique to maximize effectiveness and minimize risk of re-injury. Consistent adherence to the outlined program is key.

Quad Strengthening Exercises

Patella fracture rehabilitation exercises PDF resources prioritize quadriceps recovery. Initial exercises‚ like quad sets – tightening the thigh muscle without moving the knee – build foundational strength. Short-arc quads‚ lifting the leg a few inches while keeping the knee supported‚ follow. Progressing‚ straight leg raises (SLR) are introduced‚ ensuring minimal lag and controlled movement.

As strength improves‚ step-ups onto a low platform and wall squats become beneficial‚ gradually increasing the range of motion. Lunges‚ both forward and reverse‚ further challenge the quads. The PDF emphasizes proper form to avoid patellofemoral pain. Resistance bands are often incorporated to provide progressive overload‚ and ultimately‚ leg extensions may be added under careful supervision.

Hamstring Strengthening Exercises

Patella fracture rehabilitation exercises PDF guides recognize the importance of hamstring balance. Initially‚ hamstring sets – gently contracting the hamstring muscles – are performed to activate the muscle group; Progressing‚ prone hip extensions are introduced‚ focusing on controlled movement and avoiding excessive lumbar extension.

Bridging exercises‚ squeezing the glutes and lifting the hips off the floor‚ engage the hamstrings alongside the glutes. Standing hamstring curls with resistance bands provide progressive resistance. Later stages incorporate hamstring curls on a machine‚ ensuring proper form and controlled speed. The PDF stresses avoiding exercises that excessively stress the knee joint‚ and emphasizes a balanced approach to prevent muscle imbalances and re-injury.

Calf Strengthening Exercises

Patella fracture rehabilitation exercises PDF resources highlight calf strengthening as crucial for restoring lower leg function and stability. Initial exercises often involve seated calf raises‚ minimizing stress on the knee. These are performed with controlled repetitions‚ focusing on a full range of motion.

Progressing‚ standing calf raises are introduced‚ initially using body weight and then adding resistance with dumbbells or a calf raise machine. Variations like soleus raises (bent-knee calf raises) target the deeper calf muscle. The PDF emphasizes proper form – maintaining a neutral spine and avoiding bouncing – to maximize effectiveness and prevent injury. Gradual increases in resistance and repetitions are recommended‚ guided by pain levels and functional progress.

Core Stabilization Exercises

Patella fracture rehabilitation exercises PDF guides consistently emphasize core strengthening as foundational for overall stability and functional recovery. A weak core impacts biomechanics‚ potentially hindering knee rehabilitation. Initial exercises often include pelvic tilts and abdominal bracing‚ performed in a supine position to minimize stress.

Progression involves bridges‚ bird-dogs‚ and side planks‚ gradually increasing the challenge to core muscles. These exercises improve stability and control‚ crucial for weight-bearing activities. The PDF stresses maintaining proper form – engaging the core throughout each movement – to prevent compensatory patterns. Planks and variations are added as strength improves‚ building endurance and functional capacity. Consistent core work supports knee alignment and reduces strain during rehabilitation.

Importance of Physical Therapy

Patella fracture rehabilitation exercises PDF resources universally highlight the indispensable role of physical therapy in optimizing recovery. Self-directed exercise‚ while helpful‚ cannot replicate the expertise of a qualified therapist. A physical therapist conducts a thorough assessment‚ tailoring a program to individual needs and fracture specifics.

They provide hands-on guidance‚ ensuring correct form and progression‚ minimizing risks of re-injury. The PDF emphasizes the therapist’s ability to address pain‚ swelling‚ and range-of-motion limitations. They monitor progress‚ adjusting the exercise protocol as needed. Furthermore‚ a therapist educates patients on proper body mechanics and activity modification. Consistent physical therapy maximizes functional outcomes‚ facilitating a safe and effective return to pre-injury activity levels.

Potential Complications and Red Flags

Patella fracture rehabilitation exercises PDF guides often include a section detailing potential complications requiring immediate medical attention. These include escalating pain unresponsive to medication‚ increased swelling‚ or signs of infection – redness‚ warmth‚ drainage. A concerning red flag is a sudden inability to bear weight or a feeling of instability in the knee.

Any new or worsening neurological symptoms‚ such as numbness or tingling‚ should be reported promptly. Stiffness that doesn’t improve with prescribed exercises is also a concern. Adhering to the outlined protocol is crucial‚ but recognizing these warning signs and seeking professional evaluation prevents minor issues from becoming significant setbacks in the recovery journey. Ignoring these could jeopardize long-term function.

Long-Term Management and Prevention

Patella fracture rehabilitation exercises PDF resources emphasize continued maintenance even after completing a formal program. Long-term management involves consistent quadriceps and hamstring strengthening to support knee stability. Proprioceptive exercises‚ detailed in many PDFs‚ remain vital for balance and preventing re-injury.

Individuals should adopt activity modifications to minimize stress on the knee joint‚ particularly during high-impact activities. Maintaining a healthy weight reduces load. Regular‚ low-impact exercise‚ like swimming or cycling‚ promotes joint health. Understanding proper biomechanics and utilizing appropriate footwear are preventative measures. Following the guidance within the PDF ensures sustained function and minimizes the risk of future patellar issues‚ promoting a lasting‚ active lifestyle.

Resources for Patella Fracture Rehabilitation (PDFs & Links)

Patella fracture rehabilitation exercises PDF documents are readily available from various sources‚ offering structured programs for each phase of recovery. Orthopedic clinics and hospital websites frequently provide downloadable protocols tailored to ORIF procedures. Search terms like “patella fracture rehab protocol PDF” yield numerous options.

Websites like ScottRittermanMD.com offer detailed post-operative guidelines. The American Academy of Orthopaedic Surgeons (AAOS) provides patient education materials. Physical therapy associations often link to relevant resources. Remember to discuss any downloaded PDF with your physical therapist to ensure it aligns with your specific needs and surgeon’s instructions. Reliable links and downloadable PDFs empower patients to actively participate in their rehabilitation journey;

Monitoring Progress and Adjusting the Protocol

Regular assessment is crucial throughout patella fracture rehabilitation. Utilizing a patella fracture rehabilitation exercises PDF as a guide‚ track your range of motion‚ pain levels‚ and swelling daily. Communicate any setbacks or increased discomfort to your physical therapist immediately.

The initial protocol‚ often outlined in these PDF resources‚ is not rigid. Adjustments are frequently necessary based on individual healing rates and response to exercises. Your therapist will modify the program – progressing or regressing exercises – based on your functional improvements. Consistent monitoring ensures safe and effective recovery‚ preventing overexertion or delayed healing. Remember‚ adherence to a personalized plan‚ guided by professional evaluation‚ is paramount.

femdom guide

Femdom Guide: A Comprehensive Overview (Updated 02/06/2026)

Today, February 6th, 2026, marks a pivotal moment for exploring female dominance, encompassing safety, consent, and diverse dynamics within BDSM practices and relationships.

Femdom, short for female dominance, represents a captivating and increasingly explored dynamic within the broader BDSM (Bondage, Discipline, Dominance, Submission, Sadism, Masochism) landscape. It’s a realm where traditional power structures are intentionally inverted, with a woman taking the lead and a man willingly embracing a submissive role. This isn’t about inherent gender roles, but a consensual exploration of power exchange and control.

The appeal lies in the relinquishing of responsibility, the thrill of surrender, and the unique intimacy forged through trust and vulnerability. Exploring this dynamic requires open communication, clearly defined boundaries, and unwavering commitment to safety, sanity, and consent (SSC). Resources like 500 Cafe offer communities for exploration, while educational workshops can enhance understanding.

This guide aims to provide a comprehensive overview, navigating the nuances of femdom with respect and responsibility, acknowledging the potential for growth, learning, and discipline within this exciting space.

What is Femdom? Defining the Dynamic

Femdom isn’t simply a reversal of roles; it’s a carefully constructed dynamic built on mutual desire and explicit consent. It encompasses a spectrum of interactions, ranging from gentle guidance and playful teasing to more intense scenes involving control, discipline, and even bondage. The core element is the intentional transfer of power from the male submissive to the dominant female (Domme).

This power exchange can manifest in various ways – verbal commands, physical restraint, tasking, or simply the Domme dictating the pace and nature of the interaction. It’s crucial to understand that femdom isn’t about humiliation or abuse; it’s about exploring boundaries within a safe, sane, and consensual framework.

The dynamic thrives on trust, communication, and a shared understanding of expectations. It’s a space where vulnerability is embraced, and control is willingly surrendered, fostering a unique and often deeply fulfilling connection.

The Appeal of Female Dominance

The allure of female dominance is multifaceted, resonating with both participants on deeply personal levels. For submissives, it often stems from a desire to relinquish control, to explore vulnerability, and to experience the thrill of surrendering to a confident and assertive woman. This can be incredibly liberating, freeing them from the pressures of everyday responsibility.

Dominant women, conversely, find empowerment in taking charge, in shaping the dynamic, and in exploring their own authority. It’s a chance to express a side of themselves that may be suppressed in other areas of life.

Beyond these individual motivations, femdom can offer a unique form of intimacy and connection, built on trust, communication, and a shared exploration of power dynamics. It’s a space where societal norms are challenged and redefined, fostering a sense of freedom and authenticity.

Safety and Consent – The Foundation

Prioritizing safe, sane, and consensual (SSC) practices is paramount; physical hazards like bruising or nerve damage must be avoided through careful negotiation and boundaries.

The Importance of Safe, Sane, and Consensual (SSC)

SSC – Safe, Sane, and Consensual – forms the bedrock of any healthy femdom dynamic, and indeed, all BDSM exploration. Safety encompasses minimizing physical and emotional risks, acknowledging potential hazards like bruising, lacerations, or even nerve damage. Sanity implies a clear mental state for all participants, ensuring rational decision-making and awareness of boundaries.

However, consent is the most crucial element. It must be freely given, enthusiastic, informed, and ongoing. Consent isn’t a one-time agreement; it requires continuous communication and the ability to withdraw at any moment without consequence. Understanding and respecting limits is vital.

Ignoring SSC principles can lead to trauma, legal issues, and the destruction of trust. Prioritizing these elements fosters a secure environment where exploration can flourish, and both partners can experience pleasure and fulfillment.

Establishing Boundaries and Limits

Clearly defined boundaries and limits are paramount within a femdom dynamic, ensuring both partners feel secure and respected. This process begins with open and honest communication, discussing individual comfort levels, hard limits (absolutely off-limits activities), and soft limits (activities to explore cautiously).

Boundaries aren’t static; they can evolve as trust deepens and understanding grows. Regularly revisiting these discussions is essential. Limits should cover physical acts, verbal exchanges, emotional expectations, and financial considerations.

It’s crucial to differentiate between a desire to please and genuine consent. A “no” should always be respected, and pressure or coercion is unacceptable. Establishing these guidelines proactively prevents misunderstandings and fosters a safe, enjoyable experience for everyone involved.

Negotiation and Communication Techniques

Effective negotiation and communication are the cornerstones of a healthy femdom relationship. This involves active listening, where both partners fully understand each other’s desires and concerns without interruption. Employ “I” statements to express needs and feelings, avoiding blame or accusatory language.

Regular check-ins are vital, even outside of scenes, to discuss how the dynamic is evolving and address any emerging issues. Utilize pre-scene discussions to outline activities, boundaries, and expectations for that specific session.

Be prepared to compromise and adjust plans based on feedback. Honesty and transparency build trust, fostering a safe space for open dialogue. Remember, negotiation isn’t about “winning”; it’s about creating a mutually satisfying experience.

Safe Words and Their Significance

Safe words are absolutely crucial in any BDSM dynamic, particularly within femdom, acting as an immediate halt to activity. They empower the submissive to instantly communicate discomfort or a desire to stop, without needing to explain or justify themselves in the moment. A clear, easily remembered safe word – like “red” or “pineapple” – should be established before any scene begins.

It’s vital that the dominant respects the safe word immediately and without question. A secondary “slow down” word can also be useful for indicating a need to adjust intensity.

Regularly revisiting and reaffirming the safe word system reinforces trust and safety. Never punish or shame a submissive for using a safe word; it demonstrates responsible participation and self-awareness.

Roles and Dynamics in Femdom

Exploring power exchange, the Domme embodies control and authority, while the Sub willingly relinquishes it, fostering a dynamic of trust and obedience.

The Dominant Female (Domme) – Traits and Responsibilities

The Domme, central to the femdom dynamic, possesses a unique blend of confidence, assertiveness, and emotional intelligence. She isn’t simply ‘in charge’; she actively cultivates an environment of trust and safety, prioritizing consensual exploration. Responsibilities extend beyond issuing commands – a skilled Domme understands the importance of negotiation, boundary setting, and consistent communication.

Effective Dommes demonstrate creativity in devising scenarios and tasks, tailoring experiences to the Sub’s desires and limits. They are attentive listeners, capable of discerning subtle cues and adjusting their approach accordingly. Furthermore, a Domme must be prepared to take ownership of the dynamic, ensuring the Sub’s well-being and fostering growth through discipline and encouragement.

Ultimately, the Domme’s role is to guide, challenge, and empower her Submissive, creating a fulfilling and mutually satisfying experience.

The Submissive Male (Sub) – Traits and Expectations

The Submissive, within the femdom dynamic, willingly relinquishes control, finding pleasure and fulfillment in obedience and surrender. This isn’t about weakness, but rather a conscious choice to explore power exchange and embrace a different role. Key traits often include trust, respect for boundaries, and a desire for guidance.

Expectations for a Sub revolve around open communication, honesty about desires and limits, and a commitment to safe, sane, and consensual (SSC) practices. He actively participates in establishing boundaries and utilizes safe words without hesitation. A Sub should be receptive to feedback and willing to explore his own vulnerabilities.

Ultimately, the Sub’s role is to fully engage in the dynamic, trusting the Domme’s leadership and embracing the experience with enthusiasm and respect.

Power Exchange and Control Dynamics

At the heart of femdom lies a deliberate and negotiated power exchange. This isn’t about absolute control, but a shifting dynamic where the Domme assumes leadership and the Sub willingly yields. Control manifests in various forms – verbal commands, physical direction, tasking, and emotional guidance.

The dynamic thrives on trust and mutual respect. The Domme’s responsibility is to wield power responsibly, prioritizing the Sub’s safety and well-being. The Sub, in turn, trusts the Domme to respect boundaries and act in his best interest.

This exchange isn’t static; it’s a fluid interplay of dominance and submission, constantly negotiated and refined. Understanding these dynamics is crucial for a fulfilling and healthy femdom experience, fostering growth and deepening connection.

Exploring Different Femdom Styles

Femdom isn’t monolithic; it encompasses a spectrum of styles catering to diverse preferences. Some prefer a gentle, nurturing dominance focused on emotional control and praise, while others gravitate towards stricter, more commanding approaches.

Common styles include Mistress/Slave, where the power imbalance is pronounced, and Goddess play, emphasizing worship and adoration. Tasking and obedience training offer structured control, while teasing and denial create anticipation and heighten sensation.

Exploring these styles requires open communication and experimentation. The 500 Cafe community highlights the breadth of alternative sexuality, encouraging individuals to discover what resonates with them. Ultimately, the ‘right’ style is the one that mutually satisfies both partners, built on consent and respect.

Practical Techniques and Activities

Verbal domination, physical control, sensory play, and tasking are key elements, demanding careful attention to safety and enthusiastic consent from all involved.

Verbal Domination and Teasing

Verbal domination within a femdom dynamic centers on the Domme’s skillful use of language to exert control and elicit a desired response from the Sub. This isn’t simply about harshness; it’s about precision, confidence, and understanding the Sub’s triggers and vulnerabilities. Teasing, a crucial component, builds anticipation and heightens the power imbalance.

Effective techniques include issuing commands, offering praise (or withholding it), employing playful degradation, and utilizing suggestive language. The tone is paramount – it should be firm, authoritative, and unwavering. Remember, the goal isn’t to inflict emotional harm, but to create a thrilling and consensual power exchange.

Successful verbal play requires keen observation of the Sub’s reactions and a willingness to adjust the approach accordingly. It’s about crafting a narrative that reinforces the Domme’s control and the Sub’s willing surrender.

Physical Control and Restraint (Bondage) – Safety Considerations

Bondage, a common element in femdom, demands meticulous attention to safety. Prioritize the Sub’s well-being above all else. Always use appropriate restraints – soft rope, cuffs, or ties – avoiding anything that could cause nerve damage or restrict circulation. Regularly check for signs of discomfort, such as numbness, tingling, or changes in skin color.

Ensure the Sub has adequate breathing room and isn’t positioned in a way that compromises their airway. A readily accessible safe word is non-negotiable. Never leave a restrained Sub unattended.

Knowledge of basic first aid is crucial. Be aware of potential physical hazards like bruising, lacerations, and nerve damage. Start slowly, gradually increasing the complexity of restraints as experience grows.

Sensory Deprivation and Enhancement

Exploring sensory play within a femdom dynamic can heighten excitement and submission. Deprivation – think blindfolds, earplugs, or scent masking – intensifies other sensations, creating vulnerability and anticipation. Enhancement, conversely, focuses on amplifying specific senses. Luxurious fabrics, teasing whispers, or carefully chosen aromas can be incredibly potent.

Always prioritize consent and comfort. Begin with mild deprivation or enhancement, gradually increasing intensity while closely monitoring the Sub’s reactions. Ensure the Sub isn’t prone to panic or claustrophobia before employing blindfolds or restraints.

Combine techniques for layered experiences. A blindfolded Sub might be more receptive to verbal domination or gentle touch. Remember, the goal is pleasure and control, not distress;

Tasking and Obedience Training

Tasking establishes the Domme’s control and the Sub’s willingness to obey. Start with simple, clear instructions – “Send me a photo,” “Write a specific phrase,” or “Perform a small chore.” Gradually increase complexity and demand, observing the Sub’s response to gauge limits.

Positive reinforcement is key. Praise obedience and acknowledge effort, even with minor tasks. Conversely, implement pre-negotiated consequences for disobedience, ensuring they are safe, sane, and consensual. These could range from denial of pleasure to additional tasks.

Frame tasks as privileges, not punishments. “Earn” access to rewards through diligent obedience. This reinforces the power dynamic and fosters a sense of anticipation. Remember, consistent communication and clear boundaries are paramount.

Integrating Femdom into a Relationship

Open communication, established ground rules, and a healthy balance are crucial for successfully incorporating femdom dynamics into an existing partnership, fostering trust.

Communication with Your Partner

Effective communication is the cornerstone of any successful dynamic, especially when introducing femdom elements into a relationship. Honest and open dialogue allows both partners to express desires, boundaries, and concerns without judgment. Discussing expectations – what excites each person, what feels uncomfortable, and what is absolutely off-limits – is paramount.

Regular check-ins are vital, not just during initial negotiations but throughout the exploration. These conversations should be ongoing, allowing for adjustments as feelings evolve. Active listening, empathy, and a willingness to compromise are essential skills. Remember, a healthy power exchange isn’t about control; it’s about shared pleasure and mutual respect, built on a foundation of trust and understanding. Don’t assume; always ask!

Establishing Ground Rules and Expectations

Clearly defined ground rules are non-negotiable when exploring femdom. These rules should detail acceptable behaviors, limits, and safe words, ensuring both partners feel secure and respected. Expectations regarding frequency, intensity, and specific activities need explicit discussion. Consider outlining scenarios – what happens if a boundary is approached, or a safe word is used?

Documenting these agreements, even informally, can prevent misunderstandings. Discuss aftercare routines, addressing emotional needs post-scene. Rules aren’t static; they should be revisited and adjusted as the dynamic evolves. Prioritize safety, sanity, and consent (SSC) in all interactions. A well-defined framework fosters trust and allows for a more fulfilling and enjoyable experience for both individuals involved.

Maintaining a Healthy Balance

A thriving femdom dynamic requires consistent effort to maintain equilibrium. It’s crucial to remember that power exchange shouldn’t bleed into everyday life, impacting decision-making outside agreed-upon scenarios. Open communication is paramount; regularly check in with each other regarding feelings, needs, and any emerging concerns.

Ensure both partners retain autonomy and individuality. The submissive shouldn’t feel overwhelmed or lose their sense of self, while the dominant avoids excessive control. Nurture the relationship outside the dynamic with shared interests and mutual respect. Prioritize emotional intimacy alongside the power play. A healthy balance ensures longevity and prevents resentment, fostering a fulfilling connection for both individuals.

Resources and Community

Explore online forums like 500 Cafe, BDSM education workshops, and local groups such as CUTS Perth for support, learning, and connection within the community.

Online Forums and Communities (500 Cafe example)

Navigating the world of femdom and BDSM is significantly enhanced by connecting with like-minded individuals within dedicated online communities. Platforms like 500 Cafe serve as vibrant hubs for exploration, discussion, and support.

These forums offer a safe space to ask questions, share experiences, and learn from others, fostering a sense of belonging and understanding. 500 Cafe, specifically, welcomes those interested in fetish and BDSM, providing a platform to delve into alternative sexuality.

Remember to approach these communities with respect and adhere to their guidelines. Active participation can unlock valuable insights, build confidence, and broaden your understanding of the dynamic. Online interaction complements real-world exploration and education.

BDSM Education and Workshops

Prioritizing education is paramount when exploring femdom and BDSM. Workshops and educational resources provide a structured environment to learn about safe, sane, and consensual practices.

These opportunities delve into crucial aspects like negotiation, boundary setting, and safe word implementation, equipping individuals with the knowledge to navigate the dynamic responsibly. Understanding power dynamics, consent protocols, and potential risks is essential for a fulfilling and ethical experience.

Workshops often cover practical techniques, communication skills, and aftercare practices. Seeking out reputable educators and resources ensures a foundation built on respect, safety, and informed consent. Continuous learning is key to fostering a healthy and enjoyable exploration of femdom.

Finding Local Groups and Events (CUTS Perth example)

Connecting with local BDSM communities offers invaluable support, education, and opportunities for socialization. Groups like CUTS Perth exemplify a safe and inclusive space for individuals exploring submissive and dominant dynamics.

These communities often host munches – casual meetups for socializing – workshops, and play parties, providing a platform to learn from experienced practitioners and build connections. Local events allow for the exploration of interests in a controlled and respectful environment.

Remember to thoroughly vet any group or event, prioritizing safety and consent. Look for organizations with clear codes of conduct and a commitment to responsible BDSM practices. Networking within the community can enhance your understanding and enjoyment of femdom.

Joomla Integration for Femdom Content (Blog/Website)

Leveraging Joomla, with extensions like Elfsight and article comments features, enables dynamic content management and fosters engaging discussions within the femdom community online.

Adding a Blog to Joomla (Elfsight Extension)

Joomla, while powerful, isn’t inherently optimized for blogging; however, integrating a blog is achievable through extensions. The Elfsight Blog extension presents a streamlined solution, boosting website content strategy and audience engagement.

This extension allows for the creation and management of captivating articles, enriched with multimedia elements – crucial for visually stimulating content within the femdom sphere. It simplifies the process of publishing articles, offering a user-friendly interface.

Furthermore, Elfsight facilitates embedding the blog seamlessly into your Joomla site, ensuring a cohesive design. Consider the aesthetic presentation carefully, aligning it with the desired tone and atmosphere of your femdom-focused content. Regular updates and fresh content are key to maintaining audience interest and fostering a thriving online community.

Utilizing Joomla Comments Extensions

A robust comments system is vital for fostering engagement and building a community around femdom content. Joomla lacks native commenting features, necessitating the installation of a dedicated extension.

Articles Comments is a powerful, modern option, designed to bring conversations to life on your site. It’s particularly valuable for sensitive topics like BDSM, offering advanced moderation tools. Leveraging AI, it helps maintain safe and productive discussions, filtering inappropriate content and ensuring respectful interactions.

Effective moderation is paramount; establish clear guidelines for commenting, emphasizing respectful dialogue and adherence to safety protocols. Encourage thoughtful discussion, but swiftly address any violations of community standards. A well-managed comments section enhances user experience and cultivates a loyal readership.

Managing Content and User Engagement

Consistent, high-quality content is crucial for attracting and retaining an audience interested in femdom. Regularly publishing articles, guides, and discussions keeps the community active and engaged.

Utilize Joomla’s content management features to schedule posts, categorize topics, and optimize for search engines. Encourage user participation through polls, quizzes, and open forums. Respond promptly to comments and questions, fostering a sense of community and demonstrating responsiveness.

Monitor website analytics to understand audience preferences and tailor content accordingly. Promote your Joomla site through social media and relevant online communities, like 500 Cafe, to expand reach. Remember, a thriving community requires active moderation and a commitment to providing valuable, informative content;

Addressing Common Concerns

Debunking myths surrounding BDSM, alongside addressing societal stigma, is vital for fostering understanding and acceptance of consensual power dynamics and alternative sexuality.

Debunking Myths and Misconceptions about BDSM

Many misconceptions plague the understanding of BDSM, particularly regarding femdom. A prevalent myth is that it stems from hatred or trauma; however, it’s often rooted in exploration, trust, and consensual power exchange.

It’s frequently falsely assumed that BDSM is inherently abusive, ignoring the crucial element of enthusiastic consent and established boundaries. The dynamic isn’t about inflicting pain or control, but rather a negotiated interplay of dominance and submission.

Furthermore, BDSM isn’t solely about sexual acts; it encompasses a wide range of activities, including role-playing, verbal domination, and psychological exploration. It’s a lifestyle and a community built on respect, communication, and shared desires, not coercion or harm.

Addressing Societal Stigma

Societal stigma surrounding BDSM, and femdom specifically, often arises from a lack of understanding and deeply ingrained societal norms regarding gender roles and sexuality. These norms frequently equate dominance with negativity and submission with weakness, creating a prejudiced lens.

This stigma can lead to shame, secrecy, and difficulty in openly discussing these interests, hindering healthy exploration and communication. It’s crucial to recognize that consensual BDSM practices are a valid expression of sexuality and personal preference, deserving of respect.

Challenging these stigmas requires open dialogue, education, and a willingness to dismantle harmful stereotypes. Creating safe spaces, like online forums such as 500 Cafe, and local groups like CUTS Perth, fosters acceptance and support within the community.

reelfoot lake fishing guide prices

Reelfoot Lake Fishing Guide Prices: A Comprehensive Guide (Updated February 6, 2026)

Planning a Reelfoot Lake fishing adventure? This guide details 2026 pricing for guided trips, considering factors like duration, target species, and guide expertise.

With no rate increases for 2026, now is the perfect time to book your preferred dates and explore this fantastic fishing destination!

Reelfoot Lake, a unique shallow lake in Northwest Tennessee, is renowned for its diverse fish populations and stunning natural beauty. This expansive body of water, created by seismic activity during the New Madrid earthquakes, offers anglers exceptional opportunities to target crappie, bass, catfish, and bluegill.

The lake’s intricate network of bays, channels, and submerged timber creates a haven for fish, but navigating these waters can be challenging. Hiring a local fishing guide is highly recommended, especially for those unfamiliar with the lake’s layout and seasonal fish patterns. Guides possess invaluable knowledge of productive fishing spots, effective techniques, and current conditions, maximizing your chances of a successful and enjoyable fishing experience.

Understanding Reelfoot Lake fishing guide prices is crucial for planning your trip. Costs vary based on trip duration, target species, and the guide’s expertise. This comprehensive guide will break down the pricing structure, helping you make informed decisions and budget accordingly for an unforgettable angling adventure.

Why Hire a Fishing Guide at Reelfoot Lake?

Reelfoot Lake’s complex ecosystem and ever-changing conditions make a fishing guide an invaluable asset. Their local expertise dramatically increases your chances of a productive day on the water, saving you time and frustration. Guides intimately know the lake’s hotspots, seasonal fish movements, and the most effective bait and lure choices.

Beyond locating fish, guides provide essential safety knowledge, navigating the lake’s intricate waterways and understanding potential hazards. They also supply high-quality equipment, ensuring you have the tools needed for success. Considering Reelfoot Lake fishing guide prices is an investment in a streamlined, successful, and safe fishing experience.

Ultimately, a guide enhances your overall enjoyment, allowing you to focus on fishing while they handle the logistics and provide valuable insights into this unique fishery.

Factors Influencing Reelfoot Lake Fishing Guide Prices

Several key factors determine Reelfoot Lake fishing guide prices; Trip duration is primary, with half-day, full-day, and multi-day options commanding different rates. The target species significantly impacts cost; specialized trips for crappie, bass, or catfish often have premium pricing.

Guide experience and reputation play a crucial role, with seasoned professionals typically charging more. The time of year, or seasonality, also influences prices, with peak seasons demanding higher rates. Boat type and included amenities, like tackle and bait, contribute to the overall cost.

Finally, the number of anglers in your party can affect pricing, with group discounts sometimes available. Understanding these factors helps you budget effectively for your Reelfoot Lake fishing adventure.

Seasonality and Peak Times

Reelfoot Lake’s fishing seasons dramatically influence guide prices. Spring, particularly April and May, represents peak crappie spawning season, driving up demand and rates. Fall, from September to November, is prime time for bass and catfish, also leading to higher prices.

Summer offers consistent fishing but can be hotter and more crowded, with moderate price increases. Winter, while offering unique ice fishing opportunities, generally sees lower guide fees due to colder conditions and reduced accessibility.

Booking well in advance is crucial during peak times to secure your preferred guide and dates. Expect to pay a premium during weekends and holidays, as these are the most sought-after periods.

Target Species and Specialized Trips

Reelfoot Lake’s diverse fish population impacts guide pricing. Standard trips targeting crappie, bass, and catfish generally fall within a standard price range. However, specialized trips command higher fees.

These include focused bluegill excursions, targeting trophy catfish with specific bait and techniques, or dedicated muskie hunts – a challenging and specialized pursuit. Trips requiring specialized equipment, like side-imaging sonar for locating structure, also increase costs.

Guides offering instruction in specific techniques, such as fly fishing or advanced bass fishing strategies, will typically charge a premium for their expertise. Customizing a trip to focus on a particular species or technique will affect the overall price.

Guide Experience and Reputation

A Reelfoot Lake fishing guide’s experience significantly influences their pricing. Seasoned guides with decades of local knowledge and a proven track record naturally charge more than newer, less experienced options.

Reputation plays a crucial role; guides with consistently positive reviews, strong client testimonials, and a history of successful trips can justify higher rates. Guides holding relevant certifications or actively participating in conservation efforts may also command a premium.

Those offering exceptional customer service, providing all necessary equipment, and demonstrating a deep understanding of Reelfoot Lake’s ecosystem are valued and priced accordingly. Consider the guide’s overall value proposition when evaluating costs.

Types of Fishing Trips Available

Reelfoot Lake offers diverse fishing experiences, impacting guide pricing. Standard half-day and full-day trips cater to general angling, while specialized trips target specific species like crappie, bass, or catfish, often costing more.

Multi-day excursions, allowing for in-depth exploration and varied fishing techniques, represent the highest price point. Some guides offer customized trips tailored to individual skill levels or group preferences, influencing the final cost.

Consider options like photography-focused trips or those emphasizing learning specific fishing methods. The trip’s complexity, duration, and level of personalization directly correlate with the overall investment.

Half-Day Trips: Pricing and What’s Included

Typically lasting four to six hours, half-day Reelfoot Lake fishing trips generally range from $300 to $500 in 2026, depending on the guide and boat size. This price commonly includes the guide’s expertise, boat, basic fishing equipment (rods, reels), and safety gear.

However, bait, tackle (beyond basic lures), and fishing licenses are usually not included. Expect to pay extra for these necessities. Some guides may offer bait packages as an add-on. A half-day is ideal for beginners or those with limited time, focusing on a specific area or technique.

Full-Day Trips: Pricing and What’s Included

A full day on Reelfoot Lake with a fishing guide, typically eight to ten hours, will likely cost between $500 and $800 in 2026. This investment provides a more comprehensive fishing experience, allowing exploration of diverse areas and targeting multiple species.

Like half-day trips, the price generally covers the guide’s services, boat, standard fishing equipment, and essential safety provisions. Bait, specialized tackle, and required fishing licenses remain separate expenses. Full-day trips are perfect for serious anglers seeking a deeper dive into Reelfoot’s fishing opportunities, with potential for varied techniques and locations.

Multi-Day Trips: Pricing and Customization

For dedicated anglers, multi-day Reelfoot Lake fishing trips offer immersive experiences, typically ranging from $1,500 to $3,000+ depending on duration and customization. These packages allow for in-depth exploration and targeting specific species across various lake locations.

Pricing usually includes lodging (often basic cabins or motel accommodations), guided fishing for each day, boat usage, and the guide’s expertise. Meals and fishing licenses are typically extra. Customization is key; trips can be tailored to focus on crappie, bass, or catfish, incorporating preferred techniques and desired levels of comfort. Booking well in advance is crucial!

Average Reelfoot Lake Fishing Guide Prices (2026)

In 2026, expect to invest between $400 and $800 for a standard full-day Reelfoot Lake fishing trip with a reputable guide. Half-day trips generally fall in the $250 to $450 range. These figures represent averages, and actual costs vary significantly based on factors like trip length, target species, and the guide’s experience level.

Notably, some guides offer competitive rates with “no rate increases for 2026,” making early booking advantageous. Remember to factor in additional expenses like bait, tackle, licenses, and gratuities when budgeting for your fishing excursion. Prices reflect the value of local expertise and access.

Price Ranges for Different Trip Durations

Reelfoot Lake fishing guide pricing scales directly with trip duration. Short, 4-hour trips typically range from $250 to $350, ideal for beginners or those with limited time. Standard full-day excursions, lasting around 8 hours, generally cost between $400 and $700. For anglers seeking an immersive experience, multi-day trips can range from $600 to over $1500, depending on customization.

Keep in mind that these are estimates; specialized trips targeting specific species or employing advanced techniques may command higher rates. Booking in advance, especially during peak season, is recommended to secure your preferred duration and potentially benefit from available discounts.

Cost Breakdown: What You Pay For

When booking a Reelfoot Lake fishing guide, the price encompasses several key components. Primarily, you’re paying for the guide’s expertise, local knowledge, and time on the water. This includes boat usage, safety equipment, and navigation. Fuel costs are typically factored into the overall price, as is the provision of essential fishing gear – rods, reels, and tackle.

However, most guides do not include bait, fishing licenses, or gratuities in their base price. These represent additional expenses anglers should budget for. Some guides may offer package deals incorporating these extras, so clarifying inclusions before booking is crucial;

Popular Reelfoot Lake Fishing Guides & Their Pricing

Reelfoot Lake boasts several reputable fishing guides, each with unique specialties and pricing structures. While specific 2026 rates are still being finalized, expect competitive options. Guide Service A typically offers half-day trips starting around $400, with full-day excursions at $650, specializing in crappie and bass.

Guide Service B focuses on catfish and bluegill, with similar pricing – $450 for a half-day and $700 for a full day. Guide Service C, known for its customized multi-day packages, begins at $800 per day. Remember these are estimates; contacting each service directly for current rates is recommended.

Guide Service A: Rates and Specialties

Guide Service A is a highly-rated option for Reelfoot Lake fishing, specializing in crappie and largemouth bass. Their 2026 rates are structured as follows: half-day trips (4 hours) are priced at $400, accommodating up to two anglers. Full-day trips (8 hours) cost $650 for the same angler limit. Multi-day packages are available upon request, with customized pricing based on duration and target species.

Included in the price are all necessary fishing equipment, tackle, and safety gear. They emphasize a family-friendly experience and cater to both novice and experienced anglers. Booking in advance is strongly encouraged, especially during peak season.

Guide Service B: Rates and Specialties

Guide Service B distinguishes itself with a focus on catfish and bluegill fishing on Reelfoot Lake. For 2026, they offer half-day trips at $375 for up to two people, and full-day excursions for $600. Multi-day trips are readily customized, with pricing dependent on the specific itinerary and angler preferences. They provide all standard fishing equipment, bait, and necessary licenses for non-residents.

This service is known for its patient instruction, making it ideal for beginners. They also offer specialized trips targeting trophy catfish. Early booking is recommended to secure preferred dates, particularly during the spring and fall runs.

Guide Service C: Rates and Specialties

Guide Service C caters to serious crappie anglers, boasting extensive knowledge of Reelfoot Lake’s submerged timber and seasonal patterns. Their 2026 rates are $400 for half-day trips (maximum three anglers), and $650 for full-day adventures. Multi-day packages, including lodging options, start at $1200. They emphasize utilizing advanced fish-finding technology and proven techniques.

This service provides premium tackle and live bait, ensuring anglers have the best chance at success. Guide Service C is highly regarded for its professionalism and commitment to client satisfaction. Booking well in advance is crucial, especially during peak crappie spawning season.

Additional Costs to Consider

Beyond the guide’s base rate, several supplementary expenses should factor into your Reelfoot Lake fishing trip budget. Live bait and tackle, while sometimes included, often represent an extra $50-$100 per day, depending on your needs and preferences. A Tennessee fishing license is mandatory for all anglers aged 13 and older, costing around $30 for a short-term non-resident license.

Gratuities for your guide are customary, typically ranging from 15-20% of the trip cost, reflecting service quality. Don’t forget optional extras like fish cleaning services (around $20-$30 per limit) or transportation to and from the lake.

Live Bait and Tackle Expenses

Budgeting for bait and tackle is crucial when planning your Reelfoot Lake fishing trip. While some guides include basic tackle, specialized lures or preferred bait are usually extra. Live bait, such as minnows or worms, typically costs $5-$15 per dozen, depending on availability and type.

Artificial lures can range from $3 to $20+ each, depending on quality and brand. Expect to spend $50-$100 per day if you prefer using your own premium tackle or require a variety of options for different species and techniques. Consider the potential for lost tackle when fishing around submerged timber!

Fishing Licenses and Permits

Don’t forget to factor in the cost of Tennessee fishing licenses and permits! A non-resident daily fishing license is approximately $30, while a 7-day license costs around $50. Annual non-resident licenses are available for roughly $100. These can be purchased online through the Tennessee Wildlife Resources Agency (TWRA) website or at local retailers.

Reelfoot Lake-specific permits may also be required for certain areas or tournaments. Always verify current regulations with the TWRA before your trip to ensure compliance and avoid potential fines. Your guide can often advise on the necessary permits for your chosen fishing location and target species.

Gratuities and Optional Extras

Remember to budget for gratuities! Tipping your Reelfoot Lake fishing guide is customary for excellent service, typically ranging from 15-20% of the total trip cost. This acknowledges their expertise and effort in providing a memorable experience.

Optional extras can add to your overall expense. These might include professional fish cleaning and packaging (around $5-$10 per fish), or the provision of specialized tackle beyond what’s standard. Some guides may offer photography packages to capture your fishing successes. Clarify these potential costs with your guide beforehand to avoid surprises and plan your budget accordingly.

Booking Your Reelfoot Lake Fishing Trip

Secure your preferred dates! Given Reelfoot Lake’s popularity, especially during peak seasons, advance booking is highly recommended. Many guides accept reservations online or via phone. Confirm the booking process and required deposits with your chosen guide service.

Understand cancellation policies thoroughly. Most guides have specific terms regarding refunds or rescheduling due to weather or unforeseen circumstances. Ask about potential fees associated with late cancellations. Don’t hesitate to inquire about what’s included in the trip price and any additional costs. Now is the perfect time to book!

Advance Booking Recommendations

Prioritize early reservations, particularly if planning a trip during peak fishing seasons or around holidays. Popular guides fill up quickly, sometimes months in advance. Booking well ahead ensures you secure your desired dates and preferred guide. Consider booking at least 3-6 months prior for optimal availability.

Confirm booking details in writing, including trip dates, duration, target species, and total cost. Clarify deposit requirements and cancellation policies before finalizing your reservation. With no rate increases for 2026, now is the perfect time to book those fishing trips!

Cancellation Policies and Fees

Understand each guide’s cancellation policy before booking. Most guides require a notice period – typically 30-60 days – for a full refund. Cancellations within this timeframe often incur a fee, ranging from a percentage of the trip cost to the full amount.

Inclement weather policies also vary. Some guides offer rescheduling options, while others may only provide a partial refund. Clarify these details during the booking process. Always confirm the specific terms in writing to avoid misunderstandings. Protecting your investment requires careful review of these crucial policies.

What to Ask Your Guide Before Booking

Before securing your Reelfoot Lake fishing trip, several questions are vital. Inquire about the guide’s experience with your target species and preferred fishing techniques. Confirm what’s included in the price – boat, tackle, bait, licenses – and clarify any additional costs.

Understand the cancellation policy thoroughly, including weather-related contingencies. Ask about the guide’s safety procedures and first-aid certifications. Don’t hesitate to discuss your fishing experience level and expectations. A clear understanding upfront ensures a successful and enjoyable outing, maximizing your investment.

Saving Money on Your Reelfoot Lake Fishing Trip

Budget-conscious anglers can explore several avenues for savings. Traveling during the off-season, outside peak times, often yields lower guide rates and accommodation costs. Consider forming a group to potentially unlock discounted package deals offered by some guide services;

Bringing your own fishing gear, if you possess quality equipment, can eliminate rental fees. Carefully review what’s included in the trip price; sometimes, bait and tackle are extra. Booking well in advance might secure early-bird discounts, but always understand the cancellation policies before committing.

Traveling During the Off-Season

Opting for an off-season Reelfoot Lake fishing trip presents significant cost advantages. Guide rates are typically lower when demand decreases, offering substantial savings. Accommodation prices also tend to be more affordable during these quieter periods. While the weather might be less predictable, experienced guides can adapt to conditions.

Fewer anglers on the lake translate to a more peaceful and potentially productive fishing experience. Though peak species activity varies, dedicated guides know where and how to target fish year-round. Consider late fall or early spring for potentially excellent value and rewarding angling opportunities.

Group Discounts and Packages

Planning a Reelfoot Lake fishing trip with friends or family? Many guides offer attractive discounts for larger groups, reducing the per-person cost. Inquire about group rates when contacting potential guide services – savings can be substantial. Package deals combining fishing with lodging or equipment rentals are also frequently available.

These packages can simplify trip planning and often provide better overall value. Some guides specialize in corporate outings or family adventures, tailoring trips to specific needs. Don’t hesitate to negotiate or request customized packages to fit your budget and preferences. Exploring these options can significantly lower your overall expenses.

Bringing Your Own Gear

Considering bringing your own fishing equipment to Reelfoot Lake? This can potentially reduce costs, as rental fees for rods, reels, and tackle can add up. However, assess the quality of your gear and its suitability for the targeted species. High-quality equipment often enhances the fishing experience and increases your chances of success.

Discuss with your guide whether bringing your own gear is advisable. Some guides may recommend specific tackle for optimal results. Factor in transportation costs and potential damage during travel. While saving on rentals is appealing, ensure your gear is well-maintained and appropriate for Reelfoot Lake’s conditions.

Reelfoot Lake Fishing Regulations and Conservation

Understanding and adhering to Reelfoot Lake’s fishing regulations is crucial, regardless of your guide’s pricing. These rules are in place to ensure sustainable fish populations and preserve the lake’s ecosystem. Current regulations cover size limits, creel limits, and permitted fishing methods for various species.

Responsible fishing practices, such as catch-and-release, are strongly encouraged. Guides are typically knowledgeable about these regulations and will ensure compliance during your trip. Supporting lake conservation efforts helps maintain Reelfoot Lake’s health for future generations. Ignoring regulations can result in fines and negatively impact the lake’s resources.

Current Fishing Regulations Overview

Staying informed about Reelfoot Lake’s current fishing regulations is essential, even when factoring in guide costs. As of February 6, 2026, regulations dictate specific size and creel limits for bass, crappie, catfish, and bluegill. These limits are subject to change, so verification before your trip is vital.

Permitted fishing methods generally include rod and reel, but restrictions may apply to certain areas or species. Guides will typically inform you of any specific regulations relevant to your chosen trip. A valid Tennessee fishing license is mandatory for all anglers aged 13 and older, adding to the overall trip expense.

Responsible Fishing Practices

Ethical angling contributes to Reelfoot Lake’s sustainability, indirectly impacting long-term guide availability and pricing. Practicing catch and release, particularly with larger breeding fish, helps maintain healthy populations. Proper fish handling minimizes stress and mortality rates, ensuring future fishing opportunities.

Dispose of fishing line and tackle responsibly to prevent environmental harm, a practice often emphasized by reputable guides. Respecting the lake’s ecosystem and following all regulations demonstrates a commitment to conservation. Supporting guides who promote responsible fishing ensures a positive experience and helps preserve Reelfoot Lake for generations to come.

Lake Conservation Efforts

Ongoing conservation initiatives at Reelfoot Lake directly influence its fishing quality, potentially affecting guide demand and pricing. Habitat restoration projects, like aquatic vegetation planting, enhance fish populations and attract anglers. Water quality monitoring ensures a healthy ecosystem, supporting diverse species.

Funds generated from fishing licenses and permits contribute to these vital conservation efforts. Collaborative partnerships between state agencies, local organizations, and guides are crucial for successful lake management. Supporting these efforts through responsible angling and advocating for conservation helps maintain Reelfoot Lake’s value as a premier fishing destination, stabilizing guide pricing long-term.

venture deals pdf

Venture Deals PDF: A Comprehensive Overview (as of 02/06/2026)

Today, February 6th, 2026, venture deals encompass seed, venture, expansion, and growth funds—covering technology, consumer, and healthcare sectors, mirroring Redwood Capital’s structure.

Venture deals represent pivotal financial transactions fueling innovation and growth within the business landscape. As of today, February 6th, 2026, understanding these deals is crucial for entrepreneurs seeking capital and investors aiming for substantial returns. These aren’t simply investments; they are strategic partnerships built on risk and potential. The landscape includes diverse players – from Independent Venture Capital (IVC) firms to Corporate Venture Capital (CVC) arms of established companies.

The process often begins with securing seed funding, followed by escalating rounds of venture capital and ultimately, growth funding. Platforms like AngelList and resources from Venture Hacks provide invaluable guidance. Redwood Capital exemplifies a comprehensive fund structure, covering the entire lifecycle. Navigating this complex terrain requires a compelling business plan and leveraging various forms of leverage – labor, capital, code, and media – to maximize opportunities.

What is a Venture Deal?

A venture deal, fundamentally, is an investment made into a startup or early-stage company with high growth potential. Unlike traditional loans, venture deals involve exchanging capital for equity – a percentage of ownership in the company. These deals are inherently risky, reflecting the uncertain future of nascent businesses, yet offer the possibility of significant returns. As of February 6th, 2026, they span various stages, from initial seed funding to substantial growth funding rounds.

The core purpose is to fuel expansion, product development, and market penetration. Successful deals aren’t solely about money; they involve strategic alignment between investors and entrepreneurs. Understanding the nuances of term sheets, valuation, and liquidation preferences is paramount. Companies like ASICS, through brand expansion, demonstrate the potential outcomes of successful venture backing, showcasing how capital can drive innovation and market reach.

The Importance of Understanding Venture Capital

Understanding venture capital (VC) is crucial for both entrepreneurs seeking funding and investors aiming for high returns. As of February 6th, 2026, the landscape includes Independent Venture Capital (IVC) and Corporate Venture Capital (CVC), each with distinct motivations and investment strategies. VC isn’t simply about providing capital; it’s about partnering with innovative companies to navigate challenges and achieve exponential growth.

A solid grasp of VC principles empowers entrepreneurs to craft compelling business plans (BPs) and effectively leverage resources – including labor, capital, code, and media – during fundraising. Platforms like AngelList and Venture Hacks offer invaluable resources. Furthermore, understanding the lifecycle – from seed to growth – allows for strategic financial planning. Ignoring these dynamics can lead to unfavorable terms or missed opportunities, highlighting the necessity of informed engagement.

Key Players in Venture Deals

Key players include Independent Venture Capital (IVC), Corporate Venture Capital (CVC), seed funds, venture funds, and expansion/growth funds, all vital for capital allocation.

Independent Venture Capital (IVC)

Independent Venture Capital (IVC) firms operate distinctly from their corporate counterparts, focusing solely on generating financial returns for their limited partners. Unlike Corporate Venture Capital (CVC), IVCs aren’t tied to strategic objectives of a parent company, allowing for more objective investment decisions. These firms typically raise capital from institutional investors like pension funds, endowments, and high-net-worth individuals, creating diversified funds spanning seed, venture, expansion, and growth stages.

IVCs often specialize in specific sectors – technology, healthcare, or consumer – developing deep expertise and networks within those areas. Their investment strategies prioritize maximizing returns through successful exits, such as initial public offerings (IPOs) or acquisitions. The structure allows for agility and a dedicated focus on identifying and nurturing promising startups, contributing significantly to the venture capital ecosystem’s dynamism and innovation.

Corporate Venture Capital (CVC)

Corporate Venture Capital (CVC) represents investments made by established corporations into external startup companies. Often referred to as “” or “” in other languages, CVC differs fundamentally from Independent Venture Capital (IVC). While financial returns are important, CVC investments are frequently driven by strategic goals – gaining access to new technologies, exploring emerging markets, or disrupting existing industries.

These investments allow corporations to stay ahead of the innovation curve without dedicating significant internal resources to research and development. CVC arms can provide startups with not only capital but also valuable resources like industry expertise, distribution channels, and potential partnerships. However, this strategic alignment can sometimes lead to conflicts of interest or slower decision-making compared to IVCs focused purely on financial gains. CVC plays a crucial role in bridging the gap between established businesses and innovative startups.

Seed Funds and Their Role

Seed funds represent the earliest stage of venture capital investment, providing initial capital to startups with promising ideas but limited operational history. Often, a seed round of funding – sometimes as little as $100,000 – is sufficient to validate a concept and build a minimum viable product (MVP). This initial injection of capital is crucial for transforming an idea into a tangible business.

Seed funds typically focus on mitigating the highest risks associated with early-stage ventures. AngelList, a prominent platform, facilitates connections between startups and seed investors. As companies mature and demonstrate traction, they often seek larger funding rounds from venture capital firms. Seed funding is often considered “” (a drop in the bucket) once a company gains momentum, necessitating larger investments to scale operations and expand market reach. It’s the foundational step in the venture capital lifecycle.

Venture Funds: Core Investment Stage

Venture funds typically step in after seed funding, representing the core investment stage for scaling businesses with proven concepts. These funds provide larger capital injections to fuel growth, expand market reach, and build out teams. Redwood Capital, for example, utilizes a dedicated venture fund within its broader investment structure, focusing on technology, consumer, and healthcare sectors.

Unlike seed funding, venture capital investments often require demonstrable traction – evidence of product-market fit and early revenue generation. Venture capitalists assess business plans (BPs) with a keen eye, evaluating factors like market opportunity, competitive landscape, and the strength of the management team. Leveraging various forms of leverage – labor, capital, code, and media – is crucial for maximizing impact. Naval’s Venture Hacks resources provide valuable insights into navigating this stage effectively.

Expansion and Growth Funds

Expansion and growth funds represent the later stages of venture capital, targeting companies that have already achieved significant traction and are poised for rapid scaling. These funds provide substantial capital to accelerate market penetration, expand into new geographies, and potentially pursue acquisitions. Redwood Capital’s structure includes dedicated funds for both expansion and growth, demonstrating the importance of these stages.

At this point, companies typically have established revenue streams and a clear path to profitability. Investment decisions focus on optimizing operational efficiency, building brand awareness, and securing a dominant market position. The need for angel investment – often sufficient in earlier stages – diminishes as venture capital becomes the primary funding source. Careful consideration of macOS stability, as with any technology infrastructure, is also relevant during this phase of rapid growth.

Stages of Venture Funding

Venture funding progresses from initial seed capital to venture capital for scaling, and finally, growth funding for expanding market reach—a lifecycle mirrored by Redwood Capital.

Seed Funding: Initial Capital

Seed funding represents the earliest stage of venture capital, providing initial capital to startups. Often, this funding is relatively small – think around $1 million – and is intended to validate a product or business model. It’s the point where an idea begins to take tangible form.

However, as a company matures and demonstrates traction, seed capital can quickly become insufficient. Once a company has a relatively mature product and begins generating sales, the initial $1 million feels minimal. This is where venture capital steps in, offering larger sums to fuel scaling efforts.

Naval Ravikant emphasizes leveraging resources – labor, capital, code, and media – during this phase. AngelList provides a platform for connecting startups with potential investors, embodying the spirit of early-stage funding.

Venture Capital Funding: Scaling Up

Venture capital (VC) funding marks a pivotal shift, enabling companies to scale operations beyond initial validation. Unlike seed funding, VC investments are substantially larger, designed to accelerate growth and expand market reach. This stage typically follows demonstrated product-market fit and initial revenue generation.

Redwood Capital’s fund structure exemplifies this progression, with a dedicated “Venture fund” focused on scaling proven concepts. The emphasis shifts from proving the idea to executing rapid expansion. Securing this funding requires a compelling business plan (BP) presented with an investor’s perspective, coupled with a founder’s mindset.

Leveraging code and media, as highlighted by Venture Hacks, becomes crucial for cost-effective growth. These resources, unlike labor and capital, don’t require external permission, offering greater control and scalability.

Growth Funding: Expanding Market Reach

Growth funding represents the most substantial capital infusion, geared towards aggressively expanding a company’s market presence and solidifying its leadership position. This stage builds upon the foundation laid by venture capital, focusing on scaling sales, marketing, and operational infrastructure.

Redwood Capital’s “Growth Fund” specifically targets companies poised for rapid expansion across their respective sectors – technology, consumer, and healthcare. The goal isn’t simply growth, but achieving significant market share and establishing a defensible competitive advantage.

Successful navigation of this phase demands strategic leverage of all available resources. As Naval Ravikant emphasizes, utilizing code and media offers powerful, permissionless scaling opportunities. Furthermore, a robust business plan, viewed through an investor’s lens, remains paramount for securing and deploying capital effectively.

Components of a Venture Deal

Venture deals fundamentally rely on term sheets, valuation assessments, equity structures, liquidation preferences, and anti-dilution clauses—defining ownership and investor protections.

Term Sheets: The Foundation

Term sheets serve as the foundational agreements outlining the key terms of a venture capital investment. They aren’t legally binding, except for clauses regarding exclusivity and confidentiality, but they establish the framework for the definitive investment documents. These documents detail crucial aspects like valuation, the amount of funding, equity stake offered to investors, and control provisions.

Key elements within a term sheet include liquidation preferences – dictating the order in which investors and founders receive proceeds upon an exit – and anti-dilution provisions, protecting investors from ownership dilution in future funding rounds. Understanding these terms is paramount for both entrepreneurs and investors, as they significantly impact the long-term dynamics of the venture. Careful negotiation of the term sheet is essential to ensure a mutually beneficial partnership and a clear path forward for the company’s growth.

Valuation: Determining Company Worth

Valuation in venture deals is a complex process, often differing significantly from traditional financial analysis. It’s less about current earnings and more about future potential – assessing the company’s projected growth, market opportunity, and competitive landscape. Several methods are employed, including discounted cash flow analysis, comparable company analysis, and precedent transactions, but ultimately, valuation often comes down to negotiation.

As a company matures from needing seed capital to seeking venture or growth funding, the valuation typically increases, reflecting reduced risk and demonstrated progress. Investors consider factors like the strength of the business plan, the quality of the management team, and the traction achieved. A well-crafted business plan, leveraging labor, capital, code, and media, is crucial for justifying a higher valuation and securing favorable investment terms.

Equity and Ownership

Equity and ownership are central to venture deals, representing the investor’s stake in the company’s future success. Typically, investors receive preferred stock, granting them specific rights and preferences over common stockholders (founders and employees). The percentage of equity exchanged is directly tied to the valuation agreed upon during the term sheet negotiation.

Dilution is a key consideration for founders. Each funding round typically involves issuing new shares, decreasing the ownership percentage of existing shareholders. Understanding anti-dilution provisions – designed to protect investors from future down rounds – is crucial. Investors aim to balance ownership with control, often seeking board seats and veto rights over significant company decisions. Platforms like AngelList facilitate these negotiations, connecting startups with potential investors and providing resources for structuring equity arrangements.

Liquidation Preferences

Liquidation preferences define the order in which investors and common stockholders receive proceeds during a liquidity event, such as an acquisition or IPO. Typically, investors receive a multiple of their investment before common stockholders receive anything. This “multiple” is often 1x, meaning they get their initial investment back first, but can be higher (e.g., 2x or 3x) in certain deals.

Participating vs. non-participating preferences are critical distinctions. With a participating preference, investors receive their multiple and then participate in the remaining proceeds alongside common stockholders. Non-participating preferences limit investors to either their multiple or conversion to common stock, whichever yields a higher return. These preferences heavily influence the financial outcome for founders and investors, requiring careful negotiation during term sheet discussions.

Anti-Dilution Provisions

Anti-dilution provisions protect investors from losing value when a company issues new shares at a lower price (a “down round”). These provisions adjust the investor’s conversion price to compensate for the decreased valuation. Two primary types exist: full ratchet and weighted average.

A full ratchet provision is highly investor-friendly, resetting the conversion price to the price of the new shares, regardless of the investor’s original price. This can significantly increase an investor’s ownership. A weighted average provision, more common and founder-friendly, adjusts the conversion price based on a formula considering the amount of money raised and the prices in the down round. The formula balances investor protection with fairness to founders, mitigating extreme ownership dilution.

Navigating the Venture Deal Process

Successful navigation requires a compelling business plan, leveraging labor, capital, code, and media—with resources like AngelList and Venture Hacks proving invaluable.

Creating a Compelling Business Plan (BP)

A robust business plan (BP) is paramount when navigating venture deals, demanding an investor’s perspective coupled with an entrepreneur’s mindset during fundraising. It’s about articulating a clear vision and demonstrating a path to profitability. The plan should meticulously detail the market opportunity, the competitive landscape, and the company’s unique value proposition.

Furthermore, a strong BP outlines the team’s expertise and capabilities, showcasing why this team is best suited to execute the strategy. Financial projections must be realistic and well-supported, demonstrating a deep understanding of key metrics and potential revenue streams. Seeking guidance from experienced professionals – potentially through resources offering 8+ years of expertise – can significantly enhance the plan’s quality and appeal to potential financiers.

Ultimately, the BP isn’t just a document; it’s a narrative that convinces investors of the venture’s potential for substantial returns.

Leveraging Different Types of Leverage (Labor, Capital, Code, Media)

Navigating venture deals effectively requires understanding and utilizing various forms of leverage. Naval Ravikant, through Venture Hacks and AngelList, highlights four key types: labor, capital, code, and media. Labor and capital often necessitate external permission – securing talent and funding – while code and media offer greater autonomy.

Code, representing intellectual property and technological advantage, and media, encompassing brand building and public perception, are particularly powerful as they don’t require reliance on others’ approval. This distinction is crucial for startups aiming for rapid growth and scalability. Effectively leveraging these assets minimizes dependencies and maximizes control.

Successfully employing these leverages allows ventures to amplify their impact and attract investment, demonstrating resourcefulness and a strategic approach to building a sustainable business.

AngelList and Venture Hacks Resources

AngelList has emerged as a pivotal platform in the venture capital landscape, achieving a valuation of $4 billion in 2022. It facilitates connections between startups and investors, streamlining the fundraising process. Complementing AngelList is Venture Hacks, a resource founded by Naval Ravikant, offering invaluable insights into the mechanics of venture deals and fundraising strategies.

Venture Hacks distills complex financial concepts into actionable advice, empowering entrepreneurs to negotiate effectively and understand term sheets. Both platforms emphasize a data-driven approach to fundraising, advocating for transparency and informed decision-making. Accessing these resources—often through private messaging for expert guidance—can significantly improve a startup’s chances of securing funding.

They provide a practical framework for navigating the often-opaque world of venture capital, offering tools and knowledge to level the playing field.

Specific Venture Capital Examples

ASICS Gel-Venture 6 exemplifies brand expansion, while Redwood Capital’s fund structure—seed, venture, expansion, and growth—covers the full investment lifecycle.

Redwood Capital’s Fund Structure (Seed, Venture, Expansion, Growth)

Redwood Capital strategically structures its venture capital investments across four distinct fund stages, mirroring a comprehensive lifecycle approach. The Seed fund focuses on initial capital injections, supporting nascent companies with promising concepts. Following this, the Venture fund provides scaling capital for companies demonstrating product-market fit and early revenue generation.

As businesses mature, the Expansion Fund steps in, fueling market penetration and operational enhancements. Finally, the Growth Fund caters to established companies seeking to accelerate expansion and solidify market leadership. This tiered structure, as highlighted in SEC filings, allows Redwood to deploy capital effectively across diverse risk-reward profiles within the technology, consumer, and healthcare sectors, ensuring a holistic investment strategy.

ASICS Gel-Venture 6: A Case Study in Brand Expansion

ASICS Gel-Venture 6 exemplifies successful brand expansion through a strategic blend of performance and style. Originally a classic trail running shoe, its adoption of a “fashionable functional” aesthetic broadened its appeal beyond core athletes, attracting a wider consumer base. This expansion mirrors venture capital strategies focused on extending market reach.

The Gel-Venture 6’s ability to transition seamlessly from mountain trails to urban streets demonstrates a keen understanding of consumer preferences and market trends. This parallels how venture-backed companies leverage different types of leverage – particularly media – to amplify brand awareness and drive sales. The shoe’s success highlights the importance of adaptability and innovation in achieving sustained growth, a key principle in venture deal evaluations.

Resources and Further Learning

Explore Venture Creation Programs at the National University of Singapore, AngelList, and Venture Hacks for deeper insights into navigating venture deals and funding.

Venture Creation Programs (e.g., National University of Singapore)

Venturing into the world of startups often benefits from structured programs designed to nurture entrepreneurial skills and facilitate access to vital resources. The National University of Singapore (NUS) offers such a program, a relatively new venture creation initiative under its continuing education faculty. While differing from traditional adult education models, it provides a valuable learning environment.

These programs typically focus on building a compelling business plan (BP), understanding different types of leverage – labor, capital, code, and media – and navigating the complexities of securing funding. They often incorporate practical exercises and mentorship opportunities, connecting aspiring founders with experienced investors and industry experts. The curriculum frequently draws upon resources like Venture Hacks, embedding knowledge platforms like AngelList, which boasts a $4 billion valuation as of 2022.

Participation in these programs can significantly enhance an entrepreneur’s preparedness for the venture deal process, equipping them with the knowledge and network necessary to succeed.

Mac OS Stability and Venture Deal Considerations

For startups navigating venture deals, seemingly unrelated factors like operating system stability can subtly influence perceptions and due diligence. Investors, particularly those focused on technology, often assess the operational foundation of a company. Frequent software glitches or security vulnerabilities can raise concerns about a team’s attention to detail and overall execution capabilities.

The question of macOS stability, specifically which version is most reliable, frequently arises. Before upgrading, considerations include potential battery drain, bug prevalence, and overall system performance. A stable tech stack demonstrates a commitment to efficiency and minimizes potential disruptions. This indirectly impacts investor confidence.

While not a primary deal-breaker, a reputation for robust IT infrastructure—including a well-maintained macOS environment—can contribute positively to a startup’s image and bolster its credibility during the venture funding process.

manual scoreboard

Manual scoreboards represent a fascinating intersection of sports, technology, and human operation, evolving from simple tallying methods to intricate types of displays.

Historical Context of Manual Scoreboards

The story of manual scoreboards begins in the early 20th century, a period defined by the burgeoning popularity of organized sports and a distinct lack of electronic automation. Initially, scorekeeping relied heavily on chalkboards, simple written notations, and dedicated individuals meticulously tracking points. As games grew in scale and complexity, the need for more visible and easily updated scoring systems became apparent.

Early manual scoreboards, appearing around the 1900s, were largely handcrafted affairs. They straddled the line between purely manual operation and the first inklings of electromechanical assistance. These boards were essential for communicating game status to increasingly large audiences, marking a significant step in the spectator experience. Before the 1960s, these systems were the standard, representing a crucial era in sports technology before the digital revolution.

The Pre-Digital Era of Scorekeeping

Prior to the widespread adoption of electronic systems, scorekeeping was a decidedly manual process, demanding dedicated personnel and a keen eye for detail. Individuals, often referred to as official scorers, would meticulously record each point, foul, or advancement using pen and paper, or early mechanical tally counters. This information then needed to be physically updated on the scoreboard, a task prone to human error and requiring considerable speed.

The reliance on human intervention meant that updates weren’t instantaneous, creating a slight delay between an event on the field and its reflection on the scoreboard. This era fostered a unique connection between the scorer and the game, but also highlighted the limitations of purely manual systems. The transition from these methods laid the groundwork for the electromechanical and, eventually, fully electronic scoreboards that would revolutionize sports presentation.

Types of Manual Scoreboards

Manual scoreboards encompassed diverse designs, including flip card, sliding panel, and segmented variations, each employing unique mechanisms to visually represent game scores and information.

Flip Card Scoreboards: Mechanics and Operation

Flip card scoreboards, a cornerstone of early 20th-century sports, operated through a clever, yet simple, mechanical system. These boards utilized individual cards, often made of durable materials, each displaying a single digit or character. A network of levers and cables, activated by a scorekeeper, would physically flip these cards to reveal the updated score.

The mechanics involved a series of interconnected components. Each scoring change required the operator to manipulate a corresponding lever, triggering a rotating mechanism that flipped the appropriate card. The design allowed for relatively quick updates, though it demanded accuracy and physical effort from the operator. Blank cards were often included for flexibility in scoring scenarios.

These boards were prevalent before the widespread adoption of electronic systems, offering a reliable, albeit manual, method for displaying scores. Their visual appeal and tactile operation contributed to the atmosphere of sporting events during that era;

Sliding Panel Scoreboards: Design and Functionality

Sliding panel scoreboards presented an alternative to flip cards, employing a different mechanical approach to display scores. Instead of rotating individual cards, these boards featured panels that slid horizontally or vertically to reveal the desired numbers or letters. This design often involved a series of grooves or tracks guiding the panels’ movement.

Functionally, a scorekeeper would manipulate levers or cranks connected to the sliding panels. This action would physically shift the panels into position, updating the displayed score. The construction often utilized wooden frames with painted or printed panels, offering a visually distinct aesthetic.

Compared to flip card systems, sliding panel boards sometimes allowed for displaying longer names or more complex information. They required precise alignment and smooth operation to ensure readability. These scoreboards were a common sight in various venues before the advent of electronic alternatives.

Segmented Scoreboards: Construction and Use

Segmented scoreboards, a less common but innovative type, utilized individual segments to form numbers and letters. These segments, often made of wood or metal, were arranged in a grid-like pattern. Each segment could be individually flipped or rotated to create the desired display.

Construction involved a robust frame to support the segmented display and a complex mechanism for controlling each segment. This mechanism typically involved a network of levers, rods, and linkages, requiring precise engineering for smooth operation. The segments themselves were often painted in contrasting colors for enhanced visibility.

In use, a scorekeeper would manipulate the control mechanism, selectively flipping or rotating segments to update the score. While offering flexibility in displaying various combinations, segmented boards could be more challenging to operate and maintain due to their intricate design.

Components of a Manual Scoreboard

Manual scoreboards consist of a scoring mechanism, a sturdy frame for housing, and clearly visible number/letter displays—all working together for accurate game tracking.

The Scoring Mechanism: Detailed Breakdown

The heart of a manual scoreboard lies within its scoring mechanism, a carefully engineered system designed for reliable point updates. Early mechanisms often relied on levers and linkages, directly manipulating the visible display. These systems required a human operator to physically change the score after each play.

More sophisticated manual scoreboards incorporated ratchet and pawl systems, allowing for incremental score increases with each pull of a lever. This provided a more controlled and precise method of updating the numbers. The internal construction frequently involved a series of gears and connecting rods, translating the operator’s action into visible changes on the display panels.

Crucially, the mechanism needed to be robust enough to withstand repeated use and maintain accuracy throughout a game. The quality of materials and precision of assembly were paramount to prevent malfunctions and ensure fair play. The design also considered ease of operation, allowing scorekeepers to quickly and efficiently update the score without errors.

The Frame and Housing: Materials and Construction

The frame and housing of a manual scoreboard were critical for structural integrity and protecting the delicate scoring mechanism. Early scoreboards frequently utilized wood as the primary building material, offering affordability and ease of workability. However, wood was susceptible to weather damage and required regular maintenance.

As designs evolved, metal frames – often constructed from steel or aluminum – became increasingly common, providing superior durability and resistance to the elements. These metal frames were typically bolted together, allowing for easier assembly and disassembly for transport or repair.

The housing itself often consisted of plywood or sheet metal, enclosing the scoring mechanism and providing a surface for the number and letter displays. The exterior was frequently painted with weather-resistant coatings to prolong its lifespan. Careful consideration was given to ventilation to prevent overheating of internal components and ensure reliable operation.

Number and Letter Displays: Variations and Materials

Manual scoreboards showcased diverse number and letter display methods, evolving alongside manufacturing capabilities. Early iterations often employed painted wood or canvas stretched over frames, requiring manual repainting or replacement. A significant advancement involved the use of enameled metal digits and letters, offering greater durability and visibility.

Flip card displays utilized individual cards with numbers or letters on both sides, mechanically flipped to show the desired score. These cards were commonly made from durable plastic or coated cardboard. Sliding panel systems featured numbers and letters mounted on sliding panels, moved manually to update the score.

Segmented scoreboards employed individual segments to form numbers, often constructed from painted wood or plastic. The choice of material depended on budget, desired lifespan, and the environment in which the scoreboard would be used. Bright, contrasting colors were essential for clear visibility from a distance.

Operation and Maintenance

Manual scoreboards demand careful operation and regular upkeep to ensure accuracy and longevity; diligent handling prevents damage, while consistent cleaning maintains clear visibility.

How to Properly Operate a Manual Scoreboard

Operating a manual scoreboard requires a deliberate and careful approach to ensure accurate scorekeeping. Before an event, verify all scoring elements – flip cards, sliding panels, or segments – are set to zero or a designated starting position. During play, designate a dedicated scorer to manage the board, minimizing errors from multiple handlers.

When updating scores, make changes slowly and deliberately, confirming each digit or panel is correctly positioned before proceeding. Avoid rushing, as hasty movements can lead to misread scores. If the board features multiple scoring categories, clearly identify which section is being updated to prevent confusion. Regularly check the board from the spectators’ view to ensure readability.

After each scoring play, double-check the displayed score against official records. Familiarize yourself with any specific operating quirks of the particular manual scoreboard model. Proper operation extends the life of the equipment and guarantees a fair and accurate representation of the game’s progress;

Regular Maintenance Procedures

Consistent maintenance is crucial for preserving the functionality and longevity of a manual scoreboard. Begin with routine cleaning; dust and debris can impede smooth operation of moving parts. Gently wipe down all surfaces with a soft, dry cloth, avoiding abrasive cleaners that could damage the finish.

Periodically inspect the scoring mechanisms – flip cards, sliding panels, or segments – for any signs of wear or damage. Lubricate moving parts as needed, using a silicone-based lubricant to prevent sticking and ensure fluid movement. Check all fasteners and tighten any that are loose, preventing rattling or misalignment.

Examine the frame and housing for structural integrity, addressing any cracks or weaknesses promptly. Regularly test the operation of all scoring elements to identify potential issues before they escalate. A proactive maintenance schedule minimizes downtime and ensures reliable performance throughout its lifespan.

Troubleshooting Common Issues

Several issues can arise with manual scoreboards, but many are easily resolved. Sticking numbers are often caused by dust or lack of lubrication; cleaning and applying silicone lubricant usually fixes this. Misaligned displays can be gently adjusted, ensuring numbers are clearly visible. If a flip card or panel is damaged, careful inspection is needed – replacement might be necessary.

Rattling sounds often indicate loose fasteners; tighten all screws and bolts. A sluggish mechanism could signal a more significant problem, potentially requiring disassembly and thorough cleaning. Always prioritize safety when working with the scoreboard, and avoid forcing any components.

If issues persist, consult a qualified technician. Remember to document any problems encountered and the steps taken to resolve them, creating a valuable maintenance log for future reference and preventing recurring problems.

Evolution of Scoreboard Technology

Initially, manual scoreboards dominated, transitioning to electromechanical models, and ultimately giving way to today’s sophisticated electronic and digital scoring systems.

From Manual to Electromechanical Scoreboards

The shift from purely manual scoreboards to electromechanical systems marked a significant, yet gradual, advancement in sports technology. Early manual operation demanded dedicated personnel to physically update scores, often involving flipping cards or sliding panels with each point scored. This process, while reliable, was inherently prone to human error and lacked the dynamic capabilities desired for faster-paced games.

Electromechanical scoreboards introduced the use of electric motors and relays to automate some aspects of scorekeeping. While still requiring some manual input – often for team names or more complex statistics – the core scoring mechanism became partially automated. This reduced the workload on operators and improved the speed and accuracy of score updates. These systems represented a bridge between the entirely human-powered era and the fully electronic displays that would soon follow, offering a taste of the efficiency to come.

The Transition to Electronic Scoreboards

The move from electromechanical systems to fully electronic scoreboards represented a revolutionary leap forward, rapidly diminishing the reliance on manual operation. Transistors and, later, integrated circuits enabled the creation of displays capable of instantly reflecting score changes, statistics, and even replays – features unimaginable with purely mechanical devices.

This transition wasn’t immediate; early electronic boards often supplemented existing manual systems, gradually taking over core functions; The speed and accuracy gains were substantial, reducing errors and allowing for more complex data presentation. As technology matured, electronic scoreboards became increasingly sophisticated, incorporating timers, message displays, and eventually, computer control. The era of dedicated scorekeepers painstakingly updating scores by hand was steadily drawing to a close, replaced by automated systems offering a dynamic and engaging experience for spectators.

Modern Digital Scoreboard Systems

Contemporary digital scoreboards are a far cry from their manual predecessors, representing a pinnacle of technological integration. These systems utilize LED, LCD, or even OLED displays, offering vibrant visuals, customizable graphics, and real-time data updates. Connectivity is key, with many scoreboards now networked to scoring software, allowing for remote control and automated data feeds.

Beyond basic scoring, modern systems incorporate video replay, instant statistics, advertising displays, and interactive elements like fan engagement features. High resolution displays and sophisticated software enable dynamic content, enhancing the spectator experience. While the simplicity and tactile nature of manual scoreboards hold a nostalgic appeal, the capabilities of digital systems – speed, accuracy, and versatility – have made them the standard in virtually all competitive venues. They continue to evolve, integrating with streaming services and social media platforms.

bhagavad gita english pdf

The Bhagavad Gita, a 700-verse scripture, forms an integral part of the epic Mahabharata. Often referred to simply as the Gita, it’s a foundational text
of Hindu philosophy.

This sacred text presents a dialogue between Arjuna and Krishna, with Krishna appearing as an incarnation of Vishnu, acting as a divine teacher and guide.

Numerous English translations and PDF versions are readily available, offering access to this profound wisdom for a global audience seeking spiritual enlightenment.

Historical Context: The Mahabharata

The Mahabharata, a sprawling epic of ancient India, serves as the narrative backdrop for the Bhagavad Gita. This immense work, one of the longest poems ever written, details a dynastic struggle between two groups of cousins – the Pandavas and the Kauravas.

The conflict culminates in the Kurukshetra War, a pivotal event where the Bhagavad Gita unfolds. It’s on the battlefield, facing his kin in battle, that Arjuna experiences a crisis of conscience, prompting the divine discourse with Krishna.

Understanding the Mahabharata’s context is crucial for interpreting the Gita. The epic’s themes of duty, dharma, and the complexities of righteous action deeply inform the Gita’s teachings. Many English translations of the Gita are often accompanied by summaries of the Mahabharata to aid comprehension. Accessing a PDF version often includes this contextual information, enriching the reading experience and providing a broader understanding of the scripture’s origins.

The historical setting, though steeped in legend, provides a powerful framework for the Gita’s philosophical exploration.

The Dialogue Between Krishna and Arjuna

The heart of the Bhagavad Gita lies in the profound conversation between Prince Arjuna and his charioteer, Krishna, who is revealed to be an incarnation of Vishnu. Arjuna, overwhelmed by the prospect of fighting his own relatives in the Kurukshetra War, seeks guidance from Krishna.

This dialogue isn’t merely a philosophical debate; it’s a deeply personal and relatable exploration of duty, morality, and the meaning of life. Krishna responds with a comprehensive exposition of Hindu philosophy, covering concepts like dharma, karma, and moksha.

Many English translations of the Gita emphasize the dynamic between teacher and student, highlighting Krishna’s role as a compassionate guide. Studying a PDF version allows for close examination of the verses, revealing the nuances of their exchange. The dialogue’s accessibility makes it a timeless source of wisdom, offering insights applicable to modern life, and is often presented in simplified formats within downloadable resources.

The interaction is a model for spiritual mentorship.

Significance as a Hindu Scripture

The Bhagavad Gita holds immense significance within Hinduism, often considered one of its most important texts. It’s revered as a summary of the core teachings of the Vedas and Upanishads, making complex philosophical concepts accessible to a wider audience.

Unlike purely devotional or ritualistic scriptures, the Gita offers a holistic path to spiritual realization, encompassing action, devotion, and knowledge. Its emphasis on performing one’s duty (dharma) without attachment to results resonates deeply with Hindu ethics.

The availability of Bhagavad Gita translations in English, particularly in PDF format, has broadened its reach globally; These resources allow individuals to study the scripture independently and explore its teachings at their own pace. It’s considered a foundational text for understanding the principles of Yoga and Vedanta, and is often used as a guide for ethical living and self-discovery.

It’s a cornerstone of Hindu thought and practice.

Core Concepts of the Bhagavad Gita

Bhagavad Gita, accessible through English PDF versions, centers on Dharma, Karma, and Moksha. These interwoven concepts guide individuals toward righteous action and ultimate liberation.

Dharma: Duty and Righteousness

Dharma, a cornerstone of the Bhagavad Gita – readily explored in English PDF translations – transcends simple duty. It represents righteous conduct, moral law, and the cosmic order. Understanding one’s svadharma, or individual duty, is paramount.

The Gita emphasizes performing actions aligned with Dharma, irrespective of personal inclination or outcome. This isn’t blind obedience, but a recognition of one’s role within the larger framework of existence.

Krishna guides Arjuna to fulfill his warrior duty, even amidst the moral turmoil of battle. This illustrates that Dharma isn’t always easy, but it’s always the right path.

PDF versions often include detailed commentaries explaining the nuances of Dharma, highlighting its context-dependent nature and its importance in achieving spiritual growth. Ignoring Dharma leads to chaos, while embracing it fosters harmony and purpose.

Ultimately, Dharma is the foundation for a meaningful and fulfilling life, as illuminated within the Gita’s teachings.

Karma: Action and Consequence

The principle of Karma, central to the Bhagavad Gita and thoroughly explained in available English PDF versions, dictates that every action generates a corresponding consequence. This isn’t fatalistic; it’s a law of cause and effect governing the universe.

The Gita distinguishes between actions performed with attachment to results and those performed selflessly, as an offering. Actions driven by desire bind one to the cycle of rebirth (samsara), while selfless action (karma yoga) leads to liberation.

Understanding Karma isn’t about fearing punishment, but about taking responsibility for one’s choices.

PDF study guides often delve into the intricacies of karmic debt and the potential for purification through righteous action. The Gita emphasizes that intention is crucial; a seemingly small act performed with pure intention can have profound positive effects.

By acting with detachment and aligning with Dharma, one can transcend the limitations of Karma and move towards spiritual freedom.

Moksha: Liberation and Spiritual Freedom

Moksha, or liberation, represents the ultimate goal in the Bhagavad Gita, extensively detailed within accessible English PDF translations. It signifies freedom from the cycle of birth and death (samsara) and the attainment of union with the Divine.

The Gita outlines various paths – Karma Yoga, Bhakti Yoga, and Jnana Yoga – leading to Moksha. These aren’t mutually exclusive but complementary approaches tailored to individual temperaments.

Achieving Moksha involves transcending ego, attachment, and ignorance.

Many PDF commentaries emphasize the importance of self-realization – recognizing the true Self (Atman) as identical to the ultimate reality (Brahman). This realization dissolves the illusion of separation and brings lasting peace.

The Gita assures that Moksha is attainable in this lifetime through dedicated practice and surrender to the Divine, offering a hopeful and empowering message for spiritual seekers.

Paths to Realization (Yogas)

The Bhagavad Gita, available in numerous English PDF formats, details three primary yogic paths: Karma, Bhakti, and Jnana.

These offer diverse routes to spiritual liberation, catering to varied inclinations and aptitudes.

Karma Yoga: The Path of Action

Karma Yoga, as illuminated in the Bhagavad Gita and accessible through various English PDF translations, emphasizes selfless action performed without attachment to results. It’s the discipline of dedicating one’s actions to a higher purpose, transcending ego-driven desires.

This path isn’t about renouncing activity, but rather about transforming it into a spiritual practice. The Gita stresses that individuals should fulfill their dharma – their duty – with dedication and equanimity, accepting both success and failure as impartial outcomes.

By relinquishing the fruits of labor, one avoids the cycle of karma and its binding consequences. Studying the Bhagavad Gita in English, often found in convenient PDF form, reveals that true freedom lies not in inaction, but in skillful action performed with detachment and devotion. It’s a path of disciplined work, offered as a form of worship.

Ultimately, Karma Yoga purifies the mind and prepares the seeker for deeper spiritual understanding.

Bhakti Yoga: The Path of Devotion

Bhakti Yoga, the path of devotion, is a central tenet of the Bhagavad Gita, readily explored through numerous English PDF translations available online. It centers on cultivating a loving, personal relationship with the Divine – Krishna, in the context of the scripture.

This path emphasizes surrender, faith, and heartfelt worship. Unlike paths requiring rigorous discipline, Bhakti Yoga is accessible to all, regardless of social standing or intellectual capacity. It’s about channeling emotions and affections towards a higher power.

The Gita highlights various forms of devotion – chanting, prayer, ritual, and selfless service – all aimed at dissolving the ego and fostering a deep connection with the Divine. Accessing a Bhagavad Gita PDF in English reveals that genuine love and devotion naturally lead to liberation.

Through unwavering faith and surrender, the devotee transcends the limitations of the material world and experiences profound spiritual bliss.

Jnana Yoga: The Path of Knowledge

Jnana Yoga, the path of knowledge, as detailed in the Bhagavad Gita and accessible through various English PDF versions, emphasizes the pursuit of wisdom and self-realization through intellectual discernment. It’s a rigorous path demanding deep contemplation and a systematic investigation of reality.

This path involves understanding the true nature of the self (Atman) and its relationship to the ultimate reality (Brahman). Studying a Bhagavad Gita PDF reveals that Jnana Yoga requires detaching from illusions and recognizing the impermanence of the material world.

It’s not merely intellectual understanding, but a transformative realization that dissolves ignorance and leads to liberation. Key concepts include discrimination (viveka) and the constant inquiry into “Who am I?”

Through sustained introspection and study, the practitioner transcends the limitations of the mind and experiences the unity of all existence, achieving profound spiritual insight.

Finding Bhagavad Gita in English PDF Format

Numerous sources offer the Bhagavad Gita in English PDF format, ranging from free online downloads to paid, scholarly translations. Accessing these resources provides convenient study.

Consider translation quality and commentary when selecting a PDF version for a deeper understanding of this sacred text.

Popular Online Sources for PDF Downloads

Finding a Bhagavad Gita English PDF is remarkably easy due to its widespread digital availability. Several online platforms cater to those seeking this sacred text in a downloadable format. Websites like sacred-texts.com offer a variety of translations, including those available as PDFs, often presenting multiple versions for comparative study.

Internet Archive is another valuable resource, hosting digitized copies of various editions, ensuring preservation and accessibility. Additionally, many Hindu organizations and spiritual communities provide free PDF downloads on their websites, often accompanied by insightful commentaries.

Bhagavad Gita As It Is by A.C. Bhaktivedanta Swami Prabhupada is widely available as a PDF through the ISKCON (International Society for Krishna Consciousness) website and other distributors. Project Gutenberg also features some translations. When searching, be mindful of copyright and source reliability to ensure you are accessing an authentic and accurate version of the Bhagavad Gita.

Remember to explore different sources to find a translation that resonates with your personal understanding and spiritual journey.

Free vs. Paid PDF Versions

When seeking a Bhagavad Gita English PDF, you’ll encounter both free and paid options. Numerous websites offer free downloads, often providing classic translations or versions in the public domain. These are excellent for initial exploration and study, allowing access to the core teachings without financial commitment.

However, paid PDF versions frequently offer enhanced features. These may include scholarly introductions, detailed commentaries by respected authorities, comprehensive indexes, and improved formatting for readability. Translations by renowned scholars like Eknath Easwaran or Stephen Mitchell often come with a price tag, reflecting the depth of their work.

The choice depends on your needs and budget. If you’re a beginner, a free version is a great starting point. For in-depth study and nuanced understanding, a paid version with expert commentary can be invaluable; Consider the translator’s background and approach when making your decision, ensuring it aligns with your spiritual inclinations.

Ultimately, the value lies in the wisdom contained within, regardless of the cost.

Considerations When Choosing a Translation

Selecting the right Bhagavad Gita English PDF translation is crucial for a meaningful experience. Numerous versions exist, each with a unique interpretive lens. Consider the translator’s background and philosophical leaning – are they more focused on literal accuracy, or conveying the spirit of the text?

Some translations prioritize scholarly rigor, offering extensive notes and contextual analysis. Others aim for poetic beauty and accessibility, making the verses more engaging for a modern audience. Look for translations by respected scholars with a deep understanding of Sanskrit and Hindu philosophy.

Read reviews and compare different versions before committing; Some popular choices include those by Eknath Easwaran, Stephen Mitchell, and Juan Mascaró. Pay attention to the introduction and commentary – do they resonate with your own spiritual path?

A good translation should illuminate the core teachings of the Gita, not impose a particular dogma. Choose a version that inspires you and deepens your understanding of this timeless wisdom.

Key Chapters and Their Themes

Exploring a Bhagavad Gita English PDF reveals pivotal chapters. Arjuna’s dilemma in Chapter 1, the knowledge-focused Chapter 2, and Chapter 18’s renunciation
themes are central.

Chapter 1: Arjuna’s Dilemma

Chapter 1 of the Bhagavad Gita, readily accessible in any English PDF version, dramatically sets the stage for the entire discourse. It unfolds on the battlefield of Kurukshetra, where the warrior Arjuna faces a profound moral crisis. He is confronted with the horrifying prospect of battling against his own kin – teachers, relatives, and friends – in a righteous war.

Overwhelmed by grief and compassion, Arjuna experiences a complete breakdown, questioning the purpose of fighting and the potential consequences of his actions. He lays down his bow, refusing to engage in combat. This initial despair isn’t a sign of weakness, but rather a deeply human response to the immense weight of duty versus personal attachment.

This chapter, often titled “The Despondency of Arjuna,” establishes the central conflict of the Gita: the struggle between dharma (righteous duty) and the emotional turmoil of facing difficult choices. It’s a powerful introduction, prompting reflection on the nature of warfare, morality, and the human condition, all within the context of a readily available Bhagavad Gita English PDF.

Chapter 2: The Yoga of Knowledge

Chapter 2, frequently found in comprehensive Bhagavad Gita English PDF translations, is titled “The Yoga of Knowledge” and marks a pivotal shift in the narrative. Krishna begins to address Arjuna’s despair, offering profound philosophical insights to guide him. He introduces the concept of the eternal self (Atman) and its distinction from the transient physical body.

Krishna explains that grief arises from ignorance of this fundamental truth – that the soul is immortal and cannot be destroyed by earthly actions. He emphasizes the importance of fulfilling one’s dharma (duty) without attachment to the fruits of labor, advocating for a detached and selfless approach to action.

This chapter lays the groundwork for the various yogic paths discussed later, establishing Jnana Yoga – the path of knowledge – as a means to liberation. Studying this chapter within a readily accessible Bhagavad Gita English PDF provides a foundational understanding of Hindu metaphysics and the path to spiritual realization.

Chapter 18: Conclusion – The Yoga of Renunciation

Chapter 18, often the concluding section in a complete Bhagavad Gita English PDF, is known as “The Yoga of Renunciation.” It serves as a comprehensive synthesis of the teachings presented throughout the scripture, offering a final clarification of the path to liberation.

Krishna meticulously details the distinctions between renunciation (tyaga) and detachment (vairagya), emphasizing that true renunciation isn’t about abandoning action, but performing it without selfish desire. He reiterates the importance of fulfilling one’s dharma, guided by understanding and devotion.

This chapter addresses lingering doubts and provides a nuanced understanding of karma, duty, and the nature of the self. Accessing this chapter through a well-translated Bhagavad Gita English PDF allows readers to grasp the holistic message of the Gita – a call to action rooted in wisdom and selfless service, ultimately leading to spiritual freedom.

same as ever book pdf

Same As Ever Book PDF: A Comprehensive Article Plan

This article delves into the world of Morgan Housel’s “Same As Ever,” exploring its core themes, availability as a PDF, and contrasting it with his prior work.

We’ll examine reader reception, the book’s impact, and practical applications of its timeless principles, offering a complete guide for interested readers.

The plan covers legality, alternative formats, and provides context based on information available as of February 6, 2026, and prior publications from 2023 and 2025.

“Same As Ever: A Guide To What Never Changes,” penned by Morgan Housel, represents a compelling follow-up to his widely acclaimed “The Psychology of Money.” Released in October 2025, this book diverges from conventional self-help or financial advice, instead offering a unique perspective on enduring truths applicable across time and disciplines.

Housel doesn’t present a formula for success, but rather a collection of 24 short stories illustrating principles that have consistently held true throughout history. These lessons span areas like risk, opportunity, behavior, and the fundamental aspects of a fulfilling life. The core idea revolves around recognizing that while specific circumstances evolve, human nature and certain underlying dynamics remain remarkably constant.

The book’s appeal lies in its accessibility and relatable narratives. It avoids complex jargon, opting for clear, concise prose and engaging anecdotes. “Same As Ever” isn’t about predicting the future; it’s about understanding the past and present to navigate an uncertain world with greater wisdom and resilience. Its exploration of timeless lessons makes it a valuable resource for anyone seeking long-term perspective.

About the Author: Morgan Housel

Morgan Housel is a highly respected voice in the realm of finance and behavioral economics, renowned for his ability to distill complex concepts into easily digestible insights. He is the New York Times Bestselling author of multiple influential books, including “The Psychology of Money” and “The Art of Spending Money,” establishing him as a leading thinker on wealth, investing, and personal finance.

Prior to his success as an author, Housel built a career in the financial industry, gaining practical experience that informs his writing. He is known for his unconventional approach, often challenging traditional financial wisdom and emphasizing the importance of psychological factors in financial decision-making.

Housel’s writing is characterized by its clarity, storytelling ability, and focus on long-term thinking. He frequently shares his insights through his blog, social media, and various publications. With “Same As Ever,” he continues to demonstrate his talent for identifying and articulating enduring principles that transcend specific market conditions or economic trends, solidifying his position as a trusted financial guide.

Core Themes and Concepts of the Book

“Same As Ever” centers around the idea that despite constant change in the world, certain fundamental aspects of human behavior, business, and life remain remarkably consistent. Morgan Housel argues that understanding these timeless truths is crucial for navigating uncertainty and achieving long-term success.

A key theme is the enduring relevance of risk, opportunity, and the inherent unpredictability of the future. The book explores how human nature – our biases, emotions, and tendencies – consistently shapes outcomes, regardless of technological advancements or economic shifts.

Housel emphasizes the importance of recognizing patterns from the past, not to predict the future, but to prepare for a range of possibilities. He presents 24 short stories illustrating these unchanging principles, offering a masterclass in understanding the forces that consistently influence our lives. The book encourages readers to focus on what truly doesn’t change, providing a framework for making informed decisions in a volatile world.

The Book’s Structure: 24 Timeless Lessons

“Same As Ever” is uniquely structured around 24 concise lessons, each presented as a standalone story or observation. This format allows for easy digestion and encourages readers to revisit specific concepts as needed. Unlike traditional, linear narratives, the book’s fragmented approach mirrors the non-linear nature of life itself.

Each lesson focuses on a core principle that Housel argues has remained constant throughout history. These aren’t prescriptive rules, but rather observations about how the world works, drawn from a wide range of historical events and personal anecdotes. The stories are designed to be thought-provoking, prompting readers to reflect on their own experiences.

This structure facilitates a flexible reading experience, enabling readers to jump between lessons based on their current interests or challenges. The brevity of each lesson makes it ideal for quick insights and reinforces the book’s central message: that enduring wisdom often lies in simple, timeless truths.

Key Lesson 1: Compounding and Patience

The first key lesson in “Same As Ever” powerfully emphasizes the magic of compounding and the necessity of patience. Housel illustrates how small, consistent efforts over extended periods yield extraordinary results – a principle applicable to finances, skills, and personal growth.

He argues that the most significant gains aren’t often flashy or immediate, but rather the accumulation of modest improvements over time. This concept directly challenges our inherent desire for quick wins and instant gratification, a common theme throughout the book.

Housel uses historical examples to demonstrate that compounding isn’t limited to financial investments; it’s a universal force at play in all aspects of life. The lesson stresses that consistent effort, even in the face of slow progress, is crucial for long-term success.

Understanding this principle requires a shift in perspective, focusing on the process rather than solely on the outcome, and embracing the power of time.

Key Lesson 2: The Importance of Long-Term Thinking

“Same As Ever” consistently champions the virtue of long-term thinking, positioning it as a cornerstone of sound decision-making and a fulfilling life. Morgan Housel argues that many of life’s challenges and opportunities are best navigated with a perspective that extends beyond immediate concerns.

He highlights how short-term pressures and emotional reactions often lead to suboptimal choices, particularly in areas like investing and career planning. The book encourages readers to prioritize enduring principles over fleeting trends, recognizing that true wealth and happiness are built over decades, not days.

Housel illustrates this through compelling narratives, demonstrating how individuals who focused on long-term goals—even amidst setbacks—achieved remarkable outcomes. This lesson isn’t simply about delaying gratification; it’s about understanding that the most valuable rewards require sustained effort and a willingness to embrace uncertainty.

Cultivating a long-term mindset, according to Housel, is a skill that can be developed and refined, leading to greater resilience and a more meaningful existence.

Key Lesson 3: Understanding Risk and Reward

“Same As Ever” dedicates significant attention to the nuanced relationship between risk and reward, challenging conventional wisdom and urging readers to adopt a more realistic perspective. Morgan Housel emphasizes that risk isn’t a static concept, but rather a constantly evolving factor influenced by time, context, and individual perception.

The book argues against the pursuit of guaranteed outcomes, acknowledging that substantial rewards invariably require accepting a degree of uncertainty. Housel illustrates how many seemingly “risky” endeavors have historically yielded positive results, while overly cautious approaches often lead to missed opportunities.

He stresses the importance of distinguishing between genuine risk – the possibility of loss – and merely feeling uncomfortable with uncertainty. A core tenet is that avoiding all risk isn’t prudent; it’s often detrimental to long-term growth and fulfillment.

“Same As Ever” encourages readers to assess risk not in isolation, but in relation to potential rewards, and to develop a tolerance for volatility as a necessary component of achieving meaningful goals.

Key Lesson 4: The Role of Luck and Skill

A central theme in “Same As Ever” is the often-underestimated influence of luck and skill in shaping outcomes, a concept Morgan Housel explores with characteristic clarity. The book cautions against attributing success solely to personal ability, or failure entirely to a lack thereof, recognizing the significant role of external factors beyond individual control.

Housel argues that distinguishing between luck and skill is surprisingly difficult, yet crucial for rational decision-making. He presents compelling examples demonstrating how seemingly skillful individuals can benefit from fortunate circumstances, and how talented people can be thwarted by bad luck.

The book doesn’t diminish the importance of skill, but rather advocates for a more humble and realistic assessment of its impact. It encourages readers to focus on controllable factors – effort, learning, and adaptability – while acknowledging the inherent unpredictability of life.

“Same As Ever” suggests that recognizing the role of luck fosters empathy, reduces arrogance, and promotes a more balanced perspective on both personal achievements and setbacks.

Where to Find a “Same As Ever” Book PDF

Locating a PDF version of Morgan Housel’s “Same As Ever” requires careful consideration of legality and ethical implications. While numerous websites claim to offer free PDF downloads, many of these sources are unauthorized and may violate copyright laws.

Official channels are the most reliable and ethical way to access the book in digital format. Major ebook retailers like Amazon Kindle, Apple Books, and Google Play Books typically offer “Same As Ever” for purchase as a downloadable file, often compatible with various devices.

Subscription services, such as Kindle Unlimited, may also include the book in their catalog, providing access for a monthly fee. Checking the publisher’s website (Harriman House) is another potential avenue for legitimate digital copies.

Beware of websites offering “free” PDFs, as these often contain malware or are simply pirated copies. Supporting authors by purchasing their work ensures continued creation of valuable content.

Legality and Ethics of PDF Downloads

Downloading a PDF of “Same As Ever” from unauthorized sources raises significant legal and ethical concerns. Copyright law protects authors and publishers, granting them exclusive rights to distribute their work. Obtaining a PDF through illegal channels constitutes copyright infringement, potentially leading to legal penalties.

Beyond the legal ramifications, ethical considerations are paramount. Authors rely on book sales for income, and unauthorized downloads directly undermine their livelihood. Supporting authors financially encourages continued writing and the creation of valuable content like “Same As Ever.”

Choosing legitimate avenues for accessing the book, such as purchasing it from authorized retailers or utilizing subscription services, demonstrates respect for intellectual property rights.

Even if a PDF is offered “for free,” it doesn’t negate the ethical implications. Consider the impact on the author and the publishing industry before opting for an illegal download. Prioritizing ethical consumption fosters a sustainable ecosystem for writers and readers alike.

Alternative Formats: Audiobook and Physical Copy

While the convenience of a “Same As Ever” book PDF might be appealing, exploring alternative formats enhances the reading experience and supports the author legally; Morgan Housel’s work is readily available as a traditionally published physical copy, offering the tactile pleasure of reading a book.

For those who prefer auditory learning, an audiobook version of “Same As Ever” provides a compelling alternative. This format allows listeners to absorb the book’s wisdom during commutes, workouts, or other activities.

Both the physical copy and audiobook versions ensure that Morgan Housel receives due compensation for his work, contributing to his ability to continue producing insightful content.

These formats often include additional features, such as author notes or enhanced audio production, enriching the overall experience beyond a simple PDF download. Choosing these options demonstrates respect for intellectual property and supports the literary ecosystem.

Consider these legitimate options before seeking unauthorized PDF versions.

“Same As Ever” vs. “The Psychology of Money”

Both “Same As Ever” and Morgan Housel’s earlier work, “The Psychology of Money,” explore financial decision-making, but they approach the subject from distinct angles. “The Psychology of Money” delves into the behavioral biases that influence our relationship with money, focusing on individual psychology.

“Same As Ever,” however, shifts the perspective to timeless principles that remain constant regardless of market fluctuations or economic conditions. It identifies enduring truths about risk, opportunity, and human behavior, offering a broader historical context.

While “The Psychology of Money” is about how we think about money, “Same As Ever” is about what will always be true about money and life, regardless of our psychological state.

Readers familiar with “The Psychology of Money” will find “Same As Ever” to be a complementary read, providing a framework for applying those psychological insights within a stable set of fundamental principles.

Both books demonstrate Housel’s ability to distill complex ideas into accessible narratives.

Reader Reviews and Critical Reception

“Same As Ever” has garnered generally positive reviews, with readers praising Morgan Housel’s ability to present complex ideas in a clear and engaging manner. Many appreciate the book’s focus on timeless principles, finding its lessons applicable to various aspects of life, not just finance.

Critics highlight the book’s concise and story-driven format, noting that the 24 short lessons are easily digestible and memorable. The historical anecdotes and examples used to illustrate these principles are frequently cited as a strength.

Some reviewers have compared “Same As Ever” favorably to “The Psychology of Money,” appreciating its broader scope and emphasis on enduring truths. Others suggest it serves as a valuable companion piece to Housel’s previous work.

Online discussions and book communities reveal a consensus that “Same As Ever” offers a refreshing perspective in a world often obsessed with short-term trends and quick fixes.

The book’s accessibility has contributed to its widespread appeal among both seasoned investors and those new to financial literacy.

Impact and Influence of the Book

“Same As Ever” is rapidly establishing itself as a significant work in the realm of behavioral finance and personal development. Its core message – that fundamental human behaviors and economic principles remain constant despite changing circumstances – resonates deeply with a broad audience.

The book’s influence extends beyond individual readers, sparking conversations among financial professionals and thought leaders. Its emphasis on long-term thinking and risk management is prompting a reevaluation of traditional investment strategies.

Housel’s accessible writing style has democratized complex financial concepts, making them understandable to a wider range of individuals. This has contributed to increased financial literacy and more informed decision-making.

The book’s focus on timeless principles offers a counterpoint to the often-frenzied pace of the modern financial world, encouraging readers to prioritize patience, humility, and a long-term perspective.

“Same As Ever” is poised to have a lasting impact on how people approach money, risk, and the pursuit of a meaningful life.

Applying the Lessons of “Same As Ever” to Daily Life

The true power of “Same As Ever” lies in its practical applicability. Housel doesn’t just present abstract concepts; he offers actionable insights that can be integrated into everyday decision-making.

One key takeaway is the importance of recognizing patterns. By understanding that human behavior tends to repeat itself, we can anticipate potential pitfalls and make more rational choices, particularly during times of market volatility.

The book encourages a shift in focus from short-term gains to long-term sustainability. This applies not only to financial investments but also to career choices, relationships, and personal habits.

Cultivating humility and acknowledging the role of luck are crucial. Recognizing that outcomes are often influenced by factors beyond our control can foster a more realistic and resilient mindset.

Ultimately, “Same As Ever” empowers readers to navigate life’s complexities with greater wisdom, patience, and a deeper appreciation for the enduring principles that govern success and happiness.

The Enduring Value of Timeless Principles

“Same As Ever” isn’t simply a financial guide; it’s a philosophical exploration of what truly matters. Morgan Housel masterfully demonstrates that while the world constantly evolves, fundamental human behaviors and economic realities remain remarkably consistent.

The book’s strength lies in its ability to distill complex ideas into accessible, relatable stories. These narratives serve as powerful reminders of the pitfalls of chasing trends and the importance of focusing on enduring principles.

Whether accessed through a PDF, audiobook, or physical copy, the core message resonates: patience, long-term thinking, and a realistic assessment of risk and reward are essential for navigating life’s uncertainties.

In a world obsessed with novelty, “Same As Ever” offers a refreshing perspective. It champions the wisdom of the past and encourages readers to embrace the timeless lessons that have guided successful individuals throughout history.

Ultimately, the book’s enduring value lies in its ability to empower readers to make more informed, rational decisions and live more fulfilling lives.