Author: leonard

wow classic leatherworking leveling guide

WoW Classic Leatherworking Leveling Guide: An Overview (1-300)

This comprehensive guide details leveling Leatherworking from 1 to 300 in Classic WoW, focusing on efficient material gathering and profitable crafting strategies.

It covers trainer locations, essential recipes, and maximizing skill gains, ensuring a smooth progression through each skill bracket.

Leatherworking in WoW Classic is a valuable profession, allowing players to craft armor, bags, and other useful items. It’s intrinsically linked to Skinning, creating a powerful synergy for self-sufficiency and profit. Unlike later expansions, Classic Leatherworking requires dedicated effort and strategic material acquisition to reach the maximum skill level of 300.

This guide focuses on optimizing your leveling path, minimizing costs, and maximizing skill gains. Understanding the demand for crafted items is crucial; certain pieces are consistently sought after by players, offering opportunities for gold making. Successfully navigating the early levels requires patience and a willingness to farm or purchase materials efficiently. Prepare for a journey of crafting and resourcefulness!

Why Level Leatherworking?

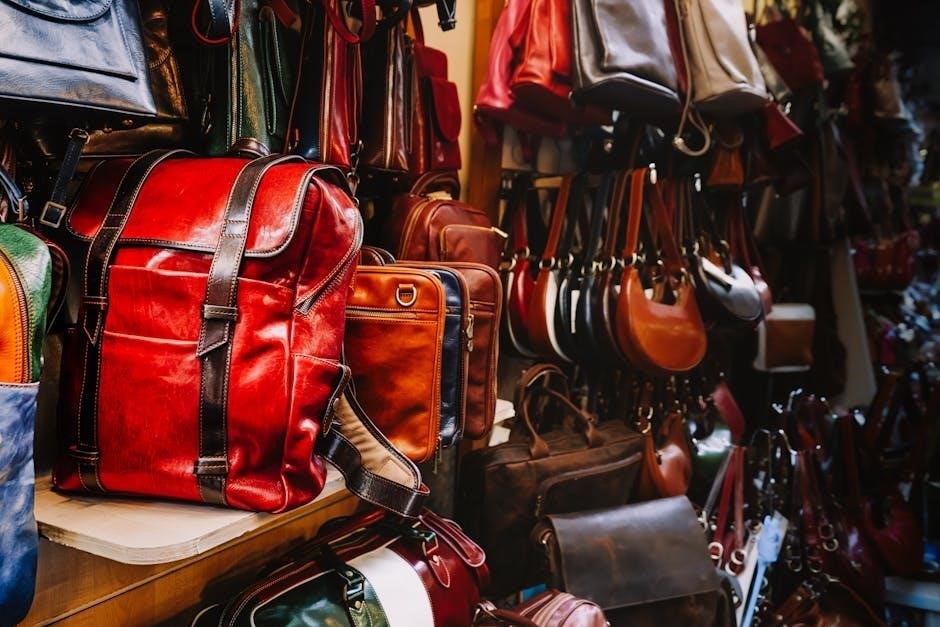
Leveling Leatherworking in Classic WoW offers significant advantages beyond simply crafting gear. It provides access to essential bags, increasing inventory space – a constant need for adventurers. Crafted armor pieces, while often replaced later, are vital for early-game progression and equipping alts.

Furthermore, Leatherworking is a profitable profession, especially when paired with Skinning. Selling crafted items on the Auction House can generate substantial gold, funding your character’s development. The ability to create specific, in-demand items provides a consistent income stream. Mastering Leatherworking enhances self-reliance and contributes to a more enjoyable Classic experience.

Leveling 1-50: Early Game Foundations

Focus on crafting basic items like Leather Bracers and Belts, utilizing readily available Light Leather. This initial phase establishes core skills and prepares you for later stages.

Trainer Locations (Levels 1-50)

For aspiring Leatherworkers starting their journey in Classic WoW, several key trainer locations are readily accessible. In the starting areas, most major cities house Leatherworking trainers. Specifically, Goldshire (for Alliance characters in Elwynn Forest) and Sen’jin Village (for Horde characters in Durotar) offer initial training up to skill level 50.

Additionally, larger hubs like Ironforge and Orgrimmar provide trainers capable of advancing your skills within this early range. Remember to frequently check back with trainers as you gain levels to unlock new recipes and maximize your progression. Utilizing these trainers efficiently is crucial for a smooth and cost-effective leveling experience during these foundational stages of Leatherworking.

Essential Materials: Light Leather

Light Leather forms the bedrock of early Leatherworking progression in Classic WoW. Primarily obtained by skinning beasts – wolves, boars, and various wildlife – it’s vital for crafting numerous items up to skill level 50. Efficient skinning is paramount; prioritize areas with high beast density to maximize your yield.

Vendors also offer Light Leather, but at a significant markup, making skinning the far more economical choice. Focus on gathering a substantial stockpile, as many early recipes require considerable quantities. Supplementing your supply through the Auction House can be considered, but be mindful of pricing fluctuations. Mastering Light Leather acquisition is key to rapid initial leveling.

Key Recipes & Crafting (1-50)

Early Leatherworking (1-50) centers around crafting simple items like Leather Armor, Leather Caps, and Leather Belts. These provide consistent skill-ups, though profit margins are minimal. Prioritize crafting items that align with your current skill level to avoid wasted materials and greyed-out recipes.

Focus on volume crafting; repeatedly making the highest skill-up item available is more efficient than diversifying. Light Leather Bracers are a reliable choice for consistent gains. Don’t overlook the value of self-sufficiency – crafting your own gear can save gold. Remember to check trainer updates for new recipes as you progress!

Leveling 50-100: Building Momentum

This phase introduces Medium Leather and more complex designs, demanding efficient farming and strategic crafting for optimal skill gains and potential profits.

Trainer Locations (Levels 50-100)

As you progress from levels 50 to 100 in Leatherworking, locating the appropriate trainers becomes crucial for unlocking new recipes and advancing your skill. Several key cities house Leatherworking trainers accessible to players within this level range.

For the Horde, Sen’jin Village (Sen’jin Shieldmaiden) and Razor Hill (Krugosh) offer training. Orgrimmar (Master Leatherworker Borin) is also a central hub. Alliance players can find trainers in Ironforge (Master Leatherworker Gronn) and Booty Bay (Hargrim).

Remember to check the trainer’s offerings to ensure they have the recipes you need for your current skill level. Frequent visits to trainers are essential for maximizing your Leatherworking progression during this stage.

Medium Leather Acquisition

Securing a steady supply of Medium Leather is vital when leveling Leatherworking from 50 to 100. This material is a core component in many recipes during this phase, impacting both skill-ups and potential profits. Efficient farming is key to minimizing costs and maximizing progress.

Prime farming locations include the Barrens (centaurs and harpies), Thousand Needles (leatherbacks), and Desolace (raptors). Skinning beasts within these zones provides a consistent source of Medium Leather. Consider utilizing Skinning synergy to increase your yield.

Auction House purchases are an alternative, but often more expensive. Prioritize farming when possible to maintain cost-effectiveness and self-sufficiency.

Profitable Crafts (50-100)

Between levels 50 and 100, several crafted items offer good returns, supplementing your leveling process with gold. Focus on items with consistent demand, such as Leather Armor Kits and various leather components used by other professions.

Leather Belts and Bracers are reliable sellers, providing steady income while contributing to skill gains. Consider crafting Hide Armor, as it’s frequently needed by leveling characters. Monitor Auction House prices to identify profitable opportunities and adjust your crafting accordingly.

Don’t overlook the value of raw materials; selling excess leather can be lucrative.

Leveling 100-150: Specialization Considerations

Reaching 100 unlocks specialization choices. Consider Skinning synergy for self-sufficiency, or focus on crafting specific armor types for maximum profit potential.

Trainer Locations (Levels 100-150)

As you progress from level 100 to 150 in Leatherworking, several key trainer locations become available across Azeroth. For Horde characters, Sen’jin Village in Durotar offers training, as does Razor Hill in The Barrens. Further options include Grom’Gol Camp in Stranglethorn Vale and Camp Taurajo in The Barrens.

Alliance players can find trainers in Ironforge, specifically within the Leatherworking Guild. Additionally, Booty Bay in Stranglethorn Vale and Lakeshire in Redridge Mountains provide convenient access to Leatherworking trainers. Remember to regularly check with trainers to unlock new recipes and advance your skill level efficiently. Utilizing these locations strategically will streamline your leveling process.

Heavy Leather Farming

Securing a consistent supply of Heavy Leather is crucial for leveling between 100 and 150. Prime farming locations include the Barrens, specifically around the Mankrik’s Wife area, teeming with beasts that drop Heavy Leather. Another excellent spot is Thousand Needles, focusing on the central and southern regions where boars and raptors roam.

Stranglethorn Vale also provides a viable option, though competition can be higher. Skinning skill significantly impacts yield, so maximizing it is essential. Consider utilizing a tracking macro to identify skinnable creatures efficiently. Consistent farming in these zones will ensure a steady supply for crafting and skill-ups.

Crafting for Profit & Skill-Ups (100-150)

Between levels 100 and 150, focus on crafting items with consistent demand. Durable Leather Armor, while not exceptionally profitable, provides reliable skill-ups. More lucrative options include crafting Hide Armor Kits and Heavy Leather Belt, frequently sought after by leveling players.

Monitor the Auction House to identify price fluctuations and adjust crafting accordingly. Prioritize recipes that utilize readily available materials to minimize costs. Remember to factor in reagent costs when determining profitability. Consistent crafting and smart auctioning will accelerate your leveling and generate gold.

Leveling 150-200: Focusing on Efficiency

This range emphasizes optimizing your crafting process, utilizing Thick Leather effectively. Prioritize recipes with high success rates and minimal wasted materials for faster skill gains;

Trainer Locations (Levels 150-200)

As you progress from 150 to 200 in Leatherworking, several key trainer locations become available across Azeroth. For the Horde, players can find trainers in Sen’jin Village (around level 150-180) and Razor Hill (levels 180-200) in Durotar.

Alliance players will find suitable trainers in Ironforge, specifically within the crafting area, covering the entire 150-200 range. Another option is Booty Bay (levels 170-200) for a more neutral location. Remember to regularly visit trainers to learn new recipes as your skill increases.

Don’t overlook the importance of checking for updated trainer locations, as they can sometimes shift with game updates or expansions. Utilizing online resources and community guides can ensure you’re always learning from the most current information.

Thick Leather Sources

Thick Leather is a crucial material for leveling between 150 and 200 Leatherworking, requiring consistent farming efforts. Prime sources include beasts found throughout Azeroth, particularly those in higher-level zones. Expect to spend time hunting in areas like Tanaris, Feralas, and Un’Goro Crater.

Specifically, look for creatures like Rhinos, Elekks, and various types of Raptors. Skinning skill is paramount; ensure it’s adequately leveled to maximize yield. Consider utilizing a Skinning enchanting tool to further increase your chances of obtaining Thick Leather.

Auction House purchases are an alternative, but can be costly. Efficient farming remains the most cost-effective method for dedicated Leatherworkers.

Recipe Optimization (150-200)

Between levels 150 and 200, focus on crafting items with high success rates and minimal material waste. Prioritize recipes like Heavy Leather Helms and Shoulder Pads, as they provide consistent skill-ups. Avoid recipes with low success chances, even if they offer slightly more skill gain, as wasted materials hinder progress.

Consider crafting items that are in demand on the Auction House, turning skill-ups into a profit. Heavy Leather Bracers are often sought after.

Regularly check the Auction House prices to identify profitable crafting opportunities and adjust your recipe choices accordingly. Efficient recipe selection is key to maximizing leveling speed and minimizing costs.

Leveling 200-250: Rugged Leather & Beyond

This range introduces Rugged Leather crafting, demanding efficient farming and strategic recipe choices for optimal skill gains and potential profits.

Trainer Locations (Levels 200-250)

Finding the right trainers is crucial for efficient progression. For levels 200-225, head to Booty Bay (Stranglethorn Vale) and seek out Zalara, a conveniently located trainer for aspiring leatherworkers.

As you approach 225-250, your journey takes you to Ratchet (Dustwallow Marsh), where Krix awaits to impart further knowledge. Remember to check for trainer availability, as they may not always be present.

Utilizing the trainer network ensures you have access to the latest recipes and skill advancements, streamlining your path to 300. Don’t neglect these vital stops!

Rugged Leather Farming Locations

Securing a steady supply of Rugged Leather is paramount during this leveling phase. Nagrand (Outland) proves to be a prime location, teeming with Talbuks and Clefthoofs – excellent sources of this valuable material.

Focus your efforts on the areas surrounding Garadar, where the density of skinnable beasts is notably high. Alternatively, Terokkar Forest offers opportunities, though competition may be fiercer.

Remember to utilize Skinning synergy to maximize your yield. Consistent farming in these zones will ensure a profitable and efficient path towards Leatherworking mastery.

Crafting High-Demand Items (200-250)

Between skill levels 200 and 250, focus on crafting items with consistent demand on the Auction House. Devilsaur Gauntlets remain a popular choice, requiring Rugged Leather and offering a good profit margin.

Heavy Leather Belts and Bracers are also reliable sellers, catering to players gearing up for raiding and PvP. Prioritize recipes that utilize readily available materials to minimize costs and maximize returns.

Regularly monitor Auction House prices to identify emerging opportunities and adjust your crafting strategy accordingly. Efficient crafting and smart selling are key to success.

Leveling 250-300: Reaching the Cap

The final stretch demands Exceptional Leather, sourced from high-level beasts. Focus on crafting high-end gear and utilizing any remaining skill-ups efficiently to reach 300.

Trainer Locations (Levels 250-300)

Reaching the pinnacle of Leatherworking requires visiting specific trainers scattered across Azeroth. For the Horde, Orgrimmar remains a central hub, with Master Leatherworker Borin serving as your go-to instructor. He’s conveniently located within the Valley of Strength.

Alliance players will find their trainer in Ironforge, specifically Master Leatherworker Bomgar. He resides in the Military Ward, easily accessible to those seeking to refine their skills. Remember to check for updated trainer locations, as they can sometimes shift with expansions or patches.

Ensure you have the required gold for each skill increase before visiting the trainer. These final skill points can be costly, so plan accordingly. Prioritize visiting the trainer after acquiring sufficient skill-ups from crafting to minimize travel expenses.

Exceptional Leather Sources

Securing Exceptional Leather is crucial for max-level crafting, demanding dedicated farming efforts. High-level beasts in Winterspring and Un’Goro Crater offer consistent drops, though competition can be fierce. Devilsaurs in Un’Goro are particularly lucrative, yielding substantial quantities.

Alternatively, consider Zul’Gurub, where bosses and trash mobs drop Exceptional Leather as part of their loot tables. This instance provides a more controlled farming environment, albeit requiring a group. Remember to utilize skinning skills alongside your Leatherworking to maximize resource acquisition.

Auction House prices fluctuate, so monitor the market for opportunities to buy leather at a discount. Efficient farming and smart purchasing are key to mastering this final stage.

Final Skill-Ups & Max Level Considerations

Reaching 300 Leatherworking unlocks the most powerful recipes, enabling crafting of high-demand items. Focus on crafting Drums of Battle, consistently sought after by raiders and PvP players. High-end armor pieces, like the Deviant Leather set, also provide substantial profit.

Consider specializing in a specific armor type to maximize crafting efficiency and recipe availability. Maintaining a steady supply of Exceptional Leather is vital for continued production. Monitor auction house trends to identify profitable opportunities and adjust your crafting accordingly.

Leatherworking remains valuable at max level, offering both income and utility.

Leatherworking Specializations

Leatherworking specializations enhance crafting efficiency, focusing on specific armor types. Skinning synergy provides material cost reductions, boosting profits and streamlining the leveling process.

Skinning Synergy

Combining Leatherworking with Skinning offers significant advantages in WoW Classic. Skinning allows players to gather their own leather, drastically reducing material costs and dependency on the Auction House. This self-sufficiency is particularly valuable during the leveling process, where gold can be scarce.

The synergy isn’t just economic; it’s also time-saving. Instead of spending time farming gold to purchase leather, you can directly acquire it while leveling your character. This streamlined approach accelerates your Leatherworking progression.

Furthermore, certain Leatherworking recipes require specific types of leather, and having Skinning ensures a consistent supply. This is especially crucial for crafting high-demand items and maximizing profits. Investing in both professions creates a powerful and efficient crafting loop.

laramie project pdf

The Laramie Project PDF: A Comprehensive Guide

Today, February 6th, 2026, accessing The Laramie Project script in PDF format is a common request for educators, students, and theatre enthusiasts alike․

This guide provides resources and insights into finding, understanding, and analyzing this impactful play, alongside related materials like Censorship News 124․

Numerous online sources offer the script, but verifying legality and quality is crucial, as the document spans 34 pages․

What is The Laramie Project?

The Laramie Project is a groundbreaking play crafted by the Tectonic Theater Project, born from a tragic real-life event․ Following the brutal 1998 murder of Matthew Shepard, a young gay student at the University of Wyoming, members of the theater company journeyed to Laramie to interview town residents․

These interviews – over 200 in total – form the core of the play, presented as verbatim theatre․ This means the dialogue is constructed directly from the recorded words of the people of Laramie, offering a multifaceted portrait of a community grappling with hate, prejudice, and the aftermath of a horrific crime․

The play doesn’t offer easy answers or a single narrative; instead, it presents a chorus of voices, revealing the complexities of human response to violence and difference․ Finding a PDF version allows for detailed script analysis and study, aiding in understanding its powerful message․

The Play’s Origins and Context

The Laramie Project emerged in the wake of Matthew Shepard’s murder, a pivotal moment that ignited national conversation about hate crimes and LGBTQ+ rights․ The Tectonic Theater Project, led by Moisés Kaufman and members, responded with immediate action, traveling to Laramie, Wyoming, just days after the tragedy․

Their intent wasn’t to create a sensationalized account, but to understand the community and the circumstances surrounding Shepard’s death through direct engagement․ Over a year and a half, they conducted extensive interviews with Laramie residents – police officers, friends, classmates, and strangers – meticulously documenting their perspectives․

Accessing the play’s script in PDF format allows a deeper dive into this context․ The verbatim nature of the work is crucial; it’s not a fictionalized retelling, but a composite of real voices, reflecting the complexities of a town grappling with a shocking event and its own internal biases․

Matthew Shepard’s Story: A Brief Overview

Matthew Shepard, a 21-year-old student at the University of Wyoming, was brutally attacked in October 1998․ He was targeted because of his sexual orientation, a horrific act that drew national and international condemnation․ The attack resulted in severe injuries, and Shepard tragically died several days later in a hospital․

His murder became a catalyst for increased awareness and advocacy for LGBTQ+ rights, prompting discussions about hate crime legislation and societal prejudice․ The Laramie Project, available as a PDF script, directly addresses this tragedy, presenting a multifaceted portrait of the events and the community’s response․

Understanding Shepard’s story is fundamental to appreciating the play’s power and purpose․ It’s a story of senseless violence, but also of resilience, remembrance, and the ongoing fight for equality and acceptance, themes powerfully conveyed within the script’s verbatim interviews․

Finding The Laramie Project Script in PDF Format

Locating a PDF copy of The Laramie Project script requires careful navigation of online resources, ensuring both accessibility and adherence to copyright regulations․

Reliable Sources for the PDF Script

Securing a legitimate PDF version of The Laramie Project script necessitates identifying trustworthy sources․ While a direct, officially sanctioned free download isn’t readily available, several avenues offer potential access․ Educational institutions often possess licensed copies for classroom use, and contacting drama departments or libraries can be fruitful․

Script retailers specializing in play scripts frequently sell digital versions, guaranteeing authenticity and legal compliance․ Be cautious of websites offering “free” downloads, as these may contain incomplete, inaccurate, or illegally distributed content․ Remember that supporting the playwrights and publishers is vital for continued artistic creation․

Exploring online theatrical resource databases, though requiring potential subscription fees, can also yield reliable PDF versions․ Always prioritize sources that clearly indicate licensing and copyright information to avoid legal issues and ensure you’re accessing a complete and accurate script․

Potential Issues with Online PDF Downloads

Downloading The Laramie Project script as a PDF from unverified sources presents several risks․ Illegally distributed copies may be incomplete, containing missing pages or scenes, hindering a full understanding of the play․ Furthermore, these downloads often harbor malware or viruses, compromising your device’s security and potentially leading to data breaches․

The quality of the PDF itself can be problematic; scans may be blurry, making the text difficult to read, or improperly formatted, disrupting the script’s structure․ Copyright infringement is a serious concern, and accessing unauthorized copies supports illegal activity․

Always exercise caution and prioritize legitimate sources to avoid these pitfalls․ Consider the potential consequences before downloading from unfamiliar websites, and ensure your antivirus software is up-to-date․

Legality and Copyright Considerations

The Laramie Project is a copyrighted work, and unauthorized reproduction or distribution of the script is illegal․ Downloading a PDF from unofficial sources often constitutes copyright infringement, potentially leading to legal repercussions for the user․ Obtaining the script through legitimate channels ensures compliance with copyright law and supports the playwrights and creators․

Licensing is typically required for public performances or classroom use beyond fair use guidelines․ Purchasing a copy from authorized vendors or securing performance rights through licensing agencies is essential․ Respecting intellectual property rights is crucial within the theatrical community and beyond․

Prioritize ethical access and avoid contributing to illegal distribution networks․

Understanding the Script’s Content

The Laramie Project powerfully presents diverse perspectives through interviews and monologues, exploring themes of hate, prejudice, and acceptance within a community deeply affected․

Key Characters and Their Perspectives

The Laramie Project doesn’t feature traditional characters, but rather presents the voices of Laramie, Wyoming residents interviewed following Matthew Shepard’s murder․ These individuals offer a spectrum of viewpoints, ranging from compassionate understanding to deeply ingrained prejudice․

Key figures include members of the police force, the District Attorney, Matthew’s friends, and local townspeople․ Their perspectives reveal the complexities of a community grappling with a horrific crime and its own biases․ Some express genuine sorrow and a desire for change, while others demonstrate discomfort, denial, or even justification of the violence․

The script meticulously captures the nuances of these interviews, allowing audiences to witness the raw emotions and conflicting ideologies present in Laramie․ Understanding these diverse perspectives is crucial to grasping the play’s profound message about tolerance and the consequences of hate․

Thematic Elements: Hate, Prejudice, and Acceptance

The Laramie Project powerfully explores the devastating consequences of hate and prejudice, triggered by Matthew Shepard’s sexual orientation․ The play doesn’t shy away from showcasing the virulent homophobia present in Laramie, Wyoming, revealing how deeply ingrained biases can fuel violence․

However, the script also highlights the potential for acceptance and understanding․ Through interviews with residents who challenge prejudice and advocate for LGBTQ+ rights, the play demonstrates the possibility of positive change․ Kimberly Price’s work on mindfulness and self-discovery, though indirectly related, echoes the play’s call for inner reflection and empathy․

The play’s strength lies in its unflinching portrayal of both the darkness of hate and the glimmer of hope for a more inclusive future․ It prompts audiences to confront their own biases and consider the importance of fostering acceptance within their communities․

The Structure of the Play: Interviews and Monologues

The Laramie Project uniquely deviates from traditional dramatic structure, primarily constructed from over 200 interviews conducted by the Tectonic Theater Project in Laramie, Wyoming․ The script isn’t a narrative with conventional scenes; instead, it’s woven together from the direct words of town residents following Matthew Shepard’s murder․

These interviews are presented largely as monologues, delivered by actors portraying the individuals who were interviewed․ This technique creates a powerful sense of immediacy and authenticity, allowing the audience to hear directly from those affected by the tragedy․

The play’s structure intentionally avoids authorial interpretation, letting the voices of Laramie speak for themselves․ This documentary-theatre approach, combined with the PDF script’s 34 pages, offers a raw and compelling exploration of a community grappling with hate and its aftermath․

Analyzing The Laramie Project’s Impact

The Laramie Project garnered critical acclaim and widespread educational use, sparking discussions on LGBTQ+ rights and prejudice, as seen in the PDF script․

The Play’s Reception and Critical Acclaim

The Laramie Project, readily available as a 34-page PDF script, experienced a remarkably swift and powerful reception following its debut․ The play’s unique documentary theatre style – constructed from hundreds of interviews – resonated deeply with audiences and critics alike․

Many lauded its unflinching portrayal of the aftermath of Matthew Shepard’s murder and the complex perspectives of Laramie residents․ The script’s power lies in its refusal to offer easy answers, instead presenting a multifaceted exploration of hate, prejudice, and the struggle for acceptance․

Its impact extended beyond traditional theatre circles, becoming a staple in educational settings to facilitate crucial conversations about tolerance and social justice․ The PDF format further amplified its accessibility, allowing for widespread study and performance․ The play’s enduring relevance continues to spark dialogue and inspire action․

Educational Use and Classroom Discussions

The accessibility of The Laramie Project script in PDF format has cemented its place as a vital tool in educational settings․ Educators frequently utilize the 34-page document to foster critical thinking and empathy among students․

Classroom discussions often center on the play’s exploration of prejudice, homophobia, and the consequences of hate crimes․ The interview-based structure encourages students to analyze diverse perspectives and challenge their own biases․

Furthermore, the script prompts examination of the power of language and the importance of respectful dialogue․ Analyzing the residents’ responses to Matthew Shepard’s murder provides a powerful case study in social responsibility․ The play’s themes align with curricula focused on social studies, English, and drama, promoting meaningful engagement and fostering a more inclusive learning environment․

The Laramie Project and the LGBTQ+ Rights Movement

The Laramie Project, readily available as a 34-page PDF script, profoundly impacted the LGBTQ+ rights movement, arriving at a crucial juncture in the fight for equality and acceptance․

The play’s depiction of Matthew Shepard’s murder galvanized activists and raised national awareness of violence against LGBTQ+ individuals․ It served as a catalyst for increased advocacy for hate crime legislation and anti-discrimination policies․

By humanizing the victim and presenting a spectrum of community reactions, the play challenged societal prejudices and fostered empathy․ Its widespread performance in schools and theaters further amplified its message, sparking conversations about tolerance and inclusion; The script continues to be a powerful tool for education and advocacy, reminding audiences of the ongoing struggle for LGBTQ+ rights and the importance of creating a safe and affirming world․

Related Resources and Further Exploration

Beyond the Laramie Project PDF, explore the Matthew Shepard Foundation, wellness coaching with Kimberly Price, and tactical radio integration kits․

Discover personal development with Kimberly Wolfe, financial guidance, and podcasts focused on mindfulness and transformation․

Information on Matthew Shepard Foundation

The Matthew Shepard Foundation stands as a vital resource directly linked to the events inspiring The Laramie Project․ Established by Judy and Dennis Shepard, Matthew’s parents, the foundation’s core mission revolves around fostering acceptance and combating hate crimes targeting LGBTQ+ individuals․

Their work extends beyond remembrance, actively promoting national advocacy, educational programs, and online resources; The foundation provides support to families affected by hate crimes and works to create safer communities for all․

Exploring their website offers a deeper understanding of Matthew’s life, the circumstances surrounding his tragic death, and the ongoing fight for equality․ It’s a crucial companion to studying The Laramie Project, providing context and a pathway for continued engagement with the issues raised within the play’s powerful narrative․

Further information can be found on their official website․

Kimberly Price and Wellness Coaching Resources

Kimberly Price offers wellness coaching focused on holistic well-being, encompassing health, career, finances, and relationships․ While seemingly unrelated to The Laramie Project PDF directly, her work addresses the emotional and psychological impact of prejudice and trauma – themes central to the play․

Her coaching emphasizes finding balance and living a desired life, starting with self-discovery․ This resonates with the play’s exploration of community responses to hate and the need for individual and collective healing․

The BE Podcast, hosted by Kimberly Price, serves as a “sanctuary” dedicated to mindfulness and Divine presence․ It provides tools for navigating inner peace and understanding, potentially aiding in processing the difficult emotions evoked by The Laramie Project․ Resources are available for those seeking personal transformation․

More information can be found through her podcast and coaching services․

Voyager Tactical Radio Integration Kit (TRIK) ⎼ Relevance? (Note: Limited connection, included due to search results)

The Voyager Tactical Radio Integration Kit (TRIK) appears tangentially related to searches for The Laramie Project PDF, likely due to algorithmic connections within search results․ The TRIK facilitates interoperability between disparate voice and data networks on the battlefield, enabling critical information flow․

Its function – ensuring clear communication in challenging environments – can be metaphorically linked to the play’s exploration of communication breakdowns and the difficulty of bridging divides in the face of prejudice․

The TRIK supports various Harris radios and up to 25 handheld devices within a portable Voyager 8-sized case․ While a seemingly disparate technology, the need for reliable communication, even amidst conflict, echoes the play’s themes of connection and understanding․

Further information is available online․

Kimberly Wolfe ⏤ Personal Development Coaching (Note: Limited connection, included due to search results)

Kimberly Wolfe offers personal development coaching, appearing in search results alongside The Laramie Project PDF due to broader keyword associations related to self-improvement and transformation․ With over 25 years of experience, Wolfe holds a psychology degree and is trained in humanistic, Jungian, and transpersonal psychology․

The connection, though indirect, lies in the play’s profound impact on audiences, often prompting introspection and a desire for personal growth․ The Laramie Project challenges viewers to confront their own biases and consider their roles in fostering acceptance and understanding․

Wolfe’s coaching focuses on facilitating such inner work, helping individuals navigate their emotional landscapes and cultivate greater self-awareness․ Her expertise could be valuable for processing the complex emotions evoked by the play․

More information is available online․

Financial Coaching with Kim (Note: Limited connection, included due to search results)

Kim provides financial coaching, surfacing in search results alongside The Laramie Project PDF due to the broader context of personal well-being and life transformation․ While seemingly unrelated, the play’s themes of justice and community can inspire a desire for positive change in all areas of life, including financial stability․

Kim’s mission centers on promoting financial literacy, drawing from her own experiences overcoming financial challenges․ She empowers individuals to achieve stability and prosperity through practical strategies and personalized guidance․

The connection, though tenuous, highlights a holistic approach to well-being․ Addressing financial stress can free up mental and emotional resources, allowing individuals to engage more fully with important social issues raised by The Laramie Project․

Further details are accessible online․

Censorship News 124 (Note: Included due to search results, relevance unclear)

Censorship News 124, appearing in search results alongside The Laramie Project PDF, presents a curious juxtaposition․ Its inclusion suggests a potential, though currently unclear, link between accessing sensitive artistic works and broader issues of freedom of expression․

The 4-page PDF document itself remains enigmatic without further context․ It’s possible the search algorithm connected it due to discussions surrounding the play’s controversial themes – hate crimes, LGBTQ+ rights, and societal prejudice – which have historically faced censorship attempts․

Exploring whether The Laramie Project has been subject to challenges or bans in certain educational or theatrical contexts might illuminate this connection․ The presence of this news item prompts consideration of the importance of open access to challenging narratives․

More research is needed to establish a definitive link․

BE Podcast ⏤ Mindfulness and Self-Discovery (Note: Included due to search results, relevance unclear)

BE Podcast, hosted by Kimberly Price, focuses on “Divine presence, mindfulness, and self-discovery․” Its appearance alongside searches for The Laramie Project PDF is initially unclear, yet potentially resonant when considering the play’s profound emotional and ethical weight․

Engaging with The Laramie Project can be deeply unsettling, prompting reflection on prejudice, empathy, and personal values․ Mindfulness practices, as explored in the podcast, could offer valuable tools for processing the play’s challenging content and its impact on individual perspectives․

The podcast’s emphasis on “abiding in the moment” might provide a framework for navigating difficult conversations and fostering compassionate understanding – themes central to the play’s message․ Further exploration could reveal intentional connections or simply algorithmic coincidence․

It’s a potential resource for emotional processing․

Personal Transformation Stories (Note: Included due to search results, relevance unclear)

The inclusion of “Personal Transformation Stories” alongside searches for The Laramie Project PDF seems initially tangential, yet holds a subtle connection․ The play itself chronicles a community’s transformation – or lack thereof – in the face of tragedy and hate․

Witnessing Matthew Shepard’s story, and the reactions of Laramie residents, can be a catalyst for personal change, prompting viewers and readers to confront their own biases and assumptions․ Stories of individual growth and overcoming challenges, like the one shared about a year ago regarding a dancer’s journey, mirror this potential for self-reflection․

Perhaps the search algorithm recognized a shared human element: the capacity for change, the struggle for acceptance, and the pursuit of a more compassionate world․ These narratives, though seemingly disparate, both explore the complexities of the human experience․

They both inspire introspection․

frigidaire oven parts diagram gle8271908a pdf

Frigidaire Oven Parts Diagram GLE8271908A PDF: A Comprehensive Guide

This detailed PDF visually breaks down the oven, simplifying repairs and maintenance with labeled parts and exploded views for accurate troubleshooting and DIY fixes.

The Frigidaire GLE8271908A oven parts diagram is a crucial technical resource for anyone undertaking repair or maintenance on this specific oven model. It’s more than just a parts list; it’s a comprehensive visual guide designed to demystify the oven’s internal structure. This PDF provides a detailed breakdown of all components, from the heating elements to the control panel, presented in a clear and organized manner.

Understanding this diagram is paramount for both seasoned technicians and DIY enthusiasts. It allows for accurate identification of parts, streamlining the repair process and minimizing the risk of ordering incorrect replacements. The diagram also supports maintaining the manufacturer’s warranty by ensuring repairs are conducted with the correct components and procedures.

Importance of Using the Official PDF

Utilizing the official Frigidaire GLE8271908A PDF is absolutely critical for successful and safe oven repairs. Third-party diagrams can often contain inaccuracies or be incomplete, leading to misdiagnosis and potentially damaging mistakes. The official document guarantees compatibility and precision, ensuring you’re working with the correct information for your specific oven model.

Furthermore, relying on the official PDF safeguards your manufacturer’s warranty. Using non-approved diagrams or parts could void coverage. The official document details proper assembly and component interaction, minimizing risks during repair. Accessing this resource directly from Frigidaire or authorized suppliers ensures authenticity and reliability, providing peace of mind throughout the repair process.

Key Components Identified in the Diagram

The diagram meticulously details heating elements, temperature sensors, the control panel, and various assemblies, enabling precise identification for effective oven maintenance.

Heating Elements and Their Locations

The Frigidaire GLE8271908A diagram clearly illustrates the placement of both the bake and broil heating elements within the oven cavity. Typically, the bake element is located at the bottom of the oven, responsible for the majority of cooking heat. The diagram pinpoints its exact position and mounting points for easy replacement. Conversely, the broil element resides at the top, providing intense, direct heat for browning and searing.

Understanding their specific locations is crucial for accurate diagnosis when experiencing uneven heating or complete element failure. The PDF provides detailed views, showcasing how these elements connect to the oven’s wiring harness and control board. Identifying these connections simplifies the repair process, ensuring a safe and effective restoration of oven functionality. Proper element replacement relies on correctly referencing the diagram.

Temperature Sensors and Controls

The Frigidaire GLE8271908A parts diagram meticulously details the oven’s temperature sensing components and their integration with the control system. This includes the oven temperature sensor, often a thermistor, responsible for relaying the internal oven temperature to the control board. The diagram illustrates its precise location, usually within the oven cavity, and its wiring connections.

Furthermore, it showcases the control board itself, the brain of the oven, and its associated components like the temperature control knob or electronic touch panel. Understanding how these elements interact is vital for diagnosing temperature inaccuracies or control malfunctions. The PDF aids in tracing wiring paths and identifying potential failure points, streamlining the troubleshooting and repair process for consistent baking results.

Control Panel and Display Assembly

The Frigidaire GLE8271908A PDF diagram provides a clear breakdown of the control panel and display assembly, crucial for oven operation. It details each button, knob, and the display screen itself, labeling their corresponding part numbers for easy identification during repairs. The diagram illustrates the ribbon cable connections linking the display to the main control board, vital for troubleshooting display issues like flickering or complete failure.

Moreover, it showcases the membrane switch panel beneath the buttons, often a source of malfunction. Understanding this assembly’s construction allows for targeted repairs, avoiding unnecessary component replacements. The diagram assists in disassembling and reassembling the control panel correctly, ensuring proper functionality and a seamless user experience.

Understanding Exploded Views

Exploded views in the PDF visually separate components, illustrating assembly order and relationships; correlating part numbers with physical parts simplifies identification and repair.

How to Read and Interpret the Diagram

Navigating the Frigidaire GLE8271908A diagram requires a systematic approach. Begin by identifying the overall oven structure presented in the exploded view. Each component is meticulously illustrated, often with multiple perspectives to clarify its shape and position.

Pay close attention to the part numbers associated with each item; these are crucial for ordering replacements. Lines extending from the parts indicate their connections and assembly order. Assemblies and sub-assemblies are grouped together, simplifying the understanding of complex systems like the gas valve or control panel.

Understanding the legend is vital – it explains symbols used for different types of parts or connections. Carefully trace the pathways of wires and tubes to grasp the oven’s functional systems. The diagram isn’t just a picture; it’s a roadmap for disassembly, repair, and reassembly.

Correlating Part Numbers with Physical Components

The Frigidaire GLE8271908A diagram’s strength lies in its precise part numbering system. Each component, from the smallest screw to the heating element, is assigned a unique identifier. This number is your key to accurate parts ordering and identification.

Cross-referencing is essential. Locate the part number on the diagram, then use it to search online parts suppliers or the official Frigidaire resources. Ensure the number matches exactly to avoid ordering incorrect replacements.

Visual confirmation is recommended. Compare the diagram’s illustration of the part with the physical component you’re trying to identify. Note the shape, size, and any distinguishing features. This dual-check process minimizes errors and ensures a successful repair.

Identifying Assemblies and Sub-Assemblies

The GLE8271908A diagram doesn’t just show individual parts; it expertly illustrates how they combine into larger assemblies and sub-assemblies. Recognizing these groupings streamlines the repair process, allowing you to focus on replacing entire functional units rather than individual components when appropriate.

For example, the “Control Panel and Display Assembly” isn’t a single part, but a collection of buttons, the display screen, and the underlying circuit board. The diagram clearly delineates these components within the assembly.

Understanding these relationships is crucial for efficient troubleshooting. If an assembly fails, the diagram helps pinpoint whether the entire unit needs replacement or if a specific sub-component is the culprit, saving time and money.

Common Replacement Parts

Frequently replaced items include oven door parts, igniters, gas valve assemblies, and baking racks, all clearly identified within the Frigidaire GLE8271908A PDF diagram.

Oven Door Parts (Hinges, Seals)

The Frigidaire GLE8271908A diagram meticulously details all oven door components, crucial for maintaining proper sealing and operation. Hinges are shown with specific part numbers, allowing for easy identification and replacement if the door becomes misaligned or difficult to open and close. The diagram also illustrates the various oven door seals, highlighting their placement and how they contribute to heat retention during baking.

Damaged or worn seals lead to heat loss and inefficient cooking. Identifying the correct seal using the PDF ensures a proper fit, maximizing oven performance. Furthermore, the diagram showcases the attachment points for these parts, aiding in a smooth and accurate repair process. Properly functioning door parts are essential for both safety and energy efficiency.

Igniter and Gas Valve Assembly

The Frigidaire GLE8271908A PDF provides a detailed schematic of the igniter and gas valve assembly, vital for gas oven functionality. The diagram clearly labels the igniter, responsible for initiating the gas flow, and the gas valve, which controls the amount of gas reaching the burner. Precise part numbers are included for each component, simplifying the ordering process for replacements.

Understanding this assembly is crucial for diagnosing ignition problems. The diagram illustrates the connections and wiring, aiding in troubleshooting. A faulty igniter or gas valve can prevent the oven from heating. The PDF helps pinpoint the exact source of the issue, ensuring a safe and effective repair. Always disconnect the gas supply before attempting any work on these components.

Baking Rack and Oven Interior

The Frigidaire GLE8271908A PDF meticulously details the oven’s interior components, including the baking racks, oven floor, and wall liners. The diagram showcases the rack support system, illustrating how the racks slide in and out. Part numbers are clearly indicated for each rack and interior panel, facilitating easy replacement if damaged or worn.

This section is invaluable for addressing issues like uneven baking or a damaged oven floor. The diagram helps identify the correct replacement parts for a seamless repair. Properly functioning racks and a clean interior are essential for optimal cooking performance. The PDF also highlights the location of interior lights and temperature probes, aiding in comprehensive maintenance and troubleshooting.

Troubleshooting with the Diagram

The GLE8271908A diagram aids in diagnosing common oven issues, ensuring accurate repair by correlating symptoms with specific parts and their locations.

Diagnosing Common Oven Issues

Utilizing the Frigidaire GLE8271908A diagram is crucial for pinpointing the root cause of oven malfunctions. A frequently encountered problem is a failure to heat, often traced back to a faulty heating element – the diagram clearly illustrates its location and corresponding part number for easy identification and replacement.

Temperature inaccuracies can often be linked to a malfunctioning temperature sensor; the diagram details its placement within the oven cavity. If the oven isn’t maintaining temperature, inspect the control panel assembly, as depicted in the exploded view. For gas ovens, issues with the igniter or gas valve are common, and the diagram provides a clear visual representation of these components.

By systematically referencing the diagram, even complex issues become manageable, allowing for targeted repairs and minimizing unnecessary part replacements.

Using the Diagram for Accurate Repair

The Frigidaire GLE8271908A PDF diagram ensures accurate repairs by providing a visual roadmap of the oven’s internal structure. Before commencing any repair, carefully study the exploded views to understand the relationship between components and assemblies.

Cross-reference the identified faulty part with the diagram’s part numbers to guarantee you order the correct replacement. Pay close attention to sub-assemblies; sometimes, a single unit needs replacing instead of individual parts. The diagram aids in disassembling and reassembling the oven correctly, preventing further damage.

Always disconnect power before starting any repair. The diagram’s clarity minimizes guesswork, reducing the risk of incorrect installations and ensuring a safe and effective repair process, maintaining the oven’s functionality and warranty.

Where to Download the GLE8271908A PDF

Access the official diagram through Frigidaire’s resources or authorized third-party parts suppliers like PhotoLifeUSA for quick and easy downloads.

Official Frigidaire Resources

For the most reliable and up-to-date Frigidaire oven parts diagram GLE8271908A PDF, begin your search directly on the official Frigidaire website. Navigate to their support section, often categorized by appliance type – in this case, ovens or cooking appliances. Utilize the model number search function, entering “GLE8271908A” to pinpoint the exact diagram for your oven.

Frigidaire frequently provides downloadable manuals and parts lists in PDF format, ensuring compatibility and accuracy. These resources are typically free of charge and offer the highest level of confidence in the information provided. Be aware that website structures can change, so exploring the site map or contacting Frigidaire’s customer support may be necessary if direct access proves difficult. Always prioritize official sources to maintain warranty validity and ensure correct part identification.

Third-Party Parts Suppliers

While official Frigidaire resources are preferred, numerous reputable third-party parts suppliers also offer the GLE8271908A oven parts diagram in PDF format. Websites like AppliancePartsPros, RepairClinic, and Sears PartsDirect commonly stock diagrams and parts for various appliance models, including Frigidaire. These suppliers often present diagrams alongside available replacement parts, streamlining the repair process.

However, exercise caution when using third-party sources. Verify the diagram’s accuracy by cross-referencing part numbers with the official Frigidaire documentation whenever possible. Ensure the supplier is well-established and offers a return policy in case of discrepancies. Be mindful of potential variations in diagram quality and completeness compared to the official PDF. Prioritize suppliers with detailed product descriptions and customer reviews.

Maintaining Your Oven After Repair

Following a repair guided by the Frigidaire GLE8271908A diagram, consistent maintenance is crucial for longevity. Regularly clean the oven interior, removing baked-on food and spills to prevent future issues. Inspect the door seals for damage, ensuring a tight closure for efficient heating. Periodically check the heating elements for signs of wear or damage, referencing the diagram for location and proper appearance.

Proper ventilation is also key; avoid obstructing the oven’s vents. Run a self-cleaning cycle (if equipped) according to the manufacturer’s instructions, but be aware of potential fumes. By proactively addressing minor issues and adhering to recommended cleaning practices, you can maximize the lifespan of your Frigidaire oven and avoid repeat repairs.

mini mental exam spanish pdf

The MMSE, developed in 1975, boasts over 70 language versions, including Spanish, and remains a frequently utilized, brief cognitive assessment tool globally.

Historical Context of the MMSE

The Mini-Mental State Examination (MMSE) originated in 1975 as a practical method for quickly assessing a patient’s mental status. Created by Marshall Folstein, MD, it rapidly gained prominence due to its simplicity and efficiency in detecting cognitive impairment.

Its widespread adoption led to translations into numerous languages, exceeding 70, to facilitate global application. The Spanish versions emerged to address the growing need for culturally sensitive cognitive assessments within Spanish-speaking populations.

Neurologia.com highlights the MMSE as the most cited cognitive test on Medline, demonstrating its enduring influence. Early adaptations aimed to ensure linguistic equivalence and cultural relevance, crucial for accurate diagnosis and monitoring of conditions like Alzheimer’s disease.

Purpose of Spanish MMSE Versions

Spanish adaptations of the MMSE were developed to provide a reliable and valid cognitive screening tool for the growing Spanish-speaking population, addressing a critical need for culturally appropriate assessments. These versions aim to identify cognitive impairment indicative of conditions like Alzheimer’s disease and other dementias.

Researchers sought to establish cognitive profiles for different dementia subtypes, guiding clinical decision-making. The Spanish MMSE assists in evaluating dementia among Spanish-speaking patients, offering a standardized approach to assessment.

Furthermore, these versions aid in assessing Mild Cognitive Impairment (MCI) and monitoring disease progression, contributing to improved patient care and research efforts within this demographic.

Availability of Spanish MMSE PDFs

Numerous Spanish MMSE forms are accessible online via PubMed, Neurologia.com, and Semantic Scholar, offering clinicians and researchers convenient access to assessment tools.

Official Sources for Download

Locating official Spanish MMSE PDFs requires careful consideration, as variations exist. While a single universally endorsed source isn’t readily apparent from the provided information, resources like PubMed, Neurologia.com, and Semantic Scholar host relevant documents and research.

PubMed provides access to studies validating Spanish versions, often including links or references to the forms themselves. Neurologia.com features articles discussing the MMSE’s use in the Spanish population, potentially offering downloadable versions or guidance on where to find them. Semantic Scholar similarly provides access to publications detailing the MMSE, which may contain or reference the PDF forms.

Researchers and clinicians should verify the source and validity of any downloaded form to ensure it aligns with current clinical standards and research protocols.

Commonly Used Spanish MMSE Forms

Identifying specific, widely-adopted Spanish MMSE forms proves challenging, as numerous adaptations exist—over 70 languages have versions. Research indicates several Spanish-language cognitive screening tasks are utilized, including the MMSE, the Mental Status Questionnaire, and the Information-Memory-Concentration test.

Publications on Neurologia.com and Semantic Scholar discuss the application of the Spanish MMSE in clinical practice, suggesting its frequent use for brief cognitive evaluations. Concurrent validity studies, detailed on PubMed, often employ specific Spanish MMSE versions for comparison with other assessments.

Clinicians should consult current literature and institutional protocols to determine the most appropriate and validated form for their patient population.

Validity and Reliability of Spanish MMSE Versions

Spanish MMSE versions demonstrate concurrent validity when compared to other cognitive tests, and effectively predict functional disability in daily living activities.

Concurrent Validity Studies

Research indicates strong concurrent validity for several Spanish-language cognitive screening tools, including the Mini-Mental State Examination (MMSE). Studies comparing the Spanish MMSE to instruments like the Mental Status Questionnaire, Information-Memory-Concentration test, and Orientation-Memory-Concentration test reveal consistent correlations, particularly when evaluating patients diagnosed with Alzheimer’s disease alongside non-demented elderly individuals.

Notably, the Spanish MMSE emerged as the most effective predictor of functional disability, specifically impairments observed in instrumental activities of daily living. Interestingly, within normal comparison groups, neither a patient’s gender nor their linguistic background – whether monolingual or bilingual – significantly impacted their performance on these assessments. These findings support the utility of these Spanish-language tools in dementia evaluation.

Comparison with Other Cognitive Tests

The Spanish Mini-Mental State Examination (MMSE) is frequently evaluated alongside other cognitive assessments to determine its relative strengths and weaknesses in identifying cognitive impairment. Concurrent validity studies, as highlighted in research, compare the Spanish MMSE’s performance against tools like the Mental Status Questionnaire and the Information-Memory-Concentration test.

These comparisons aim to establish how well the Spanish MMSE aligns with other established measures, particularly in differentiating between individuals with Alzheimer’s disease and healthy elderly controls. The MMSE’s widespread use—being the most cited cognitive test on Medline with over 70 language versions—facilitates these comparative analyses, ensuring a comprehensive evaluation of cognitive function within Spanish-speaking populations.

Impact of Bilingualism on Test Performance

Research investigating the Spanish MMSE reveals interesting insights regarding bilingualism’s influence on cognitive assessment outcomes. Studies indicate that within normal comparison groups, a patient’s monolingual or bilingual status doesn’t significantly affect their performance on the Spanish MMSE or related cognitive screening tasks.

This finding suggests the Spanish versions of the MMSE demonstrate a degree of robustness, providing reliable results regardless of an individual’s linguistic background. However, it’s crucial to acknowledge that bilingualism’s complex effects on cognition require ongoing investigation, and nuanced interpretations are essential when applying the Spanish MMSE in diverse populations.

Scoring and Interpretation of the Spanish MMSE

The Spanish MMSE scoring follows established guidelines, aiding in dementia diagnosis and correlating with functional disability, particularly impairments in daily living activities.

Scoring Guidelines

The Spanish MMSE scoring mirrors the original English version, assigning points for each correctly answered question across five cognitive domains: orientation, registration, attention and calculation, recall, and language. Each domain contributes to a total score ranging from 0 to 30, with higher scores indicating better cognitive function.

Detailed scoring manuals accompany validated Spanish versions, providing clear instructions for each item. Errors and omissions are specifically addressed within these guidelines to ensure consistent and reliable scoring practices. It’s crucial to follow these manuals precisely to minimize inter-rater variability and maintain the test’s validity. Proper scoring is fundamental for accurate interpretation and clinical decision-making.

Interpretation of Scores for Dementia Diagnosis

Interpreting Spanish MMSE scores requires careful consideration of educational background and cultural factors. Generally, a score of 24 or higher suggests normal cognition, while 18-23 indicates mild dementia, and below 18 suggests severe dementia. However, these are guidelines, not definitive diagnoses.

The Spanish MMSE is most valuable as a screening tool, prompting further, more comprehensive neuropsychological evaluation. Scores should be correlated with functional disability assessments, like impairments in daily living, to provide a holistic clinical picture. It’s vital to avoid relying solely on the MMSE for a dementia diagnosis, especially given potential influences of bilingualism.

Correlation with Functional Disability

Studies demonstrate a strong correlation between Spanish MMSE scores and functional disability, specifically impairments in instrumental activities of daily living (IADLs). Lower MMSE scores consistently predict greater difficulty managing finances, preparing meals, or using transportation.

This correlation highlights the MMSE’s utility in assessing the real-world impact of cognitive decline; While the MMSE identifies cognitive impairment, evaluating functional abilities provides crucial context for care planning and support services. Assessing both cognitive performance and functional status offers a more complete understanding of a patient’s needs and prognosis, aiding in comprehensive dementia management.

Clinical Applications of the Spanish MMSE

The Spanish MMSE aids in evaluating dementia, mild cognitive impairment, and differentiating dementia subtypes, supporting accurate diagnoses and tailored patient care plans.

Alzheimer’s Disease Screening

The Spanish MMSE proves valuable as an initial screening tool for Alzheimer’s disease within Spanish-speaking populations. Its brevity and ease of administration facilitate widespread use in primary care and neurological settings. Studies demonstrate its ability to differentiate between Alzheimer’s patients and non-demented elderly individuals, offering a quick cognitive snapshot.

Furthermore, the Spanish versions correlate well with functional disability assessments, specifically impairments in instrumental activities of daily living, providing a holistic view of disease impact. While not definitive, a low MMSE score prompts further, more comprehensive evaluations. The test’s widespread availability, with over 70 language adaptations, underscores its global relevance in identifying potential Alzheimer’s cases.

Mild Cognitive Impairment Assessment

Spanish MMSE versions aid in assessing Mild Cognitive Impairment (MCI), a transitional stage between normal aging and dementia. While not always conclusive for MCI diagnosis alone, the test provides a baseline cognitive measure for tracking progression. It helps clinicians identify individuals requiring more detailed neuropsychological evaluations.

The MMSE’s utility extends to differentiating between various MCI subtypes, contributing to a more nuanced understanding of cognitive decline. Research highlights its role in establishing a cognitive profile, crucial for monitoring changes over time. Coupled with other assessments, the Spanish MMSE supports early detection and intervention strategies for individuals at risk of developing dementia, improving patient outcomes.

Dementia Subtype Differentiation

Spanish versions of the MMSE contribute to differentiating dementia subtypes, though not definitively on their own. Researchers propose recommendations for clinical use in various contexts to establish cognitive profiles for different dementia presentations. The MMSE assists in recognizing patterns associated with Alzheimer’s disease versus other forms of dementia, guiding further diagnostic investigations.

While a comprehensive evaluation is essential, the MMSE provides valuable initial insights. It helps clinicians characterize the nature and severity of cognitive impairment, informing treatment planning and patient management. Combining MMSE results with clinical observations and other tests enhances diagnostic accuracy and supports personalized care approaches for individuals with dementia.

Considerations for Using the Spanish MMSE

Cultural and linguistic adaptations are crucial when utilizing Spanish MMSE versions, ensuring accurate assessment and minimizing bias in diverse patient populations.

Cultural and Linguistic Adaptations

Successfully implementing the Spanish MMSE necessitates careful consideration of cultural and linguistic nuances. Direct translation isn’t sufficient; adaptations must account for varying levels of education, literacy, and regional dialects within the Spanish-speaking world.

Researchers emphasize the importance of ensuring conceptual equivalence – that the test items hold the same meaning and relevance across different cultural groups. This involves pilot testing with diverse populations to identify and address any potential misunderstandings or biases. Furthermore, norms should be established for specific populations to accurately interpret scores, recognizing that cognitive performance can be influenced by factors beyond cognitive decline.

The impact of bilingualism also warrants attention, as it can influence test performance. Careful interpretation is needed to differentiate between cognitive impairment and the effects of language switching.

Patient Population Specifics

When utilizing the Spanish MMSE, clinicians must acknowledge variations within the Spanish-speaking patient population. Educational levels significantly impact baseline scores; therefore, norms should ideally be stratified by education. Consideration should be given to acculturation levels, as adaptation to a new culture can influence cognitive performance.

The test’s applicability may differ between first-generation immigrants and those born in Spanish-speaking countries. Furthermore, the MMSE’s sensitivity and specificity can vary depending on the prevalence of dementia within the specific population being assessed.

Researchers note that neither gender nor monolingual/bilingual status significantly affects test performance within normal comparison groups, but these factors should still be considered during interpretation.

Limitations of the MMSE

Despite its widespread use, the Spanish MMSE possesses inherent limitations. It primarily assesses orientation, memory, attention, calculation, and language, potentially missing nuanced cognitive deficits. The test’s brevity limits its ability to detect subtle or atypical dementia presentations.

Cultural and linguistic adaptations, while necessary, may not fully eliminate bias. The MMSE’s sensitivity is lower in detecting mild cognitive impairment, and it struggles to differentiate between dementia subtypes effectively.

Reliance solely on the MMSE for diagnosis is discouraged; it should be used in conjunction with a comprehensive neurological evaluation and other cognitive assessments for accurate characterization.

Resources and Further Information

PubMed, Neurologia.com, and Semantic Scholar offer valuable articles and publications regarding the Spanish MMSE’s validity, usage, and clinical applications.

PubMed Resources

PubMed provides access to crucial research concerning the concurrent validity of Spanish-language cognitive assessments, including the MMSE. Studies compare the Spanish MMSE’s performance against other tools like the Mental Status Questionnaire and the Information-Memory-Concentration test.

Research highlights the MMSE’s effectiveness in predicting functional disability, specifically impairments in instrumental activities of daily living, within Spanish-speaking populations. Investigations also explore whether gender or bilingual status impacts test results in normal comparison groups, revealing no significant effects.

These PubMed-indexed studies demonstrate the utility of these Spanish cognitive screening tasks in evaluating dementia among Spanish-speaking patients, offering valuable insights for clinicians.

Neurologia.com Articles

Neurologia.com features articles addressing the practical application of Spanish versions of the Mini-Mental State Examination (MMSE) in clinical settings. These resources delve into questions surrounding its appropriate use for screening, particularly within the Spanish population.

The publications emphasize the MMSE’s role in briefly evaluating a patient’s mental state, noting its widespread adoption since its creation in 1975. It’s recognized as the most frequently cited cognitive test on Medline, boasting over 70 language adaptations.

Articles discuss utilizing the Spanish MMSE to establish cognitive profiles for differentiating various dementia subtypes, aiding in accurate diagnosis and patient management.

Semantic Scholar Publications

Semantic Scholar hosts publications examining the clinical utility of Spanish MMSE versions, focusing on their application in diverse contexts. Research highlights the MMSE’s enduring relevance since its inception in 1975, solidifying its position as a highly-cited cognitive assessment tool.

These studies explore recommendations for employing the Spanish MMSE to create detailed cognitive profiles, crucial for distinguishing between different dementia subtypes and improving diagnostic accuracy.

The platform provides access to scholarly articles that underscore the MMSE’s extensive translation into over 70 languages, demonstrating its global impact on cognitive evaluation.

Future Directions in Spanish Cognitive Assessment

Ongoing research aims to refine Spanish MMSE adaptations, addressing cultural nuances and linguistic variations to enhance diagnostic precision. Exploration of the impact of bilingualism on test performance remains a key focus, acknowledging its potential influence on cognitive scores.

Future studies will likely investigate the integration of digital technologies to streamline MMSE administration and scoring, improving efficiency and accessibility.

Further validation against more comprehensive neuropsychological batteries is crucial, alongside the development of culturally sensitive norms for diverse Spanish-speaking populations.

smoke detector first alert manual

First Alert Smoke Detector Manual: A Comprehensive Guide

First Alert offers diverse smoke and CO detectors, including Onelink app-enabled models. This guide covers installation, testing, maintenance, and troubleshooting, ensuring optimal safety.

Understanding First Alert Smoke Detectors

First Alert smoke detectors are crucial safety devices designed to provide early warning of fire, potentially saving lives and property. These detectors come in various models, catering to different needs and home configurations. Understanding the core functionality is paramount for effective use.

First Alert prioritizes reliability and ease of use. Their detectors are engineered to detect both smoldering and fast-flaming fires, offering comprehensive protection. Many models integrate seamlessly with the Onelink app, enabling remote monitoring and control. Familiarizing yourself with the specific features of your First Alert detector – whether it’s ionization, photoelectric, or a dual-sensor model – is the first step towards ensuring your home’s safety. Regular testing and maintenance, as outlined in the manual, are vital for optimal performance.

Types of First Alert Smoke Detectors

First Alert offers a diverse range of smoke detectors to suit various needs. Ionization smoke detectors are generally more responsive to fast-flaming fires with visible flames. Conversely, photoelectric detectors excel at detecting slow, smoldering fires, often producing more smoke than flame.

Beyond these core technologies, First Alert provides dual-sensor detectors, combining both ionization and photoelectric sensors for comprehensive fire detection. Combination models also integrate carbon monoxide (CO) detection, offering protection against both fire and this silent killer. Furthermore, First Alert offers hardwired detectors, which connect to your home’s electrical system, and battery-powered options for easy installation. The Onelink series introduces smart detectors with Wi-Fi connectivity and app integration, providing remote monitoring and alerts. Choosing the right type depends on your specific requirements and home layout.

Ionization vs. Photoelectric Technology

First Alert smoke detectors utilize two primary sensing technologies: ionization and photoelectric. Ionization detectors contain a small amount of radioactive material between two electrically charged plates. Smoke particles disrupt the current flow, triggering the alarm – they react quickly to fast-flaming fires. However, they can be more prone to false alarms from cooking or steam.

Photoelectric detectors use a light beam and a sensor. When smoke enters the chamber, it scatters the light onto the sensor, activating the alarm. These are more effective at detecting slow, smoldering fires, common in upholstery or electrical fires, and generally have fewer nuisance alarms. Understanding these differences is crucial for selecting the appropriate detector for each area of your home. Dual-sensor models combine both technologies for enhanced protection, offering the benefits of both types.

Dual Sensor Smoke Detectors

First Alert’s dual sensor smoke detectors represent a significant advancement in fire safety technology. These detectors intelligently combine both ionization and photoelectric sensors within a single unit. This design provides comprehensive detection capabilities, responding effectively to both fast-flaming and slow, smoldering fires – the two most common types of household fires.

By integrating both technologies, dual sensor detectors minimize the risk of false alarms while maximizing responsiveness to genuine fire threats. They are particularly well-suited for areas where the fire risk is varied, such as bedrooms or living rooms. The intelligent sensing algorithms analyze the type of smoke detected, reducing nuisance alarms from cooking or steam. Investing in a dual sensor detector offers a superior level of protection and peace of mind for your home and family.

Installation and Mounting

Proper First Alert smoke detector placement is crucial for effective fire safety. Follow recommended guidelines for ceiling or wall mounting, avoiding false alarm triggers during setup.

Recommended Placement Locations

First Alert recommends installing smoke detectors on every level of your home, inside and outside of sleeping areas; Specifically, mount them on the ceiling or high on walls, as smoke rises. Avoid placing detectors near windows, doors, or air vents, as drafts can interfere with their operation.

Kitchens require special attention; install detectors at least 10 feet away from cooking appliances to minimize false alarms caused by cooking fumes. Bathrooms should also be avoided due to steam. In multi-story homes, a detector at the base of each staircase is vital for early warning.

For optimal protection, consider the layout of your home and potential fire hazards when determining placement. Regularly review and adjust detector locations as needed to ensure comprehensive coverage. Remember to consult the specific manual for your First Alert model for detailed guidance.

Avoiding False Alarms During Installation

First Alert smoke detectors can sometimes trigger false alarms during installation or shortly after. To minimize this, ensure the installation area is free from dust and debris before mounting. Avoid installing detectors in areas with high humidity, like bathrooms, or near cooking appliances, as steam and cooking fumes are common culprits.

Properly secure the detector to the mounting surface to prevent vibrations from triggering alerts. When testing after installation, briefly activate the test button; prolonged testing can sometimes cause temporary sensitivity. Ensure adequate ventilation around the detector, avoiding obstructed airflow.

Carefully review the manual for your specific First Alert model, as certain features, like sensitivity adjustments, can help reduce false alarms. Following these guidelines will ensure reliable performance and peace of mind.

Mounting Procedures – Ceiling vs. Wall

First Alert recommends ceiling mounting as the preferred installation location for smoke detectors. This allows for optimal detection of rising smoke. If ceiling mounting isn’t feasible, install the detector on a wall, positioning it 4-12 inches from the ceiling. Avoid corners, as stagnant air can delay smoke reaching the sensor.

When mounting, use the provided hardware and follow the instructions carefully. Ensure the mounting surface is solid and can support the detector’s weight. For both ceiling and wall installations, avoid placing detectors near windows, doors, or air vents, which can interfere with smoke flow.

Refer to your specific First Alert model’s manual for detailed mounting diagrams and instructions. Proper placement is crucial for effective smoke detection and minimizing false alarms. Always test the detector after installation, regardless of mounting location.

Wiring Requirements (for Hardwired Models)

First Alert hardwired smoke detectors require a 120V AC power source. Important: Electrical work should only be performed by a qualified electrician. Before installation, always disconnect power to the circuit at the breaker box to prevent electrical shock.

Typically, hardwired detectors utilize a standard three-wire configuration: black (hot), white (neutral), and bare/green (ground). Ensure proper wire connections according to local electrical codes. Many models also include a red wire for interconnection, allowing multiple detectors to alarm simultaneously.

Consult your specific First Alert model’s wiring diagram for precise instructions. Incorrect wiring can damage the detector or create a fire hazard. After wiring, restore power at the breaker and test the detector to confirm proper operation. Battery backup is often included for power outage protection.

Operation and Testing

First Alert detectors operate continuously, requiring regular testing. Utilize the test button for verification; silence/hush features manage false alarms, and battery checks are crucial.

Testing Your Smoke Detector Regularly

Regular testing is paramount for ensuring your First Alert smoke detector functions correctly. At a minimum, test your detector monthly by pressing the test button. This simulates smoke and verifies the alarm’s electronic circuitry, horn, and battery power.

Listen for a loud, distinct beep – this confirms the unit is operational. If no sound occurs, immediately address the issue by replacing the battery (if applicable) or inspecting the wiring for hardwired models.

Don’t rely solely on the alarm sounding during a fire; proactive testing provides peace of mind. Consider keeping a testing schedule to maintain consistency. Remember, a functioning smoke detector is your first line of defense against fire hazards, and consistent testing is a vital component of fire safety.

Understanding Alarm Sounds and Indicators

First Alert smoke detectors utilize distinct alarm patterns to communicate different situations. A continuous, loud beeping typically indicates smoke detection, requiring immediate evacuation. Short, intermittent chirps usually signal a low battery or a system malfunction – address these promptly.

Some models feature LED indicators. A flashing light often accompanies the alarm sound, providing visual confirmation. A solid or rapidly flashing light might indicate a different issue, such as a sensor fault. Refer to your specific model’s manual for detailed interpretations of light patterns.

Understanding these signals is crucial for a swift and appropriate response. Familiarize yourself with the sounds and lights specific to your First Alert detector to ensure you can react effectively in an emergency. Ignoring these indicators can compromise your safety.

Silence/Hush Feature – When and How to Use

The First Alert silence/hush feature is designed to temporarily silence nuisance alarms caused by cooking smoke or steam, not actual fires. It’s crucial to understand its limitations – never disable the alarm if a fire is suspected.

To activate the hush feature, typically a button on the detector is pressed once. This silences the alarm for a predetermined period, usually several minutes. The detector will automatically reset after this time. Consult your specific model’s manual for precise instructions, as button locations and procedures vary.

Repeated use of the hush feature suggests a potential issue causing frequent false alarms. Investigate the source of these alarms and address them accordingly. Remember, prioritizing safety means never ignoring a persistent or unexplained alarm, even after using the hush function.

Battery Replacement Procedures

First Alert smoke detectors require regular battery replacement to ensure reliable operation. Typically, a chirping sound indicates low battery levels, though testing monthly is recommended regardless. Use only the battery type specified in your detector’s manual – often 9V, but some models use AA or AAA.

To replace the battery, locate the battery compartment (usually on the back or side of the detector). Gently twist or slide to open it. Remove the old battery and connect the new one, ensuring correct polarity (+ and -). Securely close the battery compartment.

After replacement, test the alarm to confirm functionality. Document the date of battery replacement for future reference. Consider using long-life lithium batteries for extended protection. Dispose of old batteries responsibly, following local regulations.

Maintenance and Troubleshooting

First Alert detectors need cleaning and regular testing. Address chirping, false alarms, and end-of-life signals promptly for continued safety and optimal performance.

Cleaning Your Smoke Detector

Regular cleaning is crucial for maintaining the effectiveness of your First Alert smoke detector. Dust, dirt, and insects can accumulate inside the detector, potentially causing false alarms or hindering its ability to sense smoke. At least twice a year, or more frequently in dusty environments, gently vacuum the exterior of the detector using a soft brush attachment.

To clean the interior, carefully remove the cover as instructed in your specific model’s manual. Use compressed air to blow out any accumulated debris from the sensing chamber. Avoid using water, cleaning solutions, or chemicals, as these can damage the electronic components. A slightly damp cloth can be used to wipe the inside of the cover, ensuring it is completely dry before reattaching it.

Never disassemble the detector beyond the removal of the cover for cleaning, as this could compromise its functionality and void the warranty. Consistent cleaning ensures reliable performance and helps protect your home and family.

Troubleshooting Common Issues (Chirping, False Alarms)

A chirping sound usually indicates a low battery. Replace the battery immediately, even if it seems relatively new, as voltage drops can cause the chirp. If chirping continues after battery replacement, the detector may be nearing its end-of-life and requires replacement.

False alarms can be triggered by various factors, including dust, insects, steam, or cooking fumes. Ensure the detector is clean and properly located, avoiding areas near kitchens or bathrooms. If false alarms persist, try relocating the detector.

For hardwired models, check the circuit breaker and wiring connections. If problems persist, consult a qualified electrician. Avoid disconnecting the detector without addressing the underlying issue, as this leaves your home unprotected. Refer to your specific model’s manual for detailed troubleshooting steps and contact First Alert support if needed.

End-of-Life Signals and Replacement

First Alert smoke detectors are not designed to last forever. After a period of approximately 7-10 years, the sensor’s sensitivity can diminish, reducing its effectiveness. Most models will signal end-of-life with a distinct chirping pattern – different from a low battery chirp – or a specific flashing light sequence.

When you receive an end-of-life signal, it’s crucial to replace the detector immediately. Do not attempt to silence or bypass this signal. The detector has reached the end of its reliable service life and may not accurately detect smoke.

Proper disposal of old detectors is also important. Check local regulations for electronic waste recycling options. Always replace a smoke detector with a new one that meets current safety standards. Note the manufacture date on the new unit to track its lifespan.

First Alert Onelink App Integration

First Alert’s Onelink app enhances the functionality of compatible smoke and carbon monoxide detectors, offering remote monitoring and control. The app allows you to receive real-time alerts on your smartphone or tablet, even when you’re away from home, providing peace of mind.

Through the Onelink app, you can test detectors remotely, silence false alarms, and view event history. It also facilitates interconnected detector functionality, enabling all detectors to alarm simultaneously when one detects a threat;

Setup is straightforward – follow the app’s guided instructions to connect your detectors to your home Wi-Fi network. The app is regularly updated with improved features, including enhanced action item extraction and expanded integration support. First Alert welcomes users to utilize the app for simplified safety management.

Safety Information

First Alert detectors may include CO detection and benefit from interconnection. Always comply with regulations and prioritize safety precautions for optimal protection and reliable performance.

Carbon Monoxide Detection (Combination Models)

Many First Alert devices are combination smoke and carbon monoxide (CO) detectors, offering dual protection. CO is a colorless, odorless gas, making detection crucial for preventing poisoning. These models feature electrochemical sensors specifically designed to detect CO levels;

The alarm pattern for CO differs from smoke; familiarize yourself with the distinct sound. Regularly test the CO detection function alongside the smoke alarm. Combination units provide comprehensive safety, but remember that CO detection relies on a separate sensor and requires its own maintenance.

Ensure proper placement, avoiding obstruction near fuel-burning appliances. If the CO alarm sounds, immediately evacuate the premises and call emergency services. Never ignore a CO alarm, even if no other symptoms are present. Prioritize safety and understand the specific features of your combination unit.

Interconnected Smoke Detectors – Benefits and Setup

First Alert offers interconnected smoke detectors, creating a network where all alarms sound when one detects smoke. This is particularly beneficial in larger homes or multi-story buildings, providing earlier warning throughout the property. Interconnection can be achieved wirelessly or via hardwiring.

Wireless interconnection simplifies installation, while hardwired systems offer increased reliability. Setup typically involves syncing the detectors according to the manufacturer’s instructions, often involving a learning mode or specific button combinations. Ensure all units are compatible before attempting interconnection.

Regularly test the interconnected system to confirm all alarms communicate effectively. Interconnection significantly enhances safety by ensuring everyone in the home is alerted, regardless of the fire’s origin. Consult the manual for specific details regarding your model’s interconnection capabilities.

Regulations and Standards Compliance

First Alert smoke and carbon monoxide detectors are designed to meet or exceed stringent safety standards. These include Underwriters Laboratories (UL) listings, ensuring performance and reliability. Compliance with National Fire Protection Association (NFPA) standards, specifically NFPA 72, is also a priority.

Local building codes often mandate the type and placement of smoke detectors. It’s crucial to verify your local regulations to ensure your installation meets requirements. Many jurisdictions require interconnected smoke detectors in bedrooms and on every level of a home.

First Alert continually updates its products to align with evolving safety standards. Refer to the product packaging and accompanying documentation for specific compliance information. Proper installation and maintenance, as outlined in this manual, are essential for continued compliance and optimal protection.

Important Safety Precautions

Always prioritize safety when installing and maintaining your First Alert smoke detector. Never disable a smoke detector to prevent nuisance alarms – investigate the cause instead. Regularly test the detector to confirm functionality, and immediately replace any unit that fails to operate correctly.

Do not paint or cover the smoke detector, as this can impede its ability to detect smoke. Keep the area around the detector clear of obstructions. When replacing batteries, use only the type recommended by First Alert to avoid damaging the unit.

This device is not a substitute for regular fire prevention practices. Maintain working fire extinguishers, practice escape plans, and educate all household members on fire safety procedures. If the detector has been exposed to extreme temperatures or humidity, replace it immediately.

new horizons for seniors program applicant guide

This guide details the New Horizons for Seniors Program (NHSP), a federal grant supporting community projects. It outlines eligibility, objectives, and application processes for organizations seeking funding to enhance senior engagement.

Program Overview

The New Horizons for Seniors Program (NHSP) is a federal initiative designed to improve the lives of seniors by supporting community-based projects. This program recognizes the valuable contributions seniors make to Canadian society and aims to foster their continued engagement and well-being. The NHSP provides grants to organizations that develop and implement projects specifically tailored to the needs and interests of seniors.

Currently, the program operates with two streams: the community-based stream and the national stream. The community-based stream, the focus of this guide, funds projects at the local level, addressing regional priorities. These projects can range from initiatives promoting volunteerism and social inclusion to programs enhancing digital literacy and access to essential services. The national stream supports larger-scale, multi-province projects with broader impact.

A key aspect of the NHSP is its emphasis on community engagement. Projects are encouraged to actively involve seniors in all stages, from planning and implementation to evaluation. This ensures that initiatives are relevant, responsive, and truly benefit the senior population. The program also prioritizes projects that promote intergenerational connections, fostering understanding and collaboration between seniors and other age groups.

Eligibility Criteria for Organizations

To be eligible for funding through the New Horizons for Seniors Program (NHSP), organizations must meet specific criteria. Eligible applicants include non-profit organizations, Indigenous organizations, and municipal governments. For-profit organizations are generally not eligible, though they may partner with eligible organizations on projects.

Organizations must demonstrate a clear understanding of the needs of seniors in their community and a capacity to effectively manage grant funding. A proven track record of successfully implementing similar projects is advantageous. Applicants must be legally constituted and financially sound, with audited financial statements available upon request.

Furthermore, organizations must be registered and in good standing with the relevant government authorities. They must also adhere to all applicable federal and provincial/territorial laws and regulations. Organizations receiving funding are expected to comply with program reporting requirements and demonstrate responsible stewardship of funds.

Priority will be given to organizations that demonstrate a strong commitment to inclusivity and accessibility, ensuring that projects are welcoming and beneficial to all seniors, regardless of their background or abilities.

Eligible Project Types

The New Horizons for Seniors Program (NHSP) supports a diverse range of projects designed to improve the lives of seniors. Community-based projects are a primary focus, aiming to engage seniors in meaningful activities and address local needs. Projects promoting volunteerism among seniors, and fostering intergenerational connections are highly encouraged.

Eligible projects may include initiatives focused on social inclusion, digital literacy, health and wellness, and lifelong learning. Projects that enhance seniors’ ability to age in place and maintain their independence are also prioritized. Activities could range from organizing workshops and training sessions to creating mentorship programs and supporting community gardens.

Projects must be clearly defined with specific, measurable, achievable, relevant, and time-bound (SMART) objectives. They should demonstrate a direct benefit to seniors and align with the program’s overall goals. Projects are typically limited to a maximum duration of 52 weeks and a funding request of no more than $25,000.

Projects focusing on maximizing resource utilization, and those that demonstrate innovative approaches to addressing senior’s needs, will be favorably considered.

Funding Amounts and Duration

The New Horizons for Seniors Program (NHSP) offers grant funding to eligible organizations undertaking projects that benefit seniors. For community-based projects, the maximum funding amount available is $25,000. This funding is intended to cover eligible project costs, including personnel, materials, equipment, and travel expenses directly related to project activities.

The maximum duration for projects receiving NHSP funding is 52 weeks, or one year. Project timelines should be realistic and clearly outlined in the application, demonstrating how the project will achieve its objectives within the allocated timeframe. Organizations are expected to manage project funds responsibly and adhere to the program’s financial guidelines.

Funding is typically provided on a reimbursement basis, meaning organizations will submit claims for expenses incurred during the project period. Detailed financial reporting is required to ensure transparency and accountability. Projects must demonstrate a clear plan for sustainability beyond the initial funding period, where possible.

It’s crucial to note that funding decisions are competitive, and the availability of funds may vary from year to year.

Program Objectives

The New Horizons for Seniors Program (NHSP) is designed to support projects that actively engage seniors and improve their quality of life. A core objective is fostering community engagement, encouraging seniors to participate in social activities and contribute their skills and experience.

A significant focus is placed on promoting volunteerism, both among seniors themselves and between generations. Projects should aim to create opportunities for seniors to volunteer their time and expertise, and to connect with younger individuals through shared activities.

The program also prioritizes projects that address the unique needs of seniors, such as promoting social inclusion, improving access to information and services, and enhancing their overall well-being. Projects should demonstrate a clear understanding of the challenges faced by seniors in their communities.

Furthermore, NHSP encourages initiatives that leverage the knowledge and skills of seniors, recognizing their valuable contributions to society. Projects should align with at least one of the program’s stated objectives to be considered for funding.

Application Process ― Step-by-Step

The New Horizons for Seniors Program (NHSP) application process requires careful attention to detail. Step one is thoroughly reviewing the program guidelines to ensure your organization and project meet all eligibility criteria. Step two involves completing the online application form, providing comprehensive information about your organization and proposed project.

Step three requires compiling all required documentation, including organizational bylaws, financial statements, and a detailed project budget. Ensure all documents are submitted in the specified format. Step four focuses on crafting a compelling project narrative that clearly articulates the project’s objectives, activities, and expected outcomes.

Step five is submitting the complete application package through the online portal before the stated deadline. Late applications will not be considered. Following submission, step six involves a review process by the regional committee. Successful applicants will be notified and invited to negotiate a grant agreement. Remember to check for updates and important notices throughout the process!

Required Documentation Checklist

To ensure a complete application for the New Horizons for Seniors Program (NHSP), please submit the following documents. First, provide your organization’s official incorporation documents, including bylaws and articles of incorporation. Second, include audited financial statements for the past two fiscal years, demonstrating financial stability.

Third, a detailed project budget outlining all anticipated expenses is crucial. Fourth, submit a project proposal clearly defining objectives, activities, timelines, and evaluation methods. Fifth, include a list of key personnel involved in the project, with brief biographies highlighting their relevant experience.

Sixth, provide letters of support from partner organizations demonstrating collaboration. Seventh, if applicable, include any relevant permits or licenses required for project implementation. Eighth, notarized translations of documents (like passports) may be required. Finally, ensure all documents are submitted in the specified format (PDF preferred) and are clearly labeled. Incomplete applications may be rejected.

Key Dates and Deadlines (as of 02/06/2026)

Please carefully note the following key dates for the New Horizons for Seniors Program (NHSP) application process. The application period officially opens on March 15, 2026, and closes promptly at 5:00 PM EST on April 30, 2026. No late submissions will be accepted.

Mandatory information sessions for prospective applicants will be held virtually on March 22, 2026, and March 29, 2026. Registration for these sessions is required. Notification of successful applications is anticipated by July 15, 2026.

Projects awarded funding must commence within 60 days of receiving the grant agreement. Interim project reports are due on November 30, 2026, and final reports are due March 31, 2027. These dates are subject to change, but any modifications will be communicated via the program website and email. Regularly check for updates.

Community Engagement Focus

The New Horizons for Seniors Program (NHSP) prioritizes projects demonstrating a strong commitment to community engagement. Successful applications will showcase how seniors are actively involved in project design, implementation, and evaluation. Projects should foster intergenerational connections, promoting volunteerism between seniors and other age groups.

Emphasis is placed on initiatives that address identified community needs and leverage existing resources. Projects should actively seek partnerships with local organizations to maximize impact and sustainability. Consideration will be given to projects that demonstrate innovative approaches to engaging seniors in meaningful activities.

Applications must clearly articulate how the project will benefit the broader community, not solely the participating seniors. Demonstrating a plan for ongoing community involvement beyond the project’s funding period is highly encouraged. Projects should aim to create lasting positive change and strengthen social connections.

Promoting Volunteerism Among Seniors

A key objective of the New Horizons for Seniors Program (NHSP) is to actively promote volunteerism among seniors. Projects should create opportunities for seniors to utilize their skills and experience, contributing meaningfully to their communities. Initiatives that encourage seniors to take on leadership roles within volunteer activities are particularly valued.

The program seeks to break down barriers to volunteer participation, addressing potential challenges related to accessibility, transportation, or health concerns. Projects should demonstrate how they will recruit, train, and support senior volunteers, ensuring a positive and rewarding experience.

Furthermore, the NHSP encourages projects that foster intergenerational volunteerism, pairing seniors with younger individuals to share knowledge and build relationships. Applications should clearly outline how the project will measure and report on the number of senior volunteers engaged and the impact of their contributions.

Project Reporting Requirements

Successful applicants of the New Horizons for Seniors Program (NHSP) are required to submit regular and comprehensive reports detailing project progress and financial expenditures. These reports are crucial for program evaluation and ensuring accountability of grant funds.

Interim reports, submitted quarterly, must outline activities completed, participant numbers (specifically senior involvement), and any challenges encountered. Financial reports must accompany each interim report, providing a detailed breakdown of expenses aligned with the approved budget.

A final report is due within 60 days of project completion. This report should provide a thorough assessment of project outcomes, including measurable results related to program objectives. It must also include a narrative describing lessons learned and recommendations for future initiatives.

All reports must be submitted electronically through the designated online portal. Failure to submit timely and accurate reports may jeopardize future funding opportunities. Detailed reporting templates and guidelines will be provided upon grant approval.

Grant Agreement Terms and Conditions

The New Horizons for Seniors Program (NHSP) grant agreement outlines the legal obligations of both the funding organization and the recipient organization. Acceptance of funding signifies agreement to these terms;

Financial accountability is paramount. Funds must be used solely for approved project activities, and detailed financial records must be maintained for audit purposes. Any unspent funds must be returned to the program.

Intellectual property rights related to project outputs will be jointly owned. The funding organization reserves the right to use project results for promotional and evaluation purposes.

Reporting requirements, as detailed elsewhere in this guide, are legally binding. Failure to comply may result in funding suspension or revocation. Senior participation and leadership, as proposed in the application, must be maintained throughout the project duration.

The agreement also includes clauses regarding conflict of interest, data privacy, and termination conditions. A complete copy of the grant agreement will be provided to successful applicants for review and signature.

Maximizing Resource Utilization in Projects

Successful New Horizons for Seniors Program (NHSP) projects demonstrate efficient resource allocation. This involves careful budgeting, leveraging existing community assets, and exploring in-kind contributions to extend funding impact.

Collaboration with other organizations can significantly reduce costs and broaden project reach. Sharing resources, such as facilities or personnel, is highly encouraged. Prioritize projects that build upon existing initiatives rather than duplicating efforts.

Volunteer engagement, particularly of seniors themselves, is a cost-effective way to deliver program activities. Effective volunteer management, including training and support, is crucial.

Consider utilizing technology to streamline processes and enhance accessibility. Online platforms can facilitate communication, data collection, and project promotion. Explore opportunities for resource sharing through regional committees.

Projects should demonstrate a commitment to sustainability beyond the grant period. Developing partnerships and securing alternative funding sources will ensure long-term impact and continued benefits for seniors.

Regional Committee Application Details

Individuals interested in contributing to the New Horizons for Seniors Program (NHSP) as Regional Committee members are encouraged to apply. These committees play a vital role in reviewing applications and providing recommendations for funding.

The Regional Committee Application Form requires detailed personal information, including title, names, and contact details. Applicants should demonstrate a strong understanding of senior needs and community-based program development.

Experience in grant review, project management, or the non-profit sector is considered an asset. A commitment to impartiality and a willingness to dedicate time to the review process are essential.

Applicants should clearly articulate their motivation for joining the committee and their ability to contribute to informed decision-making. Familiarity with the NHSP objectives and eligibility criteria is highly valued.

Completed applications should be submitted by the specified deadline. Successful applicants will be notified and provided with training on the application review process and relevant guidelines.

Foundational Knowledge for Eldercare Projects

Successful New Horizons for Seniors Program (NHSP) projects require a solid understanding of eldercare principles and best practices. This foundational knowledge ensures projects are relevant, effective, and respectful of senior needs.

Projects should demonstrate awareness of the diverse challenges faced by older adults, including social isolation, health concerns, and economic insecurity. Understanding age-related changes and their impact on participation is crucial.

Knowledge of existing community resources for seniors is essential to avoid duplication of services and foster collaboration. Projects should complement, not compete with, existing programs.

Familiarity with principles of inclusive design and accessibility ensures projects are welcoming and usable by all seniors, regardless of physical or cognitive abilities.

A grasp of ethical considerations related to working with vulnerable populations, including informed consent and confidentiality, is paramount. This program prepares students with the core skills required in this field.

nikon d7200 instruction manual

Nikon Manual Viewer 2 simplifies access to your D7200’s guide via smartphone; downloadable from App Store or Google Play for convenient, on-the-go assistance.

Overview of the Camera

The Nikon D7200 is a powerful DSLR designed for enthusiasts and professionals seeking high-quality images and robust performance. Accessing the Nikon Manual Viewer 2 application on your smartphone provides a readily available digital version of the comprehensive 420-page instruction manual. This camera boasts a 24.2MP DX-format CMOS sensor and a wide ISO range, delivering exceptional clarity and detail.

It’s compatible with a variety of Nikon lenses, offering versatility for diverse photographic styles. The D7200 also supports wireless communication via Wi-Fi, enabling easy image transfer and remote control.

Key Features and Specifications

The Nikon D7200 features a 24.2MP DX-format CMOS sensor, enabling high-resolution images. Utilizing Nikon Manual Viewer 2 provides detailed specifications. It offers a 51-point autofocus system for precise subject tracking and boasts continuous shooting at up to 6 fps.

Full HD 1080p video recording at up to 60fps is supported. Wireless functionality via built-in Wi-Fi simplifies image sharing. Compatibility with Godox X1N TTL flash units enhances creative lighting options, as detailed in supporting documentation.

Getting Started

Begin by downloading Nikon Manual Viewer 2 to your smartphone for immediate access to the D7200’s comprehensive guide and quick setup instructions.

Unboxing and Initial Setup

Upon receiving your Nikon D7200, carefully unpack the box, verifying all included components are present. Before proceeding, download the Nikon Manual Viewer 2 application onto your smartphone – it’s freely available on both the App Store and Google Play. This digital manual provides instant access to detailed instructions. Familiarize yourself with the camera’s basic layout and ports. Ensure the battery is adequately charged before initial use, and insert a compatible memory card to store your photos and videos. The application will guide you through the initial setup process, including language selection and date/time configuration.

Charging the Battery

To charge the Nikon D7200’s battery, connect the supplied power adapter to the DC IN port on the camera’s side. A charging indicator lamp illuminates, signifying the charging process has begun. Refer to the Nikon Manual Viewer 2 application for detailed charging times, which vary based on battery level. Avoid using third-party chargers, as they may damage the battery. Fully charge the battery before first use for optimal performance. Once fully charged, the indicator light will change, signaling readiness for operation.

Inserting Memory Cards

The Nikon D7200 supports SD memory cards. Locate the memory card slot, typically on the camera’s side, and open the cover. Insert the card, ensuring the label faces the camera’s rear. Gently push until it clicks into place. Avoid forcing the card. To remove, lightly press the card inward; it will eject slightly for easy removal. Consult the Nikon Manual Viewer 2 app for compatible card types and capacities. Always handle cards with care to prevent data corruption.

Understanding the Camera Controls

Mastering the D7200’s mode dial, buttons, and menu system is crucial for effective operation; the Nikon Manual Viewer 2 app provides detailed guidance.

The Mode Dial

The Nikon D7200’s mode dial is your primary control for selecting shooting modes. It features options like Auto modes for simplicity, Programmed Auto for semi-automatic control, and Aperture-Priority and Shutter-Priority for creative adjustments. Manual mode grants full control over settings. Further options include Scene modes, Effects mode, and User Defined settings for personalized presets.

Understanding each mode’s function, as detailed in the Nikon Manual Viewer 2 application, is key to achieving desired photographic results. Experimentation with these modes unlocks the camera’s full potential.

Buttons and Dials Explained

The Nikon D7200 features numerous buttons and dials for precise control. The control dials adjust settings like aperture, shutter speed, and ISO. Dedicated buttons provide quick access to functions like autofocus, metering, and white balance. The ‘i’ button customizes quick settings.

Referencing the comprehensive Nikon Manual Viewer 2 application is crucial for understanding each control’s specific function. Mastering these controls enhances shooting efficiency and creative expression, allowing for seamless adjustments in various conditions.

Navigating the Menu System

The Nikon D7200’s menu system is logically organized into categories: shooting, display, setup, and custom settings. Utilize the multi-selector and dials to navigate efficiently. The Nikon Manual Viewer 2 app provides a searchable digital version of the complete menu structure.

Understanding each menu option is key to customizing the camera to your preferences. Explore custom functions and My Menu for personalized settings, streamlining your workflow and maximizing control over image capture.

Shooting Basics

Master fundamental settings like focusing modes, exposure controls (Auto, Program, Aperture-Priority, etc.), and ISO sensitivity for optimal image quality with your D7200.

Focusing Modes

The Nikon D7200 offers a versatile array of focusing modes to suit diverse shooting scenarios. Single-servo AF (AF-S) is ideal for stationary subjects, locking focus when the shutter button is half-pressed. Continuous-servo AF (AF-C) tracks moving subjects, continuously adjusting focus for sharp results.

Auto-servo AF (AF-A) automatically switches between AF-S and AF-C, attempting to determine the subject’s movement. Manual Focus (MF) provides complete control, useful in challenging conditions. Explore focus area modes – Single-point AF, Dynamic-area AF, and Group-area AF – to precisely target your desired focus point within the frame, enhancing image clarity and composition.

Exposure Modes (Auto, Program, Aperture-Priority, Shutter-Priority, Manual)

The D7200 provides five core exposure modes. Auto mode simplifies settings for beginners. Program (P) offers automatic exposure with some user control. Aperture-priority (A or Av) lets you set the aperture, influencing depth of field, while the camera determines shutter speed.

Shutter-priority (S or Tv) allows control over shutter speed, freezing or blurring motion, with automatic aperture adjustment. Finally, Manual (M) grants full control over both aperture and shutter speed, enabling creative flexibility and precise exposure.

Understanding ISO Sensitivity

ISO sensitivity determines your camera’s light sensitivity. Lower ISO settings (like 100) produce cleaner images in bright conditions. Higher ISO values (like 3200 or higher) are useful in low light, but introduce more noise or grain.

The D7200 allows ISO adjustment via a dedicated dial or menu. Balancing ISO with aperture and shutter speed is crucial for achieving proper exposure and image quality. Experiment to find the optimal setting for each shooting scenario.

Advanced Shooting Techniques

Explore Picture Control settings, White Balance adjustments, and RAW format shooting for enhanced creative control and superior image quality with your D7200.

Using Picture Control Settings

Picture Control settings on the Nikon D7200 allow photographers to customize the look of their images directly within the camera. These presets – Standard, Neutral, Vivid, Monochrome, Portrait, Landscape, and Flat – modify parameters like sharpness, contrast, brightness, and saturation.

Experimenting with these settings enables you to achieve desired aesthetic results without extensive post-processing. You can also create and save custom Picture Control profiles tailored to specific shooting conditions or personal preferences, offering a streamlined workflow for consistent image styles.

Working with White Balance

White Balance ensures accurate color rendition in your photographs, compensating for different lighting conditions. The Nikon D7200 offers numerous presets – Auto, Incandescent, Fluorescent, Direct Sunlight, Flash, Cloudy, and Shade – to match the ambient light source.

Custom White Balance allows precise calibration using a gray card or white object. Incorrect White Balance results in color casts; mastering this setting is crucial for natural-looking images, especially when shooting in challenging or mixed lighting environments.

Shooting in RAW Format

RAW format captures all image data recorded by the sensor, offering maximum flexibility in post-processing. Unlike JPEG, RAW files are uncompressed, preserving detail and dynamic range. This allows extensive adjustments to exposure, White Balance, and color without significant quality loss.

While RAW files require editing software, they provide superior control for professional results. Consider storage needs, as RAW files are considerably larger than JPEGs. The Nikon D7200’s RAW capabilities unlock its full potential.

Video Recording

The Nikon D7200 enables high-quality video capture with adjustable settings and resolution options, alongside external microphone compatibility for enhanced audio.

Video Settings and Resolution

The Nikon D7200 offers versatile video capabilities, allowing users to select from various resolutions and frame rates. You can record in Full HD 1920×1080 at frame rates of 60p, 50p, 30p, 25p, and 24p, providing options for smooth motion or a more cinematic look.

Additionally, the camera supports 1280×720 HD recording at 60p, 50p, 30p, and 25p. Adjusting these settings impacts file size and playback compatibility. Explore the menu to fine-tune video quality based on your specific needs and intended use, ensuring optimal results for your projects.

Using the Microphone

The Nikon D7200 features a built-in microphone for basic audio recording, but for enhanced sound quality, an external microphone is recommended. The camera has a standard 3.5mm microphone jack, allowing connection of various external mics.

Adjust microphone levels within the camera’s menu to prevent distortion or excessively quiet audio. Monitor sound levels using headphones connected to the camera for accurate adjustments during recording. Proper microphone usage significantly improves the overall quality of your videos.

Focusing During Video Recording

The Nikon D7200 offers autofocus capabilities during video recording, but manual focus often provides superior control and precision. Utilize focus peaking, a feature that highlights in-focus areas on the screen, for precise manual adjustments.

Smooth transitions between focal points are crucial; practice slow, deliberate focus pulls. Consider using an external monitor for a larger, clearer view during focusing. Remember that autofocus performance can vary depending on lighting conditions and subject movement;

Connectivity and Transferring Images

Connect your Nikon D7200 to a computer via USB, or utilize built-in Wi-Fi for wireless image transfer using Nikon’s applications and tools.

Connecting to a Computer

Establishing a connection between your Nikon D7200 and a computer is straightforward using a USB cable. Ensure the camera is powered off before connecting. Once connected, power on the D7200, and a connection message will appear on the camera’s screen.

Your computer should recognize the camera as a removable drive, allowing you to directly transfer images and videos. Alternatively, Nikon provides software like Nikon Transfer 2 for more organized file management and import options. This software facilitates efficient image selection and destination folder choices.

Using Wireless Communication (Wi-Fi)

The Nikon D7200 offers Wi-Fi capabilities for seamless image transfer to smartphones and tablets. First, enable Wi-Fi on the camera through the setup menu. Then, utilize the Nikon Wireless Mobile Utility app (available for iOS and Android) on your mobile device.

The app will guide you through connecting to the camera’s Wi-Fi network. Once connected, you can browse, download, and share your photos directly from your smartphone, simplifying social media uploads and quick image sharing.

Nikon Manual Viewer 2 Application

The Nikon Manual Viewer 2 application provides convenient access to your D7200’s comprehensive user manuals directly on your smartphone or tablet. Available as a free download from the App Store and Google Play, it eliminates the need to carry a physical copy.

This application allows you to quickly reference guides anytime, anywhere, offering a user-friendly interface for navigating the camera’s features and troubleshooting potential issues. It’s a valuable resource for both beginners and experienced photographers.

Customizing Your D7200

Personalize your D7200 with Custom Function settings, My Menu options, and Button Customization for a tailored shooting experience and workflow.

Custom Function Settings

The Nikon D7200 offers extensive customization through its Custom Function settings, allowing photographers to tailor the camera’s operation to their specific needs and shooting style. These settings control various aspects of the camera, from autofocus behavior and metering to button assignments and display options.

Explore the menu to assign functions to buttons, adjust the behavior of dials, and fine-tune the camera’s response to different shooting situations. Experimenting with these settings unlocks the D7200’s full potential, streamlining your workflow and enhancing your creative control.

My Menu Options

The “My Menu” feature on the Nikon D7200 provides a personalized shortcut to frequently used settings. Unlike the main menu, “My Menu” allows you to store custom selections for quick access, significantly speeding up your workflow in the field. This is especially useful for settings you adjust often, like image quality, autofocus modes, or metering options.

Populate “My Menu” with your preferred settings to avoid navigating through multiple menu pages, ensuring you’re always ready to capture the perfect shot with your desired configuration.

Button Customization

The Nikon D7200 offers extensive button customization options, allowing photographers to tailor the camera’s controls to their individual shooting style. Through the Custom Function settings, you can assign various functions to different buttons, including the AF-ON button, depth-of-field preview button, and even certain dial operations.

This level of personalization enhances efficiency, placing essential controls right at your fingertips for faster, more intuitive operation during critical shooting moments. Explore the Custom Functions menu to unlock the D7200’s full potential.

Troubleshooting Common Issues

Addressing focusing problems and exposure issues is crucial. Consult the manual for error message solutions and guidance on resolving common D7200 difficulties.

Focusing Problems

If your Nikon D7200 struggles with focus, first verify your chosen focusing mode aligns with the subject and shooting scenario. Ensure sufficient light, as low-light conditions can hinder autofocus performance. Check lens compatibility and cleanliness; a dirty lens impacts focus accuracy.

Refer to the manual for detailed explanations of autofocus-area modes and how to select the appropriate one. Experiment with single-point AF for stationary subjects and continuous AF for moving ones; If issues persist, consider manual focus and utilize live view for precise adjustments.

Exposure Issues

Incorrect exposure on your Nikon D7200 often stems from improper shooting mode selection. Auto modes may not always yield desired results; explore aperture-priority, shutter-priority, or manual for greater control. Verify your ISO setting – higher ISOs increase brightness but introduce noise.

Check the exposure compensation setting to fine-tune brightness. Review your metering mode (matrix, center-weighted, spot) to ensure it suits the scene. Consult the manual for detailed guidance on each mode and how they affect image brightness and overall exposure.

Error Messages and Solutions

The Nikon D7200 displays error messages to indicate issues. “Err” often signals a card error – try reinserting or formatting the card. “No file” means no images exist on the card or it’s unreadable. Lens errors suggest compatibility problems; ensure the lens is securely attached and compatible.

Refer to the comprehensive D7200 manual (available via Nikon Manual Viewer 2) for a complete list of error codes and their specific troubleshooting steps. Regularly updating firmware can also resolve certain error occurrences.

Maintaining Your Nikon D7200

Regular sensor cleaning, proper battery care, and keeping the firmware updated are crucial for optimal performance and longevity of your D7200.

Cleaning the Sensor

Dust accumulation on the sensor can noticeably degrade image quality. The Nikon D7200 features a built-in sensor cleaning function, accessible through the setup menu, which utilizes ultrasonic vibration to dislodge dust particles. However, for persistent dust or stubborn marks, manual cleaning might be necessary.

It’s recommended to use a dedicated sensor cleaning kit, including a blower and sensor swabs, following Nikon’s guidelines carefully to avoid damage. Improper cleaning can scratch the sensor, rendering the camera unusable. If you’re uncomfortable performing this task, consider professional sensor cleaning services.

Battery Care

To maximize the lifespan of your Nikon D7200’s battery, avoid extreme temperatures and fully discharging it frequently. Store the battery in a cool, dry place when not in use. Utilize the provided charger and avoid third-party alternatives, as they may damage the battery or camera.

Only charge the battery when needed, and don’t leave it connected to the charger for extended periods after it’s fully charged. Regularly cycling the battery—charging and discharging—helps maintain its capacity over time.

Firmware Updates

Regularly check the Nikon website (imaging.nikon.com/support) for firmware updates for your D7200. These updates often include bug fixes, performance improvements, and new features. Download the latest firmware and follow Nikon’s instructions carefully for installation, ensuring a stable power supply during the process.

Failing to maintain updated firmware can lead to compatibility issues or suboptimal camera performance. Always read the release notes accompanying each update to understand the changes implemented.

Accessories for the Nikon D7200

Enhance your D7200 with compatible lenses, flashes (like Godox X1N TTL), and remote controls, expanding creative possibilities and photographic control.

Lenses

The Nikon D7200, utilizing a Nikon F mount, offers compatibility with a vast array of Nikkor lenses – both older and newer designs. Explore options ranging from wide-angle lenses ideal for landscapes to telephoto lenses perfect for wildlife photography. Consider prime lenses for exceptional sharpness and low-light performance, or versatile zoom lenses for convenience.

Third-party lens manufacturers also provide compatible options. Refer to Nikon’s documentation for specific lens compatibility details and recommendations tailored to your photographic needs and budget. Choosing the right lens significantly impacts image quality and creative expression.

Flashes and Speedlights

Enhance your D7200’s lighting capabilities with Nikon Speedlights or compatible third-party flashes. These provide additional illumination, freeze motion, and add creative effects. The D7200 supports TTL (Through-The-Lens) flash control for automatic exposure, simplifying flash photography.

Consider using a radio-controlled flash system, like the Godox X1N TTL series, for reliable off-camera flash triggering and remote power adjustments. Explore options for bounce flash to soften light and create more flattering portraits. Proper flash usage elevates image quality.

Remote Controls and Triggers

Expand your photographic possibilities with remote controls and triggers compatible with the Nikon D7200. These tools enable hands-free operation, crucial for long exposures, astrophotography, and wildlife photography. Radio triggers, like the Godox X1N TTL series, offer greater range and reliability than infrared remotes.

Utilize remote shutter release for minimizing camera shake during delicate shots. Explore advanced triggering systems for complex lighting setups and creative effects. Ensure compatibility with your D7200 for seamless operation and optimal results.

year 4 reasoning test pdf

Year 4 Reasoning Test PDF: A Comprehensive Guide

Navigating Year 4 reasoning tests requires focused preparation; utilizing PDF resources is key for success in assessments covering English, awareness, and numerical abilities.

What is a Year 4 Reasoning Test?

Year 4 reasoning tests are designed to assess a child’s ability to think logically and solve problems, rather than simply recalling facts. These tests are a crucial part of evaluating a student’s cognitive skills, encompassing areas like verbal, numerical, and non-verbal reasoning.

Typically administered in preparation for the 11+ exams or as part of school assessments, these tests utilize PDF formats for convenient access and practice. They evaluate how well a child can interpret information, identify patterns, and draw conclusions. The questions aren’t necessarily tied to the Year 4 curriculum, focusing instead on core reasoning abilities.

Understanding the structure and question types within these PDFs is vital for effective preparation. They often mirror the style and difficulty of selective school entrance exams, making them valuable tools for building confidence and honing critical thinking skills.

The Importance of Reasoning Tests in Year 4

Reasoning tests in Year 4 are pivotal for identifying a child’s potential beyond rote learning. Proficiency in these tests, often accessed via PDF practice materials, indicates a strong foundation for future academic success. They assess crucial skills like problem-solving, logical thinking, and analytical abilities – skills essential across all subjects.

Early exposure to these tests, through dedicated PDF resources, helps children develop a strategic approach to tackling unfamiliar questions. This builds confidence and reduces test anxiety. Furthermore, strong reasoning skills are increasingly valued by secondary schools, particularly those with selective admissions processes.

Utilizing Year 4 reasoning test PDFs allows for targeted practice, pinpointing areas where a child may need additional support. This proactive approach fosters a growth mindset and prepares them for the challenges of more complex academic work.

Types of Questions Found in Year 4 Reasoning Tests

Year 4 reasoning tests, often available as downloadable PDFs, encompass a variety of question types designed to assess different cognitive skills. These commonly include verbal reasoning, evaluating comprehension and vocabulary; numerical reasoning, testing mathematical problem-solving; and non-verbal reasoning, focusing on patterns and shapes.

PDF practice papers frequently feature questions requiring children to identify missing numbers in sequences, complete analogies, or deduce rules from visual patterns. Verbal reasoning questions might involve identifying odd-one-out words or interpreting short passages. Numerical questions often present word problems requiring multiple steps to solve.

Familiarity with these question formats, gained through consistent practice with PDF resources, is crucial for building confidence and maximizing performance. Understanding the nuances of each type allows children to apply appropriate strategies.

Verbal Reasoning Questions

Verbal reasoning questions within Year 4 reasoning test PDFs assess a child’s ability to understand and analyze written information. These questions often don’t require prior knowledge, instead focusing on logical deduction from the text provided. Common formats include identifying the odd one out from a list of words, completing analogies (e.g., hot is to cold as up is to…), and following written directions.

PDF practice materials will frequently present short passages followed by comprehension questions, testing a child’s ability to extract key information. Vocabulary-based questions, such as identifying synonyms or antonyms, are also prevalent. Successfully tackling these requires strong reading comprehension and a logical approach to problem-solving.

Consistent practice with these question types, using readily available PDF resources, builds confidence and improves performance.

Numerical Reasoning Questions

Numerical reasoning questions in Year 4 reasoning test PDFs evaluate a child’s ability to apply mathematical concepts to solve problems. These aren’t simply about calculation speed; they focus on interpreting data presented in tables, charts, and graphs. Expect questions involving addition, subtraction, multiplication, and division, often embedded within word problems requiring careful analysis.

PDF practice papers will commonly feature questions about interpreting scales, understanding units of measurement, and solving problems involving money. Identifying patterns in number sequences is another frequent question type. A strong foundation in basic arithmetic is crucial, alongside the ability to translate real-world scenarios into mathematical equations.

Regular practice with these question formats, utilizing PDF resources, will enhance both mathematical skills and problem-solving abilities.

Non-Verbal Reasoning Questions – Shapes and Patterns

Non-verbal reasoning, frequently found in Year 4 reasoning test PDFs, assesses a child’s ability to understand and analyze visual information without relying on language. A core component involves identifying patterns and relationships within shapes and figures. These questions test logical thinking and spatial reasoning skills.

Expect to encounter tasks like completing sequences of shapes, identifying the odd one out from a set, and rotating or mirroring shapes to find a match. PDF practice materials often include questions involving nets of 3D shapes and identifying hidden figures within complex designs.

Developing skills in visual discrimination and abstract thinking is key. Consistent practice with varied shape-based problems, available in PDF format, will build confidence and improve performance.

Where to Find Year 4 Reasoning Test PDFs

Locating suitable Year 4 reasoning test PDFs is crucial for effective preparation. Numerous online educational resources offer downloadable practice papers. Websites specializing in primary school resources frequently provide free sample PDFs, allowing children to familiarize themselves with question formats.

Educational publishers also offer comprehensive workbooks and practice test PDFs, often available for purchase directly from their websites or through online retailers. Searching specifically for “Year 4 reasoning test PDF” will yield a wide range of options.

Remember to check the source’s credibility and ensure the PDFs align with the national curriculum standards. Utilizing a variety of PDFs from different sources provides broader practice and a more thorough understanding.

Free Online Resources for Practice

Fortunately, a wealth of free online resources exist to support Year 4 reasoning test preparation. Websites like BBC Bitesize offer interactive practice questions and explanations, covering verbal, numerical, and non-verbal reasoning. Many primary school websites also publish sample test papers and quizzes accessible without registration.

Educational blogs and forums frequently share links to free downloadable PDFs and practice materials. YouTube channels dedicated to educational content often provide walkthroughs of reasoning questions, demonstrating effective problem-solving strategies.

However, always verify the content’s accuracy and relevance to the current Year 4 curriculum. Combining resources ensures a well-rounded practice experience, building confidence and skills without financial cost.

Paid Resources: Workbooks and Practice Papers

While free resources are valuable, paid workbooks and practice papers often provide a more structured and comprehensive approach to Year 4 reasoning test preparation. Publishers like CGP and Bond offer dedicated workbooks aligned with the national curriculum, featuring a wider range of question types and difficulty levels.

These resources typically include detailed answer keys and progress trackers, allowing for effective self-assessment and identification of areas needing improvement. Online platforms also offer subscription-based access to extensive question banks and mock tests, simulating exam conditions.

Investing in quality paid materials can be particularly beneficial for students requiring targeted support or aiming for advanced preparation. Consider the child’s learning style when selecting resources.

Understanding the Different Question Formats

Year 4 reasoning tests employ diverse question formats to assess a child’s cognitive abilities. Multiple choice questions present several options, requiring students to select the most logical answer – a common format found within PDF practice papers.

Fill-in-the-blank questions test recall and application of knowledge, demanding precise answers. True/False/Cannot Say questions evaluate critical thinking and the ability to discern information validity. Familiarity with these formats is crucial.

PDF resources often mirror these formats, providing valuable practice. Understanding the nuances of each type – for example, recognizing distractors in multiple choice – enhances test-taking strategies. Mastering these formats builds confidence and improves performance.

Multiple Choice Questions

Multiple choice questions are a staple in Year 4 reasoning tests, frequently appearing in PDF practice materials. These questions present a scenario or problem followed by four or five potential answers, only one of which is correct.

Effective strategies include carefully reading the question, eliminating obviously incorrect options, and considering each choice’s logical fit. Many PDFs include detailed explanations for correct answers, aiding understanding. Distractors – intentionally misleading options – are common.

Practicing with numerous examples from Year 4 reasoning test PDFs builds speed and accuracy. Students should learn to identify keywords and apply reasoning skills to select the most appropriate response. Time management is also key when tackling these questions.

Fill-in-the-Blank Questions

Fill-in-the-blank questions within Year 4 reasoning test PDFs assess a child’s ability to identify missing information and apply logical thinking. These questions present a sentence or short passage with key words removed, requiring students to select the best fit from provided options, or sometimes, to generate their own;

Success hinges on understanding context and grammatical structure. PDFs often focus on vocabulary and comprehension skills needed to accurately complete these questions. Students should practice identifying clues within the sentence to deduce the missing word.

Careful reading and attention to detail are crucial. Practicing with a variety of fill-in-the-blank exercises from Year 4 reasoning test PDFs will improve a child’s ability to quickly and correctly identify the appropriate word or phrase.

True/False/Cannot Say Questions

True/False/Cannot Say questions in Year 4 reasoning test PDFs evaluate a child’s ability to discern factual accuracy and recognize when insufficient information is provided. These questions present a statement, and students must determine if it’s true, false, or if a definitive answer is impossible based on the given information.

Mastering this format requires careful reading and critical thinking. PDFs often include passages where students must extract information to validate statements. The “Cannot Say” option is frequently designed to trap students who assume information not explicitly stated.

Effective practice involves analyzing statements for keywords and identifying potential assumptions. Utilizing Year 4 reasoning test PDFs with varied scenarios will build confidence and improve a child’s ability to accurately assess truthfulness and information sufficiency.

How to Prepare for a Year 4 Reasoning Test

Effective preparation for a Year 4 reasoning test, utilizing PDF practice materials, centers around consistent practice and familiarization with question types. Start by dedicating short, regular study sessions rather than cramming. Focus on building core skills in verbal, numerical, and non-verbal reasoning.

Download and work through various Year 4 reasoning test PDFs, simulating test conditions to manage time effectively. Analyze incorrect answers to understand the reasoning behind them, identifying areas needing improvement. Encourage a growth mindset, emphasizing effort and learning from mistakes.

Supplement PDF practice with engaging reasoning games and puzzles. A well-rounded approach, combining structured practice with enjoyable activities, will boost confidence and maximize performance on the actual test.

Tips for Answering Reasoning Questions Effectively

When tackling Year 4 reasoning questions, especially when using PDF practice papers, prioritize careful reading and understanding of each question. Underline key information and identify what the question is truly asking. Eliminate obviously incorrect answer choices to narrow down possibilities.

For numerical questions, double-check calculations and units. In verbal reasoning, pay attention to keywords and relationships between words. With non-verbal reasoning, look for patterns and logical sequences. Time management is crucial; don’t spend too long on any single question.

If unsure, make an educated guess rather than leaving it blank. Review completed PDF practice tests, focusing on strategies that proved successful and areas for improvement.

Common Mistakes to Avoid

While practicing with Year 4 reasoning test PDFs, several common errors can hinder performance; Rushing through questions without careful reading is a frequent mistake; comprehension is paramount. Misinterpreting the question’s requirements, focusing on irrelevant details, or overlooking crucial information also leads to incorrect answers.

Another pitfall is failing to show working for numerical problems, making it difficult to identify calculation errors. In verbal reasoning, neglecting to consider all possible meanings of words can be detrimental. For non-verbal questions, assuming patterns where none exist is a common error.

Finally, avoid making careless mistakes like misreading numbers or selecting the wrong multiple-choice option. Thoroughly review completed PDFs to identify and correct these recurring errors.

Analyzing Results and Identifying Weaknesses

After completing Year 4 reasoning test PDFs, a thorough analysis of results is crucial for improvement. Don’t simply check answers; pinpoint why mistakes were made. Categorize errors – were they due to timing, misunderstanding the question, or a lack of specific skills?

Review incorrect answers alongside the correct solutions, focusing on the reasoning process. Identify recurring patterns in errors. Is there a specific question type (verbal, numerical, non-verbal) consistently causing difficulty? This highlights areas needing focused practice.

Utilize the PDF’s answer key to understand the correct approach. Track progress over time by recording scores and error types. This data informs targeted revision and builds confidence.

Resources for Parents and Educators

Supporting Year 4 students with reasoning tests requires accessible resources. Numerous websites offer free Year 4 reasoning test PDFs for practice, allowing parents and educators to assess understanding. These PDFs often include answer keys for immediate feedback.

Consider utilizing educational platforms providing structured reasoning programs. These platforms frequently offer detailed reports on student performance, identifying specific areas for improvement. Workbooks specifically designed for Year 4 reasoning are also valuable, offering varied question types.

Collaboration between parents and educators is key. Discussing a child’s strengths and weaknesses, based on PDF test results, allows for a tailored learning approach; Remember to focus on building confidence and a positive attitude towards problem-solving.

The Role of Reasoning Tests in School Admissions

Increasingly, selective schools utilize reasoning tests, often delivered as PDFs, as part of their Year 4 admissions process. These tests assess a child’s cognitive abilities – verbal, numerical, and non-verbal – rather than solely relying on prior academic achievement.

A strong performance on these tests can significantly enhance a child’s application, demonstrating potential for success in a challenging academic environment. Familiarity with the question formats, readily available through practice PDFs, is crucial.

Preparation isn’t about rote learning, but developing problem-solving skills. Schools aim to identify children who can think critically and adapt to new challenges. Utilizing Year 4 reasoning test PDFs allows students to build confidence and refine their test-taking strategies, ultimately improving their chances of admission.

at&t cl4940 manual

AT&T CL4940 Manual: A Comprehensive Guide

This comprehensive guide details the AT&T CL4940 corded phone, offering setup, feature explanations, troubleshooting, and maintenance instructions. Access online resources for full details!

The AT&T CL4940 is a corded speakerphone designed for reliable home communication, featuring an answering system and caller ID. This user-friendly phone combines classic functionality with convenient modern features. It’s a dependable choice for those seeking a straightforward telephone experience.

This manual provides detailed instructions for setting up, operating, and maintaining your CL4940. You’ll find guidance on connecting the phone, navigating the interface, utilizing advanced features like voicemail, and resolving common issues. Refer to the online resources at www.telephones.att.com/manuals for the complete user manual and additional support. The AT&T logo signifies quality and trusted performance.

Key Features and Specifications

The AT&T CL4940 boasts several key features, including a digital answering system with up to 15 minutes of recording time, and Caller ID/Call Waiting display. It offers a convenient speakerphone for hands-free communication and adjustable volume control for personalized listening. The phone supports quick access to frequently called numbers.

Specifications include a corded design, ensuring a consistent connection. It’s available in black and white finishes. The CL4940 is compatible with standard phone lines. It features an 18-2 adjustable chain (when referencing necklace gifts found online). For detailed technical specifications and a full feature list, consult the official AT&T online manual at telephones.att.com/manuals.

Setting Up Your AT&T CL4940

Proper setup involves unboxing components, connecting to a phone jack, and powering on the device – refer to the online manual for detailed instructions!

Unboxing and Component Identification

Upon opening your AT&T CL4940 package, carefully verify all included components. You should find the corded telephone base, handset with coiled cord, a telephone wall jack adapter (if needed for your phone line connection), and this user manual.

Inspect each item for any physical damage that may have occurred during shipping. The base unit houses the answering system and display. The handset is designed for comfortable conversations. The wall jack adapter allows connection to various phone line setups.

Retain the original packaging for potential future use, such as warranty claims or resale. Refer to the diagrams within the full online manual at www.telephones.att.com/manuals for visual identification of each part.

Connecting the Phone to the Phone Jack

To connect your AT&T CL4940, first locate a standard, working telephone jack. If your wall jack requires an adapter (included), securely attach it before proceeding. Plug the telephone line cord firmly into the designated jack on the back of the phone base.

Ensure a snug fit to guarantee a stable connection. If you experience issues, try a different telephone jack to rule out a problem with the wall outlet. Avoid using extension cords or adapters not specifically designed for telephone lines, as they can interfere with signal quality.

For detailed diagrams and troubleshooting tips regarding phone line connections, consult the complete user manual available online at www.telephones.att.com/manuals.

Powering On the Device

The AT&T CL4940 operates using standard AC power. Connect the provided power adapter to the DC power jack located on the back of the phone base. Then, plug the adapter into a working electrical outlet. The phone should power on automatically, displaying information on the screen.

If the display remains blank, verify the power adapter is securely connected to both the phone and the outlet. Try a different outlet to ensure the issue isn’t related to the power source.

Refer to the full user manual at telephones.att.com/manuals for detailed illustrations and safety precautions regarding power connections. Do not use any power adapter other than the one supplied with the phone.

Understanding the Phone’s Interface

The AT&T CL4940 features a user-friendly interface with clear display icons and intuitive button functions, detailed in the comprehensive online user manual.

Display Icons and Their Meanings

The AT&T CL4940 utilizes several display icons to communicate phone status and features. A solid handset icon indicates an active call, while a flashing handset signifies an incoming one. The message indicator illuminates when new voicemails are present within the answering system.

A star (*) icon often denotes special call features are active, such as call waiting. The headphone icon shows the speakerphone is engaged. Battery level is displayed visually, alerting users to low power. Refer to the full user manual at att.com for a complete listing and detailed explanation of each icon. Understanding these symbols ensures optimal phone operation and efficient feature utilization. The manual provides visual representations alongside descriptions for clarity.

Button Functions Explained

The AT&T CL4940 features dedicated buttons for core functionalities. The talk button initiates and answers calls, while the end/off button terminates them. The redial button quickly accesses the last number dialed. The message button allows access to the answering system for voicemail retrieval and settings.

Volume control buttons adjust the receiver and speakerphone volume. The flash button supports call waiting and other call management features. The speakerphone button activates hands-free calling. For detailed instructions on utilizing these buttons, consult the online user manual at att.com/manuals. Proper understanding of each button’s function enhances the user experience and unlocks the phone’s full potential.

Navigating the Menu System

The AT&T CL4940 utilizes a straightforward menu system, accessed via dedicated buttons and the display screen. Use the navigation buttons – typically up, down, left, and right – to scroll through menu options. The select or OK button confirms your choices.

Menu options include call logs, settings for the answering system, caller ID features, and date/time adjustments. The user manual, available at att.com/manuals, provides a detailed breakdown of each menu item and its corresponding functions. Familiarizing yourself with the menu structure allows for customization and efficient access to advanced features. Remember to consult the online guide for specific instructions and troubleshooting tips.

Using the Basic Phone Functions

This section covers essential AT&T CL4940 operations: making and receiving calls, volume adjustment, and utilizing the convenient speakerphone feature for hands-free communication.

Making and Receiving Calls

Making Calls: To initiate a call on your AT&T CL4940, simply lift the handset and enter the desired phone number using the keypad. Allow a moment for the connection to establish. For long-distance calls, remember to dial the appropriate access code if required by your service provider. The phone supports speed dial programming for frequently called numbers, streamlining the dialing process.

Receiving Calls: When receiving a call, the phone will ring. Lift the handset to answer. If Caller ID is enabled, the incoming caller’s information will be displayed on the screen. You can also answer the call using the speakerphone function. During a call, you can utilize features like hold, mute, and transfer (if supported by your service).

Refer to the full user manual at www.telephones.att.com/manuals for detailed instructions and troubleshooting tips regarding call functionality.

Adjusting Volume Control

The AT&T CL4940 offers adjustable volume control for both the handset and the speakerphone. During a call, use the Volume Up and Volume Down buttons located on the phone’s base to increase or decrease the listening volume to your preference. These buttons typically feature a plus (+) and minus (-) symbol for easy identification.

The ringer volume can also be adjusted to suit your environment. Access the menu system (refer to the manual for navigation instructions) to locate the ringer volume settings. You can select from various ringer volume levels, or even silence the ringer completely.

For optimal sound quality, ensure the volume is set to a comfortable level, avoiding excessive loudness which could cause distortion. Consult the online user manual for specific button layouts and menu navigation.

Using the Speakerphone

The AT&T CL4940 features a convenient speakerphone function for hands-free communication. To activate the speakerphone during an incoming call, simply press the Speakerphone button on the phone’s base. For outgoing calls, initiate the call as usual and then press the Speakerphone button. A visual indicator, often a light, will confirm activation.

Adjust the volume using the Volume Up and Volume Down buttons while the speakerphone is active to achieve a comfortable listening level. To end the speakerphone call, press the Speakerphone button again or hang up the handset.

Refer to the full user manual at www.telephones.att.com/manuals for detailed instructions and troubleshooting tips regarding speakerphone functionality.

Advanced Features of the CL4940

Explore the AT&T CL4940’s advanced capabilities, including Caller ID, Call Waiting, and a fully-featured answering system for voicemail management and convenience.

Caller ID and Call Waiting

The AT&T CL4940 offers convenient Caller ID functionality, displaying the caller’s name and/or number on the handset’s screen before you answer. This allows you to screen calls and avoid unwanted interruptions. To utilize Caller ID, ensure you have subscribed to this service through your telephone provider.

Call Waiting alerts you to incoming calls while you are already on the phone. A distinctive beep will sound, indicating a new call is attempting to reach you. You can switch between calls seamlessly. Like Caller ID, Call Waiting requires a subscription from your service provider. Refer to your provider’s documentation for activation and usage details. The phone’s manual, available online at att.com, provides further clarification.

Remember to check compatibility with your phone service.

Answering System Setup and Usage

The AT&T CL4940 features a built-in answering system for capturing messages when you’re unavailable. Initial setup involves recording a greeting – a personalized message for callers. You can choose between a long greeting for general use and a short greeting for after-hours. Access the answering system settings through the phone’s menu.

To check for new messages, press the message access button. The system will announce the number of saved messages and play them sequentially. You can delete messages individually or all at once. Adjust recording volume and the number of rings before answering to customize the system to your preferences. Detailed instructions are available in the online user manual at telephones.att.com/manuals.

Ensure sufficient memory for message storage.

Voicemail Management

While the AT&T CL4940 has an answering system, it’s important to distinguish it from voicemail provided by your telephone service provider. This phone displays voicemail indicators, prompting you to access your carrier’s voicemail service. Accessing voicemail typically involves pressing and holding the message call button, or a designated key specified by your provider.

Voicemail management – checking messages, deleting, and saving – is handled entirely through your phone company’s system, not the CL4940 itself. Refer to your service provider’s documentation or website for specific voicemail instructions. The phone simply facilitates the connection; the online manual at telephones.att;com/manuals offers limited voicemail guidance.

Remember to set up a secure voicemail password.

Troubleshooting Common Issues

Resolve typical AT&T CL4940 problems like no dial tone or poor sound quality. Basic troubleshooting tips are available online and in the user manual.

No Dial Tone Troubleshooting

Experiencing no dial tone with your AT&T CL4940? Begin by verifying the phone cord is securely connected to both the phone and the wall jack. Ensure the phone jack is active – test with a known working phone.

Check for any physical damage to the phone cord. If using a phone line filter, confirm it’s properly installed. Disconnect all other devices connected to the same phone line to isolate the issue.

If the problem persists, try a different wall jack. Refer to the full user manual at www.telephones.att.com/manuals for detailed diagrams and further assistance. Sometimes, a simple reset can resolve connectivity problems.

Poor Sound Quality Solutions

Experiencing muffled or distorted sound on your AT&T CL4940? First, ensure the volume is set to an appropriate level. Check the phone cord for any damage or kinks, as this can impact audio clarity. Try a different phone cord to rule out a faulty connection.

If using a headset, confirm it’s properly connected and functioning. Eliminate potential interference by moving the phone away from other electronic devices. A weak signal from the phone company can also cause poor sound; contact your provider.

Consult the complete user manual at www.telephones.att.com/manuals for advanced troubleshooting steps and diagrams.

Answering System Not Recording

Is your AT&T CL4940 answering system failing to record messages? Verify the tape (if applicable) isn’t full. Check the recording volume settings within the answering system menu – ensure it’s not set too low. Confirm the microphone isn’t blocked or muted.

Ensure the phone line is securely connected, as a poor connection can disrupt recording functionality. Test with a different phone line if possible. Review the user manual for specific error codes related to recording issues.

For detailed instructions and troubleshooting, refer to the online manual at www.telephones.att.com/manuals.

Maintaining Your AT&T CL4940

Regular cleaning with a soft cloth preserves your AT&T CL4940. Replace batteries when needed, and a factory reset restores optimal performance.

Cleaning Instructions

Maintaining a clean AT&T CL4940 ensures optimal performance and longevity. Always disconnect the phone from the power outlet and telephone jack before cleaning. Use a soft, slightly damp cloth to gently wipe the exterior surfaces of the handset and base unit. Avoid using harsh chemicals, abrasive cleaners, or excessive moisture, as these can damage the finish or internal components.

For stubborn dirt or fingerprints, lightly dampen the cloth with a mild soap solution, then wipe and immediately dry with a clean, dry cloth. Pay particular attention to the keypad and display area, ensuring no liquid enters the openings. Do not attempt to disassemble the phone for cleaning purposes. Regular, gentle cleaning will keep your CL4940 looking and functioning its best.

Battery Replacement (if applicable)

The AT&T CL4940 is primarily a corded phone, and may not utilize batteries for core functionality. However, certain features like the answering system or caller ID display might rely on a backup battery to retain settings during power outages. If your model includes a battery, it’s typically located within the base unit.

To replace it, first disconnect the power. Locate the battery compartment (refer to the full user manual for specific location details). Replace the old battery with a new one of the correct type – typically a standard AA or AAA battery. Ensure correct polarity (+ and -). Reconnect the power to restore functionality. Dispose of old batteries responsibly, following local regulations;

Factory Reset Procedures

Performing a factory reset on your AT&T CL4940 will restore the phone to its original settings, erasing personalized preferences like call logs and saved numbers. Caution: This action is irreversible. Consult the complete user manual at www.telephones.att.com/manuals for precise instructions, as the process can vary slightly depending on the software version.

Generally, a reset involves navigating through the phone’s menu system. Look for options like “Settings,” “Reset,” or “Factory Defaults.” You may be prompted to enter a security code. Confirm your decision to proceed. After the reset, you’ll need to reconfigure settings such as date, time, and any programmed features.

Accessing the Online Manual and Support

Find the complete AT&T CL4940 user manual and helpful support resources, including FAQs, at the official AT&T support website: telephones.att.com/manuals.

AT&T Support Website

AT&T’s dedicated support website, telephones.att.com/manuals, is your primary resource for comprehensive CL4940 assistance. Here, you can directly download the full user manual in PDF format, ensuring you have access to detailed installation and operational instructions.

Beyond the manual, the website provides a wealth of troubleshooting guides, addressing common issues like no dial tone or poor sound quality. Explore frequently asked questions (FAQs) to quickly find answers to typical user inquiries.

AT&T also offers contact options for direct support, should you require personalized assistance. The site is regularly updated with the latest information and resources to ensure a seamless user experience with your CL4940 phone.

Downloading the User Manual

Accessing the AT&T CL4940 user manual is straightforward. Visit telephones.att.com/manuals and locate the CL4940 model – both a full and abridged version are typically available for download as optimized PDF files.

Downloading the PDF allows offline access to detailed setup instructions, feature explanations, and troubleshooting steps. This is particularly useful if you prefer to have a readily available, searchable copy on your computer or mobile device.

Ensure you have a PDF reader installed to view the document correctly. The downloadable manual provides a complete reference guide for maximizing your CL4940 phone’s functionality and resolving any potential issues.

Frequently Asked Questions (FAQ)

Q: Where can I find troubleshooting tips? A: Refer to the online user manual at telephones.att.com/manuals for basic troubleshooting guidance.

Q: What if I have no dial tone? A: Check the phone line connection and ensure it’s securely plugged into a working jack. Consult the manual’s troubleshooting section for further assistance.

Q: Is the manual available in print? A: The primary resource is the downloadable PDF from the AT&T support website. A physical copy isn’t typically provided.

Q: How do I reset the phone? A: Factory reset procedures are detailed within the user manual; proceed with caution as it will erase custom settings.

fran bow guide

Fran Bow Guide: Comprehensive Walkthrough & Tips (Updated 02/06/2026)

Embark on a chilling journey! This guide provides detailed solutions, puzzle help, and secrets for Fran Bow, a psychological horror adventure, updated today.

Fran Bow is a deeply unsettling point-and-click adventure game developed by Killmonday Games. Players assume the role of Fran, a young girl grappling with a severe mental disorder following the gruesome murder of her parents. The narrative unfolds as Fran navigates a disturbing reality, frequently blurring the lines between what is real and what is a product of her fractured psyche.

The game is renowned for its dark and mature themes, psychological horror elements, and captivating, hand-drawn art style. Fran’s journey takes her from a mental asylum to fantastical realms like Ithersta, a kingdom populated by sentient vegetables. Expect challenging puzzles, a haunting atmosphere, and a story that explores trauma, loss, and the search for truth. This guide will help you unravel the mysteries within Fran Bow.

Understanding Fran’s Mental State

Fran Bow’s core revolves around Fran’s deteriorating mental health. She’s not simply experiencing a tragic event; she’s actively processing trauma through a distorted lens. The game frequently presents multiple realities, forcing players to question what is genuine and what is a hallucination born from her disorder.

Her medication, Duotine, dramatically alters her perception, shifting between seemingly ‘normal’ and terrifyingly surreal worlds. Understanding this duality is crucial. Fran’s struggles aren’t a plot device, but the very foundation of the gameplay and narrative. Pay close attention to visual cues and dialogue, as they often hint at the instability of her mental state, impacting puzzle solutions and story interpretation.

Gameplay Mechanics Overview

Fran Bow is a point-and-click adventure, emphasizing exploration, inventory puzzle-solving, and dialogue choices. Expect a non-linear experience with branching paths and multiple endings. The core loop involves examining environments for clues, collecting items, and combining them to overcome obstacles.

Duotine plays a vital role, altering Fran’s perception and unlocking new areas or interactions. Pay attention to the environment – seemingly innocuous objects often hold significance. Dialogue choices impact relationships and story progression. The game isn’t about fast reflexes, but careful observation and logical deduction. Expect a challenging, atmospheric experience requiring patience and a keen eye for detail.

Inventory Management

Fran’s inventory is crucial for progression. Accessed via a dedicated screen, it holds collected items used to solve puzzles. Items can be combined – experiment frequently! The inventory isn’t unlimited, so prioritize what you carry. Descriptions offer subtle hints about potential uses.

Pay close attention to item details; some require specific conditions to become usable. Don’t hoard unnecessary objects; a streamlined inventory aids problem-solving. Regularly review your possessions, considering how they might interact with the environment. Combining the right items often unlocks new areas or dialogue options, driving the narrative forward.

Puzzle Solving Strategies

Fran Bow’s puzzles demand observation and logical thinking. Examine environments thoroughly; clues are often hidden in plain sight. Interact with everything – even seemingly innocuous objects might be vital. Don’t underestimate the power of combining items from your inventory.

Consider Fran’s mental state; her perceptions influence puzzle solutions. If stuck, revisit previous areas – new possibilities may emerge. Pay attention to dialogue; characters often provide subtle hints. Experimentation is key! Don’t be afraid to try unconventional approaches. Remember, some puzzles require multiple steps and careful sequencing.

Chapter 1: The Murder & Asylum

Chapter 1 plunges Fran into a horrific tragedy – the brutal murder of her parents. Following this trauma, she’s committed to Oswald Asylum, separated from her beloved cat, Mr. Midnight. This chapter focuses on navigating the asylum’s unsettling environment and uncovering its dark secrets.

Expect a series of unsettling encounters and challenging puzzles. Prioritize finding Mr. Midnight, as he’s crucial to Fran’s well-being. Carefully explore each room, collecting items and interacting with the peculiar inhabitants. The primary goal is escaping Oswald Asylum, a task requiring cunning and resourcefulness.

Finding Mr. Midnight

Mr. Midnight’s presence is vital for Fran’s emotional stability throughout her harrowing journey. In Chapter 1, locating him within Oswald Asylum is paramount. Begin by thoroughly searching Fran’s room and the immediate surrounding areas. Pay close attention to vents, drawers, and under beds – cats are masters of concealment!

Interact with the asylum staff; some may offer clues, while others might hinder your progress. Don’t overlook seemingly insignificant objects, as they could be key to unlocking new areas or revealing Mr. Midnight’s location. His return significantly impacts Fran’s mental state and unlocks further gameplay options.

Escaping Oswald Asylum

Escaping Oswald Asylum requires careful observation and puzzle-solving. Begin by collecting essential items scattered throughout the environment – a hairpin, a piece of cloth, and a specific medication are crucial. Utilize these items strategically to bypass obstacles and unlock restricted areas.

Pay attention to the asylum’s routines and the guards’ patrol patterns. Timing is everything! Successfully navigating the asylum involves manipulating the environment and exploiting weaknesses in the security system. Remember to interact with every object and character, as hidden clues often lead to your freedom. Mr. Midnight’s presence aids in this escape.

Chapter 2: The Forest & Ithersta

Chapter 2 plunges Fran into a surreal and unsettling journey through the Dark Forest, leading to the peculiar realm of Ithersta. Navigation demands caution, as the forest is filled with strange creatures and hidden dangers. Prepare for unsettling encounters and prioritize finding safe passage.

Ithersta, the Vegetable Kingdom, presents unique challenges. Interact with the sentient vegetables and roots to uncover clues and progress. This chapter emphasizes dialogue choices and puzzle-solving centered around the bizarre inhabitants. Remember Fran discovers this strange land on her way home, adding to the mystery.

Navigating the Dark Forest

The Dark Forest is a labyrinthine area requiring careful exploration. Pay close attention to your surroundings, as hidden paths and interactive elements are crucial for progression. Expect unsettling visuals and atmospheric sound design to heighten the tension.

Prioritize collecting items and solving environmental puzzles to unlock new areas. Be wary of the forest’s inhabitants; some are hostile, while others offer cryptic clues. Utilize Fran’s Duotine to reveal hidden objects and pathways not visible in reality. Remember, the forest is a gateway to Ithersta, so persistence is key to uncovering its secrets.

Exploring Ithersta ౼ The Vegetable Kingdom

Ithersta is a surreal realm populated by sentient vegetables and roots living in harmony. This section emphasizes dialogue and puzzle-solving, often requiring unconventional thinking. Interact with every character; their stories and quests are vital for advancing the narrative.

Collect unique items specific to Ithersta, as they’ll be essential for crafting and trading. The environment is filled with hidden pathways and secrets, so thoroughly explore each area. Remember Fran’s ability to switch between realities – it’s crucial for uncovering hidden clues and progressing through this bizarre, yet captivating, kingdom.

Chapter 3: The Twins & The Lighthouse

Chapter 3 introduces the unsettling Twin Demons, key figures in Fran’s journey. Prepare for psychological challenges and disturbing imagery as you navigate their domain. This chapter heavily focuses on puzzle-solving within the confines of the ominous lighthouse.

The lighthouse puzzles are intricate and require careful observation of the environment. Pay close attention to symbols and patterns; they hold the key to unlocking progression. Successfully solving these puzzles is crucial for confronting the Twins and uncovering more of Fran’s fragmented memories. Expect a shift in tone and increased difficulty.

Meeting the Twin Demons

Prepare for a disturbing encounter! The Twin Demons represent a significant psychological hurdle for Fran. Their introduction is marked by unsettling visuals and cryptic dialogue, designed to disorient and unnerve the player. They aren’t directly combative, but manipulate Fran through psychological means.

Understanding their motives requires careful attention to their words and actions. They offer “help” but with hidden agendas. Successfully navigating this encounter relies on discerning truth from deception. Expect to make choices that impact Fran’s mental state and the unfolding narrative. This meeting is pivotal for progressing through Chapter 3.

Lighthouse Puzzle Solutions

Navigating the Lighthouse requires keen observation! The primary puzzle involves restoring power to the lighthouse beacon. First, locate the missing gears scattered throughout the structure – check the lower levels and exterior walkways. Correctly placing these gears reactivates the generator.

Next, you’ll need to align the lenses to focus the light beam. This involves rotating each lens individually, paying attention to the reflections. A successful alignment will illuminate a specific point on the coastline. Finally, interact with the beacon to activate it, progressing the story. Careful examination of the environment is key!

Chapter 4: The Clockwork Kingdom

Welcome to a world of gears and steam! Chapter 4 introduces the intricate Clockwork Kingdom, a bizarre realm governed by mechanical beings. Fran must navigate this complex environment, solving puzzles based on timing and manipulation of clockwork mechanisms. Expect a shift in atmosphere and a focus on intricate, detail-oriented challenges.

Exploration is crucial; hidden pathways and vital components are cleverly concealed. Be prepared to collect numerous clockwork parts to repair broken machinery and unlock new areas. This chapter demands patience and a methodical approach to unravel its secrets and advance Fran’s journey.

Navigating the Clockwork Mechanisms

Mastering the gears is key! The Clockwork Kingdom’s mechanisms require precise interaction. Observe patterns carefully before attempting to manipulate any device. Many puzzles involve adjusting gears to redirect power or activate platforms. Pay attention to the visual cues – sparking wires or jammed cogs indicate problems needing attention.

Timing is critical; some mechanisms operate on strict schedules. Experiment with different gear combinations, and don’t be afraid to backtrack and re-examine your approach. Remember to utilize Fran’s Duotine to reveal hidden elements within the clockwork structures, offering clues to solve complex challenges.

Collecting Clockwork Parts

Essential for progression! Throughout the Clockwork Kingdom, you must locate scattered clockwork parts. These components are vital for repairing broken mechanisms and unlocking new areas. Explore every nook and cranny, examining the environment meticulously. Some parts are hidden within intricate puzzles, requiring careful observation and problem-solving skills.

Utilize Fran’s Duotine frequently; hidden parts often become visible only in the alternate reality. Interact with all objects, even those seemingly insignificant. Remember to check behind obstacles and within interactive elements. A complete collection of clockwork parts is crucial for advancing the storyline and escaping the kingdom’s metallic grasp.

Chapter 5: Palontras & The Shadow Realm

A descent into darkness! Chapter 5 introduces Palontras, a bizarre and unsettling realm inhabited by the Remorians. Prepare for a significant shift in gameplay, focusing on stealth and avoiding the Shadow Creatures that relentlessly pursue Fran. These entities are sensitive to light, so utilize available sources strategically.

Navigating Palontras requires understanding the Remorian customs and completing their peculiar requests. Be mindful of your actions, as they can influence your standing with the inhabitants. The Shadow Realm presents unique challenges, demanding careful planning and resource management. Success hinges on mastering stealth and deciphering the realm’s cryptic secrets.

Entering Palontras

The gateway awaits! Accessing Palontras isn’t straightforward. You’ll need to locate and interact with specific objects within the previous area, triggering a surreal transition. Pay close attention to environmental cues and dialogue – the Remorians offer subtle hints about the path forward. Expect a disorienting experience as Fran enters this strange dimension.

Once inside, familiarize yourself with Palontras’ unique atmosphere and inhabitants. The Remorians are a peculiar race with their own customs and language. Initial interactions involve observing and understanding their behavior before attempting communication. Be prepared for unsettling visuals and a pervasive sense of dread as you begin your exploration.

Dealing with the Shadow Creatures

Confronting the darkness! The Shadow Realm presents a significant challenge – encounters with terrifying creatures are inevitable. These entities are vulnerable to light; utilizing your Duotine, Fran’s alternate reality vision, is crucial for revealing their weaknesses and pathways around them. Direct confrontation is often unwise; stealth and strategic use of the environment are key to survival.

Observe their patterns and movements carefully. Some shadows react to sound, while others are drawn to specific objects. Experiment with different approaches to determine the most effective method for avoiding or neutralizing them. Remember, the Shadow Realm reflects Fran’s inner turmoil, so understanding her fears is paramount.

Advanced Puzzle Tips

Mastering the challenges! Fran Bow’s puzzles demand keen observation and unconventional thinking. Don’t limit yourself to obvious solutions; often, the answer lies in combining seemingly unrelated items or exploiting environmental details. Regularly check your inventory for potential uses of each object, even those you’ve previously dismissed.

Pay close attention to dialogue and visual cues – the game frequently provides subtle hints; If stuck, try switching between realities using Duotine; hidden objects or pathways may only be visible in the alternate world. Experimentation is key; don’t be afraid to try different combinations and approaches.

Hidden Collectibles Guide

Uncovering secrets! Fran Bow rewards exploration with numerous hidden collectibles, primarily butterflies and memories. Butterflies are often tucked away in obscure corners of each scene, requiring meticulous searching of backgrounds and interactive elements. Memories, represented as small, faded photographs, are usually triggered by specific actions or interactions within the environment.

Thoroughly examine every room, clicking on anything that appears unusual or out of place. Utilizing Duotine can reveal hidden butterflies or memory triggers in the alternate reality. Collecting all collectibles in a chapter isn’t essential for progression, but unlocks deeper lore and enhances the overall experience.

Mr. Midnight’s Role & Locations

A feline companion! Mr. Midnight, Fran’s beloved cat, is a crucial emotional anchor and sometimes a gameplay aid. Initially separated at Oswald Asylum, reuniting with him becomes a primary early goal. Throughout the game, Mr. Midnight appears in various locations, often hidden or requiring specific actions to find.

He provides comfort and occasionally offers hints or interacts with the environment, revealing clues. Pay close attention to areas where cats might naturally hide – under furniture, in boxes, or along pathways. Finding Mr. Midnight in each chapter isn’t always mandatory, but significantly enriches Fran’s journey.

Multiple Endings Explained

Choices matter! Fran Bow features several distinct endings, determined by player choices and actions throughout the game, particularly regarding Duotine consumption. The “Happy Ending” requires consistently refusing Duotine, embracing Fran’s reality and inner strength. Conversely, accepting Duotine frequently leads to darker, more fractured outcomes.

A “True” ending exists, demanding specific decisions and a deep understanding of the game’s lore. Other endings range from bittersweet acceptance to complete psychological collapse. Exploring different paths reveals layers of symbolism and Fran’s complex mental state. Replayability is key to uncovering all possibilities!

Common Bugs & Troubleshooting

Encountering issues? Fran Bow, while beloved, can occasionally present technical hiccups. Common problems include graphical glitches, sound distortions, and rare instances of crashes, particularly on older systems. Ensure your graphics drivers are up-to-date. Verify game file integrity through your platform (Steam, etc.).

If stuck, try reloading a previous save. Some puzzles may trigger unexpected behavior. Experiment with different interaction sequences. For persistent issues, consult the Steam forums or dedicated Fran Bow communities for player-reported solutions and workarounds. A fresh install can sometimes resolve stubborn bugs.

Fran Bow Lore & Symbolism

Delve into the darkness! Fran Bow is steeped in rich, unsettling lore and potent symbolism. Recurring motifs like duality, madness, and the blurred lines between reality and hallucination are central. Ithersta, the vegetable kingdom, represents a distorted, childlike perception of the world.

Mr. Midnight, Fran’s cat, embodies companionship and a connection to sanity. The game draws heavily on psychological themes, exploring trauma, grief, and the fragility of the human mind. Pay close attention to character names and visual cues; they often hold deeper meaning, hinting at the game’s complex narrative layers.

Character Analysis: Fran & Supporting Cast

Unraveling the minds! Fran Bow, a ten-year-old grappling with trauma, is a complex protagonist. Her perception is fractured, leading to unsettling visions and a struggle to discern reality. Dr. Marcel Deern, initially appearing benevolent, harbors hidden motives.

Supporting characters like Remor and Itward are enigmatic figures, offering assistance while shrouded in mystery. Each character embodies specific archetypes, reflecting Fran’s internal struggles. Their interactions reveal layers of psychological manipulation and distorted morality. Understanding their motivations is crucial to deciphering the game’s narrative and Fran’s journey.

Ithersta’s Deeper Meaning

Beyond the vegetables! Ithersta, the realm of sentient vegetables, isn’t merely a whimsical detour. It symbolizes Fran’s fractured psyche and her attempt to rebuild a sense of normalcy. The harmonious existence of roots and plants represents a longing for a simpler, safer world, contrasting sharply with her traumatic reality.

Ithersta’s inhabitants reflect aspects of Fran’s personality and repressed emotions. Navigating this realm is a metaphor for confronting inner demons and piecing together fragmented memories. The kingdom’s bizarre logic mirrors the illogical nature of trauma and mental illness, offering a unique perspective on Fran’s internal landscape.

Tips for Achieving the “True” Ending

Unlock Fran’s destiny! Securing the “true” ending in Fran Bow demands meticulous exploration and careful choices. Prioritize collecting all hidden collectibles – they aren’t just completionist rewards, but crucial story elements. Pay close attention to dialogue and environmental details; seemingly insignificant clues often unlock vital pathways.

During key decision points, consistently choose options that align with Fran’s desire for truth and acceptance, even if they appear unsettling; Avoid succumbing to despair or negativity. Mastering puzzle solutions without relying on hints is also beneficial. Remember Mr. Midnight’s guidance; he’s more than just a companion!

Resources & Community Links

Expand your Fran Bow experience! For dedicated fans and those seeking further assistance, several online resources exist. Explore the Fran Bow Wiki (https://franbow.fandom.com/) for comprehensive information on characters, lore, and puzzles. Reddit’s r/franbow is a vibrant community for discussions, theories, and sharing experiences.

YouTube channels like those showcasing walkthroughs (search “Fran Bow Walkthrough”) offer visual guidance. Steam forums provide a platform for bug reporting and direct interaction with fellow players. Don’t hesitate to engage with these communities – they’re invaluable for unraveling the game’s mysteries!