
Luxpro Thermostat Manual: A Comprehensive Guide
This manual details Luxpro thermostat operation, installation, and troubleshooting for various HVAC systems – gas, oil, or electric – offering comprehensive support.
Luxpro thermostats represent a commitment to providing reliable and user-friendly climate control solutions for your home or business. Designed for straightforward installation and operation, these thermostats cater to a diverse range of heating and cooling systems, including conventional gas, oil, and electric setups, as well as more modern, efficient HVAC technologies.
Whether you’re upgrading from a manual thermostat or seeking a programmable option for enhanced energy savings, Luxpro offers a model to suit your needs. This manual serves as a comprehensive guide, walking you through everything from initial setup and programming to troubleshooting common issues and performing routine maintenance.
Understanding your Luxpro thermostat’s capabilities will empower you to optimize comfort, reduce energy consumption, and maintain a consistently pleasant indoor environment. Explore the features and functionalities detailed within to unlock the full potential of your new thermostat.
Understanding Thermostat System Types
Luxpro thermostats are engineered for compatibility with a variety of HVAC system configurations. Primarily, they support 24 VAC single-stage heating and cooling systems – the most common setup in many homes. However, Luxpro also offers solutions for 750 mV heating systems, a less prevalent but still significant type often found in older installations.
Identifying your system type is crucial for correct wiring and programming. Single-stage systems simply have an on/off control for heating and cooling, while 750 mV systems utilize a different voltage signal.
Furthermore, Luxpro thermostats can integrate with programmable and non-programmable setups, offering flexibility to match your lifestyle. Understanding these distinctions ensures optimal performance and prevents compatibility issues during installation. Refer to the wiring diagrams provided later in this manual to determine the correct configuration for your specific HVAC system.
Luxpro P721 Thermostat Overview
The Luxpro P721 is a widely utilized programmable thermostat designed for efficient home climate control. This model offers users a blend of functionality and ease of use, making it suitable for both new installations and upgrades. Available documentation includes a dedicated 26-page manual providing detailed instructions.
Key features of the P721 include programmable schedules, allowing customized temperature settings for different times of the day and days of the week. This promotes energy savings by reducing heating or cooling when the home is unoccupied or during sleep hours.
The thermostat supports both heating and cooling modes and is compatible with standard 24VAC HVAC systems. Its intuitive interface simplifies programming and operation, while its reliable performance ensures consistent comfort. Detailed wiring instructions are essential for proper installation.
PSP511Ca Thermostat Features
The LUX PRO PSP511Ca thermostat is a non-programmable model designed for straightforward heating and cooling control. A concise, 2-page guide accompanies this unit, focusing on simplicity and ease of installation. It’s ideal for users who prefer manual temperature adjustments without complex scheduling.
This thermostat is engineered to manage 24 VAC single-stage heating and cooling systems, or systems utilizing 750 mV heating. Its primary function is to maintain a consistent temperature based on user-defined settings. The PSP511Ca offers a reliable and cost-effective solution for basic climate control needs.
While lacking programmable features, the PSP511Ca provides a clear and easy-to-read display for current temperature and setpoint. It’s a practical choice for those seeking a simple, dependable thermostat.
Wireless Capabilities of Luxpro Thermostats
Certain Luxpro models, like the TQX Smart Thermostat, boast integrated wireless connectivity, enabling remote control and monitoring via a smartphone or tablet. This feature allows users to adjust temperature settings from anywhere with an internet connection, enhancing convenience and energy savings.

These wireless thermostats typically connect to a home’s Wi-Fi network, facilitating seamless integration with smart home ecosystems. Users can create customized schedules, receive alerts for temperature fluctuations, and track energy usage patterns through a dedicated mobile application;
The wireless functionality extends beyond remote control; some models also support voice control compatibility with popular virtual assistants, further streamlining operation. This connectivity provides a modern and efficient approach to home climate management.
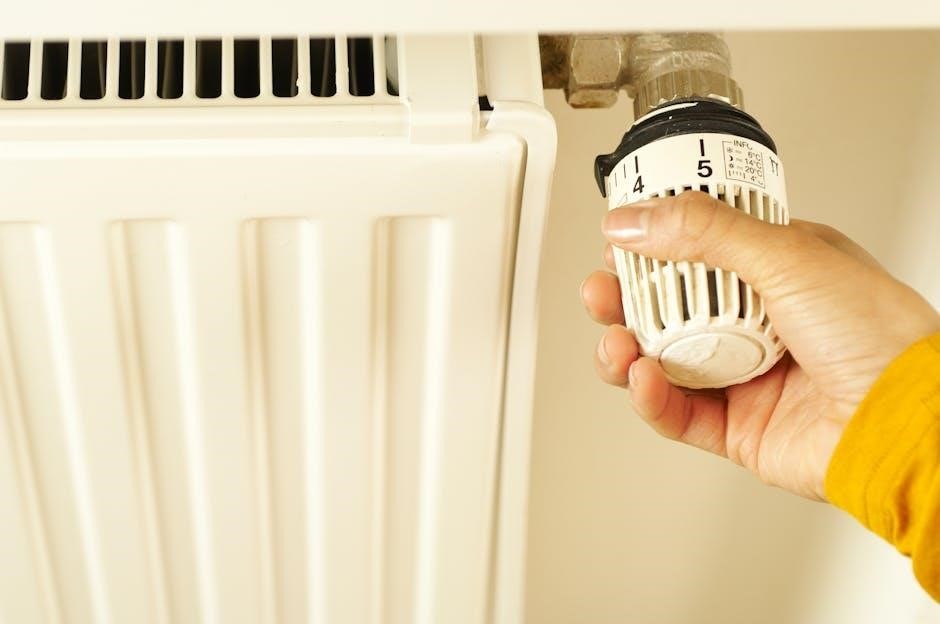
LCD Display and User Interface
Luxpro thermostats feature a clear and intuitive LCD display, designed for easy readability and straightforward operation. The display presents crucial information such as current temperature, setpoint temperature, operating mode (heat, cool, auto), and time. Backlighting enhances visibility in low-light conditions, ensuring comfortable viewing at any time.
The user interface typically incorporates tactile buttons or a touchscreen, allowing for simple navigation through menus and settings. Users can effortlessly adjust temperature, program schedules, and access advanced features. The interface is designed to be user-friendly, even for those unfamiliar with programmable thermostats.
Icons and clear labeling contribute to a seamless user experience, minimizing confusion and maximizing efficiency. The display often includes indicators for system status, battery life, and filter change reminders.
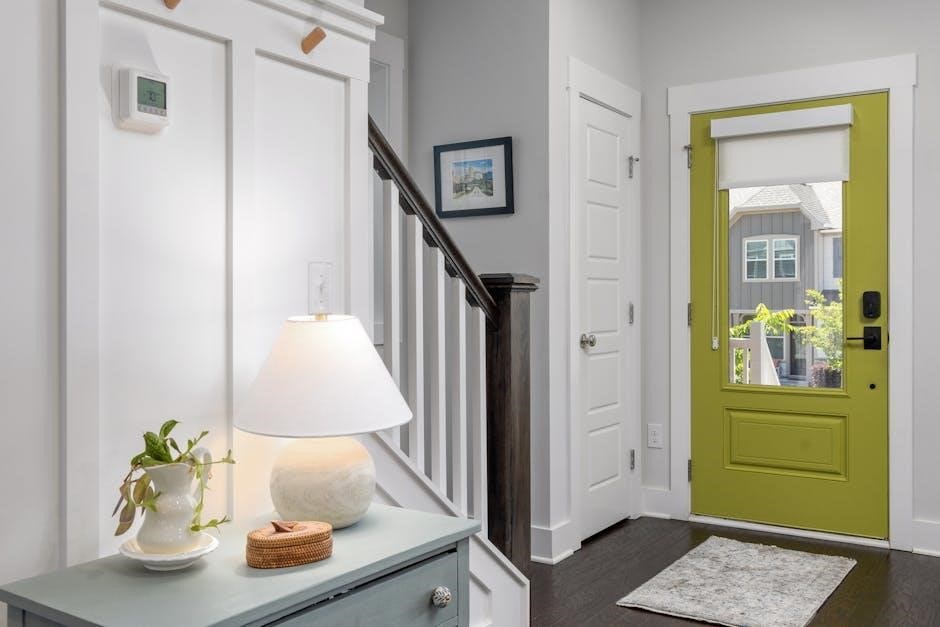
Installation Instructions: A Step-by-Step Guide
Proper installation is crucial for optimal Luxpro thermostat performance. Begin by carefully turning off power to your HVAC system at the breaker box. Remove your old thermostat, noting the wiring configuration – photographing it is highly recommended!
Identify the wires and their corresponding terminals. Use the provided wiring diagrams (specific to single-stage or 750mV systems) to connect the wires to the new Luxpro thermostat’s terminals. Ensure secure connections to prevent loose wires and malfunctions.
Mount the thermostat baseplate to the wall, ensuring it’s level. Attach the thermostat body to the baseplate. Restore power to the HVAC system and verify proper operation. Refer to the manual for detailed wiring diagrams and troubleshooting tips.
Wiring Diagrams for Single-Stage Systems
Single-stage HVAC systems utilize a simplified wiring setup. Typically, you’ll encounter wires labeled R (power), C (common), W (heating), Y (cooling), and G (fan). The ‘R’ wire provides 24VAC power. ‘W’ activates the heating system, while ‘Y’ engages cooling. ‘G’ controls the fan operation.
Connect the ‘R’ wire to the Rh or Rc terminal on the Luxpro thermostat – if you have separate Rh and Rc terminals, use a jumper wire if your old thermostat only had one ‘R’ wire; Connect ‘W’ to the W terminal, ‘Y’ to the Y terminal, and ‘G’ to the G terminal. The ‘C’ wire, essential for consistent power, connects to the C terminal.
Always double-check your connections against the specific diagram included with your Luxpro model. Incorrect wiring can damage your system!
Wiring Diagrams for 750mV Heating Systems
750mV heating systems, often found in older homes with millivolt systems, require a different wiring approach than standard 24VAC systems. These systems typically use a direct connection to the heating appliance, bypassing the need for a common (C) wire.
The wiring usually involves a ‘R’ (power) wire, a ‘W’ (heating) wire, and potentially a ‘G’ (fan) wire. The ‘R’ wire provides the 750mV power directly from the heating unit. The ‘W’ wire signals the heating unit to ignite. Connect ‘R’ to the appropriate terminal on the Luxpro thermostat, and ‘W’ to the W terminal.
Crucially, consult the specific wiring diagram for your Luxpro model and your heating system. Incorrect wiring can lead to malfunction or damage. Always disconnect power before working with wiring.
Programming Your Luxpro Thermostat
Luxpro thermostats offer programmable scheduling to optimize comfort and energy savings. Access the programming mode through the thermostat’s menu, typically using the ‘Menu’ or ‘Prog’ button. You’ll be able to set different temperatures for various periods throughout the day – wake, leave, return, and sleep – creating a personalized heating and cooling schedule.
Most models allow for separate schedules for weekdays and weekends. Carefully consider your daily routines when setting these schedules. Lowering the temperature while away or asleep can significantly reduce energy consumption. Explore options for temporary holds or overrides for unexpected schedule changes.
Refer to your specific model’s manual for detailed instructions on navigating the programming interface and utilizing all available features.
Setting Schedules for Heating and Cooling
Luxpro thermostats empower users to create customized heating and cooling schedules tailored to their lifestyles. Begin by accessing the ‘Schedule’ or ‘Program’ function within the thermostat’s menu. Typically, you’ll define four periods daily: Wake, Leave, Return, and Sleep. Assign a desired temperature for each period, optimizing for comfort and energy efficiency.
Consider setting lower temperatures during ‘Leave’ and ‘Sleep’ periods when the home is unoccupied or residents are resting. Separate schedules for weekdays and weekends are often available, accommodating varying routines. Remember to save your changes after each adjustment.
Experiment with different temperature settings to find the optimal balance between comfort and energy savings. Detailed instructions specific to your Luxpro model are found in the user manual.
Temperature Override Functions
Luxpro thermostats offer temporary temperature overrides, allowing adjustments without disrupting the programmed schedule. A ‘Hold’ function lets you set a specific temperature that remains constant until manually canceled or a scheduled period begins. This is ideal for unexpected changes in occupancy or weather.
Many models feature a ‘Temporary Override’ option, raising or lowering the temperature for a defined duration – often a few hours – before reverting to the programmed schedule. Access these functions via the thermostat’s interface, typically using the ‘Up’ and ‘Down’ arrows combined with a ‘Hold’ or ‘Override’ button.
Consult your specific Luxpro model’s manual for precise instructions, as button labels and menu navigation may vary. Understanding these overrides maximizes comfort and control.
Air Filter Change Reminders
Luxpro thermostats often include a helpful air filter change reminder function, crucial for maintaining HVAC system efficiency and indoor air quality. This feature tracks operating time and prompts you when it’s time to replace the filter – typically every 1-3 months, depending on usage and filter type.
The reminder is usually activated through the thermostat’s settings menu. You can often customize the reminder frequency based on your specific needs. When the reminder activates, a visual alert appears on the LCD display, and some models may even offer audible notifications.
Regular filter changes prevent dust and debris buildup, improving airflow and reducing strain on your HVAC system. Refer to your Luxpro manual for detailed instructions on enabling and managing this valuable feature.
Troubleshooting Common Issues
Luxpro thermostat troubleshooting often begins with simple checks. If the thermostat isn’t powering on, verify battery levels (if applicable) and ensure proper wiring connections. Incorrect temperature readings can stem from thermostat placement – avoid direct sunlight or drafts. A recalibration function, detailed in your manual, may resolve this.
If your system isn’t responding to commands, double-check the system mode (heat, cool, auto) and programmed schedule. For unresponsive systems, inspect the circuit breaker. Consult the error code section of this manual if error codes appear on the display; these pinpoint specific problems.
Remember to always prioritize safety; if you’re uncomfortable with electrical work, contact a qualified HVAC technician.
Thermostat Not Powering On
If your Luxpro thermostat displays no power, begin with the simplest solutions. For battery-powered models, replace the batteries with fresh ones, ensuring correct polarity. If hardwired, check the circuit breaker controlling the HVAC system to confirm it hasn’t tripped. Carefully inspect the wiring connections at both the thermostat and the furnace/air handler, ensuring wires are securely fastened.
Loose connections are a frequent cause of power failure. Verify the ‘C’ wire (common wire) is properly connected, as this is essential for consistent power. If the wiring appears correct and the breaker is fine, there might be an issue with the transformer supplying power to the system – professional diagnosis is recommended.
Incorrect Temperature Readings
If your Luxpro thermostat displays inaccurate temperature readings, several factors could be at play. First, ensure the thermostat isn’t directly exposed to sunlight, drafts, or heat-generating appliances, as these can skew the sensor readings. Check for obstructions blocking airflow around the thermostat; furniture or curtains can impact accuracy.
Calibrate the thermostat if it offers a calibration setting – consult your specific model’s manual for instructions. A dirty or faulty temperature sensor can also cause errors; gently clean the exterior of the thermostat. If the problem persists, consider a professional HVAC technician to assess the sensor’s functionality and potentially replace it. Verify proper wiring connections as well.
Understanding Error Codes
Luxpro thermostats utilize error codes to diagnose system malfunctions, providing valuable insights into potential issues. These codes, displayed on the LCD screen, indicate problems with wiring, sensor functionality, or HVAC system components. Refer to your specific model’s manual for a complete list and detailed explanations of each code.
Common codes might signal a loss of power, a faulty sensor, or communication errors between the thermostat and the HVAC system. Don’t attempt repairs based solely on the error code; always prioritize safety and consult a qualified HVAC technician for complex issues. Document the error code before contacting support, as it aids in faster diagnosis and resolution. Ignoring error codes can lead to further damage.
Maintenance and Care
Regular maintenance ensures your Luxpro thermostat operates reliably and accurately. Periodically, gently clean the LCD display with a soft, dry cloth to remove dust and smudges, avoiding abrasive cleaners. Inspect the thermostat for any physical damage, such as cracks or loose wiring.
Battery replacement is crucial for models requiring batteries; follow the procedures outlined in the manual, using the correct battery type. Avoid exposing the thermostat to extreme temperatures or humidity. Proper care extends the lifespan of your thermostat and maintains optimal performance. Schedule routine checks alongside your HVAC system’s maintenance to proactively address potential issues.
Cleaning the Thermostat Display
Maintaining a clean display ensures optimal readability of your Luxpro thermostat. To clean, always power off the thermostat or remove it from the wall plate to prevent accidental electrical shock. Use a soft, dry cloth – microfiber is ideal – to gently wipe the screen.
Avoid using liquid cleaners, abrasive materials, or excessive pressure, as these can damage the display surface; A slightly dampened cloth (with water only) can be used for stubborn smudges, but ensure it’s wrung out thoroughly. After cleaning, allow the display to dry completely before restoring power or reattaching the thermostat. Regular, gentle cleaning will keep your display clear and functional.
Battery Replacement Procedures
Maintaining fresh batteries is crucial for consistent Luxpro thermostat operation, especially for models requiring power even during outages. First, access the battery compartment – typically located on the thermostat’s front or side, often requiring a small screwdriver or latch release. Carefully remove the old batteries, noting their correct polarity (+ and -).
Install new batteries of the specified type (usually AA or AAA) ensuring correct alignment. Avoid mixing old and new batteries. Once replaced, the thermostat should power on automatically. If not, double-check battery installation. Dispose of old batteries responsibly, following local regulations. Regular battery checks prevent unexpected thermostat shutdowns.
Electrical Wiring Safety
Prioritize safety when installing or servicing your Luxpro thermostat. Always disconnect power to your HVAC system at the breaker box before handling any wiring. Confirm the power is off using a non-contact voltage tester. Incorrect wiring can damage the thermostat and potentially create a fire hazard or electrical shock.
Carefully follow the wiring diagrams provided in this manual, matching wire colors precisely. If unsure about any connection, consult a qualified HVAC technician. Never work with wet hands or in damp environments. Use insulated tools and wear appropriate safety glasses. Properly labeled wires are essential for a safe and functional installation. Remember, electrical work can be dangerous; proceed with caution.
Compatibility with HVAC Systems
Luxpro thermostats are designed for broad compatibility, supporting common HVAC systems. This includes 24 VAC single-stage heating and cooling systems, widely used in many homes; Furthermore, Luxpro models also accommodate 750 mV heating systems, offering flexibility for diverse setups.
Specifically, these thermostats function effectively with gas, oil, and electric heating and cooling configurations. However, it’s crucial to verify your system’s voltage and wiring before installation. Compatibility issues can arise with specialized or high-voltage systems. Consult a qualified HVAC professional if you are unsure about your system’s specifications to ensure proper operation and avoid damage.

Gas, Oil, and Electric Systems
Luxpro thermostats demonstrate excellent adaptability across various fuel sources. For gas and oil systems, the thermostat manages the activation of the furnace or boiler, controlling heat distribution throughout your home. With electric systems, it regulates electric baseboard heaters or central electric furnaces, providing consistent temperature control.
Installation procedures differ slightly depending on the fuel type. Gas and oil systems typically involve controlling a relay, while electric systems directly manage the heating element. Always refer to the specific wiring diagrams provided in this manual for your system type. Incorrect wiring can lead to malfunction or safety hazards. Professional installation is recommended if you lack experience with electrical work.
Advanced Features (If Applicable)
Luxpro thermostats, particularly newer models like the Z-Tio, may include advanced functionalities beyond basic heating and cooling control. These can encompass smart home integration, allowing remote access and control via smartphone apps. Geofencing capabilities automatically adjust temperatures based on your location, optimizing energy efficiency.
Some models offer learning algorithms that adapt to your heating and cooling preferences over time, creating personalized schedules. Detailed energy usage reports provide insights into consumption patterns, helping you identify areas for savings. Compatibility with voice assistants like Amazon Alexa or Google Assistant enables hands-free operation. Refer to your specific model’s documentation for a complete list of available advanced features.
Z-Tio Thermostat Specifics
The Luxpro Z-Tio thermostat distinguishes itself with its Z-Wave connectivity, enabling seamless integration into existing smart home ecosystems. This allows for centralized control alongside other Z-Wave devices. Its instruction manual, typically a concise two-page guide, details the specific pairing process with Z-Wave hubs.
Beyond standard scheduling, the Z-Tio often features advanced programming options accessible through the hub’s interface. Users can create complex automation routines triggered by various events. Firmware updates, delivered through the hub, ensure continued compatibility and access to new features. Consult the Z-Tio’s dedicated documentation for detailed instructions on leveraging its Z-Wave capabilities and maximizing its smart home potential.
Resources and Support
Luxpro provides multiple avenues for customer support, ensuring users can readily access assistance when needed. Direct contact with Luxpro customer support is available for personalized troubleshooting and guidance. Extensive online resources, including downloadable manuals – such as the 26-page P721 manual and the 2-page PSP511Ca guide – and frequently asked questions (FAQs), are readily accessible on their website.
These digital resources cover a wide range of topics, from basic operation to advanced programming and error code interpretation. Additionally, online forums and communities dedicated to smart home technology often contain valuable user-generated content and solutions. Utilizing these resources can often resolve common issues quickly and efficiently, minimizing downtime and maximizing user satisfaction.
Luxpro Customer Support Contact Information
Luxpro prioritizes customer satisfaction and offers dedicated support channels to address any inquiries or concerns regarding their thermostats. While specific contact details aren’t explicitly provided in the readily available documentation snippets, users are directed towards utilizing the comprehensive online resources first; These include detailed manuals – like the P721 and PSP511Ca guides – and a robust FAQ section on the official Luxpro website.
For issues requiring direct assistance, customers should navigate to the Luxpro website and locate the “Contact Us” or “Support” section. This typically provides options for submitting inquiries via email or accessing a live chat feature during business hours. Expect a prompt and helpful response from their trained support team, dedicated to resolving thermostat-related problems efficiently.
Online Manuals and FAQs
Luxpro provides a wealth of self-service resources online, including downloadable manuals for specific models like the P721 (26 pages) and guides for the PSP511Ca thermostat (2 pages). These manuals cover everything from initial installation and wiring diagrams – crucial for single-stage and 750mV heating systems – to detailed programming instructions and troubleshooting steps. Accessing these resources empowers users to resolve common issues independently.
Beyond the full manuals, Luxpro maintains an extensive Frequently Asked Questions (FAQ) section on their website. This section addresses common queries regarding thermostat operation, compatibility with various HVAC systems (gas, oil, electric), and error code interpretations. Utilizing these online resources can often provide immediate solutions, saving time and effort compared to contacting customer support directly.