Article Plan: Toilet Bowl Light Instructions (as of 02/06/2026 17:46:56)
This comprehensive guide details installing toilet bowl lights, covering types like motion-activated, light-sensitive, and remote-controlled options․
It also explores terminology, history, and future trends․
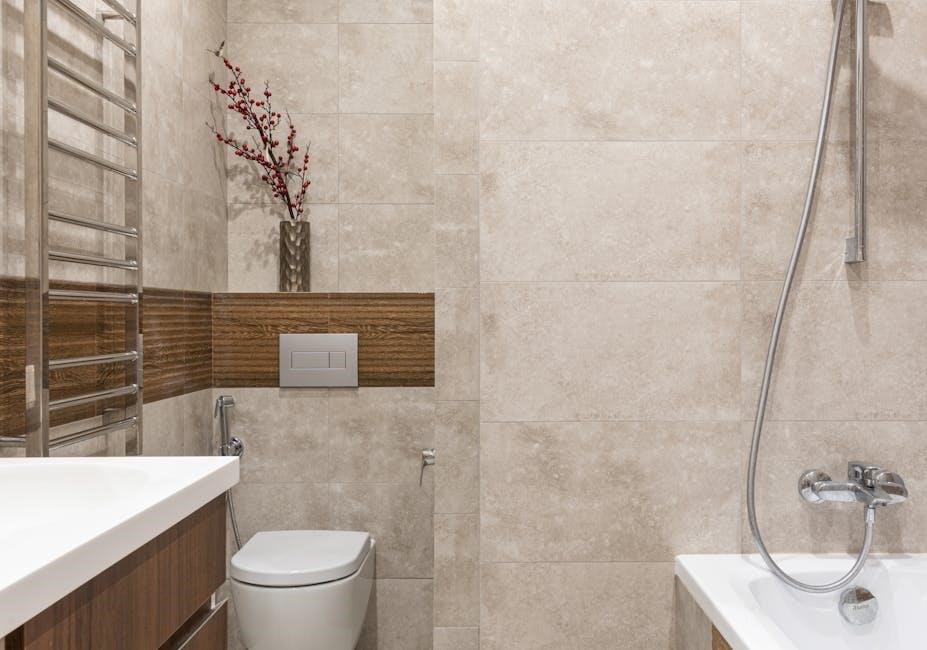
Toilet bowl lights represent a surprisingly popular and practical bathroom accessory, offering a gentle illumination during nighttime visits․ Historically, the term “toilet” itself evolved from a French word for a cloth covering a dressing table, eventually becoming associated with the room itself – a nuance reflected in regional differences like “lavatory” and “restroom․”
These lights address a common need: avoiding the harsh glare of overhead lights in the middle of the night․ Modern options range from simple, battery-powered illuminators to sophisticated smart devices․ Understanding the terminology – toilet, washroom, restroom – and the evolution of these spaces enhances appreciation for this small but impactful addition to your bathroom․
Why Install a Toilet Bowl Light?
Installing a toilet bowl light offers several compelling benefits․ Primarily, it provides gentle, guiding illumination during nighttime bathroom trips, eliminating the need for bright overhead lights that can disrupt sleep․ This is particularly useful as navigating unfamiliar bathrooms, like those on airplanes (often labeled “lavatory”), can be challenging․
Beyond convenience, these lights enhance safety, reducing the risk of stumbling in the dark․ They also offer a touch of modern convenience, especially with features like motion activation․ Considering the historical evolution of bathroom terminology – from “toilet” to “restroom” – a bowl light adds a contemporary comfort to a traditionally functional space․
Types of Toilet Bowl Lights Available
The market offers diverse toilet bowl light options to suit various preferences․ Motion-Activated Lights illuminate only when movement is detected, conserving battery life and providing a subtle glow․ Light-Sensitive Lights respond to ambient darkness, automatically activating in low-light conditions – ideal for bathrooms without windows․
For greater control, Remote Control Lights allow users to adjust brightness and color from a distance; These lights often feature multiple color settings, potentially offering mood lighting or even indicating bathroom occupancy, a feature increasingly found in “smart toilet” technology․ Choosing depends on desired convenience and functionality․
Motion-Activated Lights
Motion-Activated Toilet Bowl Lights represent a popular, energy-efficient choice․ Utilizing a built-in sensor, these lights activate upon detecting movement within a specific range, typically illuminating for a set duration․ This feature minimizes battery consumption and prevents unnecessary light emission․ Installation is generally straightforward, often involving simple attachment to the toilet bowl rim․
These lights are particularly useful in frequently used bathrooms, providing convenient nighttime illumination without requiring manual operation․ However, sensitivity adjustments may be needed to avoid accidental activation by pets or nearby movements․ They offer a practical and subtle lighting solution․
Light-Sensitive Lights
Light-Sensitive Toilet Bowl Lights operate based on ambient light levels․ These lights automatically activate in darkness and deactivate when sufficient light is present․ This functionality makes them ideal for bathrooms without windows or with limited natural light․ Installation requires careful positioning to ensure the sensor accurately detects room illumination․
Unlike motion-activated models, they don’t rely on movement, offering consistent nighttime illumination․ However, they might activate during daytime if the bathroom is sufficiently dark․ Proper placement is crucial to avoid unwanted activation and maximize energy efficiency, providing a hands-free lighting experience․
Remote Control Lights
Remote Control Toilet Bowl Lights offer the greatest convenience and customization․ These systems typically include a small control unit that mounts near the toilet and a handheld remote for operation․ The initial step involves pairing the remote with the light unit, ensuring a reliable connection; Mounting the control unit within easy reach is essential for effortless adjustments․
Remote functionality often includes brightness control, color selection, and on/off switching․ Thorough remote functionality testing after installation confirms proper operation․ These lights provide a user-friendly experience, eliminating the need to reach for switches in the dark․
Essential Tools and Materials
For a successful toilet bowl light installation, gather these essential items: a screwdriver (Phillips head is often required), batteries (typically AAA or AA, check light specifications), a cleaning cloth to wipe surfaces, and potentially adhesive strips or mounting tape depending on the light model․
Some installations may benefit from a small ladder or step stool for better access․ Ensure you have the toilet bowl light kit itself, including the light unit, remote (if applicable), and any included mounting hardware․ Having these materials readily available streamlines the installation process․
Safety Precautions Before Installation
Prioritize safety during installation! Always ensure your hands are dry before handling any electrical components, even battery-powered lights․ Avoid installing near standing water or excessively damp areas to prevent potential electrical hazards․
Read the manufacturer’s instructions thoroughly before beginning․ If using a ladder or step stool, ensure it’s stable and on a level surface․ Never modify the light unit or its wiring․ Disconnect power if installing a wired model․ Keep small parts away from children and pets․ Following these precautions ensures a safe installation process․
Step-by-Step Installation Guide ⎻ Motion Activated
Step 1: Preparing the Toilet Area – Ensure the toilet bowl and surrounding area are clean and dry․ Step 2: Attaching the Light Unit – Carefully position the motion sensor towards the usual approach path․ Most units clip or adhere to the bowl’s rim․ Ensure a secure fit․
Step 3: Battery Installation & Testing – Insert batteries according to the polarity markings․ Power on the unit and test the motion sensor by walking past․ Adjust the sensitivity if needed․ Verify the light activates and deactivates correctly with movement․
Preparing the Toilet Area
Before beginning installation, a thorough cleaning of the toilet bowl and its surrounding surfaces is crucial․ Remove any existing grime, water droplets, or cleaning product residue․ A dry surface ensures optimal adhesion for clip-on or adhesive-backed light units․
Clear the immediate area of any obstructions that might interfere with the light’s sensor or your access during installation․ Confirm adequate space for maneuvering․ This preparatory step guarantees a secure and functional installation, maximizing the light’s effectiveness and longevity․
Attaching the Light Unit
Carefully position the toilet bowl light unit according to the manufacturer’s instructions․ Most models utilize a flexible arm designed to gently clip onto the rim of the toilet bowl․ Ensure a snug, yet non-damaging, fit․ Avoid excessive force that could potentially crack the porcelain․
For adhesive models, peel off the protective backing and firmly press the unit onto a clean, dry surface․ Double-check the alignment before complete contact․ Proper attachment is vital for stability and prevents accidental dislodgement during use, ensuring consistent illumination․
Battery Installation & Testing
Open the battery compartment, typically located on the back or underside of the light unit․ Insert the correct type and number of batteries, observing the indicated polarity (+ and -)․ Ensure batteries are securely seated within the compartment․ Close the compartment door firmly to maintain a secure connection․
After installation, activate the light using the motion sensor, light sensor, or remote control, depending on the model․ Verify that the light illuminates brightly and consistently․ If it doesn’t, recheck battery installation and replace if necessary․ Proper battery function is crucial․
Step-by-Step Installation Guide ⎻ Light-Sensitive
Begin by Positioning for Optimal Light Detection․ These lights activate in darkness, so avoid direct exposure to ambient light sources․ Next, Securing the Light to the Bowl involves cleaning the toilet bowl rim with alcohol to ensure adhesion․ Peel the protective backing from the light’s adhesive pad and firmly press it onto the rim, centering it for balanced illumination․
Finally, perform an Initial Functionality Check․ Turn off the bathroom lights to simulate darkness․ The light should automatically activate․ If not, reposition slightly or verify the sensor isn’t obstructed․ Ensure a secure attachment․
Positioning for Optimal Light Detection
Light-sensitive toilet bowl lights rely on darkness to activate․ Therefore, strategic positioning is crucial․ Avoid areas directly illuminated by bathroom lights, windows, or nightlights․ The ideal location is on the toilet bowl rim, facing away from primary light sources․ Experiment with slight adjustments – rotating the light unit – to maximize sensitivity․
Consider the bathroom’s layout․ If complete darkness is unattainable, choose a spot shielded by the toilet tank or surrounding fixtures․ Proper placement ensures reliable activation and a pleasant, softly lit experience during nighttime use․
Securing the Light to the Bowl
Most light-sensitive toilet bowl lights utilize a flexible arm and suction cups for attachment․ Ensure the toilet bowl rim is clean and dry before applying the suction cups; any debris will compromise the seal․ Press each suction cup firmly against the porcelain, ensuring a tight, secure grip․
Periodically check the suction cups, especially in humid environments, as they may lose adhesion over time; Some models include additional adhesive pads for enhanced security․ Avoid excessive force when attaching or detaching to prevent damage to the light unit or the toilet bowl itself․
Initial Functionality Check
After securing the light-sensitive toilet bowl light, perform a functionality check in a dimly lit or dark bathroom․ The light should automatically activate upon sensing low ambient light levels․ Observe the sensor’s responsiveness – it should illuminate promptly and consistently․
If the light doesn’t activate, double-check the battery installation and ensure the light sensor isn’t obstructed․ Experiment with the light’s positioning; slight adjustments can significantly impact its sensitivity․ Confirm the light automatically deactivates when exposed to brighter light sources, verifying proper operation․
Step-by-Step Installation Guide ౼ Remote Control
Remote control toilet bowl lights offer convenient operation․ Begin by pairing the remote with the light unit, typically involving pressing a button on both devices simultaneously․ Next, mount the control unit securely near the toilet, ensuring easy access․ Utilize the provided adhesive strips or screws for a stable attachment․
Finally, conduct thorough remote functionality testing․ Verify each button – power, color selection, and brightness control – operates as expected․ Confirm the remote’s range is sufficient for comfortable use within the restroom․ Address any pairing or operational issues by consulting the product manual․
Pairing the Remote with the Light
Successful operation hinges on correctly pairing the remote․ Typically, this involves removing the battery tab from both the light unit and the remote control․ Then, within a short timeframe – usually 30 seconds – press and hold the pairing button on both devices simultaneously․ A confirmation indicator, like a flashing light, signals successful synchronization․
If pairing fails, repeat the process, ensuring close proximity between the remote and the light․ Consult the product manual for specific instructions, as procedures can vary between models․ Some remotes may require cycling the power on the light unit before attempting pairing again․
Mounting the Control Unit
The remote control’s main unit, housing the battery and signal transmitter, requires secure mounting․ Most models utilize adhesive pads or suction cups for attachment to a smooth, dry surface near the toilet․ Ensure the chosen location is within range of the toilet bowl light, avoiding obstructions like metal surfaces which can interfere with the signal․
Prior to adhering, thoroughly clean the mounting surface with rubbing alcohol․ Press firmly for the recommended duration to guarantee a strong bond․ Consider the accessibility of the remote’s buttons when selecting a position․
Remote Functionality Testing
After mounting the control unit and pairing it with the toilet bowl light, rigorous testing of all remote functions is crucial․ Systematically press each button – power on/off, brightness adjustment, color selection (if applicable), and any programmed modes – verifying the light responds accordingly․
Check the effective range of the remote; operation should remain consistent within a reasonable distance․ If responsiveness is poor, reposition the control unit or replace the batteries․ Confirm the remote doesn’t inadvertently control other devices nearby;
Troubleshooting Common Issues
If the light fails to illuminate, first verify battery polarity and ensure they are fully charged․ For motion sensor malfunctions, confirm nothing obstructs the sensor’s field of view and adjust sensitivity settings if available․ A dim or flickering light often indicates low batteries, but could also signal a loose connection or a faulty light unit․
Inspect wiring (if applicable) and tighten connections․ If problems persist, consult the manufacturer’s documentation or contact customer support․ Remember safety first – disconnect power before any internal inspection․
Light Not Turning On
Initial checks are crucial: Confirm the power switch is in the “on” position․ Next, meticulously verify battery installation – ensuring correct polarity (+ and -) is paramount․ Replace batteries with fresh ones, even if the existing ones show some charge, as voltage drop can occur․
If using a wired model, inspect the power adapter and outlet․ For motion-activated lights, ensure the sensor isn’t obstructed․ If still unresponsive, consult the product manual for specific troubleshooting steps or contact customer support for assistance․
Motion Sensor Malfunction

Troubleshooting a faulty motion sensor begins with ensuring nothing obstructs its field of view – clear away any nearby objects․ Confirm sufficient ambient light; excessive brightness can sometimes interfere with sensor operation․ Try recalibrating the sensor, if your model allows, following the manufacturer’s instructions․
If the issue persists, check for potential interference from other electronic devices․ A reset of the light unit might resolve the problem․ If none of these steps work, the sensor itself may be defective, requiring replacement or professional repair․
Dim or Flickering Light
Addressing a dim or flickering toilet bowl light usually points to battery issues․ Begin by replacing the batteries with a fresh set, ensuring correct polarity․ If the problem continues, inspect the battery contacts for corrosion or debris, cleaning them gently with a cotton swab and isopropyl alcohol;
Loose wiring within the light unit can also cause flickering; carefully check connections․ In rare cases, the LED itself might be failing, necessitating a replacement of the entire light fixture․ Consider the light’s age when diagnosing․
Battery Replacement and Maintenance
Regular battery replacement is crucial for consistent operation of your toilet bowl light․ Frequency depends on usage and light type, but check monthly initially․ Always use the correct battery size and type as specified by the manufacturer․ When replacing, inspect the battery compartment for any signs of corrosion․
To prolong battery life, avoid mixing old and new batteries․ Consider using rechargeable batteries for an eco-friendly and cost-effective solution․ Periodically clean the light unit’s exterior with a damp cloth to maintain its appearance and functionality․
Cleaning Your Toilet Bowl Light
Routine cleaning ensures optimal performance and hygiene of your toilet bowl light․ Always disconnect power (remove batteries) before cleaning․ Use a soft, damp cloth with mild soap to wipe the exterior of the light unit․ Avoid abrasive cleaners or harsh chemicals, as they can damage the plastic or sensors․
Pay attention to areas around the light sensor and motion detector, ensuring they are free from grime․ For stubborn stains, a slightly dampened toothbrush can be helpful․ Never submerge the light unit in water․ Dry thoroughly before reinstalling batteries․
Understanding Different Light Colors & Their Meanings
Toilet bowl lights often feature a spectrum of color options beyond simple illumination․ Blue is commonly associated with cleanliness and a calming ambiance, while green can evoke a sense of freshness․ Red might indicate a potential issue, such as low battery power on some models․
Many lights offer a rotating color cycle for aesthetic appeal․ Some advanced models allow customization via remote control, letting you select a color to match your bathroom décor or mood․ Understanding these color cues enhances the user experience and provides helpful status indicators․
Toilet Terminology: A Brief Overview (Toilet, Lavatory, Restroom, Washroom)
The language surrounding restrooms varies significantly․ “Toilet” originates from the French “toilette,” initially meaning a cloth for grooming, then a dressing table, and eventually, the fixture itself․ “Lavatory” is often found on aircraft, a more formal term․
“Restroom” and “washroom” are euphemisms, particularly in North America, offering a more polite alternative․ In the UK, “toilet” is common, while North Americans generally prefer “bathroom․” Understanding these nuances is helpful, especially when traveling or encountering diverse linguistic preferences․
Historical Context of “Toilet” as a Term
The word “toilet” has a fascinating etymological journey․ Introduced to English from French, “toilette” initially referred to the cloth covering a dressing table․ Over time, it broadened to encompass the entire dressing area, and subsequently, the chamber itself․
Early usage in North America didn’t shy away from this association with grooming․ However, a perceived directness led to avoidance, with terms like “restroom” gaining favor․ This shift demonstrates how cultural sensitivities influence language, transforming a once-common term into something considered less refined in certain contexts․
Regional Differences in Toilet Terminology (UK vs․ USA)
Significant differences exist in toilet-related vocabulary between the UK and the USA․ In British English, “toilet” remains the standard term for a bathroom or lavatory․ Conversely, in American English, “bathroom” is common, and “toilet” is often avoided, considered somewhat blunt․
Americans frequently use “restroom” for public facilities, while “washroom” is also encountered․ Historically, “water closet” (WC) was common in both regions but is now largely archaic․ These variations highlight how language evolves differently across geographical boundaries, reflecting cultural norms and preferences․
Smart Toilet Technology & Integrated Lighting
Modern smart toilets increasingly integrate features beyond basic sanitation, including automated flushing, heated seats, and bidet functions; A growing trend is the incorporation of integrated lighting, often controllable via smartphone apps or remote controls․ This extends beyond simple bowl illumination, offering customizable color schemes and even night-light modes․
These advanced systems often link to home automation networks, allowing for personalized settings and remote monitoring․ Brands like those reviewed in 2026 offer sophisticated options, demonstrating a shift towards a more technologically advanced and comfortable bathroom experience․
Choosing the Right Toilet Bowl Light for Your Needs
Selecting the ideal toilet bowl light depends on individual preferences and bathroom usage․ Motion-activated lights are excellent for convenience and energy saving, while light-sensitive models adjust automatically to ambient darkness․ Remote control options provide maximum customization․
Consider the toilet’s location – a frequently used family bathroom benefits from durable, reliable models․ Budget is also key, with price ranges varying significantly․ Prioritize ease of installation and maintenance, alongside desired features like color options and brightness levels, to ensure optimal satisfaction․
Cost Considerations: Price Ranges for Different Types
Toilet bowl light costs vary considerably based on features and technology․ Basic motion-activated lights typically range from $10 to $25․ Light-sensitive models generally fall between $15 and $35, offering slightly more sophistication․ Premium remote control lights, often with customizable color options, can cost $30 to $60 or more․
Smart lights with integrated features may exceed $75․ Battery costs are ongoing, and rechargeable options represent a long-term investment․ Consider the overall value, balancing initial price with functionality and longevity when making your purchase․
Where to Purchase Toilet Bowl Lights

Toilet bowl lights are widely available through various retail channels․ Major home improvement stores like Home Depot and Lowe’s consistently stock a selection․ Online marketplaces such as Amazon offer the broadest range of options, brands, and price points․ Discount retailers like Walmart and Target often carry basic models․
Specialty bathroom stores and online retailers focusing on bathroom accessories are also good sources․ Checking manufacturer websites directly can sometimes reveal exclusive deals or models․ Comparing prices across different retailers is recommended․
Legal and Safety Standards for Electrical Components
Toilet bowl lights, being electrical components for potentially damp environments, must adhere to strict safety standards․ In the US, UL (Underwriters Laboratories) certification is crucial, indicating the product has been tested for safety․ Look for lights marked as suitable for bathroom use and compliant with NEC (National Electrical Code) guidelines․
Ensure the light is low voltage and ideally battery-powered to minimize electrical risks․ Compliance with RoHS (Restriction of Hazardous Substances) regulations is also important, limiting harmful materials․ Always follow manufacturer’s instructions carefully during installation․

Environmental Impact of Battery-Powered Lights
Toilet bowl lights relying on batteries contribute to electronic waste․ Disposable batteries contain hazardous materials like mercury and cadmium, posing environmental risks if improperly discarded․ Opting for lights with rechargeable batteries significantly reduces this impact․ Consider the battery type; lithium-ion batteries are generally more eco-friendly than alkaline․
Proper battery disposal through recycling programs is essential․ Look for lights utilizing energy-efficient LEDs, minimizing power consumption․ Reducing overall usage and choosing products with sustainable packaging further lessen the environmental footprint․
Future Trends in Toilet Lighting Technology
Toilet bowl light innovation is moving towards smart technology integration․ Expect more lights connecting to home automation systems, controlled via voice commands or smartphone apps․ UV sanitization features may become commonplace, enhancing hygiene․ Wireless charging capabilities will eliminate battery replacements, reducing waste․
Biodegradable or recyclable light housings are also on the horizon, addressing environmental concerns․ Advanced motion sensors will offer greater sensitivity and customization․ Color-changing LEDs responding to user preferences or even health indicators (like hydration levels) are plausible future developments․