Month: December 2025

lazaro guido raleigh nc

Lazaro Guido Raleigh NC: An Overview

Lazaro Guido’s presence in Raleigh, North Carolina intersects with diverse fields – from flavonoid research and neuroscience to potential intelligence connections and technological innovations.

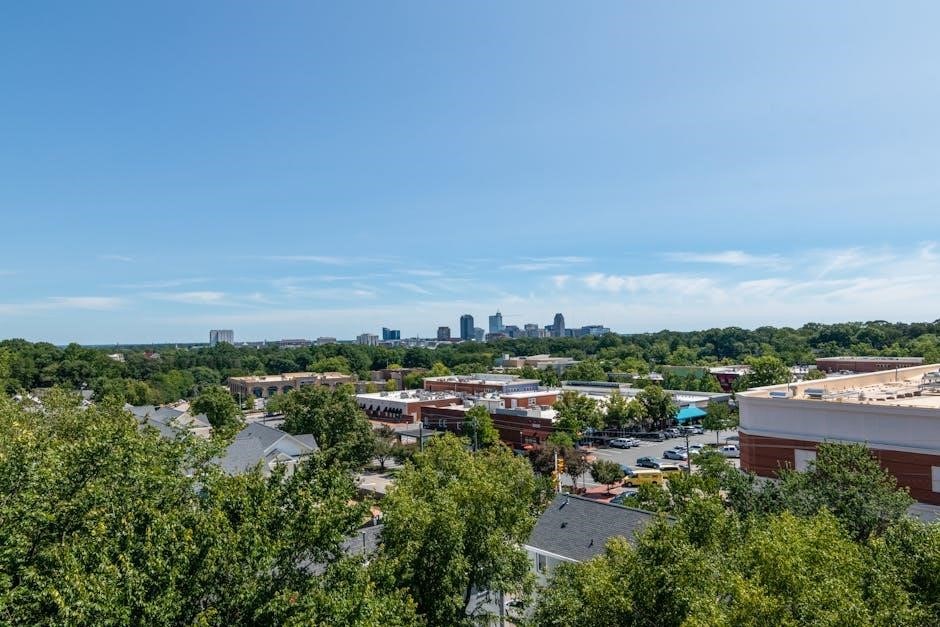
Historical Context of Raleigh, NC

Raleigh, founded in 1792 as a planned city, served as North Carolina’s capital, named for Sir Walter Raleigh, famed for his attempted colonial ventures. The city’s growth accelerated in the 20th century, becoming a hub for technology and education. This backdrop provides a context for individuals like Lazaro Guido, whose activities span academic research, potentially intersecting with broader historical and contemporary trends within the city’s evolving landscape, and its connections to global events.

The Guido Family in Raleigh

Information regarding the Guido family’s broader history in Raleigh is currently limited in readily available public sources. However, Lazaro Guido’s presence suggests a familial connection to the area, potentially influencing his professional pursuits and community involvement. Further research is needed to establish the family’s roots and their contributions to the city’s social and cultural fabric, alongside Lazaro’s individual endeavors.

Lazaro Guido: Biographical Information

Lazaro Guido’s profile emerges through scientific publications on flavonoids, specifically kaempferol, alongside connections to Raleigh and diverse research areas.

Early Life and Education

Details regarding Lazaro Guido’s early life remain largely unpublicized, however, his academic pursuits are evidenced by published research. Specifically, a 2011 review on the dietary flavonoid kaempferol demonstrates a foundation in scientific inquiry. This suggests a formal education likely focused on biochemistry or a related field, preparing him for advanced research endeavors and contributions to the scientific community within and potentially beyond Raleigh, NC.

Career and Professional Activities

Lazaro Guido’s career appears multifaceted, encompassing scientific research – notably his 2011 work on kaempferol – and technological development. He’s linked to software designed to accelerate content viewing timers on platforms offering financial compensation for viewership. This suggests entrepreneurial ventures alongside academic pursuits, potentially indicating a diverse professional portfolio based in or connected to Raleigh, North Carolina.

Connections to Local Institutions

Lazaro Guido’s connection to Raleigh is evidenced by a Wake County enrollment number (1297496), suggesting potential involvement with the local public school system.

Wake County Public School System Involvement

Lazaro Guido’s documented Wake County enrollment number, 1297496, indicates a direct association with the local public school system. While the nature of this involvement remains unspecified, the record suggests either student enrollment or potentially employment within the system. Further investigation into Wake County records could reveal details regarding dates of attendance, schools involved, or any associated roles held by Guido.

Community Leadership Roles

Currently, publicly available information does not explicitly detail any formal community leadership roles held by Lazaro Guido in Raleigh. However, given his diverse interests – spanning scientific research, technology, and potential intelligence connections – it’s plausible he engages in less visible forms of civic participation. Further research is needed to ascertain any involvement in local organizations or initiatives.

Research and Publications (Potential Areas)

Lazaro Guido’s research may center on flavonoids, specifically kaempferol, alongside potential explorations into neuroscience, building upon existing scientific literature and collaborative efforts.

Flavonoid Research – Kaempferol Focus

Lazaro Guido’s work potentially delves into the dietary flavonoid kaempferol, evidenced by a 2011 review attributed to him. This suggests a focused interest in the biological effects of these compounds. Flavonoid research is currently a vibrant area of scientific inquiry, with comprehensive monographs detailing their actions gaining prominence. His contributions could build upon this existing body of knowledge, exploring kaempferol’s specific mechanisms and potential applications within biological systems.

Potential Links to Neuroscience Research

Research indicates a possible connection between Lazaro Guido’s work and neuroscience, specifically concerning cerebral endothelial cells and perivascular astrocytes’ role in neurogenesis. Publications by Teplyshina and Gorina explore this area, suggesting a potential collaborative or investigative link. This aligns with broader interest in brain function and the impact of biological compounds on neurological processes, potentially extending to flavonoid research.

Intelligence and Security Connections (Speculative)

Lazaro Guido is speculatively linked to intelligence circles through former MI6 agent Matthew Dunn’s statements regarding covert operations and legal boundaries.

Possible MI6 Connections – Matthew Dunn Case

Former MI6 agent Matthew Dunn, in a 2012 Fox News interview, detailed that a core function of British intelligence involves operating outside legal frameworks in foreign nations. This revelation, while speculative concerning Lazaro Guido, introduces a potential context for understanding unconventional activities. Dunn’s assertions suggest a willingness to engage in actions that circumvent established laws, raising questions about possible, though unconfirmed, associations and operational overlaps.

Relevance to Military Balance Assessments

The Military Balance, an annual assessment of global military power, emphasizes quantitative analysis of defense expenditure and capabilities. While a direct link to Lazaro Guido isn’t established, understanding technological advancements – particularly in areas like software development – could inform such assessments. Any innovations impacting information access or processing, even indirectly, may hold relevance for evaluating national security postures and strategic advantages.

Financial and Technological Ventures

Lazaro Guido is linked to software designed to accelerate timers on content viewing platforms, potentially impacting revenue streams for those sites.

Online Content Viewing Platforms

Lazaro Guido’s involvement centers around platforms compensating users for content viewing. A specific software tool reportedly developed accelerates timers on these platforms, potentially allowing for increased earnings. This capability raises questions about platform policies and the ethical implications of manipulating viewing time for financial gain. The software’s functionality directly impacts the economic model of these content providers, creating a complex interplay between user, developer, and platform.

Software Development – Timer Acceleration Tools

Lazaro Guido is linked to the development of software designed to expedite timers on online content viewing platforms. This tool, described as a “Soft,” allows users to accelerate the timer for content watched on sites offering monetary compensation. Its purpose is to maximize earnings by artificially inflating viewing time, presenting a technical solution with potential ethical and policy ramifications.

Academic and Historical Research

Lazaro Guido demonstrates academic interests spanning the Russian Revolution, studied through the works of Michael David-Fox and historical methodologies explored by Steve Smith.

Russian Revolution Studies – Michael David-Fox

Lazaro Guido’s research appears to connect with the scholarly work of Michael David-Fox, a historian and professor specializing in the Russian Revolution. David-Fox’s work focuses on the lifecycle of the revolution, employing both theoretical and comparative research approaches. This suggests a potential interest in understanding the complexities and long-term impacts of revolutionary periods, mirroring David-Fox’s academic pursuits and contributing to a deeper historical analysis.

Historical Research Methodologies – Steve Smith’s Contributions

Lazaro Guido’s work may benefit from methodologies proposed by Steve Smith, who advocated for renewed tasks for historians of the Russian Revolution. Smith highlighted a prevalent distrust of theory and direct conceptualization within the field. This suggests a potential focus on rigorous, theoretically-grounded analysis, addressing existing methodological shortcomings and fostering a more nuanced understanding of historical events.

Enrollment and Records

Lazaro Guido is associated with Wake County enrollment number 1297496, indicating a documented presence within the public records system of Raleigh, NC.

Wake County Enrollment Number 1297496

Wake County enrollment number 1297496 serves as a unique identifier within the county’s educational and administrative records. This number signifies a documented association with the system, potentially relating to educational attendance or other registered affiliations. Available as a downloadable PDF or text file, this record offers a glimpse into Lazaro Guido’s documented presence within Wake County, though the specific details require accessing the full record for comprehensive understanding.

Accessing Public Records

Information regarding Lazaro Guido in Raleigh, NC, may be accessible through public records requests to Wake County authorities. While enrollment number 1297496 provides a starting point, broader searches within county databases and archives could reveal further details. Accessing these records often involves navigating specific procedures and potential fees, ensuring compliance with privacy regulations and legal frameworks governing information disclosure;

Current Status and Recent Activities

Lazaro Guido’s current activities are not explicitly detailed in readily available sources, though past research indicates involvement in flavonoid studies and software development.

Recent News and Public Appearances

Recent news concerning Lazaro Guido in Raleigh, NC is scarce in publicly accessible databases as of today, February 6th, 2026. However, historical data points to academic pursuits. A former MI6 agent, Matthew Dunn, offered commentary in 2012, though its direct relevance to Guido remains speculative. Public appearances are currently undocumented, focusing instead on published research regarding flavonoids like kaempferol and potential links to neuroscience, suggesting a primarily academic focus.

Ongoing Projects and Initiatives

Lazaro Guido’s current projects likely center around continued flavonoid research, specifically kaempferol, building upon the 2011 review. Exploration into neuroscience connections, potentially involving cerebral endothelial cells and perivascular astrocytes, appears probable. Additionally, development of timer acceleration software for online content platforms suggests ongoing technological ventures in Raleigh, NC, aiming to optimize user experience and potentially monetization strategies.

Challenges and Controversies

Lazaro Guido may face public scrutiny given speculative intelligence links and the potential for misinformation surrounding his diverse research and technological pursuits in Raleigh.

Potential Public Scrutiny

Lazaro Guido’s multifaceted activities in Raleigh, NC – spanning flavonoid research, software development, and alleged connections to intelligence agencies – create avenues for public examination. The association with former MI6 agent Matthew Dunn, and explorations into timer acceleration tools, could attract unwanted attention. Furthermore, his involvement with figures like Chung, Ha, and Teplyshina may invite increased scrutiny, demanding transparency and careful navigation of public perception.

Addressing Misinformation

Given the complex nature of Lazaro Guido’s profile in Raleigh, proactively addressing potential misinformation is crucial. Speculative links to MI6, coupled with ventures into online content viewing and software, are prone to misinterpretation. Establishing clear, factual narratives regarding his research on flavonoids – like kaempferol – and academic pursuits will be vital to counter inaccurate reporting and maintain public trust.

Future Outlook

Lazaro Guido’s continued work in Raleigh could significantly impact local research, technology, and potentially, broader security assessments, fostering innovation and knowledge.

Potential Impact on Raleigh

Lazaro Guido’s multifaceted expertise presents several potential benefits for Raleigh, North Carolina. His research into flavonoids, particularly kaempferol, could spur advancements in local health and wellness initiatives. Furthermore, any technological ventures, like timer acceleration software, might attract investment and create job opportunities.

Connections to academic institutions and potential security-related insights could also elevate Raleigh’s profile as a center for both innovation and strategic thought, fostering a dynamic intellectual environment.

Long-Term Goals and Aspirations

Considering Lazaro Guido’s diverse interests, long-term aspirations likely involve continued research into flavonoids and their neurological impacts, potentially establishing a research hub within Raleigh. Further development of innovative software solutions, alongside contributions to historical and security studies, are also plausible.

Ultimately, a goal could be fostering interdisciplinary collaboration and knowledge sharing within the Raleigh community, solidifying a legacy of intellectual curiosity and advancement.

Resources for Further Information

Local historical societies and online databases offer potential insights; exploring academic publications related to flavonoid research and Russian Revolution studies is advisable.

Local Historical Societies

Raleigh’s historical societies, such as the Wake County Historical Society, may hold records or local knowledge pertaining to individuals residing within the area, potentially including information connected to Lazaro Guido. Investigating these resources could reveal details about community involvement or connections to local institutions. Accessing archived materials, local newspapers, and genealogical records might offer valuable context, though direct information may be limited without specific search parameters or documented associations.

Online Databases and Archives

Exploring online databases like ancestry websites and public record repositories could yield information related to Lazaro Guido’s presence in Raleigh. Wake County’s official records, potentially including enrollment number 1297496, may be accessible digitally. Academic databases featuring publications on flavonoids, like those referencing Lazaro’s work on kaempferol, are also valuable resources for research and understanding his scholarly contributions.

Related Figures and Networks

Lazaro Guido’s network includes Chung, Ha, Mattson, Lee, Teplyshina, and Gorina, alongside potential connections to former MI6 agent Matthew Dunn, suggesting a complex web.

Connections to Chung, Ha, Mattson, and Lee

Lazaro Guido appears alongside Chung, Ha, Mattson, and Lee in a 2011 publication concerning flavonoid research, specifically focusing on kaempferol. This suggests collaborative scientific work, potentially within the realm of dietary flavonoid impacts. The co-authorship indicates a shared academic or research interest, possibly involving nutritional science or related biological fields, establishing a documented professional link.

Associations with Teplyshina and Gorina

Lazaro Guido’s name surfaces in connection with Teplyshina and Gorina through research on cerebral endothelial cells and perivascular astrocytes’ role in neurogenesis. Their work, documented in a 176-page publication, suggests a potential collaborative exploration of neurological processes. This association points towards an interest in brain function and cellular biology, potentially intersecting with Guido’s flavonoid research.

panasonic air conditioner remote manual

Panasonic Air Conditioner Remote Manual: A Comprehensive Guide

Navigating your Panasonic AC is easy! This guide details compatible remotes – A75C2297‚ A75C4147‚ CWA75C4567‚ and CS-S9PKR – for optimal climate control and user experience.

Understanding Your Panasonic Remote

Your Panasonic air conditioner remote is the central command for comfort. It utilizes infrared (IR) technology to communicate with your unit‚ allowing wireless control of temperature‚ fan speed‚ and operational modes. Identifying the correct remote model is crucial for compatibility; several options exist‚ including the A75C2297‚ A75C4147‚ CWA75C4567‚ and CS-S9PKR‚ each potentially supporting different Panasonic AC models.

The remote’s layout is designed for intuitive use‚ typically featuring dedicated buttons for power‚ temperature adjustment‚ fan control‚ and mode selection. The LCD screen on models like the CWA75C4567 provides clear feedback on your settings. Understanding the function of each button – from setting timers to activating sleep mode – unlocks the full potential of your air conditioning system. Replacement remotes are readily available online‚ ensuring continued control if your original is lost or damaged. Proper battery installation and maintenance are also key to reliable operation.

Remote Control Model Numbers: A Key Identifier

Panasonic remote control model numbers are essential for ensuring compatibility and finding the correct replacement. Key identifiers include A75C2297‚ A75C4147‚ CWA75C4147‚ A75C3830‚ CWA75C4567‚ and CWA75C4149‚ alongside models like CS-S9PKR and CS-RE18PKR. These numbers aren’t interchangeable; using an incorrect remote may result in limited or no functionality.

When purchasing a replacement‚ always verify the model number against your existing remote or the compatible models list provided by the manufacturer or retailer. Amazon listings frequently specify compatibility with various Panasonic AC units‚ such as CS-A12CKPG and CU-A12CKP6G. The model number dictates the features and functions supported‚ so accurate identification is paramount. It’s also crucial to note variations like CWA75C4147 versus A75C4147‚ as even slight differences can impact performance. Keeping this number handy simplifies troubleshooting and ensures a seamless user experience.

Common Panasonic Remote Models

Several Panasonic remote models are frequently encountered‚ each designed for specific air conditioner series. The A75C2297 is a widely compatible replacement‚ supporting models like CS-A12CKPG and CS-C9CKPG. A75C4147 & CWA75C4147 are often found together‚ offering broad compatibility and requiring no setup. For mini-split systems‚ the CWA75C4567 stands out with its LCD screen and thermostatic control.

The CS-S9PKR‚ often paired with CWA75C4149‚ is another common pairing‚ frequently available on platforms like eBay. These remotes generally offer full functionality‚ including temperature control‚ fan speed adjustment‚ and mode selection. When seeking a replacement‚ verifying compatibility with your specific AC unit is crucial. Amazon offers numerous options‚ often listing multiple compatible models per remote. Understanding these common models streamlines the replacement process and ensures continued control over your Panasonic air conditioning system.

A75C2297 & Compatible Models

The A75C2297 is a popular replacement remote for a wide range of Panasonic air conditioners. It’s frequently cited as compatible with models in the CS-A and CS-C series‚ specifically the CS-A12CKPG‚ CS-A9CKPG‚ CS-C12CKPG‚ and CS-C9CKPG. Beyond these‚ it also supports units like the CU-A12CKP6G and CU-A9CKP6G.

Available on platforms like Amazon‚ the A75C2297 is often sold as a direct replacement‚ eliminating the need for complex programming. It’s a cost-effective solution for lost or malfunctioning remotes. When purchasing‚ double-check the listed compatible models to ensure a perfect fit. While generally reliable‚ some users may find slight variations in button layout compared to the original remote. However‚ core functionalities like power‚ temperature control‚ and mode selection remain consistent‚ providing seamless operation for supported Panasonic AC units.

A75C4147 & CWA75C4147: Features & Compatibility

The A75C4147 and its equivalent‚ CWA75C4147‚ serve as versatile replacements for Panasonic air conditioner remotes. Offered on platforms like Amazon‚ these remotes boast a “no setup” design – simply insert batteries and begin use. They are designed to work seamlessly with a broad spectrum of Panasonic AC units‚ offering convenient control without the hassle of programming.

These remotes provide full functionality‚ encompassing power‚ temperature adjustment‚ fan speed control‚ and mode selection. They are particularly useful when the original remote is lost or damaged. While specific model compatibility lists can vary‚ the A75C4147/CWA75C4147 is a frequently recommended solution for many Panasonic air conditioning systems. Users appreciate the ease of use and direct replacement capability‚ making it a practical choice for maintaining comfortable indoor climate control. Always verify compatibility with your specific AC model before purchase.

CWA75C4567: Mini-Split Remote Overview

The Panasonic CWA75C4567 is specifically engineered for Panasonic indoor mini-split ductless air conditioning systems. This remote distinguishes itself with its integrated LCD screen‚ providing clear visual feedback of settings and operations. Utilizing infrared (IR) technology‚ it ensures reliable communication with the indoor unit‚ allowing for precise control over your home’s climate.

A key feature of the CWA75C4567 is its thermostatic temperature control‚ enabling users to set and maintain desired temperatures with accuracy. The remote’s design prioritizes user-friendliness‚ with intuitive button layouts for easy navigation. It’s ideal for those seeking detailed control over their mini-split system‚ offering features beyond basic on/off and temperature adjustments. This remote is a direct replacement option‚ ensuring compatibility and restoring full functionality to your ductless air conditioning setup.

CS-S9PKR & CWA75C4149 Remote Details

The Panasonic CS-S9PKR and CWA75C4149 remote controls are designed for specific Panasonic AC air conditioner models‚ offering a reliable solution for managing your indoor climate. These remotes are readily available for purchase‚ often found on online marketplaces like eBay‚ with multiple units frequently available. They serve as direct replacements for lost or damaged originals‚ restoring full functionality to your air conditioning system.

These remotes are designed for straightforward use – no complex programming or setup is required. Simply insert batteries and begin controlling your AC unit. Compatibility extends to models like CS-RE18PKR‚ ensuring a broad range of applicability. When purchasing‚ it’s advisable to verify compatibility with your specific AC model number to guarantee a perfect fit and seamless operation. These remotes provide essential control over temperature‚ fan speed‚ and operating modes‚ enhancing your comfort and convenience.

Basic Remote Functions

Panasonic air conditioner remotes offer intuitive control over your indoor environment. The Power Button initiates operation‚ turning the unit on or off with a simple press. Temperature Control allows precise adjustments for both cooling and heating‚ typically displayed and adjusted in Celsius. Utilize the up and down arrows to select your desired comfort level.

Fan Speed Settings provide options ranging from low to high‚ or even automatic‚ to customize airflow. The Mode Selection button cycles through essential functions: Auto for intelligent climate management‚ Cool for dedicated cooling‚ Dry to dehumidify‚ and Heat for warming your space. These core functions are universally present across most Panasonic remote models‚ ensuring ease of use. Familiarizing yourself with these basics unlocks the full potential of your air conditioning system‚ providing personalized comfort throughout the year.

Power Button & Operation

The Power Button is the primary control for your Panasonic air conditioner. Located prominently on the remote‚ a single press initiates the unit’s operation‚ bringing it to life from standby mode. A subsequent press will power the unit down‚ returning it to standby. Ensure the remote is directed towards the indoor unit’s receiver for reliable communication.

Operation is straightforward: point the remote and press the Power button. The indoor unit will respond with an indicator light and fan activation (depending on previous settings). If the unit doesn’t respond‚ check the batteries (see Battery Information section). Some models may feature a momentary delay before activation. Consistent‚ direct aiming is key for optimal performance. The power button’s responsiveness is fundamental to controlling your comfort‚ making it the most frequently used function on your Panasonic remote.

Temperature Control: Cooling & Heating

Panasonic remotes offer precise temperature adjustments for both cooling and heating modes. Typically‚ dedicated “Cool” and “Heat” buttons select the desired operation. Once selected‚ the “Temp Up” (▲) and “Temp Down” (▼) buttons modify the set temperature. The display shows the target temperature‚ allowing for accurate climate control.

Cooling mode lowers the room temperature‚ while heating mode raises it. The remote allows setting temperatures within a specific range‚ often 16°C to 30°C (61°F to 86°F)‚ though this varies by model. Some remotes display temperatures in Celsius or Fahrenheit – check your model’s settings. The “Cool” mode‚ as noted in operating instructions‚ can be set between 26°C and 28°C. Adjustments are typically made in 1°C or 1°F increments‚ providing granular control over your comfort. Consistent temperature settings contribute to energy efficiency.

Fan Speed Settings

Panasonic air conditioner remotes provide multiple fan speed options to customize airflow and comfort. Common settings include “Auto‚” “Low‚” “Medium‚” and “High.” The “Auto” setting automatically adjusts fan speed based on the temperature difference between the setpoint and the room temperature‚ optimizing both comfort and energy efficiency.

Selecting “Low” provides a gentle breeze‚ ideal for quiet operation and maintaining a consistent temperature. “Medium” offers a balanced airflow‚ suitable for most situations. “High” delivers maximum cooling or heating power‚ quickly adjusting the room temperature. Some models feature additional settings like “Quiet” or “Jet” mode for specialized airflow control. The remote’s display typically indicates the currently selected fan speed. Experimenting with different settings allows you to find the perfect balance between comfort and energy savings‚ tailoring the airflow to your specific needs and preferences.

Mode Selection: Auto‚ Cool‚ Dry‚ Heat

Your Panasonic remote offers versatile operating modes for diverse climate control needs. “Auto” mode intelligently selects cooling or heating based on the room temperature‚ maintaining your desired setpoint. “Cool” mode actively lowers the room temperature‚ providing refreshing relief during warmer weather. The temperature can be adjusted within a range‚ often 26°C to 28°C as indicated in operating instructions.

“Dry” mode functions as a dehumidifier‚ reducing humidity without significantly altering the temperature – ideal for damp environments. “Heat” mode warms the room‚ providing comfortable warmth during colder seasons. Switching between modes is typically done via dedicated buttons on the remote. Understanding each mode’s function allows you to optimize your air conditioner’s performance and energy consumption‚ ensuring a comfortable and efficient indoor climate tailored to your specific requirements and the prevailing weather conditions.

Advanced Features & Settings

Panasonic remotes offer a suite of advanced features beyond basic operation. The “Timer” function allows you to schedule the air conditioner to turn on or off at specific times‚ enhancing convenience and potentially saving energy. “Sleep Mode” gradually adjusts the temperature during the night‚ providing a comfortable sleeping environment while optimizing power usage. This mode often increases the temperature slightly while cooling‚ or decreases it during heating.

“Energy Saving Mode” further optimizes efficiency by adjusting the compressor speed and fan settings. Precise “Airflow Direction Control” lets you adjust vertical and horizontal vanes to distribute air evenly throughout the room. These settings are typically controlled via dedicated buttons on the remote. Utilizing these advanced features allows for a personalized and efficient cooling or heating experience‚ maximizing comfort and minimizing energy consumption‚ ultimately contributing to lower utility bills and a more sustainable lifestyle.

Timer Function: Setting Schedules

The timer function on your Panasonic remote allows for customized scheduling of your air conditioner’s operation. Typically‚ you’ll find dedicated “Timer” or “On/Off” buttons. Setting a timer involves programming a specific time for the unit to either start cooling or heating (On timer) or to automatically shut off (Off timer). Some models offer both options‚ providing flexible control over your climate.

Programming usually requires pressing the timer button‚ then using the number pad or arrow keys to input the desired time. Confirm your selection with an “Enter” or “Set” button. Advanced models may allow for multiple timer settings per day‚ or even different schedules for weekdays and weekends. Refer to your specific remote model’s instructions for detailed steps‚ as the process can vary slightly. Utilizing the timer function maximizes comfort and energy savings by ensuring the AC operates only when needed.

Sleep Mode: Comfort & Energy Saving

Panasonic air conditioner remotes often feature a “Sleep Mode” designed to enhance comfort during nighttime use while simultaneously optimizing energy consumption. When activated‚ this mode gradually increases (in cooling) or decreases (in heating) the set temperature over several hours. This mimics the body’s natural temperature fluctuations during sleep‚ preventing overcooling or overheating.

The gradual temperature adjustment avoids discomfort and reduces energy waste. Typically‚ Sleep Mode is activated with a dedicated button on the remote. Some models allow you to customize the rate of temperature change or the duration of the sleep cycle. The goal is to maintain a comfortable sleeping environment without unnecessarily running the AC at a constant‚ energy-intensive setting. Consult your remote’s manual for specific settings and customization options related to Sleep Mode functionality.

Energy Saving Mode: Optimizing Efficiency

Panasonic air conditioners frequently include an “Energy Saving Mode”‚ a feature designed to minimize power consumption without significantly compromising cooling or heating performance. This mode intelligently adjusts the compressor speed and fan settings to operate at optimal efficiency levels. It often works by slightly increasing the set temperature in cooling mode or decreasing it in heating mode – adjustments typically imperceptible to the user.

Activating Energy Saving Mode‚ usually via a dedicated button on the remote‚ allows the unit to automatically balance comfort and energy conservation. Some models may feature an “Eco” setting that performs a similar function. This mode is particularly beneficial during periods of moderate weather when full cooling or heating capacity isn’t required. By reducing energy usage‚ you can lower your electricity bills and minimize your environmental impact. Refer to your specific remote’s manual for detailed instructions and customization options related to Energy Saving Mode.

Airflow Direction Control: Vertical & Horizontal

Panasonic remote controls offer precise airflow direction control‚ allowing you to customize how cool or warm air is distributed throughout the room. Typically‚ dedicated buttons on the remote manage both vertical and horizontal airflow. Vertical swing adjusts the louvers to move air up and down‚ while horizontal swing controls side-to-side movement.

Many models feature auto-swing functionality‚ which automatically oscillates the louvers for wider coverage. You can often set the vertical airflow direction to specific angles or positions‚ ensuring comfortable airflow without directly blowing on occupants. Some advanced remotes allow independent control of vertical and horizontal airflow‚ providing even greater customization. Properly adjusting airflow direction maximizes comfort and efficiency by delivering conditioned air where it’s needed most‚ avoiding cold or warm spots. Consult your remote’s manual for specific button layouts and available settings.

Troubleshooting Common Issues

Encountering problems with your Panasonic AC remote? Start with the basics: check the batteries! Weak or depleted batteries are the most frequent cause of remote malfunction. If the remote isn’t connecting‚ ensure there’s a clear line of sight to the air conditioner’s IR sensor – obstructions can interfere with the signal.

Display issues on the LCD screen often indicate low batteries‚ but occasionally may signal a remote hardware problem. Incorrect temperature displays might require calibration (refer to your model’s manual for instructions). If the remote still doesn’t work after a battery change‚ try resetting the air conditioner itself. For persistent issues‚ consider purchasing a compatible replacement remote – models like A75C2297 and A75C4147 are readily available. Remember to consult the full manual for detailed troubleshooting steps specific to your Panasonic AC model.

Remote Not Working: Battery Check

Is your Panasonic AC remote unresponsive? The very first step in troubleshooting is always a battery check. This is the most common reason for a non-functional remote. Ensure the batteries are inserted correctly‚ observing the proper polarity (+ and -). Even if the batteries appear to have some charge‚ they might not be providing enough power for reliable operation;

Try replacing the batteries with a fresh set of the recommended type (see the ‘Battery Information & Replacement’ section). Avoid mixing old and new batteries‚ or different battery types. Low-quality batteries can also cause intermittent issues. After replacing the batteries‚ point the remote directly at the air conditioner’s receiver and try again. If the remote still doesn’t respond‚ proceed to check for obstructions or IR sensor problems‚ as detailed in other troubleshooting sections.

Remote Not Connecting: IR Sensor Issues

If a fresh battery set doesn’t resolve the issue‚ the problem might lie with the infrared (IR) sensor. The remote communicates with the air conditioner using an invisible beam of infrared light. Obstructions blocking this signal will prevent connection. Ensure there’s a clear line of sight between the remote and the air conditioner’s IR receiver – typically located on the front panel of the indoor unit.

Check for anything blocking the signal‚ such as furniture‚ decorations‚ or even direct sunlight. Try moving closer to the air conditioner while aiming the remote. Clean both the remote’s IR emitter and the air conditioner’s IR receiver with a soft‚ dry cloth. Dust or grime can interfere with the signal. If the issue persists‚ a faulty IR sensor on either the remote or the air conditioner itself might be the cause‚ potentially requiring professional repair or replacement.

Display Problems: LCD Screen Troubleshooting

A malfunctioning LCD screen on your Panasonic remote can hinder operation‚ displaying faded characters‚ missing segments‚ or a completely blank screen. First‚ ensure the issue isn’t simply due to low batteries; replace them with fresh ones. If the display remains problematic‚ gently try pressing the buttons on the remote – sometimes‚ a stuck button can cause display errors.

Avoid exposing the remote to extreme temperatures or direct sunlight‚ as this can damage the LCD. If the screen appears damaged (cracked or leaking)‚ the remote likely needs replacement. While some minor display issues might be temporary‚ persistent problems usually indicate internal component failure. Cleaning the screen with a soft‚ dry cloth can sometimes improve visibility‚ but avoid using liquids or harsh chemicals. Consider purchasing a compatible replacement remote if troubleshooting fails.

Incorrect Temperature Display: Calibration

If your Panasonic remote shows a temperature significantly different from the actual room temperature‚ calibration might be necessary. While many Panasonic remotes don’t offer direct user calibration‚ verifying the remote’s sensor isn’t obstructed is crucial. Ensure nothing blocks the infrared signal path between the remote and the indoor unit.

Sometimes‚ the issue isn’t the remote itself but the indoor unit’s temperature sensor. Compare the remote’s reading with a reliable thermometer placed near the indoor unit. If they consistently differ‚ the indoor unit may require professional servicing. Resetting the remote by removing and reinserting the batteries can occasionally resolve minor discrepancies. Refer to the operating instructions (F568979) for specific details related to your model. If problems persist‚ consider a replacement remote or contacting Panasonic support.

Battery Information & Replacement

Maintaining proper battery function is vital for your Panasonic air conditioner remote. The recommended battery type is typically AAA or AA‚ depending on the specific remote model (A75C2297‚ A75C4147‚ CWA75C4567‚ CS-S9PKR). Avoid mixing old and new batteries‚ or different battery types. Crucially‚ do not use rechargeable (Ni-Cd) batteries‚ as they may not provide sufficient voltage and can damage the remote.

To replace the batteries‚ locate the battery compartment‚ usually on the back of the remote. Slide the compartment cover open‚ remove the old batteries‚ and insert new ones‚ ensuring correct polarity (+ and -). Replace the compartment cover securely. Weak batteries can cause erratic operation or a non-responsive remote. Regularly check battery levels‚ especially if you notice decreased range or functionality. Amazon offers replacement remotes‚ ensuring continued control of your AC unit.

Recommended Battery Type

Selecting the correct battery type is crucial for optimal performance of your Panasonic air conditioner remote (models A75C2297‚ A75C4147‚ CWA75C4567‚ and CS-S9PKR). While specific requirements can vary slightly between models‚ the most commonly recommended battery type is AAA. Some older or larger remote models may utilize AA batteries. Always verify the battery compartment markings for confirmation.

Alkaline batteries are generally preferred due to their longer lifespan and consistent voltage output compared to other types. Avoid using heavy-duty or carbon-zinc batteries‚ as they may not provide sufficient power. Importantly‚ Panasonic explicitly advises against using rechargeable (Ni-Cd) batteries. These can deliver inconsistent voltage and potentially damage the remote’s internal circuitry. Using the correct battery ensures reliable operation and prevents potential issues with remote functionality‚ as highlighted by available replacement remotes on platforms like Amazon.

Battery Replacement Procedure

Replacing the batteries in your Panasonic remote (compatible models include A75C2297‚ A75C4147‚ CWA75C4567‚ and CS-S9PKR) is a straightforward process. First‚ locate the battery compartment‚ typically on the back of the remote. You may need to slide a small cover or press a release button to open it.

Remove the old batteries‚ noting the correct polarity (+ and -) indicated inside the compartment. Insert new AAA (or AA‚ if applicable) alkaline batteries‚ ensuring they are aligned with the polarity markings. Close the battery compartment cover securely. If the remote still doesn’t function‚ double-check the battery polarity and ensure the batteries are fresh. Avoid mixing old and new batteries. Proper battery installation‚ using the recommended type‚ guarantees consistent operation of your air conditioner remote‚ as supported by readily available replacement options online.

Safety Precautions

When using your Panasonic air conditioner remote (models A75C2297‚ A75C4147‚ CWA75C4567‚ CS-S9PKR and others)‚ prioritize safety. Avoid exposing the remote to extreme temperatures or humidity‚ as this can damage internal components. Do not disassemble the remote; there are no user-serviceable parts inside.

Keep the remote away from water and other liquids to prevent short circuits. Use only the recommended battery type (typically AAA or AA alkaline) and avoid mixing old and new batteries. Do not use rechargeable (Ni-Cd) batteries‚ as they may not provide sufficient voltage or could leak. Handle the remote with care; dropping it can cause damage; Always follow these guidelines to ensure safe and reliable operation of your Panasonic remote‚ maintaining optimal control over your air conditioning system.

the lycan’s rejected mate read online free pdf download

The Lycans Rejected Mate: A Comprehensive Guide (2026)

Odessa Hywell’s captivating tale, “The Lycans Rejected Mate,” draws readers into a world of werewolves, fate, and second chances, readily available as a free PDF download.

Numerous platforms, including OceanofPDF, offer access to this popular novel, alongside similar stories like “Rejected By My Mate.” Readers can immerse themselves in Anaiah Ross’s journey.

However, caution is advised regarding PDF availability and legality, as unofficial sites pose risks. Explore the story’s initial chapters and delve into Anaiah’s compelling backstory online!

Understanding the Core Narrative

“The Lycans Rejected Mate” centers around Anaiah Ross, a wolf burdened by a tragic past – inadvertently causing a death upon her first shift. This event brands her as an outcast within her Lycan pack, fueling hatred and abuse.

The narrative explores themes of rejection, fate, and the search for acceptance, as Anaiah navigates a world where fated mates are paramount. Readers can access the story as a free PDF download from platforms like OceanofPDF, immersing themselves in her complex journey.

The plot unfolds with potential for redemption and a second chance at love, potentially with the Lycan King himself.

The Character of Anaiah Ross

Anaiah Ross is presented as a deeply flawed and ostracized protagonist in “The Lycans Rejected Mate.” Marked by a past tragedy – the accidental death following her initial wolf shift – she endures relentless hatred and abuse from her pack.

Despite this, Anaiah possesses an inner strength and a longing for acceptance. Readers discovering the story via free PDF downloads, like those found on OceanofPDF, will witness her evolution.

She embodies vulnerability and resilience, setting the stage for a potential redemption arc.

The Significance of Rejection in Lycan Society

Within the world of “The Lycans Rejected Mate,” rejection carries immense weight, particularly concerning mates. A rejected mate faces social ostracism, loss of status, and profound emotional pain, as Anaiah Ross experiences firsthand.

This societal structure, explored through readily available free PDF versions online, highlights the importance of the mate bond in Lycan culture.

Rejection isn’t merely personal; it disrupts the pack’s harmony and challenges the established order, fueling the narrative’s central conflict.

Exploring the “Rejected Mate” Trope

The “rejected mate” trope, prominently featured in “The Lycans Rejected Mate,” is a cornerstone of paranormal romance. It fuels dramatic tension, exploring themes of heartbreak, resilience, and unexpected connections, easily accessible via free PDF downloads.

This narrative device often involves a powerful alpha and a seemingly unworthy mate, creating a compelling power imbalance and a path to self-discovery.

Hywell’s novel utilizes this trope to examine societal expectations and the strength found in embracing one’s true self.

Common Themes in Lycan Romance Literature

“The Lycans Rejected Mate,” available as a free PDF download, embodies prevalent themes within the lycan romance genre. These include fated mates, power dynamics, and the struggle for acceptance, mirroring trends seen in works influenced by Twilight.

Redemption arcs, often featuring abused omegas finding strength, are also central. The narrative frequently explores the transformative power of love and the complexities of shifting and wolf forms.

Hywell’s novel skillfully weaves these elements into a captivating story.

The Appeal of Omega/Alpha Dynamics

The captivating dynamic between omegas and alphas fuels much of the appeal in “The Lycans Rejected Mate,” easily found as a free PDF download. This pairing explores themes of power imbalance, protection, and unexpected connection.

Anaiah, as an omega, embodies vulnerability, while the Lycan King represents strength. This contrast creates tension and intrigue, resonating with readers drawn to stories of overcoming adversity and finding love.

The narrative’s focus on this dynamic is a key draw.

Where to Find “The Lycans Rejected Mate” Online

Readers seeking “The Lycans Rejected Mate” can discover this enthralling story through various online avenues, often available as a free PDF download. Platforms like OceanofPDF are popular starting points for accessing Odessa Hywell’s work.

Additionally, numerous websites host the novel, though caution regarding copyright and site security is advised. Exploring fanfiction archives may also yield related content and discussions.

Enjoy Anaiah’s journey online!

OceanofPDF and Similar Platforms

OceanofPDF emerges as a prominent source for accessing “The Lycans Rejected Mate” as a free PDF download, alongside other novels by Odessa Hywell. Comparable platforms also offer the story, catering to a wide readership eager to explore the lycan world.

However, users should exercise caution, verifying the legitimacy of download sources to avoid potential security risks and copyright infringements. Always prioritize safe browsing practices.

Enjoy the story responsibly!

PDF Availability and Legality Concerns

While “The Lycans Rejected Mate” is widely available as a free PDF download across numerous online platforms, including those mirroring OceanofPDF, significant legality concerns arise. Downloading from unofficial sources often violates copyright laws, potentially exposing users to legal repercussions.

Furthermore, such sites frequently harbor malware and viruses, compromising device security. Supporting authors through legitimate channels—purchasing ebooks or accessing authorized online reading platforms—is crucial.

Exercise caution and prioritize legal access!

Analyzing the Plot – Initial Chapters

The opening chapters of “The Lycans Rejected Mate” immediately establish Anaiah Ross as an outcast, burdened by a tragic past—inadvertently causing a death upon her first shift. This event brands her as a murderer within the Lycan pack, fueling widespread hatred and isolation.

Odessa Hywell skillfully introduces a complex world, hinting at power dynamics and foreshadowing future conflicts. Readers, accessing the story via free PDF options, are quickly drawn into Anaiah’s desperate situation.

The narrative’s pace is brisk, promising a compelling journey.

Anaiah’s Backstory and the Murder Incident

Anaiah Ross’s life irrevocably changed during her initial wolf shift, a moment meant for joyous transformation instead resulting in tragedy. The accidental death she caused instantly marked her as an outcast, a pariah within the Lycan pack, and a “murderer” in their eyes.

This pivotal incident, readily explored in free PDF versions available online, forms the core of her backstory, driving her isolation and shaping her character arc. Odessa Hywell masterfully portrays the weight of this trauma.

The event’s impact resonates throughout the narrative.

First Impressions of the Lycan Pack

Initial encounters with the Lycan pack are far from welcoming for Anaiah Ross. She’s immediately branded with hatred and disdain, a consequence of the tragic incident that defines her past. Readers discovering the story via free PDF downloads quickly grasp the pack’s prejudice.

Odessa Hywell vividly depicts a society steeped in tradition and quick to judge, creating a hostile environment for Anaiah. This initial animosity fuels much of the early conflict.

The pack’s coldness is palpable.

Key Characters Beyond Anaiah

Beyond Anaiah Ross, “The Lycans Rejected Mate” boasts a compelling cast, readily explored through free PDF downloads. The Lycan King emerges as a pivotal figure, initially distant but holding immense power and potential. His role is central to Anaiah’s fate.

Potential mate candidates and rivals add layers of complexity, fueling tension and intrigue. Odessa Hywell masterfully crafts these characters, each with their own motivations and secrets.

Their interactions shape Anaiah’s journey.

The Lycan King and His Role

The Lycan King is a dominant force in “The Lycans Rejected Mate,” often found in free PDF versions online. Initially presented as aloof and powerful, he represents a potential second chance for Anaiah, an Omega facing abuse and rejection.

His position demands responsibility, yet he’s drawn to Anaiah’s unique spirit. Odessa Hywell portrays him as complex, burdened by duty but intrigued by Anaiah’s resilience.

He’s key to her redemption.

Potential Mate Candidates and Rivalries

“The Lycans Rejected Mate,” accessible as a free PDF download, features a dynamic of potential mates beyond the King. Initial chapters hint at rivalries stemming from pack hierarchy and Anaiah’s controversial past as a perceived murderer.

These candidates, often Alpha wolves, create tension and complicate Anaiah’s journey. Odessa Hywell skillfully builds conflict around power dynamics and the societal implications of an Omega’s potential pairing.

Expect intense competition and shifting alliances.

The Role of Fate and Destiny

“The Lycans Rejected Mate,” readily available as a free PDF download, heavily explores the concepts of fate and destiny within the Lycan world. The narrative questions whether Anaiah’s path is predetermined or if she possesses agency.

Odessa Hywell contrasts “fated mates” – destined connections – with “chosen mates,” highlighting the struggle between preordained bonds and individual desires. This tension drives the plot and Anaiah’s internal conflict.

Readers ponder if her fate is truly sealed.

Fated Mates vs. Chosen Mates

Within Odessa Hywell’s “The Lycans Rejected Mate,” accessible as a free PDF download, the distinction between fated and chosen mates is central to the narrative’s conflict. Fated mates represent an undeniable, destined connection, while chosen mates involve conscious selection.

Anaiah’s rejection challenges the notion of an immutable fate, prompting exploration of whether true love requires destiny or free will. The story examines the power dynamics inherent in both types of pairings.

This dichotomy fuels the romantic tension.

The Impact of Shifting and Wolf Forms

In Odessa Hywell’s “The Lycans Rejected Mate,” readily available as a free PDF download, the act of shifting and the significance of wolf forms are profoundly impactful. Anaiah’s initial shift is a pivotal, tragic event, marking her as an outcast.

The wolf form embodies primal instincts and true nature, revealing hidden aspects of characters. Shifting isn’t merely physical; it’s emotionally and socially defining within Lycan society.

This transformation shapes the narrative’s core conflicts.

Common Tropes Found in Similar Stories

“The Lycans Rejected Mate,” accessible as a free PDF download, shares common tropes with the broader werewolf/Lycan romance genre. Odessa Hywell’s work frequently features abuse and redemption arcs, alongside the allure of second-chance romance.

Omega/Alpha dynamics are prevalent, exploring power imbalances and fated connections. Rejected mate scenarios, like Anaiah’s, are central, driving plot and character development.

These tropes resonate with readers seeking intense emotional journeys and dramatic narratives.

Abuse and Redemption Arcs

“The Lycans Rejected Mate,” often found as a free PDF download, prominently features a compelling abuse and redemption arc centered on Anaiah Ross. Initially hated and mistreated within the Lycan pack, her journey explores overcoming past trauma.

This narrative resonates with readers drawn to stories of resilience and finding strength amidst adversity. The potential for a second chance with the Lycan King adds further complexity.

Odessa Hywell skillfully crafts this emotional core, offering a path toward healing and self-discovery.

Second Chance Romance Elements

“The Lycans Rejected Mate,” accessible as a free PDF download, heavily utilizes second chance romance tropes, captivating readers with its emotional depth. Anaiah’s story intertwines with the Lycan King, presenting an unexpected connection despite her past and Omega status.

This dynamic offers a compelling exploration of forgiveness, acceptance, and rebuilding trust. The narrative promises a powerful romance fueled by shared vulnerability and a desire for redemption.

Odessa Hywell masterfully builds tension and anticipation around their evolving relationship.

Author Odessa Hywell and Her Works

Odessa Hywell has garnered significant attention within the werewolf/lycan fiction genre, notably with “The Lycans Rejected Mate,” frequently sought as a free PDF download. Her writing style consistently features strong female leads and complex paranormal relationships.

Beyond this popular novel, Hywell’s catalog includes titles like “For Never Mine” and “Four or Dead 6,” showcasing recurring themes of fate, power dynamics, and emotional resilience.

Her works are widely available online.

Other Novels by Odessa Hywell

Odessa Hywell’s literary portfolio extends beyond “The Lycans Rejected Mate,” a title often searched for as a free PDF download. Notable works include “For Never Mine,” exploring similar themes of fated connections and societal pressures within the lycan world.

“Four or Dead 6” demonstrates Hywell’s versatility, while other titles like “Bestfriend 21 25” and “The Cursed Lycans Mate” further solidify her presence in paranormal romance.

Readers seeking more can find her books online.

Hywell’s Style and Recurring Themes

Odessa Hywell consistently delivers emotionally charged narratives, often sought after as a free PDF download, like “The Lycans Rejected Mate.” Her style emphasizes complex character development and intense romantic entanglements within the lycan community.

Recurring themes include societal rejection, the power of second chances, and the exploration of Omega/Alpha dynamics. Hywell masterfully blends suspense with passionate romance, captivating readers with each novel.

Her works frequently feature strong female leads overcoming adversity.

The Popularity of Werewolf/Lycan Fiction

The enduring appeal of werewolf and lycan fiction, exemplified by titles like “The Lycans Rejected Mate” – often searched for as a free PDF download – stems from its exploration of primal instincts and forbidden romance.

This genre’s rise parallels the success of works like Twilight, fueling a surge in online fanfiction and serialized novels. Readers are drawn to themes of transformation, power, and fated connections.

Platforms offering access contribute to this widespread popularity.

The Rise of Online Fanfiction and Serialized Novels

The accessibility of platforms offering “The Lycans Rejected Mate” as a free PDF download has mirrored the broader trend of online serialized fiction and fan-created content.

Readers actively seek stories like this online, fostering communities and driving demand for similar narratives. This digital landscape allows authors, like Odessa Hywell, to gain visibility.

The ease of access fuels engagement and expands the reach of werewolf/lycan romance beyond traditional publishing channels, creating a vibrant ecosystem.

The Influence of Twilight and Other Key Works

“The Lycans Rejected Mate’s” popularity, and the demand for a free PDF download, exists within a lineage of influential works in the paranormal romance genre, notably Twilight.

These predecessors established tropes – fated mates, alpha/omega dynamics – that Hywell’s novel embraces and expands upon, attracting a pre-existing fanbase.

The success of these stories paved the way for online platforms to flourish, offering accessible content like this novel, further solidifying the genre’s appeal.

Legal Considerations for Downloading PDFs

Seeking a free PDF download of “The Lycans Rejected Mate” necessitates awareness of copyright laws and fair use principles. Unauthorized distribution infringes upon author Odessa Hywell’s rights.

Downloading from unofficial sites carries risks – malware, viruses – alongside potential legal repercussions for copyright violation. Supporting authors through legitimate channels is crucial.

Consider legal alternatives like purchasing the ebook or accessing it through subscription services to enjoy the story ethically and safely.

Copyright and Fair Use

“The Lycans Rejected Mate,” authored by Odessa Hywell, is protected by copyright, granting her exclusive rights to reproduction and distribution. Downloading a free PDF without permission violates these rights.

Fair use allows limited use for criticism, commentary, or education, but unauthorized downloads for personal enjoyment are generally prohibited. Respecting intellectual property is paramount.

Opting for legal avenues – purchasing the ebook or utilizing legitimate online platforms – ensures compliance and supports the author’s creative endeavors.

Risks Associated with Unofficial Download Sites

Seeking a free PDF download of “The Lycans Rejected Mate” from unofficial sites exposes users to significant risks. These platforms often harbor malware, viruses, and potentially harmful software, compromising device security.

Furthermore, such sites frequently violate copyright laws, leading to legal repercussions for users. The quality of the PDF may be poor, containing errors or incomplete content.

Prioritize safety by utilizing legitimate sources for reading Odessa Hywell’s work, safeguarding your digital wellbeing and respecting intellectual property rights.

Analyzing Reader Reviews and Fan Theories

Reader responses to “The Lycans Rejected Mate” are overwhelmingly positive, praising Odessa Hywell’s compelling characters and intricate plot. Common criticisms center on pacing in initial chapters, but the story gains momentum quickly.

Fan theories abound regarding Anaiah’s true lineage and the Lycan King’s motivations, fueled by online discussions and free PDF access enabling widespread readership.

Many speculate about potential sequels, exploring secondary characters’ stories, demonstrating the novel’s enduring appeal and sparking vibrant community engagement.

Common Criticisms and Praises

“The Lycans Rejected Mate” garners praise for its captivating premise, strong female lead – Anaiah Ross – and the exploration of complex themes like rejection and redemption. Readers appreciate the readily available free PDF downloads, fostering a wider audience.

However, some criticisms involve initial pacing, finding the early chapters slower. Others note familiar tropes within the werewolf romance genre, though many find them satisfyingly executed;

Overall, the novel’s emotional depth and engaging storyline outweigh the drawbacks, solidifying its popularity amongst fans seeking a thrilling read.

Popular Fan Theories About the Story’s Direction

Driven by readily available access via free PDF downloads and online reading platforms, “The Lycans Rejected Mate” fuels vibrant fan theories. A prominent one suggests the Lycan King’s initial rejection of Anaiah is a calculated move, masking deeper intentions.

Others speculate about Anaiah’s unique abilities, believing her past trauma unlocks hidden powers crucial to the pack’s future; Many anticipate a dramatic shift in power dynamics, challenging established hierarchies.

These theories demonstrate the story’s engaging nature and dedicated fanbase.

The Phenomenological Aspects of Lycan Romance

“The Lycans Rejected Mate,” easily accessible through free PDF downloads and online platforms, explores the subjective experience of love, rejection, and identity within a fantastical framework. The narrative delves into Anaiah’s emotional landscape, focusing on her perception of self and others.

Readers connect with her feelings of isolation and the search for acceptance, highlighting the story’s exploration of human (and wolf) consciousness. The text transcends simple plot, examining the very nature of being.

It’s a study in assumed realities.

Exploring the Emotional Landscape of the Characters

“The Lycans Rejected Mate,” obtainable via free PDF download and online reading, masterfully portrays complex emotional states. Anaiah Ross’s journey, from a hated outcast to a potential key player, is driven by intense feelings of shame, fear, and a yearning for belonging.

The narrative explores the pack dynamics, revealing the emotional burdens of power and the vulnerability hidden beneath alpha exteriors. Readers witness a spectrum of emotions, fostering deep empathy.

It’s a raw, visceral experience.

The Role of Language and Assumptions in Storytelling

“The Lycans Rejected Mate,” accessible through free PDF downloads and online platforms, utilizes language to shape perceptions and challenge assumptions. Initial descriptions of Anaiah Ross as a “murderer” immediately establish bias, prompting readers to question the narrative’s objectivity.

Hywell employs evocative language to convey the characters’ inner turmoil and the societal prejudices within the lycan world.

The story subtly deconstructs preconceived notions about fate and destiny.

Future Developments and Potential Story Arcs

Considering the popularity of “The Lycans Rejected Mate,” readily available as a free PDF download, sequels or spin-offs seem highly probable. Given Anaiah’s complex backstory and the introduction of potential mate candidates, further exploration of her relationships is likely.

The narrative’s focus on redemption and second chances suggests ongoing character development.

Fans speculate about the Lycan King’s role and the unfolding of fated mate dynamics, anticipating intricate plot twists and emotional resolutions within the series.

Predictions Based on Current Plot Points

Based on the readily available narrative, including the free PDF download of “The Lycans Rejected Mate,” Anaiah’s journey towards acceptance and power will likely intensify. The Lycan King’s interest hints at a complex relationship, potentially challenging pack dynamics.

Expect confrontations with those who wronged her, alongside revelations about the murder incident.

Given the trope of Omega/Alpha dynamics, Anaiah’s rise and the exploration of fated mates will likely dominate future plot developments, captivating readers online.

The Possibility of Sequels or Spin-offs

Considering the immense popularity of “The Lycans Rejected Mate,” accessible through a free PDF download and platforms like OceanofPDF, sequels or spin-offs seem highly probable. Odessa Hywell’s established werewolf universe offers ample opportunities to explore supporting characters’ stories.

Further adventures detailing the Lycan King’s past or Anaiah’s evolving powers could captivate the existing fanbase.

Given the online engagement, Hywell might leverage fan theories to shape future narratives, expanding this compelling world.

liftmaster 8165w manual

LiftMaster 8165W Manual: Comprehensive Article Plan

This detailed guide explores the LiftMaster 8165W garage door opener, covering installation, programming, troubleshooting, and maintenance, referencing available 44-page PDF manuals.

The LiftMaster 8165W is a popular garage door opener known for its reliable performance and advanced features. This model, part of the LiftMaster family, provides secure and convenient access to your garage. Numerous online resources, including readily available PDF manuals (often 44 pages in length), detail its operation and maintenance.

Understanding your 8165W system is crucial for optimal functionality and longevity. These manuals offer comprehensive guidance, covering everything from initial setup to troubleshooting common issues. The 8165W is designed for residential use, offering a balance of power and safety. It’s often compared to the 8160W model, with slight variations in features and specifications. Accessing the official PDF manual is highly recommended for all users, ensuring they have the most up-to-date information regarding their specific unit. Proper use and maintenance, as outlined in the manual, will maximize the lifespan of your garage door opener.

Understanding the 8165W System Components

The LiftMaster 8165W system comprises several key components working in harmony to provide seamless garage door operation. These include the motor unit itself, responsible for lifting and lowering the door, and the rail system, which guides the door’s movement. Remote controls, detailed in the 44-page PDF manuals, allow for convenient operation from a distance.

A crucial element is the control panel, offering local control and programming options. The system also incorporates safety sensors to prevent the door from closing on obstructions. Understanding each component’s function, as described in the user manual, is vital for effective troubleshooting and maintenance. Compatibility with various LiftMaster accessories further enhances the system’s capabilities. Familiarizing yourself with these parts, and their interaction, ensures safe and efficient operation of your 8165W garage door opener, extending its lifespan and maximizing its utility.

Safety Precautions and Warnings

Prioritizing safety is paramount when installing and operating the LiftMaster 8165W. Always disconnect power before performing any maintenance or repairs, referencing the 44-page PDF manual for detailed instructions. Never allow children to operate the garage door opener, and keep remote controls out of their reach. Regularly test the safety sensors to ensure they prevent the door from closing on obstructions – a critical safety feature.

Avoid standing directly in the path of a moving door. Inspect the system regularly for any signs of damage or wear, addressing issues promptly. Improper installation or modification can compromise safety features. The manual emphasizes the importance of professional installation if you are not comfortable with electrical work or mechanical assembly. Adhering to these precautions minimizes the risk of injury and ensures the long-term safe operation of your LiftMaster 8165W system.

Initial Setup and Installation

Proper installation of the LiftMaster 8165W is crucial for optimal performance and safety. Begin by carefully unpacking all components and verifying against the parts list in the 44-page PDF manual. Ensure the garage door is balanced before proceeding; an unbalanced door can cause significant damage. The installation process involves securely mounting the motor unit to the ceiling, followed by attaching the rail system to the door.

Precise alignment is essential for smooth operation. The manual provides detailed diagrams and step-by-step instructions for both mounting and rail attachment. Double-check all connections and hardware to ensure they are tight and secure. Before powering on the system, confirm that all safety sensors are correctly positioned and functioning. Professional installation is recommended if you lack experience with garage door opener setups.

Mounting the Motor Unit

Securely mounting the LiftMaster 8165W motor unit is the foundational step of installation. Refer to the detailed diagrams within the 44-page PDF manual for precise bracket placement and hardware specifications. Locate suitable ceiling joists capable of supporting the unit’s weight – reinforcement may be necessary. Utilize the provided mounting brackets, ensuring they are firmly attached to the joists using appropriate lag screws.

Carefully position the motor unit onto the brackets, verifying its alignment with the garage door’s travel path. Double-check that all bolts are tightened to the manufacturer’s specified torque. A stable and secure mount minimizes vibration and noise during operation. Prioritize safety by using a sturdy ladder and wearing appropriate safety glasses during this process. Incorrect mounting can lead to operational issues and potential hazards.

Attaching the Rail System

Properly attaching the rail system to the motor unit and garage door is crucial for smooth and reliable operation of the LiftMaster 8165W. Consult the 44-page PDF manual for detailed illustrations and step-by-step instructions. Begin by connecting the rail sections, ensuring they are securely locked together according to the manual’s guidance.

Next, carefully align the rail with the motor unit and fasten it using the provided hardware. Verify the rail is level and properly positioned to facilitate the door’s travel. Attach the rail to the header bracket above the garage door, again ensuring secure fastening. Double-check all connections for tightness and stability. A misaligned or loosely attached rail can cause binding, noise, and potentially damage the opener.

Programming the Remote Controls

Programming the remote controls for your LiftMaster 8165W is a straightforward process, detailed within the 44-page PDF manual. Typically, this involves entering a “learning mode” on the motor unit. Locate the “Learn” or “Smart” button on the opener itself – its exact location is illustrated in the manual.

Press and release the “Learn” button, then within the specified timeframe (usually 30 seconds), press and hold the button on the remote control you wish to program. A light indicator on the motor unit will confirm successful programming. Repeat this process for each additional remote control. If programming fails, consult the troubleshooting section of the manual. Ensure the remote has a fresh battery for optimal performance.

Setting Travel Limits

Accurate travel limit adjustments are crucial for safe and efficient operation of your LiftMaster 8165W. The 44-page manual provides detailed instructions for both up and down travel limit settings. These adjustments prevent the door from over-traveling, potentially causing damage to the door, opener, or surrounding structures.

Typically, adjustments are made using the up and down limit buttons located on the motor unit. Small increments are recommended during the adjustment process. Test the limits after each adjustment to ensure the door stops at the desired positions. Incorrectly set limits can lead to operational issues, so careful attention to the manual’s guidance is essential. Refer to the manual’s diagrams for precise button locations.

Adjusting Up Travel Limit

To adjust the up travel limit on your LiftMaster 8165W, consult the 44-page manual for specific button locations on the motor unit. Press and hold the “Up” limit adjustment button. Observe the door’s movement during this process. The door will travel upwards incrementally with each press. Release the button when the door reaches the desired fully open position.

It’s vital to make small adjustments and test after each increment to avoid overshooting the limit. Ensure the door fully opens without straining the motor or hitting any obstructions. If the door doesn’t reach the desired height, repeat the process. The manual emphasizes safety; never adjust limits while the door is in motion. Accurate adjustment prevents potential damage and ensures smooth operation.

Adjusting Down Travel Limit

Adjusting the down travel limit on the LiftMaster 8165W requires referencing the 44-page manual for precise button identification on the motor unit. Press and hold the “Down” limit adjustment button. The garage door will descend incrementally with each press of the button. Release the button when the door reaches a fully closed, secure position.

Similar to the up travel adjustment, make small, incremental changes and test the door’s operation after each adjustment. This prevents overshooting and potential damage. Ensure the door closes completely and securely on the floor without reversing prematurely. The manual stresses safety – never adjust limits while the door is moving. Proper adjustment guarantees a secure closure and optimal performance of your garage door opener.

Troubleshooting Common Issues

Addressing common problems with your LiftMaster 8165W often begins with consulting the 44-page manual. If the door doesn’t open or close, check the power supply, safety sensors, and ensure the lock feature isn’t engaged. A non-functioning remote control typically indicates a dead battery or a need for reprogramming, detailed within the manual’s learning mode section.

Error lights, as decoded in the manual, provide valuable diagnostic clues. Verify the antenna is securely connected. If issues persist, resetting the motor unit – a process outlined in the manual – can resolve software glitches. Always prioritize safety sensor alignment; misaligned sensors are a frequent cause of operational failures. Refer to the manual’s diagrams for correct positioning and troubleshooting steps.

Door Doesn’t Open/Close

When your LiftMaster 8165W door fails to operate, begin by verifying the power supply to the unit. Check the circuit breaker and ensure the opener is plugged in securely. Next, inspect the safety sensors aligned near the door opening; misalignment is a common culprit, preventing operation as a safety feature. Consult the 44-page manual for proper sensor alignment procedures.

Ensure the door isn’t manually locked. The lock feature disables the opener. Also, examine the travel limits – incorrectly set limits can prevent full door movement. Refer to the manual’s section on setting travel limits for adjustment instructions. If these steps don’t resolve the issue, a potential problem with the motor itself may require professional attention, but always consult the manual first.

Remote Control Not Working

If your LiftMaster 8165W remote isn’t functioning, the first step is to replace the battery. A weak battery is the most frequent cause of remote failure. Ensure the battery is installed correctly, observing the proper polarity. If a new battery doesn’t solve the problem, the remote may need to be reprogrammed to the motor unit. The 44-page manual details the learning mode procedure for adding or replacing remotes.

Check for obstructions between the remote and the garage door opener. Excessive distance or interference can hinder the signal. Also, verify that the antenna on the motor unit is securely connected and undamaged. If multiple remotes are used, test each one to determine if the issue is isolated to a single unit. Refer to the manual for troubleshooting specific remote model issues.

Maintenance and Lubrication

Regular maintenance is crucial for the longevity of your LiftMaster 8165W garage door opener. Periodically inspect the entire system for any signs of wear and tear, including the rail, chain or belt, and rollers. Lubricate the moving parts – the chain or belt, rollers, and hinges – with a silicone-based lubricant. Avoid using grease, as it attracts dirt and can cause issues.

The 44-page manual provides specific guidance on lubrication points. Tighten any loose bolts or screws to prevent vibrations and ensure smooth operation. Inspect the door itself for balance; a properly balanced door reduces strain on the opener. Schedule a professional inspection annually to identify and address potential problems before they escalate. Proper care extends the life of your opener and ensures safe operation.

Understanding the Control Panel

The LiftMaster 8165W control panel serves as the central hub for operating and managing your garage door. It typically features buttons for opening and closing the door, as well as indicator lights displaying the system’s status. The panel also houses the “Learn” button, essential for programming remote controls and keyless entry systems. Familiarize yourself with the function of each button and light.

The 44-page manual details the control panel’s layout and functionality. Pay attention to the error lights, as they signal potential issues with the opener. Understanding these signals allows for quicker troubleshooting. Some panels offer adjustable settings for features like safety sensors and vacation mode. Proper understanding of the control panel ensures efficient and safe operation of your LiftMaster 8165W system.

Using the Learning Mode

The Learning Mode on the LiftMaster 8165W is crucial for synchronizing new remote controls, keyless entry pads, and other compatible accessories with your garage door opener. Initiated by pressing the “Learn” button on the motor unit, this mode puts the system into a receptive state. The manual details the precise location of this button and the subsequent steps.

Typically, after activating Learn mode, you’ll need to enter a code or press a button on the device you’re adding within a specified timeframe – usually 30 seconds. The opener’s indicator light will confirm successful programming. Refer to the 44-page PDF manual for specific instructions related to different accessory types. Correctly utilizing Learning Mode ensures secure and convenient access to your garage, preventing unauthorized operation.

Replacing the Battery in Remote Controls

Maintaining functional remote controls is vital for convenient garage door operation. The LiftMaster 8165W utilizes standard batteries, typically a CR2032, though the specific type may vary depending on the remote model. The 44-page PDF manual provides detailed diagrams illustrating how to access the battery compartment, usually located on the back or side of the remote.

Carefully pry open the compartment, observing the polarity markings (+ and -) before removing the old battery. Insert the new battery with the correct orientation, ensuring a secure fit. Reassemble the remote, and test its functionality. A weak or depleted battery can cause intermittent operation or complete failure. Regularly checking and replacing the battery, as outlined in the manual, guarantees reliable access to your garage.

Resetting the Motor Unit

Occasionally, the LiftMaster 8165W motor unit may require a reset to resolve operational issues or restore factory settings. This process clears the existing programming, including remote controls and travel limits, necessitating reprogramming afterward. The 44-page PDF manual details the specific reset procedure, which typically involves disconnecting power to the unit for a designated period – usually 30 seconds to a minute.

After restoring power, the motor unit will enter learning mode, indicated by an illuminated LED. Refer to the manual for the exact LED behavior. Resetting should only be performed when troubleshooting persistent problems or preparing the unit for a new user. Remember that all previously programmed settings will be lost, requiring you to re-pair remotes and readjust travel limits as described within the comprehensive user guide.

Wiring Diagram Overview

The LiftMaster 8165W’s wiring diagram, detailed within the 44-page PDF manual, illustrates the connections between the motor unit, safety sensors, wall control, and optional accessories. Understanding this diagram is crucial for installation, troubleshooting, and replacing components. Key elements include the power supply connections (typically 120V AC), wiring for the photo eyes (safety sensors preventing door closure on obstructions), and the connections for the wired wall button.

The diagram also showcases wiring for external accessories like wireless keypads or smart home integration modules. Caution: Incorrect wiring can damage the unit or create a safety hazard. Always disconnect power before working with the wiring. If you are uncomfortable with electrical work, consult a qualified technician. The manual provides clear labeling and color-coding to aid in accurate connections, ensuring proper functionality and safety.

Compatibility with LiftMaster Accessories

The LiftMaster 8165W garage door opener boasts broad compatibility with a range of LiftMaster accessories, enhancing functionality and security. These include wireless keypads for keyless entry, offering convenient access without a remote. MyQ smart home connectivity allows control and monitoring via smartphone apps, providing real-time alerts and remote operation. Additional compatible accessories encompass vehicle-to-home systems, enabling automatic door operation upon vehicle arrival.

Refer to the official LiftMaster documentation (including the 44-page manual) for a complete and up-to-date list of compatible accessories. Ensure accessory compatibility before purchase to avoid integration issues. Some accessories may require additional programming or a specific interface module. Properly installed accessories significantly improve convenience, security, and the overall user experience with your 8165W system.

Decoding Error Lights

The LiftMaster 8165W utilizes a series of LED indicator lights on the motor unit to communicate system status and potential errors. Understanding these lights is crucial for effective troubleshooting. A rapidly flashing light often indicates a safety sensor misalignment or obstruction, preventing door operation. A steady light may signal normal operation, while intermittent flashes can denote programming mode or a specific fault.

Consult the official 8165W manual (44 pages) for a detailed breakdown of each light pattern and its corresponding meaning. Common errors include travel limit issues, motor overload protection activation, or remote control signal interference. Referencing the manual’s error code table will pinpoint the problem quickly. Ignoring error lights can lead to further damage or compromise garage door security, so prompt attention is vital.

Technical Specifications of the 8165W

The LiftMaster 8165W is a ½ horsepower DC motor garage door opener designed for sectional doors. It operates on a 120V AC power supply and features a robust lifting capacity suitable for standard residential garage doors. The unit incorporates MyQ technology, enabling smartphone control and monitoring via the MyQ app. Its rail length is customizable to fit various garage ceiling heights and door sizes.

Key specifications include a maximum door height of 8 feet and a lifting force of approximately 350 lbs. The opener boasts a soft start/stop operation for smooth and quiet performance. Detailed technical data, including dimensions, weight, and electrical characteristics, are comprehensively outlined in the official 44-page user manual. Understanding these specifications is essential for proper installation and compatibility assessment.

Comparing the 8165W to Other LiftMaster Models (8160W)

The LiftMaster 8165W and 8160W are both reliable garage door openers, but key differences exist. The 8165W generally features enhanced connectivity options and potentially a slightly improved motor design for quieter operation. Both models utilize DC motors and MyQ technology for smartphone control, however, the 8165W may offer more advanced MyQ features or integration capabilities.

Documentation suggests both models share similar lifting capacities and horsepower (½ HP). The 8160W is often positioned as a more budget-friendly option, while the 8165W targets users prioritizing advanced features and potentially longer-term reliability. Detailed comparisons of specifications, including warranty details and included accessories, can be found within their respective 44-page and 53-page PDF manuals. Choosing between them depends on individual needs and budget.

Finding and Downloading the Official PDF Manual

Accessing the official LiftMaster 8165W PDF manual is crucial for safe installation, programming, and maintenance. Several online resources host this 44-page document. A direct search on the LiftMaster website (www.liftmaster.com) under the support or manual section is the most reliable method. Alternatively, numerous third-party websites archive PDF manuals, but verifying the source’s legitimacy is essential to avoid outdated or corrupted files.

Be cautious of unofficial sources. Look for links directly referencing LiftMaster or authorized distributors. The manual covers all aspects of the 8165W, from initial setup and troubleshooting to safety precautions and detailed wiring diagrams. Downloading the PDF allows offline access for convenient reference during installation or repairs, ensuring you have the most accurate and up-to-date information available.

Warranty Information and Support

LiftMaster provides a warranty on the 8165W garage door opener, protecting against manufacturing defects in materials and workmanship; The specific warranty duration varies depending on the component – typically longer for the motor unit and shorter for parts like the remote controls. Review the official PDF manual for precise warranty details, including what is covered and excluded.

For support, LiftMaster offers multiple channels. Their website (www.liftmaster.com) features a comprehensive FAQ section, troubleshooting guides, and downloadable resources. You can also contact LiftMaster customer service directly via phone or email. Additionally, a network of authorized LiftMaster dealers provides professional installation, repair, and support services. Keep your proof of purchase readily available when contacting support or filing a warranty claim to expedite the process.

mercury outboard troubleshooting guide

Navigating Mercury outboard issues? Contact support via email at mercuryfsvps.ru, or call 7 (4922) 52-99-29. Software downloads and router settings are also available online.

Mercury outboard engines are renowned for their power, reliability, and innovative technology, powering boats across diverse marine environments. However, like any complex machinery, they can experience issues requiring troubleshooting. Understanding the fundamental principles of these engines is crucial for effective diagnosis and repair.

From classic two-stroke models to modern four-stroke and OptiMax direct-injection systems, Mercury offers a wide range of outboards. Each design presents unique characteristics and potential problem areas. Accessing technical support via mercuryfsvps.ru or contacting them at 7 (4922) 52-99-29 can be invaluable when facing complex challenges. Familiarity with resources like software downloads (CCDC Mercury crystal software) and network configurations (Mercury router settings – melogin.cn or 192.168.1.1) demonstrates the broader technological ecosystem surrounding the brand.

This guide aims to provide a comprehensive overview of common Mercury outboard problems and their solutions, empowering boat owners and technicians alike.

Understanding Basic Outboard Systems

A Mercury outboard’s functionality relies on the seamless interaction of several key systems. The fuel system delivers a precise air-fuel mixture, while the ignition system provides the spark needed for combustion. The cooling system prevents overheating, and the electrical system powers all components.

Troubleshooting effectively requires understanding how these systems interconnect. For instance, a fuel pump issue (addressed via mercuryfsvps.ru support) can mimic ignition problems. Similarly, electrical faults can disrupt fuel delivery. Familiarity with network settings (like those for a Mercury router at melogin.cn or 192.168.1.1) highlights the increasing integration of digital controls.

Software like CCDC Mercury aids in visualizing complex structures, mirroring the need to understand the internal workings of the engine. Recognizing the role of each component – from spark plugs to distributors – is fundamental to pinpointing the root cause of any malfunction.

Common Mercury Outboard Problems

Frequent issues include starting difficulties, power loss, rough idling, and overheating. Contact mercuryfsvps.ru for technical assistance, and check router settings if applicable.

Starting Issues

Encountering starting problems with your Mercury outboard? These can range from a complete lack of response – no crank, no start – to the engine cranking robustly but failing to ignite. Initial troubleshooting involves verifying the battery’s charge and connections, ensuring proper fuel delivery, and checking the kill switch. Remember to consult resources like mercuryfsvps.ru for support.

If the engine doesn’t crank, investigate the starter solenoid, battery cables, and ignition switch. A cranking engine that won’t start suggests fuel or spark issues. Inspect spark plugs for fouling or damage, and confirm fuel is reaching the carburetor or fuel injectors. Don’t overlook the importance of a functioning fuel pump. For router assistance, explore melogin.cn or 192.168.1.1.

No Crank, No Start

Facing a “no crank, no start” situation with your Mercury outboard? This indicates a problem preventing the engine from even attempting to turn over. Begin by meticulously checking the battery – ensure it’s fully charged and connections are clean and tight. Inspect the battery cables for corrosion or damage, and verify the main fuse hasn’t blown. A faulty starter solenoid is a common culprit; test its functionality.

Further investigation should include the ignition switch and wiring harness. Use a multimeter to confirm voltage is reaching the solenoid when the key is turned. Remember resources like mercuryfsvps.ru can offer support. If issues persist, consider the neutral safety switch. For network settings, explore options like 192.168.1.1 or melogin.cn.

Cranking But Not Starting

If your Mercury outboard cranks strongly but fails to start, the issue lies beyond the electrical system initiating engine rotation. Focus on fuel and spark. First, verify fuel delivery: is the fuel tank full and the fuel line unobstructed? Inspect the fuel filter for clogging. Next, check for spark at the spark plugs. A weak or absent spark indicates a problem with the ignition coil or distributor (on older models).

Consider a flooded engine – try drying the cylinders by cranking with the throttle wide open. Remember support is available at mercuryfsvps.ru. Router settings, if relevant to onboard systems, can be accessed via 192.168.1.1 or melogin.cn; Don’t overlook the possibility of a faulty safety lanyard switch.

Performance Issues

Experiencing diminished performance from your Mercury outboard? Several factors can contribute to loss of power, rough idling, or overheating. A loss of power often points to fuel delivery problems – a clogged fuel filter, failing fuel pump, or carburetor issues (older models) are common culprits. Rough idling can stem from dirty carburetors, incorrect idle mixture settings, or vacuum leaks.

Overheating is a serious concern; check for a blocked water intake, a faulty impeller, or a malfunctioning thermostat. Remember, technical support is available via mercuryfsvps.ru. While seemingly unrelated, ensure onboard network settings (accessible via 192.168.1.1 or melogin.cn) aren’t interfering with diagnostic tools. Regular maintenance is key to preventing these issues.

Loss of Power

Sudden or gradual power loss in your Mercury outboard demands investigation. Begin by inspecting the fuel system – a clogged fuel filter is a frequent offender. Verify the fuel pump is delivering adequate pressure, and for older models, examine the carburetor for debris or improper settings. Ensure proper spark plug function; weak spark diminishes combustion.

Consider compression testing to rule out internal engine issues. While troubleshooting, remember that network connectivity (using addresses like 192.168.1.1) shouldn’t impact engine performance directly, but could affect diagnostic tool access. Contact mercuryfsvps.ru for specialized support. Don’t overlook the possibility of a restricted exhaust or a failing propeller. Consistent maintenance prevents many power loss scenarios.

Rough Idling

A rough idle in your Mercury outboard signals an imbalance in engine operation. Start by checking the carburetor (older models) for dirt or varnish buildup, impacting fuel-air mixture delivery. Newer models require inspection of fuel injectors for clogging or malfunction. Verify proper spark plug condition and gap; inconsistent spark causes misfires.

Inspect the idle speed adjustment screw for correct settings. While seemingly unrelated, ensure network settings (like accessing melogin.cn) aren’t diverting attention from core engine diagnostics. Contact mercuryfsvps.ru for specialized assistance. A vacuum leak or low compression can also contribute to rough idling. Regular maintenance, including fuel stabilizer, minimizes these issues. Remember to check for proper propeller pitch and condition as well.

Overheating

Overheating is a critical issue demanding immediate attention in your Mercury outboard. Begin by inspecting the water intake for obstructions – weeds, plastic, or marine growth. Check the cooling system’s telltale indicator for consistent water flow. A failing water pump is a common culprit, requiring replacement. Examine the thermostat for proper operation; a stuck thermostat restricts coolant circulation.

Ensure the engine’s exhaust ports are clear. While troubleshooting, remember unrelated network configurations (like mercury router settings at melogin.cn) won’t resolve engine problems. Contact mercuryfsvps.ru for expert guidance. Low oil levels can also contribute to overheating. Regularly flush the cooling system to prevent corrosion and maintain optimal performance. Ignoring overheating can lead to severe engine damage.

Troubleshooting Fuel System

Fuel system issues require careful inspection. Address fuel pump problems, carburetor concerns (older models), or fuel injector faults (newer engines). Check lines and filters too.

Fuel Pump Problems

Diagnosing fuel pump issues is crucial for outboard performance. A failing fuel pump can manifest as difficulty starting, loss of power, or stalling, especially under load. Begin by verifying fuel delivery; disconnect the fuel line at the carburetor or fuel injector rail (depending on the engine type) and briefly activate the engine.

If no fuel flows, investigate the pump itself. Check for obstructions in the fuel pickup tube or fuel filter. A common issue is a clogged filter restricting fuel flow. Inspect the fuel pump diaphragm for cracks or tears, which can cause a loss of prime. Electrical connections to the fuel pump should be clean and secure.

Use a multimeter to confirm the pump is receiving voltage during cranking. If voltage is present but the pump doesn’t operate, the pump is likely faulty and requires replacement. Remember to always disconnect the battery before working on the fuel system.

Carburetor Issues (Older Models)

For older Mercury outboards, carburetor problems are a frequent cause of running issues. Symptoms include hard starting, rough idling, poor acceleration, and black smoke. Begin by inspecting the carburetor for visible damage or leaks. A common culprit is a clogged main jet or pilot jet, restricting fuel flow.

Disassemble the carburetor carefully, noting the position of all parts. Clean all jets and passages thoroughly with carburetor cleaner and compressed air. Pay close attention to the float level; an incorrect float level can significantly affect fuel mixture. Inspect the float for leaks or damage.

Ensure the carburetor gaskets are in good condition to prevent air leaks. Reassemble the carburetor, ensuring all screws are tightened properly. If problems persist, a professional carburetor rebuild may be necessary.

Fuel Injector Problems (Newer Models)

Newer Mercury outboards utilize fuel injection, introducing a different set of potential issues. Common symptoms of fuel injector problems include poor fuel economy, misfires, and difficulty starting. A key diagnostic step is checking for proper fuel pressure at the fuel rail. Low pressure indicates a potential problem with the fuel pump or filter.

Fuel injectors can become clogged with debris, restricting fuel flow. Fuel injector cleaner added to the fuel tank can sometimes resolve minor clogs. However, severely clogged injectors may require professional cleaning or replacement.

Inspect the fuel injector wiring and connectors for damage or corrosion. A faulty electrical connection can prevent the injector from operating correctly. Use a multimeter to test the injector’s resistance and ensure it falls within the manufacturer’s specifications.

Fuel Line and Filter Inspection

A crucial step in Mercury outboard troubleshooting is a thorough inspection of the fuel system’s lines and filter. Begin by visually examining the fuel lines for cracks, kinks, or signs of deterioration. Replace any damaged lines immediately to prevent fuel leaks and ensure proper fuel delivery.

The fuel filter plays a vital role in preventing contaminants from reaching the engine. A clogged fuel filter restricts fuel flow, leading to performance issues. Replace the fuel filter regularly as part of your routine maintenance schedule.

Check all fuel line connections to ensure they are tight and secure. Loose connections can cause fuel leaks and air intake, disrupting the fuel supply. Inspect the fuel tank vent to ensure it’s not blocked, as a blocked vent can create a vacuum, hindering fuel flow.

Troubleshooting Ignition System

Ignition problems require checking spark plugs, coils, and older models’ distributors/modules. Ensure proper spark for reliable starting and performance, addressing any electrical faults.

Spark Plug Issues

Diagnosing spark plug problems is crucial for optimal outboard engine performance. Begin by visually inspecting the spark plugs for fouling – carbon buildup, oil residue, or corrosion. A fouled plug hinders spark generation, leading to starting difficulties or misfires.

Next, check the spark plug gap using a feeler gauge, ensuring it matches the manufacturer’s specifications (consult your engine’s manual). An incorrect gap weakens the spark. Remove the spark plug and examine the electrode for wear or damage; replace if necessary.

To test for spark, disconnect the spark plug wire, insert a known good spark plug, ground the plug’s body against the engine block, and pull the starter cord. A strong, blue spark indicates a healthy ignition system. A weak or absent spark points to issues with the spark plug itself, the ignition coil, or wiring. Remember to always disconnect the battery before working on the ignition system!

Ignition Coil Problems

A failing ignition coil can severely impact your Mercury outboard’s performance. These coils are responsible for transforming the battery’s low voltage into the high voltage needed to create a spark at the spark plugs. Symptoms of a bad coil include difficult starting, engine misfires, and a noticeable loss of power, especially at higher RPMs.

Testing an ignition coil requires a multimeter to check its primary and secondary resistance. Compare the readings to the specifications in your engine’s service manual. Significant deviations indicate a faulty coil. Visually inspect the coil for cracks, corrosion, or signs of overheating.

If a coil tests bad, replacement is usually the only option. Ensure the replacement coil is the correct part number for your engine model. Always disconnect the battery before working on the ignition system and follow proper safety procedures when handling electrical components.

Distributor/Ignition Module (Older Models)

For older Mercury outboards utilizing a distributor and ignition module, troubleshooting involves checking several key components. The distributor cap and rotor are prone to wear and corrosion, leading to weak spark or misfires. Inspect these for cracks, carbon tracking, and ensure the rotor tip is in good condition.

The ignition module itself can fail, causing a complete loss of spark. Testing requires specialized equipment to verify its functionality. A faulty module often presents with no-start conditions or intermittent engine performance. Check the wiring connections to the module for looseness or corrosion.

Proper timing is crucial. Verify the distributor is correctly aligned according to the engine’s specifications. Incorrect timing can lead to poor performance and potential engine damage. Replacement of worn components is often necessary to restore reliable ignition.

Troubleshooting Electrical System

Electrical faults are common. Inspect batteries, wiring for corrosion, and check fuses/circuit breakers. Mercury support is reachable via mercuryfsvps.ru or 7 (4922) 52-99-29.

Battery Issues

A weak or dead battery is a frequent cause of starting problems. Begin by verifying the battery terminals are clean and securely connected, free from corrosion which can impede electrical flow. Use a voltmeter to check the battery’s voltage; a fully charged 12-volt battery should read approximately 12.6 volts. If the voltage is significantly lower, attempt to charge the battery using a suitable marine battery charger.

If the battery fails to hold a charge, it may be internally damaged and require replacement. Consider load testing the battery to assess its ability to deliver sufficient current under load. Also, ensure the battery is appropriately sized for your Mercury outboard engine’s electrical demands. Remember to consult the engine’s manual for specific battery requirements. For further assistance with Mercury components, reach out to support at mercuryfsvps.ru or call 7 (4922) 52-99-29.

Wiring Problems and Corrosion

Corrosion and damaged wiring are common culprits behind electrical malfunctions in marine environments. Thoroughly inspect all wiring connections for signs of corrosion, fraying, or loose connections. Pay close attention to connections near the battery, starter solenoid, and engine components. Use a wire brush or sandpaper to clean corroded terminals, and apply a corrosion-inhibiting spray to prevent future issues.

Check for damaged wiring insulation and repair or replace any compromised wires. A multimeter can be used to test for continuity in wiring circuits, identifying breaks or shorts. Ensure all connections are properly secured and waterproofed to prevent moisture intrusion. Remember, addressing wiring issues promptly is crucial for maintaining reliable engine operation. For technical support regarding Mercury components, contact mercuryfsvps.ru or call 7 (4922) 52-99-29.

Fuse and Circuit Breaker Checks

A blown fuse or tripped circuit breaker often indicates an electrical overload or short circuit. Begin by locating the fuse box or circuit breaker panel, typically found near the battery. Visually inspect each fuse for a broken filament or each breaker for a tripped position. Replace any blown fuses with fuses of the exact same amperage rating – never use a higher amperage fuse, as this could cause further damage.

If a circuit breaker has tripped, reset it by flipping it to the “off” position and then back to “on”. If the fuse blows or breaker trips again immediately, there’s a short circuit that needs investigation. For technical assistance with Mercury systems, reach out to mercuryfsvps.ru or call 7 (4922) 52-99-29. Remember safety first when dealing with electrical components!

Maintenance and Prevention

Proactive care prevents issues. Follow a regular schedule, winterize properly, and utilize the correct fuel and oil for optimal Mercury outboard performance and longevity.

Regular Maintenance Schedule

Consistent upkeep is crucial for a reliable Mercury outboard. Implement a schedule including pre-season checks – inspecting belts, hoses, and connections. After each use, flush the engine with fresh water to remove salt and debris.

Every 100 hours (or annually), change the engine oil and filter, inspect spark plugs, and lubricate all moving parts. Annually, examine the fuel lines and filter for cracks or blockages. Every three years, replace the water pump impeller to prevent overheating.

Don’t neglect the lower unit gear oil; change it every year or as recommended in your owner’s manual. Regularly check and tighten all bolts and fasteners. Maintaining detailed records of all maintenance performed will help identify potential issues early and ensure optimal performance.

Winterization Procedures

Proper winterization protects your Mercury outboard from freezing damage. Begin by flushing the cooling system with freshwater, then introduce a marine-grade antifreeze solution to displace all water. This prevents cracking of engine blocks and manifolds.

Next, stabilize the fuel by adding a fuel stabilizer to the fuel tank, then run the engine briefly to circulate the treated fuel throughout the system. Change the engine oil and filter, and fog the engine cylinders with fogging oil to prevent corrosion during storage.

Disconnect the battery and store it in a cool, dry place. Grease all lubrication points and inspect hoses and belts for wear. Cover the outboard to protect it from the elements, ensuring adequate ventilation to prevent moisture buildup.

Using Correct Fuel and Oil

Employing the right fuel and oil is crucial for Mercury outboard longevity. Always adhere to the manufacturer’s recommendations regarding octane rating and fuel type – typically 87 octane unleaded is sufficient, but check your engine’s manual. Ethanol-containing fuels can cause issues, so consider ethanol-free options if available, especially for older models.

Regarding oil, Mercury outboards often require specific types of two-stroke or four-stroke oil. Using the incorrect oil can lead to engine damage, reduced performance, and increased emissions. Synthetic oils generally offer superior protection and lubrication.

Regularly check oil levels and ensure proper oil-to-fuel ratios (for two-stroke engines). Avoid using automotive oils, as they aren’t formulated for the marine environment. Consistent use of quality fuel and oil minimizes wear and tear, extending the life of your outboard.

safety 1st car seat manual

Safety 1st prioritizes worker well-being through comprehensive training, hazard controls, and robust safety programs, aiming to prevent workplace incidents and promote a safe environment.

Understanding the Importance of Proper Installation

Proper car seat installation is paramount for child safety, directly impacting the effectiveness of the protective features during a collision. OSHA emphasizes training and hazard control, mirroring the need for meticulous attention to detail when securing a Safety 1st car seat. A correctly installed seat minimizes movement and distributes crash forces, significantly reducing the risk of injury.

Ignoring installation guidelines, or failing to utilize features like LATCH or the top tether, compromises safety. Just as OSHA focuses on preventing workplace injuries, proper installation prevents injuries to your most precious cargo. Regular checks ensure continued security, as components can loosen over time. Prioritizing correct installation is not merely a recommendation; it’s a critical safety measure.

Overview of Safety 1st Car Seat Models

Safety 1st offers a diverse range of car seats, catering to various age and weight groups, from infant carriers to convertible and all-in-one models. Like OSHA’s varied safety programs – lockout/tagout, confined spaces – each Safety 1st model is designed with specific safety features. Infant seats prioritize rear-facing protection, while convertibles adapt as children grow.

All-in-one seats offer extended use, reducing the need for multiple purchases. Understanding each model’s capabilities, weight limits, and installation requirements is crucial. Just as worker training is vital, familiarizing yourself with the specific manual for your Safety 1st seat ensures optimal protection and compliance with safety standards. Proper selection is the first step towards a safer journey.

Car Seat Components and Features

Effective hazard controls, like those emphasized by OSHA, are mirrored in car seat design, protecting occupants from potential injuries during travel.

Harness System Explained

The car seat’s harness system is a crucial safety component, designed to securely restrain a child during a collision. It typically consists of a five-point harness – two shoulder straps, two hip straps, and a crotch strap – distributing crash forces across the strongest parts of the body.

Proper adjustment is paramount; straps should lie flat, snug against the child’s body, and be at or below shoulder level for rear-facing, and at or above shoulder level for forward-facing. Like OSHA’s emphasis on proper equipment use, a correctly fitted harness maximizes protection. Regularly inspect the harness for wear and tear, ensuring buckles function smoothly and straps are free from damage, mirroring the importance of maintaining safety equipment in any workplace.

LATCH System vs. Seat Belt Installation

Safety 1st car seats can be installed using either the LATCH (Lower Anchors and Tethers for Children) system or the vehicle’s seat belt. LATCH provides a convenient and secure connection, utilizing lower anchors and a top tether. However, like OSHA’s focus on following established procedures, it’s vital to understand vehicle-specific LATCH weight limits.

Seat belt installation remains a reliable method, especially when LATCH limits are reached or unavailable. Proper seat belt routing and tightening are essential for a secure fit. Both methods require diligent attention to detail, mirroring the careful hazard prevention strategies emphasized in workplace safety programs. Always consult the car seat and vehicle manuals for specific instructions.

Adjustable Headrest and Recline

Safety 1st car seats feature adjustable headrests and recline functions, crucial for optimal child fit and comfort as they grow. Proper headrest height ensures the child’s head is adequately supported, similar to providing appropriate personal protective equipment in a work setting. Recline adjustments are vital for achieving the correct installation angle, particularly in rear-facing mode.

These adjustments aren’t merely for comfort; they directly impact safety. Incorrect recline can compromise the car seat’s protective capabilities. Regularly verifying and adjusting these features, akin to routine safety inspections, is essential. Always refer to the manual for specific adjustment guidelines and weight/height requirements.

Installation Guide: Rear-Facing Mode

Prioritize a secure installation, mirroring workplace safety protocols, by carefully preparing the vehicle seat and utilizing either the LATCH system or seat belt method.

Preparing the Vehicle Seat

Before installing the Safety 1st car seat in rear-facing mode, meticulous vehicle seat preparation is crucial, echoing the importance of hazard control in occupational safety. Remove any objects from the vehicle seat – cushions, blankets, or toys – that could interfere with a secure car seat installation.

Ensure the vehicle seat is clean and free of debris. Inspect the seat for any damage that might compromise its structural integrity. Refer to your vehicle’s owner’s manual for specific instructions regarding car seat installation, as vehicle seat designs vary.

Confirm the vehicle seatbelt is functioning correctly and isn’t twisted or damaged. A properly prepared vehicle seat provides a stable foundation for the car seat, mirroring the need for a safe work environment.

Securing the Base with LATCH

Utilizing the Lower Anchors and Tethers for Children (LATCH) system for base installation mirrors OSHA’s emphasis on effective hazard prevention. Locate the lower anchor points in your vehicle – consult your vehicle manual for their precise location. Attach the car seat base’s connectors to these anchors, ensuring a firm click to confirm a secure connection, similar to lockout/tagout procedures.

Once connected, firmly push down on the car seat base and pull upwards to verify it’s tightly secured. Adjust the LATCH straps to eliminate any slack, achieving a snug fit. Remember, proper training, like OSHA provides, is vital for correct implementation.

A correctly installed LATCH system minimizes movement and maximizes safety, reflecting the goal of preventing workplace injuries.

Securing the Base with Seat Belt

When LATCH isn’t feasible, secure the car seat base using the vehicle’s seat belt, mirroring OSHA’s adaptable approach to safety protocols. Route the seat belt through the designated belt path on the car seat base, as illustrated in the manual. Ensure the belt lies flat and isn’t twisted, much like proper rigging in scaffolding.

Lock the seat belt mechanism – consult your vehicle manual for instructions. Firmly press down on the base while pulling the seat belt tight to eliminate slack. A secure installation limits movement, akin to effective confined space procedures.

Regularly check the tightness, emphasizing the importance of ongoing safety checks.

Checking for Proper Installation – Rear-Facing

After installation, verify stability – a crucial step mirroring OSHA’s hazard prevention focus. Grasp the car seat base near the belt path and attempt to move it side to side and front to back. Movement exceeding one inch indicates a loose installation, requiring readjustment, similar to inspecting for wear and tear.

Ensure the base is level; a recline indicator assists. Confirm the harness is at the appropriate height for your child, reflecting the importance of proper PPE fit. Regularly reassess, as children grow, echoing the need for ongoing training.

Document checks for peace of mind.

Installation Guide: Forward-Facing Mode

Transitioning requires diligent hazard assessment, like OSHA’s approach, ensuring secure attachment with the top tether for optimal restraint and stability during travel.

Transitioning to Forward-Facing

Before switching to forward-facing mode, carefully review your Safety 1st car seat manual and your vehicle’s owner’s manual for specific instructions. Ensure your child has reached the appropriate weight and height limits as defined by Safety 1st and legal regulations. Prioritize a thorough understanding of hazard prevention, mirroring OSHA’s focus on worker safety.

Proper preparation is crucial. Re-evaluate the vehicle seat, ensuring it remains suitable for a forward-facing installation. Confirm the car seat is not near any active airbags. Remember, like effective safety programs, a secure installation is paramount. Double-check all connections and adjustments before each journey, prioritizing your child’s safety above all else, aligning with the core values of occupational safety and health.

Using the Top Tether

The top tether is a critical safety feature when using a forward-facing car seat. Locate the tether anchor point in your vehicle – consult your vehicle’s manual for its exact location. Attach the tether strap securely to this anchor, adjusting it to eliminate any slack. This minimizes forward movement during a sudden stop or crash, mirroring OSHA’s emphasis on hazard control.

A properly tightened tether significantly enhances safety, much like comprehensive training programs protect workers. Regularly inspect the tether strap for wear and tear, replacing it if damaged. Remember, consistent checks and adherence to the manual’s instructions are vital, ensuring a secure and reliable installation, prioritizing your child’s well-being and aligning with best safety practices.

Checking for Proper Installation – Forward-Facing

After installing the car seat forward-facing, perform a rigorous check. Grasp the seat near the belt path and attempt to move it side-to-side and front-to-back. It should not move more than one inch in any direction, mirroring OSHA’s standards for secure workplace equipment. Ensure the top tether is snug, minimizing forward travel during impact.

Verify the harness is properly threaded and adjusted, and that the buckle is securely fastened. Regularly inspect all connections, similar to routine safety inspections. A correctly installed car seat, combined with a properly secured harness, provides optimal protection, reflecting a commitment to safety and preventing potential injuries, just like a robust safety program.

Safety Checks and Adjustments

Regularly assess harness tightness, recline angles, and headrest height, mirroring OSHA’s emphasis on proactive hazard prevention and continuous safety program evaluation.

Harness Tightness Test

Ensuring a snug harness fit is paramount for child safety, aligning with OSHA’s focus on effective hazard control. To perform the tightness test, grasp the harness straps near the child’s shoulders. If you can pinch any slack, the harness needs tightening. The harness should lie flat against your child’s chest and should not have any twist.

A properly tightened harness prevents excessive forward movement during a sudden stop or collision. Remember, a loose harness significantly reduces the car seat’s protective capabilities. Regularly check and adjust the harness as your child grows, maintaining that secure fit. Prioritize this step, mirroring the importance of consistent safety program evaluation.

Recline Angle Verification

Maintaining the correct recline angle is crucial, much like OSHA’s emphasis on adhering to recommended safety practices. For rear-facing infants, a semi-reclined position supports their developing necks and ensures proper airway alignment. Consult your Safety 1st car seat manual for the specific angle indicators – often a line or level.

Forward-facing car seats require a more upright recline. Incorrect angles can compromise the car seat’s ability to protect your child in a crash. Regularly verify the angle, especially after adjustments or if the car seat has been moved. Prioritize this check, mirroring the need for continuous hazard assessment in safety programs.

Headrest Height Adjustment

Proper headrest positioning is paramount for your child’s safety, akin to OSHA’s focus on providing adequate personal protective equipment. The headrest should always be adjusted to encircle the child’s head, ensuring it remains within the protective shell of the car seat. As your child grows, regularly raise the headrest to maintain this secure fit.

Refer to your Safety 1st car seat manual for specific height markers and adjustment instructions. A correctly adjusted headrest minimizes head excursion during a collision, reducing the risk of injury. This proactive adjustment mirrors the importance of continuous improvement in safety and health programs.

Maintenance and Cleaning

Regular inspection for wear and tear, coupled with diligent cleaning, ensures optimal car seat function, mirroring OSHA’s emphasis on hazard prevention.

Cleaning the Car Seat Cover

Maintaining a clean car seat cover is crucial for hygiene and longevity, aligning with OSHA’s focus on safe working conditions. Always consult the Safety 1st car seat manual for specific cleaning instructions, as materials vary. Generally, most covers are removable and machine washable using mild detergent and cool water. Avoid harsh chemicals or bleach, which can degrade the fabric and potentially compromise safety features.

Air drying is recommended to prevent shrinking or damage. Thoroughly dry the cover before reinstalling it. For spot cleaning, a damp cloth with mild soap is usually sufficient. Regularly cleaning helps prevent the buildup of spills and debris, ensuring a comfortable and sanitary environment for your child, much like maintaining clean restrooms and sanitation in a restaurant setting.

Inspecting for Wear and Tear

Regular inspection, mirroring OSHA’s emphasis on hazard prevention, is vital for car seat safety. The Safety 1st manual details what to look for – check the harness straps for fraying or damage, the buckle for proper function, and the shell for cracks. Pay close attention to areas subjected to stress, like LATCH connectors and belt paths. Any sign of wear, even seemingly minor, could compromise the seat’s protective capabilities.

Like ensuring proper scaffolding maintenance, diligent inspection prevents potential failures. If damage is detected, discontinue use immediately. Refer to the manual for replacement part information or consider replacing the entire car seat. Prioritizing this step ensures continued safety, aligning with the goal of preventing workplace injuries and illnesses.

Replacing Damaged Parts

The Safety 1st car seat manual explicitly outlines procedures for replacing damaged components, mirroring OSHA’s focus on maintaining safe equipment. Never attempt to repair a car seat yourself; only use manufacturer-approved replacement parts. Contact Safety 1st customer service to obtain the correct parts for your specific model.

Proper installation, akin to lockout/tagout procedures, is crucial during replacement. Carefully follow the manual’s instructions to ensure the new part is securely attached and functions correctly. If unsure, seek assistance from a certified Child Passenger Safety Technician (CPST). Replacing damaged parts restores the car seat’s protective capabilities, upholding the commitment to worker safety and preventing potential harm, just as robust training programs do.

Understanding Car Seat Expiration Dates

Like OSHA’s emphasis on program effectiveness, Safety 1st car seats have expiration dates; these ensure continued safety standards and material integrity over time.

Expiration Date Location

Locating the expiration date on your Safety 1st car seat is crucial for ensuring your child’s continued safety. Typically, this date isn’t prominently displayed, mirroring OSHA’s detailed record-keeping requirements. Instead, it’s often found on a label affixed to the car seat itself.

Carefully inspect the side of the seat, the back, or underneath the cover. The date may be molded into the plastic or printed on a sticker. It’s usually presented as a month and year (MM/YYYY). Remember, like proper lockout/tagout procedures, diligent searching is essential. If you cannot find a date, contacting Safety 1st customer service is recommended to determine the seat’s usability, aligning with OSHA’s focus on worker rights to information.

Why Car Seats Expire

Car seats, like safety equipment in any workplace governed by OSHA standards, have expiration dates for critical safety reasons. Plastic components degrade over time, becoming brittle and less effective in a crash – similar to wear and tear on personal protective equipment. Furthermore, safety standards and regulations evolve; older seats may not meet current requirements, mirroring the continuous improvement seen in safety and health programs.

Manufacturers also account for the potential degradation of foam padding and harness systems. Expiration dates aren’t arbitrary; they represent a point where the seat’s ability to protect your child is compromised. Using an expired car seat is akin to ignoring a critical safety protocol, potentially leading to severe consequences, emphasizing the importance of proactive hazard prevention and control.

Emergency Situations and Recalls

Following a car accident, or during a recall, prioritize worker safety by immediately assessing the situation and adhering to established emergency protocols.

What to Do After a Car Accident

In the immediate aftermath of a car accident involving a Safety 1st car seat, ensuring the well-being of the child is paramount. Carefully check the child for any visible injuries and seek immediate medical attention if needed. Even if no injuries are apparent, a medical evaluation is crucial, as some injuries may not be immediately obvious.

Document the accident thoroughly, including photos of the vehicle damage, the car seat, and the surrounding area. Obtain a copy of the police report and any insurance information. Critically, do not reuse the car seat after an accident, even if it appears undamaged. The structural integrity may be compromised, and Safety 1st recommends replacement to guarantee continued protection. Contact Safety 1st customer service for guidance on proper disposal and replacement options.

Checking for Safety 1st Car Seat Recalls

Regularly checking for recalls is a vital part of car seat safety. Safety 1st, like all manufacturers, may issue recalls due to potential safety concerns. To stay informed, register your car seat with Safety 1st; this allows them to directly notify you of any recalls affecting your specific model.

You can also actively check for recalls on the National Highway Traffic Safety Administration (NHTSA) website using your car seat’s model number. The NHTSA maintains a comprehensive database of all vehicle and car seat recalls. Proactive recall checks demonstrate a commitment to child passenger safety and ensure you’re aware of any necessary corrective actions. Ignoring a recall could compromise the car seat’s protective capabilities.

Resources and Support

OSHA provides extensive resources, training materials, and grants to support workplace safety initiatives, empowering organizations and workers to prioritize health.

Safety 1st Customer Service Contact Information

For immediate assistance regarding your Safety 1st car seat, or to navigate the complexities of occupational safety and health programs, reaching out to their dedicated customer service team is crucial. Safety 1st emphasizes proactive hazard prevention through comprehensive training, mirroring OSHA’s commitment to worker well-being. While specific contact details may vary, generally, you can find support through their official website, which often includes a detailed FAQ section addressing common concerns.

Additionally, a dedicated phone line is typically available for direct communication with a customer service representative. Remember that OSHA’s resources, including hazard identification guides and best practices, can complement your understanding of car seat safety. Exploring these resources alongside Safety 1st’s support ensures a holistic approach to child passenger safety and a commitment to a secure environment.

National Highway Traffic Safety Administration (NHTSA) Resources

The National Highway Traffic Safety Administration (NHTSA) provides invaluable resources complementing the Safety 1st car seat manual, mirroring OSHA’s dedication to safety standards. NHTSA’s website offers comprehensive information on car seat best practices, including installation guides, recall notices, and ratings for various car seat models. They champion proactive hazard prevention, similar to robust workplace safety programs.

Furthermore, NHTSA facilitates safety campaigns and offers educational materials to promote proper child passenger safety. Accessing their resources alongside the Safety 1st manual ensures a thorough understanding of car seat safety regulations and best practices, fostering a secure travel environment for children. Prioritizing these resources aligns with a commitment to minimizing risks and maximizing safety.