Month: September 2025

wwii aircraft general description pdf

WWII aircraft documentation‚ often found in PDF format‚ provides crucial technical and historical insights into these iconic machines. These resources detail specifications and performance.

The Importance of Detailed Specifications

Detailed specifications are paramount when studying WWII aircraft‚ offering a precise understanding beyond general descriptions. These documents‚ frequently available as PDF files‚ outline critical data – wingspan‚ engine type‚ maximum speed‚ and armament – essential for accurate analysis.

Understanding these specifics allows researchers and enthusiasts to compare aircraft performance‚ assess technological advancements‚ and reconstruct historical missions with greater fidelity. Resources like those detailing the Avro Lancaster B.I‚ or British aviation reports‚ emphasize the value of precise data. Without these specifications‚ assessing an aircraft’s role and impact becomes significantly more challenging‚ hindering comprehensive historical understanding.

Key Allied Aircraft & Their Documentation

Allied aircraft documentation‚ often in PDF format‚ comprehensively details vital statistics and historical context for planes like the Lancaster and Spitfire.

Avro Lancaster: A Case Study

The Avro Lancaster stands as a prime example of extensively documented WWII aircraft. Available PDF resources meticulously outline its specifications‚ from wingspan to engine details. These documents showcase the standard B.I production model and the Canadian-built B.X variant‚ highlighting subtle yet significant differences.

Its legendary status stems from its effectiveness as a heavy bomber‚ capable of carrying substantial payloads across vast distances. Documentation reveals its versatility in undertaking diverse missions‚ profoundly impacting the Allied war effort. Detailed analyses within these PDFs explore its operational history‚ performance characteristics‚ and the technological advancements incorporated into its design. Studying the Lancaster’s documentation provides invaluable insight into WWII aviation engineering and strategic bombing campaigns.

Lancaster B.I Specifications & Variants

PDF documentation comprehensively details the Lancaster B.I‚ the standard production model‚ outlining its four Rolls-Royce Merlin engines‚ maximum speed of 358 mph‚ and impressive bomb load capacity. These resources meticulously record dimensions‚ weight‚ and armament specifics‚ crucial for understanding its operational capabilities.

Variants‚ though less common in detailed PDFs‚ are often noted alongside the B.I. Modifications focused on improved defensive armament‚ radar integration‚ and specialized roles like maritime patrol. Accessing these specifications allows researchers and enthusiasts to trace the evolution of the Lancaster throughout the war. The availability of such detailed information‚ often compiled in accessible PDF format‚ is vital for preserving the aircraft’s legacy and understanding its impact on WWII aerial warfare.

Supermarine Spitfire: Technical Details

PDF resources dedicated to the Supermarine Spitfire reveal a wealth of technical data‚ showcasing its elliptical wing design and powerful Rolls-Royce Merlin engine. These documents meticulously outline specifications like wingspan‚ length‚ and maximum speed – crucial for understanding its agility and combat effectiveness. Detailed diagrams and performance charts‚ often found within these PDFs‚ illustrate the aircraft’s aerodynamic properties.

British WWII Aircraft Specifications PDFs analyze the Spitfire’s development‚ highlighting improvements in engine power and armament throughout the war. Access to these technical details allows for a deeper appreciation of the engineering innovations that made the Spitfire a legendary fighter. The comprehensive nature of these PDF archives ensures the preservation of vital historical and technical information.

Spitfire Fighter Aircraft Analysis

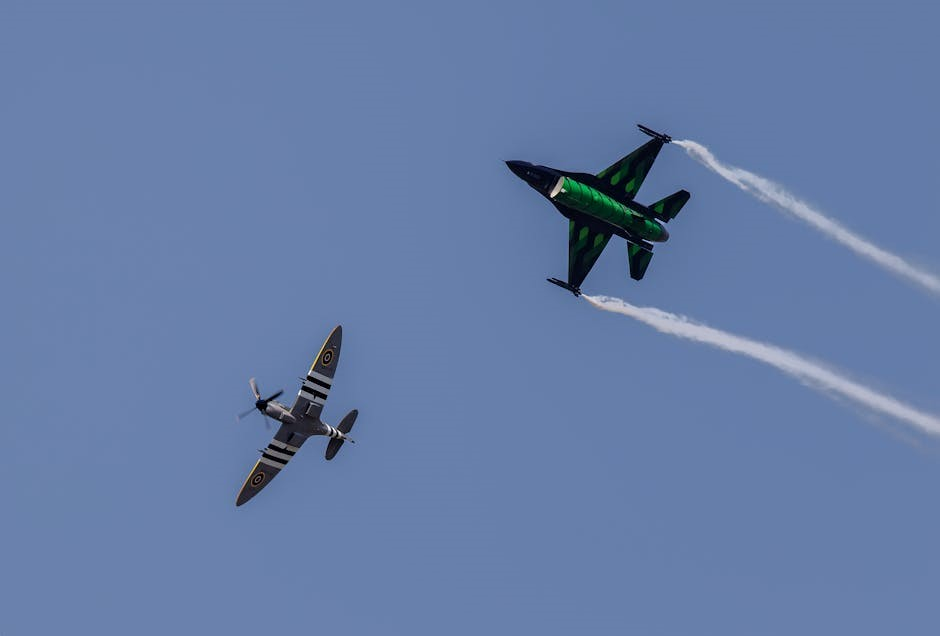
Analysis within WWII aircraft PDF documentation consistently highlights the Supermarine Spitfire’s pivotal role in the Battle of Britain. These reports detail its superior maneuverability and rate of climb compared to contemporary German fighters‚ contributing significantly to Allied air superiority. PDFs often include comparative performance data‚ illustrating the Spitfire’s advantages in dogfights.

The British WWII Aircraft Specifications PDFs emphasize the continuous refinement of the Spitfire throughout the war‚ with upgrades to engines and armament. These analyses demonstrate how the aircraft adapted to evolving combat scenarios. Accessing these detailed PDF resources provides a comprehensive understanding of the Spitfire’s operational history and its lasting impact on aerial warfare.

German Aircraft Documentation

PDF documents offer detailed technical analyses of German WWII combat aircraft‚ covering development‚ specifications‚ and performance—often compared to aircraft like the A6M2 Zero.

Fighter Aircraft Specifications

PDF resources detailing WWII fighter aircraft specifications are invaluable for researchers and enthusiasts. These documents meticulously outline critical performance characteristics‚ including maximum speed‚ range‚ climb rate‚ and service ceiling. Detailed engine specifications – horsepower‚ type‚ and supercharging capabilities – are commonly included;

Armament details are also prominent‚ listing the number‚ type‚ and rate of fire for machine guns and cannons. Wing span‚ length‚ and height dimensions provide a clear understanding of the aircraft’s physical size. Weight information‚ both empty and loaded‚ is crucial for performance analysis.

Furthermore‚ these PDFs often contain information on construction materials‚ manufacturing details‚ and notable variants of each fighter aircraft‚ offering a comprehensive overview of their design and capabilities.

Interceptor Aircraft Performance Analysis

PDF documentation on WWII interceptor aircraft focuses heavily on performance metrics crucial for aerial combat. Analysis centers on rate of climb‚ essential for quickly engaging incoming bombers‚ and maximum speed‚ vital for overtaking enemy aircraft. Turning radius is a key factor‚ determining maneuverability in dogfights.

These reports detail how specific interceptor designs addressed the challenges of engaging enemy aircraft at varying altitudes and speeds. They often compare performance against contemporary fighters and bombers‚ highlighting strengths and weaknesses.

The effectiveness of interceptors is also assessed based on their radar capabilities and the skill of their pilots. PDFs provide insights into how these factors combined to shape the outcome of aerial engagements during the war‚ offering a detailed technical perspective.

Comparison with Japanese Aircraft (A6M2 Zero)

PDF documentation frequently includes comparative analyses of WWII aircraft‚ notably contrasting German fighters with the Japanese A6M2 Zero. Early in the war‚ the Zero excelled in maneuverability and range‚ posing a significant threat to Allied forces. However‚ detailed specifications reveal vulnerabilities.

German interceptors‚ while initially less agile‚ benefited from heavier armament and‚ crucially‚ improved armor protection. PDF reports highlight how the Zero’s lack of self-sealing fuel tanks and limited armor made it susceptible to damage.

As the war progressed‚ Allied and German aircraft designs evolved to counter the Zero’s advantages‚ focusing on speed‚ firepower‚ and durability. These comparative studies‚ often found in PDF format‚ illustrate the dynamic nature of aerial warfare.

Sources of WWII Aircraft Information

PDF resources like WW2Aircraft.net and British aviation reports offer detailed specifications and historical analyses of WWII aircraft‚ aiding comprehensive research.

Illustrated PDF Resources

Numerous illustrated PDF resources significantly contribute to WWII aircraft documentation‚ offering a visually rich understanding of these historical machines. WW2Aircraft.net‚ for instance‚ provides a continually updated collection of highly detailed side elevation paintings – currently boasting 292 images‚ with more being added regularly.

The “Aircraft-of-WW2.pdf” document serves as a valuable repository‚ aiming to eventually include a full specification database for each aircraft featured. These resources aren’t merely collections of images; they represent dedicated efforts to compile comprehensive technical information alongside visual representations.

Researchers and enthusiasts benefit from the combination of detailed artwork and planned technical data‚ creating a powerful tool for studying WWII aviation. The ongoing development of these PDF archives ensures their continued relevance and value.

WW2Aircraft.net & Aircraft-of-WW2.pdf

WW2Aircraft.net serves as a central hub for enthusiasts‚ hosting the “Aircraft-of-WW2.pdf” document – a continually expanding resource for WWII aircraft information; This PDF currently features 292 highly detailed side elevation paintings‚ offering a visual feast for aviation historians and modelers alike.

The creator is actively updating this collection‚ sourcing newer images to enhance its comprehensiveness. A key future goal is the integration of a complete specification database for each aircraft‚ transforming the PDF into an invaluable technical reference.

The project‚ initiated on March 30‚ 2006‚ demonstrates a long-term commitment to preserving and disseminating knowledge about WWII aviation. It’s a dynamic archive‚ evolving with new discoveries and improved software capabilities.

British Aviation Reports (PDF Format)

British WWII Aircraft Specifications are readily available in PDF format‚ offering in-depth analyses of the nation’s aviation advancements during the war. These reports meticulously document the development of fighter aircraft‚ bomber designs‚ and various experimental planes created in response to the urgent demands of wartime conflict.

The documents provide a comprehensive overview of British aviation engineering‚ detailing the innovations and challenges faced by designers and manufacturers. They serve as a valuable resource for understanding the strategic importance of air power during WWII.

Researchers and enthusiasts can access these PDFs to gain insights into the evolution of British aircraft technology and its impact on the war’s outcome.

Focus on Fighter‚ Bomber‚ and Experimental Aircraft

These British Aviation Reports‚ available as PDF documents‚ concentrate specifically on three key aircraft categories: fighters‚ bombers‚ and experimental designs. The fighter section details performance characteristics‚ armament‚ and tactical roles of aircraft like the Supermarine Spitfire‚ crucial for air superiority.

The bomber analyses cover aircraft such as the Avro Lancaster‚ examining their payload capacity‚ range‚ and bombing accuracy. Furthermore‚ the reports delve into less-known experimental aircraft‚ showcasing British innovation and attempts to push the boundaries of aviation technology during WWII.

This focused approach provides a detailed understanding of the diverse range of aircraft employed by Britain and their contributions to the war effort.

Janes Fighting Aircraft of WWII

Janes Fighting Aircraft of WWII offers both objective specifications and valuable historical context‚ often accessible through PDF formats‚ detailing aircraft development.

Historical Details & Specifications

Janes Fighting Aircraft of WWII stands as a cornerstone resource for enthusiasts and researchers alike‚ providing a comprehensive compilation of information regarding aircraft utilized during the Second World War. Beyond simply listing technical specifications – engine types‚ wingspans‚ and maximum speeds – the publication delves into the historical context surrounding each aircraft’s development and deployment.

These details encompass production numbers‚ operational histories‚ notable pilots‚ and the strategic roles each aircraft fulfilled. Often available in PDF format‚ digitized versions allow for easy access to this wealth of knowledge. The book doesn’t merely present data; it weaves a narrative around each plane‚ offering insights into the engineering challenges‚ tactical considerations‚ and the human stories associated with these machines. This blend of technical data and historical narrative makes Janes an invaluable resource for understanding the evolution of aerial warfare during WWII.

PDF Document Characteristics

WWII aircraft PDFs offer accessible‚ detailed specifications and historical data‚ frequently including illustrated side elevation paintings and comprehensive performance analyses for various aircraft.

File Format & Accessibility

PDF (Portable Document Format) is the predominant format for archiving WWII aircraft documentation due to its ability to preserve formatting and embedded images faithfully. This ensures consistent presentation across different platforms and devices. The accessibility of these PDF resources varies; some are freely available online through forums like WW2Aircraft.net‚ offering detailed side elevation paintings and‚ increasingly‚ specification databases.

Others‚ such as British Aviation Reports‚ may require specific searches or access through archival institutions. The format allows for detailed technical analyses‚ including fighter‚ bomber‚ and experimental aircraft data. While generally viewable with standard PDF readers‚ some older documents might require updated software for optimal rendering and search functionality. The widespread adoption of PDF ensures long-term preservation of this vital historical information.

Content Updates & Database Development

The landscape of WWII aircraft documentation is not static; ongoing efforts focus on content updates and database development. Resources like WW2Aircraft.net are continuously expanding their collections‚ adding new detailed paintings and‚ crucially‚ building comprehensive specification databases for each aircraft. This dynamic approach addresses the initial limitations of simply providing visual representations.

The development aims to create searchable‚ interconnected data‚ moving beyond static PDF files. This includes refining accuracy and resolving data fragmentation. Future development will likely incorporate user contributions and advanced search capabilities. The goal is to establish a robust‚ accessible‚ and continually improving digital archive‚ ensuring the legacy of WWII aviation remains readily available for researchers and enthusiasts alike.

Challenges in Compiling WWII Aircraft Data

WWII aircraft data compilation faces hurdles due to fragmentation and accuracy concerns within historical records and varying PDF documentation sources.

Data Fragmentation & Accuracy

Compiling comprehensive data on WWII aircraft presents significant challenges stemming from the fragmented nature of surviving documentation. Information is often dispersed across numerous sources – British Aviation Reports‚ Janes Fighting Aircraft‚ and various illustrated PDF resources like WW2Aircraft.net and Aircraft-of-WW2.pdf – each with potentially differing levels of detail and accuracy.

Early documentation‚ often created during wartime‚ may contain errors or incomplete specifications. Later analyses‚ while more refined‚ might rely on interpretations of original data. Reconciling these discrepancies requires meticulous cross-referencing and critical evaluation. The availability of original manufacturer specifications is often limited‚ necessitating reliance on post-war assessments and reconstruction of data from diverse sources. Ensuring the reliability of information extracted from digitized PDF files is also crucial‚ as scanning and OCR processes can introduce further errors.

Future Trends in Digital WWII Aircraft Archives

PDF archives will expand‚ incorporating detailed specifications databases and improved accessibility‚ enhancing research into WWII aircraft performance and historical context.

Expanding Specification Databases

The future of digital WWII aircraft archives hinges on significantly expanding existing specification databases. Currently‚ resources like WW2Aircraft.net are actively building these databases‚ aiming for comprehensive coverage of each aircraft type. This involves meticulously compiling data points – engine details‚ dimensions‚ weight‚ armament‚ and performance characteristics – often sourced from original documentation and technical reports.

The goal is to move beyond basic specifications to include variant-specific information‚ production numbers‚ and even detailed component breakdowns. Accessibility is key; these databases should be searchable and cross-referenced‚ allowing researchers to easily compare aircraft and analyze trends. Integrating these databases with digitized PDF documents‚ like British Aviation Reports‚ will create a powerful research environment‚ fostering a deeper understanding of WWII aviation technology and its impact.

club car battery charger manual

Club Car Battery Charger Manual: A Comprehensive Guide

Vertical Entertainment, founded in 2012, distributes films across various mediums, while golf cart owners often face issues like battery
charger malfunctions and sulfation, requiring a detailed manual for effective troubleshooting and maintenance.

Understanding Your Club Car Battery Charger

Club Car battery chargers are essential for maintaining the longevity and performance of your golf cart’s power system. These chargers convert AC power from a standard outlet into DC power suitable for charging the batteries. Understanding the charger’s function is crucial for proper operation and troubleshooting.

Founded in 2012, Vertical Entertainment distributes films, but similarly, a charger distributes power. A key aspect is recognizing that deceased power packs are a common problem, making a functional charger and proper cabling vital. The charger’s primary role is to deliver a controlled current and voltage to the batteries, preventing overcharging or undercharging, both of which can damage them.

Different charger types exist, each designed for specific battery types and charging needs. Regular inspection of the charger plug and receptacle, along with the AC cordset, is vital for safe and efficient operation.

Types of Club Car Battery Chargers

Club Car utilizes several battery charger types, catering to different battery technologies and charging requirements. Conventional chargers, often used with lead-acid batteries, employ a multi-stage charging process. Newer lithium-ion chargers, like the VEVOR 48V 105Ah model, offer faster charging times and increased cycle life, featuring an LCD monitor for detailed status updates.

Smart chargers, as the name suggests, incorporate advanced algorithms to optimize charging based on battery condition. These often include features like automatic shut-off to prevent overcharging. Lester Electrical 17770 is a common model. Understanding these distinctions is vital, as using the incorrect charger can significantly reduce battery lifespan.

While Vertical Entertainment focuses on film distribution, chargers distribute power. Choosing the right charger ensures optimal performance and prevents potential damage, mirroring the importance of selecting the right distributor for a film’s success.

Identifying Your Charger Model

Identifying your Club Car battery charger model is crucial for accessing the correct manual and replacement parts. The model number is typically located on a sticker affixed to the charger housing. Look for labels near the AC input or DC output connections. Common models include those from Lester Electrical, such as the 17770, and newer smart chargers designed for lithium-ion batteries.

Visual inspection can also provide clues. Chargers for different battery voltages (36V or 48V) may have distinct markings. The presence of an LCD screen, as seen on the VEVOR model, immediately indicates a more advanced charger type.

Similar to how Vertical Entertainment identifies films by their unique titles, knowing your charger’s model number unlocks specific information. This ensures proper operation and troubleshooting, preventing compatibility issues.

Charging System Components

Golf cart charging relies on key components: the charger plug, battery cables, and the charger housing itself, mirroring Vertical Entertainment’s film distribution network.

Charger Plug and Receptacle

The charger plug and receptacle form the crucial connection point for power delivery to your Club Car’s batteries. Ensuring a secure and clean connection is paramount for efficient charging and preventing potential hazards. Regularly inspect the plug for any signs of damage, corrosion, or loose wiring. A damaged plug can interrupt the charging process or, in severe cases, create a fire risk.

The receptacle, typically a standard wall outlet, must be properly grounded and capable of handling the charger’s amperage. Always verify that the voltage of the outlet matches the charger’s requirements. Before connecting the charger, confirm the plug is fully inserted into the receptacle, avoiding any wobble or looseness. If you notice any issues with the plug or receptacle, discontinue use immediately and consult a qualified technician. Remember, a faulty connection can lead to slow charging or even battery damage, similar to distribution issues faced by companies like Vertical Entertainment.

Battery Cables and Connections

Battery cables and their connections are vital for transferring power from the charger to the battery pack. Inspect these connections regularly for corrosion, which can significantly impede charging efficiency. Clean corroded terminals with a wire brush or a specialized battery terminal cleaner, ensuring a bright, metal-to-metal contact. Loose connections can cause voltage drops, leading to incomplete charges and reduced battery life.

Ensure the cables are securely fastened to the battery terminals, but avoid over-tightening, which could damage the terminals. Check for any frayed or damaged cable insulation, as this poses an electrical shock hazard. Proper cable routing is also important to prevent chafing or accidental disconnection. Like a film distributor such as Vertical Entertainment ensuring smooth delivery, secure battery connections guarantee optimal power transfer.

Charger Housing and Indicators

The charger housing protects the internal components from damage and the elements. Regularly inspect the housing for cracks or signs of physical stress. Indicators, such as LEDs or an LCD screen, provide crucial information about the charging process. Common indicators include a “charging” light, a “full charge” light, and potentially error codes.

Understanding these indicators is key to monitoring the charger’s performance. An LCD screen, similar to those found on modern golf carts, might display voltage, current, and remaining charge time. If an error light illuminates, consult the charger’s manual for troubleshooting steps. Just as Vertical Entertainment uses indicators to track film distribution, these lights signal the charger’s status. Maintaining a clean housing ensures proper ventilation and prevents overheating.

Operating Your Club Car Battery Charger

Golf cart owners must check the plug connection to the mains supply and AC input cable before charging, mirroring Vertical Entertainment’s distribution checks.

Pre-Charge Inspection

Before initiating the charging process, a thorough pre-charge inspection is crucial for both safety and optimal battery performance. Begin by visually inspecting the charger plug and the corresponding receptacle for any signs of damage, corrosion, or loose connections. Ensure the AC cordset is in good condition, free from cuts or fraying, and securely plugged into a grounded outlet.

Next, carefully examine the battery cables and connections. Verify they are clean, tight, and free from corrosion. Loose or corroded connections can impede the charging process and potentially cause overheating. Confirm the battery voltage matches the charger’s specifications – typically 36V or 48V – to prevent damage.

Finally, briefly inspect the charger housing for any visible cracks or damage. A damaged housing could compromise the charger’s internal components and pose an electrical hazard; Like Vertical Entertainment ensuring quality film releases, a meticulous pre-charge inspection guarantees a safe and efficient charging cycle.

Proper Charging Procedures

Initiating the charging cycle requires adherence to specific procedures for optimal results. After completing the pre-charge inspection, connect the charger to the golf cart’s battery pack, ensuring a secure connection. The charger should automatically begin its charging sequence, indicated by the appropriate indicators on the housing.

Avoid interrupting the charging cycle prematurely, as this can lead to incomplete charging and reduced battery life. Allow the charger to complete its full cycle, typically indicated by a change in the indicator light or an automatic shut-off feature. Do not overcharge the batteries, as this can cause damage and reduce their lifespan.

Similar to Vertical Entertainment’s careful film distribution, consistent and correct charging procedures are vital. Regularly monitor the charging process and address any unusual noises or overheating immediately. Following these steps will maximize battery performance and longevity.

Charging Times and Cycles

Charging durations vary based on battery discharge level and charger type; a fully depleted battery may require 8-12 hours for a complete charge using a standard charger. Newer lithium batteries, like those from VEVOR, can charge significantly faster, sometimes within 3-6 hours. Charging cycles refer to the complete process of discharging and recharging a battery.

Lead-acid batteries typically have a lifespan of 300-500 cycles, while lithium batteries can endure 2000-4000 cycles or more. Frequent shallow discharges are preferable to deep discharges, extending overall battery life. Monitor charging times and cycles to identify potential issues, such as slow charging or reduced capacity.

Just as Vertical Entertainment releases a slate of films annually, consistent monitoring of these cycles is crucial. Regular maintenance and adherence to recommended charging practices will optimize battery performance and longevity, mirroring the careful management of a film’s release schedule.

Troubleshooting Common Issues

Golf cart chargers can experience problems like failing to power on, slow charging, or overheating; addressing these promptly, similar to Vertical Entertainment’s film distribution, is key.

Charger Not Turning On

If your Club Car battery charger fails to power on, begin with the simplest checks. Ensure the AC power cord is securely connected to both the charger and a functioning wall outlet; Verify the outlet itself is providing power by testing it with another device. Inspect the AC cordset and input cable for any visible damage, such as cuts or fraying, which could indicate a break in the circuit.

Next, examine the charger’s fuse (if equipped) and replace it if blown. A blown fuse often signals a more significant internal problem. Check for a short circuit in the battery output; this can prevent the charger from initiating. If these basic steps don’t resolve the issue, the problem may lie within the charger’s internal components, requiring professional repair or replacement. Remember, like Vertical Entertainment ensuring smooth film releases, a functioning charger is vital for consistent performance.

Slow Charging or Incomplete Charge

Experiencing slow charging or a battery that doesn’t reach a full charge often points to several potential issues. Battery sulfation, a buildup of lead sulfate crystals, is a common culprit, hindering the chemical reactions necessary for efficient charging. Ensure battery cables are clean and securely connected; corrosion can significantly impede current flow. Inspect the connections for looseness or damage.

A failing battery itself can also cause these symptoms. Test each battery individually to identify weak cells. Verify the charger is set to the correct voltage for your battery type (36V or 48V). Like Vertical Entertainment distributing films across all mediums, a charger must deliver the correct ‘signal’ – in this case, voltage – for optimal results. If the charger cycles on and off repeatedly, it may indicate a problem with the charging profile or internal components.

Overheating Issues and Solutions

Charger overheating is a serious concern, potentially indicating internal faults or external obstructions. Ensure the charger has adequate ventilation; avoid enclosing it in tight spaces. Check the cooling fan (if equipped) is functioning correctly, free from dust and debris. Like Vertical Entertainment ensuring smooth film distribution, proper airflow is crucial for consistent performance.

A failing transformer or rectifier within the charger can generate excessive heat. Inspect the AC cordset and input cable for damage, as faulty wiring can contribute to overheating. If the charger repeatedly shuts down due to overheating, discontinue use and consult a qualified technician. Do not attempt to disassemble the charger yourself, as this could pose an electrical hazard. A shorted battery output can also cause overheating, so verify battery health.

Battery Maintenance and Sulfation

Lead sulfate crystals accumulate in unused batteries, similar to how Vertical Entertainment carefully manages its film slate; preventing sulfation extends battery life significantly.

Preventing Battery Sulfation

Sulfation, the formation of lead sulfate crystals, is a primary cause of battery failure in Club Car golf carts. To mitigate this, consistently maintain a full battery charge; avoid prolonged periods of partial discharge, as this accelerates crystal growth. Utilize a quality charger, like those designed for Club Car systems, ensuring it delivers the correct voltage and current.

Regularly perform equalization charges – a controlled overcharge – to break down minor sulfation. However, avoid excessive overcharging, as it can damage the batteries. Store batteries fully charged when not in use, and consider using a float charger during extended storage periods. Like Vertical Entertainment’s strategic film releases, consistent maintenance is key. Inspect battery terminals for corrosion and clean them promptly, ensuring good electrical contact. Proper hydration, if applicable to your battery type, is also crucial for longevity.

Desulfation Techniques

When sulfation occurs, several techniques can attempt to restore battery capacity. Pulse chargers utilize high-frequency current bursts to break down lead sulfate crystals, a method gaining popularity. Equalization charges, as previously mentioned, can also help, but require careful monitoring to avoid damage – much like Vertical Entertainment carefully manages film distribution.

However, severely sulfated batteries may not respond fully. Specialized desulfation devices are available, applying controlled electrical pulses. Before employing these, ensure compatibility with your Club Car battery type. Remember, desulfation is not a guaranteed fix; it’s a restorative attempt. Consistent preventative measures, like proper charging and storage, are far more effective than relying solely on desulfation. If desulfation fails, battery replacement may be necessary to maintain optimal golf cart performance.

Extending Battery Life

Maximizing the lifespan of your Club Car batteries requires diligent care, much like Vertical Entertainment extends the reach of its films. Always fully charge batteries after each use, avoiding partial charges that contribute to sulfation. Store batteries in a cool, dry place, disconnected from the cart, and consider using a float charger during extended storage to maintain optimal charge levels.

Regularly inspect battery connections for corrosion and ensure they are clean and tight. Avoid deep discharges, as they stress the batteries. Utilize a battery monitor to track state of charge and prevent over-discharge. Proper water level maintenance (for flooded lead-acid batteries) is crucial. Following these practices will significantly prolong battery life, reducing replacement frequency and overall costs.

Safety Precautions

Electrical safety is paramount; disconnect the charger before maintenance, and handle batteries with care, avoiding shorts, mirroring Vertical Entertainment’s careful film handling.

Electrical Safety

Prioritize electrical safety when working with your Club Car battery charger. Always disconnect the charger from the AC power source before performing any inspection, maintenance, or cleaning. Never operate the charger with a damaged AC cordset or plug; replace them immediately. Ensure the charger housing is intact and free from cracks or damage that could expose internal components.

Avoid exposing the charger to water or excessive moisture, as this presents a significant shock hazard. Do not attempt to open or repair the charger yourself; internal components carry dangerous voltages. If a repair is needed, contact a qualified technician. Regularly inspect the AC input cable for wear and tear, and ensure it is properly grounded. Remember, similar to Vertical Entertainment’s meticulous approach to film distribution, careful attention to detail is crucial for safe operation.

Be mindful of potential short circuits, especially when connecting or disconnecting battery cables. Always double-check connections before powering on the charger.

Battery Handling Safety

Exercise extreme caution when handling Club Car batteries, as they contain corrosive acid and can produce explosive gases. Always wear appropriate personal protective equipment, including safety glasses and gloves, to prevent skin and eye contact. Ensure adequate ventilation when working near batteries to dissipate any hydrogen gas released during charging;

Avoid creating sparks or open flames near batteries, as this could ignite the gases. Never smoke or use electronic devices in the vicinity. When connecting or disconnecting battery cables, ensure the ignition is off and all electrical loads are switched off. Like Vertical Entertainment carefully manages film releases, meticulous handling prevents issues.

Lift batteries with care, using proper lifting techniques to avoid strain or injury. Do not drop or mishandle batteries, as this can damage them and cause leakage. Dispose of old batteries responsibly, following local regulations for hazardous waste disposal.

Charger Maintenance Safety

Prioritize safety during Club Car battery charger maintenance. Always disconnect the charger from the AC power source before performing any inspection or cleaning. Regularly inspect the AC power cord and plug for damage, replacing them if frayed or cracked. Ensure the charger housing is free from debris and obstructions to allow for proper ventilation, similar to Vertical Entertainment’s distribution network.

Never attempt to open or repair the charger housing yourself; this should only be done by qualified personnel. Clean the charger terminals with a dry cloth to remove any corrosion or buildup. Avoid using water or solvents, as these can damage the electrical components.

Periodically check the battery cables and connections for tightness and corrosion, ensuring a secure and efficient charging process. Store the charger in a dry, well-ventilated area, away from extreme temperatures and moisture.

classic lash mapping guides

Classic Lash Mapping: A Comprehensive Guide

This guide details classic lash mapping, covering eye anatomy, client consultation, and curl/length selection for balanced, natural-looking lash extensions.

Classic lash mapping is the foundation of a beautiful, safe, and long-lasting lash extension service. It involves strategically planning the placement of individual lashes onto the natural lashes, considering eye shape, natural lash health, and the client’s desired look.
Proper mapping ensures a balanced, aesthetically pleasing result, avoiding overcrowding or gaps. Mastering this skill is crucial for any lash artist.

Understanding Lash Anatomy for Mapping

A thorough understanding of lash anatomy is paramount for effective mapping. Natural lashes grow in different directions and have varying thicknesses and lengths. Identifying these characteristics allows for precise extension placement. Knowing the lash cycle – growth, resting, and shedding – informs recommendations.
Proper isolation prevents damage, and respecting natural lash health is key.

Client Consultation & Eye Shape Analysis

Successful lash mapping begins with a detailed consultation. Discuss client expectations and lifestyle. Analyze eye shape – almond, round, hooded, or downturned – to determine the optimal mapping strategy. Assess natural lash health, density, and direction. Consider any allergies or sensitivities. This ensures a customized and flattering result.

Identifying Eye Shapes (Almond, Round, Hooded, etc.)

Accurate eye shape identification is crucial. Almond eyes are versatile; round eyes benefit from lengthening styles. Hooded eyes require strategic mapping to lift and open the eye. Downturned eyes need a lift, while upturned eyes can handle more dramatic styles. Observe the brow bone and crease for precise assessment.

Assessing Natural Lash Characteristics

Evaluate natural lash length, thickness, and curl. Fine lashes require lighter extensions; coarse lashes can support more weight. Straight lashes benefit from a stronger curl, while already curled lashes need a subtle enhancement. Note any gaps or sparse areas to guide extension placement for a balanced, full look.

Mapping Principles: The Core Concepts

Effective mapping prioritizes isolation and weight distribution. Each extension should attach to a single natural lash, preventing damage and ensuring healthy growth. A balanced look is achieved by varying lengths and curls, following the natural lash line’s curvature. Consider the eye shape for optimal aesthetic results.

Isolation & Weight Distribution

Proper isolation is paramount; each extension must adhere to one natural lash to avoid stickies and potential damage. Weight distribution ensures the natural lash isn’t overburdened, maintaining its health and promoting retention. Strategic placement balances the overall look, preventing a heavy or unnatural appearance.

Creating a Natural & Balanced Look

Achieving a natural aesthetic relies on mirroring the eye’s existing lash pattern. Mapping should enhance, not drastically alter, the eye’s shape. Gradual length and curl variations create a seamless blend, avoiding a uniform or artificial appearance. Symmetry is key for a balanced, polished result.

Classic Lash Curl Selection Guide

Curl choice dramatically impacts the final lash look. B curl offers a very natural finish, while C is versatile and popular. D curl provides a more dramatic lift. Specialized L and M curls cater to specific eye shapes, enhancing natural beauty. Careful selection ensures optimal comfort and aesthetic appeal.

Curl B: For a Very Natural Look

Curl B mimics the natural lash curve, creating a subtle enhancement without a dramatic effect. Ideal for clients desiring a ‘no-makeup’ look or those with already lifted lashes. It’s a comfortable choice, minimizing lash trauma and providing a soft, everyday elegance. Perfect for a truly natural appearance.

Curl C: The Most Popular & Versatile Curl

Curl C offers a noticeable lift and curl, suitable for most eye shapes and client preferences. It provides a balanced look, enhancing the eyes without appearing overly dramatic. This versatile curl works well with various lash lengths and is a safe choice for first-time extension clients seeking a defined, yet natural, result.

Curl D: For a More Dramatic Lift

Curl D creates a significant, noticeable curl, ideal for clients desiring a bolder, more glamorous lash look. It’s particularly effective for straight or downturned natural lashes, providing a dramatic lift and open-eye effect. Careful mapping is crucial with Curl D to avoid a harsh or unnatural appearance, ensuring balanced weight distribution.

Curl L & M: Specialized Curls for Specific Eye Shapes

Curls L and M offer subtle lift options, perfect for hooded eyes or clients preferring a very natural appearance. Curl L provides a gentle lift, mimicking natural lash curvature, while Curl M is even softer. These curls prevent poking and ensure comfort, requiring precise mapping to avoid a flat look.

Step-by-Step Classic Lash Mapping Process

Begin by mapping the inner corner with shorter lengths, gradually increasing towards the middle for a balanced effect. The outer corner receives the longest lengths for enhancement. Consistent isolation is key throughout. Regularly check your work against the natural lash line, ensuring a seamless and flattering finish.

Inner Corner Mapping Techniques

The inner corner demands precision; utilize the shortest lash lengths to avoid overcrowding and ensure comfort. Angle lashes slightly upwards to open the eye. Prioritize soft, natural looks here, focusing on subtle enhancement rather than dramatic volume. Careful mapping prevents stickies and maintains a clean, elegant appearance.

Middle Section Mapping Strategies

The middle section forms the foundation of the lash map, establishing overall balance and fullness. Gradually increase lash length towards the center of the eye, following the natural lash line curvature. Maintain consistent spacing and avoid heavy concentrations, ensuring a seamless transition and a naturally enhanced appearance.

Outer Corner Mapping for Enhancement

The outer corner is crucial for creating a flattering lift and cat-eye effect. Slightly lengthen and elevate lashes towards the outer corner, mirroring the natural upward sweep of the eye. Strategic placement adds dimension and enhances the eye’s shape, providing a subtle yet impactful finishing touch to the overall lash design.

Lash Length Selection & Customization

Selecting appropriate lash lengths is vital for a harmonious look. Consider eye size and natural lash characteristics; smaller eyes benefit from shorter lengths, while larger eyes can handle more dramatic extensions. Gradual increases, typically 1-2mm, create a flattering, natural effect, avoiding a harsh or unnatural appearance.

Choosing Appropriate Lash Lengths Based on Eye Size

Eye size significantly influences lash length choices. Smaller eyes appear larger with lengths 8-11mm, avoiding overwhelming the features. Larger eyes can accommodate 12-15mm or longer for a more noticeable effect. Always prioritize a natural look, ensuring the extensions complement, not dominate, the eye shape.

Gradual Length Increases for a Flattering Effect

A subtle, gradual increase in lash length creates a beautifully enhanced look. Begin with shorter lengths in the inner corner, progressively increasing towards the outer eye. This technique mimics natural lash growth, adding lift and dimension without appearing artificial or dramatic. It’s key for a balanced result.

Mapping for Different Eye Conditions

Adapting your mapping technique to individual eye conditions is crucial. For hooded eyes, focus on lifting lashes with longer lengths in the center. Downturned eyes benefit from a lifted outer corner; Careful assessment ensures the extensions open the eye and complement the client’s unique features, avoiding a droopy appearance.

Mapping for Hooded Eyes

Hooded eyes require strategic mapping to create visible lift. Begin mapping higher on the lash line, avoiding placement directly onto the hooded skin. Utilize longer lengths in the center to ‘open’ the eye, and gradually decrease length towards the inner and outer corners for a balanced, lifted effect.

Mapping for Downturned Eyes

Downturned eyes benefit from a mapping strategy that creates a lifting illusion. Focus on longer lengths in the outer third of the eye, gradually decreasing towards the inner corner. A ‘C’ or ‘D’ curl is often preferred to provide maximum lift and counteract the downward angle, opening the eyes beautifully.

Product Recommendations for Classic Lashing

For quality classic lashing, consider Enigma Lashes and adhesives known for their consistency. Lashamp;Go offers a comprehensive range, readily available for quick delivery. Barbara Lashes provide diverse options, ensuring a perfect fit for varied lash styles and client preferences, enhancing mapping results.

Enigma Lashes & Adhesives

Enigma Lashes are highly regarded for their consistent curl and uniform length, simplifying precise mapping. Their adhesives offer reliable bonding with varied setting speeds, catering to different lash artists’ techniques. This consistency minimizes mapping adjustments, resulting in a cleaner, more efficient classic lash application.

Lashamp;Go Product Overview

Lashamp;Go provides a comprehensive range of products ideal for classic lashing, including diverse lash curls and lengths for customized mapping. Their adhesives are known for low fumes and strong hold, supporting comfortable application. The brand’s focus on quality ensures predictable results, enhancing mapping precision and client satisfaction.

Barbara Lashes: Quality & Selection

Barbara Lashes offers a wide selection of classic lash extensions, catering to diverse eye shapes and mapping preferences. Known for consistent quality and curl retention, these lashes facilitate precise isolation and weight distribution. The brand provides various lengths and thicknesses, enabling technicians to create natural, balanced looks for each client.

Troubleshooting Common Mapping Issues

Addressing uneven lash distribution requires careful re-evaluation of the initial map and strategic adjustments during application. Correcting mapping mistakes often involves gentle removal and re-application, prioritizing lash health. Consistent isolation is crucial to prevent sticking and ensure a clean, polished finish. Regularly assess the overall balance and symmetry throughout the process.

Addressing Uneven Lash Distribution

Uneven distribution often stems from inconsistent isolation or varying natural lash density. Carefully reassess the map, focusing on areas needing more or fewer extensions. Strategic placement of slightly longer lashes can balance sparse sections. Ensure uniform spacing and avoid clumping. Adjust the fan base to complement natural growth patterns.

Correcting Mapping Mistakes

Discovering errors during application requires careful correction. Gently remove incorrectly placed lashes with lash safe remover. Re-evaluate the initial map and adjust accordingly, prioritizing balance and natural appearance. Avoid excessive removal that could damage natural lashes. Document the changes made for future reference and improved technique.

Advanced Mapping Techniques

Explore hybrid mapping, seamlessly blending classic and volume techniques for textured, fuller lashes. Strategic volume lash placement enhances the outer corners or areas needing extra definition. Consider customized maps based on client preferences and lash health. Mastering these skills elevates your artistry and client satisfaction.

Hybrid mapping combines the subtlety of classic lashes with the volume of volume lashes. Strategically place volume fans towards the outer corners, creating a wispy, textured effect. Classic lashes maintain natural curl and length in the inner corners. This technique offers customizable fullness, catering to diverse client desires and lash conditions.

Maintaining Lash Health & Safety

Prioritize proper lash isolation during mapping to prevent extensions from adhering to skin. Gentle handling minimizes natural lash trauma. Educate clients on aftercare, including avoiding oil-based products and excessive rubbing. Regular checks for allergic reactions are crucial. Sterilize tools thoroughly to prevent infection and ensure client wellbeing.

Proper Lash Isolation Techniques

Effective isolation is paramount for healthy lash extensions. Utilize angled tweezers to carefully separate each natural lash, ensuring no adhesion to neighboring lashes or skin. Consistent, precise isolation prevents discomfort and maintains natural lash integrity. Practice makes perfect – refine technique for speed and accuracy during mapping.

Avoiding Lash Trauma During Mapping

Gentle handling is crucial during mapping. Avoid excessive tension or pulling on natural lashes, which can cause breakage or premature shedding. Use light pressure with tools and prioritize client comfort throughout the process. Proper technique minimizes stress on the follicles, preserving long-term lash health and preventing damage.

Brands Comparison: Lovely, Shine, Vivienne

Lovely Lashes offer diverse styles and benefits, catering to varied preferences. Shine Lashes are known for consistent quality and a broad range of curls and lengths. Vivienne Lashes distinguish themselves with unique selling points, potentially focusing on specialized materials or innovative designs for optimal application.

Lovely Lashes: Features and Benefits

Lovely Lashes provide a versatile selection, accommodating diverse lash mapping techniques and client desires. They boast a range of curls – B, C, D, L, and M – enabling customized looks. Benefits include comfortable wear, natural appearance, and ease of application for lash artists, enhancing overall client satisfaction.

Shine Lashes: Quality and Range

Shine Lashes are recognized for consistent quality and a comprehensive range, supporting precise classic lash mapping. Offering various curls (B through M), lengths, and thicknesses, they cater to diverse eye shapes and client preferences. This allows for creating balanced, natural-looking extensions, ensuring optimal comfort and lasting results.

Vivienne Lashes: Unique Selling Points

Vivienne Lashes distinguish themselves through innovative manufacturing and a focus on natural-looking results, ideal for classic lash mapping. They offer unique fiber combinations for enhanced flexibility and a comfortable feel. This brand prioritizes consistent curl retention and a refined matte finish, contributing to a sophisticated, elegant lash extension appearance.

Brands Comparison: Beautier, Beauty Eyes, I-beauty

Beautier Lashes are widely popular, known for diverse styles and affordability. Beauty Eyes Lashes cater to professionals, offering premium quality and consistent performance for precise mapping. I-beauty Lashes stand out with innovative designs and a focus on lightweight extensions, enhancing comfort and natural-looking volume during classic lashing.

Beautier Lashes: Popularity and Reviews

Beautier Lashes consistently receive positive reviews for their extensive range of curls and lengths, ideal for varied mapping techniques. Technicians praise their affordability and ease of use, making them suitable for both beginners and experienced lash artists. Many highlight consistent quality and minimal stickies, simplifying the application process.

Beauty Eyes Lashes: Professional Grade Options

Beauty Eyes Lashes are recognized as a professional-grade choice, offering superior consistency and a refined taper for precise classic lash mapping. Experienced artists appreciate the reliable curl retention and natural appearance achieved with these lashes. They cater to detailed mapping, ensuring a balanced and elegant final look.

I-beauty Lashes: Innovation and Design

I-beauty Lashes stand out through continuous innovation in lash design, offering unique options for advanced classic lash mapping techniques. Their focus on lightweight materials and varied textures allows for customized looks, enhancing natural lash isolation and weight distribution. Artists value their precision and versatility.

Brands Comparison: Neicha, Be Perfect

Neicha Lashes specialize in high-quality, consistent curls crucial for precise classic mapping, favored by professionals seeking reliable performance. Be Perfect Lashes offer versatility and value, catering to diverse skill levels with a broad range of styles, ideal for experimenting with mapping variations.

Neicha Lashes: Specialization and Quality

Neicha Lashes are renowned for their focused specialization, delivering consistently high-quality lashes essential for detailed classic mapping. Their dedication to precision ensures uniform curl and length, simplifying the creation of balanced, natural-looking sets. Professionals value Neicha for reliable performance and predictable results.

Be Perfect Lashes: Versatility and Value

Be Perfect Lashes offer a compelling combination of versatility and affordability, making them ideal for lash artists building their kit. They provide a broad range of curls and lengths suitable for diverse mapping techniques. This brand delivers excellent value without compromising on essential quality for classic lash applications.

Resources for Continued Learning

Expand your expertise through professional journals like the Ophthalmojournal and resources focusing on observational study reporting, such as the STROBE guidelines. Explore online retailers like Lash.ru for product knowledge. Continuous education ensures safe, effective, and innovative classic lash mapping techniques.

thor rv manuals online

Thor RV Manuals Online: A Comprehensive Guide

Thor Motor Coach owners benefit from readily available resources, including digital and physical manuals, offering guidance on operation, maintenance, and safety procedures.

Understanding Thor Motor Coach Resources

Thor Motor Coach prioritizes owner support, offering a wealth of resources designed to enhance the RV experience. These resources extend beyond basic operation, encompassing detailed maintenance schedules and troubleshooting guides. The Thor Motor Coach Owners Resource Portal serves as a central hub, providing convenient access to digital manuals, wiring diagrams, and floor plan-specific information.

Understanding the available resources empowers owners to confidently address both routine maintenance and unexpected issues. Accessing these manuals online allows for quick reference and eliminates the need to carry bulky physical copies. Furthermore, Thor provides dedicated dealer support to assist with manual access and technical questions, ensuring a comprehensive support network for all owners.

Where to Find Official Thor RV Manuals

Official Thor RV manuals are accessible through the Owners Resource Portal, the Thor website, and directly from authorized Thor dealerships for assistance.

Thor Motor Coach Owners Resource Portal

The Thor Motor Coach Owners Resource Portal is a centralized hub designed for current owners, providing convenient access to a wealth of information. This digital platform consolidates essential resources, including downloadable owner’s manuals, wiring diagrams, and floor plan-specific guides.

Registration is straightforward, typically requiring your Vehicle Identification Number (VIN). Once registered, you can easily locate the documentation specific to your RV model and year. The portal streamlines the process of finding crucial information related to operation, maintenance, and troubleshooting, eliminating the need to search through multiple sources. It’s a valuable tool for both new and experienced Thor owners seeking to maximize their RV experience and ensure proper vehicle care.

Thor Motor Coach Website Manual Search

The official Thor Motor Coach website offers a dedicated section for locating RV manuals, providing an alternative to the Owners Resource Portal. Users can typically search by model year and RV type (Class A, B, or C) to narrow down the results. This direct search function allows quick access to digital copies of owner’s manuals, service manuals, and supplemental guides.

While the portal often requires registration, the website’s manual search may offer publicly accessible documents. It’s a useful option for prospective buyers researching a specific model or owners who prefer not to create an account. The website also frequently hosts helpful videos and FAQs related to RV operation and maintenance, complementing the written manuals available for download.

Dealer Support for Manual Access

Thor Motor Coach dealerships serve as a valuable resource for obtaining RV manuals, particularly for owners who prefer a physical copy or require assistance navigating the digital options. Dealership service departments often maintain a stock of common manuals for the models they sell and can readily order specific owner’s guides if needed.

Furthermore, dealership technicians can provide expert guidance on understanding the manual’s contents and interpreting complex diagrams, like wiring diagrams; This personalized support is especially beneficial for first-time RV owners or those encountering unfamiliar systems. Don’t hesitate to contact your local Thor dealer for help locating or understanding your RV’s documentation.

Types of Thor RV Manuals Available

Thor Motor Coach provides diverse manuals – owner’s for operation, service for maintenance, wiring diagrams for electrical systems, and model-specific guides;

Owner’s Manuals: Core Operation

Thor Motor Coach owner’s manuals are your primary resource for understanding the fundamental operation of your recreational vehicle. These guides detail essential systems, including the control panel functions, lighting, plumbing, and appliance usage. They provide step-by-step instructions for setting up and operating key components, ensuring a safe and enjoyable travel experience.

You’ll find information on operating the generator, managing water and waste tanks, and utilizing the RV’s entertainment systems. These manuals emphasize safety precautions and best practices for everyday use. Understanding these core operational aspects is crucial for maximizing the functionality and longevity of your Thor RV, allowing you to confidently navigate and enjoy your adventures on the road.

Service Manuals: Detailed Maintenance

Thor Motor Coach service manuals delve into the intricate details of RV maintenance and repair. These comprehensive guides are geared towards those comfortable with mechanical tasks or qualified technicians. They provide exploded diagrams, torque specifications, and detailed procedures for servicing various components, from the chassis and engine to the electrical and plumbing systems.

Service manuals cover routine maintenance schedules, diagnostic procedures, and repair instructions for addressing potential issues. They are invaluable for performing preventative maintenance, extending the life of your RV, and tackling more complex repairs. Accessing these manuals empowers owners to understand their RV’s inner workings and potentially save on repair costs, ensuring continued reliability and performance.

Wiring Diagrams: Electrical Systems

Thor Motor Coach wiring diagrams are essential for understanding and troubleshooting the complex electrical systems within your RV. These diagrams visually represent the layout of all wiring, components, and connections, including the 12V and 120V circuits. They are crucial for safely diagnosing electrical faults, adding accessories, or performing repairs.

Detailed diagrams illustrate the path of electricity throughout the RV, identifying fuse locations, wire gauges, and component connections. Understanding these diagrams allows owners to confidently address electrical issues, ensuring the safe and reliable operation of all onboard systems. Always disconnect power before working on any electrical components, and consult a qualified technician if you are uncomfortable with electrical work.

Floor Plan Specific Guides

Thor Motor Coach recognizes that each RV floor plan presents unique features and configurations. Therefore, many models offer supplemental guides tailored specifically to the layout of your unit. These guides go beyond the general owner’s manual, detailing the location of specific components, unique system operations, and any floor plan-dependent instructions.

These specialized guides often include detailed illustrations highlighting the placement of storage compartments, appliance locations, and the operation of features exclusive to that floor plan. Accessing these guides ensures you fully understand and maximize the functionality of your RV’s specific design, enhancing your overall ownership experience and simplifying maintenance tasks. Check the Thor Motor Coach website or owner’s portal for availability.

Decoding Thor RV Manual Sections

Thor RV manuals are logically structured, covering safety, operation, maintenance, and troubleshooting—essential for understanding your RV’s systems and ensuring safe travels.

Safety Information & Precautions

Thor RV manuals prioritize safety, dedicating significant sections to crucial precautions for operation and maintenance. These guidelines cover everything from proper LP gas system handling and fire extinguisher usage to electrical safety and generator operation.

Understanding weight limits – GVWR, GCWR, and axle ratings – is paramount to prevent accidents and ensure vehicle stability. Manuals detail proper hitch usage, tire pressure monitoring, and safe driving practices specific to RVs.

Detailed warnings regarding carbon monoxide dangers, proper ventilation, and emergency procedures are also included. Owners are urged to thoroughly review these sections before operating their RV, ensuring a safe and enjoyable experience for all passengers. Ignoring these precautions can lead to serious injury or property damage.

Operating Instructions: Systems Overview

Thor RV manuals provide comprehensive operating instructions, beginning with a detailed systems overview. This includes explanations of the electrical system – shore power connections, battery charging, and inverter operation – alongside the plumbing system, covering fresh water tanks, grey/black water management, and water heater functionality.

Heating and air conditioning controls are thoroughly explained, as are appliance operation guides for stoves, refrigerators, and microwaves. Manuals also detail the operation of slide-outs, awnings, and leveling systems, ensuring owners understand how to properly deploy and retract these features.

Step-by-step instructions, often accompanied by diagrams, simplify complex systems, allowing owners to confidently operate their RV’s various components and maximize their travel experience.

Maintenance Schedules & Procedures

Thor RV manuals outline crucial maintenance schedules to preserve vehicle longevity and safety. These schedules detail routine checks for all major systems, including engine (or chassis) fluid levels, tire pressure, and brake inspections. They specify intervals for tasks like filter replacements – air, fuel, and water – and lubrication of moving parts.

Procedures for winterization and de-winterization are clearly explained, protecting plumbing from freezing damage. Manuals also cover appliance maintenance, such as cleaning refrigerator coils and inspecting propane lines. Detailed instructions guide owners through preventative measures, minimizing potential repairs and ensuring reliable performance throughout their RV adventures.

Troubleshooting Common Issues

Thor RV manuals dedicate sections to diagnosing and resolving frequently encountered problems. These guides assist owners in identifying issues with electrical systems – like tripped breakers or malfunctioning outlets – and plumbing concerns, such as leaks or pump failures. They offer step-by-step instructions for addressing appliance malfunctions, covering everything from furnace ignition problems to refrigerator cooling issues.

The manuals often include basic troubleshooting for chassis components, aiding in identifying potential engine or brake-related concerns. Importantly, they emphasize when professional assistance is required, preventing owners from attempting repairs beyond their skill level and ensuring safety. Clear diagrams and illustrations further simplify the diagnostic process.

Specific Thor RV Model Manuals (Popular Lines)

Thor provides dedicated manuals for each RV line – Aria, Palazzo, Four Winds, Tellaro – ensuring owners have precise guidance for their specific model.

Class A Motorhome Manuals (Aria, Palazzo)

Aria and Palazzo Class A motorhome owners require comprehensive guides due to their complex systems. Thor Motor Coach provides detailed owner’s manuals covering everything from operating the residential refrigerator and Aqua-Hot heating system to understanding the multiplex electrical system. These manuals delve into chassis and engine specifics, crucial for maintenance schedules and troubleshooting.

Furthermore, dedicated sections explain the operation of entertainment systems, awnings, and leveling jacks. Safety protocols, including emergency procedures and weight distribution guidelines, are prominently featured. Accessing these manuals digitally through the Thor website or the Owners Portal ensures owners always have the latest information at their fingertips, enhancing their RV experience and promoting safe travels.

Class C Motorhome Manuals (Four Winds, Chateau)

Four Winds and Chateau Class C motorhome manuals offer a focused approach to understanding these popular RVs; Thor Motor Coach provides guides detailing the Ford E-Series or Mercedes-Benz Sprinter chassis, covering essential maintenance like fluid checks and tire pressure. Interior systems, including the kitchen appliances, bathroom facilities, and sleeping areas, receive dedicated sections with clear operating instructions.

Owners will find valuable information on the operation of the RV’s generator, air conditioning, and heating systems. Safety features, like smoke detectors and carbon monoxide alarms, are explained, alongside emergency procedures. Digital access via the Thor website or Owners Portal ensures convenient access to updated manuals, promoting confident operation and long-term enjoyment of these versatile motorhomes.

Class B Van Manuals (Tellaro, Sequence)

Tellaro and Sequence Class B van manuals from Thor Motor Coach are specifically tailored to the unique features of these agile RVs, often built on Mercedes-Benz Sprinter chassis. These guides detail the operation of the integrated systems, including the multiplex electrical control panel and the freshwater/wastewater tanks. Owners benefit from sections covering the power awning, solar panel functionality, and the compact kitchen and bathroom setups.

Maintenance schedules focus on the Sprinter chassis, alongside RV-specific components. Troubleshooting guides address common issues, and safety information emphasizes the van’s maneuverability. Digital manuals, accessible through the Thor website and Owners Portal, provide convenient updates and ensure owners have the latest information for a seamless travel experience in their compact adventure vehicle.

Utilizing Thor RV Manuals for Maintenance

Thor RV manuals provide detailed schedules for engine upkeep, appliance care, and crucial seasonal tasks like winterization, ensuring longevity and performance.

Engine & Chassis Maintenance

Thor RV manuals dedicate significant sections to engine and chassis upkeep, recognizing their critical role in safe and reliable travel. These guides detail fluid level checks – oil, coolant, brake fluid, and power steering fluid – alongside recommended intervals for replacement.

Specific attention is given to filter maintenance, covering air filters, fuel filters, and oil filters, outlining procedures for inspection and changes. The manuals also address chassis lubrication points, tire pressure monitoring, and brake system inspections.

Furthermore, they often include torque specifications for wheel lug nuts and other critical fasteners. Following these guidelines diligently, as outlined in your Thor owner’s resource, prevents costly repairs and ensures optimal performance during your adventures.

Appliance Operation & Care

Thor RV manuals provide detailed instructions for operating and maintaining the various appliances found within your motorhome. This includes comprehensive guides for refrigerators, stoves, ovens, microwaves, water heaters, and air conditioning units. Understanding proper operation extends appliance lifespan and maximizes efficiency.

Manuals outline cleaning procedures for each appliance, specifying appropriate cleaning agents and techniques to avoid damage. Troubleshooting sections address common issues, offering solutions for minor malfunctions. Safety precautions are prominently featured, emphasizing the importance of proper ventilation and avoiding flammable materials.

Regular care, as detailed in your Thor owner’s resource, ensures these essential components function reliably, enhancing your overall RV experience and preventing unexpected breakdowns on the road.

Winterization & De-Winterization Guides

Thor RV manuals dedicate significant sections to preparing your motorhome for cold weather storage and returning it to service in the spring. These guides detail the crucial steps to prevent damage from freezing temperatures, including draining water systems, adding RV antifreeze, and protecting plumbing lines.

The winterization process outlined in your Thor owner’s resource covers fresh water tanks, hot water heaters, and waste systems. De-winterization instructions provide a clear checklist for flushing lines, sanitizing tanks, and inspecting for leaks before your first trip of the season.

Following these procedures diligently safeguards against costly repairs and ensures your RV remains in optimal condition, ready for adventure whenever the weather permits.

Digital vs. Physical Manuals: Pros & Cons

Thor RV manuals are accessible in both digital and physical formats, each offering distinct advantages. Digital manuals, readily available through the Thor Motor Coach Owners Resource Portal, provide instant access, searchability, and eliminate the risk of loss or damage. They’re environmentally friendly and often updated with the latest information.

However, physical manuals don’t require a device or internet connection, making them ideal for remote locations. Some owners prefer the tactile experience and ease of referencing diagrams without screen glare.

Ultimately, the best option depends on individual preferences. Many owners choose to utilize both – keeping a digital copy for convenience and a physical copy as a reliable backup.

glacier bay water dispenser manual

Glacier Bay Water Dispenser Manual: A Comprehensive Guide

Welcome! This manual details operation‚ installation‚ and maintenance for your Glacier Bay dispenser‚ ensuring optimal performance and longevity of this essential appliance.

Understanding Your Glacier Bay Dispenser

Your Glacier Bay water dispenser is designed to provide convenient access to both hot and cold purified water. It features a top-loading design‚ simplifying the water refilling process‚ and incorporates anti-leak technology for enhanced reliability. This appliance is engineered for both home and office use‚ offering a consistent supply of refreshing beverages.

Understanding the dispenser’s components is crucial for proper operation. Key elements include the water reservoir‚ heating and cooling systems‚ dispensing taps‚ and safety features like a child safety lock. The dispenser’s functionality relies on a balance between these systems‚ ensuring water is heated‚ cooled‚ and dispensed efficiently. Regular maintenance‚ as outlined in this manual‚ will contribute to the longevity and optimal performance of your Glacier Bay dispenser.

The name “Glacier Bay” evokes the purity and natural source of water‚ mirroring the dispenser’s aim to deliver clean‚ refreshing hydration.

Model Identification & Key Features

Identifying your specific Glacier Bay dispenser model is essential for accessing the correct support and replacement parts. Locate the model number on the appliance’s rear panel or within the owner’s manual. Common models include top-load hot and cold dispensers‚ often finished in matte black or stainless steel.

Key features across most Glacier Bay dispensers include independent hot and cold water tanks‚ allowing simultaneous access to both temperatures. The anti-leak design minimizes the risk of spills and water damage. Many models incorporate a child safety lock on the hot water tap‚ preventing accidental scalding. Temperature adjustment controls enable users to customize water heating and cooling levels.

Additional features may include a removable drip tray for easy cleaning and a large capacity water reservoir‚ reducing the frequency of refills. These features combine to deliver a convenient and reliable hydration solution.

Safety Precautions & Warnings

Important Safety Instructions: Always read and understand these precautions before operating your Glacier Bay water dispenser. To prevent electrical shock‚ never immerse the unit‚ cord‚ or plug in water. Ensure the power cord is undamaged and plugged into a grounded outlet. Do not operate the dispenser with a damaged cord or plug.

Hot water can cause severe burns; Activate the child safety lock when children are present. Avoid touching the hot water tap during or immediately after dispensing. Regularly inspect the water line connections for leaks. Do not use abrasive cleaners or harsh chemicals on the dispenser’s exterior or interior.

This appliance is intended for household use only. Improper use may void the warranty. Disconnect the dispenser from the power source before cleaning or performing maintenance. If the dispenser malfunctions‚ do not attempt to repair it yourself; contact qualified service personnel.

Installation & Setup

Begin installation by carefully unpacking all components and verifying against the included checklist‚ preparing for a seamless connection to water and power.

Unboxing & Component Checklist

Carefully unpack your Glacier Bay Water Dispenser and verify all components are present before proceeding. The box should contain the dispenser unit itself‚ a water line connection kit (including hoses and fittings)‚ the power cord‚ a user manual (this document!)‚ and potentially a filter depending on the model.

Inspect each item for any shipping damage. If damage is found‚ do not attempt to install or operate the dispenser and contact Glacier Bay customer support immediately. A complete component list is typically printed within the packaging; cross-reference this list with the contents of your box.

Key components to confirm: Dispenser body‚ hot and cold water tanks (integrated)‚ drip tray‚ water line connectors‚ power cable‚ and any included filters. Retain the packaging materials for potential returns or warranty claims. Proper inventory ensures a smooth installation process and avoids delays.

Water Line Connection – Step-by-Step

Begin by shutting off the cold water supply to the designated connection point. Locate the water inlet valve on the back of your Glacier Bay dispenser. Attach the provided water supply line to this valve‚ ensuring a snug‚ hand-tight connection. Then‚ connect the other end of the supply line to a cold water pipe‚ utilizing the appropriate fitting (typically a compression fitting).

Important: Use Teflon tape on all threaded connections to prevent leaks. Slowly turn the cold water supply back on‚ carefully checking for any leaks at both connection points. Tighten connections as needed‚ but avoid over-tightening.

Flush the system by dispensing several gallons of water to remove any air or debris from the line. This initial flush ensures clean‚ fresh-tasting water. Regularly inspect the connections for leaks during the first few days of operation.

Electrical Requirements & Powering On

Ensure your outlet meets the specified voltage requirements – typically 115V/60Hz. Do not use an extension cord; plug the Glacier Bay dispenser directly into a grounded electrical outlet. Before powering on‚ verify the dispenser is positioned correctly and the water line is securely connected and leak-free.

Locate the power switch‚ usually found on the rear of the unit‚ and switch it to the “ON” position. The dispenser will initiate a self-check process‚ indicated by illuminated control panel lights. Allow sufficient time for the cooling system to reach the desired temperature before dispensing cold water.

Caution: Never operate the dispenser with a damaged power cord or plug. If the dispenser fails to power on‚ check the circuit breaker or fuse box. Contact customer support if issues persist.

Operation & Functionality

Explore features! This section guides you through dispensing water‚ utilizing the child safety lock‚ and precisely adjusting temperature settings for optimal use.

Dispensing Hot & Cold Water

Accessing Water: Your Glacier Bay dispenser offers both hot and cold water options for diverse needs. To dispense‚ simply press the corresponding button – clearly labeled “Hot” or “Cold” – with your cup positioned beneath the spout.

Safety First: Exercise caution when dispensing hot water to prevent scalding. Always supervise children during operation. The hot water temperature is preset for convenience‚ but be mindful of its heat.

Cold Water Enjoyment: The cold water function provides refreshingly chilled water‚ ideal for beverages or immediate hydration. Ensure sufficient cooling time after initial setup for optimal coldness.

Continuous Flow: Holding the button allows for continuous dispensing. Release the button to stop the flow. Avoid prolonged continuous dispensing to prevent potential overflow. Regularly check for any leaks around the spout area.

Initial Flush: Before first use‚ it’s recommended to dispense a liter of water from both the hot and cold spouts to flush the system and ensure water purity.

Child Safety Lock – Activation & Deactivation

Protecting Little Ones: The Glacier Bay dispenser features a child safety lock to prevent accidental hot water dispensing. This is crucial in households with young children. Activation is simple: press and hold the “Child Lock” button – typically indicated by a lock icon – for approximately three seconds until a visual or audible confirmation is received.

Locked Operation: When activated‚ the hot water button will be disabled‚ preventing accidental presses. The cold water function remains operational. Attempting to dispense hot water while locked will likely result in an indicator light flashing.

Deactivation Process: To deactivate the child lock‚ repeat the process: press and hold the “Child Lock” button for three seconds. Again‚ look for a confirmation signal. Ensure the lock is deactivated when adults require access to hot water;

Regular Checks: Periodically verify the lock’s functionality to ensure it’s operating correctly. A properly functioning lock provides peace of mind and enhances safety.

Adjusting Temperature Settings

Personalized Comfort: Your Glacier Bay dispenser allows for customized hot and cold water temperatures. Temperature adjustments are typically made via dedicated “Hot” and “Cold” temperature control buttons‚ or a digital display panel. Consult your specific model’s diagram for precise button locations.

Hot Water Adjustment: Increase or decrease the hot water temperature incrementally by pressing the “Hot Temp Up” or “Hot Temp Down” buttons. The display will show the selected temperature‚ usually in Fahrenheit or Celsius. Avoid setting excessively high temperatures to prevent scalding.

Cold Water Adjustment: Similarly‚ adjust the cold water temperature using the “Cold Temp Up” or “Cold Temp Down” buttons. Lower temperatures consume more energy‚ so find a balance between desired coolness and efficiency.

Initial Setup: After initial installation‚ allow several hours for the water to reach the selected temperatures. Monitor the dispensed water to confirm accurate temperature settings.

Maintenance & Cleaning

Preserving Purity: Regular cleaning ensures optimal performance and water quality. Follow the outlined schedule for exterior wiping‚ tank sanitization‚ and filter upkeep.

Regular Cleaning Schedule

Maintaining Hygiene is Key: To ensure consistently fresh and clean water‚ adhere to this recommended cleaning schedule. Daily: Wipe down the dispenser’s exterior surfaces with a soft‚ damp cloth to remove dust and spills. Pay particular attention to the dispensing nozzles. Weekly: Thoroughly clean the drip tray to prevent bacterial growth and maintain a sanitary environment. Monthly: Sanitize the hot and cold water tanks. Refer to the ‘Internal Tank Sanitization’ section for detailed instructions.

Filter Focus: Inspect the water filter monthly. Replace it every six months‚ or sooner if you notice a decrease in water flow or a change in taste. Using genuine Glacier Bay replacement filters is crucial for optimal performance and water quality. Annually: A comprehensive deep clean‚ including all internal components accessible without disassembly‚ is recommended to prolong the lifespan of your dispenser and guarantee consistently pure water.

Exterior Cleaning Procedures

Gentle is Best: Maintaining the exterior of your Glacier Bay dispenser is simple! Use a soft‚ damp cloth with mild dish soap to wipe down all surfaces. Avoid abrasive cleaners‚ scouring pads‚ or harsh chemicals‚ as these can damage the finish. Stainless Steel Care: For stainless steel models‚ use a stainless steel cleaner and polish to prevent fingerprints and water spots‚ enhancing its appearance.

Nozzle Sanitation: Pay close attention to the dispensing nozzles. Regularly wipe them with a clean‚ damp cloth to remove any residue. For stubborn buildup‚ a solution of warm water and vinegar can be used‚ followed by a thorough rinse. Avoid Water Intrusion: Ensure no water enters the dispenser’s internal components during cleaning. Always wring out the cloth thoroughly before wiping surfaces. Dry all surfaces completely after cleaning to prevent watermarks.

Internal Tank Sanitization

Regular Sanitization is Key: To ensure consistently fresh and clean water‚ sanitize the internal tank of your Glacier Bay dispenser every six months‚ or more frequently if needed. Vinegar Solution: Prepare a sanitizing solution of equal parts white vinegar and water. Drain & Fill: First‚ completely drain the tank by dispensing water from both hot and cold taps until empty. Then‚ pour the vinegar solution into the tank‚ filling it completely.

Soak & Flush: Allow the solution to sit in the tank for at least one hour‚ ideally overnight‚ to effectively disinfect. After soaking‚ drain the vinegar solution completely. Finally‚ thoroughly flush the tank by filling and draining it with fresh water several times until the vinegar smell is completely gone. This ensures no residual taste remains.

Troubleshooting Common Issues

Quick Solutions: This section provides guidance for resolving typical problems like no water‚ leaks‚ or temperature inconsistencies with your Glacier Bay dispenser.

No Water Dispensing – Possible Causes

Problem: Your Glacier Bay water dispenser isn’t delivering water. Several factors could contribute to this issue‚ requiring systematic checks. First‚ verify the water supply is turned on fully to the dispenser. Check both the main water shut-off valve and the dispenser’s dedicated valve.

Next‚ inspect the water line connection for kinks or obstructions. Ensure the line isn’t crushed or bent‚ restricting water flow. A clogged filter is a common culprit; replace it if it’s been longer than the recommended interval.

Air in the line can also prevent dispensing. Try dispensing water for an extended period to purge any trapped air. If the problem persists‚ examine the internal components for freezing‚ especially in colder environments. Finally‚ confirm the dispenser is properly powered on and functioning correctly‚ as some models have safety interlocks.

Water Leaks – Identification & Solutions

Problem: Discovering a water leak from your Glacier Bay dispenser requires immediate attention. First‚ pinpoint the leak’s source – is it at the water line connections‚ the dispenser’s base‚ or around the internal tank? Tighten all connections carefully‚ avoiding over-tightening which can damage fittings.

Inspect the water line for cracks or punctures; replace it if damaged. A leaking tank often indicates a faulty seal or crack‚ potentially requiring professional repair or replacement. Check the drip tray for overflow‚ which could signal a problem with the internal dispensing mechanism.

Glacier Bay’s anti-leak technology may indicate a specific component failure; consult the manual for details. Ensure proper drainage and immediately clean up any spilled water to prevent slips or electrical hazards. If the leak persists after these checks‚ contact customer support.

Temperature Inconsistencies – Diagnosis

Issue: If your Glacier Bay dispenser isn’t delivering water at the selected temperature‚ several factors could be at play. First‚ verify the temperature settings – ensure they haven’t been accidentally adjusted. Allow sufficient time (up to 24 hours) for the system to reach the new setpoint after adjustments.

Check the power supply; inconsistent voltage can affect cooling/heating performance. Inspect the ventilation around the unit – restricted airflow hinders efficient operation. A buildup of scale inside the tank can also reduce heating/cooling efficiency; regular sanitization is crucial.

Consider ambient room temperature – extremely cold or hot environments impact performance. If problems persist‚ a faulty thermostat or compressor might be the cause‚ requiring professional diagnosis and repair. Refer to the warranty information for service options.

Advanced Features & Considerations

Explore the anti-leak technology‚ filter replacement schedules‚ and understand how Glacier Bay’s name reflects its origins and water source impact.

Anti-Leak Technology Explained

Glacier Bay water dispensers incorporate a robust anti-leak system designed for peace of mind and to prevent water damage. This technology centers around several key components working in unison. Firstly‚ high-quality‚ food-grade tubing and connectors are utilized‚ minimizing potential weak points. Secondly‚ a pressure-release valve regulates internal water pressure‚ preventing excessive build-up that could lead to leaks.

Furthermore‚ the dispenser features a drip tray and containment system to catch any minor condensation or accidental spills. The design prioritizes secure connections and durable materials. Regular inspection of these components‚ as outlined in the maintenance section‚ is crucial for continued leak prevention. This system isn’t foolproof‚ but significantly reduces the risk compared to standard dispensers‚ offering a reliable and safe hydration solution.

Filter Replacement – Types & Frequency

Maintaining optimal water quality requires regular filter replacement in your Glacier Bay dispenser. Two primary filter types are commonly used: sediment filters and carbon filters. Sediment filters remove particulate matter like rust and dirt‚ extending the life of the carbon filter. Carbon filters‚ conversely‚ reduce chlorine‚ taste‚ and odor‚ improving water palatability.

Frequency depends on water quality and usage. For standard municipal water‚ replace the sediment filter every six months and the carbon filter every twelve months. If your water source is well water or has known contaminants‚ consider replacing them every three to six months. Glacier Bay offers compatible replacement filters‚ easily identified by model number. Always follow the instructions provided with the new filter for proper installation‚ ensuring a secure fit to prevent leaks and maintain filtration effectiveness.

Glacier Evolution & Water Source Impact (Related to Glacier Bay’s Name)

The name “Glacier Bay” evokes the powerful forces shaping our planet’s freshwater resources. Glaciers‚ massive accumulations of ice and snow‚ are vital components of the water cycle‚ slowly releasing meltwater that feeds rivers and replenishes groundwater. Their lifecycle‚ influenced by precipitation and temperature‚ directly impacts water availability.

Historically‚ glacial melt contributed significantly to freshwater sources. However‚ accelerated melting due to climate change poses challenges. While Glacier Bay dispensers don’t directly utilize glacial meltwater‚ the brand’s name symbolizes the purity and natural origin of water. Understanding glacier evolution highlights the importance of water conservation and responsible sourcing. Protecting these icy reservoirs ensures future generations have access to this precious resource‚ mirroring Glacier Bay’s commitment to providing clean‚ refreshing water.

Warranty Information & Support

Your Glacier Bay dispenser is covered by a limited warranty against defects in materials and workmanship. Contact customer support for assistance and replacement parts.

Warranty Coverage Details

Glacier Bay proudly stands behind the quality of its water dispensers. This warranty covers defects in materials and workmanship under normal residential use for a period of one year from the date of purchase. This includes components that fail due to manufacturing errors‚ such as the heating element‚ cooling system‚ or dispensing mechanism.

However‚ the warranty does not cover damage resulting from misuse‚ abuse‚ improper installation‚ negligence‚ accidents‚ or unauthorized modifications. Normal wear and tear‚ such as cosmetic blemishes or minor scratches‚ are also excluded. Damage caused by hard water‚ mineral buildup‚ or failure to follow the recommended cleaning schedule will void the warranty.

To make a warranty claim‚ you must provide proof of purchase (receipt or invoice) and a detailed description of the defect. The defective part may need to be returned for inspection. Glacier Bay reserves the right to repair or replace the defective part at its discretion. This warranty gives you specific legal rights‚ and you may have other rights which vary by location.

Contacting Glacier Bay Customer Support

Need assistance? The Glacier Bay customer support team is readily available to help with any questions or concerns regarding your water dispenser. For immediate support‚ please visit the Home Depot website and navigate to the Glacier Bay product support section. Here‚ you’ll find a comprehensive FAQ database addressing common issues and troubleshooting steps.

You can also reach our dedicated support team via phone at 1-855-HD-GLACIER (1-855-434-5224) during regular business hours‚ Monday through Friday‚ 8 AM to 5 PM Eastern Time. Alternatively‚ email support is available at glacierbay.support@homedepot.com. Please include your model number and a detailed description of your issue when contacting us.

When contacting support‚ having your purchase date and proof of purchase readily available will expedite the process. Our knowledgeable representatives are committed to providing efficient and helpful assistance to ensure your complete satisfaction with your Glacier Bay product.

Finding Replacement Parts

Maintaining your dispenser often requires replacing components over time. Glacier Bay offers a wide range of replacement parts to ensure the continued functionality of your water dispenser. The most convenient method for locating and purchasing these parts is through the Home Depot website. Navigate to the Glacier Bay section and select your specific dispenser model.

A detailed parts diagram will be displayed‚ allowing you to easily identify the component you need. Parts commonly replaced include water filters‚ drip trays‚ spouts‚ and internal tank components. You can also find parts by searching the Home Depot website using the part number‚ if known.

For assistance in identifying the correct part‚ contact Glacier Bay customer support (1-855-HD-GLACIER) with your model number. Always ensure you order genuine Glacier Bay replacement parts to guarantee compatibility and maintain the integrity of your appliance.

black & decker bread maker manual

Black & Decker Bread Maker Manual: A Comprehensive Guide

This manual provides detailed instructions for Black & Decker bread maker models like B2000, B2200, and B1560, ensuring successful baking and troubleshooting assistance.

Understanding Your Black & Decker Bread Maker

Black & Decker bread makers simplify home baking, offering convenience and consistent results. Familiarize yourself with your model – B2000, B2200, or others – as features vary. Understanding the machine’s components, like the pan and paddle, is crucial.

Proper usage involves accurate ingredient measurement and following the correct order of addition. The control panel dictates cycle selection (Basic, Whole Wheat, French), impacting baking time and texture. Regular cleaning and maintenance ensure longevity and optimal performance.

Model Identification & Variations

Identifying your Black & Decker bread maker model is essential for accessing specific instructions and parts. Common models include the B2000, B2200, B2300, and B6000C, with variations like the B2005F. Locate the model number – often B1560, B1600, or B1620 – on the unit’s base, typically on a sticker or metal plate.

Variations may include differing cycle options or features. Referencing the correct model number ensures compatibility when seeking replacement parts or troubleshooting assistance online.

Common Black & Decker Bread Maker Models

Several Black & Decker bread maker models are frequently used in home kitchens. Popular choices include the B2000, known for its simplicity, and the B2200, offering more cycle options. The B2300 and B6000C represent further advancements, while the B2005F provides a compact design.

Older, yet reliable, models like the B1560, B1600, and B1620 are still widely supported. Understanding these common models helps in finding relevant resources and community support.

Locating the Model Number

Finding your Black & Decker bread maker’s model number is crucial for accessing specific manuals and support. Typically, it’s located on a sticker or metal plate affixed to the unit’s base. Carefully inspect the bottom of the appliance for a label containing alphanumeric characters.

This number, such as B1560 or B2200, identifies your exact model. Referencing this number ensures you obtain the correct documentation and replacement parts when needed.

Setting Up Your Bread Maker

Proper setup is essential for optimal performance. Begin by placing your Black & Decker bread maker on a stable, level surface, away from water sources. Before the first use, thoroughly clean the bread pan and kneading paddle with warm, soapy water.

Ensure all components are dry before assembly. Familiarize yourself with the pan, paddle, and housing to ensure correct placement during operation for consistent baking results.

Initial Setup and Cleaning

Before first use, unpack all components carefully. Wash the bread pan and kneading paddle with warm, soapy water; avoid abrasive cleaners. Wipe the exterior housing with a damp cloth. Thoroughly dry all parts before reassembling.

This initial cleaning removes any manufacturing residue. A clean machine ensures optimal performance and prevents unwanted flavors in your first loaf. Inspect for any damage during unpacking.

Component Overview (Pan, Paddle, Housing)

The bread pan holds ingredients during baking and features a non-stick coating for easy loaf removal. The kneading paddle mixes and kneads the dough, detaching before the baking cycle. The housing contains the heating element and control panel, providing structural support.

Ensure the paddle is securely attached before starting. Familiarize yourself with each component’s function for efficient bread making.

Basic Bread Making Process

Successful bread making relies on precise ingredient measurement and quality; use fresh yeast for optimal results. Adding ingredients in the correct order—liquids first, then dry—is crucial for proper dough development. The bread maker automatically handles kneading, rising, and baking.

Follow recipe instructions carefully for best outcomes and consistent loaf quality.

Ingredient Measurement & Quality

Accurate measurement is paramount for bread making success; use measuring cups and spoons specifically designed for baking. Fresh, high-quality ingredients yield the best results, especially yeast—check its expiration date! Flour type impacts texture; all-purpose, whole wheat, and bread flour behave differently.

Consistent measurements ensure predictable outcomes.

Adding Ingredients in the Correct Order

Generally, add liquids first, followed by dry ingredients, with yeast last—avoiding direct contact with liquids. This prevents premature yeast activation. Sugar and salt should be added before flour, ensuring even distribution. Follow your recipe precisely, as ingredient order impacts dough development and final bread texture.

Incorrect order can lead to poor results;

Using the Control Panel

The control panel features buttons for cycle selection, crust control, and start/stop. Understanding these functions is crucial for optimal bread making. Cycle options include Basic, Whole Wheat, French, and Dough. Pressing the appropriate button initiates the chosen program. Adjust crust settings for desired browning.

Familiarize yourself with each button’s purpose.

Understanding the Buttons & Functions

Each button on the control panel activates a specific function. The ‘Start/Stop’ button initiates or halts the baking process. ‘Menu’ allows cycle selection, while ‘Crust’ adjusts browning levels. ‘Timer’ enables delayed starts. Properly utilizing these controls ensures consistent results.

Refer to your model’s diagram for precise button locations and functions.

Cycle Selection (Basic, Whole Wheat, French, etc.)

Black & Decker bread makers offer pre-programmed cycles for diverse bread types. ‘Basic’ is ideal for white bread, ‘Whole Wheat’ for denser loaves, and ‘French’ for crusty results. Other options may include ‘Sweet’, ‘Dough’, or ‘Gluten-Free’.

Selecting the correct cycle optimizes kneading, rising, and baking times for each recipe.

Troubleshooting Common Issues

Common problems include kneading difficulties or bread failing to rise. Ensure ingredients are fresh and measured accurately. Check the paddle is securely attached during kneading. If the bread doesn’t rise, verify yeast activity and room temperature.

Avoid opening the lid during baking, as this releases heat and can affect the loaf’s texture.

Kneading Problems & Solutions

If the dough isn’t kneading properly, ensure the paddle is firmly in place. Too much or too little liquid can cause issues; adjust accordingly. Check the ingredient order – liquids first are crucial. A faulty paddle may require replacement;

Overloading the pan can also hinder kneading; adhere to maximum capacity guidelines.

Bread Not Rising Properly

Insufficient yeast is a common cause; verify its freshness and quantity. Old yeast loses potency, impacting rise. Incorrect water temperature – too hot kills yeast, too cold slows activation – is critical. Ensure adequate proofing time, especially in cooler environments.

Adding salt directly to yeast can inhibit rising; combine with flour first.

Error Codes & Their Meanings

Error codes signal issues within your Black & Decker bread maker. E1 often indicates a power interruption or lid sensor problem. E2 typically suggests a heating element malfunction, requiring professional attention. Consult your specific model’s manual for a complete list;

Resetting the machine may resolve minor errors; unplug for 10 minutes before restarting.

Decoding Error Messages (e.g., E1, E2)

Black & Decker bread makers utilize error codes to diagnose problems. E1 generally points to a lid issue – ensure it’s securely closed. E2 often signifies a heating element failure, potentially needing repair. Other codes may relate to sensor malfunctions or temperature regulation.

Refer to your model’s manual for a comprehensive code list and troubleshooting steps.

Resetting the Bread Maker

If your Black & Decker bread maker malfunctions, a reset can often resolve minor issues. Unplug the appliance for 5-10 minutes to fully discharge any residual power. This clears temporary errors and restores default settings.

Reconnect and power on; if the problem persists, consult the error code section or contact Black & Decker support.

Recipes & Baking Tips

Explore a variety of bread recipes tailored for your Black & Decker machine. Start with the basic white bread recipe for beginners, then experiment with whole wheat variations. Proper ingredient measurement is crucial; use the provided measuring tools for best results.

Adjust liquid levels based on flour type and consider adding dough enhancers for improved texture.

Basic White Bread Recipe

For a classic loaf, combine 3 cups bread flour, 1 ¼ cups warm water, 2 tablespoons sugar, 1 ½ teaspoons salt, and 2 ¼ teaspoons active dry yeast. Ensure yeast is fresh for optimal rising. Add ingredients to the bread maker pan in the order recommended by your model’s manual.

Select the ‘Basic’ cycle and a 1.5-pound loaf size. Enjoy freshly baked bread!

Whole Wheat Bread Variations

Experiment with whole wheat flour by substituting up to 50% for bread flour in your basic recipe. For a nuttier flavor, add 2 tablespoons of molasses or honey; Consider adding 1/4 cup of wheat germ or flaxseed meal for extra nutrients.

Use the ‘Whole Wheat’ cycle for best results. Adjust liquid slightly as whole wheat absorbs more moisture.

Cleaning & Maintenance

Regular cleaning extends your bread maker’s life. Always unplug the machine before cleaning. Wash the bread pan and paddle with warm, soapy water after each use. The housing can be wiped down with a damp cloth.

Avoid abrasive cleaners or immersing the unit in water. Ensure all parts are completely dry before reassembling.

Cleaning the Bread Pan & Paddle

Remove the bread pan and paddle immediately after baking. Wash them in warm, soapy water; stubborn residue may require soaking. Avoid using abrasive scrubbers that could damage the non-stick coating. Dry thoroughly before reinserting.

The paddle can sometimes be difficult to remove; gentle twisting may help. Inspect for any damage before each use.

Exterior Cleaning & Care

To clean the exterior, simply wipe down the bread maker housing with a damp cloth. Avoid using harsh chemicals or abrasive cleaners, as these can damage the finish. Ensure the unit is unplugged before cleaning.

Regularly dust the exterior to maintain its appearance. Do not immerse the bread maker in water; this could cause electrical hazards.

Repair & Replacement Parts

Finding replacement parts for your Black & Decker bread maker is often possible online. Websites specialize in appliance parts, including components for models like the B1560. Check Black & Decker’s official support resources for assistance locating specific parts.

Consider the model number when searching. Feet sets are available for automatic dough and bread makers, addressing common wear and tear.

Finding Replacement Parts Online

Numerous online retailers specialize in appliance parts, offering replacements for Black & Decker bread makers. Search using your specific model number (e.g., B1560) to ensure compatibility. Websites often carry parts like bread pans, paddles, and heating elements.

Compare prices and shipping costs across different vendors. Always verify the part’s suitability before purchasing.

Black & Decker Support Resources

Black & Decker’s official website is a primary resource for manuals, FAQs, and troubleshooting guides for your bread maker. You can often find downloadable manuals specific to your model number. For direct assistance, explore their customer support contact options.

These may include phone support or online chat features. Utilize these resources to resolve issues or obtain further guidance.

Advanced Features (Model Specific)

Certain Black & Decker bread maker models boast a convenient delay timer, allowing you to schedule baking in advance. Crust control settings offer customization, letting you choose from light, medium, or dark crusts.

Explore your model’s specific functions for optimal results. These features enhance baking flexibility and cater to individual preferences.

Delay Timer Functionality

The delay timer allows convenient, pre-scheduled baking. Set the timer to postpone the start of the baking cycle, ensuring fresh bread is ready when desired. Ensure ingredients are at room temperature when utilizing this feature.

Avoid adding perishable items that may spoil during the delay. Proper usage guarantees a perfectly timed, freshly baked loaf.

Crust Control Settings

Black & Decker bread makers offer adjustable crust control for personalized results. Settings typically range from light to dark, influencing the final bread crust’s color and texture. Experiment with different settings to achieve your preferred crust.

Consider the recipe and desired outcome when selecting a crust level. Darker crusts provide a more robust flavor and texture.

Safety Precautions

Always ensure the bread maker is unplugged before cleaning or maintenance. Avoid touching hot surfaces during or immediately after operation to prevent burns. Never immerse the appliance in water.

Use caution when handling the bread pan and paddle, as they become very hot. Keep the appliance away from flammable materials and ensure adequate ventilation.

Electrical Safety Guidelines

Only operate the Black & Decker bread maker with a properly grounded outlet. Never use an extension cord unless absolutely necessary, and ensure it’s rated for the appliance’s wattage. Inspect the power cord regularly for damage.

Do not operate the bread maker if the cord or plug is damaged. Avoid using the appliance in damp environments. Unplug when not in use and before cleaning.

Preventing Burns & Injuries

Exercise extreme caution when handling the bread pan and paddle after baking, as they will be very hot. Always use oven mitts or pot holders. Avoid touching the heating elements during or immediately after operation.

Keep children away from the bread maker during operation. Never attempt to disassemble the appliance while it’s plugged in. Allow the unit to cool completely before cleaning.

Frequently Asked Questions (FAQ)

Can I use different types of flour? Yes, but results may vary; experimentation is key. What if my bread maker stops mid-cycle? Check the power connection and ensure the lid is securely closed.

If the issue persists, consult the troubleshooting section or Black & Decker support. Can I open the lid during baking? Briefly, to add ingredients, but quickly to avoid temperature loss.

Can I use different types of flour?

Yes, you can experiment with various flours like whole wheat, rye, or gluten-free blends in your Black & Decker bread maker. However, be aware that different flours absorb liquids differently, potentially affecting the final bread texture.

Adjusting liquid levels may be necessary. Start with small substitutions and monitor the dough consistency for optimal results.

What if my bread maker stops mid-cycle?

If your Black & Decker bread maker halts during operation, first check the power connection and ensure it’s securely plugged in. A tripped circuit breaker could also be the cause, so reset if needed.

If power isn’t the issue, the lid sensor might be malfunctioning. Gently reseat the lid; if it restarts, avoid forceful closure in the future.

Warranty Information

Black & Decker typically offers a limited warranty on their bread makers, covering manufacturing defects for a specified period. This doesn’t include wear and tear or misuse.

To claim warranty service, retain your proof of purchase and contact Black & Decker customer support. They’ll guide you through the process, potentially requiring product return for inspection or repair.

Understanding Your Warranty Coverage

Black & Decker’s bread maker warranty generally covers defects in materials and workmanship for one to two years from the purchase date. It excludes damage from accidents, misuse, or unauthorized repairs.

The warranty typically provides for repair or replacement of the defective unit, at Black & Decker’s discretion. Shipping costs for warranty claims may be the consumer’s responsibility.

Contacting Black & Decker Customer Support

For assistance with your Black & Decker bread maker, visit the official Black & Decker website to locate contact information. You can typically find phone numbers, email addresses, and live chat options.

Be prepared to provide your model number and proof of purchase when contacting support. Their representatives can assist with troubleshooting, warranty claims, and replacement parts inquiries.

Resources & Further Information

Expand your bread-making knowledge by visiting the official Black & Decker website for additional recipes and support. Explore online bread-making communities to connect with fellow enthusiasts and share tips.

For specific model information and repair parts, utilize online resources dedicated to Black & Decker appliances. Discover forums and communities discussing the Black Myth: Wu Kong game, or BlackTransConnection for support.

Official Black & Decker Website

The official Black & Decker website is your primary resource for comprehensive bread maker support. Locate detailed manuals, frequently asked questions, and troubleshooting guides specific to your model.

Access a wealth of recipes, from basic white bread to more advanced variations, designed for optimal performance. Find information on replacement parts and contact customer support for personalized assistance with your appliance.

Online Bread Making Communities

Engage with fellow Black & Decker bread maker enthusiasts in vibrant online communities. Share recipes, baking tips, and troubleshooting advice with experienced users.

These forums offer a platform to discuss model-specific issues and discover innovative baking techniques. Benefit from collective knowledge and find solutions to common challenges, enhancing your bread-making journey.

free printable decluttering checklist pdf

Decluttering checklists‚ often available as a free printable PDF‚ offer a structured approach to simplifying your living space and reducing overwhelming clutter.

These guides‚ like those surfacing in January 2025 and beyond‚ provide focused daily tasks – starting with a donation box and progressing through areas like the refrigerator.

Utilizing a checklist‚ as highlighted in July 2024‚ encourages tackling one room‚ or even a zone within a room‚ at a time for manageable progress.

Resources from January 2026 and July 2025 demonstrate the growing availability of comprehensive lists‚ even exceeding 120 items‚ to inspire a tidy home.

What is a Decluttering Checklist?

A decluttering checklist is a curated list‚ frequently offered as a free printable PDF‚ designed to guide you through the process of systematically removing unwanted items from your home. These checklists‚ gaining popularity since January 2025‚ break down the often-daunting task of decluttering into smaller‚ more achievable steps.

They typically organize tasks by room or category‚ providing a clear roadmap for tackling clutter. Many checklists‚ as seen in resources from July 2024‚ suggest starting with simple actions like setting up a donation box or focusing on a specific area like the refrigerator door.

More comprehensive lists‚ highlighted in January 2026 and July 2025‚ can contain over 120 items‚ offering a wealth of ideas for what to eliminate. Ultimately‚ a decluttering checklist serves as a tool to promote intentional living and a more organized home environment;

Benefits of Using a Printable Checklist

Utilizing a printable decluttering checklist‚ often available as a free PDF‚ offers numerous advantages. As highlighted since January 2025‚ checklists transform a potentially overwhelming task into manageable daily actions‚ fostering a sense of accomplishment.

These guides‚ emphasized in July 2024‚ promote focus by encouraging a room-by-room or zone-by-zone approach‚ preventing feelings of being overwhelmed. The structured format‚ seen in resources from January 2026‚ ensures no area is overlooked.

Beyond organization‚ decluttering‚ guided by a checklist‚ can positively impact well-being‚ potentially improving sleep‚ memory‚ and focus – as noted in July 2025. A checklist provides motivation and a clear path towards a more intentional and clutter-free lifestyle.

Getting Started with Your Decluttering Journey

Free printable decluttering checklists (PDF) are ideal for initiating your journey‚ offering structured daily tasks like setting up a donation box‚ as suggested in January 2025.

Setting Realistic Goals

Embarking on a decluttering journey with a free printable decluttering checklist (PDF) requires establishing achievable goals. Avoid overwhelming yourself by attempting to tackle the entire house at once; instead‚ focus on smaller‚ manageable areas.

The checklists available‚ as noted in resources from January 2025 and beyond‚ often break down tasks into daily steps‚ like starting with a simple donation box setup. This incremental approach prevents discouragement and fosters a sense of accomplishment.

Consider dedicating just 15-30 minutes each day to decluttering‚ utilizing the checklist as your guide. Remember‚ the goal isn’t perfection‚ but progress. A phased approach‚ focusing on one room or zone at a time‚ as recommended in July 2024‚ is key to sustained success.

Adjust the checklist’s pace to fit your lifestyle and commitments‚ ensuring decluttering integrates seamlessly into your routine.

Choosing a Decluttering Method (e.g.‚ KonMari)

When utilizing a free printable decluttering checklist (PDF)‚ consider pairing it with a recognized decluttering method to enhance effectiveness. The KonMari method‚ focusing on category-based decluttering and keeping only items that “spark joy‚” is a popular choice.

However‚ numerous approaches exist‚ and the best method depends on your personality and preferences. Some checklists‚ emerging in January 2026‚ are designed to be method-agnostic‚ offering a flexible framework adaptable to various techniques.

Others may subtly incorporate principles from methods like the Minimalist Game or the 12-12-12 challenge. Regardless of your chosen method‚ the checklist provides structure and ensures consistent action. Resources from July 2025 highlight the importance of finding a “perfect fit” for your needs.

Experiment to discover what resonates with you;

Gathering Supplies: Boxes‚ Bags‚ and Labels

Before embarking on your decluttering journey with a free printable decluttering checklist (PDF)‚ proper preparation is key. Essential supplies include sturdy boxes for donations‚ trash bags for discards‚ and containers for items needing relocation.

Clear labeling is crucial; designate boxes for “Donate‚” “Trash‚” “Relocate‚” and potentially “Sell.” This streamlines the sorting process and prevents confusion. Resources from January 2025 emphasize the simplicity of decluttering – no fancy tools are required.

However‚ organized supplies significantly improve efficiency. Consider adding packing tape‚ markers‚ and cleaning supplies to your toolkit. A well-equipped workspace‚ combined with a checklist‚ sets the stage for a successful and less stressful decluttering experience‚ as highlighted in July 2024.

Room-by-Room Decluttering Checklist

Free printable decluttering checklists (PDF) advocate a room-by-room approach‚ focusing on one space at a time for manageable progress‚ starting with the most cluttered areas.

Kitchen Decluttering Checklist

Utilizing a free printable decluttering checklist PDF streamlines kitchen organization‚ tackling areas systematically. Begin with Refrigerator & Pantry Items‚ discarding expired foods – a Day 2 focus according to January 2025 resources. Next‚ address Cabinets & Drawers‚ removing seldom-used gadgets and duplicates.

Don’t overlook Countertop Clutter; a key area for immediate impact. These checklists‚ refined over years of simplifying homes‚ suggest easy-to-let-go items. Focus on decluttering in stages‚ as recommended in July 2024‚ ensuring a manageable process. The goal is an organized kitchen‚ improving focus and potentially even sleep‚ as noted in July 2025.

Remember to utilize donation boxes‚ set up on Day 1‚ for unwanted but usable items‚ contributing to a more intentional and clutter-free kitchen space.

Refrigerator & Pantry Items

Free printable decluttering checklist PDFs prioritize tackling expired food in the Refrigerator & Pantry. Resources from January 2025 specifically designate Day 2 for this crucial step. Discard anything past its prime – sauces‚ condiments‚ leftovers – creating space and preventing unpleasant odors.

Check expiration dates on canned goods and dry ingredients. Donate unopened‚ non-perishable items you won’t use. These checklists‚ refined over years‚ emphasize easy wins. A decluttered pantry improves visibility and reduces food waste‚ aligning with intentional living.

Remember‚ small‚ focused actions‚ like those outlined in July 2024‚ yield significant results. This initial step sets a positive tone for the entire decluttering journey.

Cabinets & Drawers

Free printable decluttering checklist PDFs consistently highlight Cabinets & Drawers as key areas for streamlining. These checklists‚ surfacing since January 2025‚ encourage a thorough assessment of kitchen storage. Remove duplicate utensils‚ chipped dishes‚ and appliances rarely used.

Organize remaining items by frequency of use‚ placing essentials within easy reach. Consider drawer dividers to maximize space and maintain order. The goal‚ as emphasized in July 2024‚ is a functional and visually appealing kitchen.

Don’t hesitate to donate or discard items that no longer serve a purpose. This focused approach‚ part of a larger decluttering strategy‚ creates a more efficient and enjoyable cooking experience.

Countertop Clutter

Free printable decluttering checklist PDFs prioritize tackling Countertop Clutter as a quick win for a more organized kitchen. Resources from January 2025 onward emphasize removing items not used daily‚ creating a spacious and functional workspace.

These checklists suggest relocating small appliances to cabinets or pantries when not in immediate use. Clear surfaces promote a sense of calm and make food preparation easier‚ aligning with the room-by-room approach highlighted in July 2024.

Limit countertop displays to a few carefully chosen decorative items. A clutter-free countertop‚ as part of a broader decluttering effort‚ contributes to a more inviting and efficient kitchen environment.

Bedroom Decluttering Checklist

Free printable decluttering checklist PDFs dedicate significant attention to the bedroom‚ recognizing its importance for rest and relaxation. These checklists‚ appearing since January 2025‚ guide users through a systematic process of removing excess belongings to create a serene space.

Focus areas include Clothing & Accessories‚ Under the Bed Storage‚ and surfaces like Nightstand & Dresser Tops. The room-by-room method‚ emphasized in July 2024‚ suggests tackling one area at a time for manageable progress.

Checklists encourage evaluating each item’s usefulness and emotional value‚ promoting intentionality. A decluttered bedroom‚ as highlighted in resources from January 2026‚ contributes to improved sleep and a more peaceful atmosphere.

Clothing & Accessories

Free printable decluttering checklist PDFs consistently prioritize clothing and accessories as a major decluttering focus within the bedroom. Resources surfacing since January 2025 emphasize a thorough evaluation of wardrobes‚ prompting users to confront accumulated items.

These checklists‚ as highlighted in July 2024‚ suggest asking key questions: Does it fit? Have I worn it in the last year? Does it bring me joy? The goal is to eliminate items that no longer serve a purpose.

Accessories like shoes‚ belts‚ and jewelry also receive attention. Decluttering these items‚ as noted in January 2026 resources‚ creates more space and simplifies daily routines‚ contributing to a more organized and peaceful bedroom.

Under the Bed Storage

Free printable decluttering checklist PDFs frequently address under-bed storage as a prime location for accumulated clutter‚ often containing forgotten or rarely used items. Resources from January 2025 onwards emphasize a complete removal and assessment of everything stored in this space.

Checklists‚ as highlighted in July 2024‚ prompt users to categorize items: keep‚ donate‚ or discard. Seasonal clothing‚ extra linens‚ and out-of-season decorations are common finds‚ requiring honest evaluation.

The goal‚ as noted in January 2026 guides‚ is to maximize this valuable storage area by only keeping essential items. Utilizing storage containers and labeling them effectively further enhances organization and accessibility.

Nightstand & Dresser Tops

Free printable decluttering checklist PDFs consistently include nightstands and dresser tops as key areas to address‚ often becoming catch-all surfaces for everyday items. Guides surfacing from January 2025 emphasize a complete clear-off to assess what truly deserves a place on these surfaces;

Checklists‚ as highlighted in July 2024‚ prompt users to remove books‚ electronics‚ lotions‚ and other frequently used items‚ then critically evaluate their necessity. The focus is on creating a calm and uncluttered sleep environment.

Resources from January 2026 suggest limiting items to essentials – a lamp‚ a book‚ and perhaps a small personal item. Maintaining clear surfaces promotes relaxation and a more organized bedroom aesthetic.

Bathroom Decluttering Checklist

Free printable decluttering checklist PDFs prioritize the bathroom due to its tendency to accumulate expired products and unused toiletries. Resources from January 2025 emphasize a thorough review of all items‚ focusing on expiration dates and usage frequency.

Checklists‚ surfacing in July 2024‚ specifically prompt users to discard expired medications‚ old makeup‚ and half-empty bottles. They also address linens and towels‚ encouraging donation or repurposing of those in poor condition.

Guides from January 2026 highlight under-sink organization as a crucial step‚ suggesting removal of unnecessary cleaning supplies and creation of a streamlined storage system. A decluttered bathroom promotes a more relaxing and hygienic space.

Expired Products

Free printable decluttering checklist PDFs consistently emphasize the removal of expired products as a primary bathroom decluttering task‚ highlighted in resources from January 2025. This includes medications‚ skincare‚ makeup‚ and even sunscreens – items that lose efficacy and can become harmful over time.

Checklists surfacing in July 2024 specifically prompt a thorough review of expiration dates‚ encouraging immediate disposal of anything past its prime. Don’t forget to check for changes in texture or smell‚ indicating spoilage even without a visible date.

Guides from January 2026 suggest a systematic approach: empty each container‚ check the date‚ and discard if expired. This simple step significantly improves bathroom organization and safety.

Linens & Towels

Free printable decluttering checklist PDFs routinely include linens and towels as a key area for bathroom decluttering‚ as noted in resources from January 2025. These checklists encourage evaluating the quantity and condition of each item‚ prompting you to let go of those rarely used or visibly worn.

Guides surfacing in July 2024 suggest a practical approach: if you haven’t used a towel or linen set in six months‚ it’s likely time to donate or repurpose it. Consider the number of sets you realistically need for your household.

Resources from January 2026 highlight that faded‚ stained‚ or ripped linens should be discarded‚ freeing up valuable storage space and promoting a more organized bathroom.

Under-Sink Organization

Free printable decluttering checklist PDFs consistently address under-sink organization within the bathroom‚ as highlighted in resources from January 2025. These checklists emphasize removing everything to assess what’s truly needed and used‚ a strategy recommended in July 2024 guides.

Expired products are a primary target‚ with checklists prompting disposal of old medications‚ cleaning supplies‚ and skincare items. Resources from January 2026 suggest grouping similar items together using bins or organizers to maximize space.

The focus is on creating a functional and accessible space‚ eliminating clutter and preventing future build-up. Checklists often include a reminder to wipe down the area after decluttering for a fresh start.

Living Room Decluttering Checklist

Free printable decluttering checklist PDFs dedicate significant attention to the living room‚ recognizing it as a central hub for clutter accumulation‚ as noted in January 2025 resources. These checklists prioritize books and magazines‚ prompting evaluation of what’s truly read or cherished.

Decorative items are also a key focus‚ encouraging a critical assessment of displays and removal of anything no longer loved or serving a purpose. Guides from July 2024 emphasize streamlining these areas.

Furthermore‚ checklists address electronics and cables‚ urging organization and disposal of outdated or unused items. Resources from January 2026 suggest a room-by-room approach‚ making the task less daunting.

Books & Magazines

Free printable decluttering checklist PDFs consistently highlight books and magazines as prime candidates for decluttering‚ reflecting insights from January 2025. The checklists prompt a realistic assessment: have you read it‚ will you reread it‚ or does it genuinely add value?

Resources from July 2024 suggest letting go of books you’ve already enjoyed and won’t revisit‚ or magazines older than six months. Consider donating to libraries or schools.

Checklists‚ as seen in January 2026 guides‚ often include a question about emotional attachment – is it a cherished memory or simply taking up space? Prioritize quality over quantity‚ creating a curated collection.

Decorative Items

Free printable decluttering checklist PDFs frequently address decorative items‚ urging a critical eye towards what truly enhances your space‚ drawing from insights in January 2025. These checklists encourage asking if an item sparks joy or simply occupies visual real estate.

Guides from July 2024 suggest removing items that no longer reflect your style or that have accumulated dust. Consider donating gently used decorations or repurposing them creatively.

Resources‚ like those appearing in January 2026‚ often prompt evaluation of sentimental value versus actual use. A curated collection‚ as opposed to cluttered displays‚ creates a more peaceful environment.

Electronics & Cables

Free printable decluttering checklist PDFs consistently highlight electronics and cables as a major clutter source‚ referencing insights from January 2025. These guides prompt identifying obsolete devices and tangled cords‚ encouraging responsible disposal or recycling.

Resources from July 2024 suggest labeling cables to avoid future confusion and discarding those for devices you no longer own. Consider consolidating chargers and accessories into a designated storage area.

Checklists‚ like those surfacing in January 2026‚ often include questions about the last time an electronic item was used‚ prompting a realistic assessment of its necessity. A streamlined tech setup contributes to a calmer living space.

Specific Items to Declutter (120+ Ideas)

Free printable decluttering checklist PDFs‚ appearing since January 2025‚ often contain lists exceeding 120 items‚ inspiring a more intentional home.

These resources‚ like those from July 2025‚ categorize suggestions‚ making decluttering less daunting and more focused on specific areas.

Clothing Related Items

Free printable decluttering checklists (PDF)‚ gaining traction since January 2025‚ consistently emphasize clothing as a prime decluttering target‚ often listing numerous items to consider.

These checklists frequently suggest discarding clothes that no longer fit‚ haven’t been worn in a year‚ or are damaged beyond repair – a common theme highlighted in resources from July 2025.

Beyond basic wearability‚ checklists prompt evaluation of duplicates‚ outdated styles‚ and items that don’t align with your current lifestyle‚ encouraging a streamlined wardrobe.

Consider letting go of formal wear rarely used‚ seasonal items taking up excessive space‚ and accessories you no longer enjoy‚ as suggested by insights from January 2026.

Don’t forget shoes‚ belts‚ hats‚ and scarves – often overlooked but contributing significantly to closet clutter‚ as detailed in various downloadable checklists.

Kitchen & Dining Items

Free printable decluttering checklists (PDF)‚ popular since early 2025‚ consistently prioritize the kitchen‚ identifying it as a major clutter hotspot‚ as noted in July 2024 resources.

These checklists often begin with expired food in the refrigerator and pantry‚ a quick win for immediate impact‚ aligning with daily tasks suggested in January 2025 guides.

Beyond perishables‚ checklists prompt evaluation of unused appliances‚ chipped dishes‚ mismatched containers‚ and excess utensils – items often accumulating over time.

Consider discarding duplicate gadgets‚ seldom-used cookware‚ and promotional items taking up valuable cabinet space‚ as highlighted in insights from January 2026.

Don’t overlook linens‚ placemats‚ and serving dishes; streamlining these can significantly reduce kitchen clutter‚ as detailed in downloadable checklist options.

Bathroom & Personal Care Items

Free printable decluttering checklists (PDF)‚ gaining traction since 2024‚ consistently emphasize bathroom decluttering‚ recognizing it as a space prone to product accumulation.

A primary focus‚ as detailed in resources from January 2025‚ is eliminating expired products – makeup‚ skincare‚ medications – ensuring safety and freeing up space.

Checklists prompt assessment of rarely used hair tools‚ travel-sized toiletries‚ and duplicate items‚ often found under sinks or in cabinets‚ as noted in January 2026 guides.

Consider discarding old toothbrushes‚ worn-out washcloths‚ and excess samples; streamlining these essentials creates a more organized and functional bathroom.

Linens and towels are also targeted‚ encouraging donation of gently used items‚ maximizing space and promoting a clutter-free environment‚ per downloadable checklist options.

Maintaining a Clutter-Free Home

Free printable decluttering checklists (PDF) advocate for consistent habits like the “one-in‚ one-out” rule‚ preventing future buildup.

Regular decluttering sessions‚ as suggested since 2024‚ are crucial; these checklists provide a framework for ongoing organization and mindful consumption.

The One-In‚ One-Out Rule

The one-in‚ one-out rule is a cornerstone of maintaining a clutter-free home‚ frequently emphasized alongside free printable decluttering checklists (PDF).

This simple principle dictates that for every new item brought into your home‚ a similar item must be removed‚ preventing accumulation and reinforcing mindful purchasing habits.

It’s a proactive strategy‚ complementing the reactive approach of decluttering checklists‚ ensuring long-term organization rather than cyclical cleanouts.

Resources from January 2026 and beyond highlight that consistently applying this rule‚ even with small items‚ significantly reduces overall clutter.

When utilizing a checklist‚ consider the one-in‚ one-out rule as a parallel practice‚ solidifying a sustainable‚ organized lifestyle.

This method supports the intentional home emphasized in decluttering guides.

Regular Decluttering Sessions

Regular decluttering sessions are vital for sustaining a tidy home‚ working in tandem with utilizing a free printable decluttering checklist (PDF).

These aren’t necessarily large-scale overhauls‚ but rather consistent‚ scheduled periods dedicated to reviewing and removing unwanted items.

Information from January 2025 suggests incorporating decluttering into routines‚ like dedicating a few minutes each day or scheduling sessions monthly.

A checklist provides structure‚ while regular sessions prevent clutter from re-accumulating‚ maintaining the progress achieved.

Resources from July 2024 emphasize focusing on one area at a time‚ mirroring the checklist’s room-by-room approach.

Consistent effort‚ guided by a checklist‚ fosters a long-term‚ organized lifestyle.

Resources & Free Downloads

Free printable decluttering checklists (PDF) are readily available online‚ as noted in January 2025‚ offering structured guidance for simplifying your home.

Numerous websites provide downloadable checklists‚ facilitating organized decluttering‚ starting with simple tasks like setting up a donation box.

Where to Find Free Printable Decluttering Checklists (PDF)

Numerous online resources offer free printable decluttering checklists in PDF format‚ catering to various decluttering styles and needs. As highlighted in recent articles from January 2025 and beyond‚ a quick internet search reveals a wealth of options.

Many blogs dedicated to organization and minimalism provide downloadable checklists‚ often broken down by room or task. These checklists‚ like the one mentioned surfacing in July 2024‚ frequently include daily or weekly assignments to maintain momentum.

Websites specializing in printable planners and organizers also commonly feature decluttering checklists. You can find options ranging from simple‚ concise lists to more detailed‚ comprehensive guides exceeding 120 items‚ as noted in January 2026. Look for checklists that align with your preferred decluttering method‚ such as the KonMari method.

Don’t hesitate to explore Pinterest and other social media platforms‚ where users often share their favorite free printable checklists.

Donation Centers & Recycling Options

Successfully decluttering often leads to a surplus of items suitable for donation or recycling. Several organizations readily accept gently used goods‚ providing a responsible outlet for your unwanted possessions.

Popular donation centers include Goodwill‚ Salvation Army‚ and local charities. These organizations often provide tax receipts for your contributions. Remember to check their specific guidelines regarding accepted items before making a drop-off.

For items that are not suitable for donation‚ explore recycling options. Many communities offer recycling programs for clothing‚ electronics‚ and household goods. Resources from January 2026 suggest researching local facilities.

Consider specialized recycling programs for items like batteries‚ light bulbs‚ and paint. Properly disposing of these materials protects the environment and supports sustainable practices‚ complementing your decluttering efforts.

78 tarot cards pdf free download

Understanding the 78 Tarot Cards

Tarot is a powerful tool for intuition, offering insight into life’s questions; it utilizes a 78-card deck for divination, a centuries-old practice gaining popularity today.

Learning tarot doesn’t require memorizing every card; focus on symbolism, trust your intuition, and relate the imagery to your own experiences for meaningful interpretations.

The Major Arcana, consisting of 22 cards, represents essential life lessons and universal themes, like The Fool and The Magician, crucial for understanding the deck.

What is Tarot?

Tarot is fundamentally a system of divination, a practice steeped in history that utilizes a specialized deck of 78 cards as a tool for self-reflection and gaining insight. It’s more than just predicting the future; it’s about understanding present energies and potential pathways.

Whether you’re a seasoned practitioner or a curious beginner, tarot serves as a powerful means to strengthen your intuition and explore the complexities of life. The cards act as a mirror, reflecting back your inner landscape and offering guidance on pressing questions.

The art of tarot reading doesn’t necessitate memorizing rigid definitions for each card. Instead, it encourages observation, trusting your gut feelings, and relating the rich imagery to your personal experiences. It’s a journey of self-discovery facilitated by symbolic representation.

Currently, tarot’s popularity is surging, fueled by social media platforms like TikTok, where millions share readings and interpretations, demonstrating its widespread appeal and accessibility.

The History of Tarot

The origins of tarot can be traced back to 15th-century Italy, where the earliest known decks were created not for divination, but as playing cards for a trick-taking game. These early decks, known as tarocchi, differed from modern tarot, lacking the extensive symbolic and esoteric associations.

Over time, particularly during the 18th century, occultists began to reinterpret the cards, imbuing them with deeper meanings drawn from Kabbalah, astrology, and other esoteric traditions. This marked a shift from gameplay to a tool for divination and self-understanding.

The 19th century saw the rise of influential tarot systems, such as the Rider-Waite-Smith deck, which became the most widely used and recognized tarot deck globally, standardizing imagery and symbolism.

Today, tarot continues to evolve, with modern practitioners blending traditional interpretations with contemporary perspectives, solidifying its enduring legacy as a powerful tool for introspection and guidance.

Divination and Tarot Reading

Divination, the practice of seeking knowledge of the future or the unknown by supernatural means, finds a potent expression through tarot reading. Utilizing the 78-card deck, readers aim to gain insight into querents’ lives, offering guidance and clarity on various situations.

A tarot reading isn’t about predicting a fixed future, but rather exploring potential outcomes based on current energies and choices. The cards act as a mirror, reflecting inner thoughts, emotions, and subconscious patterns.

Readings involve shuffling the deck, selecting cards, and interpreting their meanings in relation to the querent’s question or situation. Intuition plays a crucial role, alongside understanding card symbolism and spread positions.

Whether seeking answers about love, career, or personal growth, tarot provides a framework for self-reflection and empowers individuals to make informed decisions, navigating life’s journey with greater awareness.

The Structure of a Tarot Deck

Tarot decks consist of 78 cards, divided into the Major Arcana (22 cards) and Minor Arcana (56 cards), each with unique symbolism.

The Minor Arcana comprises four suits – Wands, Cups, Swords, and Pentacles – representing different aspects of life and elemental energies.

Major Arcana: The Core 22 Cards

The Major Arcana represents life’s significant karmic lessons, archetypal figures, and profound spiritual themes. These 22 cards, numbered 0 to 21, depict a journey of self-discovery, often referred to as the Fool’s Journey.

Cards like The Magician, The High Priestess, and The Empress embody powerful energies and represent pivotal moments in one’s life path. Understanding their symbolism – colors, imagery, and numerical position – is crucial for accurate interpretation.

Unlike the Minor Arcana, which focuses on daily events, the Major Arcana addresses larger, overarching patterns and transformative experiences. Encountering cards like Death or The Tower can initially feel daunting, but seasoned readers recognize them as catalysts for growth.

These cards aren’t necessarily about literal events; they symbolize internal shifts, spiritual awakenings, and the unfolding of destiny. Studying the Major Arcana provides a foundational understanding of the tarot’s core principles.

Minor Arcana: The Four Suits

The Minor Arcana delves into the everyday aspects of life, reflecting practical concerns, emotions, and challenges. Comprising 56 cards, it’s divided into four suits: Wands, Cups, Swords, and Pentacles, each representing a different element and area of experience.

These suits offer detailed insights into specific situations, relationships, and personal growth. Unlike the Major Arcana’s grand themes, the Minor Arcana focuses on the nuances of daily life, providing actionable guidance.

Each suit contains numbered cards (Ace through Ten) and four court cards (Page, Knight, Queen, and King), adding layers of complexity to readings. Understanding the elemental associations – Fire for Wands, Water for Cups, Air for Swords, and Earth for Pentacles – is key.

Mastering the Minor Arcana allows for a more comprehensive and nuanced understanding of the tarot, complementing the broader insights offered by the Major Arcana.

Wands: Representing Fire and Action

Wands, associated with the element of Fire, embody passion, energy, and willpower. This suit speaks to our creative impulses, ambition, and the drive to take action. Cards from the Wands suit often indicate new beginnings, inspiration, and the pursuit of goals.

They represent the spark of innovation, the courage to overcome obstacles, and the enthusiasm needed to manifest desires. Challenges within the Wands suit can signify burnout, impulsiveness, or a lack of direction.

When Wands appear in a reading, it’s a call to embrace your inner fire, to pursue your passions with confidence, and to take decisive steps towards your aspirations. The imagery often depicts flames, rods, or batons, symbolizing energy and transformation.

Understanding the nuances of the Wands suit is crucial for interpreting situations involving creativity, career, and personal power within a tarot spread;

Cups: Representing Water and Emotions

Cups, linked to the element of Water, delve into the realm of emotions, relationships, and intuition. This suit reflects our inner world – love, joy, sorrow, and the depths of our feelings. Cards from the Cups often signify emotional connections, empathy, and the subconscious.

They represent the flow of feelings, the importance of self-care, and the need for emotional honesty. Challenges within the Cups suit can indicate emotional turmoil, heartbreak, or a disconnect from one’s intuition.

When Cups appear in a reading, it’s an invitation to explore your emotional landscape, to nurture your relationships, and to trust your inner guidance. The imagery frequently features chalices, hearts, or water bodies, symbolizing emotional depth.

Grasping the subtleties of the Cups suit is vital for interpreting matters of the heart, emotional well-being, and spiritual connection within a tarot reading.

Swords: Representing Air and Intellect

Swords embody the element of Air, focusing on the intellect, logic, and the power of thought. This suit explores our mental processes, challenges, and the pursuit of truth. Cards from the Swords often signify difficult decisions, conflict, and the need for clarity.

They represent the sharpness of the mind, the ability to cut through illusions, and the consequences of our actions. Challenges within the Swords suit can indicate mental anguish, communication breakdowns, or a struggle with difficult truths.

When Swords appear in a reading, it’s a call to examine your thoughts, to confront challenges head-on, and to use your intellect to navigate complex situations. Imagery frequently features swords, blades, or stormy skies, symbolizing mental acuity.

Understanding the nuances of the Swords suit is crucial for interpreting matters of the mind, communication, and the pursuit of intellectual honesty within a tarot spread.

Pentacles: Representing Earth and Materiality

Pentacles, also known as Coins, connect to the element of Earth, grounding us in the physical world. This suit embodies practicality, security, and material possessions, focusing on finances, career, and the tangible aspects of life.

Cards within the Pentacles suit often signify hard work, stability, and the rewards of dedication. They represent the manifestation of goals, building a solid foundation, and achieving long-term success. Challenges in this suit can indicate financial worries, stagnation, or a disconnect from the physical realm.

When Pentacles appear, it’s a signal to focus on practical matters, to nurture your resources, and to appreciate the fruits of your labor. Imagery commonly features coins, landscapes, or symbols of abundance, representing earthly prosperity.

Mastering the Pentacles suit provides insight into career paths, financial stability, and the importance of grounding oneself in the material world within a tarot reading.

Finding a Free Tarot PDF

Tarot PDFs are readily available online, offering convenient access to card meanings and imagery for study and practice; however, caution is advised.

Numerous websites provide free tarot card guides in PDF format, enabling beginners to explore the 78 cards and their symbolism easily.

Legitimate Sources for Tarot PDFs

Finding trustworthy sources for free Tarot PDFs requires careful consideration. Several websites offer legally obtained and ethically distributed resources for learning the art of Tarot. Skillshare, for example, often features courses with downloadable companion PDFs, though a subscription may be required after a free trial period. Many established Tarot authors and teachers provide sample PDFs or introductory guides on their official websites as promotional material.

Project Gutenberg, a repository of free eBooks, sometimes includes older texts on divination and Tarot, offering historical perspectives. Additionally, reputable online Tarot communities and forums frequently compile lists of verified free resources, shared by experienced readers. Always prioritize websites with clear copyright information and a professional presentation, avoiding those with excessive advertisements or suspicious download links. Remember to scan downloaded files with antivirus software to ensure safety.

Exploring these avenues will provide access to valuable learning materials without compromising legal or security standards.

Risks of Downloading from Unverified Sources

Downloading Tarot PDFs from unverified sources presents significant risks. These files can harbor malware, viruses, and spyware, compromising your device and personal information. Illegitimate websites often disguise malicious software as free learning materials, exploiting users seeking readily available resources. Copyright infringement is another serious concern; downloading copyrighted material without permission is illegal and unethical, potentially leading to legal repercussions.

Furthermore, PDFs from untrustworthy sources may contain inaccurate or misleading information, hindering your understanding of Tarot and potentially leading to misinterpretations. The quality of these PDFs is often poor, with unclear images and poorly translated text. These sources frequently lack proper attribution, making it difficult to verify the author’s expertise or the information’s validity.

Protecting your digital security and respecting intellectual property rights are paramount; prioritize legitimate sources for a safe and enriching learning experience.

Copyright and Legal Considerations

Tarot card decks and accompanying guidebooks are protected by copyright law. Distributing or downloading unauthorized PDF copies constitutes copyright infringement, a violation with potential legal consequences. Creators and publishers invest significant time and resources in developing these materials, and their rights must be respected. Utilizing illegally obtained PDFs undermines their livelihood and discourages future creative endeavors.

Fair use exceptions are limited and generally do not cover the entire reproduction of a Tarot deck or guidebook. Seeking permission from the copyright holder is necessary for any use beyond personal study. Supporting creators through legitimate purchases ensures continued access to high-quality Tarot resources.

Prioritizing ethical consumption safeguards the Tarot community and fosters a sustainable environment for artists and publishers. Always verify the source’s legitimacy and adhere to copyright regulations when accessing Tarot materials.

Learning Tarot Card Meanings

Tarot symbolism is key; observe imagery, trust intuition, and relate cards to personal experiences, rather than strict memorization, for deeper understanding.

Card positions significantly impact interpretation, adding layers of meaning beyond individual card definitions within a spread.

Symbolism in Tarot Cards

Tarot cards are rich with symbolism, extending far beyond simple picture representations. Understanding these symbols unlocks deeper layers of meaning and enhances intuitive readings. When first approaching the tarot, focusing on the symbolism within each card proves more effective than attempting to memorize rigid definitions for all 78 cards.

Colors, numbers, and archetypal figures all contribute to a card’s overall message. For example, the color red often signifies passion or energy, while blue represents tranquility and intuition. Numbers hold numerological significance, adding another dimension to interpretation. Archetypes, like The Magician or The High Priestess, embody universal themes and energies.

Paying attention to these details allows for a more nuanced and personalized reading. Instead of viewing a card as having a single, fixed meaning, you can explore the various symbolic elements and how they resonate with your specific situation. This approach fosters a stronger connection with the tarot and cultivates your intuitive abilities.

Intuitive Reading vs. Memorization

Tarot reading isn’t about rote memorization of 78 card meanings; it’s a practice that thrives on intuition and personal connection. While knowing basic definitions can be a starting point, relying solely on memorization limits the depth and accuracy of your readings. True insight comes from allowing your intuition to guide you.

Intuitive reading involves observing the card’s imagery, feeling its energy, and relating it to your own experiences and the querent’s situation. Trust your gut feelings and allow the card to “speak” to you. This approach fosters a dynamic and personalized interpretation.

Memorization can create rigid interpretations, while intuition allows for flexibility and nuance. It’s about understanding the underlying energies and themes, not simply reciting pre-defined meanings. Developing your intuitive skills unlocks the tarot’s full potential, transforming it from a tool of prediction into a powerful instrument for self-discovery.

The Significance of Card Positions

Tarot card positions within a spread are just as crucial as the cards themselves. Each position represents a specific aspect of the question or situation being explored, adding layers of meaning to the interpretation. Ignoring these positions diminishes the reading’s accuracy and depth.

For example, in a three-card spread, the first card often represents the past, the second the present, and the third the potential future. Understanding this context allows you to see how events have unfolded and what possibilities lie ahead. The position clarifies the card’s relevance.

More complex spreads, like the Celtic Cross, utilize numerous positions to provide a comprehensive overview. Learning these positions and their associated meanings is essential for skilled tarot reading. It’s about recognizing how the cards interact within the framework of the spread, revealing a holistic narrative.

Popular Tarot Spreads

Tarot spreads offer frameworks for interpreting cards, with the Three-Card Spread revealing past, present, and future. The Celtic Cross provides a detailed, comprehensive reading.

Three-Card Spread: Past, Present, Future

The Three-Card Spread is a foundational layout, perfect for beginners and quick insights. It’s remarkably versatile, addressing a wide range of questions with simplicity and clarity. This spread focuses on temporal dynamics, examining how past events influence the current situation and potential future outcomes.

To perform this spread, shuffle your tarot deck while focusing on your question. Then, draw three cards, laying them out from left to right. The first card represents the past – the influences and events that have led to the present moment. Consider what energies are coming to the surface from previous experiences.

The second card signifies the present – the current situation, challenges, and opportunities. This card reveals what’s actively unfolding in your life right now. Finally, the third card indicates the future – the likely outcome if you continue on your current path. Remember, the future isn’t fixed; it’s a potentiality.

Interpreting the cards in relation to each other is key. How does the past influence the present, and how might the present shape the future? This spread offers a concise yet powerful snapshot of your situation.

Celtic Cross Spread: A Comprehensive Reading

The Celtic Cross Spread is arguably the most popular and detailed tarot layout, offering a profound and multifaceted reading. It’s a complex spread, ideal for in-depth exploration of a situation, revealing hidden influences and potential outcomes with remarkable accuracy.

This spread utilizes ten cards, each representing a specific aspect of the querent’s life. Card one signifies the present, while card two reveals immediate challenges. Cards three and four explore the past and future, respectively. Cards five and six depict underlying influences and potential outcomes.

The remaining cards – seven through ten – delve into the querent’s self-perception, external influences, hopes and fears, and the ultimate outcome. Interpreting the interplay between these cards requires careful consideration and intuition.

The Celtic Cross isn’t just about predicting the future; it’s about understanding the energies at play and empowering the querent to make informed decisions. It provides a holistic view, revealing the complexities of a situation and offering guidance for navigating life’s challenges.

click clack moo pdf

Click, Clack, Moo: Cows That Type ─ Article Plan

Click, Clack, Moo’s readily available PDF versions facilitate easy access for educators and readers alike, offering digital copies for convenient study and enjoyment.

Click, Clack, Moo: Cows That Type, penned by Doreen Cronin and beautifully illustrated by Betsy Lewin, is a delightful and humorous tale that has captivated young readers since its publication. This charming story introduces us to Farmer Brown and his mischievous cows who discover the power of a typewriter! The narrative unfolds as the cows begin to communicate their demands through typed notes, leading to a comical negotiation with a bewildered Farmer Brown.

The book’s enduring popularity is further enhanced by the accessibility of Click, Clack, Moo PDF versions online, making it a convenient resource for classrooms, libraries, and home reading. These digital copies allow for easy sharing and integration into educational activities, ensuring this beloved story continues to reach new generations.

About the Author: Doreen Cronin

Doreen Cronin is a celebrated American author, best known for her humorous and engaging children’s books, including the beloved Click, Clack, Moo: Cows That Type. Before becoming a full-time author, Cronin worked as a lawyer, a background that perhaps informs the negotiation scenes so cleverly depicted in her stories. She skillfully blends wit and relatable scenarios, appealing to both children and adults.

Cronin’s talent for creating memorable characters and playful narratives has earned her numerous accolades. The widespread availability of Click, Clack, Moo PDF versions demonstrates the book’s lasting impact and Cronin’s ability to connect with readers across various platforms and generations.

About the Illustrator: Betsy Lewin

Betsy Lewin is a highly acclaimed American illustrator renowned for her charming and expressive artwork, perfectly complementing Doreen Cronin’s witty stories. Her illustrations in Click, Clack, Moo: Cows That Type bring the farm animals to life with delightful detail and personality, enhancing the book’s comedic effect. Lewin’s style is characterized by its warmth, humor, and ability to capture the emotions of her characters.

The accessibility of Click, Clack, Moo PDF copies allows readers to fully appreciate Lewin’s artistic contributions, showcasing her talent for visual storytelling and solidifying the book’s enduring appeal.

Plot Summary of Click, Clack, Moo

Click, Clack, Moo: Cows That Type unfolds as Farmer Brown faces a unique challenge: his cows discover an old typewriter and begin communicating their demands! Initially, they request electric blankets for the cold barn, typing notes to the bewildered farmer. Farmer Brown stubbornly refuses, leading to a typing strike and escalating demands.

The cows’ clever use of the typewriter, easily viewed in a Click, Clack, Moo PDF, highlights the story’s playful narrative. Duck acts as a mediator, ultimately leading to a negotiation where the cows get their blankets, and Farmer Brown gets his milk – a humorous resolution!

Farmer Brown’s Initial Problem

Farmer Brown’s central issue, vividly depicted in a Click, Clack, Moo PDF, begins with the discovery of an old typewriter in the barn. His cows, surprisingly, learn to operate it, initiating a series of typed notes addressed directly to him. The initial problem isn’t the typing itself, but the cows’ demands communicated through these notes.

Specifically, they request electric blankets to combat the barn’s cold temperatures. Farmer Brown dismisses their request, failing to recognize the cows’ newfound ability to articulate their needs. This dismissal sets the stage for the escalating conflict and the subsequent typing strike, as clearly shown within the story’s pages.

The Cows Learn to Type

The narrative, easily accessible in a Click, Clack, Moo PDF, details the cows’ unexpected acquisition of typing skills. Discovering an abandoned typewriter in the barn, they begin experimenting, initially producing random letters. However, their persistence and collaborative effort quickly lead to proficiency.

The cows demonstrate remarkable ingenuity, utilizing their hooves to strike the keys, forming words and eventually, coherent sentences. This newfound ability empowers them to communicate their needs directly to Farmer Brown, bypassing traditional methods. The story playfully illustrates this learning process, highlighting the cows’ determination and surprising intelligence.

The Cows’ Demands

As detailed within a readily available Click, Clack, Moo PDF, the cows, now capable of typed communication, present Farmer Brown with a list of demands. These aren’t requests for lavish treatment, but rather basic comforts – electric blankets to combat the cold barn during winter.

Their typed note clearly articulates this need, demonstrating a collective bargaining approach. The cows’ demands are presented in a straightforward, non-aggressive manner, highlighting their reasonable expectations. This pivotal moment showcases their newfound power and ability to advocate for improved living conditions, initiating a negotiation with Farmer Brown.

Farmer Brown’s Response and Negotiation

As revealed in a Click, Clack, Moo PDF, Farmer Brown initially responds with frustration to the cows’ typed demands. He attempts to simply ignore their requests, hoping they’ll cease their typing and return to their usual routines. However, the cows escalate, withholding their milk production as a form of protest.

This forces Farmer Brown to negotiate. A compromise is eventually reached: the cows receive electric blankets, but only during the coldest nights. The story highlights the importance of communication and finding mutually acceptable solutions, even when faced with unusual circumstances, as clearly illustrated within the narrative.

Key Characters

Exploring a Click, Clack, Moo PDF reveals the central figures driving the story’s humorous conflict. Farmer Brown, exasperated and initially dismissive, represents traditional authority. The cows, surprisingly literate and assertive, embody a collective seeking improved conditions. Their typed demands, found within the PDF, showcase their newfound agency.

Crucially, Duck acts as an unlikely mediator, translating between Farmer Brown and the cows. This character’s role is pivotal in facilitating communication and ultimately, negotiation. Each character’s distinct personality, readily apparent even in digital versions like the PDF, contributes to the book’s charm and thematic depth.

Farmer Brown

Within the pages of a Click, Clack, Moo PDF, Farmer Brown emerges as a somewhat grumpy and initially inflexible character. He’s presented as a man accustomed to running his farm his way, unprepared for the cows’ sudden ability to communicate their needs. His reactions to the typed demands, easily viewed in the PDF, are often exasperated and resistant.

However, the story subtly reveals a capacity for compromise. Though slow to adapt, Farmer Brown eventually negotiates with the cows, demonstrating a willingness to address their concerns. Examining his portrayal in the PDF highlights his journey from frustration to reluctant understanding.

The Cows

The cows in Click, Clack, Moo, as depicted within a readily accessible PDF version of the book, are the driving force behind the narrative’s playful conflict. They aren’t simply farm animals; they’re intelligent, resourceful, and determined to improve their living conditions. Discovering a typewriter, they cleverly utilize it to articulate their demands for electric blankets.

A PDF reading reveals their collective action and unified voice, showcasing a subtle commentary on labor rights. Their actions are not malicious, but rather a logical response to cold winter nights. The cows’ characterization, easily observed in the PDF, is both humorous and empowering.

Duck (as a Mediator)

Duck, a pivotal character easily observed when reviewing a Click, Clack, Moo PDF, serves as the unlikely mediator between Farmer Brown and his typing cows. He’s the crucial link in communication, patiently relaying messages back and forth, attempting to negotiate a peaceful resolution to the escalating demands for electric blankets.

The PDF highlights Duck’s pragmatic approach; he isn’t aligned with either side, but seeks a compromise. His role demonstrates the importance of diplomacy and understanding. Duck’s calm demeanor contrasts with Farmer Brown’s frustration and the cows’ firm stance, making him essential to the story’s outcome.

Themes Explored in the Book

A Click, Clack, Moo PDF reveals several key themes. Firstly, communication and negotiation are central, showcasing how understanding different perspectives can lead to resolution. Secondly, the story subtly explores labor and rights, as the cows demand better working conditions – electric blankets! – mirroring real-world labor movements.

Finally, the book champions problem-solving. Farmer Brown, the cows, and Duck all contribute to finding a solution, demonstrating collaborative thinking. Examining a PDF version allows for focused analysis of these themes, making it a valuable resource for discussions about fairness, compromise, and effective communication.

Communication and Negotiation

A Click, Clack, Moo PDF highlights the importance of clear communication, even – or especially – when parties have differing needs. The cows utilize a novel method – typing – to articulate their demands, bypassing traditional animal-to-human communication barriers. This forces Farmer Brown to engage in negotiation.

The story demonstrates that successful negotiation requires understanding the other side’s perspective. While initially resistant, Farmer Brown eventually compromises, showcasing the benefits of finding mutually acceptable solutions. Analyzing the typed notes within the PDF emphasizes how written communication can facilitate productive dialogue.

Labor and Rights

Examining a Click, Clack, Moo PDF reveals subtle themes of labor and animal rights. The cows’ demands – electric blankets – can be interpreted as requests for improved working conditions, highlighting their contribution to the farm’s productivity. Their strike, communicated through typed notes, represents a form of collective bargaining.

Though presented playfully, the story introduces the concept of workers asserting their needs. The cows aren’t simply asking for favors; they’re negotiating for comfort and well-being in exchange for their labor. A PDF version allows close examination of the cows’ demands, prompting discussion about fairness and respect in any working relationship.

Problem Solving

A Click, Clack, Moo PDF showcases multiple instances of problem-solving. Farmer Brown initially struggles with the cows’ strike and their typed demands, representing an unexpected challenge. Duck acts as a mediator, attempting to find a solution acceptable to both parties, demonstrating negotiation skills.

The story encourages young readers to consider different approaches to conflict resolution. Analyzing the PDF allows for a detailed look at the steps taken – from the cows’ initial protest to the eventual compromise. It highlights that effective problem-solving often requires communication, understanding, and a willingness to find common ground.

Click, Clack, Moo as a Caldecott Medal Book

While Click, Clack, Moo didn’t win the Caldecott Medal, it received a Caldecott Honor in 2001, recognizing Betsy Lewin’s exceptional illustrations. Accessing a PDF version allows close examination of her work – the expressive cow faces and humorous depictions of farm life.

The Caldecott Honor acknowledges the book’s contribution to children’s literature through its visual storytelling. A PDF facilitates classroom discussions about how illustrations enhance the narrative. It demonstrates how pictures can convey emotion and contribute to understanding the story’s themes, making it a valuable resource for educators.

Educational Applications: 2nd Grade Study Guide

A Click, Clack, Moo PDF serves as a fantastic resource for a 2nd-grade study guide, enabling teachers to easily share the story with students. Activities can focus on character analysis, plot sequencing, and identifying the story’s problem and solution.

The PDF format allows for annotation and interactive exercises. Students can practice writing skills by composing letters to Farmer Brown, mirroring the cows’ demands. Vocabulary building exercises, utilizing words from the story, can also be incorporated. This digital accessibility enhances engagement and supports differentiated learning within the classroom.

Vocabulary from Click, Clack, Moo

Utilizing a Click, Clack, Moo PDF streamlines vocabulary instruction. Key words like “demands,” “negotiate,” “complaints,” and “electric” are central to understanding the narrative. Teachers can create worksheets directly within the PDF, asking students to define these terms in context.

Further exercises could involve sentence writing, using the vocabulary words, or identifying synonyms and antonyms. The digital format allows for interactive quizzes and games, reinforcing comprehension. Accessing the story as a PDF simplifies the creation of customized vocabulary lists tailored to specific learning needs.

Spelling Words Related to the Story

A Click, Clack, Moo PDF is invaluable for creating targeted spelling lists. Words directly from the text, such as “farmer,” “cows,” “type,” “demands,” “electric,” and “blankets,” become engaging practice material. Teachers can easily highlight these words within the PDF and generate accompanying spelling tests.

Activities could include writing sentences using the words, identifying misspelled versions, or participating in spelling bees. The digital format allows for interactive spelling games and personalized word lists based on student needs. Utilizing the PDF ensures consistent spelling practice aligned with the story’s content.

Click, Clack, Moo in the Classroom: Lesson Plans (1st Grade)

A readily available Click, Clack, Moo PDF streamlines lesson planning for first grade. Teachers can utilize the digital text for shared reading experiences, focusing on character identification and plot sequencing. Lesson plans might include pre-reading discussions about farm animals and their needs.

Post-reading activities could involve retelling the story in their own words, drawing scenes, or acting out the roles of Farmer Brown and the cows. The PDF facilitates easy projection for whole-class viewing and annotation. Extension activities could center around writing persuasive letters to Farmer Brown!

Puppet Show Adaptations of Click, Clack, Moo

Adapting Click, Clack, Moo into a puppet show is a dynamic way to engage young learners. Utilizing a PDF version of the story provides a convenient script for narration and dialogue. Simple cow and Farmer Brown puppets can be crafted from paper bags or socks, fostering creativity.

The puppet show format encourages students to embody characters and explore themes of communication and negotiation. It aligns with NAEYC Standard 4, emphasizing developmentally effective approaches. A PDF copy allows for easy script adjustments and prop lists. This interactive performance brings the story to life!

Puppet Show and NAEYC Standards

A Click, Clack, Moo puppet show directly supports NAEYC Standard 4, focusing on using developmentally effective approaches. Accessing the story via a PDF allows for tailored script modifications to suit diverse learning needs. The show promotes language development, social-emotional skills, and creative expression.

Puppet play encourages collaborative storytelling and problem-solving, mirroring the book’s negotiation theme. Utilizing a PDF version streamlines preparation and ensures fidelity to the original narrative. This activity fosters a playful learning environment aligned with NAEYC’s commitment to high-quality early childhood education.

Instructional Materials for Teaching Click, Clack, Moo

Essential instructional materials include the Click, Clack, Moo book itself, readily available in PDF format for digital reading and printing. Complementary resources are cow puppets, enhancing interactive storytelling and role-playing. A “Letter to Farmer Brown” template encourages writing skills and perspective-taking.

Accessing a PDF version of the book allows teachers to easily project illustrations and highlight key vocabulary. Anchor charts summarizing plot points and character traits further support comprehension. These materials, combined with the digital accessibility of a PDF, create a dynamic and engaging learning experience;

Book Itself

Click, Clack, Moo: Cows That Type, penned by Doreen Cronin and illustrated by Betsy Lewin, is the foundational element for any lesson. Conveniently, a PDF version of the book is widely accessible online, offering a digital alternative to the physical copy. This PDF format allows for easy projection during read-alouds and facilitates close examination of Lewin’s charming illustrations.

The story’s engaging narrative and relatable themes make it ideal for second and first graders. Having the PDF readily available streamlines lesson preparation and ensures all students have access to the text, regardless of library availability.

Cow Puppets

Utilizing cow puppets enhances engagement during a Click, Clack, Moo lesson, bringing the story to life for young learners. While a PDF of the book provides the narrative, puppets allow for interactive retelling and role-playing. Students can embody the cows, practicing dialogue and expressing their “demands” – mirroring the story’s central conflict.

Templates for creating simple cow puppets are easily found online, often accompanying lesson plans focused on the book. These resources complement the PDF version, transforming a reading activity into a dynamic, hands-on experience. Puppets foster creativity and comprehension.

Letter to Farmer Brown Template

A “Letter to Farmer Brown” template extends learning beyond the Click, Clack, Moo PDF, encouraging students to practice persuasive writing. This activity asks children to step into the cows’ shoes, articulating their needs and demands just as they do in the story. Templates often include sentence starters or prompts to guide younger writers.

The exercise reinforces comprehension of the narrative and develops communication skills. Students must consider Farmer Brown’s perspective while advocating for the cows. Accessing the story via PDF allows for repeated reference during the writing process, ensuring accuracy and detail in their letters;

Click, Clack, Moo: Lifeline Theatre Adaptation

The Lifeline Theatre’s adaptation of Click, Clack, Moo demonstrates the story’s broad appeal and adaptability beyond its original PDF format. Praised as a sophisticated children’s show, the production features a clever script derived from Doreen Cronin’s beloved picture book. This stage version brings the characters to life, enhancing the narrative with visual and auditory elements.

Understanding the plot through the PDF version provides a strong foundation for appreciating the nuances of the theatrical performance. The adaptation showcases how a simple story about cows and typing can be transformed into a captivating experience for audiences of all ages, proving its enduring quality.

Finding Click, Clack, Moo PDFs Online

Numerous online resources offer Click, Clack, Moo in PDF format, catering to educators, parents, and young readers. Websites dedicated to children’s literature frequently host downloadable PDF versions for educational purposes. A quick internet search using keywords like “Click, Clack, Moo PDF download” yields several results, including options for free access and previews.

However, users should exercise caution and verify the legitimacy of the source before downloading to ensure safety and quality. Many platforms provide legally obtained PDF copies, while others may offer unauthorized downloads. Always prioritize reputable websites for a secure and reliable experience.

Download Options for Click, Clack, Moo PDF

Several avenues exist for downloading the Click, Clack, Moo PDF. Some websites offer direct downloads, requiring minimal registration or providing immediate access to the file. Others may necessitate creating an account or completing a brief survey before enabling the download. Online libraries and digital bookstores often list the book in PDF format, sometimes with preview options.

It’s crucial to confirm the file’s safety by scanning it with antivirus software post-download. Legitimate sources typically provide high-quality PDFs, while unofficial sites may contain compromised files. Consider purchasing the PDF from reputable vendors to support the author and illustrator.

Narrator Script Excerpts from Click, Clack, Moo

Excerpts reveal the story’s charm through narration. “CLICK, CLACK, MOO Cows That Type By Doreen Cronin,” begins one script, immediately establishing the core concept. The narrator introduces Farmer Brown’s predicament: “Farmer Brown has a problem. His cows like to type.” This sets the stage for the cows’ demands and the ensuing negotiation.

Further excerpts showcase the typing sounds – “CLICK, CLACK, MOO!” – bringing the story to life auditorily. These snippets, often found accompanying PDF versions for performance purposes, highlight the book’s playful rhythm and engaging dialogue, perfect for read-alouds or dramatic adaptations.

Click, Clack, Moo: Cows That Type ౼ Free PDF Download

Numerous online resources offer a Click, Clack, Moo PDF for free download, catering to educators, parents, and young readers. Websites frequently provide the complete story in a digital format, easily accessible on various devices. Searching for “Click,Clack,Moo Crows That Type PDF” yields several results, allowing convenient access to the beloved tale.

However, users should exercise caution, ensuring downloads originate from reputable sources to avoid potential malware. These PDF versions are invaluable for classroom use, story time, or simply enjoying the book digitally.

Critical Reception and Reviews

Click, Clack, Moo: Cows That Type has garnered widespread acclaim, celebrated for its humorous narrative and engaging illustrations. Reviews consistently highlight the book’s appeal to young children, praising its clever portrayal of farm animals and relatable themes. The story’s success has led to numerous adaptations, including a notable production by Lifeline Theatre, described as a sophisticated children’s show.

The availability of the PDF version has further broadened its reach, allowing wider access to this critically lauded story. Its enduring popularity is a testament to Cronin and Lewin’s collaborative talent.

Similar Books to Click, Clack, Moo

Readers who enjoy the playful spirit of Click, Clack, Moo might also appreciate other humorous farm-themed picture books. Titles featuring animal antics and clever problem-solving resonate with the same audience. Exploring books by Doreen Cronin herself, within the Click, Clack series, offers a natural extension.

Accessing a PDF copy of Click, Clack, Moo can inspire further reading exploration. Books with similar themes of communication and negotiation, or those employing witty animal characters, provide comparable enjoyment for young readers.

The Series: Click, Clack Books

The delightful world introduced in Click, Clack, Moo: Cows That Type extends into a charming series by Doreen Cronin and Betsy Lewin. These books continue the humorous adventures of Farmer Brown and his resourceful animals, each facing new challenges and employing creative solutions.

Finding a PDF version of the original story can spark interest in the entire series. Titles like Click, Clack, Moo: Cows That Type at School and Click, Clack, Moo: Cows That Type—Valentine’s Day offer continued entertainment and reinforce themes of communication and collaboration.

Where to Purchase Click, Clack, Moo (Physical and Digital)

Click, Clack, Moo: Cows That Type is widely available! Physical copies can be found at major booksellers like Barnes & Noble and independent bookstores. For digital access, numerous online platforms offer the book. A convenient option is downloading a PDF version, though ensure it’s from a reputable source to respect copyright.

Amazon, Apple Books, and Google Play Books all provide digital editions. Libraries often offer e-book lending services, providing free access to the PDF or other digital formats. Checking these resources can save costs while enjoying this beloved story!

The Enduring Appeal of Click, Clack, Moo

Click, Clack, Moo: Cows That Type continues to captivate readers with its humorous narrative and relatable themes. The story’s accessibility is further enhanced by the availability of PDF versions, allowing wider access for educational purposes and personal enjoyment.

Its clever exploration of communication, negotiation, and even labor rights resonates with both children and adults. The charming illustrations by Betsy Lewin perfectly complement Doreen Cronin’s witty text, creating a truly memorable reading experience. The book’s lasting popularity proves its timeless appeal and enduring place in children’s literature.

holiday inn channel guide

Holiday Inn Channel Guide: A Comprehensive Overview (Updated 02/06/2026)

Welcome! This detailed guide provides essential information regarding television channel availability at Holiday Inn locations, updated as of today’s date.

Federal holidays in 2026 impact programming, with eleven recognized days offering varied television specials and schedules for guests’ enjoyment.

Channel listings, like A&E (56) and SYFY (51), are subject to change, so always consult the in-room guide or front desk for the most current information.

Understanding Holiday Inn TV Channel Offerings

Holiday Inn strives to provide a diverse and enjoyable television experience for all guests. Channel availability varies significantly depending on the specific hotel location and the cable package offered. Generally, guests can expect a blend of standard cable options, with possibilities for expanded packages including premium channels like HBO and Showtime.

The core offerings typically include major broadcast networks – ABC, CBS, NBC, and FOX – alongside popular cable channels catering to diverse interests. News enthusiasts will find CNN, Fox News, and MSNBC, while sports fans can tune into ESPN and FS1. Entertainment options span A&E, TLC, and Discovery, complemented by movie channels such as TNT, TBS, and SYFY.

It’s crucial to remember that channel numbers are subject to change. The provided listings (like channel 45 for SPIKE TV) serve as examples and may differ at your specific Holiday Inn. Furthermore, Spanish-language channels like Telemundo and Telefutura are often included to cater to a broader audience. Understanding these variations ensures a smoother and more satisfying viewing experience during your stay.

The Importance of a Channel Guide

A comprehensive channel guide is paramount for a positive guest experience at Holiday Inn. Given the fluctuating nature of channel lineups – as evidenced by examples like channel 51 for SYFY and 45 for SPIKE TV – relying on memory alone is often insufficient. Channel numbers are demonstrably “subject to change,” necessitating a reliable reference point.

The guide empowers guests to quickly locate desired programming, whether it’s catching up on news via CNN or enjoying entertainment on A&E. It minimizes frustration and wasted time spent endlessly flipping through channels. Moreover, understanding available options, including Spanish-language channels like Telemundo, enhances inclusivity.

Beyond basic listings, a good guide clarifies premium channel availability (HBO, Showtime) and any special holiday programming, such as those occurring on Federal Holidays in 2026. Accessing this information – through in-room guides, front desk assistance, or potentially online listings – is vital for maximizing in-room entertainment during your stay.

Accessing the Holiday Inn Channel Guide

Holiday Inn offers multiple avenues for guests to access the most up-to-date channel information. The most readily available resource is the in-room channel guide, typically located in the television cabinet or on the desk. This printed guide provides a snapshot of the current channel lineup, though remember listings are “subject to change.”

For immediate assistance or clarification, the front desk is an excellent point of contact. Staff members can provide current channel numbers, answer questions about programming, and troubleshoot any issues you may encounter. Additionally, some Holiday Inn locations may offer online channel listings, accessible via the hotel’s Wi-Fi network – check with the front desk for availability.

Remember that external websites like TV Channel Lists are not affiliated with Holiday Inn and cannot provide specific, accurate information for each location. Utilizing the hotel’s provided resources ensures you receive the correct details for your stay.

Standard Channel Lineups at Holiday Inn

Holiday Inn provides varied cable packages, ranging from basic options to expanded selections and premium channels like HBO and Showtime, depending on location.

Basic Cable Package

The standard basic cable package at most Holiday Inn locations offers a solid foundation of popular viewing options, designed to cater to a broad range of preferences. Typically, guests can expect access to major broadcast networks such as ABC (channels 3 & 74), CBS (channel 25.2), and NBC (channel 25.1), providing local programming and national news coverage.

Furthermore, the basic package commonly includes essential cable channels like CNN, ensuring guests stay informed with up-to-the-minute news, and options for family entertainment such as A&E (channel 56) and TV Land (channel 44). Travel Channel (channel 1) and HLN (channel 28.1) are also frequently included.

For those seeking lighter fare, TBS (channel 14) and Freeform (channel 45) often form part of the standard lineup. This package aims to deliver a comfortable and convenient in-room entertainment experience without requiring additional costs, making it ideal for casual viewers.

Expanded Cable Options

For guests desiring a more comprehensive television experience, Holiday Inn frequently offers expanded cable packages beyond the basic selection. These upgraded options typically include a wider array of sports channels, such as ESPN and FS1, catering to sports enthusiasts seeking live games and analysis. Entertainment choices are also broadened, potentially adding channels like Discovery and TLC, offering diverse programming.

The expanded package often incorporates digital HD channels, providing superior picture quality for select networks like ABC HD (channel 79) and TBS HD. Guests may also find additional movie channels, supplementing the standard offerings with a greater variety of film content;

Availability and pricing for expanded packages vary by location, so it’s recommended to inquire at the front desk. These options provide a richer viewing experience for those who appreciate a larger channel selection and enhanced picture clarity.

Premium Channel Availability (HBO, Showtime, etc.)

Holiday Inn locations often provide access to premium cable channels like HBO and Showtime, though availability is typically on an on-demand or pay-per-view basis. These channels showcase exclusive original series, blockbuster movies, and uncut boxing events, appealing to viewers seeking high-quality entertainment.

Accessing premium channels usually involves a separate charge added to your room bill. Guests can typically purchase access for a 24-hour period or for the duration of their stay. The front desk can provide specific pricing details and instructions for ordering.

While not always guaranteed, some Holiday Inn properties may include a premium channel as part of a special package or promotion. Always confirm current offerings and costs with hotel staff to ensure a seamless and enjoyable viewing experience.

Popular Channels Typically Available

Guests can generally expect a diverse selection of channels, including news (CNN, Fox News), sports (ESPN, FS1), entertainment (A&E, TLC), and movie options (TNT, TBS).

News Channels (CNN, Fox News, MSNBC)

Staying informed during your travels is easy with readily available national and international news coverage. Holiday Inn typically provides access to leading 24-hour news networks, ensuring guests remain connected to current events.

CNN offers comprehensive reporting, in-depth analysis, and breaking news from around the globe, catering to a broad audience seeking diverse perspectives. Fox News delivers a conservative viewpoint, focusing on political and social commentary alongside news updates.

MSNBC provides a progressive perspective on current affairs, featuring political analysis and debate. These channels allow guests to follow developing stories, political landscapes, and world events throughout their stay. Channel numbers are subject to change, so please refer to the in-room guide or front desk for the most accurate listings.

Access to these networks ensures a well-rounded news experience for all travelers.

Sports Channels (ESPN, FS1, etc.)

For sports enthusiasts, Holiday Inn strives to deliver comprehensive coverage of live games, highlights, and sports-related programming. Guests can typically access a variety of channels dedicated to the world of sports, ensuring they don’t miss any action during their travels.

ESPN is a leading sports network, broadcasting a wide range of events, including professional and collegiate games, studio shows, and original programming. FS1 (Fox Sports 1) offers live sports coverage, analysis, and studio programming, focusing on major leagues and events.

Additional sports channels may include regional sports networks, providing coverage of local teams and events. Channel availability varies by location, so checking the in-room guide or contacting the front desk is recommended. Enjoy catching your favorite teams and athletes while relaxing at Holiday Inn!

Entertainment Channels (A&E, TLC, Discovery)

Holiday Inn understands the importance of diverse entertainment options for its guests. A robust selection of entertainment channels provides something for everyone, from captivating reality shows to fascinating documentaries and thrilling dramas. These channels offer a welcome escape and relaxation during your stay.

A&E (channel 56) delivers a mix of reality television, crime dramas, and documentaries, offering compelling stories and engaging content. TLC focuses on lifestyle programming, including reality shows centered around families, relationships, and personal transformations.

Discovery Channel explores the wonders of the natural world, science, and technology through captivating documentaries and series. Channel availability may vary, so consulting the in-room guide or front desk is advised. Enjoy unwinding with quality entertainment at Holiday Inn!

Movie Channels (TNT, TBS, SYFY)

Holiday Inn provides guests with access to a variety of movie channels, ensuring there’s always something exciting to watch. These channels offer a diverse range of films, from blockbuster hits to classic favorites, catering to different tastes and preferences. Enjoy a relaxing evening with a captivating movie during your stay!

TNT frequently airs popular movies, original series, and sporting events, providing a broad entertainment experience. TBS is known for its comedic programming, including sitcoms, stand-up specials, and original comedy series, offering plenty of laughs.

SYFY (channel 51) specializes in science fiction, fantasy, and horror movies and television shows, appealing to fans of these genres. Channel lineups are subject to change, so checking the in-room guide or contacting the front desk is recommended for the most up-to-date listings.

Specific Channel Numbers (Example ⏤ Subject to Change)

Please note: Channel numbers can vary by location and are always subject to change. Examples include A&E on channel 56 and SYFY on 51.

Channel Listings by Number (01-50)

Here’s a sample listing of channels 01 through 50, though availability may differ based on your specific Holiday Inn location. Channel 1 typically features Travel Park TV, offering destination information and travel-related content for guests. Channel 3 broadcasts ABC (KEYT), while Channel 4 showcases NBC (WMBF). HLN can be found on channel 23, and CBS (WBTW) is often on channel 25.

Entertainment options within this range include TV Land on channel 44 and Freeform on channel 45. For news enthusiasts, Spectrum News is often available on channel 10.1. Channel 51 typically offers SYFY, catering to science fiction fans. Remember that these are examples, and actual channel lineups are subject to frequent updates and regional variations. Always consult the in-room guide or contact the front desk for the most accurate and current channel information during your stay.

Channel Listings by Number (51-100)

Continuing the channel guide, this section details listings from 51 to 100, acknowledging that availability varies by Holiday Inn location. Channel 51 frequently features SYFY, providing science fiction and fantasy programming. TBS can often be found on channel 14, offering a mix of comedy and entertainment. Telemundo, a Spanish-language channel, is sometimes available on channel 43, alongside Telefutura.

Further up the dial, you might find CNBC on channel 24, delivering business and financial news. Bay News 9 is often located on channel 10.2, providing local coverage. Remember, these are illustrative examples, and channel lineups are dynamic. For the most precise and up-to-date information during your stay, please refer to the in-room channel guide or kindly inquire with the front desk staff. They can provide a tailored list specific to your Holiday Inn’s current offerings.

Spanish Language Channels (Telemundo, Telefutura)

For our Spanish-speaking guests, Holiday Inn strives to provide access to popular Spanish-language channels. Telemundo and Telefutura are frequently included in expanded cable packages, offering a diverse range of programming, including telenovelas, news, and sports. Channel 43 is a common location for Telefutura, while Telemundo’s availability can vary, but is often found within a similar range.

These channels cater to a broad audience, delivering culturally relevant content. However, specific channel numbers are subject to change based on location and cable provider agreements. To confirm the current channel number for Telemundo or Telefutura at your specific Holiday Inn, please consult the in-room channel guide or contact the front desk. Our team is dedicated to ensuring you have a comfortable and enjoyable viewing experience.

Troubleshooting Channel Issues

Experiencing TV problems? Common issues include no signal, incorrect listings, or pixelation. Contact the front desk for assistance or check cable connections promptly.

No Signal Issues

Encountering a blank screen or a “No Signal” message? This is a frequently reported issue, and several simple steps can often resolve it quickly. First, ensure the television is powered on and the correct input source is selected – often labeled as “TV,” “Cable,” or “HDMI.”

Next, carefully check the cable connection at the back of the television and the wall outlet, ensuring it’s securely fastened. If using a converter box, verify its power supply and connection to the TV.

If the problem persists, try cycling the power to both the television and the cable box (if applicable) by unplugging them for 30 seconds, then plugging them back in. Should these steps fail, immediately contact the front desk; a technician may be needed to diagnose potential issues with the hotel’s cable system or equipment.

Remember, signal disruptions can sometimes occur due to inclement weather or scheduled maintenance.

Incorrect Channel Listings

Discovering discrepancies between the in-room channel guide and what’s actually displayed on your television? This can be frustrating, but is often easily addressed. Channel lineups are subject to frequent updates by cable providers, and the printed guides may not always reflect the very latest changes.

First, double-check the channel number against the most recent guide available at the front desk. If the discrepancy persists, try a channel scan on the television – instructions for this are usually found within the TV’s menu settings.

Remember that channel numbers can vary significantly between different Holiday Inn locations. If a scan doesn’t resolve the issue, promptly inform the front desk staff; they can provide the most accurate, up-to-date channel list or escalate the problem to the appropriate technical support team.

Pixelation or Poor Picture Quality

Experiencing a fuzzy or pixelated picture on your Holiday Inn television? Several factors can contribute to this issue, ranging from simple signal interference to more complex technical problems. Initially, verify that all cables connecting to the television are securely fastened. Loose connections are a common culprit.

If the problem persists, try switching to a different channel to determine if the issue is isolated to a single broadcast. Widespread pixelation across multiple channels suggests a broader signal problem.

Contact the front desk immediately; they can often reset the cable box or investigate potential issues with the hotel’s overall signal distribution system. Don’t hesitate to report the problem – a clear viewing experience is a priority for Holiday Inn guests!

Holiday Inn Channel Guide Resources

Need assistance? Utilize the in-room guide, ask our friendly front desk staff, or check for available online listings for channel information.

In-Room Channel Guide

Your First Point of Reference: The in-room channel guide is designed to be your primary resource for navigating the television options available during your stay at Holiday Inn; This conveniently located booklet, typically found on your desk or near the television, provides a comprehensive listing of all channels currently offered.

Expect to find channels categorized for easy browsing, including news (CNN, Fox News, MSNBC), sports (ESPN, FS1), entertainment (A&E, TLC, Discovery), and movie options (TNT, TBS, SYFY). The guide also details any premium channel availability, such as HBO or Showtime, and often includes brief descriptions of each channel’s programming.

Please remember that channel numbers are subject to change, so always refer to the most recent in-room guide for accurate information. While we strive to keep these guides updated, discrepancies can occur. If you encounter any inconsistencies, please don’t hesitate to contact the front desk for assistance. The in-room guide is a valuable tool for maximizing your in-room entertainment experience.

Front Desk Assistance

Dedicated Support for Your Viewing Pleasure: Our front desk team is readily available to assist you with any questions or concerns regarding the Holiday Inn television channel lineup. We understand that navigating channel guides or troubleshooting technical issues can sometimes be frustrating, and we’re here to help ensure a seamless entertainment experience.

Don’t hesitate to contact the front desk if you encounter difficulties finding a specific channel, experience signal problems, or notice incorrect channel listings. Our staff can provide updated channel information, assist with resetting your television, or escalate any technical issues to our maintenance team.

We can also clarify premium channel access and pricing, should you be interested in upgrading your viewing options. Consider us your personal TV concierge! We aim to provide prompt and courteous service, ensuring you can relax and enjoy your favorite programs during your stay. Simply call or visit the front desk – we’re happy to assist.

Online Channel Listings (If Available)

Convenient Digital Access to Channel Information: While not all Holiday Inn locations currently offer online channel listings, we are continually working to expand digital accessibility for our guests. Check the specific hotel’s website before your stay to determine if an online guide is available. This resource, if present, provides a convenient way to preview the channel lineup before you arrive.

An online channel guide typically mirrors the in-room guide, offering a categorized list of available channels with corresponding numbers. It can also include brief descriptions of each channel’s programming. Please note that channel lineups are subject to change, so the online listing should be considered a reference point, not a definitive guarantee.

If an online guide isn’t available, remember that the in-room guide and our friendly front desk staff are excellent resources. We strive to provide multiple avenues for accessing channel information, ensuring a pleasant viewing experience for all our guests.

Federal Holidays and TV Programming (2026)

Special Broadcasts Await! Federal holidays in 2026 will feature unique television schedules, including specials and themed programming for Holiday Inn guests.

New Year’s Day Programming

Start the Year with Entertainment! Holiday Inn guests can anticipate a diverse range of programming on New Year’s Day, January 1st, 2026. Traditionally, networks offer celebratory specials, including retrospective looks at the past year and previews of upcoming events.

Expect to find movie marathons across channels like TNT and TBS, providing comfortable viewing options after New Year’s Eve festivities. News channels, such as CNN, Fox News, and MSNBC, will likely feature coverage of New Year’s Day parades and events, alongside insightful analysis of the year ahead.

Entertainment channels like A&E and TLC often broadcast themed programming, and sports fans may find college football bowl games on ESPN or FS1. If New Year’s Day falls on a Sunday, remember that Monday will be observed as a holiday, potentially extending the special programming schedule.

Martin Luther King, Jr. Day Specials

Honoring a Legacy Through Television – On Martin Luther King, Jr. Day, January 19th, 2026, Holiday Inn guests can expect thoughtful and inspiring television programming. Networks traditionally dedicate the day to celebrating Dr. King’s life and achievements, showcasing documentaries and biographical films.

News channels like CNN, MSNBC, and Fox News will likely feature special reports and historical coverage, examining the Civil Rights Movement and Dr. King’s enduring impact. Entertainment channels may present programs promoting diversity, inclusion, and social justice.

Guests can also anticipate themed movie selections that reflect Dr. King’s values and the ongoing pursuit of equality. Remember, if the holiday falls on a Sunday, the following Monday will be observed, potentially extending these special broadcasts. Check your in-room guide for specific channel listings and times.

Memorial Day Television Schedules

Remembering and Honoring Heroes – Memorial Day, observed on May 25th, 2026, at Holiday Inn, will feature television schedules dedicated to honoring the men and women who died while serving in the U.S. military. Expect patriotic programming across numerous channels.

News networks such as CNN and Fox News will likely broadcast coverage of national Memorial Day events, including the National Memorial Day Parade in Washington, D.C., and ceremonies at Arlington National Cemetery. History Channel and similar networks often air documentaries focusing on American military history and the sacrifices made by service members.

Entertainment channels may present films and specials with themes of patriotism, courage, and remembrance. Movie channels like TNT and TBS could showcase war films or stories of heroism. Consult the in-room channel guide or front desk for a detailed listing of Memorial Day programming.