Month: September 2025

2018 chevrolet equinox manual

Welcome! This guide unlocks your 2018 Equinox’s potential, offering detailed insights into operation, maintenance, and safety features, accessible via PDF downloads.

Overview of the Vehicle

The 2018 Chevrolet Equinox is a compact crossover SUV designed for versatility and efficiency. It caters to diverse needs, from daily commutes to family adventures. Available in various trims, the Equinox offers a range of features, including advanced safety technologies and a user-friendly infotainment system. This vehicle boasts a comfortable interior and respectable fuel economy.

Understanding its capabilities requires referencing the official owner’s manual, a comprehensive resource detailing every aspect of the vehicle. The manual provides crucial information on operation, maintenance schedules, and troubleshooting common issues, ensuring a safe and enjoyable driving experience. Access the PDF version easily online!

Importance of the Owner’s Manual

Your 2018 Chevrolet Equinox owner’s manual is an indispensable resource, offering a complete understanding of your vehicle’s operation and maintenance. It details safety features, driving modes, and in-vehicle technology, maximizing your driving experience. Ignoring the manual can lead to improper vehicle use or neglected maintenance, potentially causing damage or safety hazards.

The manual provides crucial information on warning lights, troubleshooting, and warranty details. Easily accessible as a downloadable PDF, it empowers owners to address minor issues and understand their vehicle’s capabilities fully. Regularly consulting it ensures longevity and optimal performance of your Equinox.

Understanding Your Equinox

Dive deeper! Explore detailed specifications, key features, and trim level distinctions of your 2018 Chevrolet Equinox for a comprehensive understanding.

Vehicle Specifications (2018 Model)

The 2018 Chevrolet Equinox presents a range of configurations to suit diverse needs. Engine options include a 1.5L Turbo, a 2;0L Turbo, and a 1.6L Diesel (availability varies by region). Transmission choices are a 6-speed automatic or a 9-speed automatic.

Dimensions reveal a compact crossover, typically around 183.1 inches in length, 72.6 inches in width, and 65.4 inches in height. Curb weight fluctuates between approximately 3,265 to 3,635 pounds, depending on the trim and engine. Fuel tank capacity generally stands at 18.8 gallons. Available drivetrain options encompass front-wheel drive and all-wheel drive, enhancing versatility across various terrains. Detailed specifications are readily available within the official owner’s manual PDF.

Key Features and Technologies

The 2018 Equinox boasts a suite of advanced technologies. The infotainment system, featuring a 7 or 8-inch touchscreen, supports Apple CarPlay and Android Auto. Available features include a built-in 4G LTE Wi-Fi hotspot, enhancing connectivity on the go. Safety is prioritized with available Forward Collision Alert and Automatic Emergency Braking.

Additional highlights encompass a hands-free liftgate, heated seats, and a panoramic sunroof. The Teen Driver technology allows monitoring of driving habits. Bluetooth connectivity ensures seamless integration with smartphones. Refer to the owner’s manual for detailed instructions on utilizing these features and maximizing your driving experience.

Trim Levels and Differences

The 2018 Chevrolet Equinox offered several trim levels: L, LS, LT, and Premier. The base L model provides essential features, while the LS adds conveniences like a rearview camera. Stepping up to the LT introduces enhanced comfort and technology options, including heated seats and a power driver’s seat.

The Premier trim represents the pinnacle of luxury, boasting leather upholstery, a Bose sound system, and advanced safety features. Engine options varied by trim, with a 1.5L turbo, a 2.0L turbo, and a 1.6L diesel available. Consult the owner’s manual for a comprehensive breakdown of each trim’s specific features and specifications.

Operating Your Vehicle

Mastering your Equinox is easy! This section details starting, driving modes, fueling procedures, and essential fluid checks for optimal performance and safety.

Starting and Stopping the Engine

Starting your 2018 Equinox typically involves ensuring the vehicle is in Park or Neutral, firmly pressing the brake pedal, and then pressing the Start/Stop button. The engine will ignite, and the instrument cluster will illuminate. For a smooth start in cold weather, avoid excessive throttle.

To stop the engine, simply press the Start/Stop button while the vehicle is in Park or Neutral. Ensure the vehicle comes to a complete stop before shutting off the engine. Avoid prolonged idling to conserve fuel and reduce emissions. Always allow the engine to idle briefly before shutting it down, especially after highway driving.

Driving Modes and Controls

The 2018 Equinox offers selectable driving modes, influencing throttle response and shift patterns. These typically include Normal, Sport, and Snow/Ice modes, accessible via a dedicated selector. Normal mode balances fuel efficiency and performance. Sport mode enhances acceleration and responsiveness. Snow/Ice mode optimizes traction on slippery surfaces.

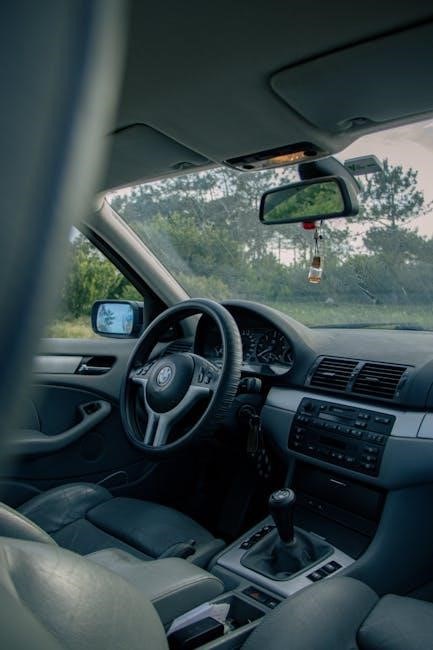
Essential controls include the steering wheel-mounted buttons for audio, cruise control, and phone functions. The gear selector manages transmission shifts. Familiarize yourself with the location and operation of all controls for safe and convenient driving.

Fueling and Fluid Checks

The 2018 Equinox accepts unleaded gasoline with an octane rating of 87 or higher. Always refer to the owner’s manual for specific fuel capacity details. Regularly check essential fluid levels, including engine oil, coolant, brake fluid, power steering fluid, and windshield washer fluid. Low fluid levels can compromise vehicle performance and safety.

Locate the dipsticks and reservoir caps, and follow the manual’s instructions for proper checking procedures. Ensure fluids are topped off to the recommended levels. Promptly address any leaks or significant fluid consumption.

Safety Features

Protect yourself! The 2018 Equinox boasts advanced safety, including airbags, stability control, and forward collision alert – detailed in your owner’s manual.

Airbag System

Crucial Safety Component: Your 2018 Chevrolet Equinox is equipped with an advanced airbag system designed to provide occupant protection during certain collision events. This system includes frontal airbags for both driver and passenger, as well as seat-mounted side-impact airbags.

The manual details proper seating positions and safety belt usage for optimal airbag effectiveness. It’s vital to understand that airbags deploy with significant force and can cause injury if not used correctly. Always follow the guidelines outlined in the owner’s manual regarding child safety seats and airbag deactivation (if equipped). Familiarize yourself with the system’s indicators and limitations for comprehensive safety knowledge.

Stability Control System

Enhanced Vehicle Control: The 2018 Chevrolet Equinox features a sophisticated Stability Control System (ESC) designed to help maintain directional control during challenging driving conditions. This system automatically intervenes to prevent skidding and loss of control by applying brakes to individual wheels and adjusting engine power.

The owner’s manual explains how the ESC works and its limitations. It’s important to remember that ESC doesn’t eliminate the risks associated with driving, and drivers should always maintain safe speeds and practice responsible driving habits. The system’s indicator light will illuminate when activated, providing visual feedback.

Forward Collision Alert

Proactive Safety Feature: The 2018 Chevrolet Equinox offers Forward Collision Alert (FCA) as an available safety feature. This system utilizes a forward-facing camera to monitor the distance between your vehicle and obstacles ahead. If a potential collision is detected, FCA provides visual and audible warnings to alert the driver.

The owner’s manual details how to enable, disable, and customize FCA settings. It emphasizes that FCA is a driver-assistance feature and doesn’t replace attentive driving. Drivers must always remain vigilant and prepared to take corrective action. Understanding the system’s limitations is crucial for safe operation.

Maintenance and Care

Preserve Performance! The manual details a recommended schedule for fluid checks, tire maintenance, and overall vehicle upkeep, ensuring longevity and reliability.

Recommended Maintenance Schedule

Proactive care is key! Your 2018 Equinox’s longevity depends on adhering to the outlined maintenance schedule within the owner’s manual. This schedule details inspections – like fluid levels, tire pressure, and brake components – at specific mileage intervals.

Regular oil changes are crucial, with recommendations varying based on driving conditions. Filter replacements (air, cabin, fuel) are also specified. Beyond routine checks, the manual highlights essential services like spark plug replacement and coolant flushes at designated intervals. Following this schedule ensures optimal performance, safety, and helps maintain your vehicle’s value. Consult the manual for the precise schedule tailored to your driving habits.

Fluid Capacities and Types

Maintaining correct fluid levels is vital! The 2018 Equinox requires specific fluids for optimal operation. The owner’s manual details capacities for engine oil (typically around 5.5 quarts with a 1.5L engine), coolant, transmission fluid, power steering fluid, brake fluid, and windshield washer fluid.

It also specifies the types of fluids to use – for example, Dex-Cool coolant is often recommended. Using the incorrect fluid can cause damage. Always refer to the manual for precise specifications, as variations may exist based on engine and trim level. Accurate fluid levels ensure smooth performance and prevent costly repairs.

Tire Information and Maintenance

Proper tire care enhances safety and longevity! The 2018 Equinox owner’s manual provides crucial tire information, including recommended tire sizes (often 225/65R17 or 235/50R18, depending on the trim), optimal tire pressure (typically around 35 PSI, check the door jamb sticker!), and load capacity.

Regularly check tire pressure and tread depth. The manual details proper tire rotation procedures to ensure even wear. It also explains how to interpret the DOT tire code for age and manufacturing information. Ignoring tire maintenance can lead to reduced fuel efficiency and increased risk of accidents.

In-Vehicle Technology

Explore connectivity! The 2018 Equinox manual details the infotainment system, Bluetooth pairing, and available navigation features for a seamless driving experience.

Infotainment System Overview

The 2018 Equinox’s infotainment system is a central hub for connectivity and control. The owner’s manual provides a comprehensive guide to navigating its features, including the touchscreen display and associated buttons. Users can access audio controls, smartphone integration via Apple CarPlay and Android Auto, and vehicle settings.

Detailed instructions cover customizing the home screen, adjusting audio preferences, and utilizing voice commands. The manual also explains how to connect external devices via USB and Bluetooth. Understanding these features enhances the driving experience, providing convenient access to entertainment and information while maintaining focus on the road; Refer to the manual for specific details on your Equinox’s trim level.

Bluetooth Connectivity

Establishing a Bluetooth connection in your 2018 Equinox allows for hands-free calling and wireless audio streaming. The owner’s manual details the pairing process, guiding you through the infotainment system’s menus. It explains how to discover available devices, enter pairing codes, and confirm the connection.

Troubleshooting tips are included for resolving common issues, such as failed connections or audio distortions. The manual also covers managing paired devices, deleting old connections, and optimizing Bluetooth performance. Securely connecting your smartphone enhances convenience and safety while driving, allowing you to stay connected without distractions.

Navigation System (if equipped)

If your 2018 Equinox features a navigation system, the owner’s manual provides comprehensive instructions for its operation. It details entering destinations, utilizing points of interest, and understanding map views. The manual explains how to adjust settings like voice guidance, route preferences, and map display options.

Information on updating map data is also included, ensuring accurate and reliable navigation. Troubleshooting sections address common issues, such as GPS signal loss or incorrect route calculations. Utilizing the navigation system effectively enhances your driving experience, providing turn-by-turn directions and minimizing travel time.

Troubleshooting Common Issues

This section details warning lights, jump-starting procedures, and a basic troubleshooting guide to resolve minor issues with your 2018 Chevrolet Equinox.

Warning Lights and Indicators

Understanding your Equinox’s warning lights is crucial for safe operation. The owner’s manual provides a comprehensive guide to each indicator, explaining its meaning and recommended action. Ignoring these signals could lead to more significant mechanical problems or compromise safety. Common lights include the check engine light, oil pressure warning, and low tire pressure indicator.

Pay close attention to lights related to braking systems, airbag functionality, and stability control. The manual details the difference between critical warnings requiring immediate attention and informational alerts. Regularly reviewing this section ensures you’re prepared to address any potential issues promptly and effectively, maintaining your vehicle’s reliability.

Jump Starting Procedures

A discharged battery can leave you stranded, but safely jump-starting your 2018 Equinox is possible. The owner’s manual details the correct procedure, emphasizing safety precautions to prevent damage to the electrical system. Always use jumper cables in good condition and follow the specified order for connecting and disconnecting them – positive to positive, negative to ground.

Incorrectly connecting cables can cause sparks or even battery explosions. Ensure both vehicles are turned off before starting the process. After jump-starting, allow the Equinox to run for a sufficient period to recharge the battery fully, and consider having it tested by a professional.

Basic Troubleshooting Guide

Encountering minor issues? The 2018 Equinox owner’s manual provides a basic troubleshooting guide for common problems. This section covers issues like unresponsive infotainment systems, difficulties starting the engine, and unusual noises. It details simple checks you can perform yourself before seeking professional assistance, potentially saving time and expense.

Warning lights are addressed, explaining their meaning and suggested actions. Remember, this guide is for preliminary assessment only; complex problems require a qualified technician. Always prioritize safety and consult the manual for specific instructions related to your vehicle’s features.

Detailed Component Information

Explore the inner workings! This section of the 2018 Equinox manual provides in-depth explanations of the engine, transmission, and braking systems.

Understanding the Engine

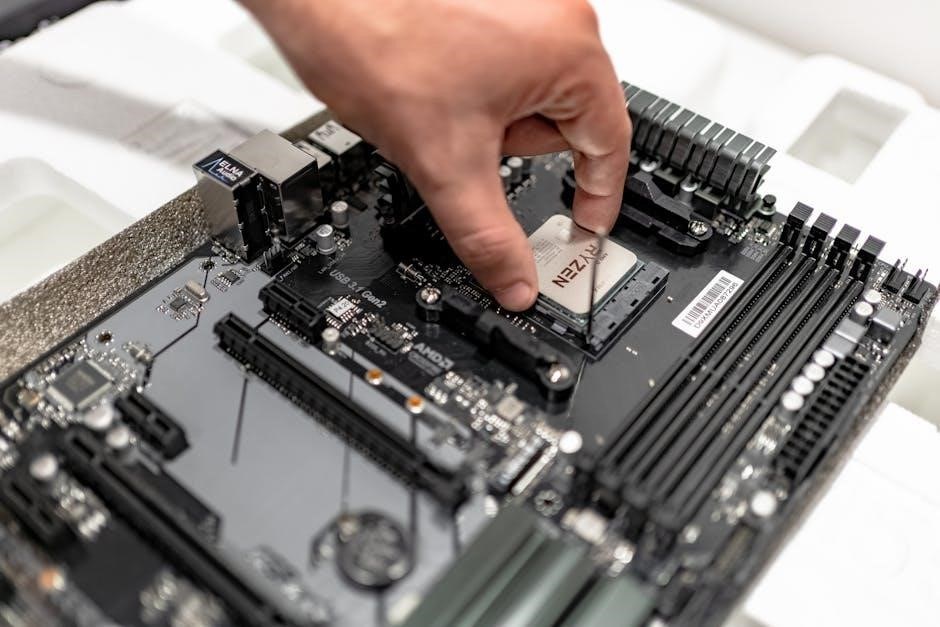
Engine Overview: The 2018 Chevrolet Equinox offers a choice of three engines – a 1.5L Turbo, a 2.0L Turbo, and a 1.6L Diesel. This section details each engine’s specifications, including horsepower, torque, and cylinder configuration. Learn about the engine’s key components, such as the turbocharger (if equipped), fuel injection system, and cooling system.

Operation & Maintenance: Understand proper engine break-in procedures and recommended oil types; Discover how the engine control module (ECM) manages performance and emissions. Familiarize yourself with routine maintenance tasks, like checking fluid levels and inspecting belts and hoses, to ensure optimal engine longevity and efficiency.

Transmission System Details

Transmission Types: The 2018 Equinox primarily features a six-speed automatic transmission, paired with the 1.5L and 2.0L engines. The diesel engine utilizes a nine-speed automatic. This section explains the function of each transmission, including gear ratios and shift patterns. Understand the differences between automatic and manual shift modes, if available.

Fluid & Maintenance: Learn about the recommended transmission fluid type and change intervals. Discover how to check the transmission fluid level and identify potential issues like slipping or harsh shifting. Proper transmission maintenance is crucial for smooth operation and preventing costly repairs, ensuring long-term reliability.

Braking System Explained

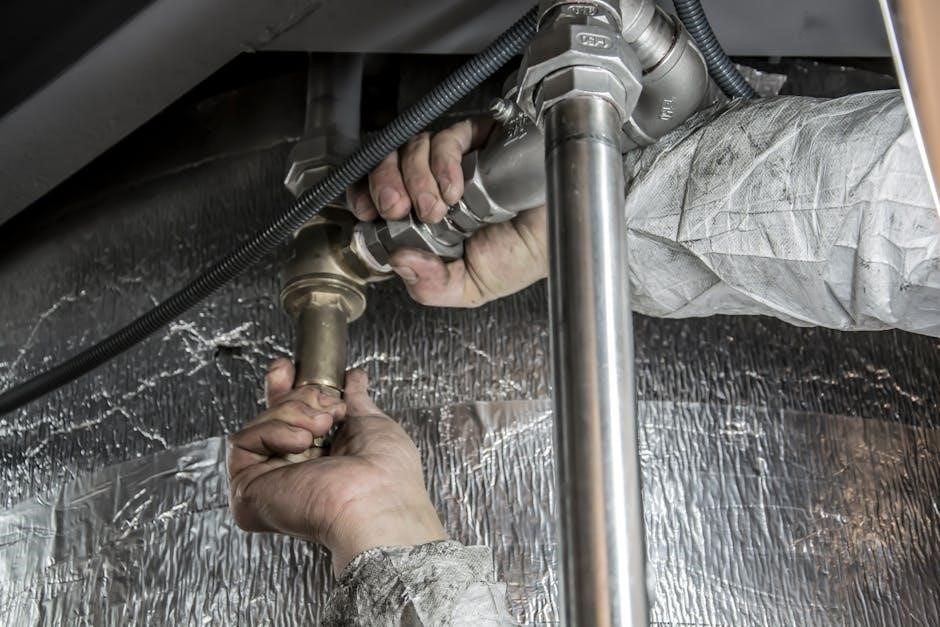
Components & Function: The 2018 Equinox utilizes a hydraulic braking system with ventilated front discs and solid rear discs. This section details the operation of the anti-lock braking system (ABS), preventing wheel lockup during hard braking. Understand the role of the brake booster and master cylinder in applying braking force.

Maintenance & Inspection: Learn how to inspect brake pads, rotors, and brake lines for wear and damage. Discover the recommended brake fluid type and change intervals. Addressing brake system issues promptly is vital for safety, ensuring optimal stopping performance and preventing accidents.

Accessing the Official Manual

Find your answers! Download the 2018 Equinox owner’s manual in PDF format from my.chevrolet.com, or explore MyChevrolet resources online.

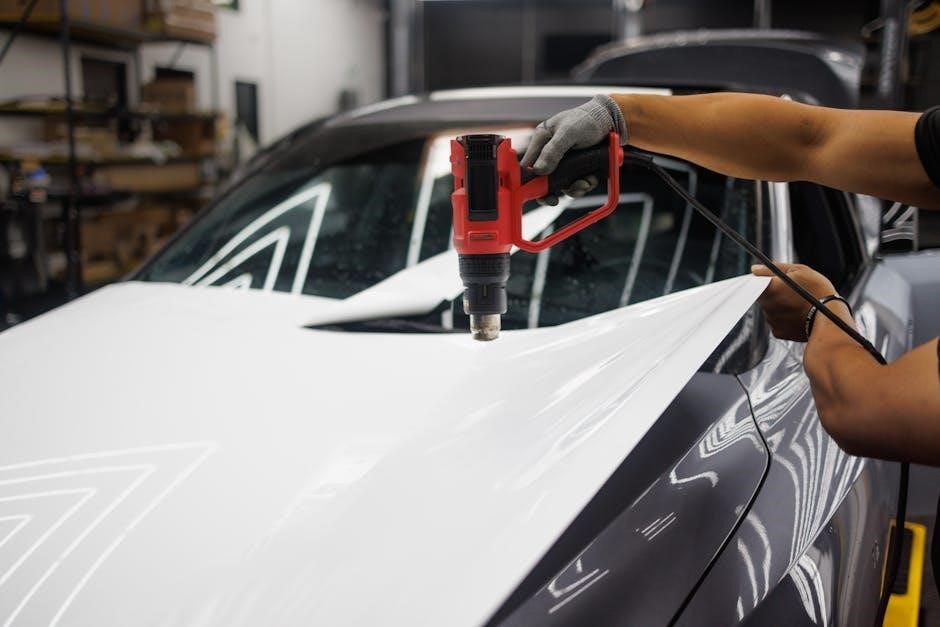
Downloading the 2018 Equinox Owner’s Manual (PDF)

Effortless access to information! Obtaining the 2018 Chevrolet Equinox owner’s manual in PDF format is remarkably simple. Visit the official my.chevrolet.com website and navigate to the owner’s manual section. Search specifically for the 2018 Equinox model. The downloadable PDF contains 324 pages of comprehensive guidance, covering every aspect of your vehicle.

This digital resource provides detailed explanations, diagrams, and troubleshooting tips, ensuring you have the knowledge needed for safe and efficient operation. The file size is approximately 2MB, allowing for a quick and easy download. Keep this manual readily available for future reference!

MyChevrolet Resources

Beyond the manual! MyChevrolet offers a wealth of supplementary resources to enhance your ownership experience. Explore the website for frequently asked questions, helpful videos, and a supportive online community. Register your 2018 Equinox to access personalized alerts, maintenance reminders, and exclusive offers.

The platform also provides access to the Chevrolet owner center, where you can manage your vehicle’s information and connect with Chevrolet customer support. Utilize these digital tools to maximize your vehicle’s performance and stay informed about important updates and recalls. It’s a complete ownership ecosystem!

Locating Specific Information within the Manual

Finding answers quickly! The 2018 Equinox owner’s manual features a comprehensive index, allowing you to pinpoint specific topics with ease. Utilize the alphabetical listing to quickly navigate to sections covering everything from airbag systems to winter driving tips.

Furthermore, the manual is logically organized by vehicle systems and operational procedures. Scan the table of contents for broader categories, then delve into detailed subsections. Keyword searches within the PDF version are also highly effective. Don’t spend hours searching – the manual is designed for efficient information retrieval!

Warranty Information

Coverage details are key! Understand your 2018 Equinox’s warranty, including claim procedures, for peace of mind and protection against unexpected repairs.

Coverage Details

The 2018 Chevrolet Equinox warranty provides comprehensive coverage for your vehicle. Typically, this includes a bumper-to-bumper warranty lasting for 3 years or 36,000 miles, whichever comes first. Powertrain coverage, protecting the engine and transmission, often extends to 5 years or 60,000 miles. Corrosion protection is usually offered for 3 years/unlimited miles.

Specific details can vary, so reviewing your original warranty booklet is crucial. It outlines what components are covered, any exclusions, and deductible information. Understanding these terms ensures you maximize your warranty benefits when addressing potential vehicle issues. Refer to MyChevrolet resources for personalized warranty information.

Claim Procedures

To initiate a warranty claim for your 2018 Chevrolet Equinox, first, schedule a service appointment with an authorized Chevrolet dealership. Clearly describe the issue to the service advisor. The dealership will diagnose the problem and determine if it’s covered under warranty;

If approved, the dealership will submit the claim to Chevrolet. Keep detailed records of all service visits, including dates, descriptions of the problem, and repair orders. MyChevrolet resources offer guidance on the claim process and allow you to track claim status online. Contact Chevrolet customer service for assistance if needed.

honeywell visionpro 8000 installation manual

Honeywell VisionPro 8000 offers advanced climate control‚ detailed in its installation manual. This guide ensures successful operation and maintenance of your new thermostat system.

The manual‚ available as a PDF‚ provides step-by-step instructions for a smooth setup‚ covering everything from unpacking to advanced configuration options.

Honeywell’s commitment to user-friendly technology is evident in the TH8000 series‚ detailed within the comprehensive operating and installation documentation.

Overview of the System

Honeywell VisionPro 8000 is a touchscreen programmable thermostat designed for comprehensive home climate control. The system supports heating‚ cooling‚ and automatic changeover modes‚ offering flexible scheduling options.

Its installation manual details wiring diagrams for various HVAC systems‚ ensuring compatibility and efficient operation. Remote access and smart home integration capabilities enhance user convenience‚ as outlined in the documentation.

The system’s robust features and user-friendly interface are central to its design‚ providing optimal comfort and energy savings.

Key Features and Benefits

The Honeywell VisionPro 8000 boasts a vibrant touchscreen display and intuitive menu navigation‚ simplifying programming and adjustments. Its installation manual highlights features like dynamic scheduling and energy-saving modes.

Benefits include remote access via the Honeywell Home app‚ smart home integration‚ and precise temperature control. The system offers both automatic and manual changeover options for personalized comfort.

RoHS compliance and detailed error code explanations further enhance its value and reliability.

Unpacking and Component Check

Carefully unpack the Honeywell VisionPro 8000‚ verifying all components against the package contents list in the installation manual.

Ensure the thermostat‚ backplate‚ screws‚ and documentation are present before proceeding with installation‚ as detailed in the guide.

Package Contents Verification

Carefully inspect the Honeywell VisionPro 8000 package upon arrival. The installation manual lists all included items: the thermostat unit itself‚ a mounting backplate‚ installation screws‚ and wire labels.

Confirm the presence of the operating manual and any additional documentation. Report any missing or damaged components immediately to Honeywell support for prompt resolution.

Identifying System Components

The Honeywell VisionPro 8000 consists of a touchscreen thermostat‚ a backplate for wall mounting‚ and wiring terminals. The manual details each component’s function and appearance.

Familiarize yourself with the thermostat’s display‚ buttons‚ and connection points. Understanding these elements‚ as illustrated in the manual‚ is crucial for successful installation and operation.

Installation Prerequisites

Before starting‚ consult the manual for required tools and materials. Prioritize safety by disconnecting power and following all outlined precautions during installation.

Ensure compatibility with your HVAC system‚ referencing the manual’s wiring diagrams for proper connections and a successful setup.

Required Tools and Materials

Honeywell VisionPro 8000 installation necessitates a Phillips head screwdriver‚ a flathead screwdriver‚ and wire strippers for precise connections.

You’ll also require a level to ensure proper thermostat mounting‚ along with electrical tape for secure wiring. The manual recommends a multimeter for voltage verification.

Finally‚ have appropriate wiring (typically 18-22 gauge thermostat wire) readily available‚ and consult the manual for any system-specific requirements.

Safety Precautions

Before beginning Honeywell VisionPro 8000 installation‚ always disconnect power to your HVAC system at the breaker to avoid electrical shock.

The manual stresses the importance of following all local electrical codes and regulations. If unsure‚ consult a qualified HVAC technician.

Wear appropriate safety glasses and exercise caution when working with wiring; improper installation can lead to system malfunction or hazard.

Wiring and Connections

Honeywell VisionPro 8000 wiring requires careful adherence to provided HVAC system diagrams within the installation manual.

Proper connections ensure optimal thermostat functionality and system compatibility‚ detailed in the manual’s wiring section.

Securely connect wires to the thermostat backplate‚ referencing the manual for correct terminal assignments.

Thermostat Backplate Installation

The installation manual details mounting the Honeywell VisionPro 8000 backplate securely to the wall‚ ensuring a level and stable base.

Carefully remove the existing thermostat base‚ identifying and labeling wires before disconnecting. Use appropriate screws and anchors for your wall type‚ as outlined in the manual;

Proper backplate installation is crucial for correct thermostat operation and a clean‚ professional appearance‚ following the manual’s guidance.

HVAC System Wiring Diagrams

The Honeywell VisionPro 8000 installation manual provides detailed wiring diagrams for various HVAC system configurations‚ including conventional and heat pump setups.

These diagrams clearly illustrate terminal designations for wires like R‚ C‚ W‚ Y‚ and G‚ ensuring correct connections.

Carefully follow the appropriate diagram for your system type to avoid miswiring and potential damage‚ referencing the manual for clarification.

Power Supply Connection

The Honeywell VisionPro 8000 installation manual emphasizes the importance of a stable 24VAC power supply for reliable operation.

Connect the ‘C’ (common) wire to the HVAC system’s transformer‚ and the ‘R’ (power) wire to the 24VAC hot terminal.

Ensure the transformer meets the thermostat’s power requirements‚ as detailed in the manual‚ before establishing the power supply connection.

Initial System Setup

The Honeywell VisionPro 8000 manual guides users through powering on‚ date/time settings‚ and Wi-Fi network connectivity for optimal performance.

Follow the on-screen prompts for a streamlined setup‚ ensuring proper communication with your HVAC system‚ as outlined in the manual.

Powering On the Thermostat

According to the Honeywell VisionPro 8000 installation manual‚ after wiring is complete‚ the thermostat should power on automatically. If it doesn’t‚ verify the power supply connection.

The touchscreen display will illuminate‚ initiating the startup sequence. The manual details troubleshooting steps if the screen remains blank‚ including checking the breaker and wiring;

Ensure proper voltage is supplied for reliable operation‚ referencing the specifications within the manual for correct power requirements.

Date and Time Configuration

The Honeywell VisionPro 8000 installation manual instructs users to set the correct date and time via the touchscreen interface. Accurate timekeeping is crucial for scheduling functions.

Navigate to the settings menu‚ as outlined in the manual‚ to access the date and time options. Follow the prompts to input the current information precisely.

Proper configuration ensures accurate scheduling and reliable operation of your thermostat‚ enhancing its energy-saving capabilities as detailed in the documentation.

Network Connectivity (Wi-Fi)

The Honeywell VisionPro 8000 installation manual details Wi-Fi setup for remote access and smart home integration. Access the network settings through the touchscreen menu.

Select your Wi-Fi network from the available list and enter the password‚ following the on-screen instructions in the manual. A stable connection is essential.

Successful connection enables remote control via the Honeywell Home app‚ offering convenience and advanced features as described in the provided documentation.

Programming Basic Settings

The manual guides users through setting system mode (Heat/Cool/Off)‚ temperature scheduling‚ and fan control. These basic settings optimize comfort and efficiency.

Customize schedules to match your lifestyle‚ ensuring optimal temperature regulation. Refer to the Honeywell VisionPro 8000 installation manual for details.

Setting System Mode (Heat/Cool/Off)

Honeywell’s VisionPro 8000 allows easy selection of Heat‚ Cool‚ or Off modes via the touchscreen interface. The manual details how to navigate to this setting.

Users can choose automatic changeover or manual changeover‚ detailed in the installation manual. Selecting the correct mode ensures efficient HVAC operation and desired comfort levels.

Proper mode selection is crucial for energy savings and maintaining a comfortable indoor environment‚ as outlined in the comprehensive Honeywell documentation.

Temperature Scheduling

The Honeywell VisionPro 8000’s manual explains how to program customized temperature schedules for optimal comfort and energy efficiency. Users can set different temperatures for various times of day.

Detailed instructions guide you through creating weekly schedules‚ accommodating diverse lifestyles. This feature‚ outlined in the installation manual‚ maximizes savings and convenience.

Schedule flexibility is a key benefit‚ allowing precise control over your home’s climate‚ as described in the Honeywell product documentation.

Fan Control Settings

The Honeywell VisionPro 8000 installation manual details various fan control options for enhanced comfort. Users can select “Auto” for on-demand circulation or “On” for continuous airflow.

The manual explains how to customize fan operation based on heating or cooling cycles‚ optimizing air distribution. These settings contribute to a more comfortable indoor environment.

Honeywell provides clear instructions for adjusting fan speed and duration‚ ensuring efficient and personalized climate control within your home‚ as per the documentation.

Advanced Configuration Options

The Honeywell VisionPro 8000 installation manual unlocks smart home integration and remote access. Customize settings for energy savings and system flexibility.

Explore detailed instructions for connecting to Honeywell Home‚ enabling control via smartphone or other compatible devices‚ as outlined in the guide.

Smart Home Integration

Honeywell VisionPro 8000’s installation manual details seamless integration with popular smart home platforms. Connect your thermostat for voice control via Amazon Alexa or Google Assistant.

The guide explains setup procedures‚ ensuring compatibility and enabling remote management of your home’s climate. Leverage the Honeywell Home app for enhanced control and automation features.

Explore advanced scenarios like geofencing and customized routines‚ all detailed within the comprehensive documentation for a truly connected home experience.

Remote Access Setup

The Honeywell VisionPro 8000 installation manual provides clear instructions for enabling remote access. Utilize the Honeywell Home mobile app to control your thermostat from anywhere with an internet connection.

Detailed steps guide you through account creation‚ thermostat registration‚ and secure network configuration. Enjoy convenient temperature adjustments and monitoring while away from home.

Troubleshooting tips within the manual address common connectivity issues‚ ensuring a reliable remote access experience for optimal comfort and energy savings.

Energy Saving Features

The Honeywell VisionPro 8000 installation manual highlights several energy-saving features. Smart scheduling allows customized temperature settings based on occupancy and time of day‚ reducing wasted energy.

Geofencing capabilities automatically adjust temperatures when you leave or approach home‚ maximizing efficiency. The manual details how to configure these features for optimal savings.

Learn about utilizing system flexibility and dynamic settings to minimize energy consumption while maintaining a comfortable living environment‚ as outlined in the documentation.

Troubleshooting Common Issues

The Honeywell VisionPro 8000 manual assists with resolving issues like power failures‚ connectivity problems‚ and inaccurate readings.

Decoding error messages is simplified with the manual’s guidance‚ enabling quick resolution of system malfunctions and ensuring optimal performance.

Thermostat Not Powering On

According to the installation manual‚ if your Honeywell VisionPro 8000 fails to power on‚ first verify the power supply connection at the HVAC system.

Check the circuit breaker and ensure it hasn’t tripped. Confirm proper wiring to the thermostat backplate‚ referencing the wiring diagrams in the manual.

A discharged battery can also cause this issue; consider replacement as outlined in the maintenance section of the manual.

Connectivity Problems

The Honeywell VisionPro 8000 installation manual details troubleshooting for connectivity issues. Ensure your Wi-Fi network is functioning correctly and the thermostat is within range.

Verify the correct network password was entered during setup. Restarting both the thermostat and your router can often resolve temporary connection problems.

Consult the manual’s section on network connectivity for advanced troubleshooting steps and potential interference sources.

Incorrect Temperature Readings

The Honeywell VisionPro 8000 installation manual addresses inaccurate temperature displays. Confirm the thermostat isn’t exposed to direct sunlight or drafts‚ impacting sensor readings.

Check for proper airflow around the unit‚ as restricted ventilation can cause discrepancies. Recalibrate the temperature sensor following the manual’s instructions.

Ensure correct wiring to the HVAC system‚ as faulty connections can lead to erroneous temperature reporting.

Understanding System Changeover

The Honeywell VisionPro 8000 installation manual details automatic and manual changeover options. Users can select heating or cooling modes as needed for comfort.

Configure settings via the touchscreen‚ choosing between automated switching or direct control based on your preferences and climate conditions.

Automatic Changeover Configuration

Honeywell VisionPro 8000’s automatic changeover‚ explained in the installation manual‚ intelligently switches between heating and cooling. This feature maintains a consistent temperature without manual adjustments.

The system utilizes setpoints to determine when to shift modes‚ optimizing energy efficiency and comfort. Configuration involves setting desired temperatures for both heating and cooling cycles.

Ensure proper sensor calibration for accurate readings‚ as detailed in the documentation‚ to maximize the effectiveness of this automated function.

Manual Changeover Operation

Honeywell VisionPro 8000’s manual changeover‚ outlined in the installation manual‚ allows users direct control over system mode – selecting Heat‚ Cool‚ or Off as needed.

This is useful when automatic switching isn’t desired‚ or for overriding the programmed schedule. The thermostat interface provides simple selection options for immediate adjustments.

The manual emphasizes that users must actively choose heating or cooling to maintain desired temperatures‚ bypassing automated system decisions.

Using the Touchscreen Interface

The Honeywell VisionPro 8000 features an intuitive touchscreen. The manual details navigating menus for settings‚ display customization‚ and system control with ease.

Users can readily access scheduling‚ temperature adjustments‚ and advanced features through the responsive touchscreen interface.

Navigating the Menu

Honeywell VisionPro 8000’s touchscreen menu is accessed by gentle taps. The manual explains icons representing system mode‚ schedule settings‚ fan control‚ and advanced options.

Swipe gestures allow quick scrolling through options‚ while the ‘back’ and ‘home’ icons ensure easy navigation. Detailed diagrams within the manual illustrate each menu level.

Understanding the menu structure is key to customizing your thermostat and maximizing energy efficiency‚ as outlined in the comprehensive installation guide.

Display Customization

Honeywell VisionPro 8000 allows personalized display settings via the touchscreen menu. The installation manual details options for brightness‚ contrast‚ and screen timeout duration.

Users can select preferred temperature units (Fahrenheit or Celsius) and customize the displayed information‚ such as date‚ time‚ and system status.

These adjustments‚ explained in the manual‚ enhance readability and tailor the thermostat’s interface to individual preferences for optimal user experience.

Maintenance and Care

Honeywell VisionPro 8000 requires minimal upkeep. The installation manual advises regular cleaning with a soft cloth and periodic battery replacement as needed.

Proper care ensures longevity and optimal performance of your thermostat‚ maintaining accurate temperature readings and reliable operation.

Cleaning the Thermostat

Honeywell recommends gently cleaning the VisionPro 8000 touchscreen with a soft‚ dry cloth to remove dust and fingerprints.

Avoid using liquid cleaners or abrasive materials‚ as these can damage the display. The installation manual emphasizes a delicate approach to preserve the touchscreen’s responsiveness and clarity.

Regular‚ gentle cleaning maintains optimal visibility and ensures continued smooth operation of your thermostat’s interface.

Battery Replacement

The Honeywell VisionPro 8000 utilizes batteries to retain settings during power outages‚ as detailed in the installation manual.

Replace batteries when the low battery icon appears on the touchscreen. Use only fresh alkaline batteries of the correct size‚ following the polarity markings within the battery compartment.

Proper battery maintenance ensures uninterrupted operation and preserves programmed schedules.

Reading Error Codes

Honeywell VisionPro 8000 displays error codes to diagnose issues‚ explained in the installation manual. Decoding these messages helps resolve system malfunctions quickly.

Refer to the manual’s troubleshooting section for a complete list and corresponding solutions for each error condition encountered.

Decoding Error Messages

Honeywell VisionPro 8000 error messages‚ detailed in the installation manual‚ provide crucial diagnostic information. These codes pinpoint specific problems within the HVAC system or thermostat itself.

The manual offers a comprehensive table translating each code into a plain-language description of the fault. Understanding these messages is key to efficient troubleshooting and repair‚ minimizing downtime.

Always consult the manual before attempting repairs‚ ensuring accurate diagnosis and safe operation of your Honeywell system.

Resolving Error Conditions

The Honeywell VisionPro 8000 installation manual provides detailed steps for resolving identified error conditions. It guides users through troubleshooting‚ often starting with simple checks like power cycles and wiring confirmations.

For more complex issues‚ the manual directs users to specific component testing procedures. It emphasizes safety precautions and‚ when necessary‚ recommends contacting a qualified HVAC technician.

Following the manual’s guidance ensures safe and effective resolution of system faults‚ restoring optimal performance to your Honeywell thermostat.

Warranty Information

Honeywell provides coverage details within the VisionPro 8000 installation manual. Contact Honeywell support for specific terms and to initiate any warranty claims.

The manual outlines the duration and limitations of the product warranty‚ ensuring customer satisfaction and peace of mind.

Resources and Support

Access online manuals and frequently asked questions at honeywell.com or yourhome.honeywell.com‚ referenced in the VisionPro 8000 installation manual.

The Honeywell Home website offers additional support‚ troubleshooting guides‚ and contact information for expert assistance with your thermostat system.

energy flow in the ecosystem pdf

Ecosystems rely on a continuous energy flow, originating from the sun, and transferred through food chains. Understanding this flow, often detailed in resources like an energy flow in the ecosystem pdf, is crucial.

Defining Ecosystems and Their Components

Ecosystems are dynamic networks encompassing living organisms – biotic components – and their non-living environment – abiotic factors. These systems, detailed in resources like an energy flow in the ecosystem pdf, function through intricate interactions. Key components include producers (plants), consumers (animals), and decomposers (bacteria, fungi).

Energy flow, the central theme, dictates ecosystem structure and function. Abiotic factors, such as sunlight, water, and nutrients, influence the rate of energy capture and transfer. Understanding these components, and their interconnectedness, is vital for comprehending ecosystem stability and resilience, as explored within comprehensive ecological studies.

The Importance of Energy in Ecosystem Function

Energy is the primary driver of all ecological processes, fueling growth, reproduction, and maintaining organization within ecosystems. Resources like an energy flow in the ecosystem pdf highlight how this energy, initially captured by producers, cascades through trophic levels.

Without a constant energy input, ecosystems would collapse. The efficiency of energy transfer dictates the carrying capacity and overall productivity of a system. Understanding these dynamics, as detailed in ecological studies, is crucial for conservation efforts and predicting ecosystem responses to environmental changes. Energy availability directly impacts biodiversity and ecosystem services.

The Sun as the Primary Energy Source

Solar radiation powers nearly all life on Earth, initiating energy flow through ecosystems. An energy flow in the ecosystem pdf details this process, starting with sunlight.

Solar Radiation and Its Role in Life

Solar radiation represents the fundamental input of energy into nearly all ecosystems globally. This energy, arriving as electromagnetic waves, is not uniformly utilized; specific wavelengths are crucial for life processes. The initial capture of this energy is primarily achieved through photosynthesis, a process detailed in resources like an energy flow in the ecosystem pdf.

This captured energy fuels the entire trophic structure, driving growth and reproduction across all organisms. Without the constant influx of solar energy, ecosystems would collapse. Understanding the quantity and quality of solar radiation reaching Earth, and how it’s converted, is vital for comprehending energy flow dynamics.

Photosynthesis: Capturing Solar Energy

Photosynthesis, the cornerstone of most ecosystems, is the process where plants, algae, and some bacteria convert light energy into chemical energy in the form of glucose. This conversion, thoroughly explained in resources like an energy flow in the ecosystem pdf, utilizes chlorophyll to capture specific wavelengths of sunlight.

The resulting glucose fuels the producers’ growth and metabolism, forming the base of the food chain. Oxygen is released as a byproduct, essential for respiration in many organisms. The efficiency of photosynthesis significantly impacts the amount of energy available to higher trophic levels, dictating overall ecosystem productivity.

Trophic Levels and Food Chains

Food chains illustrate energy flow through trophic levels – producers to consumers. An energy flow in the ecosystem pdf details these levels and their interconnectedness.

Producers (Autotrophs) – The First Trophic Level

Producers, like plants, form the foundational first trophic level in any ecosystem. Utilizing solar energy through photosynthesis, they convert inorganic compounds into organic matter, creating the initial energy source. This process is comprehensively explained in resources such as an energy flow in the ecosystem pdf.

These autotrophs are vital as they capture external energy, making it available to the rest of the ecosystem. Without producers, the energy flow would cease, impacting all subsequent trophic levels. Understanding their role is paramount when studying ecosystem dynamics, and detailed diagrams are often found within an energy flow in the ecosystem pdf.

Consumers (Heterotrophs) – Levels Two and Beyond

Consumers, or heterotrophs, occupy trophic levels above producers, obtaining energy by consuming other organisms. These levels include primary consumers, secondary consumers, and higher-level predators. The transfer of energy between these levels is a core concept in ecosystem studies, often visualized in an energy flow in the ecosystem pdf.

Unlike producers, consumers cannot create their own food and rely on the energy stored in organic matter. Detailed explanations of consumer roles and energy transfer efficiencies are commonly found within an energy flow in the ecosystem pdf, illustrating the interconnectedness of life and the importance of each trophic level.

Primary Consumers (Herbivores)

Primary consumers, commonly known as herbivores, form the second trophic level in an ecosystem. They directly obtain energy by consuming producers – plants and other photosynthetic organisms. This initial transfer of energy is fundamental to understanding energy flow, often detailed in resources like an energy flow in the ecosystem pdf.

Herbivores play a crucial role in regulating plant populations and transferring energy to higher trophic levels. An energy flow in the ecosystem pdf typically illustrates how much energy is assimilated by herbivores from plant matter, and how much is lost as heat or waste, demonstrating the inefficiencies inherent in energy transfer.

Secondary Consumers (Carnivores)

Secondary consumers, primarily carnivores, occupy the third trophic level, obtaining energy by consuming primary consumers (herbivores). This predatory relationship is a key component of energy flow within an ecosystem, and is often visually represented in an energy flow in the ecosystem pdf.

Carnivores exhibit adaptations for hunting and digesting animal tissue, reflecting their role in transferring energy further up the food chain. An energy flow in the ecosystem pdf will demonstrate the significant energy loss occurring at this stage, as carnivores are less efficient at converting consumed biomass into their own tissue compared to herbivores.

Tertiary and Quaternary Consumers (Apex Predators)

Tertiary and quaternary consumers represent the highest trophic levels, often referred to as apex predators. These carnivores prey on other carnivores, playing a crucial role in regulating population sizes and maintaining ecosystem stability. An energy flow in the ecosystem pdf illustrates their position at the pinnacle of energy transfer.

Due to the 10% rule, apex predators receive a drastically reduced amount of energy from the initial solar input. Consequently, their populations are typically smaller and more vulnerable to disruptions. Studying their role, as detailed in an energy flow in the ecosystem pdf, is vital for conservation efforts.

Food Webs: Complex Energy Relationships

Food webs depict interconnected food chains, showcasing realistic energy flow. An energy flow in the ecosystem pdf highlights these complex interactions and energy pathways.

Interconnectedness of Food Chains

Food chains rarely exist in isolation; instead, they intertwine to form intricate food webs, representing the true complexity of energy flow within an ecosystem. A comprehensive energy flow in the ecosystem pdf visually demonstrates this interconnectedness, revealing how multiple organisms can occupy various trophic levels simultaneously.

This web-like structure provides stability, as the loss of one species doesn’t necessarily collapse the entire system. Organisms often have diverse diets and roles, buffering against disruptions. Studying these connections, as detailed in such resources, is vital for understanding ecosystem resilience and predicting the consequences of environmental changes. The pdf often illustrates these relationships graphically.

The Role of Omnivores in Food Webs

Omnivores play a critical, yet often underestimated, role in food webs by consuming both plants and animals. This flexible feeding strategy positions them at multiple trophic levels, significantly influencing energy flow. An energy flow in the ecosystem pdf often highlights how omnivores act as crucial links between different food chains.

They efficiently transfer energy from producers to higher-level consumers, and vice versa, stabilizing the ecosystem. Their presence increases the complexity and robustness of the food web. Detailed analyses within the pdf demonstrate how omnivory impacts population dynamics and overall ecosystem health, showcasing their importance beyond simple predator-prey relationships.

Energy Transfer and the 10% Rule

Energy transfer between trophic levels is remarkably inefficient, with only about 10% becoming available to the next level. An energy flow in the ecosystem pdf explains this loss.

Inefficient Energy Transfer Between Trophic Levels

Energy transfer within an ecosystem isn’t a seamless process; it’s characterized by significant losses at each trophic level. A substantial portion of energy is utilized by organisms for life processes like respiration, movement, and maintaining body temperature; This metabolic activity converts energy into unusable heat, dissipating it into the environment;

Furthermore, not all biomass is consumed by the next level – some remains as waste or is unavailable. Consequently, only approximately 10% of the energy stored in one trophic level is transferred to the next. Resources like an energy flow in the ecosystem pdf visually demonstrate this principle, highlighting the diminishing energy available at higher levels.

The Ecological Significance of Energy Loss

Energy loss between trophic levels profoundly shapes ecosystem structure and limits food chain length. The 10% rule dictates that higher trophic levels support fewer organisms due to dwindling energy availability. This explains why apex predators are relatively rare compared to producers or primary consumers.

This energy dissipation also drives nutrient cycling, as waste and dead organisms become substrates for decomposers. Understanding these dynamics, often detailed in an energy flow in the ecosystem pdf, is vital for comprehending ecosystem stability and resilience. Ultimately, energy loss isn’t a flaw, but a fundamental characteristic of ecological systems.

Ecological Pyramids: Visualizing Energy Flow

Ecological pyramids – of energy, biomass, or numbers – graphically represent energy flow through ecosystems, as detailed in an energy flow in the ecosystem pdf.

Pyramids of Energy

Pyramids of energy illustrate the rate of energy flow through each trophic level in an ecosystem. These pyramids, often explored in resources like an energy flow in the ecosystem pdf, are based on the principle that energy transfer is inefficient. Consequently, each successive level contains less energy than the one below it.

Unlike pyramids of biomass or numbers, energy pyramids are never inverted, as energy loss is inevitable with each transfer. The base represents the producers, capturing the most energy from sunlight, while apex predators occupy the narrowest top, receiving the least. Studying these pyramids provides insight into ecosystem stability and productivity, highlighting the fundamental constraints on food chain length.

Pyramids of Biomass

Pyramids of biomass represent the total mass of living organisms at each trophic level within an ecosystem, often detailed in an energy flow in the ecosystem pdf. They illustrate the amount of organic matter present, providing a snapshot of potential energy stored. Typically, these pyramids are widest at the base (producers) and narrow towards apex predators.

However, unlike energy pyramids, biomass pyramids can be inverted in certain ecosystems, such as aquatic environments, where producers (phytoplankton) have a fast turnover rate. Despite potential inversions, they remain valuable tools for understanding ecosystem structure and the distribution of organic material, offering insights into energy storage capacity.

Pyramids of Numbers

Pyramids of numbers graphically depict the population size at each trophic level within an ecosystem, frequently explored in resources like an energy flow in the ecosystem pdf. They showcase the sheer quantity of organisms present, offering a simple visualization of ecosystem structure. Generally, these pyramids are broad at the base (producers) and taper towards higher trophic levels.

However, like biomass pyramids, number pyramids can be inverted. For instance, a single tree supporting numerous herbivores can create an inverted pyramid. Despite this limitation, they provide a quick assessment of population densities and relative abundance, aiding in understanding energy flow dynamics and trophic relationships.

Decomposition and Nutrient Cycling

Decomposers break down organic matter, releasing vital nutrients back into the ecosystem – a process detailed in an energy flow in the ecosystem pdf.

The Role of Decomposers (Detritivores)

Decomposers, including bacteria and fungi, are essential components of ecosystems, functioning as nature’s recyclers. They break down dead organic matter – detritus – from all trophic levels, releasing crucial nutrients back into the environment. This process isn’t simply waste removal; it’s a fundamental step in nutrient cycling, making elements available for producers.

Without decomposers, nutrients would remain locked within dead organisms, halting primary productivity. Resources like an energy flow in the ecosystem pdf often highlight the vital role of detritivores in maintaining ecosystem health and stability. They effectively close the loop, ensuring a continuous flow of energy and matter.

Returning Nutrients to the Ecosystem

Decomposition isn’t just about breaking down organic matter; it’s about liberating essential nutrients – nitrogen, phosphorus, carbon – back into the soil, water, and atmosphere. These nutrients become available for uptake by producers, fueling primary productivity and initiating the energy flow anew. This cyclical process is fundamental to ecosystem sustainability.

An energy flow in the ecosystem pdf will illustrate how decomposers transform complex organic compounds into simpler inorganic forms. This nutrient regeneration sustains life, preventing nutrient depletion and supporting the entire food web. Without this constant return, ecosystems would quickly become barren and unable to support diverse life forms.

Energy Flow in Different Ecosystems

Energy flow varies greatly between terrestrial and aquatic ecosystems, influenced by factors like sunlight penetration and nutrient availability, as detailed in an energy flow in the ecosystem pdf.

Terrestrial Ecosystems

Terrestrial ecosystems, like forests and grasslands, exhibit distinct energy flow patterns. Solar energy fuels primary producers – plants – through photosynthesis. This captured energy then moves up trophic levels via herbivores consuming plants, followed by carnivores preying on herbivores.

Decomposition plays a vital role, returning nutrients to the soil, supporting further plant growth. Factors like temperature, rainfall, and sunlight intensity significantly impact primary productivity, influencing the entire energy flow. Detailed analyses, often found in resources like an energy flow in the ecosystem pdf, illustrate these complex interactions and energy transfer efficiencies within these land-based systems.

Aquatic Ecosystems

Aquatic ecosystems, encompassing oceans, lakes, and rivers, demonstrate unique energy flow dynamics. Phytoplankton, microscopic algae, serve as the primary producers, harnessing solar energy via photosynthesis. This energy is then transferred to zooplankton, small aquatic animals, and subsequently to fish and larger predators.

Decomposition by bacteria and other organisms recycles nutrients, sustaining primary production. Light penetration, water temperature, and nutrient availability are key factors influencing energy flow. Comprehensive studies, often detailed in an energy flow in the ecosystem pdf, reveal the intricate web of interactions and energy transfer efficiencies within these water-based environments.

Human Impact on Energy Flow

Human activities significantly disrupt ecosystem energy flow, impacting food webs and nutrient cycles. Details on these disruptions are often found in an energy flow in the ecosystem pdf.

Disruptions to Food Webs

Food web disruptions, extensively documented in resources like an energy flow in the ecosystem pdf, stem from various human actions. Habitat destruction, overexploitation of species, and the introduction of invasive organisms all cascade through trophic levels. Removing a keystone species can trigger collapses, altering energy pathways.

Pollution, including pesticides and heavy metals, bioaccumulates, impacting predator populations. Climate change further exacerbates these issues, shifting species distributions and altering phenological events. These changes destabilize established energy transfer mechanisms, reducing overall ecosystem resilience. Understanding these complex interactions, as detailed in comprehensive analyses, is vital for effective conservation strategies.

Pollution and Energy Availability

Pollution significantly impacts energy availability within ecosystems, a topic thoroughly explored in resources like an energy flow in the ecosystem pdf. Contaminants reduce primary productivity by hindering photosynthesis in plants and algae. Toxic substances accumulate in organisms, decreasing their energy reserves and reproductive success.

Acid rain, oil spills, and plastic pollution all disrupt energy transfer between trophic levels. Reduced energy at lower levels cascades upwards, impacting apex predators. Furthermore, pollution can alter decomposition rates, affecting nutrient cycling and overall ecosystem health. Mitigating pollution is crucial for maintaining stable energy flows.

Measuring Energy Flow in Ecosystems

Assessing energy flow requires quantifying primary productivity and transfer efficiency, detailed in resources like an energy flow in the ecosystem pdf, using various techniques.

Techniques for Assessing Primary Productivity

Primary productivity, the rate of energy capture by producers, is vital for understanding energy flow. Several techniques are employed for its assessment, often detailed within an energy flow in the ecosystem pdf. Gross primary productivity (GPP) measures total energy captured, while net primary productivity (NPP) accounts for energy used by producers for respiration.

Methods include measuring carbon dioxide uptake during photosynthesis, analyzing biomass accumulation – the increase in organic matter – and utilizing remote sensing technologies to estimate vegetation cover and photosynthetic activity. Radioactive carbon-14 tracing can also track carbon assimilation. These techniques, combined, provide a comprehensive view of energy input into ecosystems.

Quantifying Energy Transfer Efficiency

Energy transfer efficiency between trophic levels is rarely perfect, typically around 10%, a concept often illustrated in an energy flow in the ecosystem pdf. This inefficiency stems from energy lost as heat during metabolic processes, incomplete consumption, and energy stored in indigestible parts.

Researchers quantify this efficiency by comparing the energy content of organisms at successive levels. Biomass measurements and calorimetry – determining energy content through combustion – are key methods. Understanding these efficiencies is crucial for predicting ecosystem responses to disturbances and managing resources. Models based on these efficiencies help forecast population dynamics.

paint by numbers printable pdf

Paint by Numbers, now readily available as printable PDFs, offer a delightful and accessible artistic outlet for all ages, blending creativity with convenience.

These digital versions democratize the art form, allowing instant access to numerous designs from the comfort of your home, fostering relaxation and artistic expression.

What are Paint by Numbers?

Paint by Numbers is a captivating art form where an image is divided into sections, each assigned a specific number corresponding to a particular color.

Traditionally, these kits included a canvas with pre-printed outlines and numbered areas, alongside corresponding paint pots. However, the advent of printable PDFs has revolutionized this hobby.

Now, users can download and print these designs at home, offering a cost-effective and customizable experience. The core concept remains the same: follow the numbers to create a beautiful, finished artwork, regardless of artistic skill.

The Rise of Printable PDFs

The popularity of Paint by Numbers experienced a significant resurgence with the emergence of printable PDF formats.

This shift offered a convenient alternative to traditional kits, eliminating the need for physical stores and pre-packaged materials. Digital downloads provide instant access to a vast library of designs, catering to diverse tastes.

Furthermore, printable PDFs empower users with flexibility – choosing their preferred paper or canvas, paint brands, and printing scale, fostering a personalized artistic journey.

Benefits of Using Printable Paint by Numbers

Printable Paint by Numbers offer affordability, convenience, and creative freedom, allowing artists of all levels to enjoy a relaxing and rewarding artistic experience.

Cost-Effectiveness

Printable Paint by Numbers significantly reduce costs compared to pre-painted canvases or traditional art classes. Downloading a PDF eliminates shipping fees and the markup associated with physical products, making art accessible to a wider audience.

You only pay for the design itself, and can reuse the template multiple times. Furthermore, artists can utilize existing acrylic paints and brushes, minimizing initial investment. This affordability encourages experimentation and allows for exploring various designs without substantial financial commitment, fostering a budget-friendly hobby.

Convenience and Accessibility

Printable Paint by Numbers PDFs offer unparalleled convenience; instant access to designs is available anytime, anywhere with an internet connection and a printer. No waiting for shipping or trips to art stores are required!

This accessibility makes it ideal for spontaneous creative sessions or as a relaxing activity during travel. The digital format allows for easy storage and organization of designs, eliminating clutter. It’s a fantastic option for those with limited space or mobility.

Customization Options

Paint by Numbers printable PDFs increasingly offer exciting customization possibilities, moving beyond pre-defined designs. Some platforms allow users to upload personal photos and transform them into unique paint-by-number templates, creating truly personalized artwork.

Furthermore, users can often adjust the complexity level, choosing between simpler designs for beginners or intricate patterns for experienced artists. Color palette modifications are also emerging, allowing for a tailored artistic experience.

Where to Find Paint by Numbers Printable PDFs

Paint by Numbers printable PDFs are widely available online, ranging from free resources to premium options on platforms like Etsy and dedicated websites.

Exploring these avenues unlocks a vast library of designs to suit every artistic preference and skill level.

Free Printable Options

Numerous websites offer free Paint by Numbers printable PDFs, providing a fantastic starting point for beginners or those seeking budget-friendly options. These resources often feature a diverse selection of simpler designs, ideal for children or quick projects.

However, be mindful of the image quality; free PDFs may have lower resolution compared to paid versions. Websites dedicated to coloring pages and printable activities frequently include paint by number options. A quick online search using keywords like “free paint by number PDF” will reveal a wealth of possibilities, allowing you to download and start painting immediately!

Paid Printable Options – Etsy

Etsy emerges as a prominent platform for paid Paint by Numbers printable PDFs, showcasing a vast collection created by independent artists and designers. This marketplace offers a significantly wider range of themes, complexities, and artistic styles compared to free options.

You’ll discover everything from customizable designs – turning personal photos into paint by numbers – to intricate recreations of famous paintings. While requiring a purchase, Etsy generally guarantees higher image resolution and unique, professionally crafted designs, ensuring a rewarding painting experience.

Paid Printable Options – Dedicated Websites

Several websites specialize specifically in Paint by Numbers printable PDFs, offering curated collections and often, advanced features. These dedicated platforms frequently provide options for customizing difficulty levels, selecting canvas sizes, and even choosing paint color palettes.

Compared to Etsy, these sites may offer more streamlined purchasing and delivery, alongside dedicated customer support. Expect a focus on high-quality images and professionally designed kits, though prices can vary depending on complexity and customization options.

Popular Themes for Paint by Numbers

Paint by Numbers themes are incredibly diverse, ranging from serene landscapes and charming animals to iconic famous paintings and captivating abstract art designs.

Landscapes and Nature Scenes

Landscapes and nature scenes consistently rank among the most beloved Paint by Numbers themes, offering a tranquil escape through art. Printable PDFs allow you to recreate breathtaking vistas – from majestic mountains and serene forests to calming beaches and vibrant meadows.

These designs often feature rich color palettes and varying levels of detail, catering to both beginners and experienced painters. The therapeutic process of bringing these natural wonders to life on canvas provides a relaxing and rewarding experience, fostering a connection with the beauty of the outdoors.

Animals and Wildlife

Paint by Numbers printable PDFs featuring animals and wildlife are incredibly popular, appealing to animal lovers of all ages. You can bring to life majestic lions, playful dolphins, graceful birds, or charming domestic pets with ease and enjoyment.

These designs often showcase intricate details in fur, feathers, and scales, providing a satisfying challenge for painters. The vibrant colors and expressive eyes of these creatures truly come alive on canvas, creating stunning and heartwarming artwork for your home.

Famous Paintings Recreations

Paint by Numbers printable PDFs offer a unique opportunity to recreate iconic masterpieces from art history. Imagine bringing Van Gogh’s “Starry Night” or Monet’s “Water Lilies” to life with your own hands, guided by numbered sections.

These kits provide a simplified approach to understanding composition, color palettes, and brushwork of renowned artists. It’s a fantastic way to appreciate art on a deeper level and create a beautiful, personalized tribute to classic paintings.

Abstract Art Designs

Paint by Numbers printable PDFs aren’t limited to realistic imagery; they brilliantly encompass the world of abstract art! Explore vibrant color combinations and geometric shapes with designs inspired by artists like Kandinsky or Mondrian.

These kits encourage experimentation and allow for a more free-flowing artistic experience, perfect for those seeking a modern and expressive outlet. Abstract designs offer a unique challenge and stunning results, adding a contemporary touch to your painted collection.

Choosing the Right Printable PDF

Selecting a printable PDF requires considering image resolution, complexity, and format to ensure a satisfying painting experience and a beautiful final artwork.

Image Resolution and Quality

Ensuring high image resolution is paramount when selecting a paint by numbers printable PDF. A low-resolution image will result in pixelated lines and blurry numbers, hindering a precise and enjoyable painting process.

Look for PDFs boasting at least 300 DPI (dots per inch) for crisp, clear details. This guarantees defined sections and legible numbers, crucial for accurate color application. Prioritize PDFs sourced from reputable providers who prioritize image quality, delivering a superior artistic experience and a professional-looking finished piece.

Complexity Level – Beginner vs. Advanced

Paint by numbers printable PDFs cater to all skill levels, ranging from beginner-friendly designs to advanced, intricate patterns. Beginners should opt for larger numbered sections and fewer colors, simplifying the process and building confidence.

Advanced painters can challenge themselves with smaller sections, a wider color palette, and more detailed imagery. Consider the number of colors – fewer colors generally indicate easier designs. Carefully assess your experience before choosing a PDF to ensure an enjoyable and fulfilling painting journey.

PDF Format and Print Settings

Paint by numbers printable PDFs are typically designed for standard A4 or US Letter size paper, but verifying dimensions is crucial before printing. Ensure your printer settings are optimized for high-quality output, selecting “photo” or “best” quality for sharp lines and clear numbers.

Avoid scaling the image during printing, as this can distort the numbered sections. Choose a paper weight suitable for acrylic paints to prevent bleed-through; heavier cardstock is recommended. Proper settings guarantee a satisfying painting experience.

Materials Needed for Paint by Numbers

Paint by Numbers requires acrylic paints, a variety of paint brushes in different sizes, and suitable paper or canvas for bringing your chosen design to life!

Acrylic Paints

Acrylic paints are the most commonly recommended medium for paint by numbers, especially with printable PDFs, due to their versatility and ease of use. They offer vibrant colors, quick drying times, and are water-based for simple cleanup.

Beginner kits often include a pre-selected set of acrylics, but experienced painters may prefer to purchase individual colors for greater control. Look for student-grade or artist-grade acrylics depending on your desired level of pigment richness and longevity. Ensure the paints are non-toxic and suitable for the paper or canvas you’ve chosen.

Paint Brushes – Sizes and Types

Selecting the right paint brushes is crucial for successful paint by numbers using printable PDFs. A variety of sizes is essential, ranging from fine detail brushes (sizes 000, 000, 0) for small numbered areas, to larger flat brushes (sizes 4, 6, 8) for broader sections.

Synthetic brushes are generally preferred for acrylics as they hold their shape well and are easy to clean. Round brushes are versatile, while liner brushes excel at precise lines. Invest in a few quality brushes for optimal control and results.

Paper or Canvas

The choice between paper and canvas impacts your paint by numbers experience with printable PDFs. Heavier weight paper (140lb/300gsm) is suitable for practice or simpler designs, minimizing bleed-through. For a more professional feel, stretched canvas or canvas boards are ideal.

Canvas provides texture and durability, enhancing the final artwork. Primed canvas is recommended for better paint adhesion. Consider the size of your PDF and choose a surface accordingly, ensuring a satisfying painting process.

Printing Your Paint by Numbers PDF

Printing your paint by numbers PDF requires careful attention to detail for optimal results, ensuring clear lines and vibrant colors for a fulfilling artistic experience.

Paper Selection – Weight and Texture

Choosing the right paper is crucial for a successful paint by numbers experience. A heavier weight paper, around 90-110lb, prevents bleed-through from acrylic paints, maintaining image clarity. Textured paper, like watercolor paper, adds depth and interest, while smoother options are ideal for detailed work.

Consider the paint’s viscosity; thicker paints necessitate heavier stock. Standard printer paper is generally too thin, leading to warping and potential tears. Experimenting with different textures can elevate your finished artwork, offering a unique aesthetic.

Printer Settings – Quality and Paper Type

Optimal printer settings are vital for vibrant, accurate paint by numbers prints. Select “High Quality” or “Photo” mode for sharp lines and detailed numbering. Crucially, specify your chosen paper type – matte, glossy, or watercolor – within the printer settings for correct ink distribution.

Ensure the color profile is set to RGB for accurate color reproduction. A test print is recommended to verify settings before printing the entire PDF, saving both ink and paper.

Scaling and Orientation

Correct scaling is paramount; ensure your paint by numbers PDF prints at 100% size to maintain accurate number alignment with the design. Avoid “Fit to Page” options, as they distort the image. Orientation should typically be “Portrait” unless the design specifically dictates “Landscape.”

Double-check these settings in your printer dialogue box before printing. Incorrect scaling renders the artwork unpaintable, while wrong orientation misaligns the entire image.

Tips for Successful Painting

Begin with the background sections, then progress to darker colors, layering gradually for depth and vibrancy in your paint by numbers creation.

Starting with the Background

Commencing with the background areas of your paint by numbers printable PDF is a strategic approach for several reasons. Larger background sections often share colors, allowing you to efficiently use your paints and establish a foundational layer.

This method minimizes the risk of accidentally smudging details while working on finer elements later. It also provides a visual framework, making it easier to gauge color placement and overall composition as you progress. Don’t be afraid to apply multiple coats for even coverage!

Working from Dark to Light Colors

A generally recommended technique when tackling your paint by numbers printable PDF is to begin with the darkest shades and progressively move towards lighter hues. This approach prevents accidental smudging of lighter colors by darker ones, preserving the clarity of your artwork.

Darker colors also provide a strong base, allowing subsequent lighter layers to blend seamlessly. It’s easier to layer light over dark than vice versa, achieving richer, more nuanced tones throughout your painting.

Layering Techniques

For a vibrant finish with your paint by numbers printable PDF, consider employing layering techniques. Applying multiple thin coats of paint, rather than one thick coat, yields smoother coverage and richer color depth.

Allow each layer to dry completely before applying the next to prevent muddling. This builds intensity gradually, especially useful for achieving subtle gradients and variations within each numbered section, enhancing the overall visual appeal of your completed artwork.

Troubleshooting Common Issues

Paint by Numbers printable PDFs can sometimes present challenges like paint bleeding, incorrect numbering, or paper wrinkling; solutions exist for a flawless finish!

Paint Bleeding

Paint bleeding occurs when colors unintentionally mix, blurring the defined areas within your Paint by Numbers design. This often happens with thinner paints or when applying excessive pressure with your brush.

To minimize bleeding, use high-quality acrylic paints and avoid overly saturated brushes. Applying multiple thin coats, allowing each to dry completely, is far superior to one thick application.

If bleeding occurs, carefully try to redefine the lines with a fine-tipped brush and the correct color, or consider using a color sealant to prevent further spreading.

Incorrect Numbering

Incorrect numbering on a Paint by Numbers PDF can be incredibly frustrating, disrupting the entire painting process. Errors might include missing numbers, duplicated numbers, or numbers assigned to the wrong sections of the image.

Before starting, carefully compare the numbers on the canvas (or printed PDF) with the color chart. If discrepancies exist, contact the seller or provider for a corrected version.

Alternatively, you can manually adjust the numbering, but this requires careful attention to detail and a good understanding of the image.

Paper Wrinkling

Paper wrinkling is a common issue when working with printable Paint by Numbers PDFs, especially with thinner paper stocks. Moisture from paints can exacerbate this, distorting the image and making precise coloring difficult.

To minimize wrinkling, use heavier weight paper – cardstock is ideal. Secure the paper to a flat, firm surface like a board using painter’s tape. Applying light pressure while painting can also help keep the paper flat.

If wrinkles appear, gently try to smooth them out, but avoid excessive handling.

Software for Creating Your Own Paint by Numbers

MS Paint and Paint.NET empower users to transform images into Paint by Numbers templates, offering varying levels of control and complexity for personalized designs.

MS Paint Basics for Numbering

MS Paint, despite its simplicity, provides a foundational approach to creating Paint by Numbers. Begin by opening your chosen image and reducing the color palette to represent your desired numbered sections.

Utilize the shape tools – primarily rectangles – to meticulously cover areas, filling each with a distinct color corresponding to a number. Then, employ the text tool to clearly label each section with its assigned number, ensuring legibility.

Save the final product as a high-resolution image, ready for printing and painting!

Paint.NET – Advanced Image Editing

Paint.NET offers superior control for crafting Paint by Numbers designs. Leverage its layer functionality to isolate sections for easier numbering and color assignment. Utilize the magic wand tool for quick selection of areas with similar tones.

Employ plugins to automate color reduction and streamline the numbering process, enhancing efficiency. The software’s advanced editing capabilities allow for precise adjustments and a professional finish.

Save your creation as a high-quality PDF for optimal printing results!

Legal Considerations and Copyright

Paint by Number PDFs for personal use are generally permissible, but distributing or commercially exploiting copyrighted images requires explicit permission from the rights holder.

Using Images for Personal Use

Paint by Number printable PDFs are fantastic for individual enjoyment and creative exploration! Downloading and utilizing these designs for your own painting pleasure is typically considered fair use, provided it remains non-commercial.

You can freely print and paint these images for personal decoration, gifting to friends and family, or simply as a relaxing hobby. However, remember that the copyright of the original image still belongs to the artist or rights holder.

Therefore, reselling completed paintings or redistributing the PDF files themselves is generally prohibited without obtaining the necessary licenses or permissions.

Commercial Use Restrictions

Utilizing Paint by Number printable PDFs for commercial gain is generally restricted by copyright laws. Selling completed paintings created from copyrighted designs without permission is a violation of intellectual property rights.

Furthermore, redistributing, reselling, or profiting from the PDF files themselves – even if modified – is strictly prohibited unless you have secured a commercial license from the copyright owner.

Businesses seeking to use these designs must obtain explicit authorization to avoid legal repercussions, ensuring ethical and lawful operation within the creative marketplace.

The Future of Paint by Numbers

Paint by Numbers evolves with digital apps and AI integration, offering dynamic designs and personalized experiences via printable PDFs and beyond.

Digital Paint by Numbers Apps

Digital Paint by Numbers apps represent a significant evolution, moving beyond traditional printable PDFs. These applications offer interactive experiences, often featuring a vast library of images and real-time color suggestions.

Many apps allow users to upload personal photos, converting them into customized paint-by-number projects. Features like zoom functionality, error detection, and automatic color filling enhance the painting process.

Furthermore, some apps integrate with online communities, enabling users to share their artwork and participate in challenges, fostering a collaborative artistic environment.

Integration with AI Technology

AI technology is poised to revolutionize Paint by Numbers, extending beyond simple printable PDFs. Artificial intelligence can now automatically generate complex and unique designs, tailored to individual preferences and skill levels.

AI algorithms can analyze images, creating optimal color palettes and numbering schemes for a seamless painting experience.

Moreover, AI-powered apps can offer personalized guidance, suggesting color choices and identifying potential errors, ultimately enhancing creativity and accessibility for all users.

Resources and Further Learning

Online communities and tutorial videos provide invaluable support for Paint by Numbers enthusiasts, offering tips, inspiration, and a platform for sharing creations.

Explore forums and guides to elevate your artistic journey and connect with fellow painters!

Online Communities and Forums

Engaging with online communities dedicated to Paint by Numbers is a fantastic way to enhance your experience. Platforms like Reddit and Facebook host active groups where enthusiasts share completed artwork, offer advice, and discuss techniques.

These forums are invaluable for troubleshooting, discovering new printable PDF sources, and gaining inspiration from others. Many artists also share custom creations and offer helpful tips for achieving optimal results. Participating fosters a supportive environment for learning and growth, making the hobby even more enjoyable!

Tutorial Videos and Guides

Numerous online resources provide tutorial videos and guides specifically for Paint by Numbers, catering to all skill levels. YouTube channels offer step-by-step demonstrations, covering everything from paint mixing to brush techniques and layering methods.

Websites and blogs often feature detailed written guides, addressing common challenges like paint bleeding or achieving smooth color transitions. These resources are incredibly helpful for beginners and experienced painters alike, ensuring a successful and satisfying artistic journey.

siser easyweed heat transfer vinyl instructions

Siser Easyweed is a popular choice for crafters‚ offering simplicity and durability in heat transfer applications․ It’s renowned for its effortless weeding and strong adhesion;

This vinyl provides a professional finish on various fabrics‚ making it ideal for personalized apparel and creative projects․ It’s a versatile material for beginners and experts․

What is Siser Easyweed?

Siser Easyweed is a single-layer heat transfer vinyl (HTV) celebrated for its user-friendly nature and consistent performance․ It’s constructed from polyurethane‚ providing a soft‚ flexible feel on garments after application․ Unlike some other HTVs‚ Easyweed requires minimal pressure and temperature adjustments for successful bonding․

This makes it exceptionally suitable for both home crafters and professional businesses․ The vinyl’s adhesive properties ensure a durable‚ long-lasting design that withstands repeated washing․ It’s available in a vast spectrum of colors‚ including glitter and stretch options‚ expanding creative possibilities․ Easyweed simplifies the heat transfer process‚ delivering quality results with ease․

Why Choose Siser Easyweed?

Siser Easyweed stands out due to its exceptional ease of use‚ even for beginners․ Its low-tack adhesive allows for effortless weeding‚ saving valuable time and reducing frustration․ The vinyl’s consistent quality ensures reliable adhesion to a wide range of fabrics‚ from cotton to polyester blends․

Furthermore‚ Easyweed offers excellent durability‚ resisting peeling and cracking after numerous washes․ The broad color selection and specialty finishes‚ like glitter and stretch‚ cater to diverse project needs․ Choosing Easyweed means prioritizing a smooth‚ professional finish and a hassle-free crafting experience․

Tools and Materials Needed

Essential tools include a vinyl cutter‚ heat press‚ weeding tools (hook‚ tweezers)‚ Teflon sheet‚ and of course‚ Siser Easyweed vinyl itself for successful application․

Vinyl Cutter Compatibility

Siser Easyweed demonstrates excellent compatibility with a wide array of vinyl cutters‚ enhancing its accessibility for diverse crafting setups․ Popular choices like Cricut‚ Silhouette‚ and Brother ScanNCut machines perform exceptionally well with this material․

When utilizing a vinyl cutter‚ adjusting blade depth and pressure is crucial for clean cuts without damaging the carrier sheet․ Test cuts are highly recommended to optimize settings for your specific cutter and blade․ Proper calibration ensures precise design transfer and minimizes wasted material‚ leading to professional-looking results․ Experimentation is key to achieving optimal performance․

Heat Press Requirements

Siser Easyweed application necessitates a heat press capable of maintaining consistent temperature and pressure․ A flat‚ even platen surface is essential for uniform adhesion․ Clamshell‚ swing-away‚ and draw presses are all suitable options‚ depending on your production needs and workspace․

Ensure your heat press can accurately reach 305°F (150°C)‚ the recommended application temperature․ Consistent pressure‚ ranging from light to medium‚ is vital for a secure bond․ Regularly calibrate your heat press to guarantee accurate readings and reliable performance‚ resulting in durable and professional heat transfers․

Weeding Tools

Weeding is a crucial step after cutting Siser Easyweed‚ requiring specialized tools for precise removal of excess vinyl․ A sharp weeding hook‚ available in various styles‚ is fundamental for lifting intricate design elements․ A light box or bright‚ flat surface significantly aids visibility during this process‚ especially with complex designs․

Additionally‚ tweezers can be helpful for grabbing smaller pieces․ Investing in high-quality weeding tools ensures clean‚ efficient removal‚ preserving the integrity of your design․ Proper illumination and sharp tools contribute to a professional and polished final product․

Design Preparation

Creating a successful heat transfer requires careful design preparation․ This includes designing‚ mirroring‚ and optimizing cut settings for Siser Easyweed vinyl․

Proper preparation ensures a clean cut and a flawless application onto your chosen fabric‚ resulting in a professional finish․

Creating Your Design

Designing for Siser Easyweed begins with selecting or creating your desired artwork․ Utilize graphic design software like Adobe Illustrator‚ Silhouette Studio‚ or Cricut Design Space to craft your image․ Consider the complexity of your design; intricate details require precise cutting settings․

Ensure your design is clean and free of overlapping lines or small‚ disconnected elements that may prove difficult to weed․ Simplify designs when necessary for easier application․ Think about color choices if using multiple Easyweed varieties․ Finally‚ save your design in a compatible file format‚ such as SVG or DXF‚ for seamless importing into your cutting software․

Mirroring Your Design

Mirroring‚ or flipping‚ your design is a crucial step when working with Siser Easyweed․ Because you’ll be applying the vinyl carrier sheet face down onto the fabric‚ the design needs to be reversed․ Most cutting software programs have a “mirror” or “flip horizontal” function․

Activate this feature before sending your design to the cutter․ Failing to mirror will result in a backwards image on your final product․ Double-check this setting‚ especially when working with text or directional graphics․ A quick visual inspection on the software screen can prevent frustrating errors later in the process․

Cutting Settings for Siser Easyweed

Optimal cutting settings depend on your vinyl cutter model‚ blade condition‚ and the specific Easyweed variety․ However‚ a good starting point is a blade depth of around 45-60 degrees‚ with a medium to low force setting․ Perform a test cut before committing to the full design․

This ensures clean cuts without going through the carrier sheet․ Adjust the settings incrementally until the vinyl is cut cleanly‚ leaving the carrier intact․ Refer to Siser’s website or your cutter’s manual for recommended settings as a guide‚ and always prioritize a test cut for best results․

The Application Process: Step-by-Step

Applying Easyweed involves preheating the garment‚ precisely positioning the design‚ and using heat and pressure for a secure bond․ This ensures a lasting result․

Preheating the Garment

Preheating your garment is a crucial first step for successful Siser Easyweed application․ This process removes moisture and wrinkles‚ creating an optimal surface for vinyl adhesion․ Use a heat press or iron to warm the fabric for approximately 2-3 seconds․

Ensure the garment is smooth and dry before proceeding․ This step prepares the fibers‚ allowing the heat-activated adhesive on the Easyweed to bond effectively․ Consistent preheating across the entire application area is vital for uniform results․ A properly preheated garment significantly reduces the risk of vinyl lifting or peeling after washing․

Applying the Vinyl Design

Carefully position your weeded Siser Easyweed design onto the preheated garment‚ ensuring the carrier sheet is facing upwards․ Apply firm‚ even pressure using a heat press or iron․ Maintain a consistent temperature of 305°F (150°C) for optimal bonding․

Avoid shifting the design during the application process‚ as this can lead to misalignment or incomplete adhesion․ Press for the recommended time of 10-15 seconds‚ depending on the fabric type and Easyweed variety․ Consistent pressure distribution is key to achieving a durable and professional-looking result․

Temperature Settings: 305°F (150°C)

Maintaining 305°F (150°C) is crucial for successful Siser Easyweed application․ This temperature ensures the adhesive activates sufficiently to bond with the fabric fibers without causing scorching or damage․ Always verify your heat press accuracy with a temperature probe for consistent results․

Lower temperatures may result in poor adhesion‚ while higher temperatures can melt or distort the vinyl․ For thicker fabrics‚ slightly increased dwell times are preferable to raising the temperature․ Consistent heat application across the entire design is vital for a durable‚ long-lasting transfer․

Pressure Settings: Light to Medium

Applying light to medium pressure with your heat press is key when working with Siser Easyweed․ Too little pressure won’t allow sufficient bonding‚ leading to peeling after washing․ Conversely‚ excessive pressure can cause the vinyl to spread or appear distorted on the fabric․

Adjust your heat press based on the fabric type; lighter materials require less pressure․ A firm‚ even pressure across the entire design is essential․ Test with a small sample first to determine the optimal setting for your specific setup and material combination‚ ensuring a professional finish․

Application Time: 10-15 Seconds

Applying heat for 10-15 seconds is the standard duration for Siser Easyweed‚ but this can vary slightly․ Ensure the entire design receives consistent heat during this period for optimal adhesion․ A longer application time doesn’t necessarily improve results and could potentially scorch the fabric or damage the vinyl․

Pre-pressing the garment for 2-3 seconds before applying the vinyl helps remove moisture and wrinkles․ Monitor the application closely‚ and adjust the time based on your heat press and fabric type․ A quick test press is always recommended to confirm proper bonding․

Peeling the Carrier Sheet

Peeling can be done hot or cold‚ depending on the Easyweed variety․ Gently lift a corner to test; if the vinyl lifts‚ peel slowly and evenly for best results․

Hot Peel vs․ Cold Peel

Understanding whether to hot peel or cold peel your Siser Easyweed carrier sheet is crucial for a successful application․ Generally‚ Easyweed is a “hot peel” vinyl‚ meaning you should attempt to peel the carrier sheet immediately after removing the garment from the heat press‚ while it’s still warm․

However‚ some designs with intricate details or larger areas may benefit from a “cold peel‚” where you allow the vinyl to cool completely before peeling․ A quick test peel in a corner will reveal if it’s ready․ If the vinyl lifts with the carrier‚ it needs more cooling time․ Always refer to the specific Easyweed product instructions‚ as variations exist․

Troubleshooting Peeling Issues

If your Siser Easyweed vinyl is lifting or peeling after application‚ several factors could be at play․ Insufficient heat or pressure are common culprits; ensure your heat press reaches 305°F (150°C) with medium pressure․ Verify the vinyl is properly adhered before peeling – a test peel is vital․

If peeling occurs post-wash‚ re-press the design with a Teflon sheet for added protection․ Bubbling under the vinyl suggests trapped moisture; pre-press the garment longer․ Always weed carefully to avoid tearing the vinyl․ If issues persist‚ consult Siser’s official resources for specific guidance․

Post-Application Care

To maintain your Siser Easyweed design‚ wait 24 hours before washing․ Turn garments inside out and wash in cold water‚ avoiding harsh detergents or bleach․

Washing Instructions

Ensuring the longevity of your Siser Easyweed application requires careful washing practices․ Always turn your garment inside out before placing it in the washing machine; this protects the vinyl from direct abrasion during the wash cycle․ Use a mild detergent and select a cold water setting – hot water can compromise the adhesive properties of the vinyl․

Avoid using bleach or fabric softeners‚ as these can break down the vinyl’s composition and cause it to crack or peel over time․ Gentle cycle is recommended to minimize stress on the applied design․ Following these simple steps will help preserve the vibrancy and integrity of your Siser Easyweed creations for many washes to come․

Drying Instructions

Proper drying techniques are crucial for maintaining the quality of your Siser Easyweed heat transfer vinyl application․ After washing‚ it’s best to avoid high heat‚ which can cause the vinyl to distort or separate from the fabric․ Tumble dry on a low heat setting‚ or even better‚ hang your garment to air dry․

If using a dryer‚ consider turning the garment inside out to further protect the design․ Do not iron directly over the vinyl‚ as the heat can melt or damage it․ Following these drying guidelines will help ensure your Siser Easyweed designs remain vibrant and durable‚ extending the life of your customized apparel․

Advanced Techniques

Explore layering Easyweed for complex designs and utilize its compatibility with diverse fabrics like polyester and cotton blends for unique projects․

Mastering these skills unlocks creative potential and expands your heat transfer vinyl capabilities․

Layering Siser Easyweed

Layering Siser Easyweed allows for intricate‚ multi-colored designs‚ expanding creative possibilities beyond single-color applications․ When layering‚ always apply the first layer first‚ allowing it to fully cool before applying subsequent layers․

It’s crucial to use different Easyweed varieties for optimal adhesion; for example‚ combining Easyweed Stretch with standard Easyweed can create interesting textures and effects․ Remember to adjust heat press settings slightly – a slightly longer application time (around 5-10 seconds extra per layer) and medium to firm pressure are generally recommended․ Always test a small sample before committing to the full design to ensure proper bonding and prevent peeling․

Avoid excessive layering‚ as it can impact the fabric’s breathability and comfort․

Using Siser Easyweed with Different Fabrics

Siser Easyweed performs exceptionally well on cotton‚ polyester‚ and blends‚ but adjustments may be needed for optimal results with unique materials․ For delicate fabrics like rayon or silk‚ a lower temperature setting (around 285°F/140°C) and a shorter application time (5-8 seconds) are recommended to prevent scorching․

With thicker fabrics like denim or fleece‚ increase the application time to 15-20 seconds and use firm pressure․ Always pre-test on a scrap piece of fabric to determine the ideal settings․ Consider using a Teflon sheet or parchment paper to protect both the vinyl and the garment during heat application‚ especially with sensitive materials․

Troubleshooting Common Problems

Common issues with Siser Easyweed include vinyl not sticking‚ peeling after washing‚ or bubbling․ Adjusting temperature‚ pressure‚ and time often resolves these problems effectively․

Vinyl Not Sticking

If your Siser Easyweed isn’t adhering to the fabric‚ several factors could be at play․ First‚ ensure your heat press temperature is accurately set to 305°F (150°C)․ Inconsistent heat is a frequent culprit․

Secondly‚ verify sufficient pressure is being applied – aim for light to medium․ Insufficient pressure prevents proper bonding․ Also‚ confirm the application time is between 10-15 seconds․

Preheating the garment for 2-3 seconds is crucial for removing moisture and preparing the fibers․ Finally‚ check the fabric type; some materials require longer press times or different settings․ A test cut is always recommended!

Vinyl Peeling After Washing

Experiencing peeling after washing suggests an incomplete bond during application․ Double-check that you’re following the recommended temperature of 305°F (150°C) and applying light to medium pressure for the full 10-15 seconds․

Ensure the garment was preheated correctly‚ as this removes moisture hindering adhesion․ Also‚ verify you’re using appropriate washing instructions – turn the garment inside out‚ use mild detergent‚ and avoid harsh chemicals or bleach․

Some fabrics require extra care; consider a post-press to reinforce the bond․ If peeling persists‚ a re-application might be necessary‚ ensuring optimal settings are used․

Bubbling or Wrinkling

Bubbling or wrinkling often indicates inconsistent heat distribution or insufficient pressure during application․ Confirm your heat press platen reaches and maintains 305°F (150°C) evenly across the surface․ Apply medium pressure consistently throughout the 10-15 second application time․

Pre-pressing the garment for 2-3 seconds eliminates moisture‚ preventing steam buildup․ Using a Teflon sheet or parchment paper protects both the vinyl and garment․ Avoid overlapping the heat press‚ ensuring complete coverage․ If issues persist‚ reduce the application time slightly․

Siser Easyweed Varieties

Siser Easyweed comes in diverse options like Stretch‚ Glitter‚ and Electric․ Each variety offers unique textures and finishes for customized apparel projects․

These specialized formulas expand creative possibilities‚ catering to different aesthetic preferences and fabric types;

Easyweed Stretch

Easyweed Stretch is specifically engineered for fabrics with spandex or Lycra content‚ like athletic wear‚ swimwear‚ and leggings․ Its exceptional elasticity ensures the design moves seamlessly with the garment‚ preventing cracking or peeling during wear and washing․

This vinyl maintains a soft hand feel‚ even after application‚ providing comfort․ Recommended settings typically mirror standard Easyweed – 305°F (150°C) with light to medium pressure for 10-15 seconds․ Hot or cold peel is generally suitable‚ but always test a small area first․ It’s a fantastic choice when flexibility is paramount!

Easyweed Glitter

Easyweed Glitter adds a dazzling sparkle to any project! This heat transfer vinyl boasts a vibrant‚ eye-catching finish‚ perfect for creating standout apparel‚ accessories‚ and decorations․ Despite its glittery appearance‚ it remains surprisingly easy to weed‚ though a light tack mat is recommended․

Application requires a slightly warmer temperature – around 305°F (150°C) – and medium pressure for 15-20 seconds․ A cold peel is generally advised to prevent lifting․ Due to the glitter particles‚ a cover sheet is often used during pressing to protect the heat press platen and ensure even adhesion․

Easyweed Electric

Easyweed Electric is a revolutionary heat transfer vinyl known for its incredibly smooth‚ soft hand feel․ Unlike traditional glitter HTV‚ Electric offers a comfortable wear‚ making it ideal for garments worn directly against the skin․ It features a unique‚ metallic sheen that catches the light beautifully‚ providing a premium look․

Application settings are similar to standard Easyweed: 305°F (150°C) with medium pressure for 10-15 seconds‚ followed by a hot peel․ A test cut is always recommended․ This vinyl is a fantastic choice for high-quality‚ comfortable‚ and visually striking designs․

Safety Precautions

Always use caution with a heat press‚ protecting hands and surfaces․ Ensure proper ventilation when handling vinyl‚ and avoid prolonged skin contact․

Heat Press Safety

Operating a heat press requires strict adherence to safety guidelines․ Always wear heat-resistant gloves to protect your hands from burns when handling hot garments or the press itself․ Ensure the heat press is placed on a stable‚ level surface‚ away from flammable materials․

Never leave a heated press unattended․ Be mindful of the hot platen and surrounding areas; accidental contact can cause severe burns․ Keep the workspace clear of obstructions and ensure adequate ventilation․ Regularly inspect the heat press for any damage or malfunctions before each use․ Disconnect the power source when not in use or performing maintenance․

Vinyl Handling Safety

When working with Siser Easyweed‚ prioritize safe handling practices․ Utilize a weeding tool to carefully remove excess vinyl‚ avoiding cuts or scrapes․ Work in a well-ventilated area‚ as some vinyls may release minimal fumes during cutting or heating․ Store vinyl rolls and sheets in a cool‚ dry place‚ away from direct sunlight․

Dispose of vinyl scraps responsibly․ While generally non-toxic‚ avoid ingestion․ Keep vinyl away from small children and pets․ Always wash your hands after handling vinyl‚ especially before eating or touching your face․ Proper storage and careful handling ensure a safe and enjoyable crafting experience․

Resources and Further Learning

Explore Siser’s official website for detailed guides and FAQs․ Numerous online tutorials and vibrant crafting communities offer support and inspiration for your projects․

Siser Official Website

Siser’s official website (siser․com) is the definitive resource for all things Easyweed․ Here‚ you’ll discover comprehensive product information‚ including detailed specifications for each vinyl variety‚ ensuring you select the perfect material for your project․

The website also features a wealth of instructional videos demonstrating cutting‚ weeding‚ and heat application techniques․ Downloadable cutting settings charts are available‚ optimized for various vinyl cutters and software programs․

Furthermore‚ Siser provides helpful FAQs addressing common issues and troubleshooting tips․ You can also find information on upcoming workshops and events‚ connecting you with fellow crafters and Siser experts․ It’s a hub for inspiration and support!

Online Tutorials and Communities

Numerous online platforms offer valuable tutorials and support for Siser Easyweed users․ YouTube channels like “Heat Transfer Warehouse” and “Jennifer Maker” provide step-by-step guides‚ covering everything from basic application to advanced techniques․

Facebook groups dedicated to heat transfer vinyl‚ such as “Heat Transfer Vinyl – Tips & Tricks‚” foster a collaborative environment where crafters share experiences‚ troubleshoot problems‚ and offer advice․

Websites like Silhouette School and Cricut Learn also feature articles and videos specifically addressing Siser Easyweed compatibility with their respective cutting machines․ These communities are invaluable resources for learning and inspiration!

bar to psi conversion chart pdf

Bar to PSI Conversion Chart PDF: A Comprehensive Guide

Discover essential resources for converting bar to PSI‚ including downloadable PDF charts‚ online tools‚ and practical applications for accurate pressure measurements.

Understanding Pressure Units

Pressure‚ a fundamental concept in physics and engineering‚ quantifies the force applied perpendicularly to a surface per unit area. It’s crucial to grasp different units because various fields employ them. The bar (symbol: bar) is a metric unit of pressure‚ slightly greater than atmospheric pressure at sea level. Conversely‚ PSI (pounds per square inch) is an imperial unit‚ widely used in North America for tire pressure and industrial applications.

Understanding these units is vital for accurate measurements and conversions. Different systems—like meteorological‚ hydraulic‚ and industrial—often require switching between bar and PSI. A conversion chart PDF simplifies this process‚ providing quick reference points. Recognizing the context of pressure measurement—whether gauge or absolute—also impacts the conversion and interpretation of results. Accurate conversions ensure safety and efficiency in diverse applications.

What is a Bar?

The bar is a metric unit of pressure‚ defined as 100‚000 Pascals (Pa). It’s commonly used in meteorology and across much of the world for specifying pressures in various systems. Historically‚ it was close to the average atmospheric pressure at sea level‚ though slightly higher. One bar equals approximately 14.5038 pounds per square inch (PSI)‚ making it a convenient reference point for conversions;

Understanding the bar’s relationship to other units‚ like atmospheres and megapascals (MPa)‚ is crucial for comprehensive pressure analysis. A bar to PSI conversion chart PDF often includes these relationships for easy reference. The bar is preferred in many scientific and industrial contexts due to its simplicity and connection to the SI system of units. Utilizing accurate conversion tools ensures precise measurements.

What is PSI?

PSI stands for pounds per square inch‚ an imperial and US customary unit of pressure. It measures the force exerted over a given area – specifically‚ one pound of force acting on one square inch. PSI is widely used in North America for applications like tire pressure‚ industrial processes‚ and hydraulic systems. It’s a familiar unit for many‚ making it essential to understand its conversion to metric units like the bar.

A bar to PSI conversion chart PDF is invaluable for quickly translating between these systems. Knowing that 1 bar is roughly equivalent to 14.5 PSI allows for quick estimations‚ but precise conversions require accurate charts or tools. PSI remains prevalent due to its historical use and ease of understanding in certain industries‚ despite the global shift towards metric measurements.

Why Convert Between Bar and PSI?

Converting between bar and PSI is crucial due to the differing standards used globally. Many European and scientific applications utilize bar‚ a metric unit‚ while industries in North America frequently rely on PSI‚ an imperial unit. A bar to PSI conversion chart PDF bridges this gap‚ enabling seamless communication and operation across international boundaries.

Misinterpreting pressure readings can lead to equipment malfunction‚ safety hazards‚ or inaccurate results. Whether adjusting tire pressure‚ calibrating industrial machinery‚ or interpreting meteorological data‚ accurate conversion is paramount. Having a readily available conversion resource‚ like a downloadable chart‚ ensures consistency and prevents costly errors. Understanding both units facilitates collaboration and avoids misunderstandings in diverse technical fields.

Conversion Factors & Key Relationships

Explore the fundamental relationships between bar and PSI‚ essential for precise calculations and utilizing a bar to PSI conversion chart PDF effectively.

The Core Conversion: 1 Bar to PSI

Understanding the foundational conversion is crucial when working with pressure units. Precisely‚ 1 bar is equivalent to 14.50377 PSI (pounds per square inch). This core relationship forms the basis for all other conversions between these two units. A reliable bar to PSI conversion chart PDF will consistently reflect this value as its starting point.

This conversion isn’t merely a numerical exchange; it represents a difference in the systems used to measure force per unit area. Bar‚ a metric unit‚ is commonly used in scientific and industrial applications‚ while PSI is prevalent in the United States and certain engineering fields. Therefore‚ accurate conversion‚ utilizing a chart or calculator‚ is vital for seamless communication and operation across different sectors. Remember to always verify the source of your conversion chart PDF for accuracy.

Common Conversion Values (0-40 PSI Range)

For quick reference‚ a bar to PSI conversion chart PDF frequently details values within the 0-40 PSI range. Here’s a snapshot: 0 PSI equates to 0 bar‚ 10 PSI is approximately 0.69 bar‚ 20 PSI is around 1.38 bar‚ 30 PSI translates to roughly 2.07 bar‚ and 40 PSI is about 2.76 bar.

This range is particularly relevant for applications like tire inflation‚ where pressures are often specified in PSI‚ but understanding the equivalent bar value can be beneficial. A comprehensive chart PDF will provide more granular values within this range for increased precision. Utilizing these common conversions streamlines tasks and minimizes the need for constant recalculations‚ making a readily available chart invaluable for everyday use and quick estimations.

Conversion Values (40-100 PSI Range)

A bar to PSI conversion chart PDF often expands significantly within the 40-100 PSI range‚ catering to industrial and hydraulic applications. 40 PSI is approximately 2.76 bar‚ 50 PSI equates to roughly 3.45 bar‚ 60 PSI translates to about 4.14 bar‚ 70 PSI is around 4.83 bar‚ 80 PSI is approximately 5.52 bar‚ 90 PSI is roughly 6.21 bar‚ and 100 PSI converts to about 6.90 bar.

This range is crucial for systems demanding higher pressures. Detailed PDF charts provide finer increments for precise adjustments. Understanding these conversions is vital for maintaining equipment safety and optimal performance. Accurate conversion ensures compatibility and prevents potential damage‚ making a reliable chart an essential tool for professionals working with pressurized systems.

Conversion Values (100-200 PSI Range)

Within a bar to PSI conversion chart PDF‚ the 100-200 PSI range is critical for high-pressure applications like certain hydraulic systems and specialized industrial equipment. 100 PSI is approximately 6.90 bar‚ 120 PSI equates to roughly 8.27 bar‚ 140 PSI translates to about 9.65 bar‚ 160 PSI is around 11.03 bar‚ 180 PSI is approximately 12.41 bar‚ and 200 PSI converts to about 13.79 bar.

PDF charts in this range offer granular detail for precise calibration and maintenance. Accurate conversion is paramount to prevent system failures and ensure operational safety. Professionals rely on these charts for consistent and reliable pressure readings‚ vital for complex machinery and critical processes. Utilizing a detailed chart minimizes errors and maximizes efficiency.

Practical Applications of Bar to PSI Conversion

Explore real-world uses of bar to PSI conversions‚ from tire inflation and industrial processes to hydraulic systems and meteorological data.

Tire Pressure Measurement

Maintaining correct tire pressure is crucial for vehicle safety‚ fuel efficiency‚ and tire longevity. Tire pressure is frequently displayed in PSI (pounds per square inch)‚ but many pressure gauges and vehicle documentation‚ particularly in Europe and other regions‚ utilize bar as the standard unit. Therefore‚ a reliable bar to PSI conversion is essential for drivers.

Using a conversion chart or tool ensures accurate inflation‚ preventing underinflation – which leads to increased rolling resistance and potential tire failure – and overinflation‚ which can cause a harsh ride and reduced grip. Downloadable PDF charts provide a quick reference‚ while online converters offer instant calculations. Always consult your vehicle’s tire placard (usually located on the driver’s side doorjamb) for the recommended pressure‚ and convert accordingly before inflating your tires.

Remember to check tire pressure when tires are cold‚ as driving heats them up and increases the pressure reading. Accurate tire pressure contributes significantly to overall vehicle performance and safety.

Industrial Pressure Systems

Across numerous industrial applications‚ precise pressure control is paramount for operational efficiency and safety. Systems utilizing pneumatic or hydraulic power often employ either bar or PSI as the standard unit of measurement. A readily available bar to PSI conversion chart PDF is‚ therefore‚ invaluable for engineers‚ technicians‚ and operators.

Applications range from manufacturing processes and power generation to oil and gas refining. Accurate conversion prevents miscalibration of equipment‚ ensuring optimal performance and preventing potentially hazardous situations. PDF charts offer a convenient offline reference‚ while online conversion tools facilitate quick calculations during maintenance or troubleshooting.

Consistent and accurate pressure readings‚ achieved through reliable conversion‚ contribute to increased productivity‚ reduced downtime‚ and enhanced safety protocols within industrial environments. Utilizing these resources is a best practice for maintaining system integrity.

Hydraulic Systems

Hydraulic systems‚ crucial in construction‚ manufacturing‚ and aerospace‚ rely heavily on precise pressure management. Often‚ components are sourced globally‚ with specifications listed in either bar or PSI. A readily accessible bar to PSI conversion chart PDF becomes essential for seamless integration and maintenance.

Understanding the conversion is vital when diagnosing issues‚ replacing parts‚ or adjusting system parameters. Incorrect pressure readings due to unit misinterpretation can lead to component failure or unsafe operating conditions. PDF charts provide a quick‚ reliable reference point‚ independent of internet connectivity.

Furthermore‚ technicians benefit from having conversion data at their fingertips during field repairs. Utilizing a conversion chart ensures accurate adjustments‚ maximizing system efficiency and prolonging equipment lifespan. Consistent use of these resources promotes safety and operational reliability.

Meteorological Pressure Readings

Weather forecasting and atmospheric studies frequently utilize pressure measurements‚ often reported in millibars (mbar) or hectopascals (hPa)‚ closely related to barometric pressure. Converting these readings to PSI can be necessary when comparing data with systems utilizing imperial units‚ or for audiences more familiar with PSI.

A bar to PSI conversion chart PDF serves as a valuable tool for meteorologists‚ weather enthusiasts‚ and researchers. It facilitates understanding of pressure systems and their impact on weather patterns. Accurate conversion is crucial for correlating atmospheric pressure with other meteorological variables.

Having a readily available PDF chart allows for quick reference during data analysis and interpretation‚ especially in situations where immediate conversion is required. This ensures consistency and avoids errors when presenting or discussing meteorological information with diverse audiences.

Accessing and Utilizing Bar to PSI Conversion Charts

Explore readily available PDF charts and online conversion tools for seamless bar to PSI translations‚ enhancing accuracy and efficiency in various applications.

PDF Chart Availability & Sources

Numerous sources offer downloadable Bar to PSI conversion charts in PDF format‚ catering to diverse needs. A quick online search reveals a wealth of options‚ ranging from simple‚ single-page tables to more comprehensive guides including conversions for other pressure units like mWG‚ kPa‚ MPa‚ and millimeters of mercury. Many engineering websites and pressure measurement equipment manufacturers provide these charts as free resources.

Specifically‚ dedicated pressure conversion websites often host downloadable PDFs. Additionally‚ educational institutions and technical documentation repositories frequently include these charts within larger guides on fluid mechanics or industrial instrumentation. When selecting a PDF chart‚ prioritize clarity‚ accuracy‚ and a suitable pressure range for your intended application. Always verify the source’s reliability to ensure the information is trustworthy and up-to-date‚ avoiding potential errors in critical pressure calculations.

Online Conversion Tools

Beyond static PDF charts‚ a multitude of online conversion tools provide instant Bar to PSI conversions. These tools offer convenience and eliminate the need for manual lookups‚ often incorporating features like unit selection and real-time calculations. Websites like Farnell‚ and numerous general unit converters‚ allow users to input a value in either Bar or PSI and receive the equivalent value immediately.

These digital tools are particularly useful for quick estimations or when dealing with frequently changing pressure values. Many also include conversion capabilities for other pressure units‚ streamlining complex calculations. While offering speed and ease of use‚ it’s crucial to verify the tool’s accuracy‚ especially for critical applications. Cross-referencing results with a trusted PDF chart can provide an additional layer of confidence in the conversion process.

Using a Conversion Table Effectively

When utilizing a Bar to PSI conversion table‚ whether within a PDF or a printed format‚ understanding its structure is key. Tables typically list Bar values in one column and their corresponding PSI equivalents in another‚ facilitating quick lookups. Begin by identifying the closest Bar value to your known pressure.

For precise conversions‚ especially between listed values‚ interpolation may be necessary. This involves estimating the PSI value based on the surrounding data points. Always pay attention to the table’s units and any specified rounding rules. Remember that conversion tables provide approximate values; for critical applications requiring high accuracy‚ consider using a dedicated conversion tool or calculator alongside the table for verification.

Advanced Considerations

Explore nuanced factors like temperature’s impact on pressure readings‚ the distinction between gauge and absolute pressure‚ and ensuring conversion accuracy for reliable results.

Accuracy and Rounding

Achieving precise conversions from bar to PSI necessitates understanding potential inaccuracies. The 1 bar to PSI conversion factor (14.50377 PSI) is inherently a decimal‚ demanding rounding during practical application.

Conversion charts and tools often present values rounded to varying degrees of precision – typically whole numbers or one/two decimal places. This rounding introduces a small margin of error. For applications demanding high accuracy‚ such as industrial calibration or scientific measurements‚ utilizing the full conversion factor and minimizing rounding steps is crucial.

Consider the context of your measurement. A slight difference in PSI may be inconsequential for tire inflation but critical in hydraulic systems. Always assess the required precision and select a conversion method that aligns with those needs. Furthermore‚ be mindful of the source of your conversion chart or tool; reputable sources generally offer greater accuracy.

Temperature Effects on Pressure

Pressure readings are intrinsically linked to temperature. As temperature fluctuates‚ the volume of a gas or liquid changes‚ directly impacting measured pressure. A bar to PSI conversion performed without accounting for temperature variations can yield inaccurate results.

For gases‚ the Ideal Gas Law dictates this relationship – increased temperature leads to increased pressure‚ assuming constant volume. Liquids exhibit a similar‚ though less pronounced‚ effect due to thermal expansion. Therefore‚ conversion charts often assume a standard temperature.

When precise measurements are required‚ especially in industrial or scientific contexts‚ it’s vital to correct pressure readings to a reference temperature. This involves applying temperature compensation formulas or utilizing pressure sensors with built-in temperature correction features. Ignoring temperature effects introduces systematic errors into your bar to PSI conversions.

Absolute vs. Gauge Pressure

Understanding the difference between absolute and gauge pressure is crucial for accurate bar to PSI conversions. Gauge pressure‚ commonly used in everyday applications like tire inflation‚ measures pressure relative to atmospheric pressure. Absolute pressure‚ however‚ is measured relative to a perfect vacuum – zero pressure.

Conversion charts typically specify whether they utilize gauge or absolute pressure. Converting between the two requires adding or subtracting atmospheric pressure (approximately 14.7 PSI or 1.01325 bar) from the gauge pressure reading. Failing to account for this distinction leads to significant errors.

For instance‚ a tire pressure of 32 PSI (gauge) is actually 46.7 PSI (absolute) at sea level. Always verify the pressure type specified in the conversion chart or tool to ensure correct calculations and reliable results when working with bar to PSI conversions.

Resources and Further Information

Explore reliable online calculators‚ downloadable PDF conversion charts‚ and technical documentation for in-depth pressure unit understanding and precise conversions.

Reliable Online Pressure Calculators

Numerous online pressure calculators facilitate quick and accurate conversions between bar and PSI‚ eliminating the need for manual calculations or referencing extensive conversion tables. These tools are particularly useful for professionals and enthusiasts requiring immediate results in various applications. Farnell‚ for instance‚ provides a pressure calculator capable of converting millibars to kilopascals and vice versa‚ demonstrating the breadth of unit conversions available.

Many free online converters instantly translate pressure values‚ supporting units like Pascals‚ bars‚ MPa‚ PSI‚ kg/cm²‚ mm Hg‚ and atmospheres. These calculators often feature user-friendly interfaces‚ allowing for easy input and output of values. Utilizing these resources ensures precision and efficiency when dealing with pressure measurements‚ streamlining workflows and minimizing potential errors. They are invaluable for quick checks and verifying conversions obtained from charts or tables.

Downloadable Conversion Chart PDFs

Accessing Bar to PSI conversion charts in PDF format offers a convenient‚ offline solution for quick reference. These charts typically present a comprehensive table listing equivalent values across a range of pressures‚ from 0 to 200 PSI and beyond. A readily available document provides approximate equivalents between bar‚ mWG‚ kPa‚ MPa‚ and PSI units‚ simplifying pressure unit translations.

Downloading a PDF ensures accessibility even without an internet connection‚ making it ideal for fieldwork or situations where online tools are unavailable. These charts often include additional information‚ such as common conversion factors and key relationships between units. Searching online will reveal numerous sources offering free‚ downloadable conversion charts‚ catering to diverse needs and applications. Saving a chart allows for consistent and reliable conversions whenever needed.

Technical Documentation & Standards

Understanding the underlying standards governing pressure measurements is crucial for accurate conversions. While a simple bar to PSI chart provides quick results‚ detailed technical documentation clarifies the nuances of pressure definitions – absolute versus gauge pressure‚ for instance. Resources from metrology organizations and engineering standards bodies offer precise definitions of bar and PSI‚ ensuring consistency in calculations.

These documents often detail the environmental factors influencing pressure readings‚ such as temperature effects. Furthermore‚ they outline acceptable tolerances and rounding practices for conversions. Accessing these standards guarantees adherence to industry best practices and minimizes errors in critical applications. Referencing such documentation is particularly important in industrial settings and scientific research where precision is paramount‚ supplementing the convenience of a conversion chart PDF.

ge air conditioner user manual

GE air conditioners offer reliable cooling solutions, blending innovation with user-friendly designs. Understanding your model’s features, via the user manual, ensures optimal performance and longevity.

What is a GE Air Conditioner?

GE air conditioners represent a long-standing tradition of quality and innovation in home comfort. These units are designed to provide efficient and reliable cooling, utilizing various technologies to suit diverse needs. A GE air conditioner user manual is your primary resource for understanding the specific features of your model.

From window units offering targeted cooling to portable and central air systems, GE caters to a wide range of spaces and preferences. The user manual details everything from initial setup and operation to maintenance procedures and troubleshooting tips. Familiarizing yourself with the manual ensures you maximize the unit’s performance and extend its lifespan, ultimately enjoying consistent and comfortable climate control.

Types of GE Air Conditioners Available

GE offers a diverse portfolio of air conditioning solutions, each with unique characteristics. Window units provide focused cooling for single rooms, while portable ACs offer flexibility without permanent installation. Central air systems deliver whole-house comfort, and ductless mini-splits are ideal for zoning.

Your GE air conditioner user manual will be specific to the type of unit you own. It’s crucial to consult the correct manual, as installation, operation, and maintenance procedures vary significantly. The manual details features like energy-saving modes, fan speeds, and filter replacement instructions tailored to your specific GE model, ensuring optimal performance and efficiency.

Understanding Your GE Air Conditioner’s Control Panel

Refer to your GE air conditioner user manual to decipher the control panel’s functions. It details button operations for temperature, fan speed, and modes.

Power and Mode Buttons

The power button, as detailed in your GE air conditioner user manual, initiates and terminates operation. Mode buttons cycle through cooling, fan-only, dehumidifying, and auto functions. Cooling mode actively lowers room temperature, while fan-only circulates air without cooling. Dehumidifying reduces moisture, and auto mode intelligently adjusts settings based on room conditions.

Specific models may include energy-saver modes, optimizing efficiency. The manual clarifies each mode’s operation and recommended usage scenarios. Understanding these functions allows for customized comfort and energy conservation. Always consult the manual for precise button layouts and functionalities specific to your GE unit.

Temperature and Fan Speed Settings

Your GE air conditioner user manual explains temperature control, typically ranging from 60°F to 80°F (16°C to 27°C). Lowering the temperature increases cooling intensity. Fan speed settings – low, medium, and high – adjust airflow. Lower speeds are quieter, while higher speeds maximize cooling.

Auto fan speed, if available, automatically adjusts based on temperature. The manual details how these settings interact and impact energy consumption. Experimenting with combinations allows personalized comfort. Precise temperature adjustments and fan speed selection, guided by the manual, optimize performance and efficiency for your specific needs.

Timer and Sleep Functions

The GE air conditioner user manual details timer settings for automated operation. You can program the unit to turn on or off at specific times, conserving energy and ensuring comfort. Sleep mode gradually increases the temperature overnight, preventing excessive cooling and saving energy while you rest.

The manual explains how to set and adjust these functions. Sleep mode often features a pre-set temperature increase schedule. Utilizing these features, as described in the manual, provides convenience and optimizes energy efficiency. Proper programming ensures the unit operates according to your schedule and preferences.

Installation and Setup

Refer to the GE air conditioner user manual for detailed instructions on proper installation. Correct setup is crucial for efficient cooling and optimal unit performance.

Proper Placement for Optimal Cooling

The GE air conditioner user manual emphasizes strategic placement for peak efficiency. Avoid direct sunlight exposure, as it forces the unit to work harder. Ensure adequate airflow around the unit; obstructions hinder cooling.

For window units, select a sturdy window and ensure a secure, level installation to prevent vibrations and potential falls. Portable units benefit from placement near a window for exhaust hose venting, but avoid placing them directly in front of curtains or furniture.

Consider room size when choosing a unit; an undersized unit won’t cool effectively, while an oversized one cycles on and off frequently, wasting energy. Consult the user manual’s guidelines for recommended room sizes.

Window Installation Guide

The GE air conditioner user manual provides detailed window installation instructions. First, ensure the window frame is strong enough to support the unit’s weight. Assemble the side panels, extending them to fit the window opening securely.

Next, carefully lift the AC unit and place it into the window, ensuring it’s level. Secure the unit with mounting brackets and screws, following the user manual’s diagrams precisely.

Proper sealing is crucial; use the provided foam insulation to fill gaps around the unit, preventing air leaks and maximizing cooling efficiency. Finally, lower the window sash against the unit, securing it with the locking mechanism.

Portable AC Unit Setup

The GE air conditioner user manual details a straightforward portable AC setup. Begin by attaching the exhaust hose to the unit’s rear outlet. Then, connect the window kit to a suitable window opening, ensuring a snug fit to prevent hot air recirculation.

Insert the exhaust hose into the window kit adapter, securing it firmly. Place the portable AC unit near a grounded electrical outlet, avoiding obstructions to airflow.

Follow the user manual’s instructions for initial operation, including setting the desired temperature and fan speed. Regularly check the condensate drain tank and empty it as needed.

Maintenance and Cleaning

The GE air conditioner user manual stresses regular filter cleaning for peak efficiency. Coil cleaning and general unit upkeep prolong lifespan and maintain optimal cooling performance.

Filter Cleaning and Replacement

According to the GE air conditioner user manual, maintaining a clean air filter is crucial for efficient operation and air quality. Filters should be inspected monthly, and cleaned or replaced as needed – typically every one to three months, depending on usage. A dirty filter restricts airflow, reducing cooling capacity and potentially causing the unit to work harder, leading to increased energy consumption and possible damage.

The manual details how to access and remove the filter, usually located behind the front grille. Cleaning involves gently washing the filter with mild soap and water, ensuring it’s completely dry before reinstalling. Replacement filters, specified by your model number, are readily available online or at appliance retailers. Always turn off and unplug the unit before performing any maintenance.

Coil Cleaning Procedures

The GE air conditioner user manual emphasizes the importance of cleaning both the evaporator and condenser coils annually to maintain optimal performance. Dirty coils reduce cooling efficiency and can lead to system failures. Begin by disconnecting power to the unit. The evaporator coil, inside the unit, can be cleaned with a commercially available coil cleaner, following the product’s instructions carefully.

For the condenser coil, located outside, gently remove debris with a soft brush or vacuum. Avoid bending the fins. A fin comb can straighten any bent fins. Rinse both coils with water, ensuring no cleaner residue remains. Proper coil cleaning improves airflow and heat transfer, extending the lifespan of your GE air conditioner.

General Unit Cleaning

The GE air conditioner user manual recommends regular exterior cleaning to preserve its appearance and functionality. Wipe down the unit’s casing with a damp cloth and mild detergent. Avoid abrasive cleaners, which can damage the finish. Pay attention to vents and louvers, ensuring they are free from dust and obstructions. For portable units, clean the exterior after each use, especially during peak cooling seasons.

Inspect the drain plug regularly for any buildup. A clean unit not only looks better but also operates more efficiently. Remember to always disconnect the power before cleaning any part of the air conditioner. Consistent general cleaning contributes to the longevity of your GE appliance.

Troubleshooting Common Issues

The GE air conditioner user manual provides solutions for typical problems like poor cooling or leaks. Refer to it first for quick fixes and error code explanations.

Unit Not Cooling Properly

If your GE air conditioner isn’t cooling effectively, the user manual suggests several checks. First, ensure the filter is clean; a clogged filter restricts airflow, reducing cooling capacity. Verify the temperature settings are correct and the unit isn’t in “Fan Only” mode.

Next, inspect the condenser coils (outdoor unit) for debris and clean them if necessary. Confirm proper ventilation around both the indoor and outdoor units. The manual also details troubleshooting steps for potential refrigerant leaks, though these typically require professional service. Finally, check for error codes displayed on the unit, referencing the manual for their specific meanings and recommended actions.

Water Leaks and Drainage

According to the GE air conditioner user manual, minor condensation is normal during operation. However, significant water leaks indicate a problem. First, check the drain hose for clogs or kinks; a blocked hose prevents proper water drainage. The manual illustrates how to locate and clear the drain hose.

Ensure the unit is slightly tilted towards the drain outlet to facilitate water flow. Inspect the drain pan for cracks or damage. If leaks persist, the user manual advises contacting a qualified technician, as internal issues like a frozen evaporator coil or refrigerant problems may be the cause, requiring professional repair.

Error Codes and Their Meanings

The GE air conditioner user manual provides a comprehensive list of error codes displayed on the unit’s control panel. These codes signal specific malfunctions, aiding in troubleshooting. For example, “E1” might indicate a sensor error, while “E2” could signify a compressor issue.

The manual details each code’s meaning and suggests potential solutions, ranging from simple fixes like cleaning the filter to more complex repairs requiring a qualified technician. Ignoring error codes can lead to further damage. Always consult the user manual before attempting any repairs, and prioritize safety by disconnecting power before inspection.

Smart Features and Connectivity

GE air conditioners with Cync compatibility, detailed in the user manual, enable remote control via the Google Home app and voice commands for convenience.

Google Nest Integration

GE air conditioners featuring Cync compatibility seamlessly integrate with the Google Nest ecosystem. The user manual provides step-by-step instructions for linking your appliance to the Google Home app. This connection allows for convenient voice control using Google Assistant, enabling you to adjust settings like temperature and fan speed with simple commands.

Furthermore, integration with Google Nest Hub displays provides a visual interface for managing your air conditioner. You can remotely turn the unit on or off, monitor current conditions, and create customized schedules directly from the Google Home app or compatible devices. Detailed troubleshooting for connectivity issues is also found within the user manual.

Remote Control via Mobile App

GE air conditioners equipped with Wi-Fi capabilities offer remote control functionality through the Cync mobile app. The user manual details the download and setup process for both iOS and Android devices. Once connected, users can manage their air conditioner from anywhere with an internet connection, adjusting temperature, fan speed, and mode settings.

The app also allows for scheduling operation, creating customized cooling profiles to optimize comfort and energy efficiency. Notifications regarding filter maintenance or error codes can be sent directly to your smartphone. Comprehensive instructions for app navigation and troubleshooting common connectivity problems are thoroughly explained within the user manual.

Safety Precautions

GE’s user manual emphasizes electrical safety and proper ventilation. Always follow grounding instructions and avoid operating the unit in hazardous environments for safe use.

Electrical Safety Guidelines

GE air conditioner user manuals consistently prioritize electrical safety. Always ensure the unit is properly grounded to prevent shock hazards, as detailed in the manual’s diagrams. Never operate the AC with a damaged power cord or plug; replacement must be done by qualified personnel.

Avoid using extension cords, as they can overheat and pose a fire risk. The manual stresses the importance of a dedicated circuit to prevent overloading. Disconnect the unit from the power source before any cleaning or maintenance, and never touch the internal components with wet hands. Following these guidelines, outlined in your GE manual, guarantees safe operation and prevents potential electrical incidents.

Proper Ventilation Requirements

GE air conditioner user manuals emphasize the critical role of proper ventilation for efficient operation and indoor air quality. Portable units require venting to the outside, typically through a window kit, to expel hot air. Window units need unobstructed airflow around the unit, both inside and outside the room, as illustrated in the manual.

Restricting airflow reduces cooling capacity and can strain the compressor. The manual cautions against placing objects near the air intake or exhaust vents. Maintaining adequate ventilation prevents moisture buildup, minimizing the risk of mold growth and ensuring optimal performance, as detailed within your GE air conditioner’s guide.

Warranty Information

GE air conditioner user manuals detail warranty coverage, typically one year for parts and labor. Registration is often required for full benefits and claim processing.

GE Air Conditioner Warranty Details

GE air conditioner warranties, as outlined in the user manual, generally provide one year of coverage for both parts and labor against manufacturing defects. Extended warranties are often available for purchase, offering additional protection beyond the initial period.

The standard warranty typically excludes damage resulting from improper installation, misuse, accidents, or natural disasters. It’s crucial to retain proof of purchase for warranty claims. The user manual will specify the exact process for submitting a claim, including required documentation and contact information for GE’s service centers.

Commercial use may void certain warranty provisions, so understanding the terms is vital. Always register your appliance to ensure seamless warranty service when needed.

How to Make a Warranty Claim

To initiate a warranty claim for your GE air conditioner, consult the detailed instructions within the user manual. Typically, you’ll need your model number, serial number, and proof of purchase date. First, contact GE’s customer service department via phone or their website, detailing the issue.

They may request diagnostic information or photos/videos of the problem. If the issue is covered, GE will authorize a service visit from a qualified technician. Keep all communication records. The user manual outlines specific exclusions, so review it carefully before submitting your claim to avoid delays.

protection warrior leveling guide

Embarking on a Protection Warrior leveling journey in WoW Classic offers a robust and rewarding experience, blending survivability with consistent progression.

This guide details optimal talent builds, strategies, and gear choices for efficiently navigating the leveling process, ensuring a strong foundation for endgame content.

Warriors excel in both PvE and PvP, making them versatile choices for players seeking a challenging yet fulfilling leveling experience.

Overview of the Protection Warrior

Protection Warriors are masters of defense, specializing in mitigating damage and controlling the battlefield. They utilize a combination of shields, armor, and defensive abilities to withstand immense pressure, making them ideal tanks.

Leveling as Protection focuses on survivability, allowing for consistent questing and dungeon completion. While damage output is lower compared to Fury or Arms, the ability to solo challenging content and efficiently handle multiple enemies is a significant advantage.

Key strengths include high armor, block chance, and various defensive cooldowns, ensuring resilience throughout the leveling process. Mastering threat generation is crucial for successful tanking.

Why Choose Protection for Leveling?

Opting for Protection during leveling provides unparalleled survivability, minimizing downtime from deaths and enabling consistent progress. This spec excels at handling multiple enemies, streamlining quest completion and grinding efficiency.

Unlike Fury or Arms, Protection allows soloing challenging elite quests and efficiently farming areas. It’s a fantastic choice for new players or those preferring a safer, more methodical leveling experience.

Furthermore, learning tanking fundamentals early prepares you for endgame dungeons and raids, offering a valuable skillset.

Leveling Talents (1-80)

Strategic talent allocation is crucial for efficient leveling. Prioritize talents enhancing survivability, threat generation, and utility throughout the 1-80 progression.

This section details optimal talent choices for each level range.

Early Game Talents (Levels 10-20)

Focus on foundational talents that improve survivability and damage output during these initial levels. Prioritize Improved Shield Bash for increased control, and invest points into Deflection to mitigate incoming damage.

Tactical Mastery is also beneficial, enhancing stance switching. Early investment in Improved Battle Shout provides a noticeable boost to party damage when questing with others. Don’t neglect Mace Specialization if using a mace, as it significantly increases damage dealt. These talents establish a solid base for future specialization.

Mid-Game Talents (Levels 20-40)

Transitioning into the mid-game, prioritize talents that enhance threat generation and defensive capabilities. Improved Revenge becomes crucial for consistent damage and threat. Invest in Concussion Blow for interrupting enemy spellcasting and controlling the battlefield.

Improved Taunt is essential for maintaining aggro on multiple targets. Consider points in Shield Specialization to further bolster your defenses. These talents solidify your role as a reliable tank, preparing you for more challenging content and group play.

Late-Game Talents (Levels 40-60)

As you approach the level cap, focus on maximizing survivability and threat sustain. Improved Shield Block significantly reduces incoming damage, while Anticipation lowers physical damage taken. Last Stand provides a crucial burst of health when facing critical situations, enhancing your resilience.

Improved Demoralizing Shout further weakens enemies, aiding in threat control. Prioritize talents that synergize with your core abilities, ensuring you remain a steadfast and dependable tank throughout your leveling journey.

Talent Choices for Levels 60-80

Continuing your progression, invest in talents that bolster your defensive capabilities and threat generation. Improved Revenge increases the damage of your key threat ability, while Concussion Blow provides valuable crowd control. Shield Specialization enhances shield effectiveness, reducing damage taken.

Deflection increases your chance to avoid attacks, and Improved Battle Shout boosts party damage. These talents solidify your role as a durable and reliable tank, preparing you for challenging content.

Essential Skills & Abilities

Mastering core abilities like Shield Slam, Thunder Clap, and Demoralizing Shout is crucial. Prioritize learning Battle Shout for group utility and Revenge for threat.

Core Abilities for Protection

Shield Slam remains your primary damage dealer and threat generator, utilizing Rage effectively. Thunder Clap is vital for AoE threat and slowing enemies, enhancing survivability. Demoralizing Shout significantly reduces enemy damage output, bolstering your defenses.

Revenge provides consistent damage and threat when taking damage, synergizing with your tanking role. Shield Block is paramount for mitigating physical damage, reducing incoming hits. Intercept allows for quick engagement or disengagement, controlling combat flow.

Consistently utilizing these abilities forms the foundation of effective Protection Warrior gameplay, ensuring both survivability and threat control throughout the leveling process.

Important Utility Skills

Battle Shout significantly boosts your party’s melee damage, providing valuable support during group content. Charge is crucial for initiating combat and quickly closing the distance to targets. Battle Stance offers increased melee damage and allows access to key abilities.

Last Stand provides a substantial temporary health boost, aiding in surviving challenging encounters. Second Wind offers a quick burst of healing, improving self-sustain. Mace Stun provides crowd control, interrupting enemy casts and creating openings.

Mastering these utility skills enhances your overall effectiveness as a Protection Warrior, both in solo and group scenarios.

Spells to Prioritize Learning

Shield Slam is your primary damage ability and threat generator, so maximize its ranks early. Battle Shout provides a significant damage boost for you and your party, making it essential. Demoralizing Shout reduces enemy damage output, increasing your survivability.

Revenge offers a reliable source of damage and threat, triggered by taking damage. Prioritize learning all ranks of Thunder Clap for AoE threat. Mortal Strike, while later, becomes a core ability for both damage and threat.

Focusing on these spells will dramatically improve your leveling efficiency.

Leveling Zones & Strategies

Efficient leveling involves strategic zone selection and quest prioritization. Focus on areas with dense mob populations and quests offering substantial experience rewards.

Dungeons provide excellent experience and gear, but questing often proves faster for a Protection Warrior.

Best Zones for Efficient Leveling

For Protection Warriors, zones offering a high density of quests and relatively easy-to-manage mobs are ideal. Eastern Plaguelands and Western Plaguelands provide numerous quests and manageable enemy types, facilitating consistent progression.

Hillsbrad Foothills is another strong contender, offering a mix of quest types and opportunities for AoE grinding. Searing Gorge and Un’Goro Crater become viable at higher levels, providing challenging but rewarding experiences. Prioritize zones aligning with your current level range to maximize efficiency and minimize downtime.

Questing vs. Dungeon Leveling

As a Protection Warrior, both questing and dungeon leveling offer distinct advantages. Questing provides a steady stream of experience and allows for exploration, while dungeons offer faster leveling, particularly with a coordinated group.

Dungeons also provide valuable gear upgrades, crucial for maintaining threat and survivability. However, dungeon queues can be lengthy. A hybrid approach – questing to fill gaps between dungeon runs – is often the most efficient, balancing speed and gear acquisition.

Grinding Strategies for Specific Levels

For Protection Warriors, efficient grinding focuses on maximizing kills per hour while minimizing downtime. Levels 20-30 benefit from humanoid mobs in zones like Durotar or Elwynn Forest, offering quick kills and decent drops.

Levels 30-40, consider grinding beasts in Barrens or Thousand Needles. Levels 40-50, Un’Goro Crater provides consistent mob density. Prioritize areas with minimal travel time between spawns to optimize experience gains and maintain momentum.

Gear & Stat Priorities

Prioritize stamina and strength while leveling, seeking gear with defensive stats. Early on, any upgrade is beneficial, but focus on survivability.

Later, prioritize gear offering increased armor and block chance, enhancing your tanking capabilities and overall resilience.

Early Game Gear Acquisition

Initially, focus on readily available green-quality gear from quests and vendors. Don’t hesitate to replace white or grey items with even slightly better alternatives. Prioritize pieces offering stamina to increase your health pool, crucial for survival.

Dungeons provide a significant gear upgrade opportunity, especially for head, shoulders, and chest pieces. Participate in early dungeons like Deadmines or Stockades to acquire valuable equipment. Remember to check the Auction House for affordable upgrades, but avoid overspending early on.

Weapon upgrades are vital; seek out weapons with higher damage per second (DPS) to improve threat generation.

Stat Weights for Protection Warriors

Stamina reigns supreme, directly increasing your health pool and survivability – prioritize it on all gear. Defense is crucial for mitigating physical damage, reducing incoming hits. Strength contributes to attack power, indirectly aiding threat generation.

Agility offers a small amount of crit chance and armor, providing a minor defensive benefit. Intellect is less important for leveling, as mana management isn’t a primary concern. Focus on maximizing Stamina and Defense, then Strength, when selecting gear.

Prioritize stats that enhance your ability to stay alive and maintain threat.

Pre-Raid Best in Slot (BiS) Considerations

Prioritize gear with Stamina and Defense, aiming for a balanced build before raiding. Dungeon drops and crafted items are excellent sources. Look for pieces offering Strength for increased threat. Blacksmithing can provide powerful upgrades, especially chest and leg pieces.

Consider the Hammer of the Titans from Blackrock Depths, a strong weapon option. Lionheart Helm is a coveted item, offering significant defensive stats. Focus on filling gear gaps with readily available, stat-boosting options.

Combat & Rotation Basics

Maintain threat with Shield Slam and Thunder Clap on cooldown. Utilize Charge to initiate combat, and Revenge for consistent damage.

Prioritize defensive cooldowns during challenging encounters, ensuring survival and sustained threat generation throughout leveling.

Single-Target Rotation

For consistent single-target threat and damage while leveling, begin with a Charge to engage the enemy. Immediately follow with Shield Slam, utilizing it on cooldown as your primary damage dealer and threat generator.

Maintain Thunder Clap on cooldown to consistently apply a threat increase. Weave in Revenge whenever it procs, capitalizing on opportunities for additional damage. Prioritize keeping Demoralizing Shout active to reduce enemy damage output.

Remember to utilize defensive abilities proactively to mitigate incoming damage and maintain survivability throughout prolonged engagements.

AoE (Area of Effect) Rotation

When facing multiple enemies, initiate with Thunder Clap to establish initial threat on all targets. Follow up with frequent casts of Shockwave, maximizing its area of effect to damage and generate threat across the group.

Utilize Demoralizing Shout to reduce the damage output of all affected enemies, enhancing your survivability. Continuously weave in Shield Slam, prioritizing targets with the highest threat to maintain control.

Remember to reposition strategically to effectively engage all enemies within your AoE abilities’ range.

Threat Generation Techniques

Maintaining consistent threat is crucial for a Protection Warrior. Begin encounters with a well-timed Charge to immediately establish dominance. Utilize Thunder Clap frequently, as it generates significant threat on multiple targets.

Prioritize Shield Slam on cooldown, ensuring it remains your primary threat tool. Employ Demoralizing Shout not only for damage reduction but also for its threat generation properties.

Don’t underestimate the value of Revenge procs; they offer substantial threat when used effectively.

Professions for Leveling

Blacksmithing and Mining offer self-sufficiency, crafting gear upgrades. First Aid is essential for sustained leveling, providing crucial healing between rests.

Engineering provides utility, while Skinning and Leatherworking offer consistent income and gear options.

Recommended Professions

For Protection Warriors, Blacksmithing stands out, allowing crafting of durable, readily available gear, reducing reliance on dungeon drops. Paired with Mining, it provides complete self-sufficiency in equipment upgrades throughout the leveling process.

First Aid is non-negotiable; consistent healing outside of combat is vital for a tank’s survival. Engineering offers invaluable utility – gadgets for travel, combat advantages, and emergency situations. While Leatherworking and Skinning provide income, they are less impactful than the direct benefits of Blacksmithing and Engineering for a leveling Protection Warrior.

Benefits of Each Profession

Blacksmithing grants access to powerful armor and weapons, enhancing survivability and damage output. Mining provides the raw materials, eliminating gold expenditure on essential crafting components. First Aid offers consistent self-healing, crucial for tanking and solo play.

Engineering delivers unique gadgets – teleporters, bombs, and scopes – boosting mobility and combat effectiveness. Leatherworking generates income through crafted armor, while Skinning provides leather for crafting, offering a supplementary gold source.

Consumables & Utility Items

Potions and Healthstones provide crucial emergency healing, while strategically chosen food and drink sustain health and mana during prolonged encounters.

Engineering gadgets offer utility, enhancing mobility and providing tactical advantages throughout the leveling process.

Potions & Healthstones

Potions are indispensable for Protection Warriors during leveling, offering immediate health restoration in critical situations. Minor Healing Potions are cost-effective early on, transitioning to Greater Healing Potions as gold allows. Keep a generous supply readily available, especially before engaging elite mobs or challenging quests.

Healthstones serve as a reliable backup healing source with a longer cooldown, perfect for emergencies when potions are unavailable. Regularly replenish your Healthstone supply from vendors. Prioritize using these consumables proactively to mitigate damage and maintain survivability throughout your leveling journey.

Food & Drink Choices

Maintaining health and mana regeneration is crucial while leveling. Early on, inexpensive foods like Grilled Catfish or Dog Biscuits provide sufficient health recovery. As you gain gold, upgrade to options offering higher health and stamina regeneration, such as Roasted Boar;

For mana, Refreshing Spring Water is essential, especially during prolonged combat. Consider Major Mana Potions for emergencies. Prioritize food and drink that complement your playstyle, ensuring consistent resource management and sustained tanking capabilities throughout your leveling experience.

Useful Engineering Gadgets

Engineering offers invaluable utility for a leveling Protection Warrior. Goblin Jumper Cables can be a lifesaver, allowing for self-resurrection in emergencies. Gnomish Army Knife provides convenient access to repair, food, and drink.

Bombing Run offers a quick escape or damage boost, while Rocket Boots enhance mobility. These gadgets significantly improve survivability and efficiency, streamlining the leveling process and providing tactical advantages in challenging situations. Investing in Engineering is highly recommended.

Dungeon Leveling Guide

Dungeons provide fast experience and gear for Protection Warriors. Focus on tanking effectively, learning boss mechanics, and coordinating with your group for success.

Optimal dungeons accelerate leveling, offering valuable rewards and combat practice.

Optimal Dungeons for Protection Warriors

Protection Warriors thrive in dungeons due to their exceptional tanking capabilities and threat generation. Stockade (levels 19-24) and Deadmines (levels 18-22) are excellent early-game options, offering straightforward mechanics and consistent pulls.

As you level, prioritize Shadowfang Keep (levels 26-30), Blackfathom Deeps (levels 29-32), and Gnomeregan (levels 33-37) for increased experience and better gear. Later, Scarlet Monastery (various wings for levels 38-45) and Razorfen Kraul (levels 46-50) provide substantial rewards and challenging encounters, solidifying your tanking skills.

Remember to communicate with your group and utilize crowd control effectively.

Tanking Strategies in Dungeons

Effective tanking as a Protection Warrior revolves around consistent threat generation and strategic positioning. Always Charge into combat, establishing immediate threat with Shield Slam and Thunder Clap on cooldown. Utilize Demoralizing Shout to reduce enemy damage output, enhancing survivability for the group.

Prioritize facing enemies away from allies, minimizing collateral damage. Employ Intercept to quickly address ranged attackers or reposition mobs. Communicate with healers regarding incoming damage and cooldown usage. Mastering these fundamentals will ensure smooth and successful dungeon runs.

Dealing with Difficult Dungeon Mechanics

Dungeons often present unique mechanics requiring quick adaptation. Protection Warriors must anticipate and mitigate incoming damage, utilizing cooldowns like Shield Wall proactively. Coordinate with the group to interrupt crucial casts and control adds effectively.

Be prepared to kiting dangerous enemies if overwhelmed, utilizing Concussive Blow to create distance. Communicate clearly about boss abilities and positioning requirements. Understanding these mechanics is crucial for successful dungeon completion and group survival.

Dealing with Difficulties

Overcoming challenges like elite mobs and PvP encounters requires strategic use of abilities and understanding your limits. Mana and Rage management are key!

Handling Elite Mobs

Facing elite mobs as a Protection Warrior demands careful preparation and execution. Prioritize utilizing Defensive Stance and maintaining consistent threat generation with Shield Slam and Thunder Clap.

Employ Demoralizing Shout to reduce their damage output, and strategically use Intervene to protect yourself or allies. Shield Block is crucial for mitigating significant damage spikes. Remember to utilize potions and healthstones proactively to sustain through prolonged engagements.

Kiting can be effective if overwhelmed, but focus on maintaining consistent damage mitigation and threat.

Surviving PvP Encounters

Encountering players while leveling requires quick thinking and defensive maneuvering. Immediately utilize Defensive Stance and employ Hamstring to slow their advance. Intervene is vital for peeling for yourself or allies under attack.

Prioritize using Shield Wall as a reactive cooldown against burst damage; Demoralizing Shout reduces enemy damage, while Disarm can temporarily neutralize a melee opponent. Focus on survival; disengage if significantly outnumbered.

Don’t hesitate to utilize terrain to your advantage and flag for assistance if needed.

Managing Mana & Rage

Protection Warriors rely on Rage for abilities, but mana management is crucial for utility spells. Conserve mana by minimizing unnecessary spell casts, especially during downtime. Utilize abilities like Thunder Clap strategically to generate threat and Rage efficiently.

Prioritize gear with Stamina and Spirit to improve survivability and mana regeneration. First Aid is invaluable for self-healing between fights, reducing potion dependency.

Understand your rotation to maximize Rage generation without overcapping.

Advanced Leveling Tips

Mastering stance switching, efficient kiting, and optimizing travel time significantly accelerate leveling. Prioritize quest chains and utilize world events for bonus experience gains.

Utilizing Warrior Stances Effectively

Strategic stance switching is crucial for maximizing efficiency. While leveling, primarily remain in Defensive Stance for its superior armor and damage reduction, essential for survivability against elite mobs and challenging quests.

Briefly shift to Battle Stance when initiating combat to benefit from increased damage output, then immediately return to Defensive Stance. Avoid Berserker Stance during leveling, as the increased damage vulnerability outweighs the offensive benefits.

Understanding these nuances allows for optimized threat generation and sustained survivability, streamlining the leveling process and minimizing downtime.

Kiting Techniques for Survival

Mastering kiting is vital when facing overwhelming odds or difficult elite enemies. Utilize Concussive Blow to slow targets, creating distance for healing and rage generation. Combine this with Intercept to reposition enemies, controlling the engagement range.

Employ Shield Wall for burst damage reduction during kiting sequences, allowing for safer maneuvering. Remember to utilize terrain to your advantage, creating obstacles and bottlenecks. Effective kiting transforms challenging encounters into manageable situations.

Optimizing Travel Time

Minimizing travel time is crucial for efficient leveling. Utilize your Warrior’s Charge ability frequently, maximizing its range and cooldown reduction through talents. Consider investing in mounts as soon as possible, prioritizing faster options when financially feasible.

Plan quest routes strategically, grouping objectives within the same zone to reduce unnecessary backtracking. Explore engineering gadgets like the Goblin Rocket Boots for short bursts of speed. Efficient travel translates directly into increased leveling speed and overall progress.

Resources & Further Reading

Explore WoWhead and Icy Veins for detailed guides, talent builds, and updated information. Engage with community forums and Discord servers for shared knowledge!

Useful Websites & Guides

Numerous online resources provide invaluable assistance for Protection Warrior leveling. WoWhead (wowhead.com) offers comprehensive databases, including talent calculators, quest guides, and item information, crucial for optimizing your build and progression.

Icy Veins (icy-veins.com) delivers detailed class guides, covering rotations, stat priorities, and leveling strategies tailored specifically for Protection Warriors. These sites are regularly updated with the latest information, ensuring accuracy and relevance.

Additionally, exploring class-specific guides created by experienced players can offer unique insights and perspectives, enhancing your leveling experience and overall understanding of the class.

Community Forums & Discord Servers

Engaging with the WoW community is invaluable for Protection Warrior leveling. Official Blizzard forums and dedicated WoW-focused websites host active discussions where players share tips, strategies, and experiences.

Discord servers, particularly those centered around Warriors or specific realms, provide real-time assistance and a collaborative environment. These platforms allow you to ask questions, receive feedback on your talent builds, and find leveling partners.

Networking with fellow players fosters a supportive learning experience, accelerating your progress and enjoyment of the game.

WoWhead & Icy Veins Resources

WoWhead and Icy Veins are indispensable resources for any Protection Warrior leveling. WoWhead provides comprehensive databases of quests, items, and abilities, alongside user-submitted comments and guides.

Icy Veins offers detailed class guides, including talent builds, rotations, and gearing advice specifically tailored for Protection Warriors. These websites are regularly updated with the latest information, ensuring accuracy and relevance.

Utilizing these platforms streamlines your leveling process, providing access to expert knowledge and community insights.

translation geometry worksheet pdf

Translation geometry worksheets, often available as PDF downloads, are crucial tools for mastering geometric transformations. They aid in understanding shifts of figures without rotation or resizing.

What is Translation in Geometry?

Translation in geometry represents a specific type of transformation where a shape or object is moved from one location to another without altering its size, orientation, or shape. Think of sliding a figure across a plane; that’s translation! This movement is defined by a translation vector, indicating the horizontal and vertical shift.

Essentially, every point in the shape is moved the same distance in the same direction. Translation geometry worksheets, frequently found as PDF documents, help visualize and practice this concept. They often involve identifying the translation vector given a pre-image and image, or applying a given vector to translate a shape. Understanding translation is foundational for grasping more complex geometric transformations.

Why Use Translation Geometry Worksheets?

Translation geometry worksheets, readily available as PDF downloads, provide targeted practice for a fundamental geometric skill. They’re invaluable for solidifying understanding beyond theoretical concepts. These worksheets offer a structured approach to learning, progressing from simple translations on coordinate planes to more complex scenarios involving geometric shapes and vectors.

Consistent practice with these resources builds confidence and fluency in applying translation rules. They help students develop problem-solving skills, spatial reasoning, and the ability to visualize geometric transformations. Furthermore, worksheets often include answer keys, enabling self-assessment and independent learning. Mastering translation through dedicated practice prepares students for advanced geometry topics and real-world applications.

Types of Translation Geometry Worksheets

Translation geometry worksheets, often in PDF format, vary widely – from coordinate plane exercises to those featuring shapes and vector-based translations.

Worksheets Focusing on Coordinate Plane Translations

Coordinate plane translation worksheets, frequently offered as downloadable PDF files, are foundational for grasping this geometric concept. These resources typically present students with points plotted on a coordinate grid and require them to apply a given translation rule – often expressed as (x, y) → (x + a, y + b).

Students practice shifting points horizontally and vertically, accurately plotting the translated image. More advanced worksheets introduce translating lines, segments, and simple polygons. These exercises reinforce understanding of how coordinate changes directly correspond to geometric movement. Many PDF worksheets include answer keys for self-assessment and practice. The focus remains on applying translation rules within the familiar framework of the coordinate system, building a strong base for more complex transformations.

Worksheets with Geometric Shapes

Worksheets featuring geometric shapes, often available as PDF downloads, present a visual approach to understanding translation. These resources move beyond simple coordinate points, showcasing pre-drawn shapes like triangles, squares, and circles. Students are tasked with translating these shapes across a plane, maintaining their original size and orientation.

These PDF exercises commonly involve tracing the translated image or accurately redrawing it based on provided translation vectors or rules. Some worksheets challenge students to identify the translation that maps a pre-image to its image. This type of practice strengthens spatial reasoning skills and reinforces the concept that translation is a rigid transformation – preserving shape and size. They are excellent for visual learners and building intuition about geometric movement.

Worksheets Involving Vectors

Translation geometry worksheets utilizing vectors, frequently found as PDF documents, introduce a more formal and algebraic approach to the concept. These resources represent translations as directed line segments, defining both magnitude and direction. Students learn to express translations using component form, such as <a, b>, indicating horizontal and vertical shifts.

PDF exercises often require students to apply vector addition to find the resultant translation after multiple transformations. They may also need to determine the vector representing a given translation between two points or shapes. Understanding vectors provides a powerful tool for precisely describing and predicting the outcome of translations. This builds a bridge between geometric intuition and algebraic representation, enhancing problem-solving skills in coordinate geometry.

Key Concepts Covered in Translation Geometry

Translation geometry worksheets (often PDFs) emphasize coordinate changes, vector roles, and identifying translation rules for precise figure movements.

Understanding Coordinate Changes

Translation geometry worksheets, frequently found as downloadable PDFs, heavily focus on mastering coordinate changes. These worksheets present points and shapes on a coordinate plane, requiring students to apply translation rules – often expressed as (x, y) → (x + a, y + b).

The core concept involves understanding how adding or subtracting values to the x and y coordinates systematically shifts the figure; Worksheets progressively increase in complexity, starting with simple translations and moving towards combinations of multiple translations.

Students learn to visualize these changes and accurately plot the translated images. A strong grasp of coordinate plane basics is essential. Many PDF worksheets include grids to aid in visualization and accurate plotting, reinforcing the direct relationship between the translation rule and the resulting coordinate shifts.

The Role of Vectors in Translation

Translation geometry worksheets, often available as PDFs, increasingly utilize vectors to represent translations. A vector, denoted as , defines the horizontal and vertical shift. This provides a concise and powerful way to express translation rules. Students learn to interpret vectors as instructions for moving points and shapes.

Worksheets demonstrate how adding a vector to a point’s coordinates achieves the translation. This connection between vectors and coordinate changes is fundamental. More advanced PDF worksheets explore vector addition, representing composite translations as the sum of individual vectors.

Understanding vector components allows students to visualize the direction and magnitude of the translation. This approach bridges geometry with algebraic concepts, enhancing problem-solving skills and providing a deeper understanding of translational transformations.

Identifying Translation Rules

Translation geometry worksheets, frequently found as PDF downloads, heavily emphasize identifying translation rules. These rules describe how each point in a figure is shifted. Worksheets present pre-image and image coordinates, challenging students to determine the consistent change in x and y values.

Students learn to express these rules algebraically, such as (x, y) → (x + a, y + b), where ‘a’ and ‘b’ represent the horizontal and vertical translation. PDF exercises often include diagrams where students visually inspect the shift and then formulate the rule.

More complex worksheets present multiple translations or require students to apply a given rule to a series of points. Mastering this skill is crucial for understanding the underlying principles of translational symmetry and geometric transformations.

Solving Problems with Translation Geometry Worksheets

Translation geometry worksheet PDFs provide practice applying translation rules to points, lines, and polygons, building problem-solving skills in coordinate geometry.

Translating Points on a Coordinate Plane

Translation geometry worksheet PDFs frequently begin with exercises focused on translating individual points. These worksheets present coordinates and a translation rule – often expressed as (x, y) → (x + a, y + b). Students apply this rule to each point, systematically adding ‘a’ to the x-coordinate and ‘b’ to the y-coordinate.

For example, if a point is at (2, 3) and the rule is (x, y) → (x ― 1, y + 2), the translated point becomes (1, 5). Worksheets often include coordinate grids where students plot both the original and translated points to visually confirm their calculations; More complex worksheets may involve multiple translations applied sequentially, requiring students to carefully track each step.

Understanding this foundational skill is vital, as it forms the basis for translating more complex geometric figures. These exercises reinforce the concept that translation represents a rigid motion, preserving distances and angles.

Translating Lines and Segments

Translation geometry worksheet PDFs progress to translating lines and line segments after mastering point translation. These worksheets typically provide the equation of a line or the coordinates of a segment’s endpoints, alongside a translation rule like (x, y) → (x + a, y + b). Students must then apply this rule to every point defining the line or segment.

For segments, this means translating both endpoints and then redrawing the segment connecting the new points. For lines, translating just two points is sufficient to define the translated line. Worksheets often ask students to write the equation of the translated line, requiring them to determine the new slope and y-intercept.

Visualizing these translations on a coordinate plane is crucial. The core principle remains: translation is a rigid transformation, preserving length and parallelism.

Translating Polygons

Translation geometry worksheet PDFs frequently feature exercises involving the translation of polygons. These worksheets present a polygon on a coordinate plane, defined by its vertices, alongside a translation rule – commonly expressed as (x, y) → (x + a, y + b). The student’s task is to apply this rule to each vertex of the polygon.

Accurately translating each vertex is paramount. Once translated, students connect the new points in the original order to redraw the translated polygon. Worksheets often emphasize that translation preserves size and shape; the translated polygon is congruent to the original.

More complex worksheets might ask students to find the area or perimeter of both the original and translated polygons, demonstrating that these properties remain unchanged.

Advanced Translation Geometry Concepts

Translation geometry worksheet PDFs extend to compositions, symmetry explorations, and even three-dimensional translations, building upon foundational skills.

Composition of Translations

Composition of translations involves performing multiple translations consecutively. A translation geometry worksheet PDF focusing on this concept presents scenarios where a figure undergoes a series of shifts. Students learn to determine the final position of a shape after applying several translation rules in a specific order.

These worksheets often require students to represent each translation as a vector and then combine those vectors – either graphically or algebraically – to find the resultant translation. Understanding that translation is commutative (the order doesn’t matter) is a key takeaway. More advanced worksheets might involve translating functions or equations, requiring a deeper grasp of coordinate transformations. The PDF format allows for clear visual representation of the translations and provides ample space for students to demonstrate their work and understanding of this complex geometric principle.

Translation and Symmetry

Translation geometry worksheet PDFs frequently explore the connection between translations and symmetry. While a single translation doesn’t create symmetry on its own, repeated translations can generate patterns exhibiting translational symmetry – a repeating motif shifted by a constant vector. These worksheets challenge students to identify such symmetries within geometric designs;

Exercises often involve determining the translation vector that maps one part of a symmetrical pattern onto another. Students analyze figures and predict how they will continue to repeat infinitely. Understanding this link reinforces the concept of transformations and their role in creating visually appealing and mathematically precise designs. The PDF format is ideal for presenting intricate patterns and allowing students to clearly mark and analyze the repeating translated elements, solidifying their comprehension of symmetry.

Translation in Three Dimensions

Translation geometry worksheet PDFs extend the concept beyond the two-dimensional plane into three dimensions. These worksheets introduce translation vectors represented by ordered triples (x, y, z), indicating the shift along each axis. Students learn to apply these vectors to points and shapes in 3D space, visualizing the movement in a new context.

Exercises often involve finding the new coordinates of points after a translation, or determining the translation vector given initial and final positions. The PDF format allows for clear representation of 3D coordinates and diagrams. Understanding 3D translation is crucial for fields like computer graphics and engineering. These worksheets build a foundation for more complex spatial reasoning and transformations, preparing students for advanced mathematical concepts and real-world applications.

Resources for Translation Geometry Worksheets

Numerous websites offer translation geometry worksheet PDFs for free or purchase, alongside online generators for customized practice and readily available answer keys.

Online Worksheet Generators

Online worksheet generators provide a dynamic approach to practicing translation geometry. These tools allow educators and students to create customized translation geometry worksheet PDFs tailored to specific learning needs. Users can often adjust parameters like coordinate plane size, the number of points or shapes to translate, and the complexity of the translation rules (e.g., simple shifts versus vector-based translations).

Several platforms offer this functionality, enabling the generation of unique worksheets with each attempt. This is particularly useful for preventing students from simply copying answers. Some generators also include options to randomize the translation vectors or rules, further enhancing the challenge. The generated worksheets are typically downloadable as PDF files, making them easily printable and distributable. These resources are invaluable for reinforcing concepts and providing targeted practice.

PDF Downloadable Worksheets

PDF downloadable worksheets represent a readily accessible and convenient resource for learning translation geometry. Numerous websites offer a wide variety of these worksheets, covering different skill levels and focusing on various aspects of translation, such as coordinate plane translations, translating geometric shapes, and utilizing vectors. The PDF format ensures consistent formatting across different devices and operating systems, simplifying printing and distribution.

These worksheets often include a range of problems, from basic translations of single points to more complex transformations of polygons. Many also provide answer keys for self-assessment or teacher use. Searching for “translation geometry worksheet PDF” yields numerous results, allowing educators and students to find materials that precisely match their curriculum and learning objectives. They are a staple for independent practice and homework assignments.

Worksheet Answer Keys

Worksheet answer keys are an indispensable component when utilizing translation geometry worksheet PDF resources. They provide immediate feedback, allowing students to verify their solutions and identify areas where they may need further practice or clarification. These keys typically accompany the worksheets, often as a separate PDF document, or are included on a final page within the same file.

Access to accurate answer keys fosters independent learning and self-assessment. Educators also benefit greatly, streamlining the grading process and enabling them to quickly pinpoint common misconceptions among students. When downloading translation geometry worksheets, always prioritize resources that include comprehensive answer keys. This ensures a more effective and efficient learning experience for everyone involved, promoting a deeper understanding of the concepts.

Applications of Translation Geometry

Translation geometry, practiced via worksheets (PDF format often used), finds real-world application in fields like computer graphics, robotics, and architectural design.

Computer Graphics and Image Processing

Translation geometry, reinforced through practice with worksheets – frequently found as PDF documents – is fundamental to computer graphics. It allows for the repositioning of objects within a digital scene without altering their shape or size. Image processing relies heavily on translations for tasks like image registration, where multiple images are aligned.

Consider moving a character in a video game; this is a translation; Similarly, adjusting the position of elements in a digital photograph utilizes these principles. Understanding the coordinate changes involved, often practiced on translation geometry worksheets, is vital for developers. The ability to accurately translate objects is crucial for creating realistic and dynamic visual experiences. These PDF resources provide a solid foundation for these complex applications, building skills in manipulating graphical elements effectively.

Robotics and Navigation

Translation geometry, honed through exercises found in translation geometry worksheets – often available as PDF files – is essential for robotics and navigation systems. Robots rely on precise movements, and translation is a core component of that. Calculating a robot’s new position after a linear movement directly applies these geometric principles.

Navigation systems, like those used in self-driving cars, constantly perform translations to map a vehicle’s position and plan routes. Understanding coordinate changes, a key skill developed using these worksheets, is paramount. The ability to define translation vectors and apply them accurately ensures robots and vehicles move as intended. These PDF resources provide the foundational knowledge for developing and implementing sophisticated robotic control and autonomous navigation algorithms, enabling efficient and accurate movement.

Architecture and Design

Translation geometry, practiced through translation geometry worksheets – frequently found as downloadable PDFs – plays a vital role in architectural and design processes. Architects utilize translations to create repeating patterns, symmetrical designs, and efficiently arrange elements within a building plan. Understanding how shapes shift without alteration is fundamental to spatial planning.

Designers employ these principles for tasks like tiling, wallpaper patterns, and creating modular components. The ability to accurately predict the new location of an object after a translation, reinforced by worksheet practice, is crucial for precise execution. These PDF resources help visualize and implement designs, ensuring aesthetic appeal and structural integrity. Mastering these concepts allows for innovative and efficient design solutions, impacting both form and function.

a long way gone pdf

A Long Way Gone: A Comprehensive Exploration of Ishmael Beah’s Memoir

Ishmael Beah’s powerful memoir, readily available as a PDF, details his experiences as a child soldier․
Numerous online resources offer free downloads,
facilitating access to this crucial narrative of war and resilience․

Ishmael Beah’s A Long Way Gone: Memoirs of a Boy Soldier is a harrowing and deeply moving account of his experiences during the Sierra Leone Civil War․ The book, frequently sought after in PDF format for accessibility, transcends a simple war story; it’s a profound exploration of childhood, trauma, and the devastating consequences of conflict․ Beah’s narrative begins with a relatively normal upbringing, abruptly shattered by the escalating violence that engulfed his country․

The memoir chronicles his forced separation from his family, his desperate journey for safety, and his eventual recruitment as a child soldier․ The availability of the text as a PDF allows for wider dissemination of this important story, reaching students, researchers, and anyone seeking to understand the realities faced by children in war․ Beah doesn’t shy away from the brutal details of his experiences, offering a raw and unflinching portrayal of the psychological and physical toll of war․

A Long Way Gone serves as a vital testament to the resilience of the human spirit and a powerful indictment of the use of child soldiers․ The ease of access through PDF versions underscores the book’s enduring relevance and its capacity to educate and inspire action․

The Author: Ishmael Beah – Background and Early Life

Ishmael Beah was born in 1980 in Mattru Jong, Sierra Leone․ Before the civil war irrevocably altered his life, he enjoyed a relatively typical childhood, filled with family, friends, and a passion for hip-hop music․ He often walked several miles to attend school, demonstrating a thirst for education that would later become a cornerstone of his recovery․ His early life was characterized by a strong sense of community and a vibrant cultural environment, all tragically disrupted by the escalating conflict․

The widespread availability of A Long Way Gone as a PDF allows readers to connect with Beah’s story on a deeper level, understanding the stark contrast between his peaceful beginnings and the horrors he would endure․ He began writing his story as part of a rehabilitation program facilitated by UNICEF, a process that proved instrumental in his healing․

Beah’s background highlights the innocence stolen from countless children caught in the crossfire of war․ The accessibility of his memoir in PDF format ensures his voice, and the voices of those he represents, continue to be heard globally, fostering empathy and promoting awareness․

Historical Context: The Sierra Leone Civil War (1991-2002)

The Sierra Leone Civil War, spanning from 1991 to 2002, was a brutal conflict fueled by economic grievances, political instability, and the illicit diamond trade – often referred to as “blood diamonds․” The Revolutionary United Front (RUF), led by Foday Sankoh, initiated the war, aiming to overthrow the government․ This conflict was notorious for its extreme violence against civilians, including widespread mutilation, rape, and the systematic recruitment of child soldiers;

Understanding this historical backdrop is crucial when reading Ishmael Beah’s A Long Way Gone, readily available as a PDF․ The PDF format allows for easy dissemination of this vital historical account, ensuring a broader understanding of the war’s devastating impact․ The RUF’s tactics deliberately targeted vulnerable populations, exploiting children for their ruthlessness and obedience․

The war’s legacy continues to affect Sierra Leone today․ Accessing the memoir as a PDF provides a powerful, first-hand perspective on the human cost of conflict, emphasizing the urgent need for peace, justice, and rehabilitation efforts․

The Initial Separation and Journey for Safety

Ishmael Beah’s harrowing journey begins with the abrupt separation from his family during an attack on his village․ Forced to flee with his older brother, Junior, he embarks on a desperate search for safety amidst the escalating chaos of the Sierra Leone Civil War․ This initial displacement marks a pivotal moment, shattering his childhood innocence and thrusting him into a world of unimaginable hardship․

The early stages of their flight involve traveling with groups of boys, constantly moving from village to village, seeking refuge from the RUF rebels․ This period is characterized by fear, uncertainty, and the growing realization of the war’s pervasive reach․ The availability of A Long Way Gone as a PDF allows readers to intimately experience this initial trauma․

The PDF version facilitates wider access to Beah’s account, highlighting the vulnerability of children caught in conflict․ The journey is a testament to the resilience of the human spirit, even in the face of overwhelming adversity, and the desperate measures taken to survive․

Arrival at Refugee Camps and Early Hardships

Upon reaching refugee camps, Ishmael and his companions encounter a different kind of struggle – one defined by overcrowding, scarcity of resources, and the constant threat of disease․ These camps, intended as havens, quickly become places of immense hardship, offering little in the way of comfort or security․ The PDF version of A Long Way Gone vividly portrays the desperation and despair experienced by the refugees․

The boys face relentless challenges, including hunger, lack of medical care, and the emotional toll of separation from their families․ The camps are not safe; attacks and raids are frequent, further traumatizing those seeking shelter․ The readily available PDF format allows for a deeper understanding of these conditions․

Beah details the loss of his brother, Junior, during this period, a devastating blow that intensifies his sense of isolation and vulnerability․ This loss foreshadows the further erosion of his innocence and sets the stage for his eventual recruitment․ Accessing the memoir as a PDF underscores the urgency of addressing the plight of displaced children․

Recruitment into the RUF: The Loss of Innocence

The PDF of A Long Way Gone details the harrowing moment Ishmael is forcibly recruited into the Revolutionary United Front (RUF); This marks a brutal turning point, signifying the complete destruction of his childhood and the irreversible loss of innocence․ Initially, he resists, but the relentless pressure and the sheer desperation for survival leave him with no choice․

Beah’s account, powerfully presented in the PDF version, reveals the systematic manipulation and coercion employed by the RUF to transform boys into soldiers․ He is stripped of his identity, his name replaced with a number, and subjected to intense psychological conditioning․ The memoir exposes the horrific reality of child soldiery․

The PDF format allows readers to confront the stark details of this process, emphasizing the trauma inflicted upon these young victims․ This recruitment isn’t portrayed as a heroic act, but as a violent abduction and a complete severing from any semblance of a normal life․ The downloadable PDF serves as a vital testament to this tragedy․

The Brutal Reality of Child Soldier Life

The PDF version of A Long Way Gone unflinchingly depicts the horrific realities endured by Ishmael and other child soldiers․ It’s a world saturated with violence, fueled by drugs, and devoid of compassion․ The downloadable PDF allows readers to witness firsthand the systematic dehumanization these children faced․

Beah’s memoir, accessible as a PDF, details constant exposure to death, the forced participation in raids, and the psychological toll of committing unspeakable acts․ The PDF emphasizes the loss of empathy, as boys are trained to kill without remorse, becoming instruments of war․ The narrative doesn’t shy away from the graphic details, offering a stark and disturbing portrayal․

The PDF format amplifies the impact of Beah’s testimony, allowing readers to grapple with the long-lasting consequences of trauma․ It highlights the complete erosion of childhood, replaced by a brutal existence defined by fear, obedience, and the constant threat of violence․ The readily available PDF serves as a powerful indictment of war’s impact on the most vulnerable․

Weapons Training and Indoctrination

The PDF of A Long Way Gone meticulously details the relentless weapons training inflicted upon Ishmael and the other boys․ It wasn’t simply about learning to fire an AK-47; it was a systematic process of stripping away their humanity and transforming them into killing machines․ Accessing the PDF reveals the brutal efficiency of this indoctrination․

Beah’s account, readily available as a PDF, illustrates how the Revolutionary United Front (RUF) used fear, drugs, and constant repetition to instill unwavering obedience․ The PDF highlights the psychological manipulation employed – boys were told their families were enemies, fostering a sense of isolation and dependence on the RUF․ The downloadable PDF showcases the erosion of moral boundaries․

The PDF format allows readers to fully comprehend the intensity of the training, from disassembling and reassembling weapons in the dark to enduring grueling physical exercises․ It’s a chilling depiction of how easily innocence can be corrupted․ The accessible PDF serves as a stark warning about the dangers of exploiting vulnerable children for warfare․

The Psychological Impact of Violence and Trauma

The readily available PDF of A Long Way Gone profoundly illustrates the devastating psychological toll of war on a young boy․ Ishmael Beah’s memoir, accessible as a PDF, doesn’t shy away from depicting the horrific nightmares, flashbacks, and emotional numbness he experienced․ Downloading the PDF allows readers to witness the unraveling of his childhood innocence․

The PDF reveals how the constant exposure to violence – witnessing and committing atrocities – fundamentally altered Beah’s perception of the world․ The PDF format emphasizes the long-lasting effects of trauma, including difficulty forming relationships and a pervasive sense of guilt․ The downloadable PDF showcases the struggle to reconcile his past actions with his desire for a normal life․

Through the detailed narrative within the PDF, we understand the profound impact of losing his family, friends, and identity․ The PDF serves as a powerful testament to the resilience of the human spirit, but also a stark reminder of the invisible wounds of war․ Accessing the PDF fosters empathy and understanding․

Drug Use and its Role in Maintaining Control

The PDF version of A Long Way Gone chillingly details the systematic use of drugs to control child soldiers, stripping them of their agency and turning them into ruthless killing machines․ Downloading the PDF provides a stark understanding of how substances like cocaine and marijuana were routinely administered to boys like Ishmael Beah․

The PDF reveals that these drugs weren’t simply recreational; they were tools of manipulation, suppressing fear and inhibiting moral reasoning․ Accessing the PDF allows readers to grasp how the RUF commanders exploited the vulnerability of these children, using drugs to desensitize them to violence and ensure obedience․ The PDF format highlights the dehumanizing aspect of this practice․

Through Beah’s firsthand account, presented in the PDF, we learn how drug use blurred the lines between reality and hallucination, making it easier to commit unspeakable acts․ The PDF underscores the devastating cycle of addiction and trauma․ The readily available PDF serves as a crucial resource for understanding the complexities of child soldiery․

Beah’s Experiences with Combat and Killing

The harrowing realities of combat and the act of killing are unflinchingly portrayed in the PDF version of A Long Way Gone․ Downloading the PDF offers a direct encounter with Ishmael Beah’s descent into violence, detailing his forced participation in brutal raids and battles․ The PDF doesn’t shy away from the psychological toll of taking a human life․

Through Beah’s narrative, accessible in the PDF, readers witness his initial reluctance and growing desensitization to violence․ The PDF reveals how he was compelled to carry out orders, becoming a cog in a machine of war․ The PDF format emphasizes the loss of innocence and the erosion of his moral compass․ Accessing the PDF provides a visceral understanding of the trauma inflicted upon child soldiers․

The PDF meticulously recounts specific instances of combat, illustrating the chaos, fear, and dehumanization inherent in warfare․ The PDF serves as a powerful testament to the devastating consequences of conflict, particularly for those forced to participate․ The readily available PDF is a crucial resource for understanding the human cost of war․

The Intervention of UNICEF and Rehabilitation Programs

The pivotal role of UNICEF and subsequent rehabilitation programs in Ishmael Beah’s life is comprehensively detailed within the accessible PDF of A Long Way Gone․ Downloading the PDF allows readers to trace Beah’s journey from a traumatized child soldier to a boy receiving crucial support․ The PDF highlights UNICEF’s intervention as a lifeline, offering a pathway towards healing and reintegration․

The PDF meticulously describes the rehabilitation center environment, emphasizing the therapeutic approaches employed to address the deep psychological wounds inflicted by war․ The PDF showcases the importance of counseling, education, and creative expression in Beah’s recovery․ Accessing the PDF reveals the challenges faced during rehabilitation, including nightmares, flashbacks, and difficulty trusting others․

The PDF underscores the dedication of the staff and the power of community in fostering healing․ The readily available PDF serves as a testament to the effectiveness of well-structured rehabilitation programs for child soldiers․ The PDF offers hope and demonstrates the possibility of rebuilding lives shattered by conflict․

Life at the Rehabilitation Center: Healing and Recovery

The PDF version of A Long Way Gone vividly portrays life within the rehabilitation center, a sanctuary designed for healing․ Downloading the PDF allows readers to experience, alongside Ishmael Beah, the initial disorientation and gradual adaptation to a life free from violence․ The PDF details the structured environment, emphasizing routines and therapeutic activities aimed at rebuilding trust and fostering emotional stability․

The PDF reveals the challenges Beah faced – battling nightmares, grappling with guilt, and learning to express emotions he’d long suppressed․ Accessing the PDF showcases the power of group therapy and individual counseling in processing trauma․ The PDF highlights the importance of creative outlets, like writing and storytelling, in reclaiming his voice and identity․

The readily available PDF demonstrates how education became a cornerstone of recovery, offering Beah a path towards a future beyond war․ The PDF underscores the center’s commitment to providing a safe and nurturing environment, fostering a sense of belonging and hope․ The PDF is a powerful testament to the resilience of the human spirit․

The Challenges of Reintegration into Society

The PDF of A Long Way Gone poignantly illustrates the immense hurdles Ishmael Beah encountered upon re-entering civilian life․ Downloading the PDF allows readers to understand the societal stigma faced by former child soldiers, and the difficulty in shedding the label of “killer․” The PDF details the suspicion and fear from communities struggling to accept those who had committed horrific acts․

The PDF reveals Beah’s internal struggles – navigating normal social interactions, forming healthy relationships, and reconciling his past with his present․ Accessing the PDF showcases the challenges of finding employment and overcoming the psychological scars of war․ The PDF highlights the lack of adequate support systems and resources for reintegration․

The readily available PDF demonstrates the importance of continued therapy and education in rebuilding a life․ The PDF underscores the need for societal understanding and forgiveness; The PDF serves as a stark reminder of the long-lasting consequences of conflict and the complexities of healing, offering a crucial perspective on post-conflict recovery․

Education as a Path to Healing and Hope

The PDF version of A Long Way Gone powerfully demonstrates how education became a lifeline for Ishmael Beah, offering a pathway away from the trauma of war․ Downloading the PDF allows readers to witness his transformation as he rediscovers a sense of self through learning․ The PDF details his dedication to schooling, viewing it as a means of reclaiming his stolen childhood and building a future․

Accessing the PDF reveals how education provided Beah with a safe space to process his experiences and articulate his pain․ The PDF showcases the power of knowledge in challenging the cycle of violence and fostering empathy․ The PDF highlights the importance of intellectual stimulation in rebuilding cognitive function damaged by trauma and drug use․

The readily available PDF underscores the role of education in empowering Beah to become an advocate for other child soldiers․ The PDF serves as a testament to the resilience of the human spirit and the transformative potential of learning․ The PDF offers a beacon of hope, illustrating that even after unimaginable horrors, a brighter future is possible through education․

Beah’s Testimony and Advocacy for Child Soldiers

The widely accessible PDF of A Long Way Gone serves as a crucial platform for Ishmael Beah’s powerful testimony, amplifying the voices of countless child soldiers worldwide․ Downloading the PDF allows readers to directly engage with his harrowing experiences and understand the devastating impact of war on vulnerable youth․ The PDF details his journey from victim to advocate, showcasing his unwavering commitment to raising awareness․

Through his memoir, available as a PDF, Beah tirelessly advocates for the rights and rehabilitation of child soldiers, challenging the international community to address the root causes of this horrific practice․ The PDF highlights his work with organizations like UNICEF, bringing attention to the urgent need for support and intervention․ The PDF demonstrates the importance of providing education, counseling, and reintegration programs․

The easily obtainable PDF empowers readers to become informed advocates themselves, fostering a global movement to end the recruitment and use of child soldiers․ The PDF is a testament to the power of storytelling in driving social change and promoting peace․ The PDF ensures Beah’s message reaches a wider audience, inspiring action and hope․

Themes Explored in “A Long Way Gone”

The readily available PDF version of A Long Way Gone allows for focused exploration of its profound themes․ Downloading the PDF facilitates a deeper understanding of the brutal loss of innocence experienced by child soldiers, vividly depicted within its pages․ The PDF showcases the corrosive power of violence and its lasting psychological scars, a central theme throughout Beah’s narrative․

Through the PDF, readers confront the complexities of identity and belonging, as Beah grapples with the erosion of his childhood and forced participation in horrific acts․ The PDF reveals the theme of survival against unimaginable odds, highlighting the resilience of the human spirit․ The PDF also explores the importance of memory and storytelling as tools for healing and reclaiming one’s humanity․

Accessing the PDF allows for close examination of the theme of rehabilitation and the challenges of reintegration into society after experiencing extreme trauma․ The PDF underscores the vital role of education and support systems in fostering recovery․ The PDF serves as a powerful reminder of the devastating consequences of war and the urgent need for peace․

Critical Reception and Literary Significance

The widespread availability of A Long Way Gone as a PDF has significantly contributed to its reach and impact, fostering critical discussion․ The PDF format allows educators to easily incorporate Beah’s memoir into curricula, prompting analysis of its literary merit and historical importance․ Critics have lauded the book’s raw honesty and unflinching portrayal of the Sierra Leone Civil War, readily accessible through the PDF․

The PDF version facilitates close readings of Beah’s prose, praised for its simplicity and emotional power․ Literary scholars recognize the memoir’s significance as a vital contribution to the genre of war literature and a powerful testament to the resilience of the human spirit, all within the PDF’s pages․ The PDF’s accessibility has broadened the audience engaging with these critical conversations․

The PDF has enabled global dissemination of Beah’s story, raising awareness about the plight of child soldiers and prompting advocacy efforts․ Its literary significance lies in its ability to humanize a complex conflict and challenge readers to confront uncomfortable truths, easily shared via the PDF․

“A Long Way Gone” as a PDF Resource: Accessibility and Distribution

The proliferation of A Long Way Gone in PDF format has dramatically increased its accessibility, particularly for educational purposes and in regions with limited access to physical books․ Numerous online platforms offer free PDF downloads, though copyright considerations should always be respected․ This widespread distribution, via the PDF, allows students and readers worldwide to engage with Beah’s harrowing story․

The PDF format’s portability and ease of sharing make it an ideal resource for book clubs, classrooms, and individual study․ The availability of a searchable PDF also facilitates research and analysis of the text․ However, users should be mindful of the source of the PDF to ensure its authenticity and quality․

The PDF version removes financial barriers to accessing this important memoir, promoting wider understanding of the experiences of child soldiers․ While purchasing a physical copy supports the author, the PDF serves as a crucial tool for democratizing knowledge and fostering global dialogue, readily available as a PDF․

Further Resources and Related Works

Beyond A Long Way Gone, several resources deepen understanding of child soldier experiences and the Sierra Leone Civil War․ Organizations like UNICEF offer reports and advocacy materials concerning children affected by conflict, often available as PDF documents for download․ Exploring these resources provides crucial context to Beah’s memoir․

Related memoirs, such as those by other former child soldiers, offer comparative perspectives on trauma, rehabilitation, and reintegration․ Academic articles and documentaries focusing on the Sierra Leone conflict provide historical and political analysis․ Many of these supplementary materials can be found online, frequently in PDF format, enhancing research capabilities․

For educators, lesson plans and discussion guides accompanying A Long Way Gone are often available as downloadable PDFs, facilitating classroom engagement․ Websites dedicated to human rights and conflict resolution also provide valuable information․ Accessing these diverse resources, including the readily available PDF of Beah’s work, fosters a more comprehensive understanding of this complex issue․