Month: March 2025

rainbow passage pdf

The Rainbow Passage PDF: A Comprehensive Guide (Updated 02/06/2026)

Today, February 6th, 2026, numerous online resources offer the Rainbow Passage in PDF format. These digital versions facilitate easy access for professionals and researchers alike.

Accessibility is a key consideration when utilizing these PDFs, ensuring inclusivity for diverse assessment needs.

Various versions exist, catering to specific requirements within speech-language pathology and related fields.

What is the Rainbow Passage?

The Rainbow Passage is a standardized oral reading passage, widely recognized and utilized across various professional disciplines. Originally developed by personnel at Bell Laboratories, it’s become a cornerstone in evaluating speech and language skills. Its consistent phonetic complexity makes it ideal for detailed assessments.

Today, the passage is frequently encountered in PDF format, offering convenient accessibility for practitioners. This digital format allows for easy distribution and consistent presentation during evaluations. The passage’s enduring relevance stems from its ability to elicit a broad range of speech sounds, making it valuable for identifying articulation and phonological disorders.

Furthermore, the Rainbow Passage isn’t limited to speech pathology; it also finds application in assessing reading fluency and voice quality. The availability of PDF versions streamlines the assessment process, particularly in remote settings. Its standardized nature ensures reliable and comparable results across different individuals and locations. The passage continues to be a vital tool for professionals seeking objective measures of communicative abilities.

Historical Origins of the Rainbow Passage

The Rainbow Passage’s origins trace back to the early 20th century and the work conducted at Bell Laboratories. Initially, it wasn’t designed for speech pathology, but rather as a tool for testing the quality of telephone receivers. Engineers needed a standardized passage to assess how accurately speech sounds were transmitted.

The passage’s specific content was carefully chosen to include a diverse range of phonemes – speech sounds – ensuring a comprehensive evaluation of audio fidelity. Over time, speech-language pathologists recognized its potential beyond telecommunications. The consistent phonetic structure proved invaluable for identifying speech impediments and articulation errors.

As technology evolved, so did the accessibility of the passage. The advent of PDF formats in the digital age has greatly simplified its distribution and use. While its initial purpose was technical, the Rainbow Passage has transitioned into a fundamental assessment tool, readily available in PDF form for professionals worldwide, maintaining its legacy of standardized evaluation.

Bell Laboratories and its Development

Bell Laboratories, a renowned research and development company, played a pivotal role in the creation of the Rainbow Passage. Established in 1925, Bell Labs was at the forefront of telecommunications innovation, constantly striving to improve the clarity and reliability of telephone technology.

The development of the passage wasn’t a deliberate effort to create a speech assessment tool. Instead, it emerged from the necessity to objectively evaluate the performance of telephone receivers. Engineers required a standardized text sample containing a broad spectrum of speech sounds to accurately measure transmission quality.

The passage’s carefully selected phonetic content allowed for consistent testing across different devices and network conditions. Later, the passage was digitized and became widely available in PDF format. This ensured its continued use and accessibility for speech-language pathologists. Bell Laboratories’ initial work inadvertently provided a valuable resource for the field of speech pathology, now easily distributed as a PDF.

The Passage’s Initial Purpose: Telephone Receiver Testing

Initially, the Rainbow Passage wasn’t designed for speech therapy; its primary function was rigorous telephone receiver testing at Bell Laboratories. Engineers needed a standardized method to assess the accuracy and fidelity of sound reproduction during telephone calls.

The passage’s carefully chosen words and phonetic diversity allowed for a comprehensive evaluation of receiver performance. By having individuals read the text, engineers could analyze how well the receiver transmitted various speech sounds – vowels, consonants, and diphthongs – across the telephone line.

The goal was to identify any distortions or inconsistencies in sound quality. The resulting data helped refine receiver designs and improve overall telephone communication. The availability of the passage in PDF format today allows for easy replication of these initial testing conditions. This historical context is crucial when understanding the passage’s unique characteristics and its continued relevance, even in digital PDF form.

Why is the Rainbow Passage Still Used Today?

Despite its origins in telephony, the Rainbow Passage remains a valuable tool due to its consistent phonetic complexity. Its enduring utility stems from its ability to reliably elicit a wide range of speech sounds, making it ideal for standardized assessments.

Professionals continue to utilize the passage, often accessed in convenient PDF format, for evaluating speech clarity, articulation, and phonological skills. The passage’s standardized nature allows for consistent comparisons across individuals and over time.

Furthermore, the Rainbow Passage serves as a benchmark for voice quality analysis. The readily available PDF versions facilitate remote assessments and research. Online communities, like the Rainbow 6 Discord, demonstrate continued interest in the passage’s legacy, highlighting its lasting impact beyond its initial purpose. Its continued use underscores its effectiveness and adaptability in modern speech-language pathology.

The Rainbow Passage Text & Content

PDF versions of the passage contain the original text, designed for phonetic analysis. Accessing it digitally ensures consistent content for standardized evaluations and research purposes.

The Full Text of the Rainbow Passage

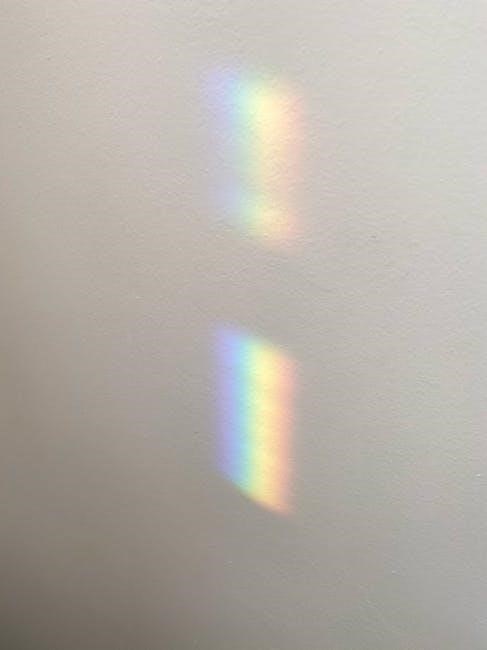
The complete Rainbow Passage text, readily available in numerous PDF formats online, reads as follows: “The sun came out and we saw a rainbow. The tropical butterfly’s wings were shimmering with all the colors of the rainbow. Two drifters off to see the world; there’s such a lot of world to see. Were after the same rainbows end, waiting round the bend. Moon River, the song from the movie Breakfast at Tiffanys.”

This passage, originally developed by Bell Laboratories, is a concise yet phonetically diverse sample. Its consistent structure and recognizable vocabulary make it ideal for standardized speech assessments. The PDF format ensures faithful reproduction of the original text, eliminating variations that could impact assessment reliability. Digital availability allows for convenient distribution and use in remote evaluations, a growing trend in speech-language pathology. The passage’s brevity also makes it suitable for quick screening purposes.

Researchers and clinicians rely on the standardized text within these PDFs to maintain consistency across evaluations and studies.

Linguistic Features of the Passage

The Rainbow Passage, frequently accessed via PDF documents, exhibits several key linguistic characteristics. It incorporates a blend of simple and complex sentence structures, offering a range of grammatical challenges. The passage features a diverse phonetic inventory, including sounds often misarticulated by individuals with speech sound disorders.

Notably, it contains multiple instances of vowel sounds and consonant blends, providing ample opportunity to assess articulation clarity. The text’s poetic quality, drawing from the song “Moon River,” introduces figurative language and a slightly elevated vocabulary. PDF versions preserve these nuances, ensuring accurate linguistic analysis.

The passage’s relatively short length allows for repeated readings, facilitating detailed examination of prosody and fluency. Its widespread availability in PDF format promotes standardized linguistic assessment across various clinical settings.

Phonetic Characteristics & Sound Inventory

The Rainbow Passage, commonly distributed as a PDF, is phonetically rich, making it ideal for speech assessment. It contains a broad spectrum of phonemes, including frequently misarticulated sounds like /r/, /s/, and /θ/. The passage’s structure allows for the evaluation of consonant clusters – “drifters,” “world” – and vowel variations, crucial for identifying phonological patterns.

PDF accessibility ensures consistent phonetic presentation, regardless of the device used. The text includes both voiced and voiceless sounds, providing a comprehensive phonetic sample. Analyzing the passage via PDF allows clinicians to assess articulation precision, speech rate, and prosodic features.

Its standardized nature, preserved in PDF format, facilitates comparative analysis of speech samples. The passage’s phonetic complexity makes it a valuable tool for diagnosing and monitoring speech sound disorders.

Common Words and Phrases Used

The Rainbow Passage, readily available as a PDF, features recurring linguistic elements that contribute to its assessment utility. Frequent words include articles (“the,” “a”), prepositions (“of,” “to,” “around”), and common verbs (“see,” “were,” “waiting”). Phrases like “off to see the world” and “waiting round the bend” appear, providing context for evaluating fluency and prosody.

The PDF format ensures consistent presentation of these key phrases. Analyzing the repetition of these elements helps assess an individual’s ability to maintain speech rhythm and articulation accuracy. The passage’s vocabulary, while relatively simple, allows for observation of grammatical structure and sentence formulation.

Clinicians utilize these commonalities within the PDF to identify patterns in speech errors and assess overall language proficiency. The consistent phrasing aids in standardized evaluation and comparison of results.

Rainbow Passage Applications & Uses

PDF accessibility enhances its use in speech-language pathology, articulation assessments, and reading fluency evaluations. Digital formats support remote testing and voice quality analysis.

Speech and Language Pathology

The Rainbow Passage, readily available in PDF format, is a cornerstone tool for speech and language pathologists (SLPs). Its standardized nature allows for consistent and reliable assessments of various speech parameters. SLPs utilize the passage to evaluate articulation, phonological processes, and overall speech clarity in individuals with communication disorders.

PDF versions offer practical advantages, enabling easy printing, digital annotation, and remote administration of assessments. The passage’s phonetic complexity, encompassing a wide range of sounds, makes it ideal for identifying specific speech sound errors. Furthermore, the text’s length provides sufficient material for assessing speech fluency and prosody.

Accessibility features within PDF readers, such as text-to-speech functionality, can also be leveraged to support individuals with reading difficulties during assessment. The standardized scoring protocols, combined with the passage’s consistent linguistic features, contribute to objective and meaningful results, guiding individualized treatment planning and progress monitoring.

Articulation and Phonological Assessment

The Rainbow Passage, conveniently accessed as a PDF, serves as a valuable resource for detailed articulation and phonological assessments. Its carefully selected phonemes allow clinicians to efficiently identify speech sound errors – distortions, substitutions, and omissions – across various sound classes. The standardized text ensures consistent stimulus presentation, crucial for reliable data collection.

PDF format facilitates easy scoring and documentation of errors, often utilizing standardized phonetic transcription. SLPs analyze error patterns to determine if they represent developmental delays or underlying phonological disorders. The passage’s length provides ample opportunity to observe error consistency and variability.

Utilizing the PDF version allows for repeated administrations to track progress during intervention. Clinicians can highlight errors directly on the digital document, streamlining the assessment process. The Rainbow Passage’s established norms and widespread use contribute to the validity and comparability of assessment results, informing targeted therapy goals.

Reading Fluency Evaluation

The Rainbow Passage, readily available in PDF format, is a frequently employed tool for evaluating reading fluency. Its standardized text allows for objective measurement of reading rate, accuracy, and prosody – the expressive qualities of reading. Clinicians and educators utilize the passage to gauge a reader’s ability to decode text smoothly and efficiently.

PDF versions simplify administration, allowing for timed readings and easy recording of words correct per minute (WCPM). Analyzing reading speed alongside accuracy provides a comprehensive picture of fluency. Observing prosody – phrasing, intonation, and stress – reveals comprehension and engagement with the text.

The passage’s consistent length and readability level make it suitable for tracking progress over time. Repeated readings with the PDF document allow for monitoring improvements in fluency skills. This data informs instructional decisions and helps tailor interventions to address specific reading challenges, ultimately fostering confident and proficient readers.

Voice Quality Analysis

Utilizing the Rainbow Passage in PDF format extends beyond reading assessment, serving as a valuable resource for voice quality analysis. The standardized nature of the text minimizes linguistic variability, allowing clinicians to focus on vocal characteristics. Professionals can assess parameters like pitch, loudness, resonance, and articulation during a recorded reading from the PDF.

PDF accessibility enables remote analysis, facilitating telehealth applications and wider access to specialized evaluations. Analyzing vocal features helps identify potential voice disorders, such as hoarseness, breathiness, or strained vocal quality. The passage’s phonetic diversity challenges the vocal mechanism, revealing subtle anomalies.

Objective measures, combined with perceptual judgments, provide a comprehensive voice profile. This information guides treatment planning for individuals with voice impairments, aiming to improve vocal health and communication effectiveness. The Rainbow Passage, therefore, is a versatile tool for both diagnostic and therapeutic purposes.

Rainbow Passage in Digital Formats (PDF)

PDF versions of the Rainbow Passage are widely available online, offering convenient access for professionals. These digital formats support remote assessments and easy distribution.

Availability of Rainbow Passage PDFs Online

Numerous sources provide the Rainbow Passage in PDF format, making it readily accessible to speech-language pathologists, researchers, and educators. A simple online search reveals a multitude of downloadable PDFs, catering to various needs and preferences. Websites dedicated to speech therapy resources frequently host these files, often offering multiple versions or variations of the passage.

Furthermore, professional organizations and academic institutions may also provide access to Rainbow Passage PDFs through their online portals or digital libraries. The widespread availability of these digital documents significantly streamlines the assessment process, eliminating the need for manual transcription or photocopying.

However, it’s crucial to verify the source and ensure the PDF is a standardized version of the passage to maintain assessment reliability. The ease of access contributes to its continued use in diverse clinical and research settings, supporting consistent evaluation practices.

Different PDF Versions and Variations

While the core text of the Rainbow Passage remains consistent, several PDF versions and variations are available online. These differences often relate to formatting, such as font size, line spacing, and the inclusion of specific instructions for administration and scoring. Some PDFs may feature highlighted phonetic symbols or annotations to aid in analysis.

Variations can also include different layouts designed for specific assessment tools or software. Certain versions might be optimized for screen readers, enhancing accessibility for individuals with visual impairments. It’s important to note that subtle formatting changes can potentially influence reading rates and articulation patterns.

Therefore, clinicians should carefully select a standardized PDF version and maintain consistency across assessments. Utilizing the same format ensures reliable data collection and minimizes the impact of extraneous variables. Awareness of these variations is crucial for accurate interpretation of results and comparable data analysis.

Using PDFs for Remote Assessments

The advent of telehealth has significantly expanded the use of Rainbow Passage PDFs for remote speech and language assessments. Digital formats allow clinicians to administer the passage virtually, overcoming geographical barriers and increasing accessibility for clients. Screen-sharing capabilities enable real-time observation of reading performance, while recording features capture audio for detailed phonetic analysis.

However, successful remote assessment requires careful consideration of technical factors. Ensuring a stable internet connection and appropriate audio-visual equipment is paramount. Clinicians must also verify the client’s ability to accurately display and interact with the PDF document.

Security and confidentiality are also vital concerns when transmitting sensitive assessment data. Utilizing secure platforms and adhering to HIPAA guidelines are essential for protecting client privacy. Despite these challenges, PDFs offer a practical and efficient solution for conducting comprehensive evaluations remotely.

PDF Accessibility Considerations

Ensuring Rainbow Passage PDFs are accessible is crucial for equitable assessment practices. Individuals with visual impairments or reading difficulties may require accommodations to participate fully. PDFs should be tagged correctly to enable screen readers to interpret the text accurately, allowing users to navigate and comprehend the passage effectively.

Font size and contrast are also important factors. Providing options for adjusting these settings enhances readability for individuals with low vision. Alternative text descriptions for any images or graphics within the PDF are essential for screen reader users.

Furthermore, PDFs should adhere to WCAG (Web Content Accessibility Guidelines) standards to maximize inclusivity. Regularly testing PDFs with assistive technologies helps identify and address potential barriers. Prioritizing accessibility ensures that all individuals have an equal opportunity to demonstrate their skills.

Rainbow Passage & Related Communities

Online communities, like the Rainbow 6 Discord and subreddit, discuss related topics. While not directly focused on the PDF, they offer a space for related discussions.

Rainbow 6 Discord Server

While seemingly unrelated to the technical aspects of the Rainbow Passage PDF itself, the Rainbow 6 Discord server (accessible via https://discord.gg/rainbow6) functions as a vibrant hub for enthusiasts of the Rainbow Six franchise. This community, primarily focused on the tactical shooter game Rainbow Six Siege, occasionally features discussions touching upon the broader history and lore associated with the “Rainbow” branding.

Although direct conversations about the passage’s PDF format or linguistic properties are infrequent, the server provides a platform where individuals interested in the “Rainbow” theme might encounter references to its origins. Users share information, strategies, and engage in general conversation about the game and its universe. It’s a space where the cultural impact of the “Rainbow” name – the origin of the passage’s moniker – is actively discussed and celebrated.

Therefore, while not a dedicated resource for the Rainbow Passage PDF, the Discord server represents a connected community where the broader “Rainbow” concept resonates, potentially leading to tangential awareness or interest in its historical roots.

Rainbow Six Subreddit Discussions

The Rainbow Six subreddit, a dedicated online forum for fans of the Rainbow Six series, presents a similar, albeit broader, connection to the Rainbow Passage than the Discord server. While the primary focus remains on Rainbow Six Siege and related tactical gameplay, discussions occasionally veer into the historical context of the “Rainbow” name.

Users frequently share news, feedback on the Test Server (r/Rainbow6SiegeTS), and engage in general conversation about the franchise. Though direct inquiries about the Rainbow Passage PDF are rare, the subreddit serves as a repository of community knowledge where the origins of the “Rainbow” branding might surface.

Posts referencing the passage’s development by Bell Laboratories, or its use in telephony testing, occasionally appear, demonstrating a level of awareness within the community. It’s a space where the cultural significance of “Rainbow” is debated and explored, offering a tangential link to the passage’s history and digital availability.

Rainbow Six Siege Test Server Feedback

The Rainbow Six Siege Test Server subreddit (r/Rainbow6SiegeTS), dedicated to providing feedback on upcoming game changes, surprisingly exhibits minimal direct discussion regarding the Rainbow Passage PDF. The focus remains firmly on gameplay mechanics, operator balancing, and bug reporting within the evolving game environment.

However, the very existence of a “Rainbow” themed game and its dedicated testing phase indirectly acknowledges the legacy of the name’s origin. Players contributing feedback are, unknowingly, participating in a digital extension of a brand rooted in the Bell Laboratories passage.

While not explicitly referencing the PDF or its linguistic properties, the subreddit’s active community demonstrates ongoing engagement with the “Rainbow” identifier. It’s a space where the brand is constantly scrutinized and redefined, a far cry from its initial purpose, yet still connected by a shared name and history.

The “Over the Rainbow” Locomotive (90014)

The British Rail Class 37 locomotive, number 90014, named “Over the Rainbow,” presents a fascinating, albeit tangential, connection to the Rainbow Passage. While seemingly unrelated to speech pathology or telephone testing, the locomotive’s name highlights the enduring cultural resonance of the “rainbow” concept.

Interestingly, the locomotive features a “Rainbow plate” below its name, a subtle visual link. This demonstrates how the imagery has permeated various aspects of British culture since the passage’s development. The locomotive’s existence, documented as of January 4th, 2025, serves as a curious parallel to the passage’s continued use in modern assessments.

The locomotive’s name, evoking a sense of hope and journey, mirrors the passage’s role as a standardized tool for evaluating communication skills. Both represent a reaching for something beyond the immediate, a pursuit of clarity and connection.

the honor guard manual pdf

The Honor Guard Manual PDF: A Comprehensive Guide

Honor guard manuals in PDF format offer detailed protocols‚ historical context‚ and specific team procedures – from USAF standards to Civil Air Patrol guidelines.

Understanding the Purpose of Honor Guard Manuals

Honor guard manuals‚ often available as PDF documents‚ serve as essential references for maintaining tradition‚ precision‚ and respect during ceremonial duties. These guides standardize procedures for various teams – including rifle guards‚ color teams‚ and pallbearers – ensuring uniformity across different branches and organizations.

They detail proper protocol‚ honors rendered‚ and specific movements‚ like the silent three-count‚ vital for dignified presentations. PDF format allows for easy access‚ distribution‚ and updates‚ supporting consistent training and adherence to established guidelines‚ as seen in USAF and USPHS protocols.

Historical Context of Honor Guards

Honor guard traditions trace back centuries‚ initially serving as protective measures for dignitaries and symbols of authority. The Clearwater Fire Rescue manual notes origins in the Continental Army‚ highlighting early roles in security and symbolic representation.

Over time‚ these groups evolved to embody respect and reverence‚ particularly during military and state ceremonies. PDF manuals preserve this history‚ codifying established protocols and ensuring continuity. They document the evolution of procedures‚ from early formations to modern standards‚ maintaining the dignity inherent in these solemn duties.

USAF Honor Guard Protocol and Ceremonies

USAF Honor Guard procedures‚ detailed in relevant PDF manuals like AFMAN 36-2203‚ emphasize precision and respect. These guides cover basic protocol elements‚ including stance‚ movements‚ and salutes. The three-count movement is fundamental for rendering honors‚ synchronized across rifle guards and flag bearers.

PDF resources outline specific ceremonies‚ ensuring adherence to Air Force Instructions (AFI) and Training Circulars (TC). Proper hand positioning and securing the flag are critical‚ as described in the DrillMaster’s manual‚ showcasing the importance of detailed instruction.

Basic Protocol Elements

PDF honor guard manuals meticulously detail fundamental protocol elements. These include maintaining correct posture – locked wrists and a firm stance – during ceremonies. USAF guides emphasize a silent three-count for rendering honors‚ ensuring synchronized movements. Proper hand placement‚ like keeping the right hand along trouser seams‚ is crucial.

PDF resources illustrate securing the flag with a fist grip on the sling cup. These elements‚ found in manuals like the DrillMaster’s‚ are vital for precision and demonstrating respect during all honor guard duties.

Honors Rendered: A Three-Count Movement

PDF honor guard manuals consistently highlight the “honors rendered” procedure as a synchronized three-count movement. This applies universally‚ from rifle guards to flag bearers‚ ensuring uniformity. The first count prepares the team‚ the second initiates the movement‚ and the third secures the final position.

USAF and USPHS guides emphasize a silent execution of this count. PDF resources‚ like the DrillMaster’s manual‚ often include diagrams illustrating proper form during each count‚ vital for precision and respect.

US Public Health Service Commissioned Corps Honor Guard

PDF versions of the US Public Health Service (USPHS) Commissioned Corps Surgeon General’s Honor Guard (SGHG) Drill and Ceremonies Manual are crucial resources. These manuals‚ guided by Commissioned Corps Instructions (CCI) 421.01‚ 421.02‚ and 512.01‚ clearly define the SGHG’s roles and responsibilities.

PDF access ensures adherence to official USPHS policy. The manual details procedures for all SGHG functions‚ promoting standardized ceremonial practices and upholding the Corps’ traditions‚ readily available for download.

Roles and Responsibilities of the SGHG

The SGHG manual PDF meticulously outlines the team’s duties‚ encompassing participation in official ceremonies honoring distinguished guests and recognizing significant achievements within the US Public Health Service Commissioned Corps. PDF access ensures members understand their obligations.

PDF documentation details responsibilities like presenting the colors‚ rendering honors‚ and participating in memorial services. The manual emphasizes maintaining a high standard of professionalism and representing the Corps with dignity‚ all clearly defined within the PDF format.

Governing Instructions and Policies

The SGHG manual PDF is firmly rooted in Commissioned Corps Instructions (CCI) 421.01‚ 421.02‚ and 512.01‚ establishing official US Public Health Service policy. Accessing the PDF ensures adherence to these governing directives‚ outlining conduct and operational procedures.

PDF documentation details uniform regulations‚ participation eligibility‚ and guidelines for ceremonial events. This PDF resource provides a comprehensive framework‚ ensuring all SGHG activities align with established protocols and maintain the highest standards of professionalism and respect.

Civil Air Patrol Honor Guard Manual

The Civil Air Patrol Honor Guard Manual PDF is meticulously derived from several authoritative sources‚ including Air Force Manual (AFMAN) 36-2203 and Air Force Instruction (AFI) 34-1201. This PDF ensures alignment with established military protocol and standards.

Furthermore‚ the PDF incorporates guidance from Army Training Circular (TC) 3-21.5 and Air Force Directive (AFD) 130219-033‚ specifically concerning USAF Honor Guard Training. Accessing this PDF guarantees adherence to a comprehensive and standardized framework for all CAP honor guard activities.

Derivation from Air Force Manuals

The Civil Air Patrol Honor Guard Manual PDF heavily relies on established Air Force Manuals (AFMAN) as its foundational basis. Specifically‚ AFMAN 36-2203‚ covering Drill and Ceremonies‚ provides the core structure and procedures detailed within the PDF document.

This derivation ensures consistency and adherence to recognized military standards. By mirroring Air Force protocols‚ the PDF facilitates seamless integration and interoperability during joint ceremonies‚ upholding a unified standard of honor and respect across all branches.

Alignment with AFI and TC Standards

The Civil Air Patrol Honor Guard Manual PDF doesn’t solely depend on AFMANs; it also aligns with Air Force Instructions (AFI) 34-1201‚ focusing on protocol‚ and AFPAM 34-1202‚ a guide to proper protocol execution. Furthermore‚ the PDF incorporates guidance from Army Training Circular (TC) 3-21.5‚ detailing drill and ceremonies.

This multi-faceted alignment ensures the PDF reflects best practices and maintains a high level of standardization‚ promoting precision and discipline within the Civil Air Patrol’s honor guard operations.

The DrillMaster’s Honor Guard Manual

The DrillMaster’s Honor Guard Manual PDF distinguishes itself as a comprehensive resource‚ being the only one with extensive descriptions and photographic guides for all honor guard movements. This PDF covers every ceremony‚ including Pall Bearers‚ Firing Parties‚ and Color Teams.

It provides detailed instructions for both the 2-Man and 6-Man Flag Fold techniques‚ as well as Cordon procedures‚ making it an invaluable tool for training and execution.

Comprehensive Coverage of Honor Guard Movements

The DrillMaster’s Honor Guard Manual PDF excels in its detailed coverage of movements‚ offering photographic guides for every ceremony. This PDF meticulously outlines procedures for Pall Bearers‚ the Firing Party‚ and the Color Team‚ ensuring precision.

Furthermore‚ it provides step-by-step instructions and visuals for both the 2-Man and 6-Man Flag Fold‚ alongside Cordon formations‚ making it a truly comprehensive resource for honor guard training.

Detailed Descriptions and Photographic Guides

The DrillMaster’s Honor Guard Manual PDF distinguishes itself with extensive descriptions and accompanying photographs of all honor guard movements. This PDF resource doesn’t just tell you how to perform a maneuver‚ it shows you‚ enhancing understanding and replication.

These visual aids are invaluable for mastering complex formations and ensuring uniformity within the team‚ covering every aspect of honor guard ceremonies with clarity and precision.

Specific Honor Guard Teams and Their Procedures

Honor guard manuals in PDF format dedicate sections to specialized teams like Pall Bearers and Firing Parties. These PDF guides detail the unique responsibilities and techniques required for each role‚ ensuring dignified and respectful execution of duties.

The PDF resources cover rifle salutes‚ flag folding (both 2-man and 6-man techniques)‚ and cordon procedures‚ providing comprehensive instructions for a variety of ceremonial events.

Pall Bearers: Responsibilities and Techniques

Honor guard manuals in PDF format extensively describe Pall Bearer duties‚ emphasizing synchronized movements and respectful handling of the casket. PDF guides detail proper lifting techniques‚ maintaining a consistent pace‚ and precise positioning during processionals.

These PDF resources often include photographic guides illustrating correct posture and hand placement‚ ensuring a dignified presentation. Manuals stress the importance of teamwork and silent communication for a flawless performance.

Firing Party: Execution of Rifle Salutes

Honor guard manuals in PDF format provide meticulous instructions for the firing party‚ detailing rifle salute execution. PDF guides cover precise timing‚ synchronized volleys‚ and proper weapon handling procedures. They emphasize safety protocols and maintaining a consistent firing rhythm.

These PDF resources often include diagrams illustrating firing positions and team formations. Manuals stress the solemnity of the salute and the importance of respectful‚ coordinated movements during this crucial honor.

Color Team (Color Guard) Procedures

Honor guard manuals in PDF format dedicate significant sections to Color Team procedures‚ outlining flag bearer hand positioning and movement. PDF guides detail the silent three-count for rendering honors‚ ensuring synchronized respect. They emphasize maintaining proper flag etiquette and dignified presentation.

These PDF resources illustrate correct grip techniques and flag carriage‚ stressing precision and reverence. Manuals cover formations‚ transitions‚ and protocols for posting and retrieving the colors with utmost respect.

Flag Bearer Hand Positioning

Honor guard manuals in PDF format meticulously detail flag bearer hand positioning‚ emphasizing a secure and respectful grip. PDF guides specify keeping the right hand along the trouser seam‚ while the left hand forms a fist around the sling cup.

These PDF resources illustrate locked wrists and curled fingers to secure the flag‚ maintaining a dignified posture. Manuals stress consistent hand placement during all movements‚ particularly during the silent three-count for rendering honors‚ ensuring precision and reverence.

Silent Three-Count for Rendering Honors

Honor guard manuals in PDF format universally emphasize the silent three-count as fundamental to rendering honors. PDF guides detail this synchronized movement for both rifle guards and flag bearers‚ ensuring uniformity and respect.

These PDF resources explain the count’s purpose: a precise‚ silent execution of presenting and withdrawing honors. Manuals highlight the importance of maintaining stillness and focus throughout the three counts‚ demonstrating discipline and reverence during ceremonial events. Consistency‚ as detailed in the PDF‚ is key.

Flag Folding Ceremonies

Honor guard manuals in PDF format dedicate significant sections to flag folding‚ outlining both the 2-man and 6-man techniques with meticulous detail. These PDF guides provide step-by-step instructions‚ often accompanied by photographic illustrations‚ ensuring proper execution.

PDF resources emphasize the symbolic meaning embedded within each fold‚ connecting the ceremony to patriotic values. Manuals stress precision and uniformity‚ vital for representing respect and honor. The PDF format allows for easy reference during training and performance.

2-Man Flag Fold Technique

Honor guard manuals in PDF format detail the 2-man flag fold as a streamlined method for situations with limited personnel. PDF guides illustrate synchronized movements‚ emphasizing communication and coordination between the two individuals.

These PDF resources break down each fold into precise steps‚ ensuring a crisp and respectful presentation. Manuals often include diagrams clarifying hand placements and folding sequences. The PDF format facilitates easy access for practice and review‚ promoting proficiency in this traditional ceremony.

6-Man Flag Fold Technique

Honor guard manuals in PDF format comprehensively illustrate the traditional 6-man flag folding ceremony. These PDF guides detail each individual’s role and precise movements‚ ensuring synchronized execution and a visually impactful tribute.

PDF resources often include diagrams and step-by-step instructions‚ clarifying hand positions and folding sequences. Manuals emphasize the symbolic meaning behind each fold‚ reinforcing respect and reverence. Accessing this information in PDF format allows for convenient study and consistent performance.

Clearwater Fire Rescue Honor Guard Manual

PDF versions of the Clearwater Fire Rescue Honor Guard Drill and Ceremonies Manual detail the team’s historical roots in Continental Army traditions. These PDF guides outline protective measures and the symbolic representation inherent in their ceremonies.

The PDF provides a structured approach to drill and ceremonies‚ ensuring precision and uniformity. Accessing the manual in PDF format facilitates easy reference for training and event preparation‚ upholding the honor guard’s commitment to respect and professionalism.

Historical Origins in the Continental Army

PDF documentation reveals that honor guards originated in the Continental Army‚ initially serving dual roles as both protective forces and symbols of respect. These early formations showcased discipline and allegiance.

The Clearwater Fire Rescue Honor Guard’s PDF manual emphasizes this historical connection‚ tracing its lineage to these foundational military practices. Understanding these origins‚ detailed within the PDF‚ informs the team’s modern protocols and reinforces the significance of their ceremonial duties.

Protective Measures and Symbolic Representation

PDF manuals‚ like the Clearwater Fire Rescue’s‚ illustrate how honor guards historically functioned as protective details for key figures‚ ensuring their safety during events. Beyond security‚ these teams embody symbolic representation‚ conveying honor‚ respect‚ and solemnity.

The PDF details how precise movements and dignified bearing communicate reverence. This dual function – protection and symbolism – is consistently emphasized throughout the PDF‚ highlighting the honor guard’s vital role in ceremonies and public appearances.

Accessing and Utilizing Honor Guard Manuals in PDF Format

PDF versions of honor guard manuals are readily available through various online resources‚ offering convenient access to crucial protocols and procedures. Regularly downloading and reviewing these PDF documents is essential for maintaining proficiency.

Effective utilization requires consistent training and updates‚ ensuring all members adhere to the latest standards. The PDF format allows for easy distribution and reference during drills‚ fostering precision and respect within the honor guard team.

Online Resources for PDF Downloads

Accessing honor guard manuals in PDF format is streamlined through official websites of respective organizations. The USAF‚ US Public Health Service‚ and Civil Air Patrol often host these resources. Amazon.com also provides access to publications like “The Honor Guard Manual” by John Marshall.

Furthermore‚ searching for specific branch “honor guard manual PDF” yields relevant results. Ensure downloaded files originate from trusted sources to guarantee accuracy and adherence to current protocols. Regular checks for updated versions are crucial.

Importance of Regular Training and Updates

Consistent training‚ guided by the latest honor guard manual PDF versions‚ is paramount for maintaining precision and respect. Protocols evolve‚ necessitating updates to reflect current standards – like those outlined in AFI and TC standards.

Regular practice reinforces proper execution of movements‚ honors rendered‚ and ceremonial procedures. Staying current ensures teams adhere to governing instructions and policies‚ upholding the dignity and solemnity of these important events. Manual revisions address new technologies and best practices.

Future Trends in Honor Guard Training and Manuals

Future honor guard training‚ detailed in updated PDF manuals‚ will likely integrate new technologies for enhanced precision and efficiency. Emphasis will remain on meticulous execution and unwavering respect for traditions.

Expect to see expanded use of virtual reality for practice and refinement of movements. Manuals will adapt to incorporate these advancements‚ alongside a continued focus on core protocol elements. Maintaining the solemnity and dignity of ceremonies remains central‚ guided by evolving standards.

Integration of New Technologies

Modern honor guard PDF manuals are poised to reflect the integration of innovative technologies into training regimens. Virtual reality simulations offer realistic practice environments‚ enhancing precision and minimizing logistical challenges.

Digital resources‚ including video analysis tools‚ will aid in refining movements and adherence to protocol. Expect augmented reality applications to provide real-time feedback during drills. These advancements‚ documented in updated manuals‚ aim to elevate performance while preserving the core values of honor and respect.

Emphasis on Precision and Respect

Contemporary honor guard PDF manuals consistently underscore the paramount importance of precision in every movement and the unwavering demonstration of respect. These documents detail exacting standards for rifle salutes‚ flag handling‚ and ceremonial formations.

They reinforce the symbolic weight of each action‚ emphasizing the honor bestowed upon those remembered and the dignity of the service. Updated manuals will likely further refine these aspects‚ ensuring continued reverence and flawless execution of duties.

cuisinart food processor manual 14-cup

Cuisinart 14-Cup Food Processor Manual: A Comprehensive Guide

This manual details the Cuisinart DFP-14BCNYC, covering setup, operation, recipes, and troubleshooting for optimal use of your 14-cup food processor.

Welcome to the world of efficient food preparation with the Cuisinart DFP-14BCNYC Custom 14-Cup Food Processor! This powerful appliance, part of the Classic Series, is designed to simplify a multitude of kitchen tasks. From chopping vegetables and making dough to slicing fruits, this food processor delivers consistent, professional results.

This manual serves as a comprehensive guide, ensuring you fully understand and utilize all the features of your new Cuisinart appliance. It covers everything from initial setup and safety precautions to detailed operating instructions and helpful recipes. Explore the versatility of the included work bowls – 14-cup, 11-cup, and 4.5-cup – and accessories to unlock a new level of culinary convenience.

Understanding the Key Features

The Cuisinart DFP-14BCNYC boasts a robust motor designed for efficiency and power, capable of handling diverse food processing needs. Its large 14-cup work bowl is ideal for family-sized meals and batch cooking, while the included 11-cup and 4.5-cup bowls offer versatility for smaller portions.

Key features include multiple speed settings – Low, Medium, and High – plus a Pulse function for precise control. The included blade assembly excels at chopping, and a dedicated dough blade simplifies bread and pastry making. A slicing disc expands functionality, allowing for uniform vegetable and fruit preparation. Safety features ensure secure operation throughout the process.

Package Contents & Accessories

Your Cuisinart 14-Cup Food Processor package includes several essential components for versatile food preparation. You’ll find the motor base, a substantial 14-cup work bowl, alongside a convenient 11-cup and a smaller 4.5-cup work bowl for varied tasks.

Essential accessories are also included: a metal chopping blade for general processing, a dedicated dough blade for bread and pastry, and a slicing disc for uniform cuts. The package also contains a pusher assembly, ensuring safe ingredient feeding. These components combine to provide a comprehensive food processing solution, ready for immediate use.

Work Bowls (14-Cup, 11-Cup, 4.5-Cup)

The Cuisinart 14-Cup Food Processor boasts three work bowls, offering flexibility for diverse culinary needs. The largest, a 14-cup (3.5L) bowl, is ideal for large batches and family-sized meals. A medium 11-cup bowl provides a practical size for everyday tasks, while the compact 4.5-cup bowl excels at smaller preparations like dips, sauces, or chopping individual portions.

These work bowls are constructed from durable, BPA-free plastic and feature clear measurement markings for accurate ingredient additions. Their varying capacities allow you to select the optimal size, minimizing waste and maximizing efficiency during food processing.

Blade Assembly – Chopping Blade

The Cuisinart 14-Cup Food Processor’s metal chopping blade is a cornerstone of its versatility. Constructed from high-quality stainless steel, this blade effortlessly handles a wide range of ingredients, from vegetables and fruits to nuts and cheeses. Its design ensures even chopping and consistent results, saving valuable preparation time.

Proper installation is crucial: the blade must securely attach to the processor’s spindle in the work bowl. Always handle the blade with care, as the edges are exceptionally sharp. This blade is a standard part included with the processor.

Dough Blade

The Cuisinart 14-Cup Food Processor includes a specialized dough blade, designed for efficient and consistent kneading. This blade’s unique shape mimics the action of hand-kneading, quickly bringing dough ingredients together for breads, pizza, and pastries. It significantly reduces kneading time compared to traditional methods, delivering perfect results every time.

When using the dough blade, ensure the work bowl is dry. The blade securely attaches to the spindle. Recipes in the included booklet provide guidance for optimal dough consistency. This blade is a standard accessory.

Slicing Disc

The Cuisinart 14-Cup Food Processor’s slicing disc enables quick and uniform slicing of fruits and vegetables. This accessory is ideal for preparing salads, gratins, or garnishes with professional precision. The disc easily attaches to the food processor base, offering adjustable thickness settings for varied slice styles.

Always use the food pusher to safely guide ingredients across the disc; Ensure the work bowl is properly assembled before operation. Cleaning the slicing disc requires careful handling due to its sharp edges; hand washing is recommended for longevity.

Safety Precautions

Prioritize safety when operating your Cuisinart 14-Cup Food Processor. Always unplug the appliance before assembly, disassembly, or cleaning. Never operate with damaged parts or a loose lid. Keep hands and utensils away from the moving blade during operation – utilize the pusher consistently.

Do not immerse the motor housing in water. Supervise children closely when the appliance is in use. Avoid processing hot liquids, as they can create pressure. Ensure the unit is stable on a flat surface before use, and never overload the work bowl.

Before First Use: Cleaning & Preparation

Proper preparation ensures optimal performance and hygiene. Before initial use, thoroughly wash all removable parts – work bowls (14-, 11-, and 4.5-cup), lid, pusher assembly, and blades – in warm, soapy water. Rinse completely and dry. The motor housing should be wiped clean with a damp cloth; avoid immersion.

Inspect all components for any damage. Familiarize yourself with each part’s function. This initial cleaning removes any manufacturing residue. Ensure all parts are fully dry before assembling the food processor for the first time, guaranteeing a safe and effective operation.

Assembling the Food Processor

Correct assembly is crucial for safe operation. Begin by placing the chosen work bowl securely onto the processor base, ensuring it locks into place. Next, carefully position the lid onto the work bowl, aligning the tabs and rotating until it clicks, indicating a secure fit.

Finally, install the pusher assembly by inserting it into the feed tube opening on the lid. Verify all components are firmly attached before operation. Improper assembly can lead to malfunctions or potential hazards. Always double-check the locking mechanisms before powering on the appliance.

Attaching the Work Bowl

Securely mounting the work bowl is the first step in assembly. Position the desired work bowl (14-cup, 11-cup, or 4.5-cup) onto the food processor base. Align the bowl with the base, noticing the designated grooves or alignment indicators.

Gently but firmly press down on the work bowl and rotate it clockwise until it locks into position. A distinct click confirms a secure attachment. Ensure the bowl is stable and doesn’t wobble before proceeding. Incorrect attachment can prevent proper operation and pose a safety risk.

Securing the Lid

Proper lid placement is crucial for safe and effective operation. Carefully position the lid onto the assembled work bowl, ensuring it aligns correctly with the bowl’s rim and the processor base. The lid features locking tabs that must engage with corresponding slots on the bowl.

Press down firmly on the lid and rotate it clockwise until you hear a clear “click,” indicating it’s securely locked. The food processor will not operate unless the lid is fully locked. Never attempt to override this safety feature. Verify the lid is firmly attached before adding food or powering on the appliance.

Pusher Assembly Installation

The pusher assembly is essential for safely guiding food through the feed tube. Locate the pusher assembly, consisting of the large pusher and the smaller feeding tube insert; Insert the appropriate tube insert into the opening on the lid, selecting the size that best accommodates the food you’re processing.

Place the large pusher on top of the insert. Ensure it moves freely within the feed tube. The pusher is designed to apply gentle pressure to food, directing it towards the blade. Never use your hands or other utensils to push food down the feed tube; always utilize the provided pusher assembly for safety.

Operating Instructions

Before operation, ensure the unit is properly assembled with the work bowl securely locked in place. The Cuisinart 14-Cup Food Processor features intuitive controls. The On/Off control initiates and stops the motor. Utilize the Pulse function for short bursts of power, ideal for chopping or preventing over-processing.

Select the desired speed – Low, Medium, or High – based on the recipe or food preparation task. Start with a lower speed and increase as needed. Avoid prolonged operation at high speed for delicate ingredients. Always use the pusher when feeding food through the feed tube, never your hands!

Pulse Function Explained

The Pulse function delivers short, controlled bursts of power when the On/Off control is pressed and held. This is exceptionally useful for tasks requiring precise control, like coarsely chopping vegetables or creating textured sauces. Unlike continuous operation, the motor only runs while the button is depressed, preventing over-processing.

Use pulsing for ingredients needing a specific consistency – for example, chopping nuts without turning them into butter. It’s also ideal for starting dough mixtures, combining ingredients briefly, or achieving a chunky salsa. Release the button to stop the blade immediately.

Low, Medium, and High Speed Settings

The Cuisinart 14-Cup Food Processor offers three speed settings: Low, Medium, and High, providing versatility for diverse food preparation tasks. Low speed is best for coarsely chopping, shredding, or mixing delicate ingredients. Medium speed excels at slicing, grating, and pureeing softer foods like cooked vegetables.

High speed is designed for tougher tasks – kneading dough, emulsifying sauces, or finely chopping hard vegetables. Start with a lower speed and increase as needed to achieve the desired consistency. Remember, the appropriate speed depends on the recipe and ingredient type.

On/Off Control

The Cuisinart 14-Cup Food Processor features a simple and intuitive On/Off control for effortless operation. This control initiates and stops the motor, allowing precise command over processing. To start, simply press the On/Off button; the processor will run continuously until the button is pressed again to stop.

Combined with the Pulse function, this control offers complete flexibility. Always ensure the lid is securely locked in place before operating. Never attempt to override the safety mechanisms. Proper use of the On/Off control ensures safe and efficient food preparation.

Using the 14-Cup Work Bowl

The 14-Cup Work Bowl is ideal for large-batch processing, such as chopping vegetables for stocks, making bread dough, or preparing large salads. Ensure the bowl is properly seated and locked onto the processor base before adding ingredients. Utilize the appropriate blade – the chopping blade for general processing or the dough blade for kneading.

Avoid overfilling; leave space for ingredients to circulate. The pusher assembly is crucial for safely guiding food towards the blade. Always operate with the lid securely fastened for safety and optimal results.

Using the 11-Cup Work Bowl

The 11-Cup Work Bowl offers a versatile mid-size option, perfect for tasks requiring a smaller capacity than the 14-Cup bowl, yet still substantial for family-sized portions. It’s excellent for sauces, pâtés, or smaller batches of dough. Ensure secure attachment to the base before operation.

Like the larger bowl, utilize the correct blade for the task and avoid overfilling. The pusher assembly remains essential for safe and efficient food processing. Remember to always lock the lid firmly in place before activating the processor.

Using the 4.5-Cup Work Bowl

The 4.5-Cup Work Bowl is ideal for smaller jobs – think chopping herbs, making salad dressings, or grinding spices. Its compact size provides greater control and efficiency when processing limited quantities. It’s particularly useful for tasks where larger bowls would leave ingredients unevenly processed.

Always ensure the bowl is securely locked onto the processor base; Utilize the pusher for safe ingredient feeding. Remember, even with this smaller bowl, never operate the processor without the lid firmly locked in position for safety.

Recipes & Food Preparation Ideas

Unlock culinary creativity with your Cuisinart! This processor excels at dough making – effortlessly kneading bread, pizza, or pastry dough in a fraction of the time compared to hand kneading, ensuring consistent results. Easily chop vegetables for soups, stews, or salsas, achieving uniform pieces quickly.

Slice fruits and vegetables for salads or snacks with precision using the slicing disc. Explore recipes in the included booklet, like white bread, and adapt them to your preferences. Experiment with pesto, hummus, and various dips!

Making Dough with the Cuisinart 14-Cup

The Cuisinart 14-Cup excels at dough preparation. Utilize the dough blade for optimal kneading, significantly reducing the time and effort compared to manual methods. Begin by combining dry ingredients, then gradually add liquids through the feed tube while the machine is running.

Process until the dough forms a ball, adjusting consistency as needed. Avoid over-processing, which can result in tough dough. Refer to the recipe booklet for specific instructions, such as the white bread recipe, and enjoy perfectly kneaded dough every time!

Chopping Vegetables

The Cuisinart 14-Cup food processor simplifies vegetable preparation. Employ the metal chopping blade for consistent results. Cut vegetables into uniform sizes before processing for even chopping. Utilize the pulse function for coarse chops or run continuously for finer textures.

Avoid overcrowding the work bowl to ensure thorough processing. For larger quantities, work in batches. This appliance efficiently handles onions, carrots, celery, and more, saving valuable time in the kitchen and delivering perfectly chopped vegetables for your recipes.

Slicing Fruits & Vegetables

Achieve uniform slices with the Cuisinart’s slicing disc. Ensure the disc is securely attached before operation. Firm fruits and vegetables, like cucumbers, zucchini, and potatoes, slice most effectively. Use the pusher to gently guide food through the feed tube.

Adjust the thickness setting on the slicing disc for desired slice thickness. For softer fruits, like tomatoes, a slower speed may prevent crushing. Always exercise caution when using the slicing disc and never attempt to reach inside while the blade is in motion.

Troubleshooting Common Issues

If the motor overheats, immediately stop the food processor and unplug it. Allow it to cool completely before resuming use. A non-rotating blade usually indicates improper assembly – ensure the blade is correctly locked into the work bowl.

If the lid isn’t locking, verify it’s properly aligned with the work bowl and that the locking tabs are engaged. Avoid forcing it. For any persistent issues, consult the full manual or Cuisinart support. Never operate the processor if components aren’t securely fastened.

Motor Overheating

Motor overheating can occur during prolonged use or when processing very hard ingredients. If this happens, the food processor will likely stop functioning. Immediately unplug the unit and allow the motor to cool down completely – this could take 30-60 minutes.

Avoid overloading the work bowl, and process ingredients in batches if necessary. Ensure proper ventilation around the unit. Repeated overheating may indicate a problem; contact Cuisinart support for assistance. Following recipe guidelines helps prevent strain on the motor.

Blade Not Rotating

If the blade isn’t rotating, first ensure the unit is plugged in and the lid is securely locked into place – it won’t operate otherwise. Check that the blade assembly is correctly attached to the work bowl’s center post. Avoid forcing it; proper alignment is key.

Overfilled bowls can also prevent rotation. Reduce the ingredient quantity. If the issue persists, inspect the blade for damage or obstructions. Never attempt repairs yourself; contact Cuisinart customer service for guidance and potential replacement parts.

Lid Not Locking

A lid that won’t lock is a common safety feature preventing operation. Ensure the work bowl is correctly positioned on the base and isn’t overfilled. Verify the lid is aligned with the arrows on both the lid and the work bowl, then apply firm, even pressure.

The pusher assembly must be properly installed for the safety interlock to function. Inspect the locking rings for debris or damage. Do not force the lid; if it still won’t lock, discontinue use and contact Cuisinart support for assistance to avoid potential hazards.

Cleaning and Maintenance

Regular cleaning ensures optimal performance and longevity of your Cuisinart food processor. Many parts – work bowls, lids, and pusher assemblies – are dishwasher safe (top rack recommended). However, hand washing blades and discs preserves their sharpness.

For stubborn food residue, use warm, soapy water and a soft brush. Avoid abrasive cleaners. Thoroughly dry all components before reassembly. Proper storage involves keeping the blades safely covered and the unit in a clean, dry location. Inspect for damage before each use.

Dishwasher Safe Parts

Convenience is key with the Cuisinart 14-Cup Food Processor! The 14-cup, 11-cup, and 4.5-cup work bowls, along with the work bowl covers and pusher assembly, are all designed to be safely cleaned on the top rack of your dishwasher. This simplifies cleanup after food preparation.

However, to maintain optimal condition, it’s recommended to avoid prolonged exposure to high heat. While dishwasher safe, hand washing can extend the lifespan of certain plastic components. Always ensure parts are thoroughly rinsed and dried before storage.

Hand Washing Instructions

For delicate cleaning, or if you prefer, hand washing is an excellent option for your Cuisinart 14-Cup Food Processor parts. Use warm, soapy water and a soft sponge or cloth. Avoid abrasive cleaners, as they can scratch the surfaces.

Carefully wash the work bowls, lids, and pusher assembly. The blades require extra caution; handle them carefully to avoid cuts. Rinse thoroughly under warm water and allow all parts to air dry completely before reassembling or storing. This method helps preserve the quality and longevity of your appliance.

Proper Storage

To maximize the lifespan of your Cuisinart 14-Cup Food Processor, proper storage is crucial. Ensure all parts are completely dry before storing to prevent mildew or odors. The work bowls can be stacked, but avoid placing heavy items on top.

Store the blade assembly separately and securely, ideally in a designated container or wrapped to prevent accidental contact. Keep the motor base in a clean, dry place, away from direct sunlight and extreme temperatures. Proper storage ensures your appliance remains ready for its next culinary task.

Warranty Information

Cuisinart provides a limited warranty for the DFP-14BCNYC 14-Cup Food Processor. This typically covers defects in materials and workmanship for a specified period, usually one year from the date of original purchase.

The warranty does not cover damage resulting from misuse, accidents, or unauthorized repairs. To make a warranty claim, retain your proof of purchase and contact Cuisinart customer service. Detailed warranty terms and conditions are available in the accompanying documentation or on the Cuisinart website.

Technical Specifications

The Cuisinart DFP-14BCNYC boasts a powerful motor, typically ranging from 600 to 700 watts, ensuring efficient food processing. It features multiple speed settings – low, medium, and high – plus a pulse function for precise control. Work bowl capacities include 14-cup, 11-cup, and 4.5-cup options.

Dimensions vary, but generally, the unit is around 11 x 8 x 14 inches. Voltage requirements are standard 120V. The processor is constructed with durable materials, including BPA-free plastic and stainless steel blades. Weight is approximately 13 pounds.

Model Variations (DFP-14N, Elite Collection)

The Cuisinart DFP-14N is a closely related model, often sharing similar features and accessories with the DFP-14BCNYC. The “Elite Collection” represents a premium line, potentially offering enhanced features like a more robust motor or upgraded materials. These variations may include additional accessories or specialized discs not found in the standard model.

Both models maintain the core functionality of the 14-cup capacity and versatile processing capabilities. Differences often lie in cosmetic details and bundled accessories, catering to varying user needs and budgets. Check specific model details for exact specifications.

Comparing to Previous Models (Cuisinart CPT180)

Compared to older Cuisinart models like the CPT180, the DFP-14BCNYC (and related 14-cup versions) represent a significant upgrade in capacity and functionality. The CPT180 was primarily a toaster, while the DFP-14 series focuses on comprehensive food processing – chopping, slicing, shredding, and dough making.

The 14-cup models boast a more powerful motor and a wider range of included discs and blades. They offer greater versatility for diverse culinary tasks. While the CPT180 excelled at toasting, the DFP-14 series provides a complete food preparation solution.

Additional Cuisinart Products (Air Fryers)

Cuisinart extends its kitchen appliance expertise beyond food processors, offering a diverse range of products, notably their air fryers. These include models like the Cuisinart XXL Dual-Zone Air Fryer, praised for its large capacity and ability to cook multiple items simultaneously.

These air fryers feature clear viewing windows for easy monitoring and boast three-year warranties, highlighting Cuisinart’s commitment to quality. They provide a healthier alternative to traditional frying, delivering crispy results with less oil. Exploring Cuisinart air fryers complements the functionality of your 14-cup food processor.

Where to Find Additional Support & Resources

For comprehensive assistance with your Cuisinart DFP-14BCNYC 14-Cup Food Processor, several resources are readily available. Cuisinart’s official website provides downloadable manuals in multiple languages, including English and German (Bedienungsanleitung). You can access detailed guides covering all aspects of operation, from initial setup to troubleshooting common issues.

Furthermore, online tutorials and frequently asked questions sections offer quick solutions. Should you require direct support, Cuisinart’s customer service team is accessible via phone or email. Explore these resources to maximize your food processor experience.

legend bluetooth manual

Legend Bluetooth Manual: Comprehensive Guide

This comprehensive guide details setup, pairing, operation, and troubleshooting for your Legend Bluetooth headset, including the Voyager Legend 50.

The Legend Bluetooth headset offers seamless connectivity for calls, music, and voice assistant access. This user guide provides essential instructions for optimal use, covering pairing with mobile phones and laptops. Features include automatic call answering and transfer capabilities. Explore enhanced audio quality and convenient controls for a superior wireless experience, detailed within this manual.

Unboxing and Package Contents

Upon unboxing your Legend Bluetooth headset, ensure you have all components. The Legend 5 Silverback includes two acoustic systems, two protective grilles, two power cables, and this user manual. Verify all items are present and undamaged. Missing components should be reported immediately to ensure a complete and functional setup for your new device.

Legend 5 Silverback Components

The Legend 5 Silverback package specifically contains two crucial acoustic systems designed for optimal audio performance. Alongside these, you’ll find two protective grilles, safeguarding the speakers from potential damage. These components work in tandem to deliver a superior listening experience, ensuring clarity and durability for your Bluetooth headset usage.

Included Accessories

Your Legend Bluetooth headset package includes essential accessories for immediate use. You’ll receive two power cables to ensure reliable charging, and two acoustic systems for enhanced audio quality. A comprehensive user manual is also provided, detailing setup, operation, and troubleshooting steps. These components guarantee a seamless and user-friendly experience right out of the box.

Understanding the Headset Features

The Legend Bluetooth headset boasts intuitive features designed for seamless connectivity and clear communication. Key components facilitate easy call management and audio control. Understanding the LED indicator meanings is crucial for monitoring pairing status, battery life, and call activity. This section details each function, ensuring optimal performance and a user-friendly experience.

Key Components and Their Functions

The Legend headset incorporates essential components for optimal use. These include acoustic systems for clear audio, protective meshes safeguarding internal parts, and power cables for charging. The headset automatically answers calls when placed on the ear and transfers them between phone and device. Proper understanding of these functions enhances usability.

LED Indicator Meanings

The headset’s LED provides crucial status information. A flashing red and blue light signifies pairing mode, indicating readiness to connect with a new Bluetooth device. During operation, different colors and flashing patterns communicate call status, battery level, and connection stability. Understanding these signals ensures seamless usage and troubleshooting.

Pairing the Legend Bluetooth Headset

To establish a connection, ensure your headset is in pairing mode – indicated by alternating red and blue LED flashes. Activate Bluetooth on your device and initiate a search for available connections. Select “TWS Legend” from the list to complete the pairing process. This allows seamless audio transfer.

Pairing with Mobile Phones

Initiate pairing by placing the headset on your ear and powering it on; the LED will flash red and blue. Enable Bluetooth on your mobile phone and search for new devices. Choose “TWS Legend” when it appears in the list. Confirm the pairing request if prompted, establishing a hands-free connection for calls and audio.

Pairing with Laptops and Other Devices

To pair with laptops or other Bluetooth-enabled devices, ensure the headset is in pairing mode – indicated by alternating red and blue LED flashes. Access the Bluetooth settings on your device and initiate a scan for available devices. Select “TWS Legend” from the discovered list to establish a connection for audio and communication.

Using the Headset for Calls

The Legend headset facilitates seamless call management. Answer incoming calls by simply pressing a designated button on the device. To end a call, press the same button again. Furthermore, the automatic call answering feature allows hands-free operation by placing the headset on your ear, initiating call acceptance.

Answering and Ending Calls

To answer a call with your Legend headset, a simple press of the designated call control button is all that’s needed. Conversely, ending an active call is equally straightforward – another press of the same button will disconnect the call. Ensure clear audio during operation.

Automatic Call Answering Feature

The Legend headset boasts an innovative auto-answer function; simply placing the headset on your ear automatically answers incoming calls. This hands-free convenience streamlines communication. However, ensure this feature is enabled within the Bluetooth settings for optimal functionality and a seamless call experience.

Audio Features and Controls

The Legend Bluetooth headset delivers exceptional audio for calls and music. Utilize integrated controls for seamless operation. Adjust volume levels to your preference, and effortlessly manage music playback – pause, play, and skip tracks directly from the headset. Enjoy clear sound and convenient control during every use.

Music Playback Controls

The Legend headset allows convenient music control. Pause and resume playback with a single touch. Skip forward or backward through tracks effortlessly, managing your audio experience without needing to access your paired device. Enjoy uninterrupted listening, controlling your music directly from the headset for ultimate convenience and ease of use.

Volume Adjustment

Adjust the volume on your Legend headset easily. Utilize dedicated controls to increase or decrease the audio level to your preference. Ensure clear call quality and immersive music listening. Fine-tune the sound for any environment, guaranteeing optimal audio performance. Precise volume control enhances your overall user experience with the device.

Voice Commands and Virtual Assistant Integration

Activate your virtual assistant effortlessly with the Legend headset; Supported commands allow hands-free control for calls, music, and more. Seamless integration streamlines your daily tasks. Enjoy convenient operation without needing to touch your connected device. Experience enhanced productivity and accessibility through voice-activated features, simplifying your interactions.

Activating Voice Assistant

To activate the voice assistant, consult your mobile device’s specific instructions, as the process varies. Typically, a long press on the multi-function button initiates the assistant. Ensure your phone is paired and recognizes the headset for seamless activation. Confirm voice assistant settings are enabled on your smartphone for optimal performance.

Supported Voice Commands

The Legend headset supports standard voice commands compatible with your smartphone’s virtual assistant – Siri, Google Assistant, or others. Common commands include making calls (“Call John”), sending texts (“Text Mom I’m running late”), and playing music (“Play my playlist”). Specific command availability depends on your phone’s assistant.

Troubleshooting Common Issues

If your Legend headset isn’t pairing, ensure Bluetooth is enabled on both devices and the headset is in pairing mode (flashing red/blue). For poor audio, check the volume levels and ensure no obstructions interfere with the Bluetooth connection. Restarting both devices often resolves connectivity problems.

Headset Not Pairing

If the Legend headset fails to pair, verify Bluetooth is active on your phone or laptop. Confirm the headset is in pairing mode, indicated by alternating red and blue LED flashes. Delete previous pairings and retry. Ensure the headset isn’t already connected to another device, potentially causing interference.

Poor Audio Quality

Experiencing muffled or distorted audio? Ensure the headset is fully charged, as low battery can impact performance. Reduce distance between the headset and paired device. Check for interference from other Bluetooth devices or physical obstructions. Clean the headset’s speaker mesh for clearer sound transmission. Restart both devices.

Maintaining Your Legend Headset

To ensure longevity, regularly clean your Legend headset with a soft, dry cloth. Avoid harsh chemicals or abrasives. Store the headset in a cool, dry place when not in use, protecting it from extreme temperatures and humidity. Proper storage prevents damage and maintains optimal performance. Keep it away from water!

Cleaning Instructions

Regular cleaning is vital for hygiene and performance. Use a soft, dry microfiber cloth to wipe down the headset’s exterior. For stubborn marks, lightly dampen the cloth with water – ensure no liquid enters openings. Avoid solvents, abrasive cleaners, or excessive moisture, as these can cause damage.

Storage Recommendations

Proper storage extends your headset’s lifespan. When not in use, store the Legend Bluetooth headset in a cool, dry place, away from direct sunlight and extreme temperatures. A protective case is recommended to prevent dust accumulation and physical damage. Avoid storing with sharp objects that could scratch the surface.

Bluetooth Connectivity Details

The Legend Bluetooth headset utilizes Bluetooth technology for wireless connection. Expect a standard Bluetooth range, though performance can vary based on environmental factors. Multiple device pairing is supported, allowing seamless switching between a phone and laptop. Ensure Bluetooth is enabled on both devices for successful connectivity.

Bluetooth Version and Range

The Legend headset employs Bluetooth for a wireless experience. While the specific Bluetooth version isn’t explicitly stated, expect compatibility with common Bluetooth profiles. Typical Bluetooth range is up to 33 feet (10 meters), but walls and interference can reduce this. Optimal performance requires a clear line of sight between devices.

Multiple Device Pairing

The Legend headset supports pairing with multiple devices, allowing seamless switching between a mobile phone and laptop. However, active connection is typically limited to one device at a time. To connect to another, disable Bluetooth on the current device or manually select the desired device within your Bluetooth settings.

Safety and Regulatory Information

Important safety precautions include avoiding exposure to water, as the Bluetooth headphones are not waterproof. Ensure responsible usage and adhere to all applicable regulations. This device complies with relevant safety standards. Refer to the full user guide for detailed compliance information and operating instructions to ensure safe and legal operation.

Important Safety Precautions

Avoid water exposure; these Bluetooth headphones are not waterproof. Use responsibly and follow all guidelines. Do not disassemble the device. Prolonged high-volume listening can damage hearing. Keep away from extreme temperatures and direct sunlight. Discontinue use if damage occurs. Always prioritize safe operation and adhere to local regulations.

Compliance Information

This device adheres to relevant safety standards and regulations. It complies with Bluetooth specifications for interoperability. Refer to the product documentation for specific certifications and approvals; Operation is subject to local restrictions. The manufacturer is not responsible for non-compliance resulting from unauthorized modifications. Ensure adherence to all applicable laws.

Changing the Device Name

To personalize your headset, you can modify its Bluetooth name. Access your device’s Bluetooth settings, locate “TWS Legend” in the paired devices list, and select it. A renaming option will appear, allowing you to input a new, unique identifier. Save the changes for the updated name to reflect.

Accessing Bluetooth Settings

To begin renaming your Legend headset, first navigate to the Bluetooth settings on your paired device – typically a smartphone or laptop. Locate the settings menu, then select “Bluetooth” to view a list of connected and available devices. Find your “TWS Legend” headset within this list to proceed.

Renaming the TWS Legend

Once selected, tap on the “TWS Legend” entry. A menu will appear, offering options related to the device. Choose the option to “Rename” or “Edit” the device name. Input your desired new name using the on-screen keyboard, then confirm your changes. The headset will now appear with the new name.

Poly Voyager Legend 50 Bluetooth Headset Overview

This overview provides essential user information for the Poly Voyager Legend 50 Bluetooth headset. The guide focuses on task-based instructions, covering pairing with mobile devices, proper headset fitting, initiating and managing calls, and utilizing voice command functionality. Legal information regarding the device is also included for reference.

User Guide Summary

This user guide comprehensively details setting up and effectively using your Voyager Legend Bluetooth headset, alongside the BT300 Bluetooth USB Adapter. It covers essential functions like automatic call answering, seamless call transfer between phone and headset, and pairing procedures. Instructions ensure optimal performance and user experience.

Legal Information

Poly (formerly Plantronics) retains all intellectual property rights to the Voyager Legend and associated documentation. This guide is for user assistance only and does not grant any licensing rights. All trademarks are the property of their respective owners. Compliance with safety and regulatory standards is paramount; refer to the full manual for details.

pure chlor salt system manual

Pure Chlor Salt Systems offer a revolutionary approach to pool sanitation, simplifying water care and enhancing the swimming experience.

These systems convert dissolved salt into chlorine through electrolysis, providing a consistent and gentle sanitizing solution.

Contact Solaxx Customer Service for questions, and remember regular salt cell cleaning is vital for optimal system operation.

What is a Pure Chlor Salt System?

A Pure Chlor Salt System represents a significant advancement in pool and spa sanitation technology. Unlike traditional chlorination methods relying on manually added chemicals, these systems generate chlorine automatically through the electrolysis of salt dissolved in your pool water. Essentially, the system converts ordinary salt (sodium chloride) into chlorine, bromine, and other sanitizing agents.

This process occurs within the salt cell, the core component of the system. The generated chlorine effectively sanitizes the water, eliminating bacteria, algae, and other contaminants. A key benefit is consistent chlorine levels, reducing the need for frequent testing and adjustments. Remember to check the salt level and clean the cell regularly for optimal performance, as indicated by the control panel.

Benefits of Using a Salt Chlorinator

Employing a salt chlorinator delivers numerous advantages over conventional chlorine systems. Enjoy consistently soft, clean water, as salt-generated chlorine is gentler on skin, eyes, and hair, minimizing irritation. Say goodbye to harsh chemical odors – salt chlorination produces a more natural swimming experience.

Furthermore, these systems reduce the need for purchasing, handling, and storing hazardous chlorine tablets or liquid. Maintenance is simplified, though regular salt cell cleaning and water chemistry checks remain crucial. A flashing “Check Cell” light indicates potential issues, like low salt or a cell nearing the end of its lifespan, requiring attention.

System Components

A Pure Chlor Salt System comprises a salt cell, a control panel for monitoring, and a flow sensor ensuring proper operation.

These components work harmoniously to convert salt into chlorine for effective pool sanitation.

Salt Cell: The Core of the System

The salt cell is the heart of a Pure Chlor Salt System, responsible for converting dissolved salt (sodium chloride) into chlorine gas through a process called electrolysis. This chlorine then sanitizes your pool water, eliminating bacteria and algae.

The cell contains titanium plates coated with precious metals, which facilitate the electrolytic reaction. Over time, these plates can wear down due to usage, impacting the cell’s efficiency. A flashing “Low Salt” light can indicate worn blades.

Regular inspection and cleaning of the salt cell are crucial for maintaining optimal performance and extending its lifespan. Proper water chemistry also plays a vital role in preventing scale buildup and corrosion within the cell.

Control Panel: Monitoring and Adjustment

The control panel serves as the central hub for monitoring and adjusting your Pure Chlor Salt System. It displays vital information, including chlorine output levels, salt concentration, and system status through indicator lights. These inputs include a keypad, flow/salt sensor, and salt cell status.

Understanding the panel’s indicators is key to effective operation. A “Check Cell” light signals potential issues, ranging from low salt levels to the need for cell cleaning. Adjusting chlorine output allows you to fine-tune sanitation based on pool usage and environmental factors.

The panel also often features a “Super Chlorination” mode for boosting chlorine levels after heavy use.

Flow Sensor: Ensuring Proper Operation

The flow sensor is a critical component of your Pure Chlor Salt System, ensuring optimal performance and protecting the salt cell. It continuously monitors the water flow rate through the system. The system won’t operate without adequate flow, preventing damage to the cell and ensuring effective chlorine production.

If the flow rate is insufficient, the control panel will likely display an error message, halting chlorine generation. Proper plumbing connections are essential for accurate flow detection. Regularly inspect the sensor and associated plumbing for obstructions or damage.

A functioning flow sensor guarantees consistent and reliable sanitation.

Installation and Setup

Installation requires careful attention to salt level, plumbing, and electrical connections. Prioritize safety and follow the manual closely for a successful setup.

Initial Salt Level Requirements

Establishing the correct initial salt level is crucial for optimal system performance. Most Pure Chlor Salt Systems require a salt concentration between 2700-3400 ppm (parts per million).

Accurately testing the water’s salt content before startup is essential, utilizing a reliable salt test kit or strip. Adding salt gradually ensures proper dissolution and prevents localized high concentrations.

Insufficient salt levels trigger the “Low Salt” indicator, hindering chlorine production. Conversely, excessive salt can lead to corrosion and damage system components.

Regular monitoring and adjustments, guided by the system manual, maintain the ideal salt range for consistent sanitation and prolonged salt cell life.

Proper Plumbing Connections

Correct plumbing is fundamental for efficient system operation. The Pure Chlor Salt System must be installed on the return line, after the filter and heater, ensuring water is adequately filtered before reaching the salt cell.

Utilize appropriate PVC pipe and fittings, adhering to local plumbing codes. A dedicated bypass valve allows for salt cell isolation during maintenance or winterization.

Ensure a smooth, unrestricted flow to prevent airlocks and maximize chlorine production. Verify all connections are watertight to avoid leaks and potential electrical hazards.

Proper flow rate, as indicated by the flow sensor, is vital; insufficient flow triggers error messages and reduces sanitation effectiveness.

Electrical Connections and Safety

Electrical connections must be performed by a qualified electrician, adhering to all local and national electrical codes. The system requires a dedicated circuit with appropriate grounding to prevent electrical shock.

Always disconnect power at the breaker before performing any electrical work. Ensure the control panel is adequately protected from the elements and moisture.

Verify the voltage matches the system’s specifications. Improper wiring can damage the salt cell and void the warranty.

Regularly inspect wiring for damage and ensure all connections are secure. Prioritize safety – never attempt electrical repairs without professional expertise.

Operation and Monitoring

Operation involves monitoring the control panel indicators for salt levels and cell status. Normal parameters ensure consistent chlorine output for sparkling, sanitized pool water.

Understanding the Control Panel Indicators

The control panel is your central hub for monitoring and adjusting your Pure Chlor Salt System. Key indicators provide vital information about system performance. A “Low Salt” light signals insufficient salt levels, potentially hindering chlorine production – ensure proper salt concentration for optimal sanitation.

The “Check Cell” light has multiple meanings; a flashing light indicates approximately 8000 amp hours of operation, prompting a salt level check. A solid “Check Cell” light suggests either low salt or the need for salt cell cleaning. LEDs and keypad inputs offer a user-friendly interface for adjustments.

Normal Operating Parameters

Maintaining ideal operating parameters is crucial for a consistently sanitized pool; Typically, a salt level between 2700-3400 ppm is recommended, though this can vary – always consult your system’s specific manual. Proper water chemistry, including pH and alkalinity, significantly impacts chlorine production efficiency.

Ensure the flow rate aligns with the system’s specifications; inadequate flow can trigger error messages. Regular monitoring of the salt cell status is essential, noting any changes in performance or indicator lights. Consistent operation within these parameters ensures a safe and enjoyable swimming environment.

Adjusting Chlorine Output

Fine-tuning chlorine output is essential for maintaining optimal sanitation levels. Most Pure Chlor Salt Systems feature adjustable output settings, often expressed as a percentage. Increase the percentage for higher chlorine production during periods of heavy use or intense sunlight, and decrease it to conserve salt and reduce chemical demand.

Utilize the system’s “Super Chlorination” mode for shock treatment after pool parties or algae blooms. Regularly test water chemistry to confirm adequate chlorine levels and make necessary adjustments. Remember, consistent monitoring and small adjustments yield the best results.

Troubleshooting Common Issues

Addressing issues like “Low Salt” or “Check Cell” lights promptly ensures continued sanitation. A flashing “Check Cell” indicates amp-hour limits, requiring salt checks.

Low Salt Light – Causes and Solutions

The “Low Salt” indicator on your Pure Chlor system signals insufficient salt levels for effective chlorine generation. Several factors can contribute to this, including water dilution from rainfall or backwashing, and splash-out from swimmers. Regularly test your pool water’s salt concentration using a reliable salt test kit or strips – aim for the manufacturer’s recommended level, typically between 2700-3400 ppm.

If the salt level is indeed low, simply add pool salt, ensuring it’s specifically designed for salt chlorination systems. Broadcast the salt evenly around the pool perimeter while the pump is running to facilitate proper dissolution. Avoid adding excessive amounts at once, as this can overload the system. A flashing “Low Salt” light can also indicate a need for salt cell cleaning, as scale buildup can mimic low salinity readings.

Check Cell Light – What Does it Mean?

A solid or flashing “Check Cell” light on your Pure Chlor system indicates a potential issue with the salt cell’s performance. A solid light often suggests either low salt levels or the need for cell cleaning, as scale buildup hinders chlorine production. However, a flashing “Check Cell” light carries a more specific meaning: it signifies the system has accumulated approximately 8000 amp hours of operation.

This flashing alert prompts you to verify the salt level and, crucially, assess the cell’s condition. Worn-down cell blades, due to prolonged use, can trigger this light. Regular inspection and cleaning, as outlined in the maintenance section, are essential. If the light persists after addressing salt levels and cleaning, the cell may be nearing the end of its lifespan and require replacement.

Flashing Check Cell Light – Amp Hour Considerations

When the “Check Cell” light on your Pure Chlor system flashes, it’s a critical indicator related to accumulated amp hours – approximately 8000. This doesn’t necessarily mean immediate cell failure, but signals the system is tracking its operational workload. The flashing light is a prompt to proactively check your salt level, ensuring it’s within the recommended range for optimal performance.

Consider this a maintenance reminder. High amp hour accumulation suggests the cell has been working diligently. Regularly cleaning the cell is crucial to remove scale buildup, which reduces efficiency and contributes to higher amp hour counts. Ignoring this warning could lead to reduced chlorine output and, eventually, cell degradation. Monitor closely after cleaning to see if the flashing stops.

Solid Check Cell Light – Salt Level and Cleaning

A solid “Check Cell” light on your Pure Chlor system typically indicates either a low salt concentration or the need for a thorough cell cleaning. Begin by verifying your salt level using a reliable test kit; ensure it falls within the manufacturer’s specified range. If the salt level is adequate, the light suggests scale buildup is hindering the cell’s performance.

Initiate the cell cleaning procedure as outlined in your system’s manual. A dirty cell restricts chlorine production, impacting water sanitation. If the light persists after cleaning and confirming proper salt levels, further inspection or professional service may be required. Darker plates and a consistently illuminated “Check Cell” light could signify cell wear.

Maintenance and Cleaning

Regular maintenance is crucial for optimal performance. This includes periodic salt cell cleaning, consistent water chemistry checks, and proper winterization procedures to protect your system.

Salt Cell Cleaning Procedures

Maintaining a clean salt cell is paramount for efficient chlorine generation. Over time, calcium and other mineral deposits can accumulate on the cell plates, reducing its effectiveness. To clean, begin by turning off the system and isolating the cell. Carefully remove the cell from its housing, noting the orientation of the connections.

Prepare a cleaning solution of muriatic acid and water (follow safety guidelines!). Submerge the cell in the solution for approximately 15-20 minutes, or until visible scale dissolves. Avoid prolonged soaking. Rinse thoroughly with fresh water and inspect the plates. Repeat if necessary. Reinstall the cell, ensuring proper connections, and restart the system. Regular cleaning, based on usage and water hardness, will extend the cell’s lifespan and optimize performance.

Regular Water Chemistry Checks

Consistent water chemistry is crucial for optimal salt chlorinator performance and longevity. Regularly test your pool water – at least weekly – for pH, alkalinity, calcium hardness, and stabilizer (cyanuric acid) levels. Maintaining proper pH (7.2-7.8) prevents scale buildup on the salt cell, while balanced alkalinity (80-120 ppm) ensures pH stability;

Calcium hardness (200-400 ppm) prevents corrosion or scaling, and stabilizer protects chlorine from sunlight degradation. Adjust chemicals as needed, following product instructions. Imbalanced water chemistry can lead to reduced chlorine output, cell damage, and overall system inefficiency. Accurate testing and adjustments are key to a trouble-free swimming season.

Winterizing Your Salt Chlorination System

Proper winterization protects your salt chlorinator from freeze damage and ensures easy startup in the spring. First, reduce the salt level slightly below recommended minimums to prevent concentrated brine. Next, thoroughly flush the system with fresh water to remove any remaining salt solution. Disconnect the power supply to the control panel and salt cell.

Remove the salt cell and store it indoors in a dry location, ideally submerged in a bucket of fresh water. Drain all plumbing lines to prevent freezing. Consider using a winterizing kit for added protection. Remember to consult your system’s manual for specific instructions.

Salt Cell Lifespan and Replacement

Salt cell lifespan varies based on usage and water chemistry. A flashing “Check Cell” light often indicates nearing end-of-life, requiring inspection and potential replacement.

Factors Affecting Salt Cell Life

Several key factors significantly influence the longevity of your salt cell. Maintaining proper water chemistry is paramount; imbalances like low pH or calcium hardness accelerate cell degradation. Consistent chlorine demand, stemming from heavy pool usage or sunlight exposure, also contributes to wear and tear.

The quality of salt used matters – ensure it’s 99.9% pure pool salt to avoid unwanted mineral buildup. Regular cleaning, as indicated by the system’s alerts, is crucial; scale formation reduces efficiency and shortens cell life.

Furthermore, the cell’s operating hours directly correlate with its lifespan; higher output settings demand more from the cell. Finally, consistent power fluctuations can negatively impact performance and durability, potentially leading to premature failure.

Recognizing a Worn-Out Salt Cell

Identifying a failing salt cell is crucial for maintaining consistent pool sanitation. A common indicator is a persistently flashing “Check Cell” light, often accompanied by a “Low Salt” reading even with correct salt levels. Diminished chlorine production, requiring frequent manual shocking, is another telltale sign.

Visually inspect the cell plates; excessive scaling, pitting, or erosion suggests significant wear. If plates appear dark and steady check cell light is on, it may indicate the cell is nearing the end of its life. Reduced flow through the cell, despite a functioning flow sensor, can also signal internal blockage or damage.

Salt Cell Replacement Process

Replacing your salt cell involves several key steps. First, ensure the system is completely powered off. Carefully disconnect the old cell from its housing and plumbing connections, noting the orientation for reinstallation. Inspect the new cell for any damage before proceeding.

Connect the new cell, ensuring a watertight seal. Reconnect the electrical connections, strictly adhering to the manufacturer’s wiring diagram. After reassembly, prime the system according to the manual. Monitor the control panel; initial operation may require a brief stabilization period. Verify proper chlorine production and water chemistry balance post-replacement.

Advanced Features and Settings

Pure Chlor systems offer features like Super Chlorination for quick sanitation, adjustable cell cleaning cycles, and flow rate adjustment for optimized performance.

Super Chlorination Mode

Super Chlorination is a valuable feature within your Pure Chlor Salt System, designed to rapidly increase chlorine output for enhanced sanitation. This mode is particularly useful after periods of heavy pool use, rainfall, or algae blooms, providing a quick boost to combat contaminants.

Activating Super Chlorination temporarily overrides the standard chlorine production settings, maximizing the salt cell’s output. Typically, this lasts for a predetermined duration, often around 24-72 hours, after which the system automatically reverts to its normal operating parameters.

It’s crucial to monitor water chemistry closely during and after Super Chlorination, as elevated chlorine levels can impact comfort and potentially damage pool surfaces if not managed correctly. Always consult your system’s manual for specific instructions and recommended durations for this mode.

Cell Cleaning Cycle Settings

Your Pure Chlor Salt System incorporates an automatic cell cleaning cycle to maintain optimal performance and extend the lifespan of the salt cell. This feature periodically reverses the polarity of the cell, helping to prevent calcium scale buildup on the plates.

The frequency and duration of the cleaning cycle are often adjustable via the control panel. Common settings include options for daily, weekly, or manual activation. More frequent cleaning is recommended in areas with hard water or high calcium levels.

Regularly utilizing the cell cleaning cycle minimizes the need for manual cleaning and ensures consistent chlorine production. A flashing “Check Cell” light can indicate the need for cleaning or a potential issue with the cell itself, prompting a review of these settings.

Flow Rate Adjustment

Maintaining the correct water flow rate is crucial for the efficient operation of your Pure Chlor Salt System. The system relies on consistent water movement through the salt cell to effectively generate chlorine. Insufficient flow can lead to reduced chlorine output and potential damage to the cell.

Most systems feature a flow sensor that will shut down the chlorine generation if the flow rate drops below a specified threshold. Adjustments may be necessary if you’ve recently changed your pump or plumbing;

Refer to your system’s manual for the recommended flow rate range. Proper flow ensures optimal chlorine production and prolongs the life of your salt cell, preventing scale buildup.

Customer Support and Resources

Solaxx provides comprehensive support for your Pure Chlor Salt System. Contact customer service via email for assistance with any questions or concerns.

Online resources and FAQs are readily available to help troubleshoot and maintain your system effectively.

Contacting Solaxx Customer Service

Solaxx understands that you may encounter questions or require assistance with your Pure Chlor Salt System. Their dedicated customer service team is readily available to provide support and guidance. For prompt assistance, you can reach them directly via email at email160;protected. When contacting support, please have your system model number and a detailed description of the issue you are experiencing readily available.

Providing this information will help the support team diagnose the problem efficiently and offer the most effective solution. Solaxx is committed to ensuring your complete satisfaction with their products and services, and their customer service representatives are trained to address a wide range of inquiries, from installation and operation to troubleshooting and maintenance.

Online Resources and FAQs

Solaxx provides a wealth of online resources to assist you with your Pure Chlor Salt System. Their website features a comprehensive Frequently Asked Questions (FAQs) section, addressing common concerns and providing step-by-step instructions for various tasks. These resources cover topics ranging from initial setup and water chemistry balancing to troubleshooting error messages like the “Check Cell” indicator.

Additionally, you may find helpful information through online forums and communities dedicated to pool maintenance. These platforms allow you to connect with other users, share experiences, and seek advice. Remember to always refer to your system’s manual for specific guidance and safety precautions.

v shred program pdf

V Shred Program PDF: A Comprehensive Review (Updated 02/06/2026)

V Shred offers a lifestyle program, accessible via PDF, focusing on nutrition guidance and macro calculation for successful weight loss and fitness journeys.

This review, updated today (02/06/2026), provides a comprehensive look at the program’s components and potential benefits, referencing current research.

What is V Shred?

V Shred is presented as more than just a diet or workout plan; it’s a comprehensive lifestyle program designed to help individuals achieve their fitness goals. Available through a PDF format and an Android application (V Shred VIP), the program emphasizes personalized guidance, particularly in the areas of nutrition and macro-nutrient tracking.

The core concept revolves around providing users with the tools and knowledge to understand their bodies and make informed decisions about their health. It aims to guide individuals through the fundamentals of nutrition, calculating individual macronutrient needs, and establishing a sustainable approach to fitness.

Recent reviews (dated January 30, 2025, and November 22, 2025) highlight its focus on providing a structured path to success, moving beyond generic advice. The program’s creator, ДВ Тренин, emphasizes a tailored approach, making it potentially suitable for a wide range of individuals seeking to improve their fitness levels.

The Core Philosophy of V Shred

V Shred’s central philosophy centers on empowering individuals with the knowledge to take control of their health and fitness. It moves away from restrictive dieting and promotes a sustainable lifestyle change built upon understanding individual nutritional needs. The program prioritizes personalized macro calculation, recognizing that a “one-size-fits-all” approach rarely yields lasting results.

This philosophy extends to a focus on education, teaching users how to achieve their goals rather than simply telling them what to do. The emphasis isn’t solely on physical transformation, but on building a strong foundation of nutritional understanding.

The program, as described in recent reviews, aims to demystify fitness and nutrition, making it accessible to individuals regardless of their starting point. It’s about creating a long-term, healthy relationship with food and exercise, guided by personalized data and expert instruction.

V Shred VIP: An Overview

V Shred VIP represents a premium tier within the V Shred ecosystem, offering an enhanced and more personalized experience. Available as an Android application, VIP provides clients with access to a more comprehensive suite of tools and resources beyond the standard PDF program. This includes potentially more detailed nutritional guidance and customized workout plans tailored to individual progress.

The VIP program appears to focus on a more immersive lifestyle approach, offering ongoing support and accountability. While details are still emerging, reviews suggest a greater emphasis on community and direct access to V Shred trainers.

It’s positioned as a step up for those seeking a more intensive and supported journey towards their fitness goals, building upon the core principles established in the foundational V Shred PDF program.

Understanding the V Shred Programs

V Shred programs, delivered via PDF and the VIP app, cater to both men and women, emphasizing personalized nutrition and macro tracking for optimal results.

V Shred Programs for Men

V Shred’s programs for men, often accessed through a downloadable PDF, are designed to address common male fitness goals – namely, muscle gain and fat loss. The core approach centers around individualized macro calculations, providing a tailored nutritional framework.

These programs aren’t one-size-fits-all; they aim to guide men through the fundamentals of nutrition, empowering them to make informed dietary choices. The PDF resources typically include detailed guidance on tracking macronutrients, ensuring adherence to the prescribed plan.

Furthermore, V Shred emphasizes a holistic approach, combining nutrition with structured workout routines. The program’s success hinges on consistent effort and a commitment to the principles outlined within the PDF materials, fostering sustainable lifestyle changes.

V Shred Programs for Women

V Shred offers specialized programs for women, delivered through comprehensive PDF guides, focusing on achieving a balanced physique and improved overall wellness. These programs prioritize a personalized approach, recognizing the unique physiological needs of women.

The core of these programs revolves around customized nutrition plans, with detailed macro calculations tailored to individual goals and activity levels. The PDF resources provide clear instructions on tracking food intake and making healthier choices.

Beyond nutrition, V Shred for women incorporates targeted workout routines designed to build strength, enhance curves, and boost confidence. The program emphasizes sustainable habits, aiming to empower women to take control of their health and fitness journey through accessible PDF guidance.

Customized Nutrition Plans

V Shred’s PDF programs heavily emphasize customized nutrition as a cornerstone of success. These aren’t generic diet plans; instead, they begin with a detailed assessment to calculate individual macronutrient needs – protein, carbohydrates, and fats.

The PDF guides provide clear instructions on how to track these macros, empowering users to understand their food intake and make informed choices. This approach moves beyond simple calorie counting, focusing on the quality of food consumed.

V Shred aims to educate users about nutrition, teaching them the fundamentals of a balanced diet and how to tailor it to their specific goals. The PDF resources offer practical tips and strategies for meal prepping and navigating dietary challenges, fostering long-term healthy habits.

Key Components of a V Shred PDF Program

V Shred’s PDF programs integrate macro calculation, detailed workout routines, and a focused 21-day challenge emphasizing pre and post-workout stretching for optimal results.

Macro Calculation & Tracking

A cornerstone of the V Shred PDF program is its emphasis on personalized macro calculation. The program doesn’t advocate for a one-size-fits-all approach; instead, it guides users through determining their individual macronutrient needs – protein, carbohydrates, and fats – based on their specific goals, body composition, and activity levels.

This calculation forms the basis of a tailored nutrition plan, and the PDF provides tools and guidance for tracking macro intake. Consistent tracking is presented as crucial for achieving desired outcomes, whether weight loss, muscle gain, or improved fitness. The program stresses understanding what you’re eating, not just that you’re eating, fostering a mindful approach to nutrition.

Effective macro tracking allows for adjustments and optimization, ensuring continued progress and preventing plateaus. The V Shred methodology positions macro awareness as a fundamental skill for long-term health and fitness success.

Workout Routines Explained

The V Shred PDF program delivers structured workout routines designed to complement the nutrition plans. These aren’t generic workouts; the program aims to provide exercises suitable for various fitness levels, though individual suitability requires consideration (see related considerations). The routines are presented with clear instructions and, often, video demonstrations to ensure proper form and technique.

Emphasis is placed on progressive overload – gradually increasing the intensity or volume of workouts over time – to continually challenge the body and promote adaptation. The PDF details specific exercises, sets, repetitions, and rest periods.

Furthermore, the program incorporates a 21-day challenge focus, with routines designed to build momentum and establish consistent exercise habits. The routines are designed to be efficient and effective, fitting into busy lifestyles.

Pre-Workout & Post-Workout Stretching (21-Day Challenge Focus)

The V Shred PDF program heavily emphasizes the importance of dynamic stretching before workouts and static stretching afterward, particularly within the framework of the 21-day challenge. This isn’t merely an add-on; it’s integrated as a crucial component for injury prevention and enhanced recovery.

Pre-workout routines focus on dynamic movements – controlled, fluid motions – to increase blood flow, improve joint mobility, and prepare muscles for exertion. Post-workout stretching centers on static holds, lengthening muscles and improving flexibility.

Detailed instructions and visual guides are provided within the PDF, demonstrating proper form for each stretch. This focus on flexibility and recovery is designed to maximize results and minimize the risk of muscle soreness or injury during the challenge and beyond.

Analyzing the V Shred Approach

V Shred’s methodology centers on personalized nutrition, macro-nutrient balance, and calculated workout routines, delivered through their PDF program for optimal results.

The Role of Nutrition in V Shred

V Shred places significant emphasis on nutrition as the cornerstone of its program, asserting that successful transformation hinges on understanding and implementing proper dietary habits. The program doesn’t advocate for restrictive dieting, but rather focuses on guiding individuals to make informed food choices aligned with their calculated macronutrient needs.

The core principle revolves around providing users with the knowledge to “shred” – meaning to lose fat and build lean muscle – through a tailored nutritional approach. This involves detailed macro calculation, ensuring adequate protein intake for muscle preservation and growth, and strategically managing carbohydrate and fat consumption.

V Shred’s approach aims to empower individuals to take control of their diet, fostering a sustainable lifestyle change rather than a temporary fix. The program’s PDF resources provide guidance on meal planning and understanding food labels, contributing to long-term adherence and positive outcomes.

Importance of Macro-Nutrient Balance

V Shred underscores the critical importance of achieving a balanced intake of macronutrients – protein, carbohydrates, and fats – for optimal results. The program’s methodology centers around individualized macro calculations, tailored to each user’s body composition, activity level, and fitness goals.

Protein is prioritized to support muscle preservation and growth during weight loss, while carbohydrates are strategically managed to provide energy for workouts and daily activities. Healthy fats are included for hormonal balance and overall health.

This balanced approach distinguishes V Shred from restrictive diets, promoting sustainable fat loss and muscle gain. The program’s PDF resources detail how to track macro intake effectively, ensuring users stay within their personalized targets. Achieving this balance is presented as fundamental to long-term success.

V Shred’s Stance on Supplements

V Shred adopts a pragmatic approach to dietary supplements, acknowledging their potential benefits but emphasizing they are supplemental to a solid foundation of nutrition and exercise. The program doesn’t position supplements as magical solutions, but rather as tools that may enhance results when used strategically.

While V Shred offers its own line of supplements, the program materials stress that achieving success doesn’t require their purchase. The core philosophy revolves around prioritizing whole, unprocessed foods and consistent training.

Information within the V Shred PDF resources focuses on understanding supplement ingredients and their potential effects, encouraging informed decision-making. Users are advised to research thoroughly and consider individual needs before incorporating any supplements into their regimen.

Effectiveness and Potential Benefits

V Shred aims for weight loss, muscle gain, and improved fitness through personalized plans, emphasizing nutrition and workouts for noticeable, positive transformations.

Weight Loss Results with V Shred

V Shred’s effectiveness in facilitating weight loss stems from its holistic approach, combining customized nutrition plans with structured workout routines. The program centers around calculating and tracking macronutrients, a key element in managing caloric intake and promoting fat loss.

User experiences, while varied, frequently highlight significant weight reduction when adhering to the program’s guidelines. The emphasis on understanding individual metabolic needs, rather than promoting restrictive dieting, appears to contribute to sustainable results.

However, it’s crucial to acknowledge that individual outcomes depend heavily on consistent effort and adherence to the prescribed plan. Success isn’t guaranteed and requires dedication to both nutritional adjustments and regular exercise, as guided by the V Shred PDF resources.

Muscle Gain Potential

V Shred programs aren’t solely focused on weight loss; they also offer pathways for muscle gain, particularly when combined with appropriate resistance training. The customized nutrition plans, emphasizing adequate protein intake, are fundamental to supporting muscle protein synthesis and recovery.

While the V Shred PDF provides workout routines, the extent of muscle gain depends on the specific program chosen and the individual’s training intensity and consistency. Programs geared towards more advanced fitness levels naturally offer greater potential for hypertrophy.

It’s important to note that significant muscle gain typically requires a caloric surplus alongside progressive overload in training, which may necessitate adjustments to the initially prescribed macro calculations.

Improved Fitness Levels

V Shred programs, delivered through their PDF resources, aim to enhance overall fitness levels beyond just weight loss or muscle gain. The 21-day challenge component, with its focus on pre- and post-workout stretching, contributes to improved flexibility and reduced risk of injury.

Consistent adherence to the workout routines, coupled with the nutritional guidance, promotes increased cardiovascular health and endurance. Users often report feeling more energetic and capable in their daily activities.

The program’s emphasis on building sustainable habits – regarding both diet and exercise – fosters long-term improvements in physical conditioning. This holistic approach supports a healthier lifestyle and sustained fitness gains.

Potential Risks and Considerations

V Shred’s approach requires careful consideration, particularly regarding nanomaterials and individual fitness levels; consulting a healthcare professional is always recommended before starting.

Nanomaterials and Health (Referencing Related Research)

V Shred, like many supplement-focused programs, doesn’t explicitly address the potential risks associated with nanomaterials found in some supplement formulations. Research, including work by V, Kreyling, W, Lademann J, Krutmann J, Warheit D, and Oberdorster E, highlights the potential toxicity of these materials.

Their review for ECETOC emphasizes the need for caution. While V Shred doesn’t directly utilize nanomaterials in its core PDF program, users independently choosing supplements based on recommendations should be aware of this emerging field of study. The potential for fiber toxicity warrants informed decision-making. It’s crucial to research supplement ingredients thoroughly and prioritize reputable brands with transparent sourcing practices to mitigate any unforeseen health risks.

Suitability for Different Fitness Levels

V Shred programs aim for broad accessibility, but suitability varies significantly based on individual fitness levels. The program’s core philosophy centers around personalized guidance, suggesting modifications are possible. However, the PDF materials themselves may not always offer detailed regressions or progressions for exercises.

Beginners might find the initial phases manageable, focusing on foundational movements and macro tracking. Intermediate and advanced users may require supplemental training to continually challenge themselves. The 21-day challenge, a key component, could be intense for those new to structured fitness. V Shred emphasizes consulting a healthcare professional, crucial for individuals with pre-existing conditions, ensuring safe participation and optimal results.

Consulting a Healthcare Professional

V Shred consistently recommends consulting a healthcare professional before starting any new fitness or nutrition program, and this advice is paramount. This is especially critical given the program’s emphasis on dietary changes and exercise intensity. Individuals with pre-existing health conditions – cardiovascular issues, diabetes, or musculoskeletal limitations – require medical clearance.

Furthermore, the potential risks associated with intense training, even without known conditions, necessitate professional guidance. Considering research into nanomaterials and health, a doctor can assess individual susceptibility. V Shred’s approach isn’t a substitute for personalized medical advice; a physician can tailor recommendations based on a comprehensive health evaluation, ensuring safety and maximizing benefits.

V Shred vs. Other Fitness Programs

V Shred distinguishes itself through personalized macro calculations and nutritional guidance, differing from traditional diets and offering a unique approach compared to fitness apps.

Comparing V Shred to Traditional Diets

Traditional diets often emphasize restrictive calorie counting or eliminating entire food groups, frequently leading to unsustainable results and potential nutritional deficiencies. V Shred, however, adopts a more flexible approach centered around individualized macro-nutrient balance – protein, carbohydrates, and fats – calculated specifically for each user.

Unlike many conventional diets that offer a one-size-fits-all plan, V Shred prioritizes customization. This personalized strategy, detailed within the program’s PDF resources, aims to optimize metabolism and promote long-term adherence. The program doesn’t simply dictate what to eat, but rather how much of each macro-nutrient is needed to achieve individual fitness goals.

Furthermore, V Shred integrates workout routines alongside nutritional guidance, recognizing the synergistic relationship between exercise and diet for optimal results, a component often lacking in standard dietary approaches.

V Shred and Laparoscopic Gastrectomy (Indirectly Related Research)

Research concerning laparoscopic total gastrectomy, as published in Surgical Endoscopy (2013), highlights the significant physiological changes following major gastric surgery, impacting nutrient absorption and dietary needs. While seemingly disparate, this research underscores the critical importance of personalized nutrition plans – a core tenet of the V Shred program.

V Shred’s emphasis on macro-nutrient calculation and balanced eating can be viewed as a proactive approach to optimizing nutritional intake, mirroring the post-operative dietary considerations following gastrectomy. Though V Shred isn’t designed for post-surgical recovery, the program’s focus on individualized dietary adjustments reflects a similar principle of tailoring nutrition to specific bodily needs.

Both scenarios – post-gastrectomy and general fitness – demonstrate the necessity of understanding individual metabolic responses to food, reinforcing V Shred’s customized approach.

V Shred and Personalized Fitness Apps

V Shred distinguishes itself within the crowded fitness landscape by offering a structured PDF program, contrasting with the often algorithm-driven approach of personalized fitness apps. While apps provide convenience and data tracking, V Shred emphasizes a more holistic, coach-guided experience, focusing on foundational knowledge of nutrition and exercise.

The V Shred program’s PDF format delivers a comprehensive, readily accessible resource, unlike apps that often require ongoing subscriptions for full access. This allows users to learn why certain strategies work, fostering long-term adherence.

However, both V Shred and personalized apps share the goal of individualization. V Shred achieves this through macro calculation and tailored plans, while apps leverage user data. Ultimately, the best approach depends on individual learning styles and preferences.

Accessing the V Shred PDF & Resources

V Shred resources, including the PDF program, are available through their official website, often requiring a subscription for full access to plans and support.

Where to Find the V Shred PDF

Finding the V Shred PDF program materials primarily involves visiting the official V Shred website. Access isn’t typically granted through direct download; instead, the PDF and associated resources become available upon enrollment in a specific V Shred program or subscription tier.

Potential users should navigate to the V Shred website and explore the various program options tailored to their fitness goals. Once a program is selected and purchased, the PDF, along with supplementary materials like workout routines and nutrition guides, will be accessible through the member’s online account.

Be cautious of unofficial sources offering the V Shred PDF, as these may contain outdated or inaccurate information. Always prioritize obtaining the program directly from V Shred to ensure authenticity and access to the latest updates and support.

Cost and Subscription Options

V Shred’s pricing structure varies significantly depending on the chosen program and subscription level. While specific costs aren’t publicly detailed without exploring the official website, options generally range from one-time purchases for individual programs to recurring subscription fees for ongoing access to resources and support.

The V Shred VIP program represents a premium tier, likely involving a higher monthly or annual fee, offering enhanced features like personalized coaching and advanced nutrition plans. Basic programs may be available at a lower upfront cost, providing foundational workout routines and dietary guidance.

Potential customers should carefully review the available subscription options and associated costs on the V Shred website to determine the best fit for their budget and fitness objectives. Promotional offers and discounts may also be available periodically.

rth6580wf1001 install manual

Article Plan: Honeywell RTH6580WF1001 Install Manual

This comprehensive guide details the installation of the Honeywell RTH6580WF1001 Wi-Fi thermostat‚ covering everything from unboxing to advanced features and troubleshooting steps.

The Honeywell RTH6580WF1001 is a smart‚ 7-day programmable Wi-Fi thermostat designed to provide convenient and efficient control over your home’s heating and cooling systems. This thermostat allows for remote access and control via the Honeywell Home app‚ enabling users to adjust temperatures from anywhere with an internet connection. It’s a popular choice for those seeking to modernize their home comfort and potentially reduce energy consumption.

This model boasts a user-friendly interface and compatibility with a wide range of HVAC systems. Key features include customizable schedules‚ geofencing capabilities‚ and smart alerts. The RTH6580WF1001 aims to simplify temperature management‚ offering both convenience and cost savings. Understanding its features and proper installation is crucial for maximizing its benefits. This manual will guide you through each step‚ ensuring a smooth and successful setup process‚ allowing you to enjoy a more comfortable and energy-efficient home environment.

Unboxing and Component Check

Upon receiving your Honeywell RTH6580WF1001‚ carefully open the box and verify all components are present. You should find the thermostat unit itself‚ a mounting plate‚ screws and wall anchors for installation‚ wire labels for easy identification during wiring‚ and a detailed installation guide – this document!

Inspect each item for any signs of damage that may have occurred during shipping. If any parts are missing or damaged‚ immediately contact Honeywell support or the retailer where you purchased the thermostat. Do not attempt to install a damaged unit. Proper component verification is a crucial first step.

Familiarize yourself with the thermostat’s front panel‚ noting the display screen‚ control buttons‚ and any access points. Keep the packaging materials for potential future use‚ such as warranty claims or returns. A thorough check now prevents issues later during the installation process‚ ensuring a smooth and hassle-free experience.

Safety Precautions

Before beginning the installation of your Honeywell RTH6580WF1001 thermostat‚ prioritize safety. Always turn off the power to your heating and cooling system at the circuit breaker to avoid electrical shock. Confirm the power is off with a non-contact voltage tester.

If you are uncomfortable working with electrical wiring‚ consult a qualified HVAC technician. Incorrect wiring can damage your system or create a safety hazard. Wear appropriate safety glasses to protect your eyes during installation‚ especially when drilling or handling small parts.

Be mindful of the wires connected to your existing thermostat; label them carefully before disconnecting to ensure correct reconnection. Avoid touching bare wires. Keep small parts‚ such as screws‚ away from children and pets. Follow all local electrical codes and regulations. A safe installation is a successful installation – proceed with caution and respect for electrical safety.

Tools Required for Installation

Successfully installing your Honeywell RTH6580WF1001 thermostat requires a few essential tools. You will need a Phillips head screwdriver for removing and securing the thermostat and mounting plate. A flathead screwdriver may also be useful for certain wiring connections.

A non-contact voltage tester is crucial for verifying the power is off before handling any wires – safety first! Wire strippers are necessary for preparing the wires for connection to the new thermostat. Pliers can assist with bending or manipulating wires.

A level is recommended to ensure the thermostat is mounted straight for aesthetic appeal and accurate readings. A drill with appropriate drill bits may be needed if new mounting holes are required. Finally‚ a smartphone or tablet with Wi-Fi access is essential for the setup and configuration process via the Honeywell Home app. Having these tools readily available will streamline the installation.

System Compatibility Check

Before beginning the installation of your Honeywell RTH6580WF1001‚ verifying system compatibility is paramount. This thermostat is generally compatible with most 24V heating and cooling systems‚ including furnaces‚ air conditioners‚ heat pumps‚ and boilers. However‚ it’s not compatible with line voltage systems (110V or 220V) or millivolt systems.

Confirm your system uses standard HVAC wiring – Rh‚ Rc‚ W‚ Y‚ and G are common wires. The presence of a C-wire (common wire) is highly recommended for reliable Wi-Fi connectivity; if absent‚ a C-wire adapter may be required (discussed later).

Heat pump systems may require specific configuration settings within the thermostat. Carefully review your existing thermostat’s wiring and compare it to the Honeywell RTH6580WF1001 wiring diagrams to ensure a proper match. If unsure‚ consult a qualified HVAC professional to avoid potential damage or malfunction.

Wiring Diagram Overview

The Honeywell RTH6580WF1001 utilizes a standard color-coded wiring system for easy installation. Typically‚ Rh and Rc connect to the heating and cooling power sources respectively. W controls heating‚ Y controls cooling‚ and G activates the fan. A crucial component‚ the C-wire (common wire)‚ provides continuous power to the thermostat‚ enabling Wi-Fi functionality.

Refer to the detailed wiring diagram included in the packaging‚ or available online at wifithermostat.com/videos‚ for specific configurations based on your HVAC system type. Pay close attention to heat pump wiring‚ as it often differs from conventional systems.

Incorrect wiring can damage your HVAC equipment or the thermostat itself. Double-check all connections before powering on the system. If you encounter any uncertainty‚ consult a qualified HVAC technician. Proper labeling of wires before disconnection is highly recommended for a smooth re-installation process.

C-Wire Requirement and Installation

The Honeywell RTH6580WF1001 requires a C-wire (common wire) for consistent power‚ essential for its Wi-Fi capabilities and reliable operation. Many older HVAC systems lack a dedicated C-wire at the thermostat location. If absent‚ several solutions exist.

You can run a new wire from your furnace or air handler‚ which may require professional assistance. Alternatively‚ a C-wire adapter can be used‚ borrowing power from existing wires. These adapters‚ while convenient‚ may not be compatible with all systems – verify compatibility before purchase.

Carefully follow the adapter’s instructions for proper installation. Incorrect adapter wiring can cause system malfunctions. If unsure‚ consult an HVAC professional. A stable power supply via the C-wire ensures optimal thermostat performance and prevents unexpected shutdowns or connectivity issues. Resources like wifithermostat.com/videos may offer guidance.

Connecting to Your Home Wi-Fi Network

After powering on the Honeywell RTH6580WF1001‚ the thermostat will prompt you to connect to your home Wi-Fi network. Select “Connect to Wi-Fi” on the thermostat’s display. The thermostat will scan for available networks.

Choose your network from the list and enter your Wi-Fi password using the on-screen keyboard. Ensure you enter the password correctly‚ as incorrect credentials will prevent connection. The thermostat will then attempt to establish a connection. A successful connection is indicated by a Wi-Fi symbol appearing on the display.

If the connection fails‚ double-check your password and ensure your router is functioning correctly. Refer to wifithermostat.com/videos for visual assistance. A stable Wi-Fi connection is crucial for remote access and advanced features via the Honeywell Home app.

Initial Thermostat Setup

Following successful power-up and Wi-Fi connection‚ the Honeywell RTH6580WF1001 will guide you through the initial setup process. This includes setting your location for accurate weather information and time synchronization. You’ll be prompted to enter your zip code.

Next‚ configure your heating and cooling system type – options typically include forced air‚ heat pump‚ and radiant. Select the option that best matches your home’s system. The thermostat will then ask about your fuel source (gas‚ electric‚ oil). Accurate system configuration is vital for optimal performance.

Finally‚ you may be asked to name your thermostat for easy identification within the Honeywell Home app. This step is optional but recommended. Refer to resources like honeywell home thermostat manual for detailed guidance throughout this process.

Programming the 7-Day Schedule

The Honeywell RTH6580WF1001 excels with its customizable 7-day scheduling. Access the scheduling feature either directly on the thermostat’s touchscreen or conveniently through the Honeywell Home app. Each day can be individually programmed with up to four distinct periods: Wake‚ Leave‚ Return‚ and Sleep.

For each period‚ set your desired temperature. Consider energy savings by lowering the temperature while you’re away or asleep. The thermostat remembers your preferences and automatically adjusts the heating or cooling accordingly. You can copy a schedule from one day to others for quicker setup.

Utilize the “Hold” function for temporary overrides. For example‚ if you’re staying home unexpectedly‚ activate a hold to maintain a comfortable temperature. Explore resources like wifithermostat.com/videos rth9585wf for visual guidance on schedule programming.

Using the Honeywell Home App

The Honeywell Home app unlocks remote control and advanced features for your RTH6580WF1001. Download the app from your device’s app store and create an account. Follow the in-app instructions to pair your thermostat with your home Wi-Fi network – a crucial step for remote access.

Once connected‚ you can adjust the temperature‚ view current settings‚ and manage your 7-day schedule from anywhere with an internet connection. The app also provides energy usage reports‚ helping you identify potential savings. Geofencing capabilities automatically adjust the temperature based on your location.

Explore features like voice control compatibility with Amazon Alexa or Google Assistant. Refer to resources like honeywell thermostat wifi setup guides available online for detailed app navigation. The app streamlines thermostat management‚ offering convenience and energy efficiency.

Troubleshooting Common Issues

If your Honeywell RTH6580WF1001 experiences issues‚ start with basic checks. Ensure the thermostat is securely powered and the Wi-Fi connection is stable. A common problem is a lost Wi-Fi connection; re-enter your network credentials within the Honeywell Home app.

If the display is blank‚ verify the C-wire is correctly installed – a frequent cause of power failures. For unresponsive touchscreens‚ try a thermostat reset. If the temperature readings are inaccurate‚ recalibrate the thermostat through the app settings. Explore online resources like honeywell home thermostat manual for specific error code explanations.

Consult the app’s troubleshooting section or Honeywell’s support website for detailed guidance. Remember to check for firmware updates‚ as these often address known bugs. If problems persist‚ contact Honeywell’s customer support for assistance.

Resetting the Thermostat to Factory Defaults

Resetting your Honeywell RTH6580WF1001 to factory defaults erases all personalized settings‚ returning it to its original state. This is useful for troubleshooting persistent issues or preparing the thermostat for a new user. The process typically involves navigating the thermostat’s menu system.

Access the settings menu on the thermostat’s touchscreen. Locate the “Reset” or “Factory Reset” option – its exact location may vary slightly. Confirm your decision‚ as this action is irreversible without reconfiguring the device. The thermostat will power cycle and revert to its initial setup screen.

After a reset‚ you’ll need to reconnect to your Wi-Fi network and re-enter your scheduling preferences. Refer to the initial setup instructions within this manual or the honeywell home thermostat manual for guidance. Remember to re-register the device within the Honeywell Home app.

Understanding Error Codes

The Honeywell RTH6580WF1001 utilizes error codes to diagnose potential issues with its operation. These codes appear on the thermostat’s display‚ signaling problems ranging from connectivity issues to system malfunctions. Recognizing these codes is crucial for effective troubleshooting.

Common error codes include those related to Wi-Fi connectivity (indicating a lost connection or authentication failure)‚ C-wire issues (signaling insufficient power)‚ and heating/cooling system errors. Consult the honeywell home thermostat manual or the Honeywell Home app for a comprehensive list of error codes and their corresponding meanings.

When an error code appears‚ first attempt a simple reset of the thermostat. If the problem persists‚ refer to the troubleshooting section of this manual or contact Honeywell support for assistance. Documenting the error code before contacting support will expedite the resolution process.

Warranty Information and Support

Honeywell provides a limited warranty for the RTH6580WF1001 thermostat‚ typically covering defects in materials and workmanship for a specified period from the date of purchase. Review the warranty documentation included with your thermostat for precise terms and conditions‚ including coverage duration and exclusions.

For technical support and assistance‚ Honeywell offers several avenues. You can access their online support portal at honeywellhome.com‚ where you’ll find FAQs‚ troubleshooting guides‚ and downloadable resources. Alternatively‚ you can contact Honeywell’s customer support team via phone or email.

Keep your proof of purchase readily available‚ as it may be required when requesting warranty service. The Honeywell Home app also provides access to support resources and allows you to submit support requests directly. Ensure you register your thermostat online to streamline the support process.

Advanced Features and Settings

The Honeywell RTH6580WF1001 boasts several advanced features beyond basic temperature control. Geofencing utilizes your smartphone’s location to automatically adjust the thermostat when you leave or return home‚ optimizing energy savings. Smart Alerts notify you of unusual temperature fluctuations or system issues via the Honeywell Home app.

Customizable comfort settings allow you to fine-tune temperature preferences for different times of day and days of the week. Humidity control‚ if supported by your HVAC system‚ can be managed through the thermostat. Filter change reminders help maintain optimal system performance and air quality.

Explore the thermostat’s settings menu to access features like swing temperature adjustment‚ cycle rate control‚ and display customization. Integration with other smart home platforms‚ such as Amazon Alexa or Google Assistant‚ enables voice control and automation possibilities. Regularly check for firmware updates to unlock new features and improvements.

toilet bowl light instructions

Article Plan: Toilet Bowl Light Instructions (as of 02/06/2026 17:46:56)

This comprehensive guide details installing toilet bowl lights, covering types like motion-activated, light-sensitive, and remote-controlled options․
It also explores terminology, history, and future trends․

Toilet bowl lights represent a surprisingly popular and practical bathroom accessory, offering a gentle illumination during nighttime visits․ Historically, the term “toilet” itself evolved from a French word for a cloth covering a dressing table, eventually becoming associated with the room itself – a nuance reflected in regional differences like “lavatory” and “restroom․”

These lights address a common need: avoiding the harsh glare of overhead lights in the middle of the night․ Modern options range from simple, battery-powered illuminators to sophisticated smart devices․ Understanding the terminology – toilet, washroom, restroom – and the evolution of these spaces enhances appreciation for this small but impactful addition to your bathroom․

Why Install a Toilet Bowl Light?

Installing a toilet bowl light offers several compelling benefits․ Primarily, it provides gentle, guiding illumination during nighttime bathroom trips, eliminating the need for bright overhead lights that can disrupt sleep․ This is particularly useful as navigating unfamiliar bathrooms, like those on airplanes (often labeled “lavatory”), can be challenging․

Beyond convenience, these lights enhance safety, reducing the risk of stumbling in the dark․ They also offer a touch of modern convenience, especially with features like motion activation․ Considering the historical evolution of bathroom terminology – from “toilet” to “restroom” – a bowl light adds a contemporary comfort to a traditionally functional space․

Types of Toilet Bowl Lights Available

The market offers diverse toilet bowl light options to suit various preferences․ Motion-Activated Lights illuminate only when movement is detected, conserving battery life and providing a subtle glow․ Light-Sensitive Lights respond to ambient darkness, automatically activating in low-light conditions – ideal for bathrooms without windows․

For greater control, Remote Control Lights allow users to adjust brightness and color from a distance; These lights often feature multiple color settings, potentially offering mood lighting or even indicating bathroom occupancy, a feature increasingly found in “smart toilet” technology․ Choosing depends on desired convenience and functionality․

Motion-Activated Lights

Motion-Activated Toilet Bowl Lights represent a popular, energy-efficient choice․ Utilizing a built-in sensor, these lights activate upon detecting movement within a specific range, typically illuminating for a set duration․ This feature minimizes battery consumption and prevents unnecessary light emission․ Installation is generally straightforward, often involving simple attachment to the toilet bowl rim․

These lights are particularly useful in frequently used bathrooms, providing convenient nighttime illumination without requiring manual operation․ However, sensitivity adjustments may be needed to avoid accidental activation by pets or nearby movements․ They offer a practical and subtle lighting solution․

Light-Sensitive Lights

Light-Sensitive Toilet Bowl Lights operate based on ambient light levels․ These lights automatically activate in darkness and deactivate when sufficient light is present․ This functionality makes them ideal for bathrooms without windows or with limited natural light․ Installation requires careful positioning to ensure the sensor accurately detects room illumination․

Unlike motion-activated models, they don’t rely on movement, offering consistent nighttime illumination․ However, they might activate during daytime if the bathroom is sufficiently dark․ Proper placement is crucial to avoid unwanted activation and maximize energy efficiency, providing a hands-free lighting experience․

Remote Control Lights

Remote Control Toilet Bowl Lights offer the greatest convenience and customization․ These systems typically include a small control unit that mounts near the toilet and a handheld remote for operation․ The initial step involves pairing the remote with the light unit, ensuring a reliable connection; Mounting the control unit within easy reach is essential for effortless adjustments․

Remote functionality often includes brightness control, color selection, and on/off switching․ Thorough remote functionality testing after installation confirms proper operation․ These lights provide a user-friendly experience, eliminating the need to reach for switches in the dark․

Essential Tools and Materials

For a successful toilet bowl light installation, gather these essential items: a screwdriver (Phillips head is often required), batteries (typically AAA or AA, check light specifications), a cleaning cloth to wipe surfaces, and potentially adhesive strips or mounting tape depending on the light model․

Some installations may benefit from a small ladder or step stool for better access․ Ensure you have the toilet bowl light kit itself, including the light unit, remote (if applicable), and any included mounting hardware․ Having these materials readily available streamlines the installation process․

Safety Precautions Before Installation

Prioritize safety during installation! Always ensure your hands are dry before handling any electrical components, even battery-powered lights․ Avoid installing near standing water or excessively damp areas to prevent potential electrical hazards․

Read the manufacturer’s instructions thoroughly before beginning․ If using a ladder or step stool, ensure it’s stable and on a level surface․ Never modify the light unit or its wiring․ Disconnect power if installing a wired model․ Keep small parts away from children and pets․ Following these precautions ensures a safe installation process․

Step-by-Step Installation Guide ⎻ Motion Activated

Step 1: Preparing the Toilet Area – Ensure the toilet bowl and surrounding area are clean and dry․ Step 2: Attaching the Light Unit – Carefully position the motion sensor towards the usual approach path․ Most units clip or adhere to the bowl’s rim․ Ensure a secure fit․

Step 3: Battery Installation & Testing – Insert batteries according to the polarity markings․ Power on the unit and test the motion sensor by walking past․ Adjust the sensitivity if needed․ Verify the light activates and deactivates correctly with movement․

Preparing the Toilet Area

Before beginning installation, a thorough cleaning of the toilet bowl and its surrounding surfaces is crucial․ Remove any existing grime, water droplets, or cleaning product residue․ A dry surface ensures optimal adhesion for clip-on or adhesive-backed light units․

Clear the immediate area of any obstructions that might interfere with the light’s sensor or your access during installation․ Confirm adequate space for maneuvering․ This preparatory step guarantees a secure and functional installation, maximizing the light’s effectiveness and longevity․

Attaching the Light Unit

Carefully position the toilet bowl light unit according to the manufacturer’s instructions․ Most models utilize a flexible arm designed to gently clip onto the rim of the toilet bowl․ Ensure a snug, yet non-damaging, fit․ Avoid excessive force that could potentially crack the porcelain․

For adhesive models, peel off the protective backing and firmly press the unit onto a clean, dry surface․ Double-check the alignment before complete contact․ Proper attachment is vital for stability and prevents accidental dislodgement during use, ensuring consistent illumination․

Battery Installation & Testing

Open the battery compartment, typically located on the back or underside of the light unit․ Insert the correct type and number of batteries, observing the indicated polarity (+ and -)․ Ensure batteries are securely seated within the compartment․ Close the compartment door firmly to maintain a secure connection․

After installation, activate the light using the motion sensor, light sensor, or remote control, depending on the model․ Verify that the light illuminates brightly and consistently․ If it doesn’t, recheck battery installation and replace if necessary․ Proper battery function is crucial․

Step-by-Step Installation Guide ⎻ Light-Sensitive

Begin by Positioning for Optimal Light Detection․ These lights activate in darkness, so avoid direct exposure to ambient light sources․ Next, Securing the Light to the Bowl involves cleaning the toilet bowl rim with alcohol to ensure adhesion․ Peel the protective backing from the light’s adhesive pad and firmly press it onto the rim, centering it for balanced illumination․

Finally, perform an Initial Functionality Check․ Turn off the bathroom lights to simulate darkness․ The light should automatically activate․ If not, reposition slightly or verify the sensor isn’t obstructed․ Ensure a secure attachment․

Positioning for Optimal Light Detection

Light-sensitive toilet bowl lights rely on darkness to activate․ Therefore, strategic positioning is crucial․ Avoid areas directly illuminated by bathroom lights, windows, or nightlights․ The ideal location is on the toilet bowl rim, facing away from primary light sources․ Experiment with slight adjustments – rotating the light unit – to maximize sensitivity․

Consider the bathroom’s layout․ If complete darkness is unattainable, choose a spot shielded by the toilet tank or surrounding fixtures․ Proper placement ensures reliable activation and a pleasant, softly lit experience during nighttime use․

Securing the Light to the Bowl

Most light-sensitive toilet bowl lights utilize a flexible arm and suction cups for attachment․ Ensure the toilet bowl rim is clean and dry before applying the suction cups; any debris will compromise the seal․ Press each suction cup firmly against the porcelain, ensuring a tight, secure grip․

Periodically check the suction cups, especially in humid environments, as they may lose adhesion over time; Some models include additional adhesive pads for enhanced security․ Avoid excessive force when attaching or detaching to prevent damage to the light unit or the toilet bowl itself․

Initial Functionality Check

After securing the light-sensitive toilet bowl light, perform a functionality check in a dimly lit or dark bathroom․ The light should automatically activate upon sensing low ambient light levels․ Observe the sensor’s responsiveness – it should illuminate promptly and consistently․

If the light doesn’t activate, double-check the battery installation and ensure the light sensor isn’t obstructed․ Experiment with the light’s positioning; slight adjustments can significantly impact its sensitivity․ Confirm the light automatically deactivates when exposed to brighter light sources, verifying proper operation․

Step-by-Step Installation Guide ౼ Remote Control

Remote control toilet bowl lights offer convenient operation․ Begin by pairing the remote with the light unit, typically involving pressing a button on both devices simultaneously․ Next, mount the control unit securely near the toilet, ensuring easy access․ Utilize the provided adhesive strips or screws for a stable attachment․

Finally, conduct thorough remote functionality testing․ Verify each button – power, color selection, and brightness control – operates as expected․ Confirm the remote’s range is sufficient for comfortable use within the restroom․ Address any pairing or operational issues by consulting the product manual․

Pairing the Remote with the Light

Successful operation hinges on correctly pairing the remote․ Typically, this involves removing the battery tab from both the light unit and the remote control․ Then, within a short timeframe – usually 30 seconds – press and hold the pairing button on both devices simultaneously․ A confirmation indicator, like a flashing light, signals successful synchronization․

If pairing fails, repeat the process, ensuring close proximity between the remote and the light․ Consult the product manual for specific instructions, as procedures can vary between models․ Some remotes may require cycling the power on the light unit before attempting pairing again․

Mounting the Control Unit

The remote control’s main unit, housing the battery and signal transmitter, requires secure mounting․ Most models utilize adhesive pads or suction cups for attachment to a smooth, dry surface near the toilet․ Ensure the chosen location is within range of the toilet bowl light, avoiding obstructions like metal surfaces which can interfere with the signal․

Prior to adhering, thoroughly clean the mounting surface with rubbing alcohol․ Press firmly for the recommended duration to guarantee a strong bond․ Consider the accessibility of the remote’s buttons when selecting a position․

Remote Functionality Testing

After mounting the control unit and pairing it with the toilet bowl light, rigorous testing of all remote functions is crucial․ Systematically press each button – power on/off, brightness adjustment, color selection (if applicable), and any programmed modes – verifying the light responds accordingly․

Check the effective range of the remote; operation should remain consistent within a reasonable distance․ If responsiveness is poor, reposition the control unit or replace the batteries․ Confirm the remote doesn’t inadvertently control other devices nearby;

Troubleshooting Common Issues

If the light fails to illuminate, first verify battery polarity and ensure they are fully charged․ For motion sensor malfunctions, confirm nothing obstructs the sensor’s field of view and adjust sensitivity settings if available․ A dim or flickering light often indicates low batteries, but could also signal a loose connection or a faulty light unit․

Inspect wiring (if applicable) and tighten connections․ If problems persist, consult the manufacturer’s documentation or contact customer support․ Remember safety first – disconnect power before any internal inspection․

Light Not Turning On

Initial checks are crucial: Confirm the power switch is in the “on” position․ Next, meticulously verify battery installation – ensuring correct polarity (+ and -) is paramount․ Replace batteries with fresh ones, even if the existing ones show some charge, as voltage drop can occur․

If using a wired model, inspect the power adapter and outlet․ For motion-activated lights, ensure the sensor isn’t obstructed․ If still unresponsive, consult the product manual for specific troubleshooting steps or contact customer support for assistance․

Motion Sensor Malfunction

Troubleshooting a faulty motion sensor begins with ensuring nothing obstructs its field of view – clear away any nearby objects․ Confirm sufficient ambient light; excessive brightness can sometimes interfere with sensor operation․ Try recalibrating the sensor, if your model allows, following the manufacturer’s instructions․

If the issue persists, check for potential interference from other electronic devices․ A reset of the light unit might resolve the problem․ If none of these steps work, the sensor itself may be defective, requiring replacement or professional repair․

Dim or Flickering Light

Addressing a dim or flickering toilet bowl light usually points to battery issues․ Begin by replacing the batteries with a fresh set, ensuring correct polarity․ If the problem continues, inspect the battery contacts for corrosion or debris, cleaning them gently with a cotton swab and isopropyl alcohol;

Loose wiring within the light unit can also cause flickering; carefully check connections․ In rare cases, the LED itself might be failing, necessitating a replacement of the entire light fixture․ Consider the light’s age when diagnosing․

Battery Replacement and Maintenance

Regular battery replacement is crucial for consistent operation of your toilet bowl light․ Frequency depends on usage and light type, but check monthly initially․ Always use the correct battery size and type as specified by the manufacturer․ When replacing, inspect the battery compartment for any signs of corrosion․

To prolong battery life, avoid mixing old and new batteries․ Consider using rechargeable batteries for an eco-friendly and cost-effective solution․ Periodically clean the light unit’s exterior with a damp cloth to maintain its appearance and functionality․

Cleaning Your Toilet Bowl Light

Routine cleaning ensures optimal performance and hygiene of your toilet bowl light․ Always disconnect power (remove batteries) before cleaning․ Use a soft, damp cloth with mild soap to wipe the exterior of the light unit․ Avoid abrasive cleaners or harsh chemicals, as they can damage the plastic or sensors․

Pay attention to areas around the light sensor and motion detector, ensuring they are free from grime․ For stubborn stains, a slightly dampened toothbrush can be helpful․ Never submerge the light unit in water․ Dry thoroughly before reinstalling batteries․

Understanding Different Light Colors & Their Meanings

Toilet bowl lights often feature a spectrum of color options beyond simple illumination․ Blue is commonly associated with cleanliness and a calming ambiance, while green can evoke a sense of freshness․ Red might indicate a potential issue, such as low battery power on some models․

Many lights offer a rotating color cycle for aesthetic appeal․ Some advanced models allow customization via remote control, letting you select a color to match your bathroom décor or mood․ Understanding these color cues enhances the user experience and provides helpful status indicators․

Toilet Terminology: A Brief Overview (Toilet, Lavatory, Restroom, Washroom)

The language surrounding restrooms varies significantly․ “Toilet” originates from the French “toilette,” initially meaning a cloth for grooming, then a dressing table, and eventually, the fixture itself․ “Lavatory” is often found on aircraft, a more formal term․

“Restroom” and “washroom” are euphemisms, particularly in North America, offering a more polite alternative․ In the UK, “toilet” is common, while North Americans generally prefer “bathroom․” Understanding these nuances is helpful, especially when traveling or encountering diverse linguistic preferences․

Historical Context of “Toilet” as a Term

The word “toilet” has a fascinating etymological journey․ Introduced to English from French, “toilette” initially referred to the cloth covering a dressing table․ Over time, it broadened to encompass the entire dressing area, and subsequently, the chamber itself․

Early usage in North America didn’t shy away from this association with grooming․ However, a perceived directness led to avoidance, with terms like “restroom” gaining favor․ This shift demonstrates how cultural sensitivities influence language, transforming a once-common term into something considered less refined in certain contexts․

Regional Differences in Toilet Terminology (UK vs․ USA)

Significant differences exist in toilet-related vocabulary between the UK and the USA․ In British English, “toilet” remains the standard term for a bathroom or lavatory․ Conversely, in American English, “bathroom” is common, and “toilet” is often avoided, considered somewhat blunt․

Americans frequently use “restroom” for public facilities, while “washroom” is also encountered․ Historically, “water closet” (WC) was common in both regions but is now largely archaic․ These variations highlight how language evolves differently across geographical boundaries, reflecting cultural norms and preferences․

Smart Toilet Technology & Integrated Lighting

Modern smart toilets increasingly integrate features beyond basic sanitation, including automated flushing, heated seats, and bidet functions; A growing trend is the incorporation of integrated lighting, often controllable via smartphone apps or remote controls․ This extends beyond simple bowl illumination, offering customizable color schemes and even night-light modes․

These advanced systems often link to home automation networks, allowing for personalized settings and remote monitoring․ Brands like those reviewed in 2026 offer sophisticated options, demonstrating a shift towards a more technologically advanced and comfortable bathroom experience․

Choosing the Right Toilet Bowl Light for Your Needs

Selecting the ideal toilet bowl light depends on individual preferences and bathroom usage․ Motion-activated lights are excellent for convenience and energy saving, while light-sensitive models adjust automatically to ambient darkness․ Remote control options provide maximum customization․

Consider the toilet’s location – a frequently used family bathroom benefits from durable, reliable models․ Budget is also key, with price ranges varying significantly․ Prioritize ease of installation and maintenance, alongside desired features like color options and brightness levels, to ensure optimal satisfaction․

Cost Considerations: Price Ranges for Different Types

Toilet bowl light costs vary considerably based on features and technology․ Basic motion-activated lights typically range from $10 to $25․ Light-sensitive models generally fall between $15 and $35, offering slightly more sophistication․ Premium remote control lights, often with customizable color options, can cost $30 to $60 or more․

Smart lights with integrated features may exceed $75․ Battery costs are ongoing, and rechargeable options represent a long-term investment․ Consider the overall value, balancing initial price with functionality and longevity when making your purchase․

Where to Purchase Toilet Bowl Lights

Toilet bowl lights are widely available through various retail channels․ Major home improvement stores like Home Depot and Lowe’s consistently stock a selection․ Online marketplaces such as Amazon offer the broadest range of options, brands, and price points․ Discount retailers like Walmart and Target often carry basic models․

Specialty bathroom stores and online retailers focusing on bathroom accessories are also good sources․ Checking manufacturer websites directly can sometimes reveal exclusive deals or models․ Comparing prices across different retailers is recommended․

Legal and Safety Standards for Electrical Components

Toilet bowl lights, being electrical components for potentially damp environments, must adhere to strict safety standards․ In the US, UL (Underwriters Laboratories) certification is crucial, indicating the product has been tested for safety․ Look for lights marked as suitable for bathroom use and compliant with NEC (National Electrical Code) guidelines․

Ensure the light is low voltage and ideally battery-powered to minimize electrical risks․ Compliance with RoHS (Restriction of Hazardous Substances) regulations is also important, limiting harmful materials․ Always follow manufacturer’s instructions carefully during installation․

Environmental Impact of Battery-Powered Lights

Toilet bowl lights relying on batteries contribute to electronic waste․ Disposable batteries contain hazardous materials like mercury and cadmium, posing environmental risks if improperly discarded․ Opting for lights with rechargeable batteries significantly reduces this impact․ Consider the battery type; lithium-ion batteries are generally more eco-friendly than alkaline․

Proper battery disposal through recycling programs is essential․ Look for lights utilizing energy-efficient LEDs, minimizing power consumption․ Reducing overall usage and choosing products with sustainable packaging further lessen the environmental footprint․

Future Trends in Toilet Lighting Technology

Toilet bowl light innovation is moving towards smart technology integration․ Expect more lights connecting to home automation systems, controlled via voice commands or smartphone apps․ UV sanitization features may become commonplace, enhancing hygiene․ Wireless charging capabilities will eliminate battery replacements, reducing waste․

Biodegradable or recyclable light housings are also on the horizon, addressing environmental concerns․ Advanced motion sensors will offer greater sensitivity and customization․ Color-changing LEDs responding to user preferences or even health indicators (like hydration levels) are plausible future developments․

descubre 1 workbook answers pdf

Understanding “Descubre 1 Workbook Answers PDF”

Leboncoin, a French online classifieds platform, boasts millions of listings across various categories – cars, real estate, jobs, and more – regionally and nationally.

What is “Descubre 1”?

Descubre 1 is an introductory Spanish textbook, typically used in high school or early college language courses. It forms part of a broader series designed to build a foundational understanding of Spanish grammar, vocabulary, and cultural contexts. The curriculum emphasizes communicative competence, aiming to equip students with the ability to engage in basic conversations and comprehend simple texts.

Interestingly, Leboncoin, a popular French website, facilitates diverse transactions – from vehicle sales to holiday rentals – showcasing a vast marketplace for goods and services. It serves as a digital hub connecting buyers and sellers across France, offering a convenient platform for various needs, mirroring the desire for accessible resources like “Descubre 1” answers.

The Importance of Workbook Answers

Workbook answers serve as crucial self-assessment tools for students learning Spanish with “Descubre 1”. They provide immediate feedback on comprehension and identify areas needing further study. Checking answers reinforces correct usage and clarifies misunderstandings, accelerating the learning process. However, relying solely on answers can hinder genuine skill development.

Similar to finding the perfect listing on Leboncoin – a French platform with millions of ads for everything imaginable – students seek readily available solutions. Yet, just as careful consideration is needed when purchasing from Leboncoin, answers should be used thoughtfully, as a learning aid, not a shortcut to avoid engagement with the material.

Where to Find “Descubre 1 Workbook Answers PDF”

Leboncoin’s extensive ad network, spanning France and various regions, mirrors the dispersed nature of online resources for textbook solutions like this one;

Official Textbook Resources

Leboncoin, functioning as a digital marketplace, highlights the importance of verifying sources – much like seeking official textbook resources. While Leboncoin doesn’t directly offer educational materials, its structure emphasizes direct connections between sellers and buyers. Similarly, the most reliable “Descubre 1 Workbook Answers PDF” sources are typically found through the official publisher’s website or accompanying online learning platforms. These resources often include interactive exercises, graded assessments, and, crucially, answer keys designed for self-assessment;

Always prioritize these official channels to ensure accuracy and alignment with the curriculum. Be cautious of unofficial sources, as they may contain errors or outdated information. Checking with your instructor or school’s learning management system is also a valuable step in locating legitimate resources.

Third-Party Websites Offering Solutions

Leboncoin’s vast array of listings mirrors the numerous third-party websites claiming to provide “Descubre 1 Workbook Answers PDF.” However, similar to navigating Leboncoin’s diverse offerings, caution is paramount. Many websites aggregate answers, often without verifying their accuracy. These sites range from dedicated homework help platforms to general file-sharing repositories. While potentially offering quick solutions, they frequently contain errors, incomplete answers, or even malware.

Exercise extreme diligence when using these resources. Cross-reference answers with official materials whenever possible, and be wary of sites requesting personal information or subscriptions. Remember, relying solely on these sources can hinder genuine learning and understanding of the Spanish language.

Online Forums and Communities

Leboncoin facilitates connections between buyers and sellers, much like online forums and communities dedicated to language learning. Platforms like Reddit (specifically subreddits focused on Spanish) and dedicated language exchange forums often feature threads where students discuss “Descubre 1” challenges and share assistance. However, the quality of information varies greatly.

While collaborative learning can be beneficial, remember that answers provided by peers may be incorrect or based on misunderstandings. Treat these forums as a starting point for discussion, not a definitive source of answers. Always verify information and prioritize understanding the underlying concepts rather than simply copying solutions.

Potential Risks of Using Online Answer Keys

Leboncoin’s diverse listings highlight the potential for encountering inaccurate or outdated information, mirroring the risks found with freely available answer keys online.

Accuracy Concerns

Leboncoin, as a user-generated content platform, demonstrates the inherent challenge of verifying information accuracy. Similarly, online “Descubre 1 Workbook Answers PDF” sources often lack rigorous quality control. Answers posted by individuals may contain errors, misinterpretations of the material, or be based on incorrect editions of the textbook.

Relying on such inaccurate solutions hinders genuine learning and can reinforce flawed understanding of Spanish grammar and vocabulary. The sheer volume of listings on Leboncoin – millions across France – illustrates how easily misinformation can proliferate. Students using unverified answer keys risk developing bad habits and ultimately performing poorly on assessments due to these inaccuracies.

Therefore, critical evaluation of any online resource is paramount, just as one would carefully assess a listing on Leboncoin before making a purchase.

Academic Integrity Issues

Leboncoin’s diverse offerings, from job postings to property rentals, require honest representation from users. Similarly, utilizing “Descubre 1 Workbook Answers PDF” without engaging with the material compromises academic honesty. Submitting work based on copied answers constitutes plagiarism, a serious offense with potential consequences ranging from lowered grades to expulsion.

The temptation to quickly find solutions, mirroring the convenience of Leboncoin’s classifieds, can undermine the learning process. True understanding comes from actively working through problems, not simply obtaining the correct answers. Relying on external sources prevents students from developing critical thinking and problem-solving skills essential for success in Spanish and beyond.

Maintaining academic integrity is crucial, just as trust is vital within the Leboncoin marketplace.

Copyright and Legal Considerations

Leboncoin operates within a legal framework governing online transactions and content. Similarly, “Descubre 1 Workbook Answers PDF” materials are protected by copyright law. Distributing or accessing answer keys without authorization from the publisher, Vista Higher Learning, is a violation of these rights.

Unauthorized reproduction and sharing of copyrighted materials, akin to fraudulent listings on Leboncoin, can lead to legal repercussions. This includes potential lawsuits and financial penalties. Students found distributing or using illegally obtained answer keys may face disciplinary action from their educational institutions.

Respecting intellectual property is paramount, mirroring the importance of legitimate commerce on platforms like Leboncoin. Always utilize officially sanctioned resources for learning and assessment.

Alternatives to Directly Using Answer Keys

Leboncoin facilitates diverse transactions; likewise, learning Spanish involves varied approaches beyond answer keys – practice, tutoring, and collaborative study are beneficial.

Utilizing Online Practice Activities

Leboncoin’s extensive ad listings demonstrate the power of accessible platforms; similarly, numerous websites offer interactive Spanish practice. These resources move beyond static workbook exercises, providing dynamic engagement with the language. Many platforms feature quizzes, games, and simulations mirroring real-life conversational scenarios.

These activities often provide immediate feedback, helping learners identify and correct errors without relying on a separate answer key. They can focus on specific grammar points or vocabulary, complementing the “Descubre 1” curriculum. Furthermore, some sites adapt to the learner’s pace and skill level, offering a personalized learning experience. Exploring these options fosters independent learning and a deeper understanding of Spanish concepts, mirroring Leboncoin’s user-driven approach.

Seeking Help from Teachers or Tutors

Just as Leboncoin connects buyers and sellers, teachers and tutors bridge the gap between student confusion and comprehension. Direct interaction with an educator provides personalized guidance far exceeding any answer key. They can explain complex grammatical concepts, address individual learning styles, and offer tailored practice exercises.

A teacher can identify the root of a student’s errors, preventing the reinforcement of incorrect patterns. Tutors offer focused attention, allowing for more frequent questions and immediate clarification. This approach fosters a deeper understanding of the material, rather than simply obtaining the correct answer. Utilizing these resources, much like navigating Leboncoin’s diverse offerings, requires active engagement and targeted support.

Collaborative Study Groups

Similar to how Leboncoin facilitates connections between individuals for various transactions, study groups connect learners for mutual support and knowledge sharing. Working with peers allows students to explain concepts to one another, solidifying their own understanding in the process; Discussing challenging exercises from “Descubre 1” can reveal diverse approaches and perspectives.

This collaborative environment mirrors the broad range of listings found on Leboncoin, offering multiple solutions to a single problem. Group members can quiz each other, review grammar rules, and practice conversational Spanish. It’s a dynamic learning experience that fosters accountability and encourages active participation, ultimately proving more effective than passively seeking answers.

Specific Chapters and Common Questions

Leboncoin’s diverse listings, from cars to real estate, parallel the varied challenges within “Descubre 1,” requiring focused effort for successful completion.

Leboncoin, facilitating connections for various needs – from finding a new home in Provence-Alpes-Côte d’Azur to securing employment – mirrors the foundational aspect of Chapter 1.

This initial chapter of “Descubre 1” centers on mastering basic Spanish greetings like “Hola” and “Buenos días,” alongside self-introductions utilizing “Me llamo…” and asking others “¿Cómo te llamas?”

Key concepts involve understanding formal versus informal address (usted vs. tú) and correctly conjugating the verb “llamarse” (to be called). Students often struggle with gender agreement in introductions and pronunciation of Spanish vowels.

Successfully navigating these initial interactions, much like a smooth transaction on Leboncoin, builds confidence for further language exploration.

Chapter 2: Describing People ⏤ Common Challenges

Leboncoin’s detailed listings, showcasing features of various items – like a car’s color or a house’s size – parallel the focus of Chapter 2: describing people in Spanish.

This chapter introduces adjectives and their crucial agreement with nouns in gender and number. Students frequently stumble with adjective placement (before or after the noun) and remembering the correct forms for masculine/feminine and singular/plural.

Common errors include misusing “ser” and “estar” when describing characteristics versus temporary states. Mastering physical descriptions, personality traits, and clothing vocabulary is essential.

Like navigating the numerous ads on Leboncoin, accurate description requires attention to detail and correct application of grammatical rules.

Chapter 3: Daily Routines ― Verb Conjugation Focus

Leboncoin’s platform facilitates daily transactions – buying, selling, renting – mirroring the repetitive actions described in Chapter 3: daily routines.

This section heavily emphasizes regular verb conjugations in the present tense, particularly reflexive verbs used to describe personal care activities (e.g., waking up, getting dressed). Students often struggle with memorizing the endings for each pronoun (yo, tú, él/ella/usted, nosotros, vosotros, ellos/ellas/ustedes).

Identifying and correctly conjugating stem-changing verbs adds another layer of complexity. Accurate time expressions and sequencing of events are also crucial for fluency.

Just as Leboncoin requires precise categorization of listings, mastering verb conjugations is key to clear communication about daily life.

Resources for Spanish Language Learning

Leboncoin, with its diverse listings, showcases real-world French language use, offering a glimpse into everyday life and cultural context.

Duolingo and Other Language Apps

Leboncoin’s extensive categorization – from automobiles to vacation rentals – mirrors the practical vocabulary needed for real-life interactions in French-speaking regions.

Exploring listings for “maison” (house) or “voiture” (car) provides contextual learning beyond textbook phrases. The platform’s regional focus, highlighting areas like Provence-Alpes-Côte d’Azur and Nouvelle-Aquitaine, offers insights into dialectal variations.

Furthermore, analyzing ad descriptions – often concise and direct – enhances reading comprehension skills. The sheer volume of ads provides ample practice material, simulating exposure to authentic French language use. This immersion, though indirect, complements structured learning methods like Duolingo and other language apps.

Online Spanish Dictionaries

Leboncoin’s diverse offerings, spanning employment opportunities and clothing, demonstrate the breadth of vocabulary encountered in everyday French life, mirroring Spanish language needs.

Just as a Spanish dictionary clarifies unfamiliar terms in “Descubre 1,” navigating Leboncoin requires deciphering descriptions for “emploi” (job) or “vêtements” (clothing). The platform’s user accounts and ad management features – “Gérez vos annonces” – introduce practical digital literacy.

Analyzing the structure of these online listings, similar to dissecting Spanish sentences, builds comprehension. The regional categorization, like focusing on Martinique or Bretagne, parallels learning regional Spanish dialects. This practical application enhances vocabulary retention and contextual understanding.

Spanish Language Exchange Partners

Leboncoin’s community aspect, facilitating direct interaction between buyers and sellers, mirrors the benefits of a Spanish language exchange. Just as negotiating a price on a “voiture d’occasion” (used car) requires communication, language exchange demands active participation.

The platform’s regional focus – Provence-Alpes-Côte dAzur, Nouvelle-Aquitaine – highlights the importance of regional variations, similar to Spanish dialects. Connecting with native speakers, like responding to a “location de vacances” (vacation rental) ad, provides authentic language practice.

Building rapport through online interactions, akin to managing your “annonces” on Leboncoin, fosters confidence and fluency. This reciprocal learning environment accelerates language acquisition.

people places and things pdf

People, Places, and Things: Understanding PDF Documents

People are central to online platforms like the “,” facilitating communication with officials; places, such as cities like Shijiazhuang, are tracked by message volume; and things—like reports—are submitted.

Analyzing PDF documents often involves identifying key elements: people mentioned, places referenced, and things – objects, items, or concepts – discussed within. Platforms like the “” demonstrate this, tracking interactions with people in leadership roles across various places (cities and districts).

These platforms also handle submitted things, such as messages and reports. Understanding how to extract this information – names, locations, and subject matter – is crucial for effective PDF data analysis, enabling insights into communication patterns and content themes. This framework provides a foundational approach.

What Does “People, Places, and Things” Refer To?

In the context of PDF analysis, “People” signifies individuals mentioned – leaders receiving messages on platforms like the “”. “Places” denote geographic locations referenced, such as Shijiazhuang, Tangshan, and various districts, tracked by message volume. “Things” encompass the content itself: submitted messages, reports, images (under 50MB), and videos (under 100MB, 60 seconds max).

This categorization aids in structuring information extraction, allowing for focused analysis of who is involved, where events occur, and what is being communicated within the PDF document.

Understanding the “People” Aspect in PDFs

People in PDFs relate to individuals like county and district leaders receiving messages via online platforms, demonstrating a focus on citizen communication.

Identifying People Mentioned in PDF Documents

Extracting person names from PDFs involves recognizing individuals connected to online governmental platforms, such as county and district leaders. These platforms, designed for public interaction, feature names associated with message reception and responses. Identifying these “people” requires parsing text for titles – like “” (secretary) – followed by location names.

Furthermore, analyzing message statistics, like total submissions and public replies per region, implicitly highlights individuals in positions of responsibility. The provided data showcases leaders from various cities and counties, indicating a need to pinpoint these figures within PDF reports or communications.

Named Entity Recognition (NER) for People

Applying Named Entity Recognition (NER) to PDFs containing governmental communication data focuses on identifying individuals like county and district leaders. NER systems must be trained to recognize titles – such as “” (secretary) – preceding names, and associate them with specific locations like Shijiazhuang or Changfeng County.

Successfully implementing NER requires handling Chinese characters and understanding contextual clues within the PDF text. The goal is to accurately extract names linked to message handling, differentiating them from other entities mentioned in the documents.

Extracting Contact Information of People from PDFs

PDFs related to the “,” a platform for public communication, contain valuable contact details. Extracting these requires identifying email addresses like leaderpeople.cn, kfpeople.cn, and rmwjubaopeople.cn, alongside phone numbers such as 010-65363636 and 010-65363263.

Automated extraction must account for varying PDF layouts and potential inconsistencies in formatting. Successfully retrieving this information enables direct communication channels with relevant authorities and facilitates efficient response handling.

Exploring the “Places” Component in PDFs

PDFs track message volumes from various places – cities like Shijiazhuang, Tangshan, and Qinhuangdao – demonstrating geographic data within these documents.

Geographic Locations Mentioned in PDFs

PDF documents frequently contain references to specific geographic locations, as evidenced by the data presented regarding Chinese cities; The provided text details message volumes originating from places like Shijiazhuang, Tangshan, and Qinhuangdao, alongside smaller districts such as Dongcheng and Xicheng. This suggests PDFs can serve as repositories for location-based information, whether explicitly stated in reports or implicitly revealed through user interaction data. Extracting these locations allows for spatial analysis and understanding regional trends represented within the document’s content. Identifying these places is crucial for contextualizing the information contained within the PDF.

Using OCR to Identify Place Names

Optical Character Recognition (OCR) becomes essential when dealing with scanned PDF documents containing place names. The provided data, listing cities like Shijiazhuang and Tangshan, would initially exist as images within a scanned PDF. OCR technology converts these images of text into machine-readable text, enabling the identification and extraction of geographic locations. Accurate OCR is vital; errors can misrepresent place names, hindering analysis. Post-OCR processing, including spell-checking and gazetteer matching, improves accuracy, allowing for reliable location-based data retrieval from PDFs.

Mapping Locations Extracted from PDFs

Once place names are extracted from PDF documents using OCR, the next step involves mapping these locations. The data referencing cities like Shijiazhuang, Tangshan, and Qinhuangdao provides examples for geocoding – converting place names into geographic coordinates (latitude and longitude). These coordinates can then be visualized on a map using Geographic Information Systems (GIS) software or mapping APIs. This allows for spatial analysis, identifying patterns, and understanding the geographic distribution of information contained within the PDF documents, revealing location-based insights.

Analyzing the “Things” Element in PDFs

PDF submissions, including images and reports, represent “things.” Analyzing tables of contents and extracted data reveals listed items and objects within these documents.

Object Detection within PDF Images

PDF documents frequently contain images, presenting a unique challenge and opportunity for data extraction. Object detection techniques, powered by computer vision, can identify and categorize elements within these images. This goes beyond simple Optical Character Recognition (OCR) and delves into visual analysis. For example, identifying specific products featured in a catalog image embedded in a PDF, or recognizing landmarks within a scanned photograph.

Successfully implementing object detection requires robust algorithms capable of handling varying image quality and complex layouts. The goal is to automatically pinpoint and label “things” present in the visual content, enriching the overall data extracted from the PDF.

Identifying Products and Items Listed in PDFs

PDF documents, like catalogs and invoices, often list numerous products and items. Extracting this information automatically is crucial for businesses. Techniques involve a combination of OCR to convert images of text into machine-readable format, and then Natural Language Processing (NLP) to understand the context. Identifying product names, descriptions, and associated prices requires sophisticated algorithms capable of handling variations in formatting and terminology.

Successfully pinpointing these “things” enables automated inventory management, price comparison, and data analytics, streamlining business processes and improving efficiency.

Analyzing Tables of Contents for “Things”

PDF tables of contents offer a structured overview of a document’s contents, revealing key “things” discussed. Analyzing these sections provides a rapid method for identifying topics and themes. Automated extraction tools can parse the table of contents, creating a hierarchical representation of the document’s structure. This allows for targeted information retrieval, focusing on specific items or subjects of interest.

By mapping the table of contents, we can quickly understand the scope and organization of the PDF, accelerating the process of data discovery and analysis.

PDF Technology and Data Extraction

PDF structure impacts data extraction; OCR converts scanned images to text, while parsing libraries facilitate access to content, aiding in identifying “people, places, and things.”

PDF Structure and its Impact on Data Extraction

PDF documents can vary greatly in their internal structure, significantly influencing the ease and accuracy of data extraction related to “people, places, and things.” Some PDFs are natively digital, containing selectable text and logical formatting, making information retrieval straightforward. However, many are scanned images, requiring Optical Character Recognition (OCR) to convert visuals into machine-readable text.

Complex layouts, with multi-column text, tables, and embedded images, pose challenges. The way elements are layered and organized affects parsing accuracy. Understanding the PDF’s underlying structure—whether it’s text-based, image-based, or a hybrid—is crucial for selecting the appropriate extraction techniques and achieving reliable results when identifying key entities.

Optical Character Recognition (OCR) for PDFs

OCR is vital for extracting “people, places, and things” from scanned or image-based PDF documents. It converts images of text into machine-readable text, enabling analysis. However, OCR isn’t perfect; accuracy depends on image quality, font clarity, and document complexity. Errors can misrepresent names, locations, or item descriptions.

Advanced OCR engines utilize machine learning to improve recognition rates, but post-processing is often necessary to correct errors and ensure data integrity. Effective OCR is the foundational step for unlocking information within visually-structured PDFs, facilitating the identification of key entities.

PDF Parsing Libraries and Tools

Several libraries and tools aid in extracting “people, places, and things” from PDFs. PDFMiner is a popular Python library for text extraction, while Tesseract OCR excels at converting images to text, crucial for scanned documents. Adobe Acrobat Pro offers robust parsing capabilities alongside editing features;

These tools dissect PDF structure, identifying text, images, and tables. Choosing the right tool depends on the PDF’s complexity and the desired level of detail. Combining parsing with NLP techniques enhances entity recognition for improved data extraction.

Advanced Techniques for Information Retrieval

NLP and machine learning categorize “people, places, and things” within PDFs, while regular expressions pinpoint specific patterns for efficient data retrieval.

Natural Language Processing (NLP) in PDF Analysis

NLP techniques are crucial for dissecting the textual content within PDF documents, enabling the identification of “people,” “places,” and “things” with greater accuracy. This involves employing methods like named entity recognition to pinpoint individuals mentioned, alongside geolocation extraction to identify relevant locations. Sentiment analysis can further reveal contextual information surrounding these entities.

Furthermore, NLP assists in understanding relationships between these elements – for example, determining which people are associated with specific places or objects. By processing language nuances, NLP moves beyond simple keyword searches, offering a deeper comprehension of the information contained within complex PDF structures, ultimately improving data retrieval;

Machine Learning for Categorizing “People, Places, and Things”

Machine Learning (ML) models excel at automating the categorization of entities within PDF documents as “people,” “places,” or “things.” Trained on labeled datasets, these models learn to recognize patterns and features indicative of each category. Algorithms like Support Vector Machines or deep learning networks can achieve high accuracy in classifying extracted entities.

ML can also handle ambiguity and context, improving upon rule-based systems. For instance, distinguishing a person’s name from a place name. Continuous learning and refinement through feedback loops further enhance the model’s performance, making it a powerful tool for large-scale PDF analysis.

Using Regular Expressions for Pattern Matching

Regular Expressions (Regex) provide a powerful method for identifying specific patterns within PDF text, aiding in the extraction of “people,” “places,” and “things.” For example, Regex can locate email addresses (people’s contact info) or postal codes (place identifiers). Defining patterns for common names or organizational structures assists in entity recognition.

While not as sophisticated as ML, Regex offers a quick and efficient solution for simpler extraction tasks. Combining Regex with PDF parsing libraries allows for targeted data retrieval, streamlining the analysis process and enabling focused information gathering.

Practical Applications of PDF Analysis

PDF analysis, leveraging “people,” “places,” and “things” extraction, supports legal reviews, financial reporting, and resume parsing—vital for efficient data workflows.

Legal Document Review and Analysis

PDF analysis dramatically streamlines legal processes by automatically identifying key entities within contracts and court filings. Extracting “people” – parties, witnesses, lawyers – alongside relevant “places” – jurisdictions, addresses – and crucial “things” – assets, clauses, dates – accelerates due diligence.

This capability reduces manual review time, minimizes errors, and enhances compliance. Platforms like those facilitating communication with government officials demonstrate the need for precise information retrieval. Analyzing submitted documents, identifying involved parties, and pinpointing locations are essential for effective legal assessment and case management, ultimately improving efficiency and accuracy.

Financial Report Analysis

PDF-based financial reports contain vital data requiring efficient extraction. Identifying “people” – executives, auditors, stakeholders – alongside “places” – headquarters, operational locations, regulatory jurisdictions – and key “things” – revenue figures, assets, liabilities – is crucial. Automated analysis accelerates insights, revealing trends and anomalies.

Similar to platforms tracking citizen communication, financial data demands precision. Extracting this information from complex reports reduces manual effort and improves accuracy. Analyzing locations of revenue generation and identifying key personnel involved in financial decisions are essential for informed investment strategies and risk assessment.

Resume and CV Parsing

PDF resumes and CVs are rich sources of “people” data – names, contact details, skills, and experience. Identifying “places” – educational institutions, previous employers, locations of work – and “things” – certifications, projects, publications – is vital for recruitment. Automated parsing streamlines applicant tracking.

Like platforms managing public feedback, efficient data extraction is key. Extracting structured information from varied PDF formats accelerates screening processes. Identifying candidate locations and relevant experience allows recruiters to quickly assess suitability, mirroring the focused data retrieval seen in other PDF analysis applications.

Challenges in Extracting Data from PDFs

PDF complexity, scanned documents, and varied layouts hinder accurate extraction of “people,” “places,” and “things” data, demanding robust OCR and parsing techniques.

Dealing with Scanned PDFs

Scanned PDFs present significant hurdles for extracting information about “people,” “places,” and “things.” Unlike digitally created PDFs with selectable text, scans are essentially images, requiring Optical Character Recognition (OCR) to convert them into machine-readable format.

The accuracy of OCR is crucial; errors can misidentify names, locations, or objects. Image quality—resolution, skew, and noise—directly impacts OCR performance. Pre-processing steps, like deskewing and noise reduction, are often necessary. Furthermore, complex layouts with multiple columns or tables can confuse OCR engines, leading to incorrect data association.

Post-OCR correction and validation are vital to ensure reliable data extraction for meaningful analysis.

Handling Complex PDF Layouts

Extracting “people,” “places,” and “things” from PDFs with intricate layouts—multiple columns, tables, headers, and footers—poses substantial challenges. Standard parsing methods often struggle to discern the logical reading order, leading to fragmented or misaligned data. Identifying relationships between text elements becomes difficult, hindering accurate entity recognition.

Advanced techniques, like layout analysis and rule-based systems, are needed to reconstruct the document’s structure. These methods analyze visual cues—positioning, font styles, and spacing—to determine the correct reading flow.

Careful consideration of table structures is also essential for accurate data retrieval.

Ensuring Data Accuracy

Accurate extraction of “people,” “places,” and “things” from PDFs requires rigorous validation. Errors can arise from OCR inaccuracies, parsing mistakes, or ambiguous entity recognition. Post-processing steps are crucial; these include spell-checking, data type validation, and cross-referencing with external knowledge bases.

For location data (“places”), geocoding verification confirms the validity of extracted addresses. Regarding “people,” confirming names against known databases enhances reliability. Automated quality checks and human review are often combined to maximize precision.

Maintaining data integrity is paramount.

Tools for Working with “People, Places, and Things” in PDFs

Adobe Acrobat Pro aids PDF manipulation, while PDFMiner and Tesseract OCR facilitate text extraction—essential for identifying “people,” “places,” and “things.”

Adobe Acrobat Pro

Adobe Acrobat Pro stands as a comprehensive solution for interacting with PDF documents, offering robust features beneficial for extracting “people,” “places,” and “things.” Its editing capabilities allow for direct manipulation of text and images, aiding in identifying key entities. Furthermore, Acrobat Pro’s OCR functionality transforms scanned documents into searchable and editable formats, crucial when dealing with image-based PDFs.

The software’s advanced search options enable pinpointing specific names, locations, or items within large documents. Its form recognition features can automatically identify and extract data from structured PDFs, streamlining information retrieval. Acrobat Pro’s export functions also facilitate converting PDFs into various formats for further analysis with specialized tools.

PDFMiner

PDFMiner is a Python library geared towards extracting text content from PDF documents, serving as a foundational tool for identifying “people,” “places,” and “things.” Unlike visual editors, it focuses on programmatic access to the PDF’s internal structure. This allows developers to build custom scripts for parsing text, locating keywords, and extracting data based on defined patterns.

While it doesn’t directly perform Named Entity Recognition (NER), PDFMiner provides the raw text necessary for integration with NLP libraries. It’s particularly useful for processing large volumes of PDFs where automated extraction is essential, though requiring coding expertise for effective implementation.

Tesseract OCR

Tesseract OCR is a powerful open-source Optical Character Recognition engine crucial for extracting text from scanned PDFs or images containing “people,” “places,” and “things.” When PDFs lack selectable text, Tesseract converts images of text into machine-readable formats. This enables subsequent analysis using NLP techniques like Named Entity Recognition (NER) to identify specific entities.

However, accuracy depends heavily on image quality; skewed or low-resolution scans can hinder performance. Integrating Tesseract with PDF parsing libraries enhances data extraction workflows, bridging the gap between visual content and structured information.

Ethical Considerations and Data Privacy

Protecting Personally Identifiable Information (PII) related to “people” and “places” within PDFs is paramount, demanding compliance with data privacy regulations and responsible extraction.

Protecting Personally Identifiable Information (PII)

Extracting data concerning “people” from PDFs necessitates stringent PII protection measures. This includes redacting sensitive contact information, like email addresses (leaderpeople.cn, kfpeople.cn) and phone numbers (010-65363636, 010-65363263) discovered during analysis.

Furthermore, location data relating to “places” – cities like Shijiazhuang, Tangshan, and Qin Huangdao – must be handled responsibly, avoiding potential tracking or misuse.

Data extraction workflows should prioritize anonymization techniques and adhere to relevant data privacy regulations to safeguard individual rights and maintain ethical standards.

Compliance with Data Privacy Regulations

PDF data extraction involving “people” and “places” must align with regulations governing PII. Analyzing documents containing contact details (leaderpeople.cn, kfpeople.cn) requires adherence to rules like GDPR or CCPA, demanding consent for processing.

Geographic data extracted from “places” – Shijiazhuang, for example – falls under location privacy laws, restricting tracking without justification.

Organizations must implement robust data governance policies, ensuring transparency, data minimization, and secure storage to demonstrate compliance and avoid legal repercussions.

Responsible Use of PDF Data Extraction

Extracting “people” data (like contacts from leaderpeople.cn) demands ethical consideration; avoid profiling or discriminatory practices. Analyzing “places” (cities listed – Shijiazhuang, Tangshan) should respect community sensitivities and avoid reinforcing biases.

When identifying “things” within PDFs, ensure extracted information isn’t misused for manipulative purposes. Transparency is key – clearly disclose data collection practices.

Prioritize data security, anonymization where possible, and responsible handling of sensitive information to build trust and avoid harm.

Future Trends in PDF Data Extraction

AI will automate “people,” “places,” and “things” identification, enhancing workflows and cloud integration, mirroring the online platforms for official communication.

AI-Powered PDF Analysis

Artificial Intelligence is poised to revolutionize PDF data extraction, particularly concerning the identification of “people,” “places,” and “things.” Similar to online platforms tracking communication with officials across various cities, AI can automate the recognition of named entities within PDF documents. This includes identifying individuals mentioned, pinpointing geographic locations, and cataloging objects or items detailed within the text and images.

Machine learning models can be trained to categorize these elements with increasing accuracy, surpassing traditional methods. Furthermore, AI can handle complex layouts and scanned documents, extracting information even from challenging sources, mirroring the data collection from numerous regional message boards.

Automated Data Extraction Workflows

Establishing automated workflows for PDF analysis streamlines the process of identifying “people,” “places,” and “things.” Inspired by platforms tracking official communications across regions, these workflows integrate Optical Character Recognition (OCR), Natural Language Processing (NLP), and machine learning. They can automatically parse documents, extract relevant entities – like names, locations, and product listings – and categorize them for further analysis.

Such systems reduce manual effort, improve accuracy, and enable scalable data processing, mirroring the efficient tracking of message volumes from diverse locations, ultimately delivering actionable insights.

Integration with Cloud-Based Services

Seamless integration with cloud platforms is crucial for scalable PDF data extraction concerning “people,” “places,” and “things.” Leveraging cloud services allows for centralized storage, processing, and accessibility of extracted information, mirroring the online accessibility of leadership message boards. This enables collaborative analysis and real-time updates, similar to tracking message volumes across various cities.

Cloud solutions facilitate automated workflows, reducing infrastructure costs and enhancing data security, ultimately empowering organizations to efficiently manage and utilize valuable PDF data.